Forum Replies Created
-
AuthorPosts
-
November 24, 2016 at 5:47 pm #23204
 vhgmcbuddyMember
Appreciate all the help. Though I used to tinker with motorbikes, I’m only just getting back into such things after many years.
Does anyone want to talk me through setting the timing and points on a villiers mk25 c? (It’s on a clifford mk1 rotavator)
There is an arrow on the flywheel, one on the back plate (at about 11 o clock) and one at the end of the countershaft. In my research I seem to be getting conflicting ideas as to what lines up with what!November 24, 2016 at 2:49 pm #23201vhgmcbuddyMemberThank you both. I have decided to take the magneto to The Mower Centre in Hailsham to be tested as I’m not too far from there and they can supply any replacement parts needed.
November 21, 2016 at 4:43 pm #23164vhgmcbuddyMemberSomeone is breaking a 700 on that auction site and they say they have most parts available, but not listed.
November 17, 2016 at 8:02 am #23139vhgmcbuddyMemberThree spindles re housed fitted all new bearings. Deck had a good going over and sprayed with etch primer; will be painted with top coat and Waxoyl before next season. I wasn’t looking forward to this job. But apart from the first pulley being a pain, the rest of it went fine. Cost for three housings and bearings approximately the price of one complete new spindle assembly. New set of blades now and be ready for next spring. This deck is model No 78347, serial 6900001- & up, 1996. Owen.
Attachments:
November 14, 2016 at 3:34 pm #23112vhgmcbuddyMemberThanks for the tip – I did wonder if it would be better to wait util after the relining. I have found a very local company that does relining and specialises in old cars particularly. They are E.F. Breen in Maidstone (Kent). They are going in on Thursday for relining.
The bushes came from Robush vibration solutions (thanks to Busman for that tip) and thankfully I have not put them in yet.Any thoughts on the use of a lubrication (if so what) to help with pressing in the new bushes?
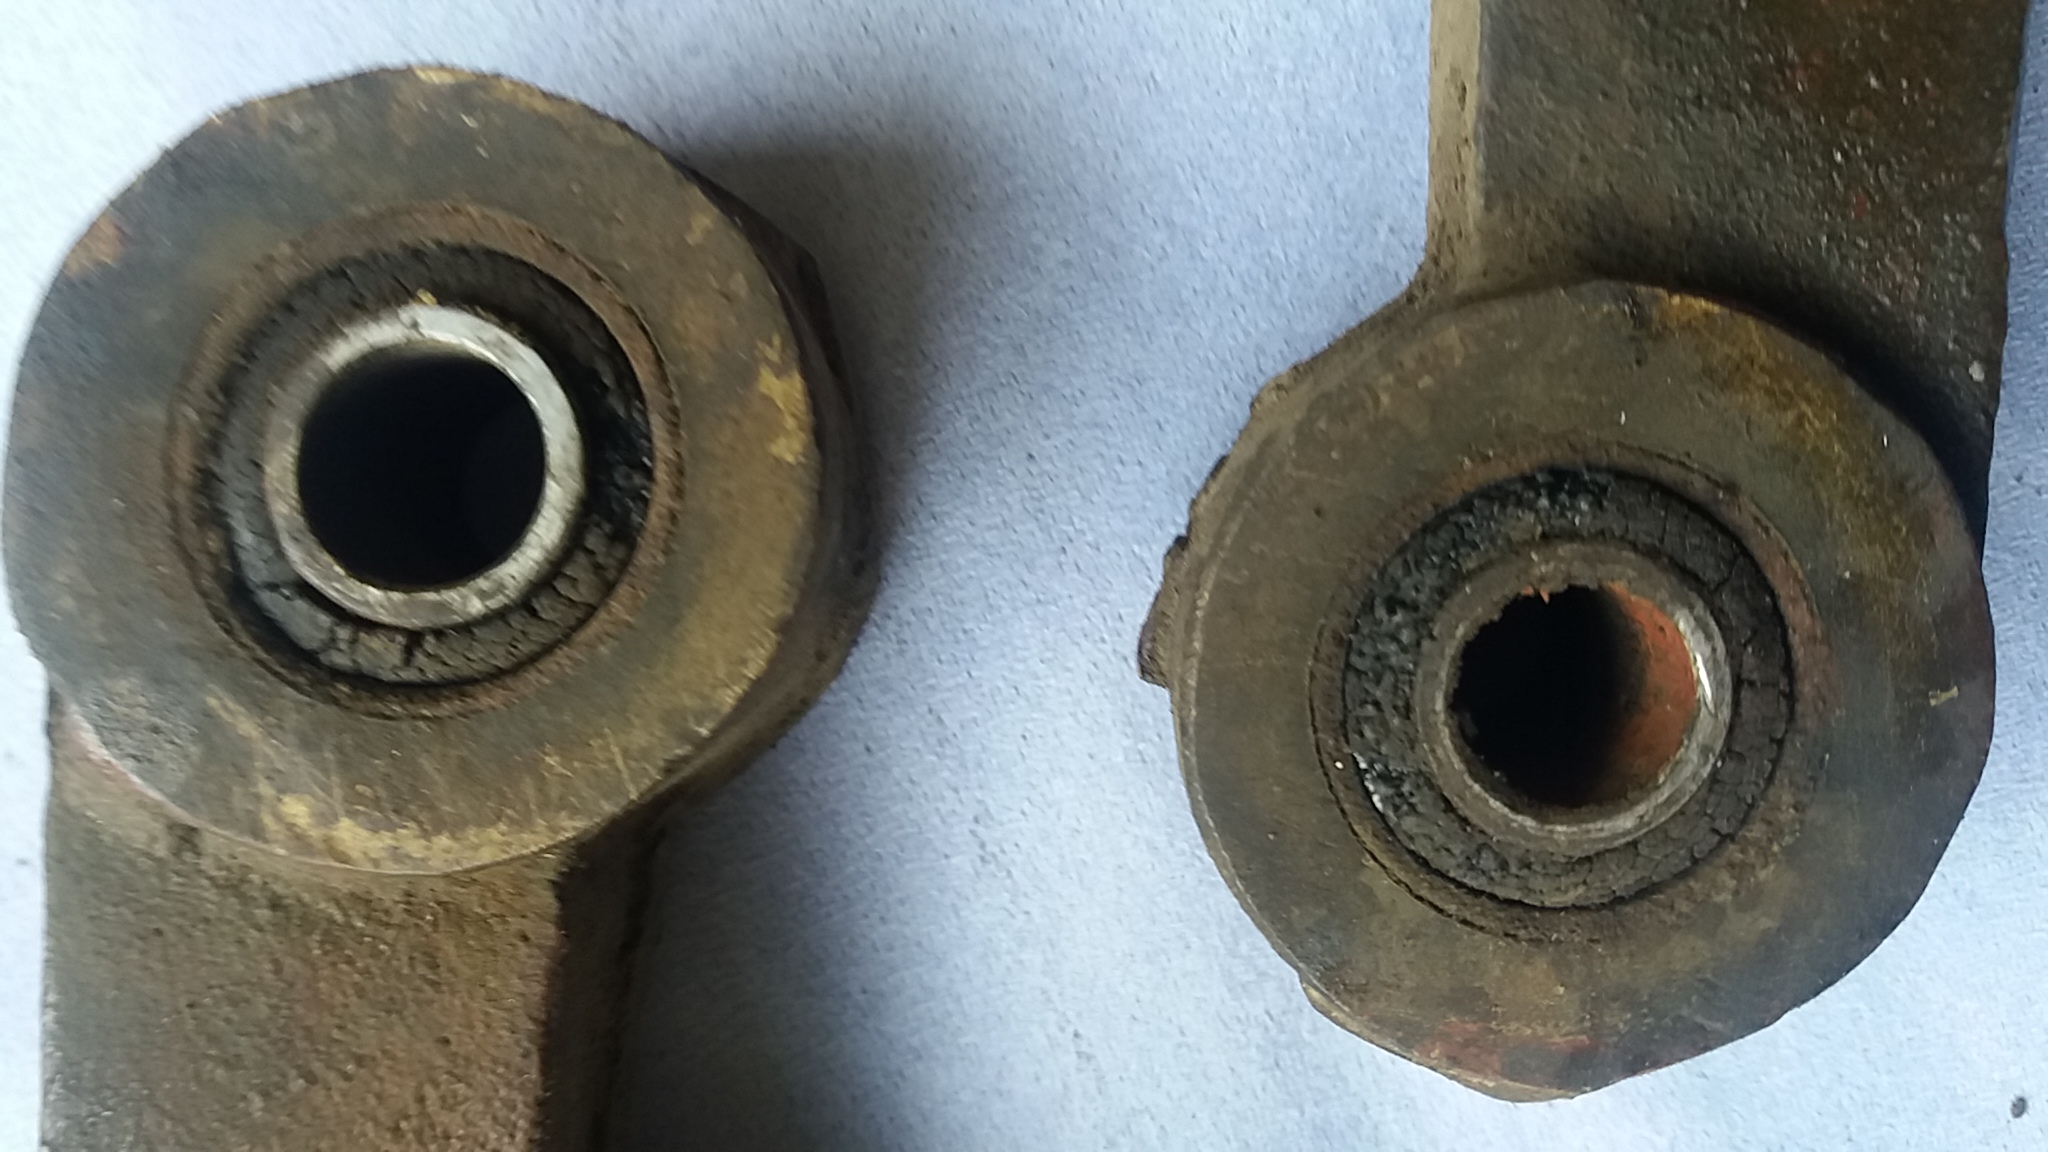
November 13, 2016 at 11:29 pm #23109vhgmcbuddyMemberThanks Charlie. I didn’t have to heat them up in the end, I just used lots of penetrating fluid and they eventually pressed out. I have cleaned the shoes up and now ready to put the new bushes in. Question: Do I use any type of lubricant to press them in? If so what? Thanks.
Attachments:
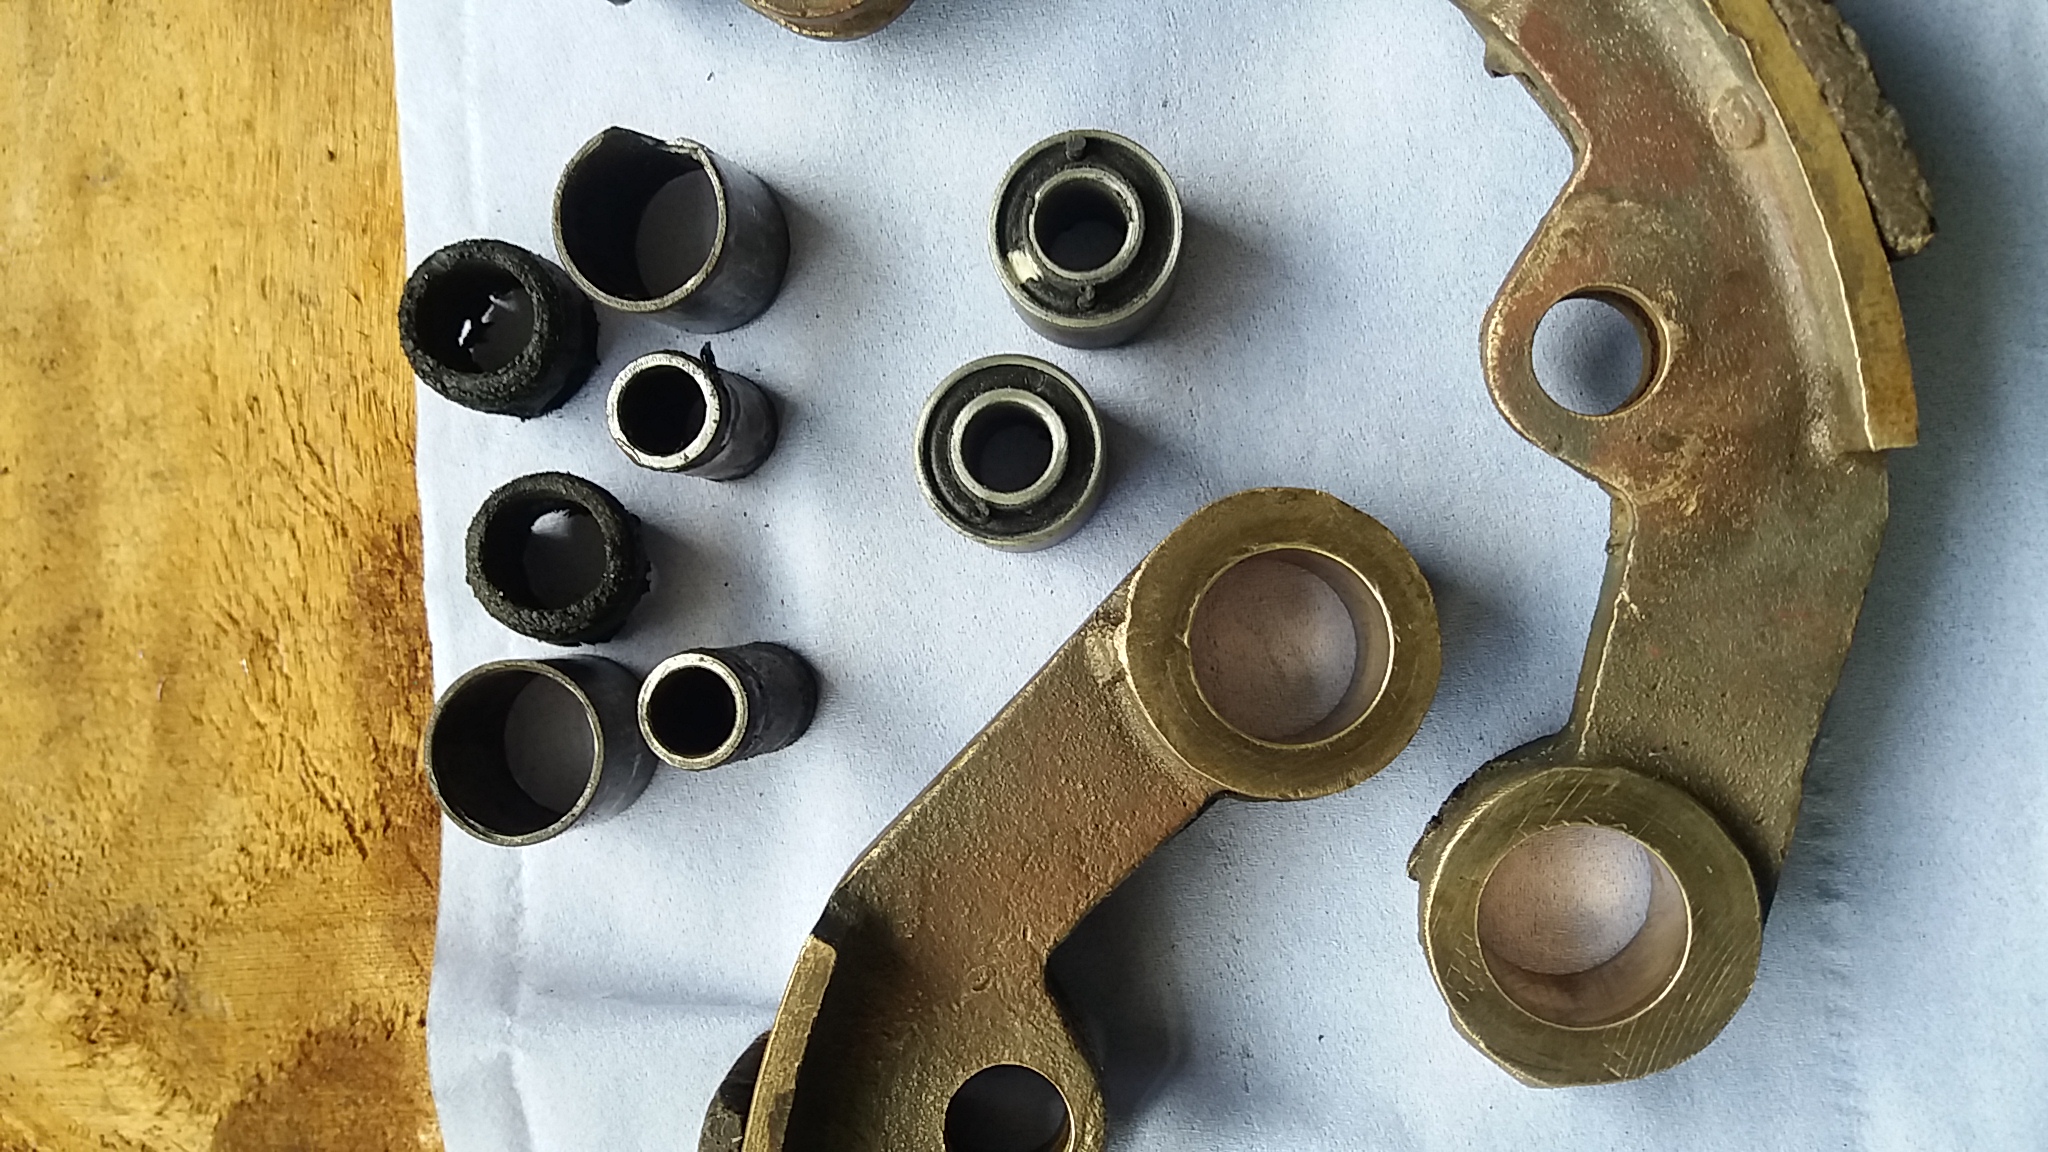
November 11, 2016 at 4:06 pm #22995vhgmcbuddyMemberDespite my best efforts only the centre part came out and the outer sleeve stayed in. I gently used a hacksaw to make a cut on the sleeve but as you can see from the picture it is reluctant to come away from the shoe. Any advice to get these out would be much appreciated.
Attachments:
November 11, 2016 at 8:56 am #22993vhgmcbuddyMemberMany thanks to Ransomes256. I got the job done in one hour after finding the spacers – hidden in rust & paint! Unfortunately gear selector came apart & I now have to work out correct position.
VHGMC Forum is a mine of information. Thanks, TonyNovember 11, 2016 at 12:01 am #22991vhgmcbuddyMemberOk. The Trusty clutch shoes came out of the driver just fine and I have found a local company that does re-lining. I have also ordered and received new clutch shoe bushes. So my next questions are: What’s the best method/tool for removing the old bushes and installing the new ones? Also what’s the best way / product to clean up the shoes before I have them re-lined (petrol and a toothbrush?)
Attachments:
November 10, 2016 at 8:56 pm #22989vhgmcbuddyMemberOk thanks
November 10, 2016 at 8:55 pm #22988vhgmcbuddyMemberI’m away from home till next week but I will check out the engine number and post a couple of pictures then
November 9, 2016 at 11:38 pm #22974vhgmcbuddyMemberI would kill for a shed like that Charlie
I could get all my Bolens in there!
November 9, 2016 at 11:31 pm #22972vhgmcbuddyMemberSounds like she needs an over haul 😉
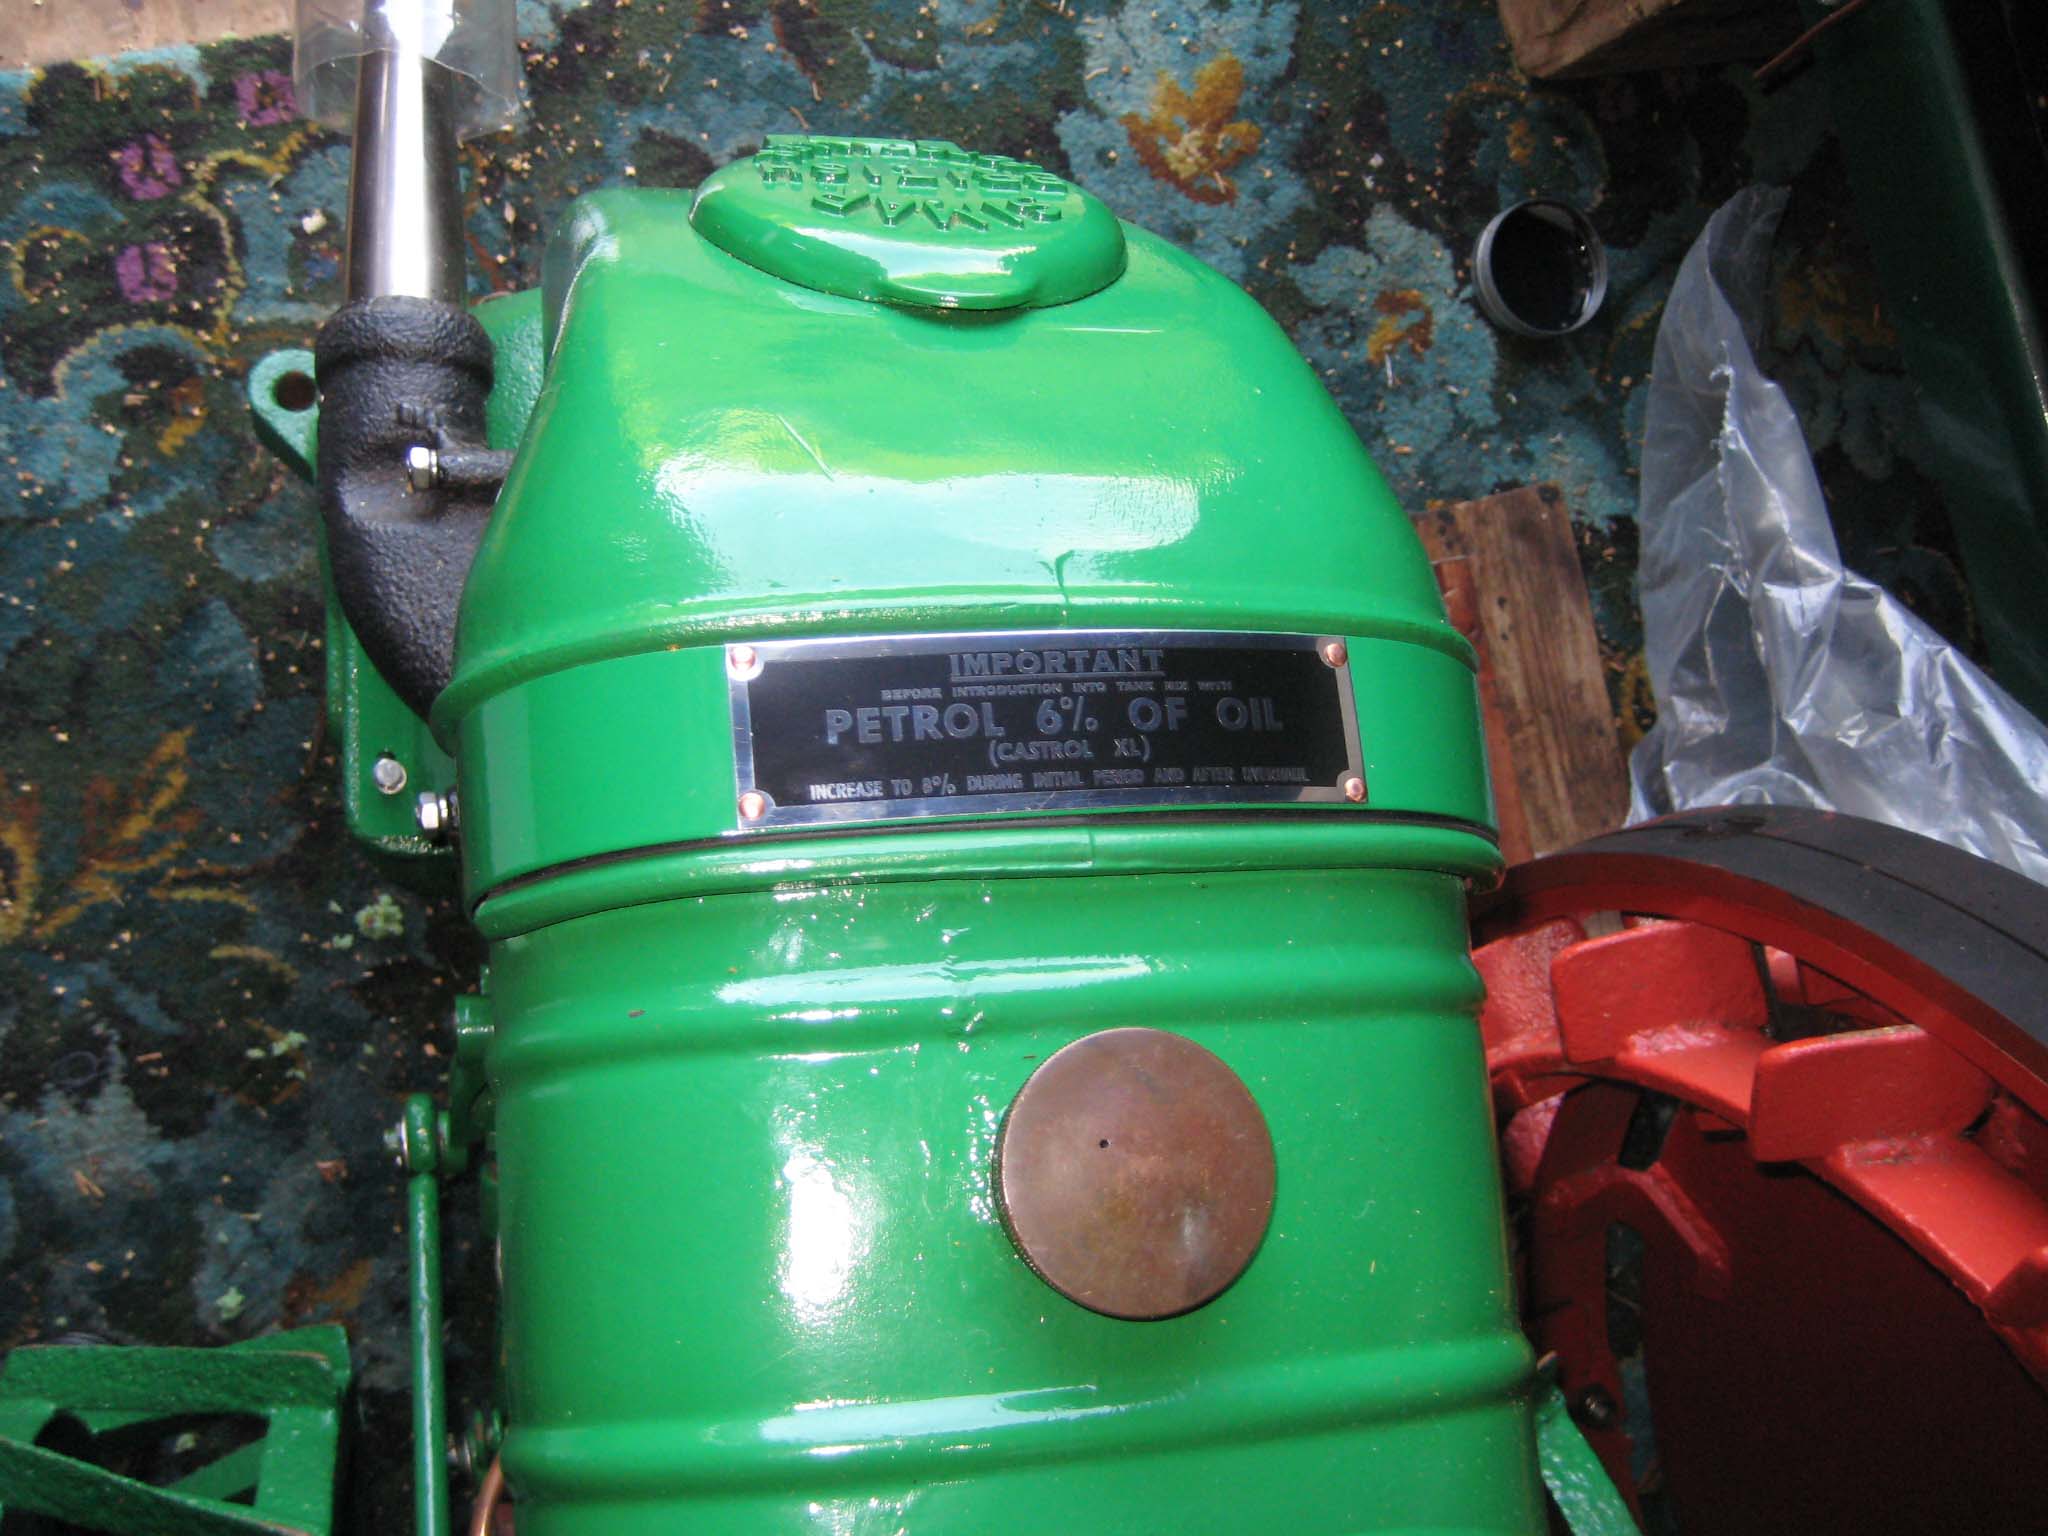
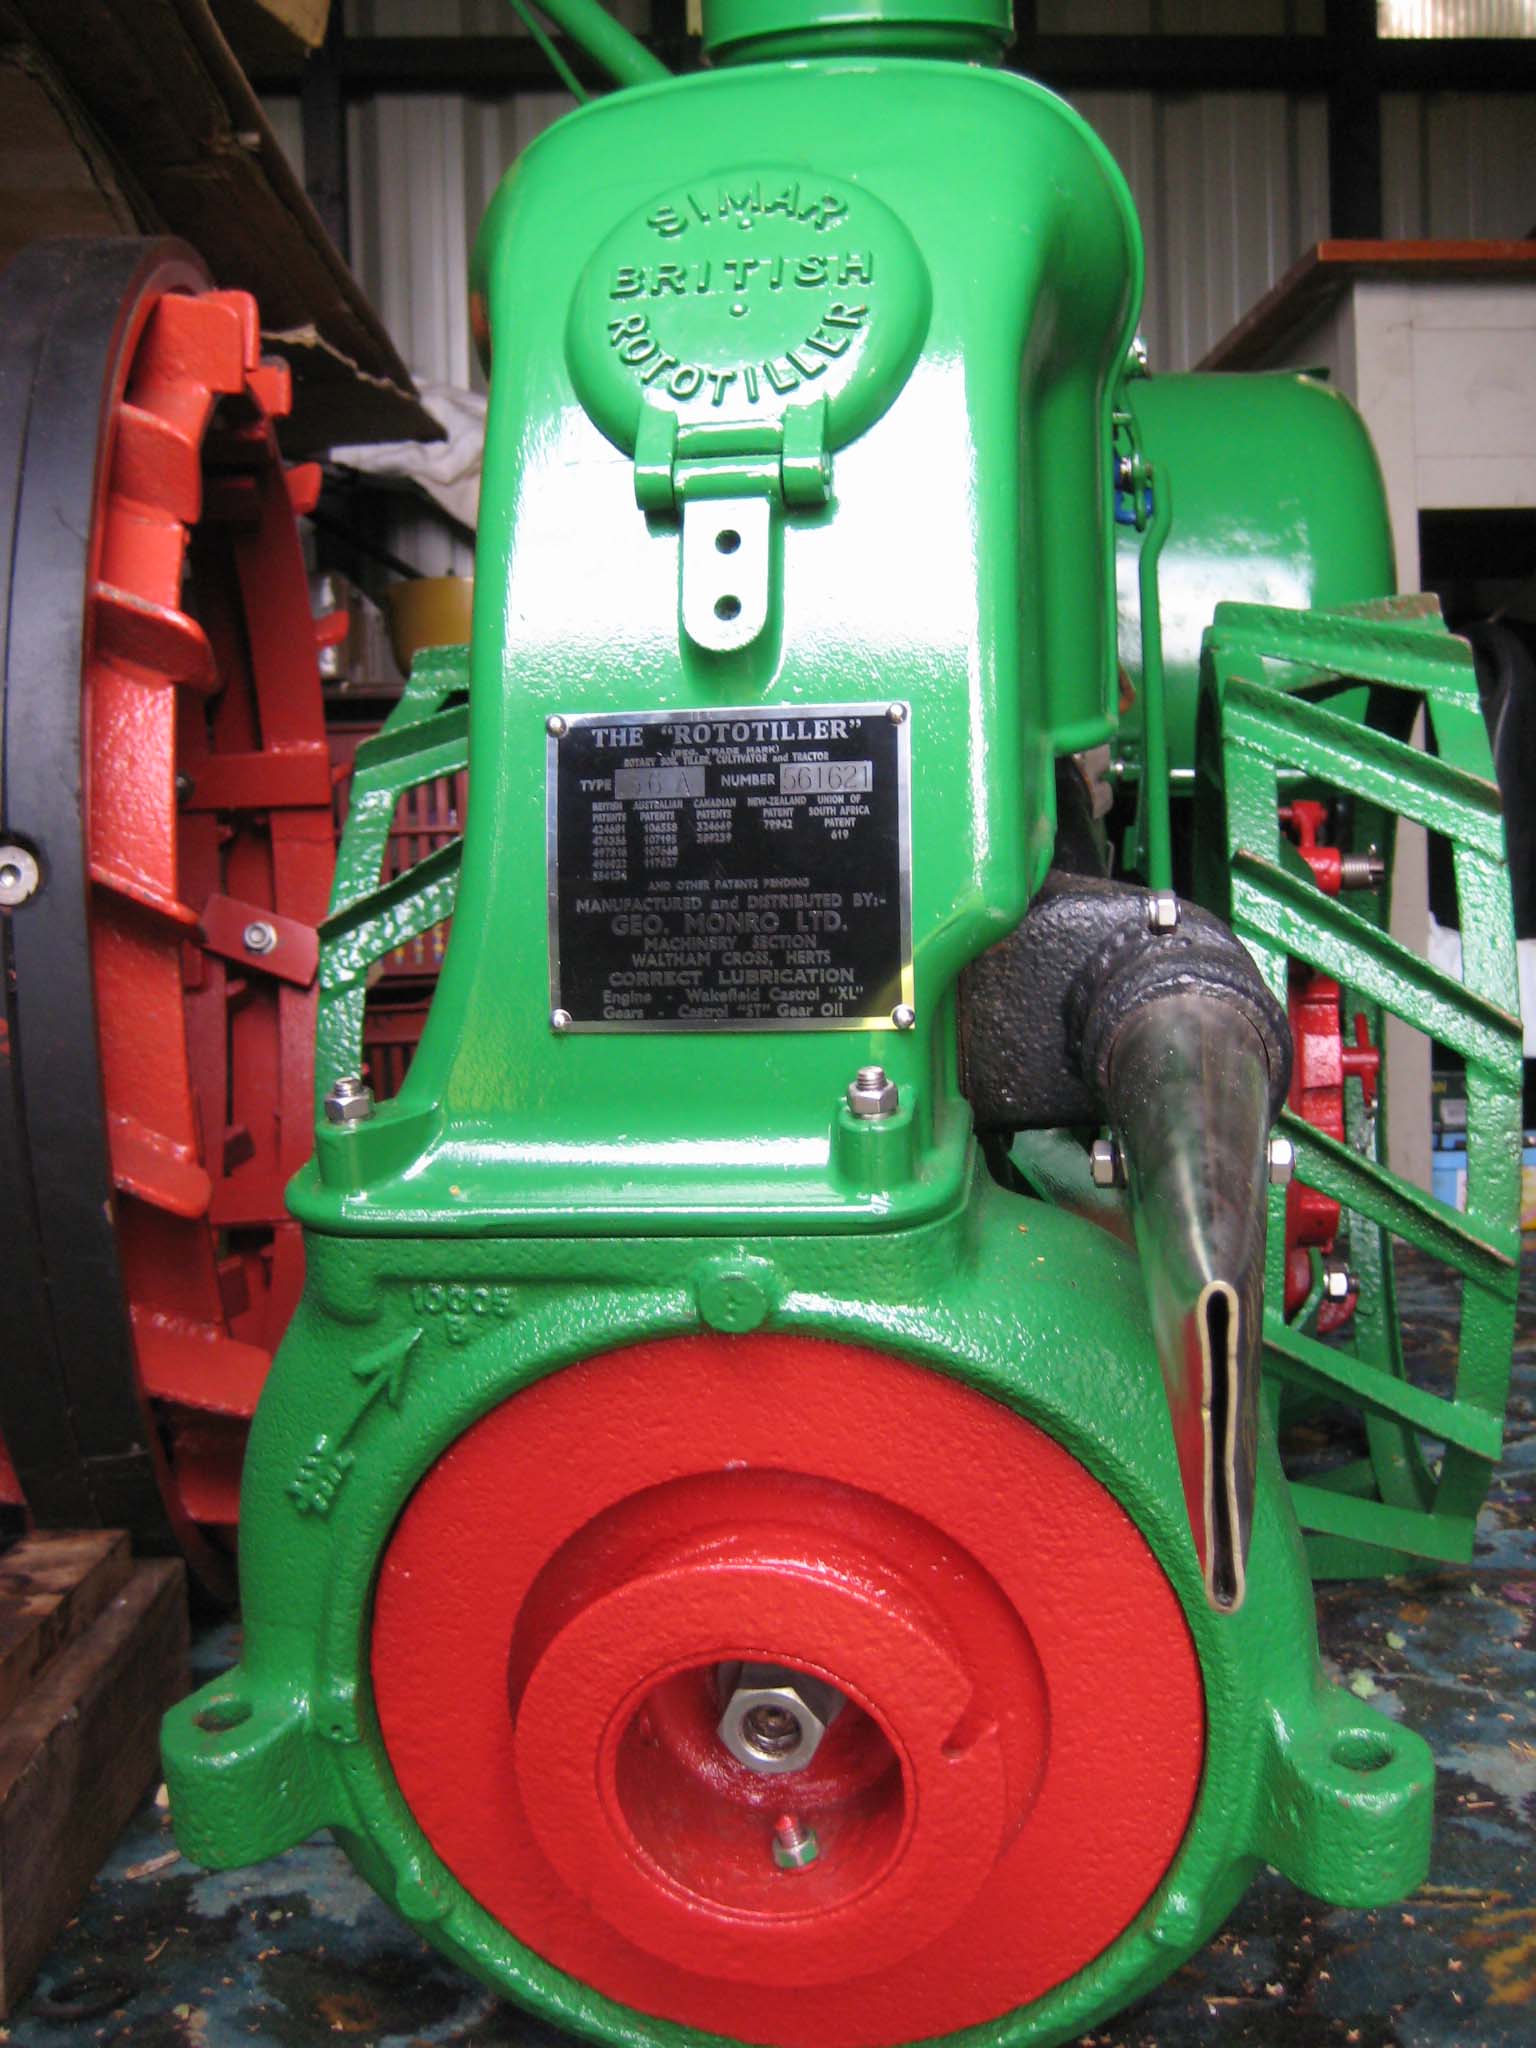
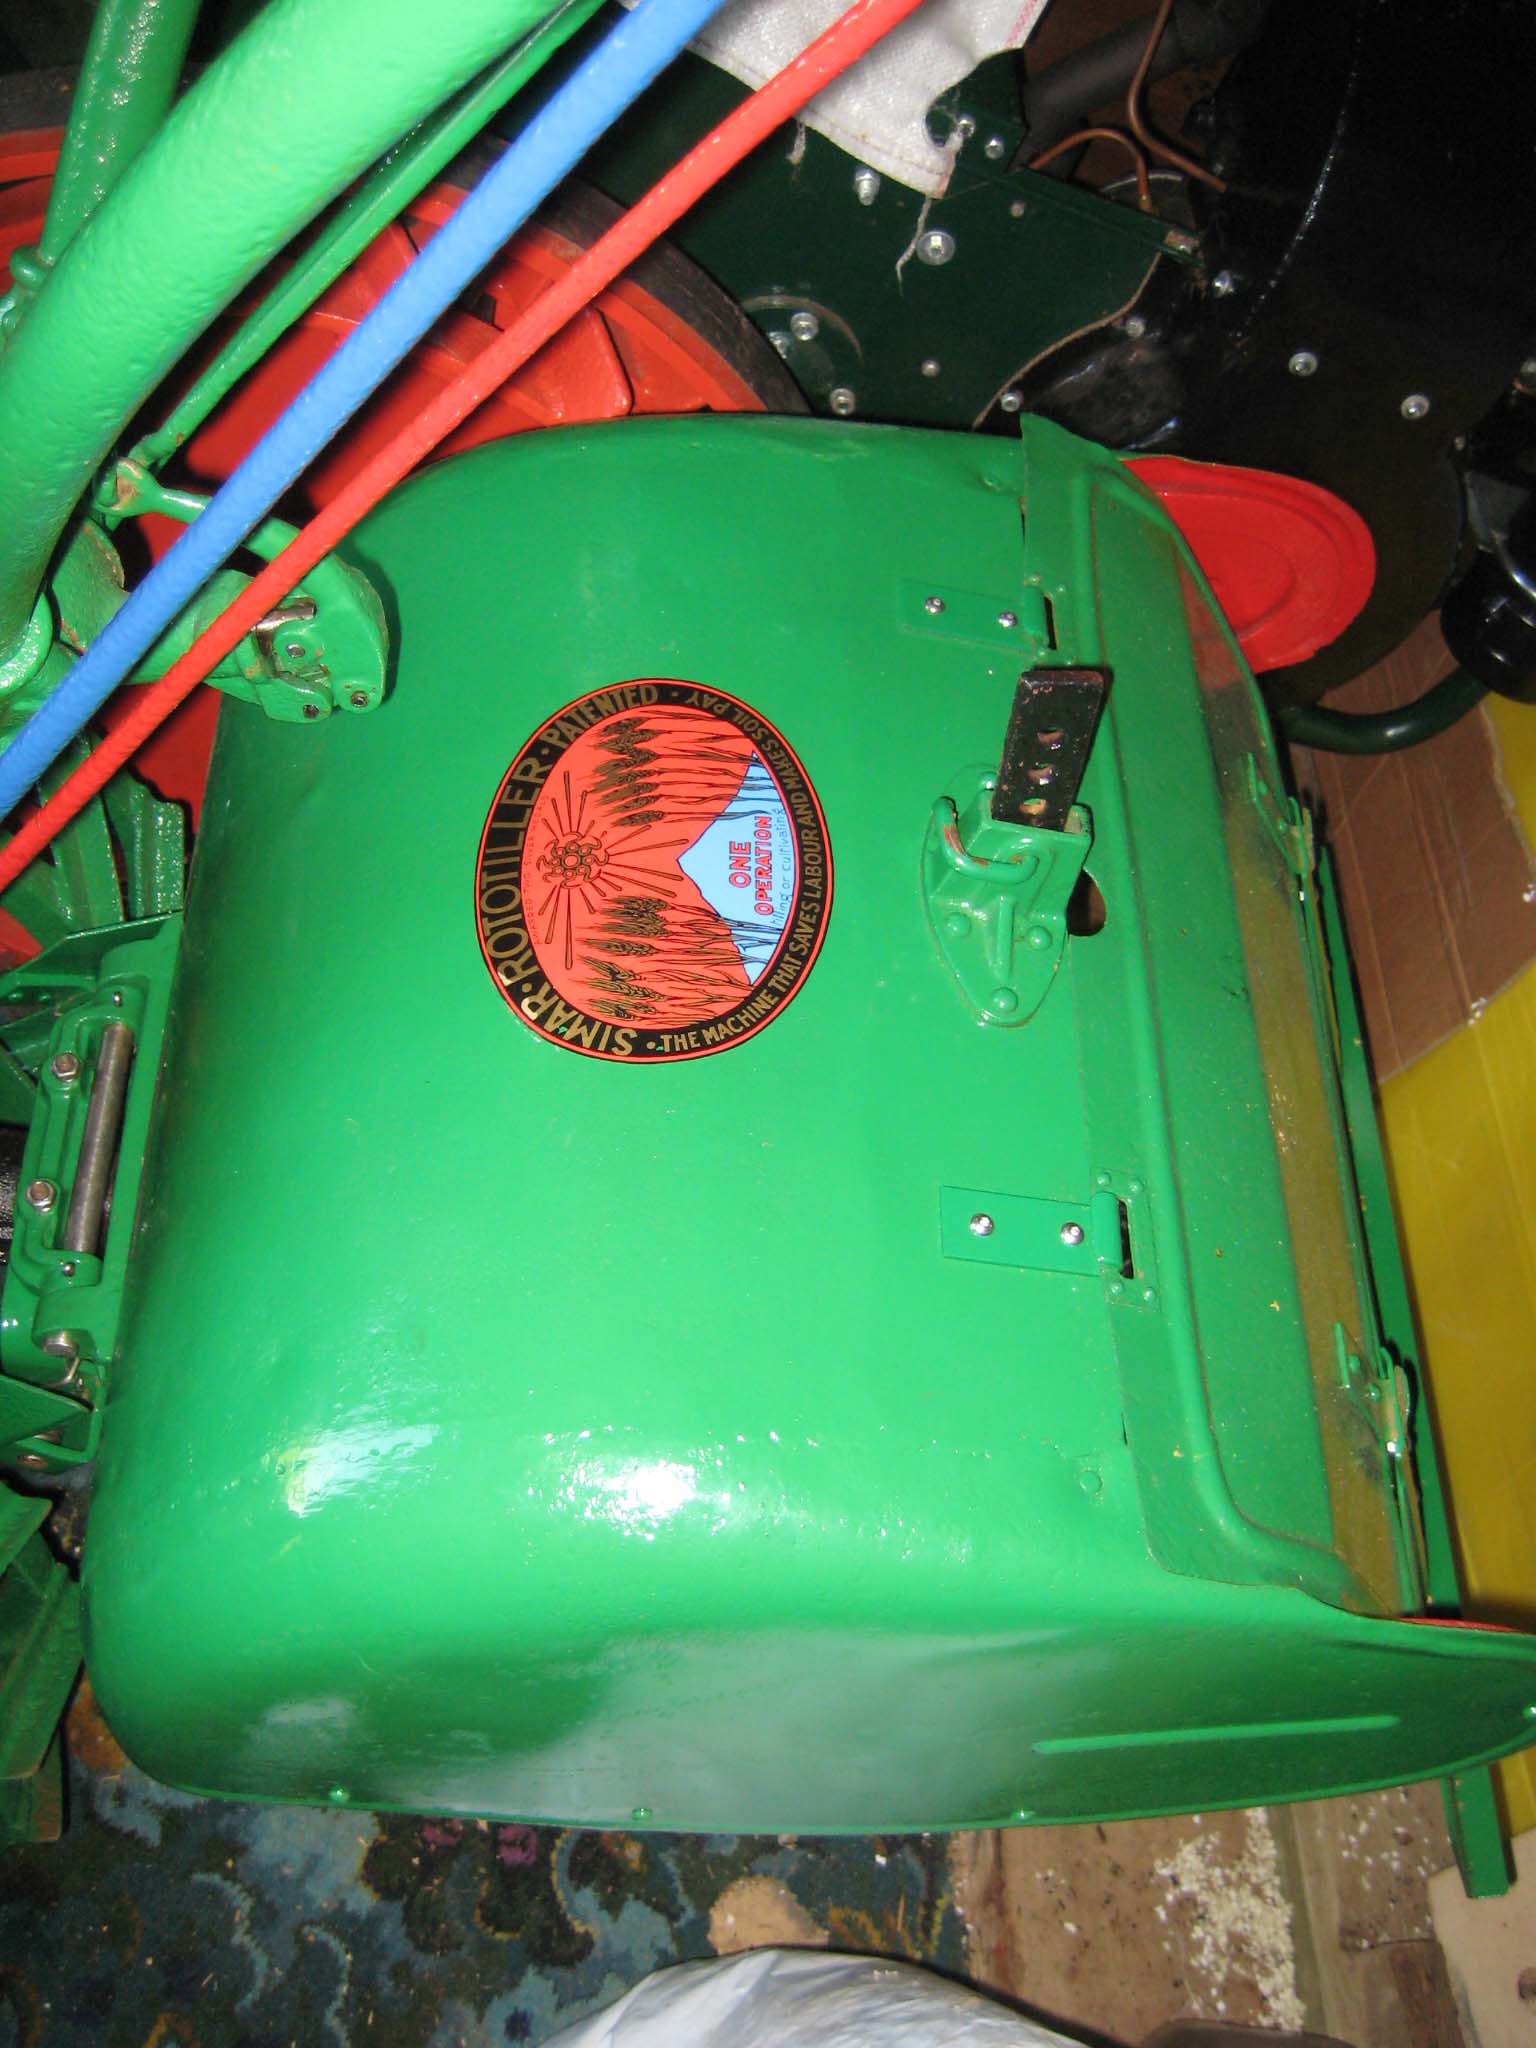
November 9, 2016 at 7:53 pm #22964vhgmcbuddyMemberThe original identification plates were damaged, so they were used as templates by Vintage Brass Plates to produce replacements. The fuel mixture plate is riveted to the front fuel tank strap (Simar 0147). I used 2mm diameter copper rivets intended for model steam locomotives, which were peened over with a hammer on the back face of the strap. The main identification plate is fixed to the engine cowl by No. 6 x 1/4″ long pan head hammer drive screws (Simar 0148). A decal for the miller cover was supplied by Charlie Moore (Simar 0149). The only outstanding parts left to fit are the wooden balls which fit into the ends of the handlebar tubes.
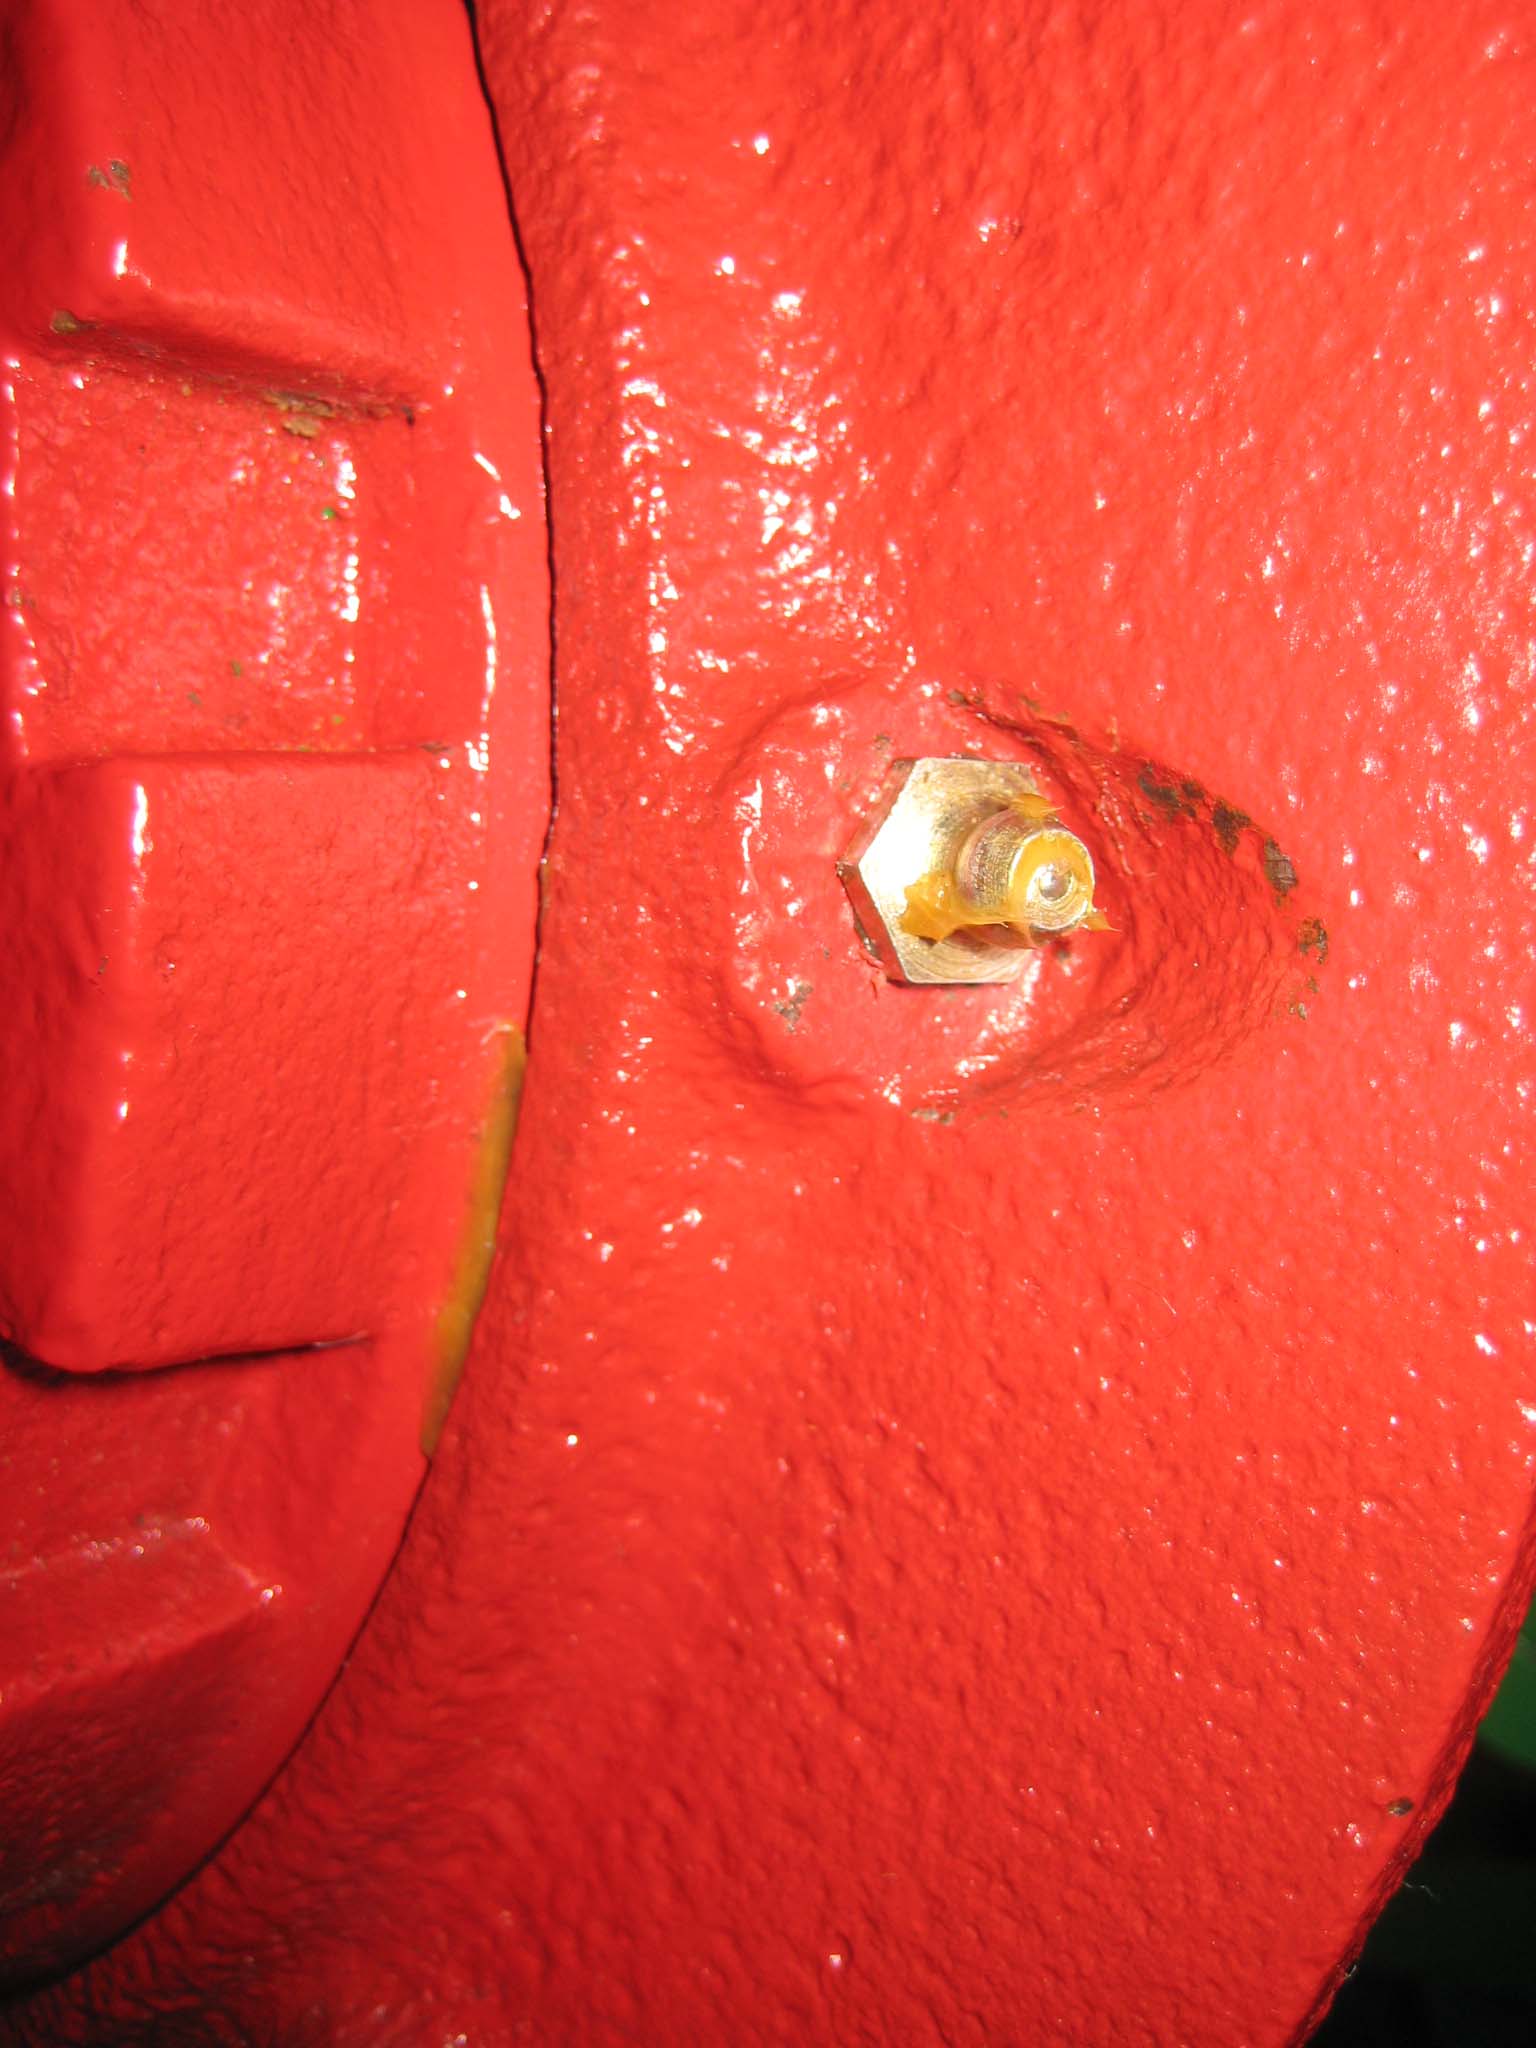
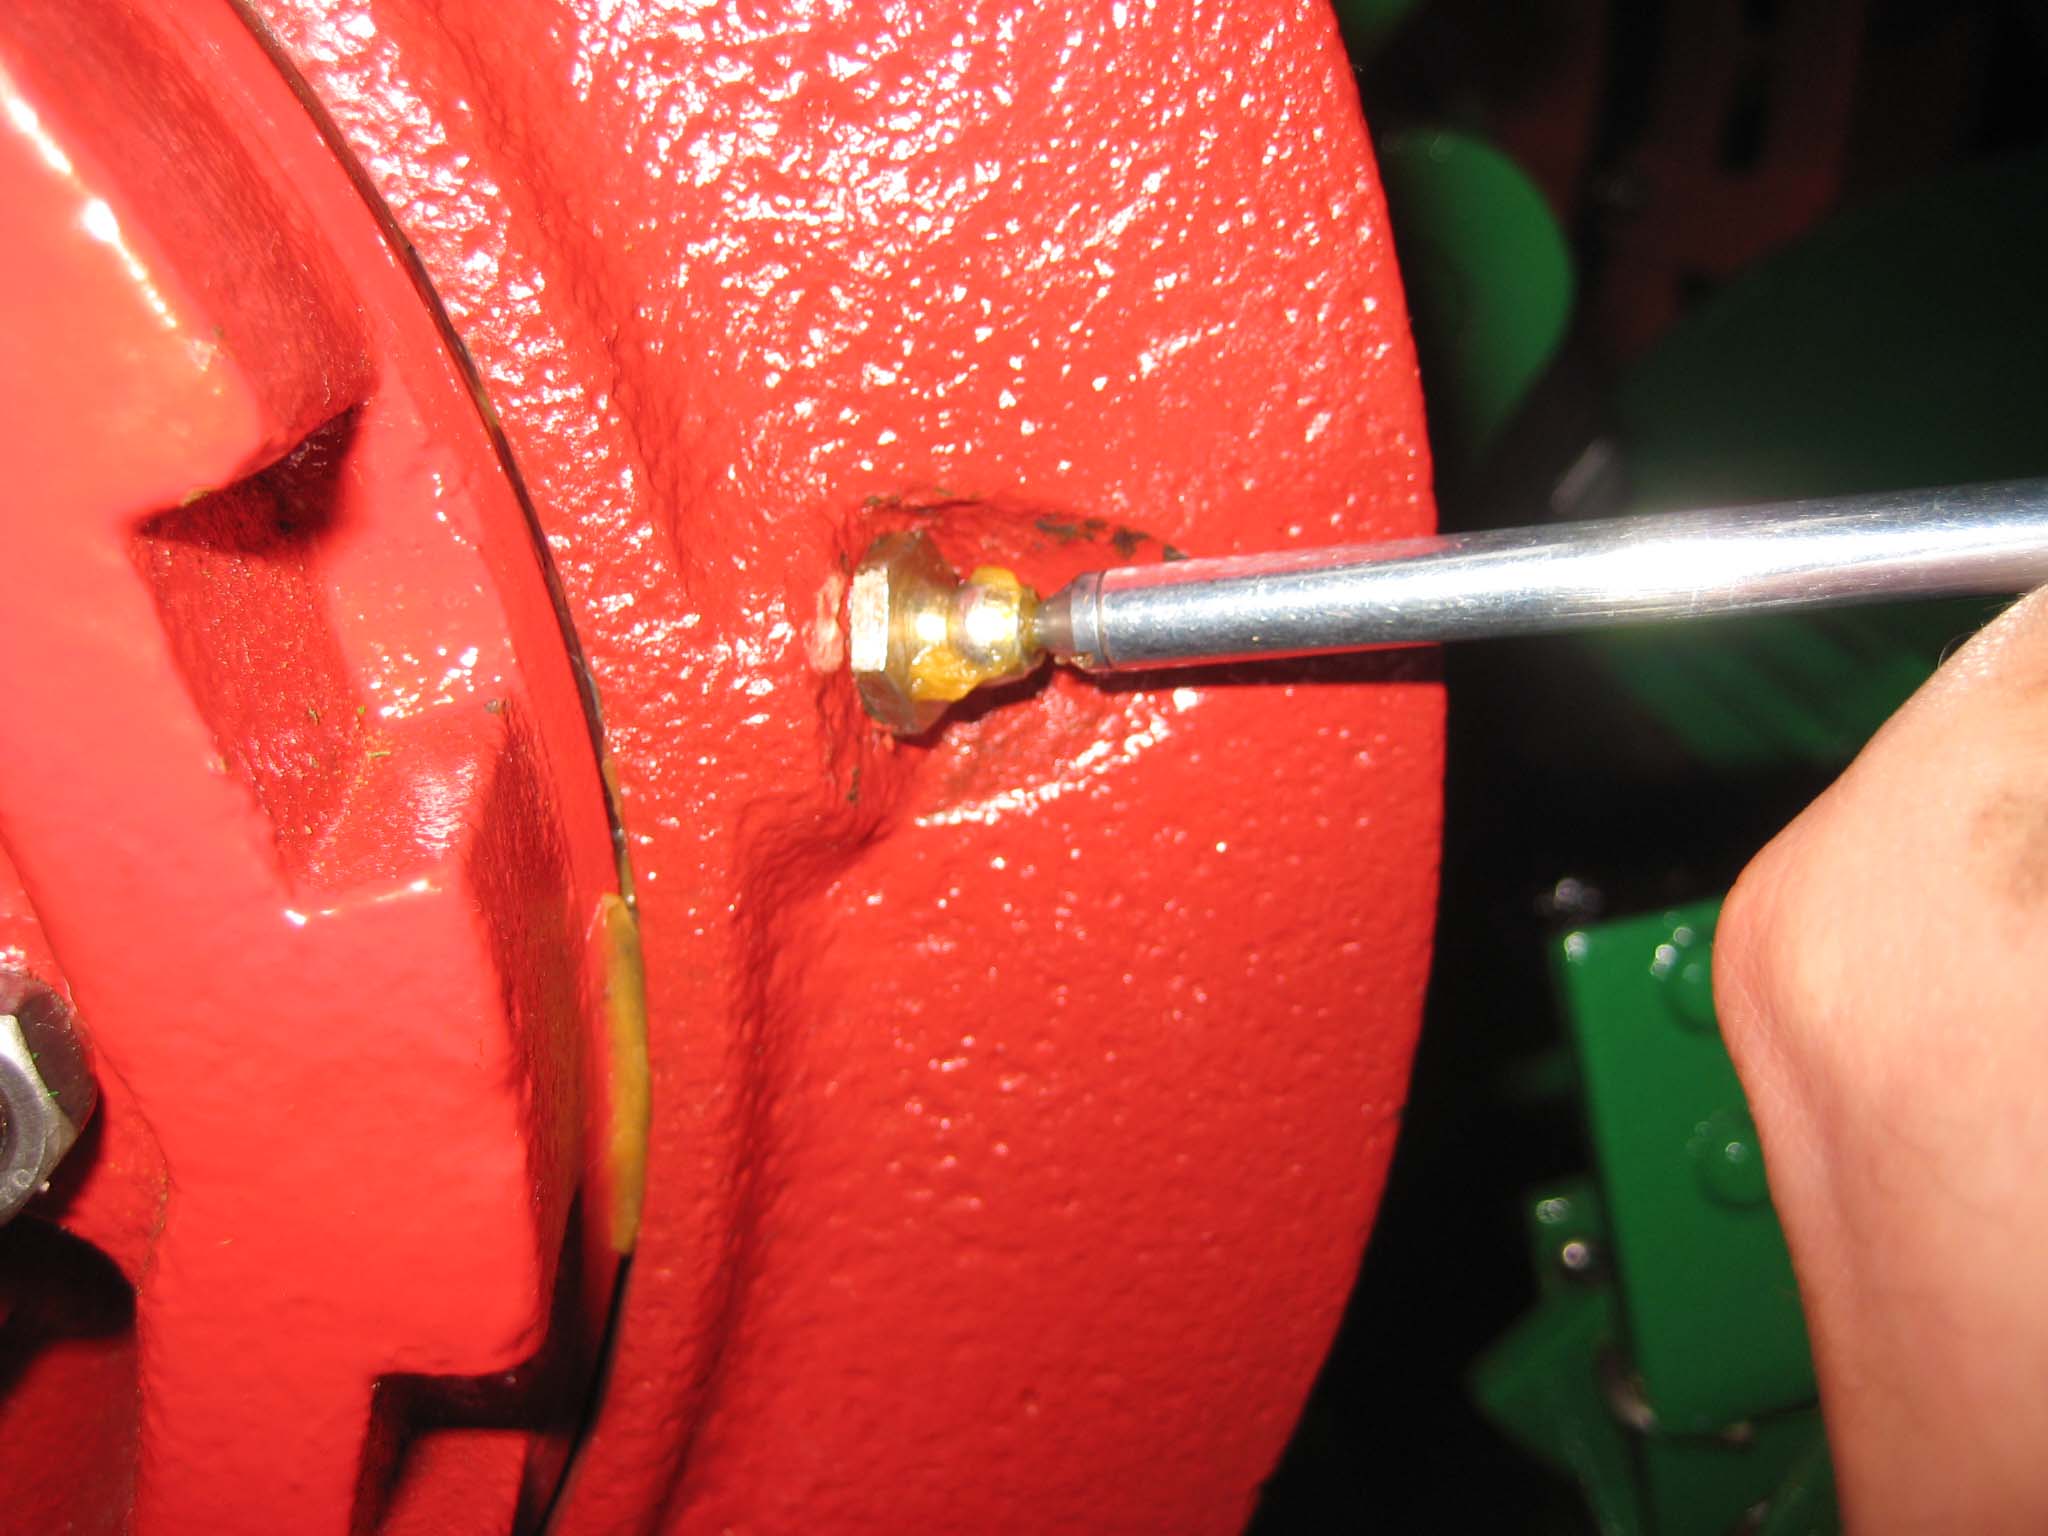
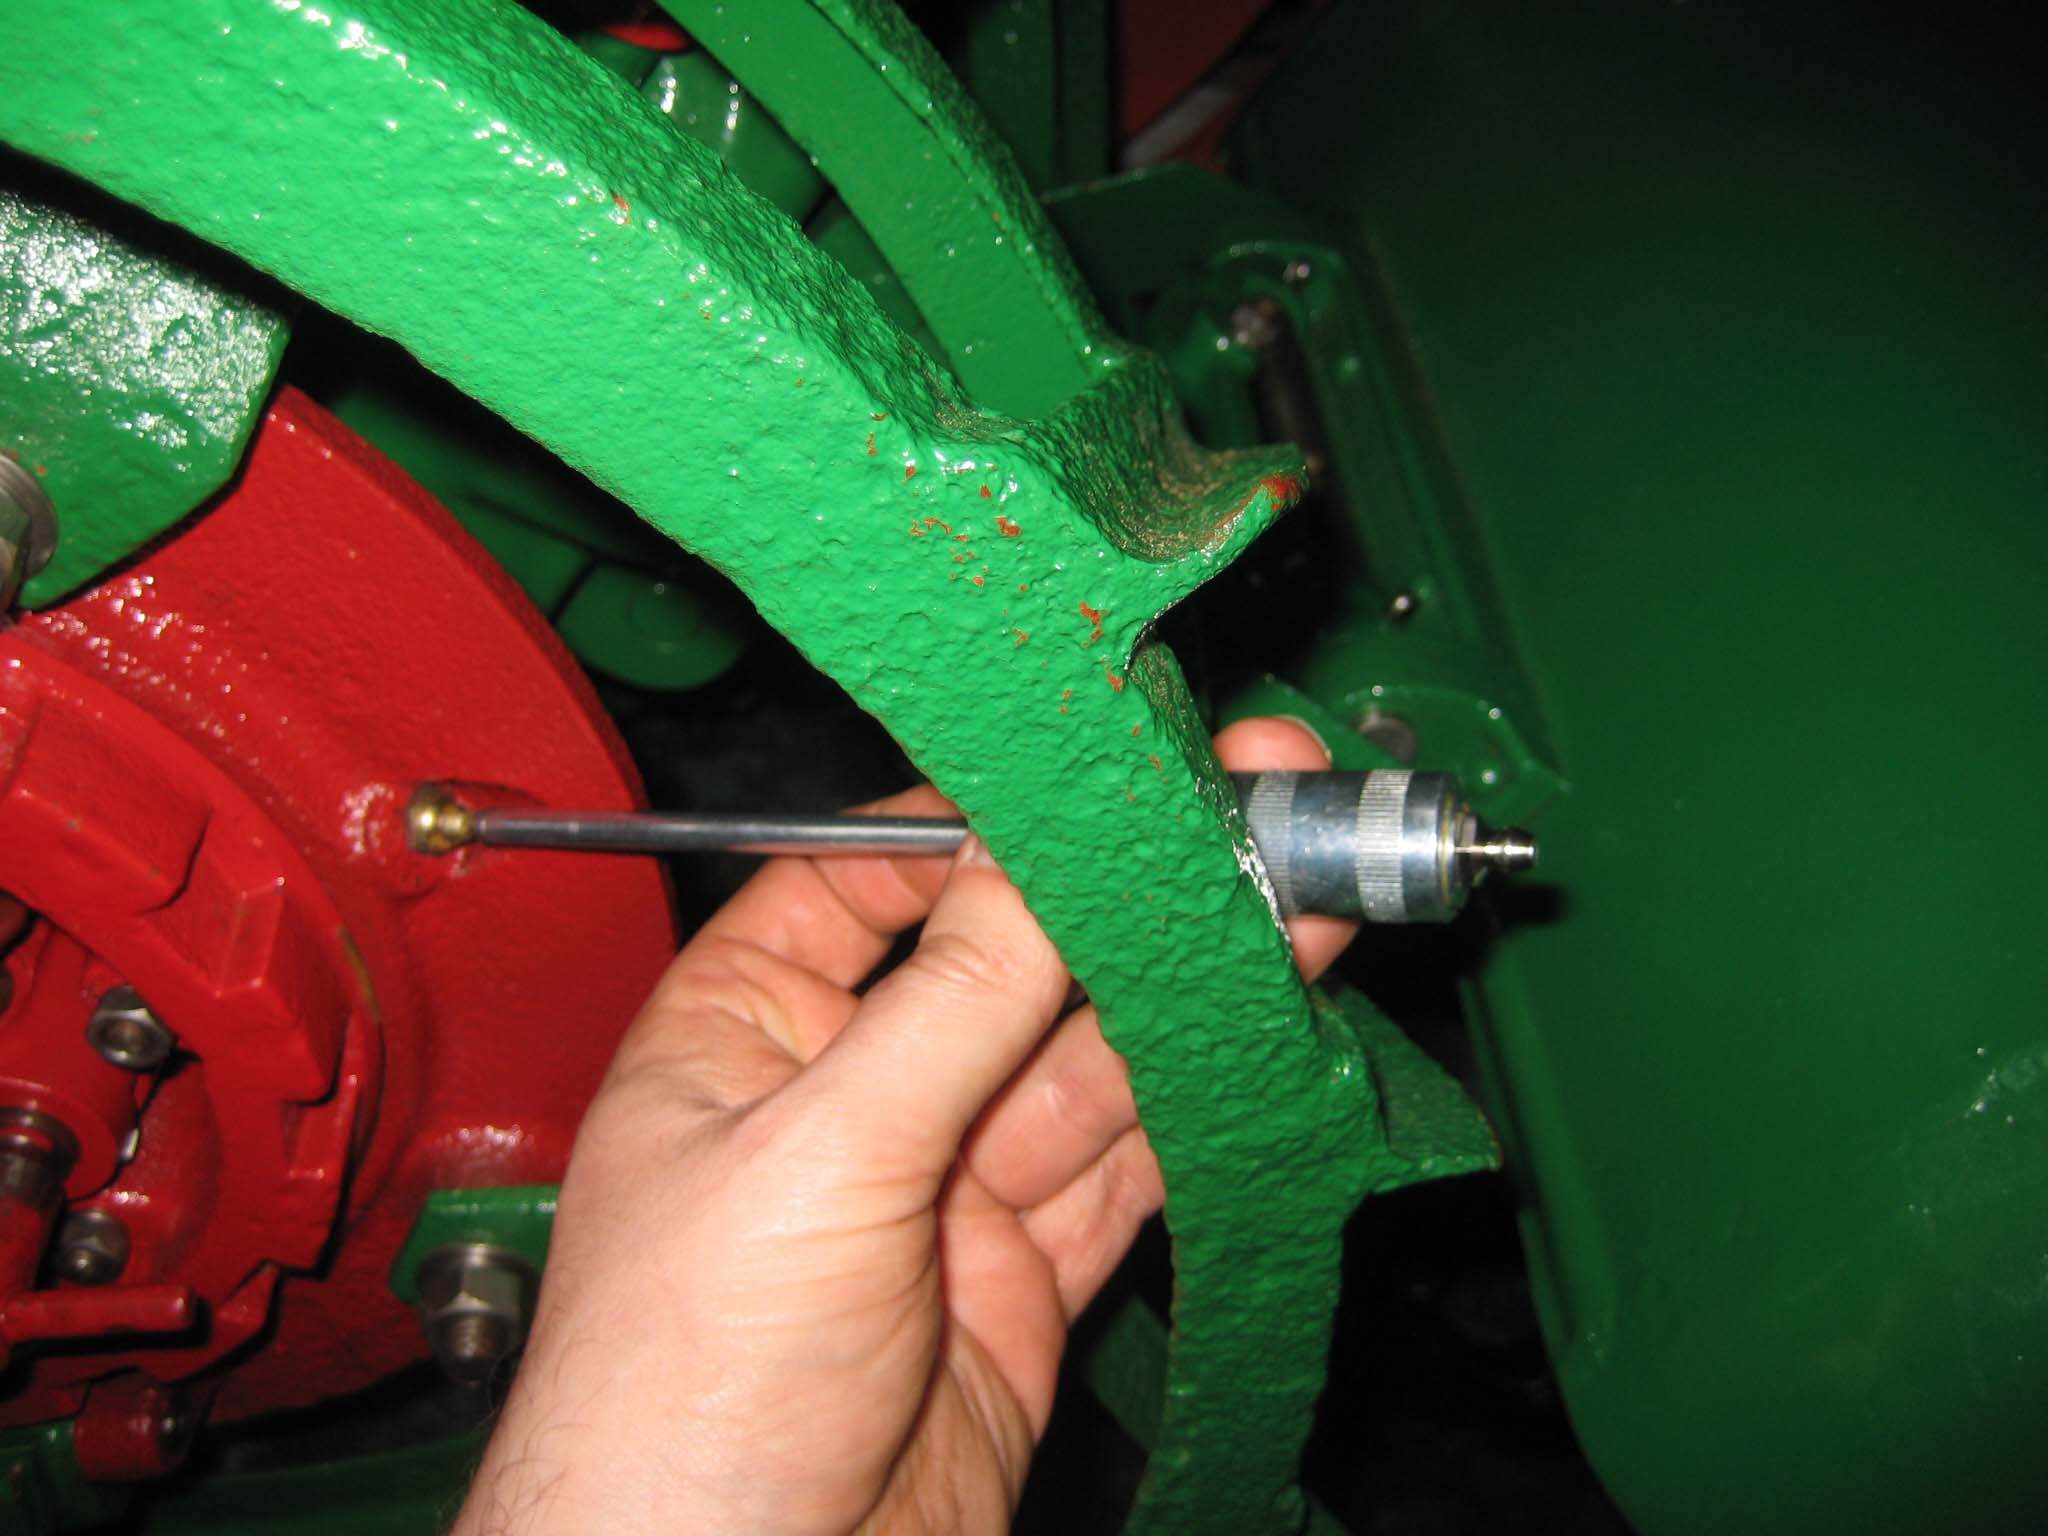
While greasing the various lubrication points on the machine in preparation for it’s maiden voyage, I discovered that whoever drilled the hole for the grease nipple on the left hand wheel hub must have been having a bad day, as it does not sit concentric with the recess in the casting (Simar 0150), which means that a standard grease gun will not fit on to it. Fortunately, I have a needle adaptor which is very handy for awkward to reach grease nipples (Simar 0151 & 152).
Much to my surprise, the Simar fired up at the first attempt, and burbled away smoothly once warmed up a bit. Unfortunately, rain then stopped play, so wasn’t able to film it’s first outing into the veg patch, so watch this space for the grand finale!!Attachments:
November 9, 2016 at 5:41 pm #22962vhgmcbuddyMemberWhy do you think you need a donor? What is worn? Some of the gears are available individually, as are bearing, seals ect.
-
AuthorPosts