Forum Replies Created
-
AuthorPosts
-
August 3, 2022 at 8:01 am #39612
 trusty220Keymaster
It’s a pity I can’t do something along those lines with this job as there’s so much work that just won’t be seen under the covers. It’s the same thing with the classic car restoration people- most of the important work is underneath and you don’t get to see it beyond looking at the paintwork and lifting the bonnet!
The difference is that we all know what’s been done in this case!
August 2, 2022 at 12:37 pm #39599trusty220KeymasterThis restoration is really using all of my skills! I’m now into woodwork which does make a refreshing change from oily stuff and paint.
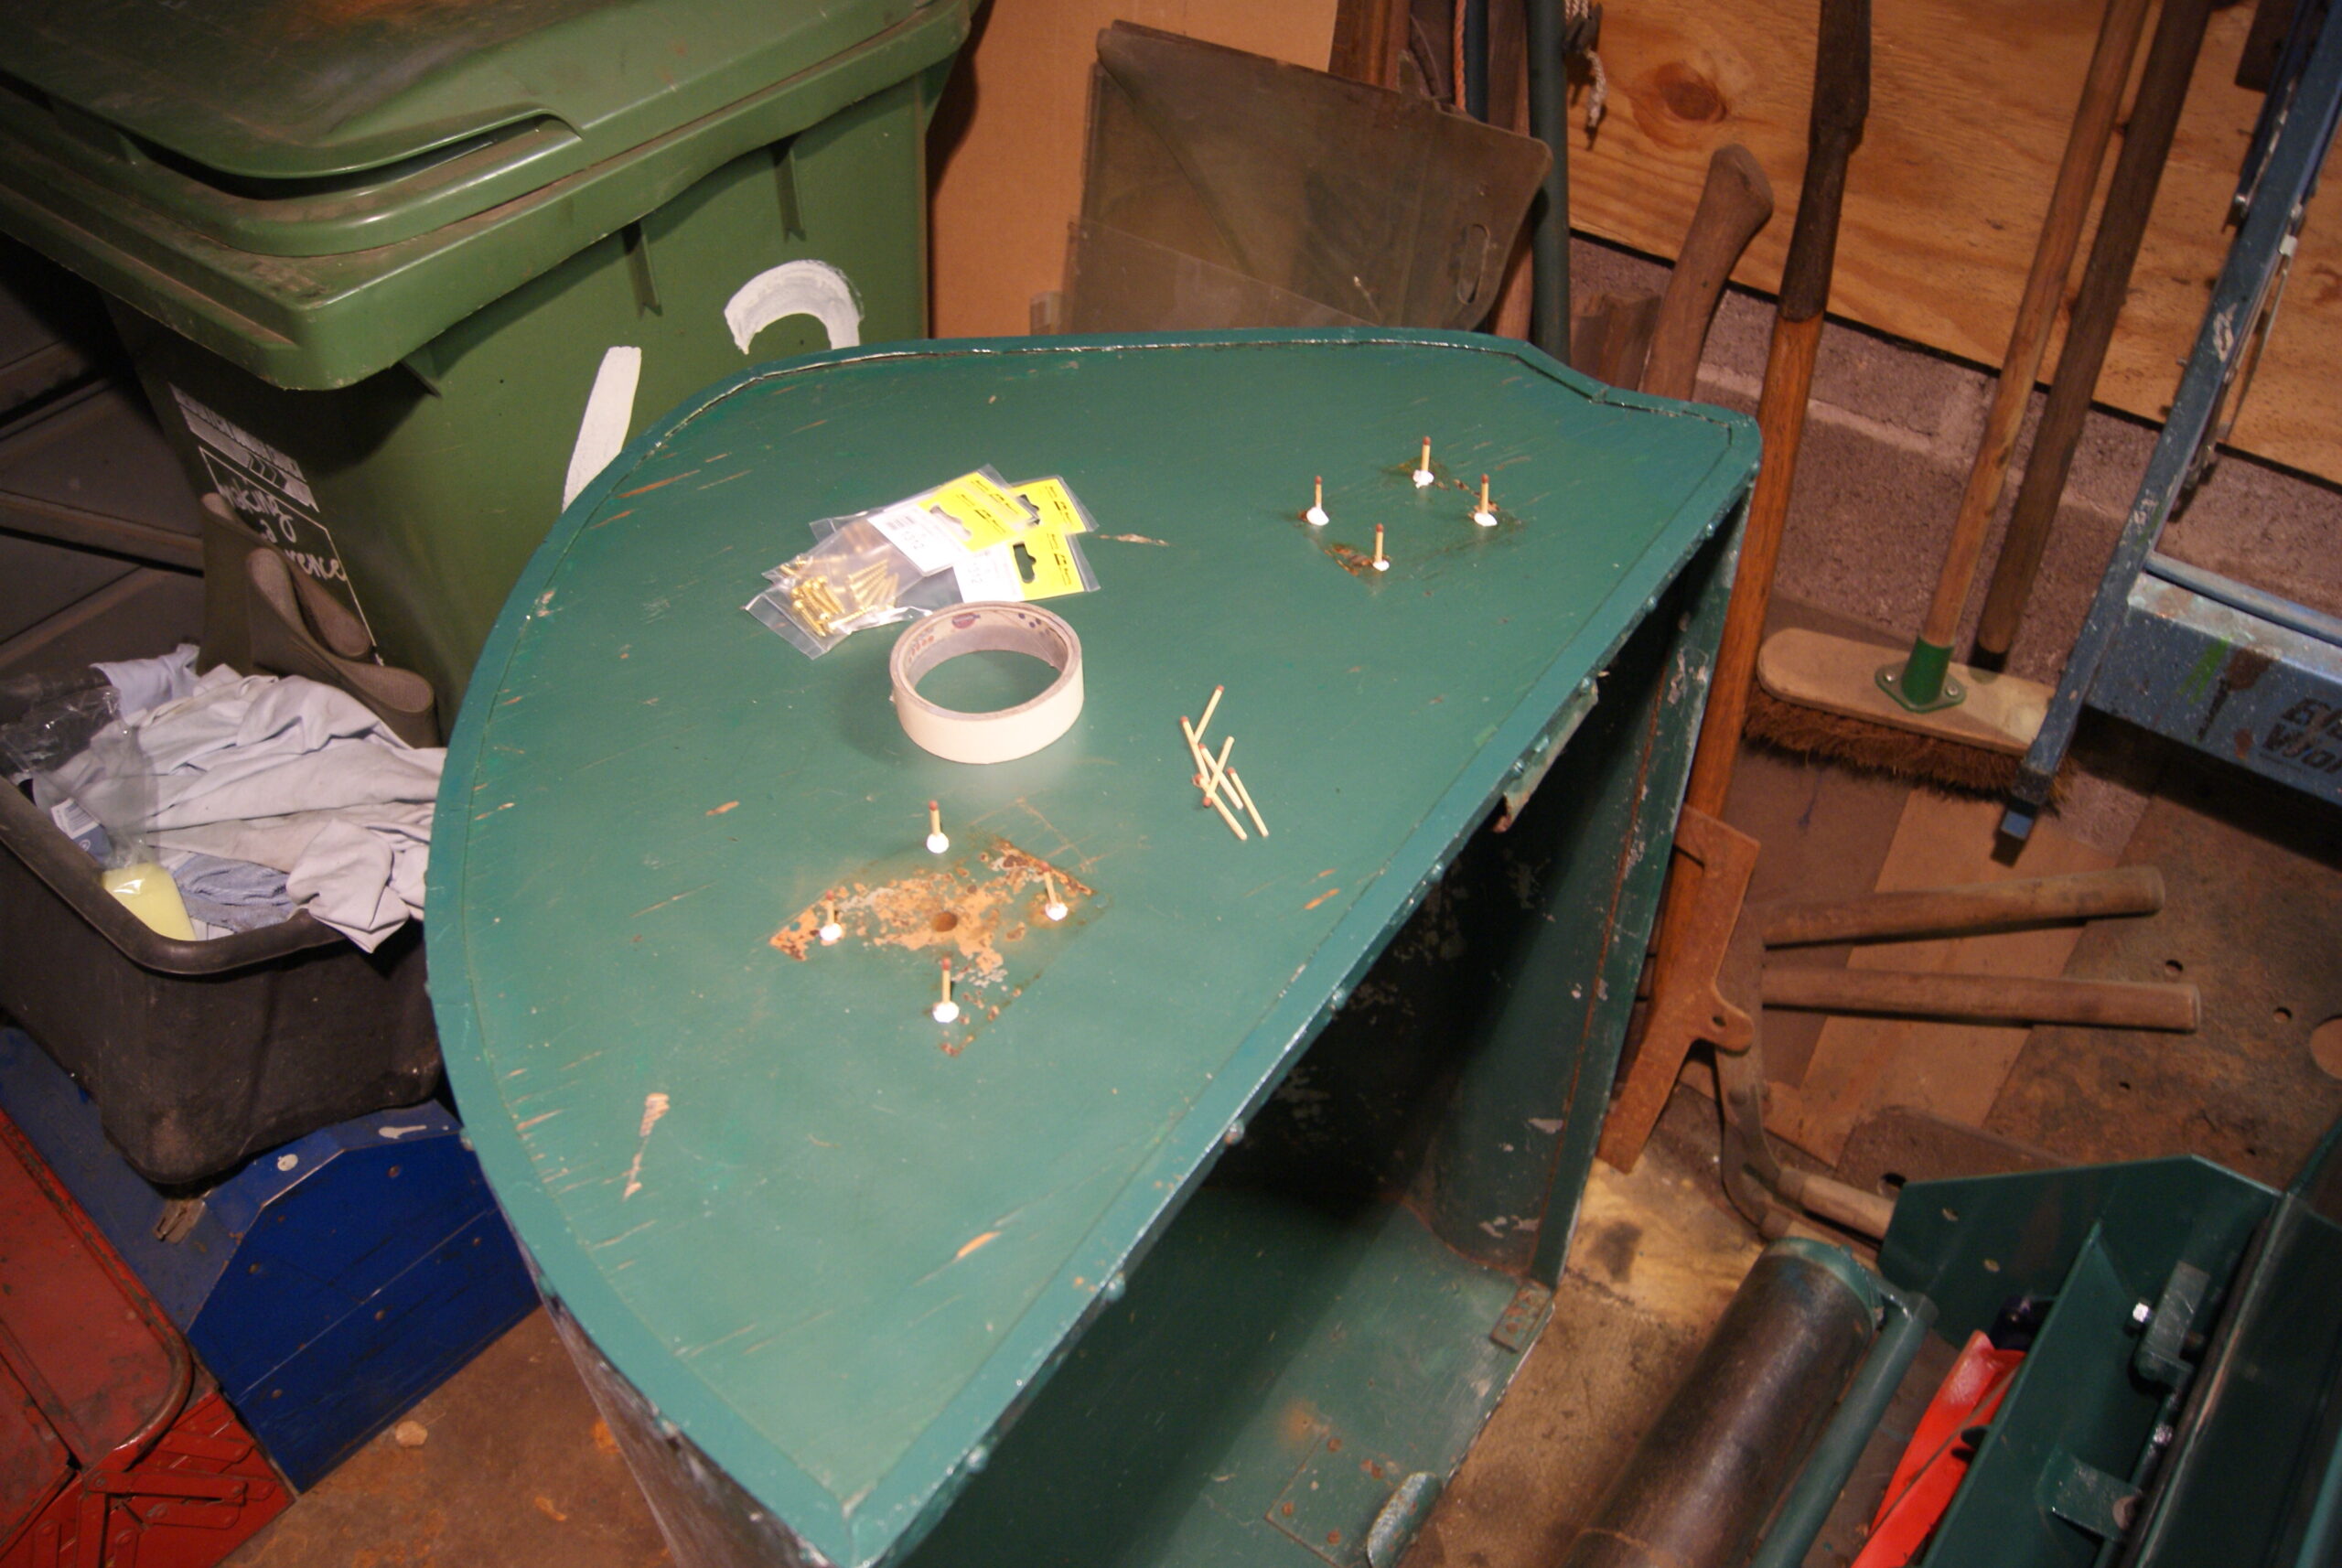
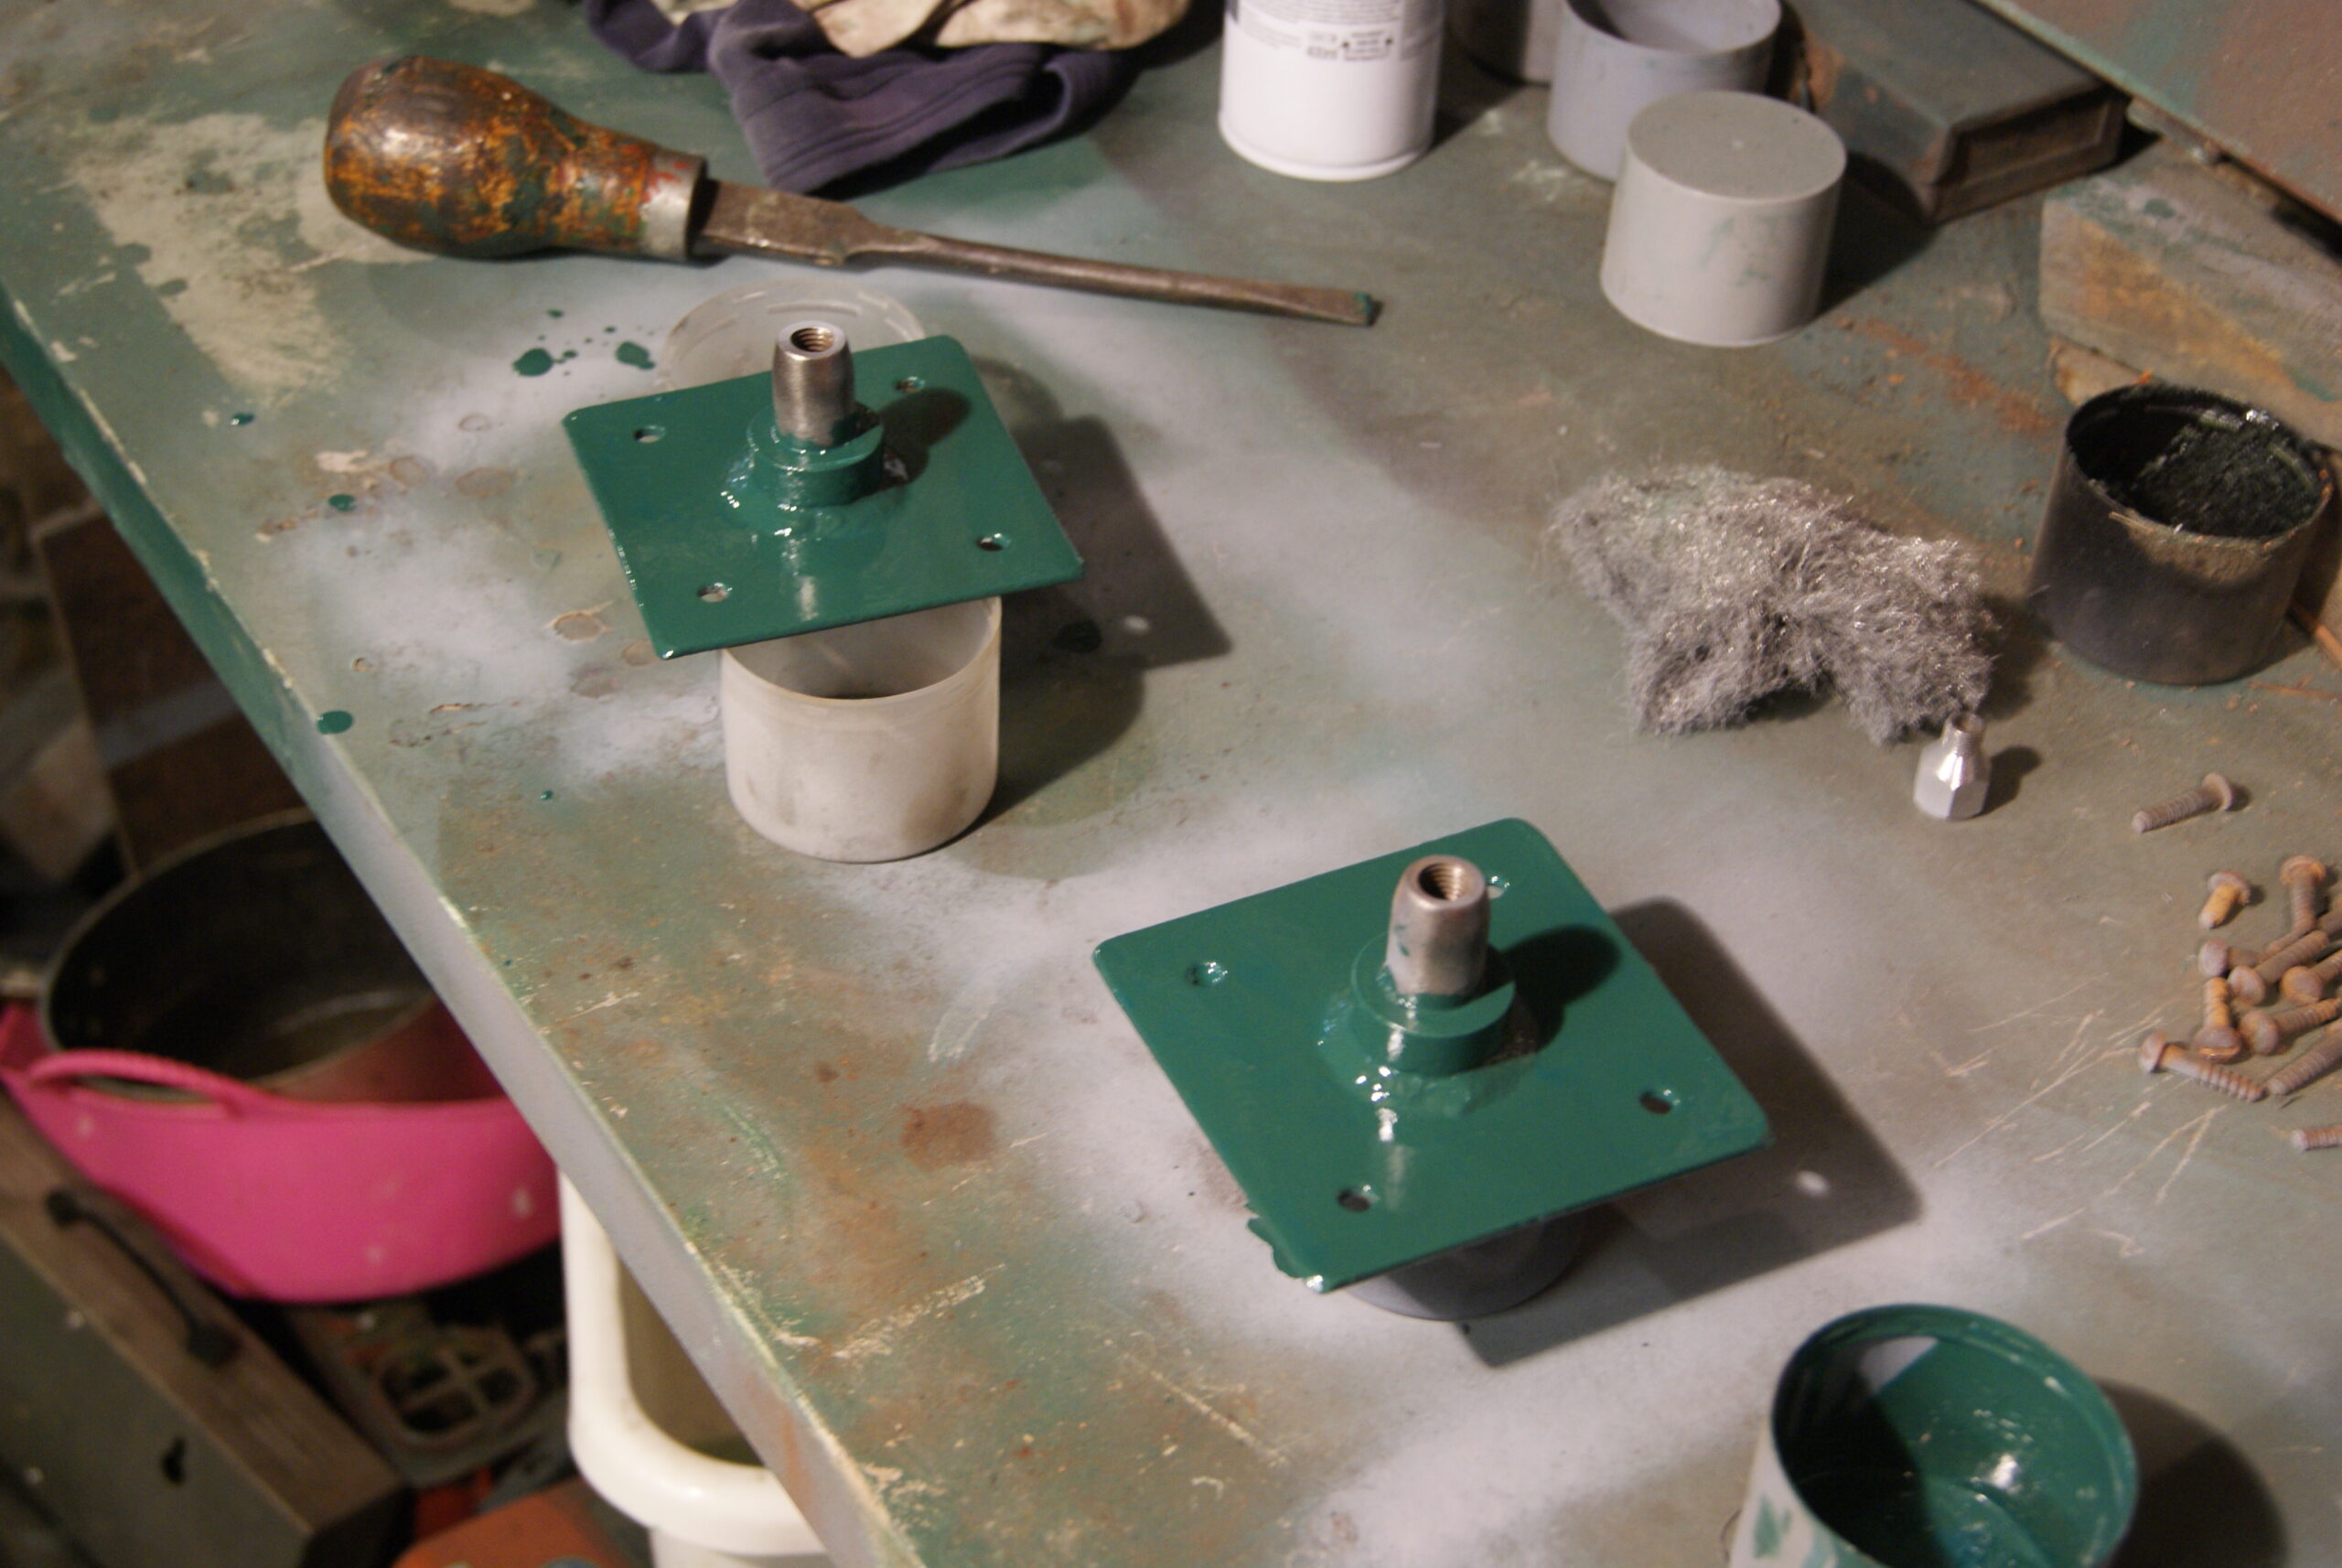
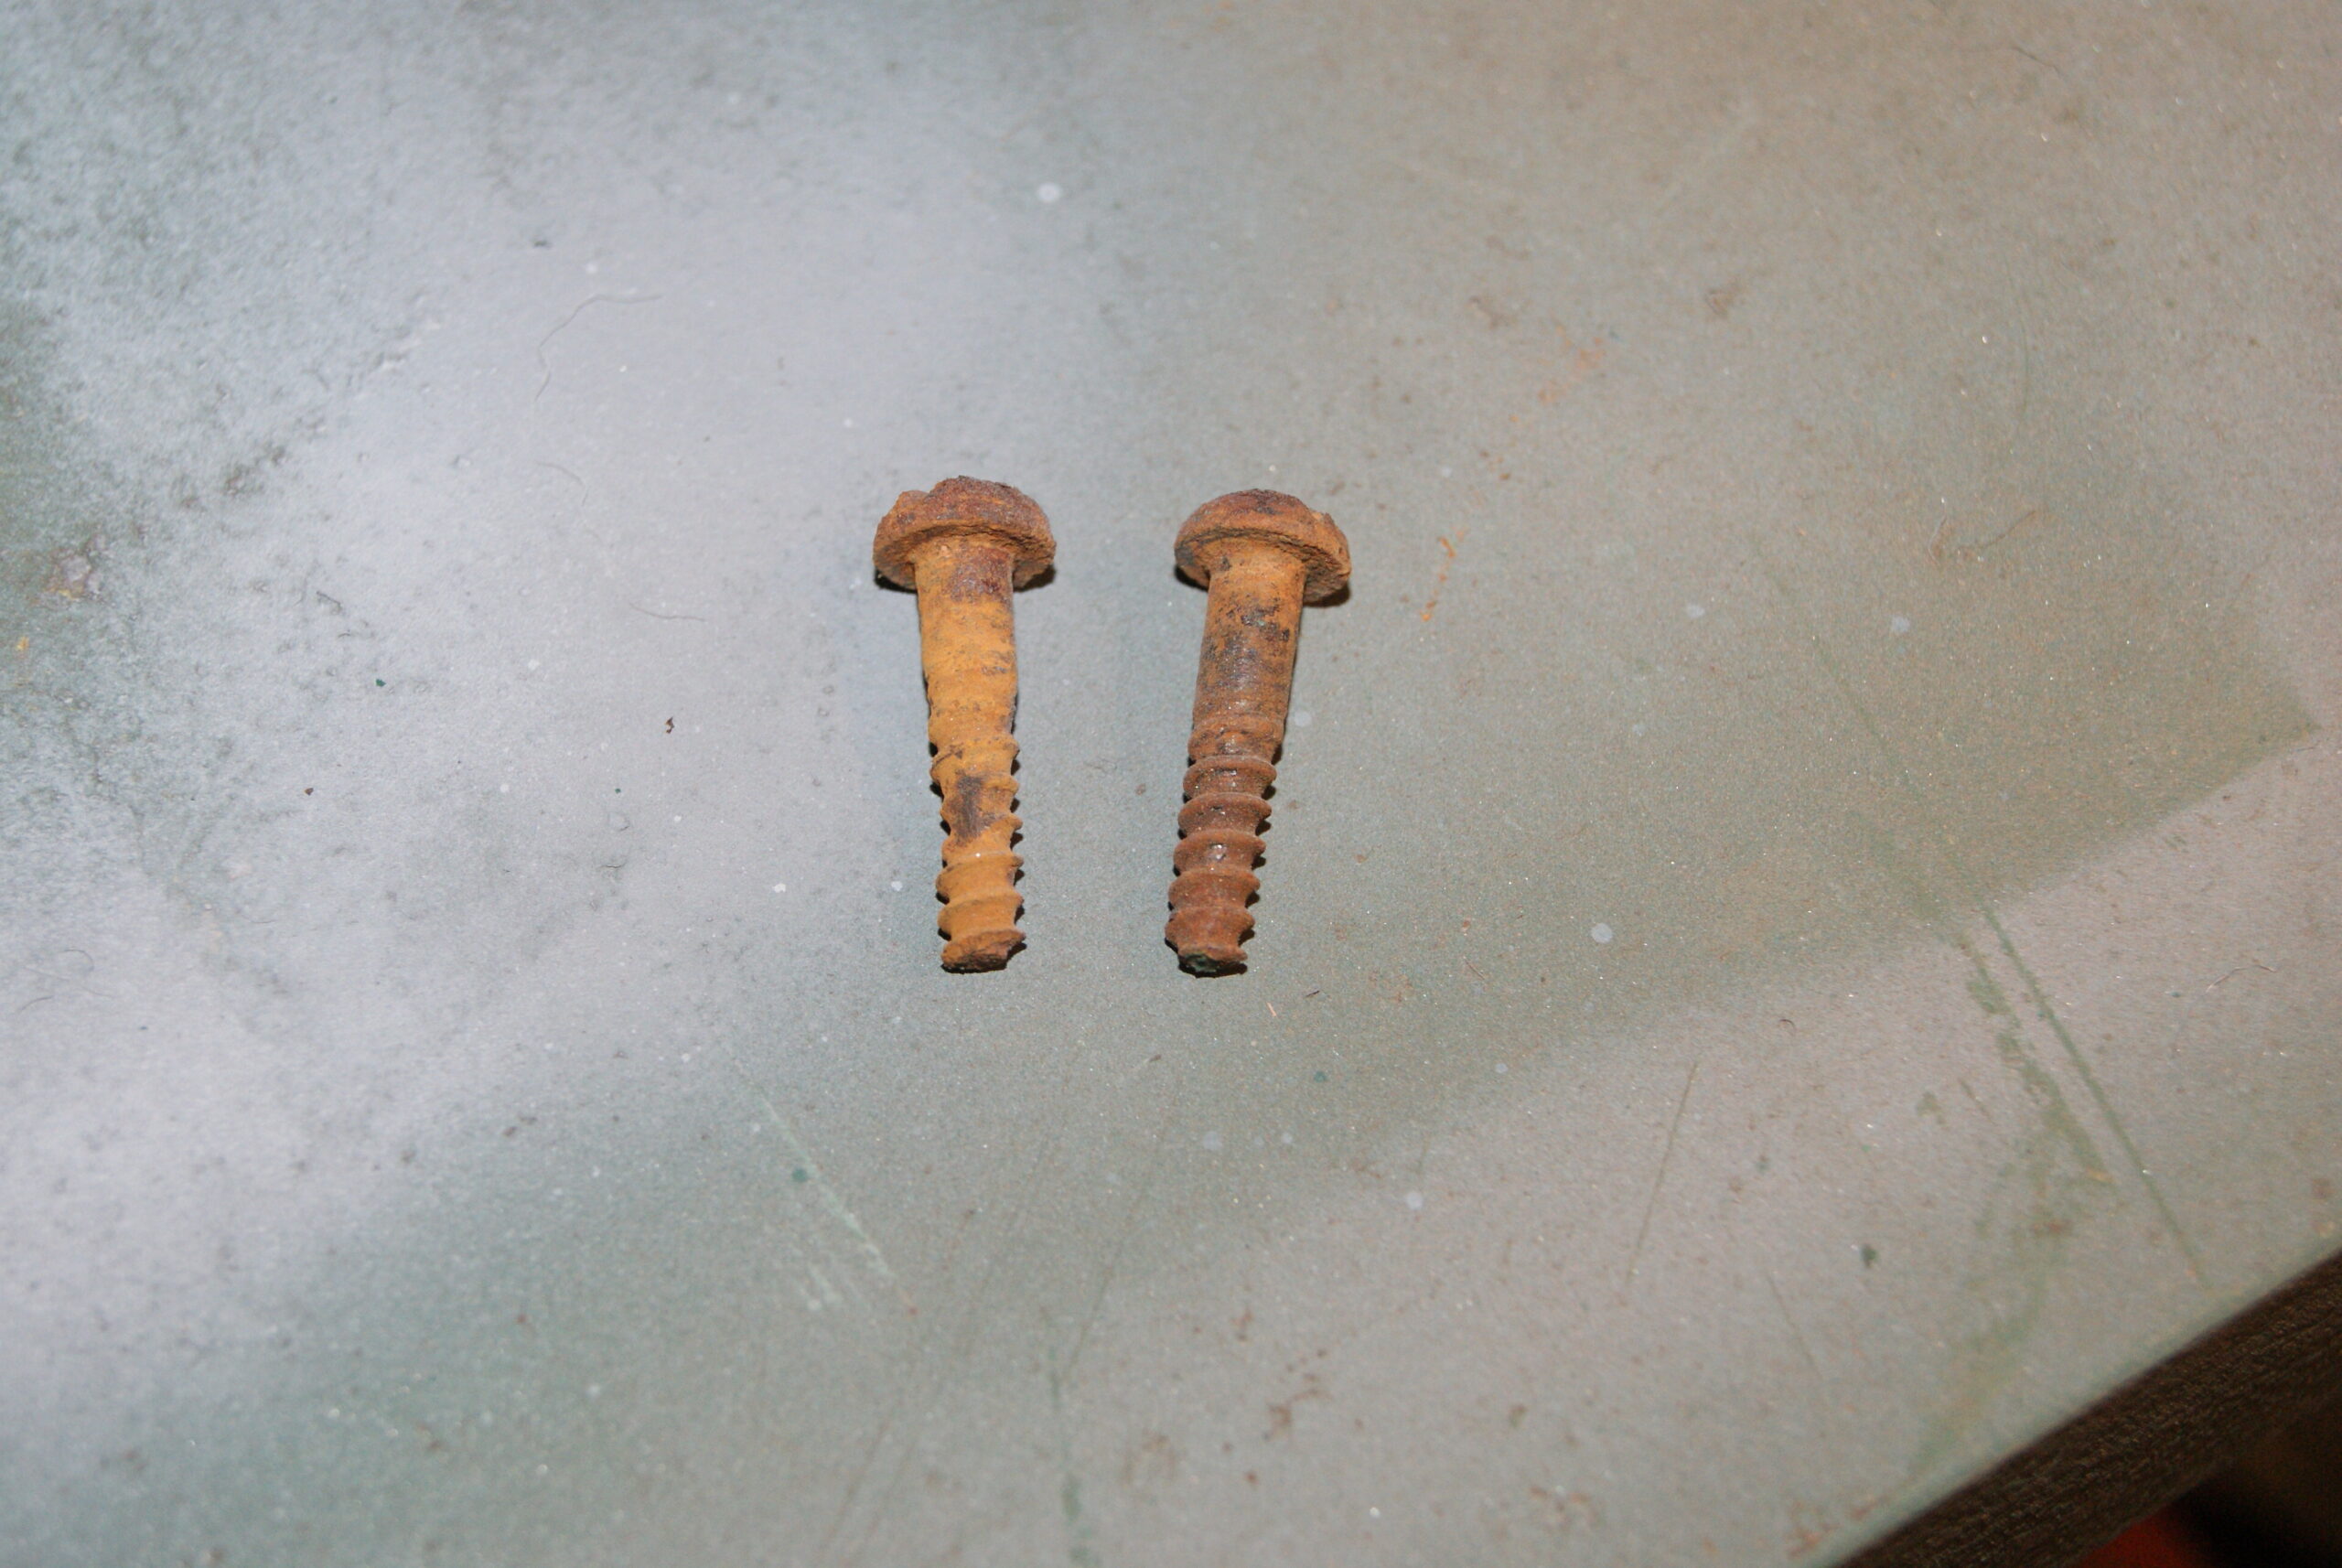
As I said before, the sides of the grassbox are made from 3/4″ plywood and the metal brackets that hold it in place on the mower are secured with steel screws that have been shortened down from 1 1/2″ to about 1″. This means that most of the screw that is in the wood is the smooth shank under the head with only a few threads that really grip the wood tightly. As a consequence many of the screws weren’t actually doing anything as they had chewed out of the holes they were in, so a remedy had to be found.
Each screw hole had been drilled through the wood and each one appeared on the inside of the grassbox. Masking tape was used to temporarily seal the holes then matchsticks were glued into each hole using PVA glue; the masking tape was there only to keep the glue in place whilst it hardened and will be removed as soon as it has set.
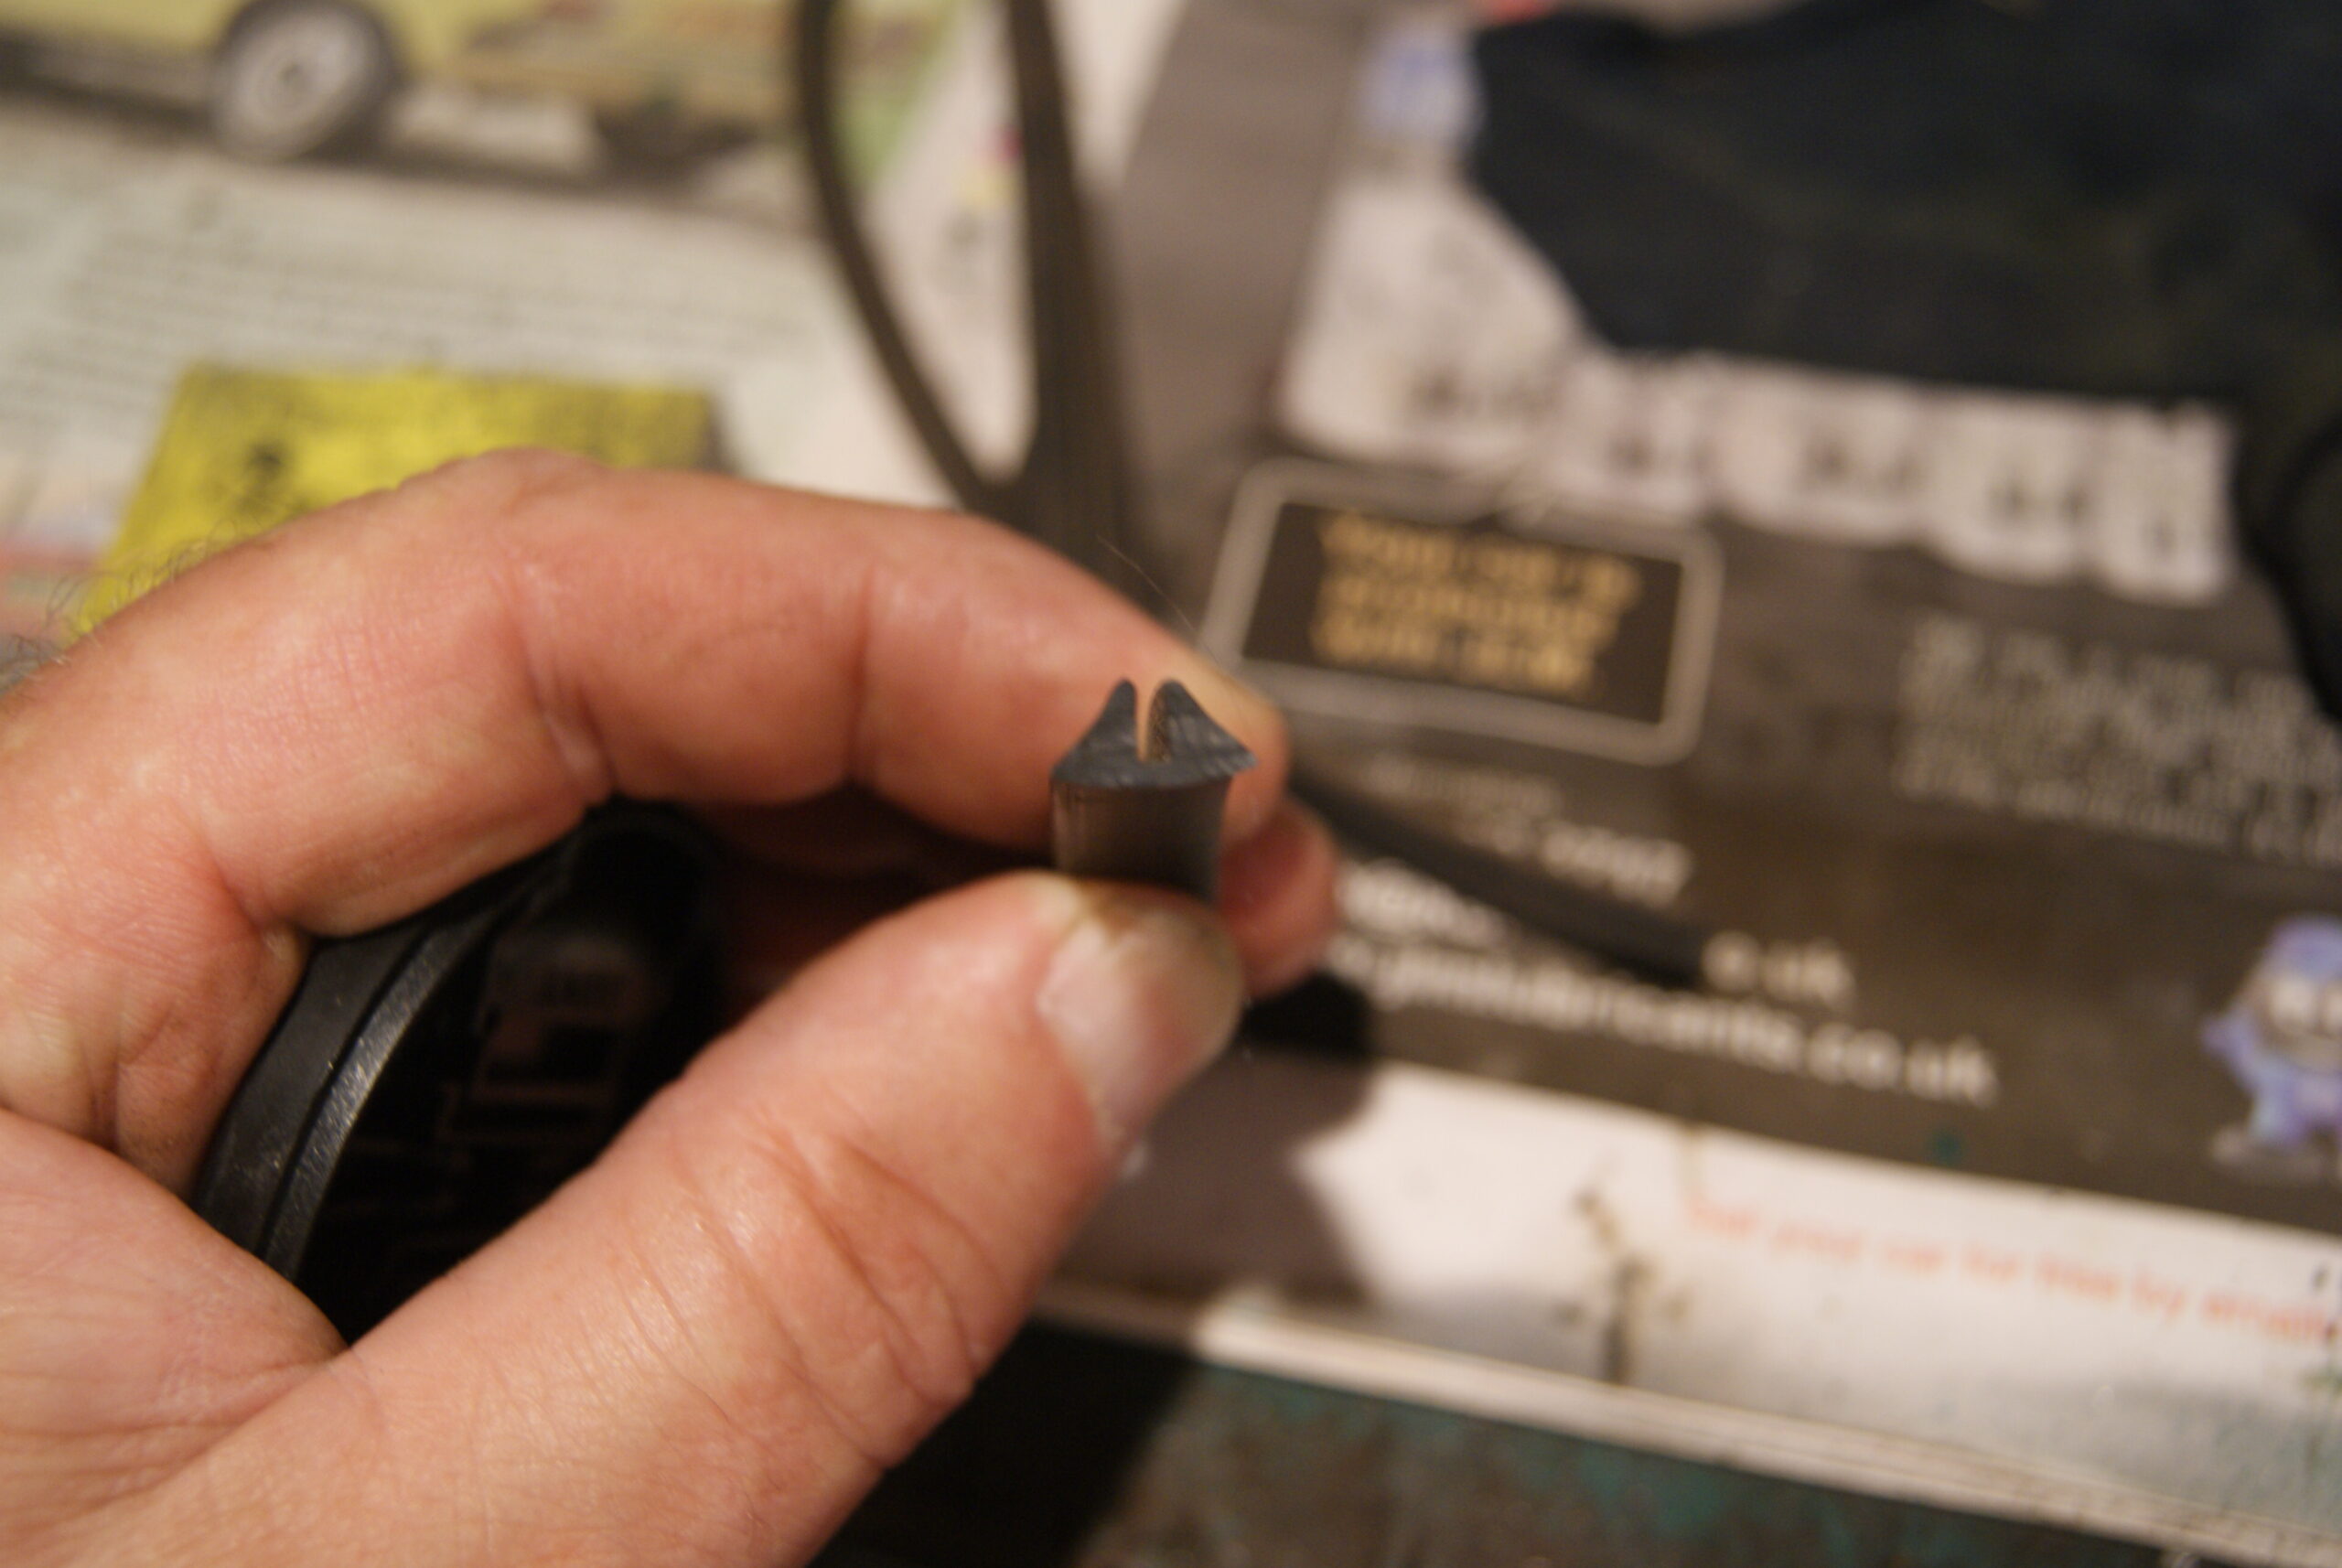
I’ve now put this to one side to harden whilst I turned my attention to the chain guard. This is now partially complete but needs a little more fettling, so that will be next inbetween stages on the grassbox. One thing I discovered whilst looking at the original photo’s was that the rim of the guard was edged with some dark coloured material, presumably to prevent it rubbing the paint. It hasn’t got it fitted now and must have been thrown away years ago but it rang a bell in the back of my mind- I had some ideal rubber strip hanging in the garage which I’d bought for edging the overiders on the GT6 a few years ago. I tried it for size and it fitted on the steel edge of the guard, but I’ve only got about 12″ of it spare so I’ll have to order another strip from the local Triumph dealer.
That’s it for another day. Mrs. Geoff is treating me to a fish and chip dinner!
Attachments:
August 2, 2022 at 11:24 am #39598trusty220KeymasterOh, I forgot, your best contact for finding parts will be Ernest Doe Ltd., your local Ransomes agent.
August 2, 2022 at 11:22 am #39597trusty220KeymasterWe used to change them as a pair when the need arose, but just in case the part numbers you may need are:-
Engine to Variator Belt = MBA4471
Variator to Gearbox Belt= MBA4472Before you go to the trouble and expense to replace the belt have you tried to adjust it? The recommended way to adjust the belts is to start the engine up, then with the gear stick in neutral rev the engine so that the belts spin. With the belts spinning away happily move the Transport Lever so that it’s midway between top and bottom- there’s no corresponding hole for the peg to sit in so you’ll just have to judge it by eye.
Stop the engine, engage parking brake and get off the machine. Remove the fibreglass safety guard and check the position of the belts in the variator pulley- if they are adjusted correctly they should be sitting at the same depth on each side of the pulley. If they are badly adjusted you will find that one is deeper than the other and you must move the engine backwards or forwards to correct that situation. The engine is fixed to the chassis with four big bolts- slacken them off ( a lot, not just a bit) then go to the adjuster bolt on the front left hand side of the engine. Moving the engine forward increases tension on the engine drive belt and it will consequently sink deeper into it’s side of the variator pulley when the engine revs up again; moving the engine backwards will decrease tension on the engine belt and it will climb up the pulley sheaves.
Obviously you will need to start the engine after each adjustment so that you can check what effect it’s had on the belts. Be extremely cautious of the moving parts and replace the safety guard before attempting to start the engine. Even if you replace the belt or belts you will need to follow this procedure to set them up; the adjuster on the centre bolt of the variator pulley is only there to tension both belts evenly once you’ve balanced the tensions properly by moving the engine.
It sounds complicated but it’s really quite a simple operation. Above all, use plenty of common sense and don’t forget to replace safety guards before starting the engine; there are loads of moving parts under there and any one can snag loose clothing, so be extremely careful.
August 2, 2022 at 10:57 am #39596trusty220KeymasterI’ve got some brass ones from the local ironmonger this morning. Thankfully the national superstores haven’t put him out of business or I’d really be in trouble.
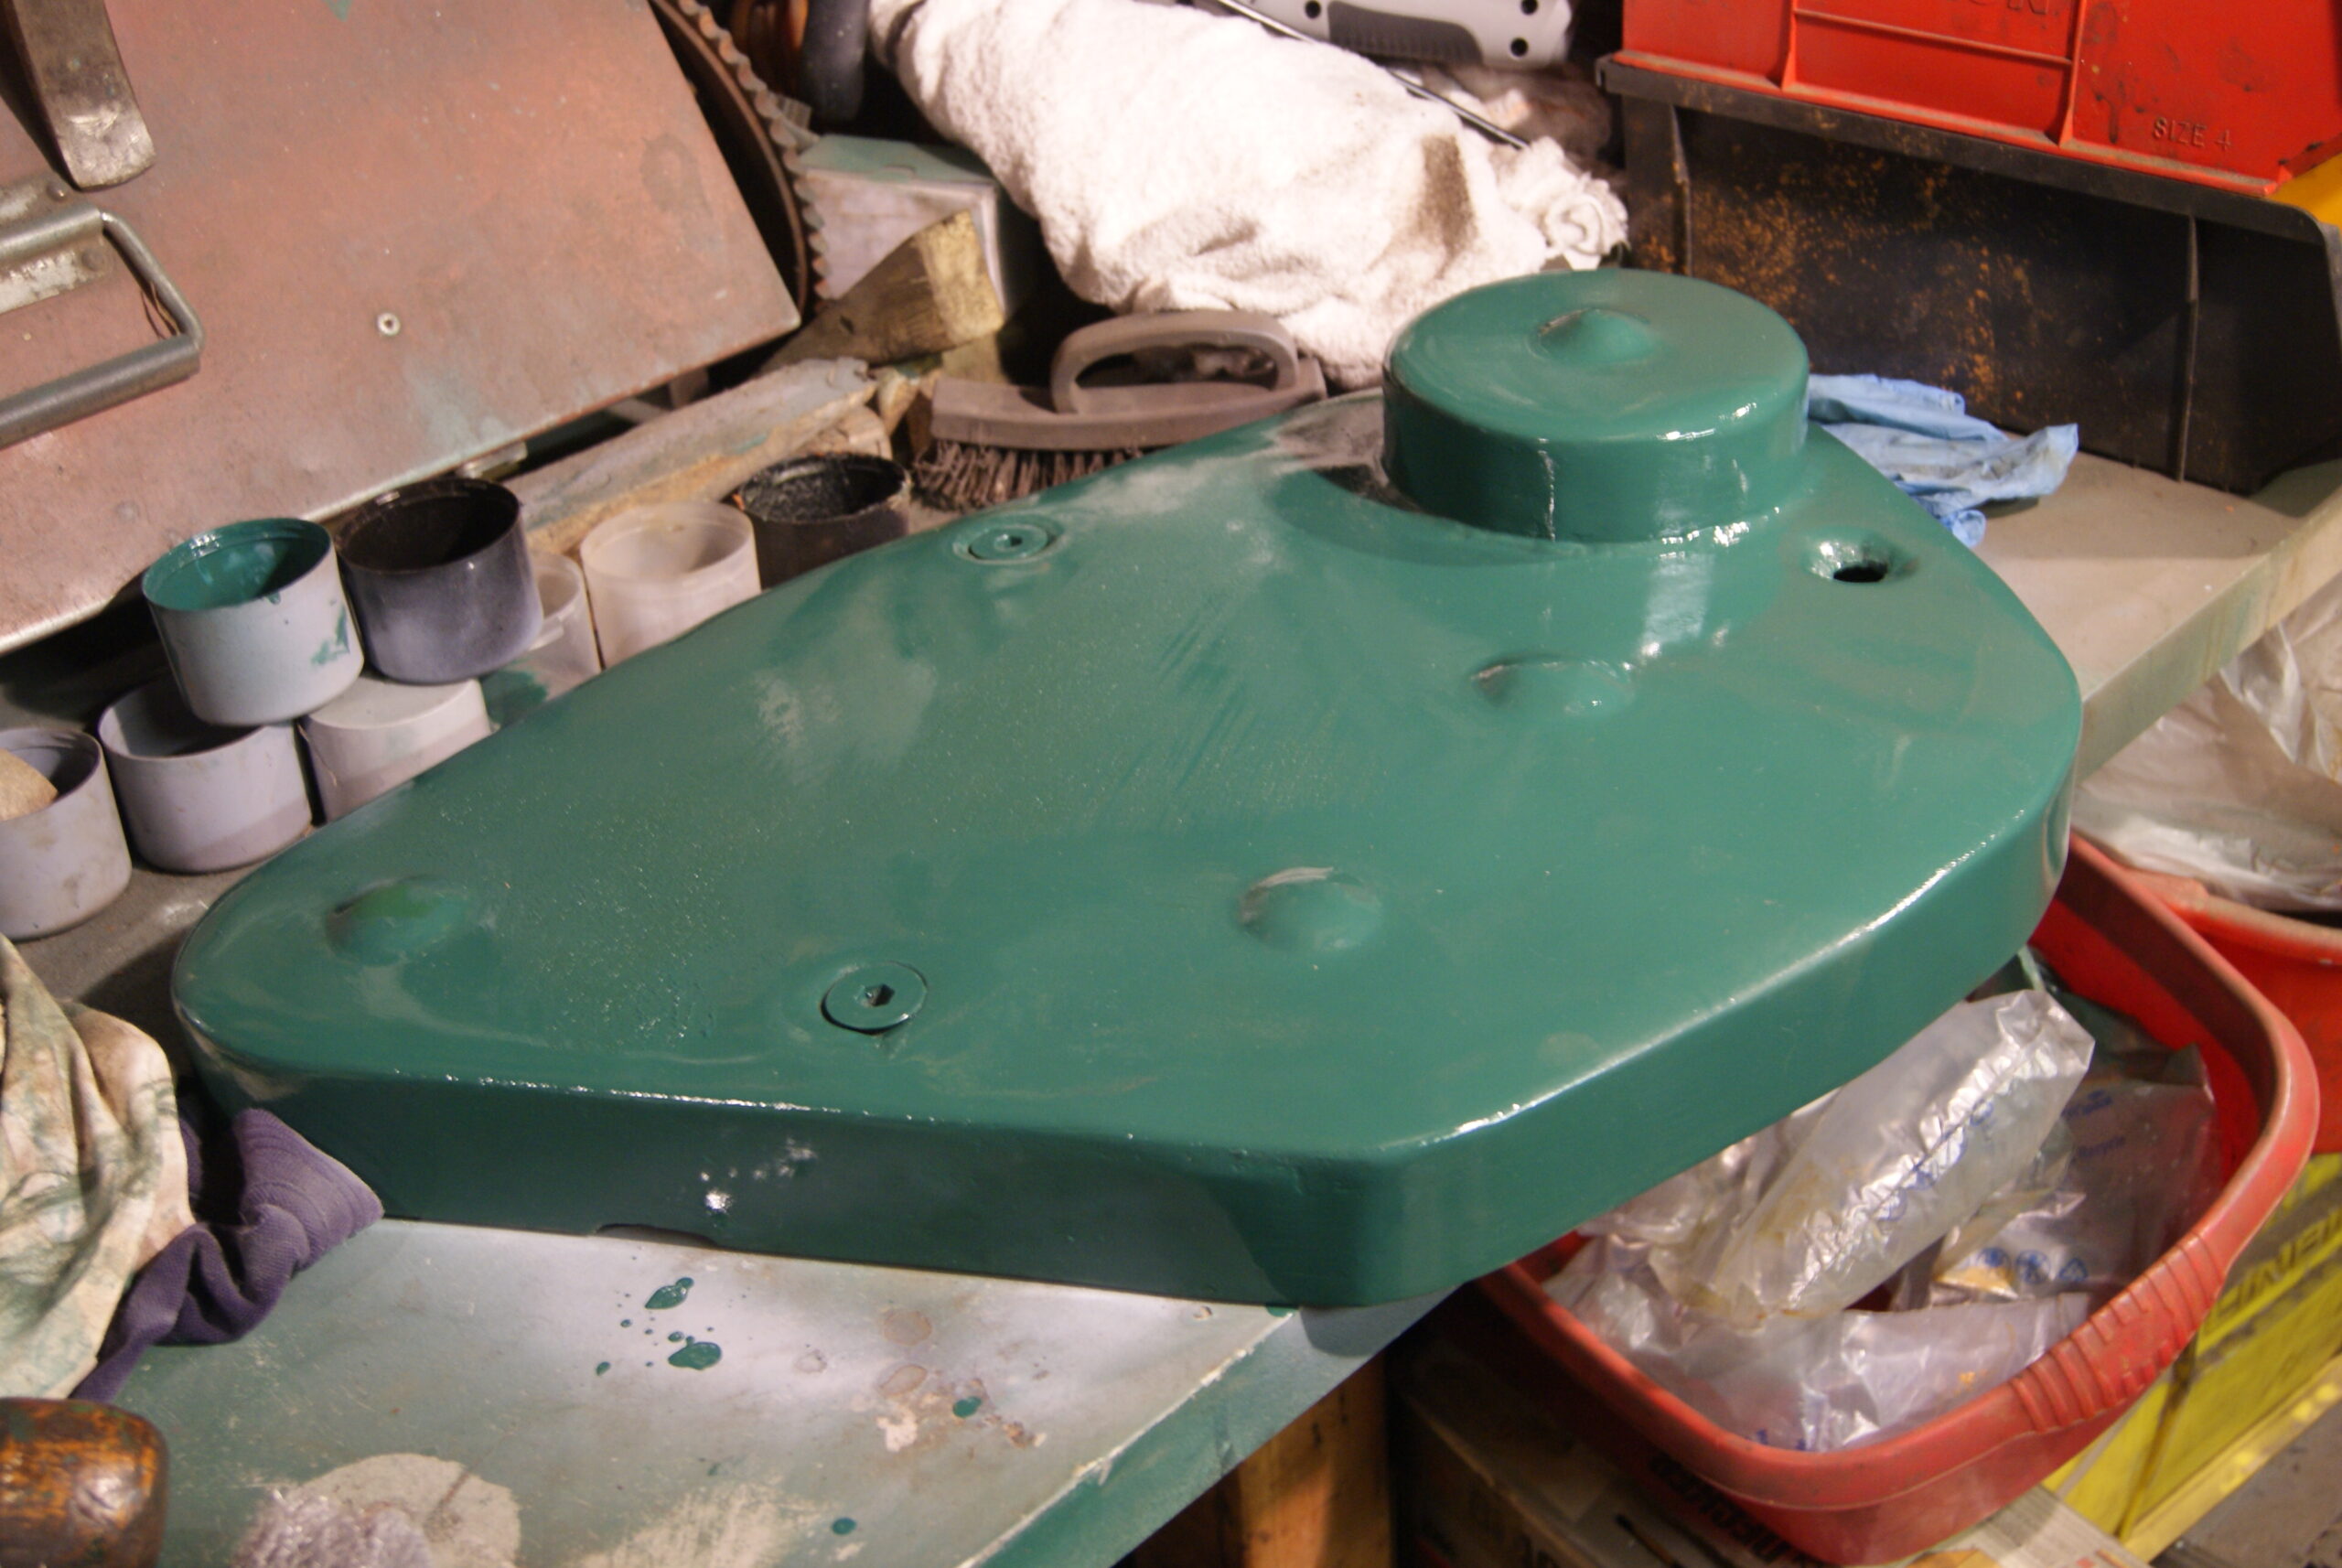
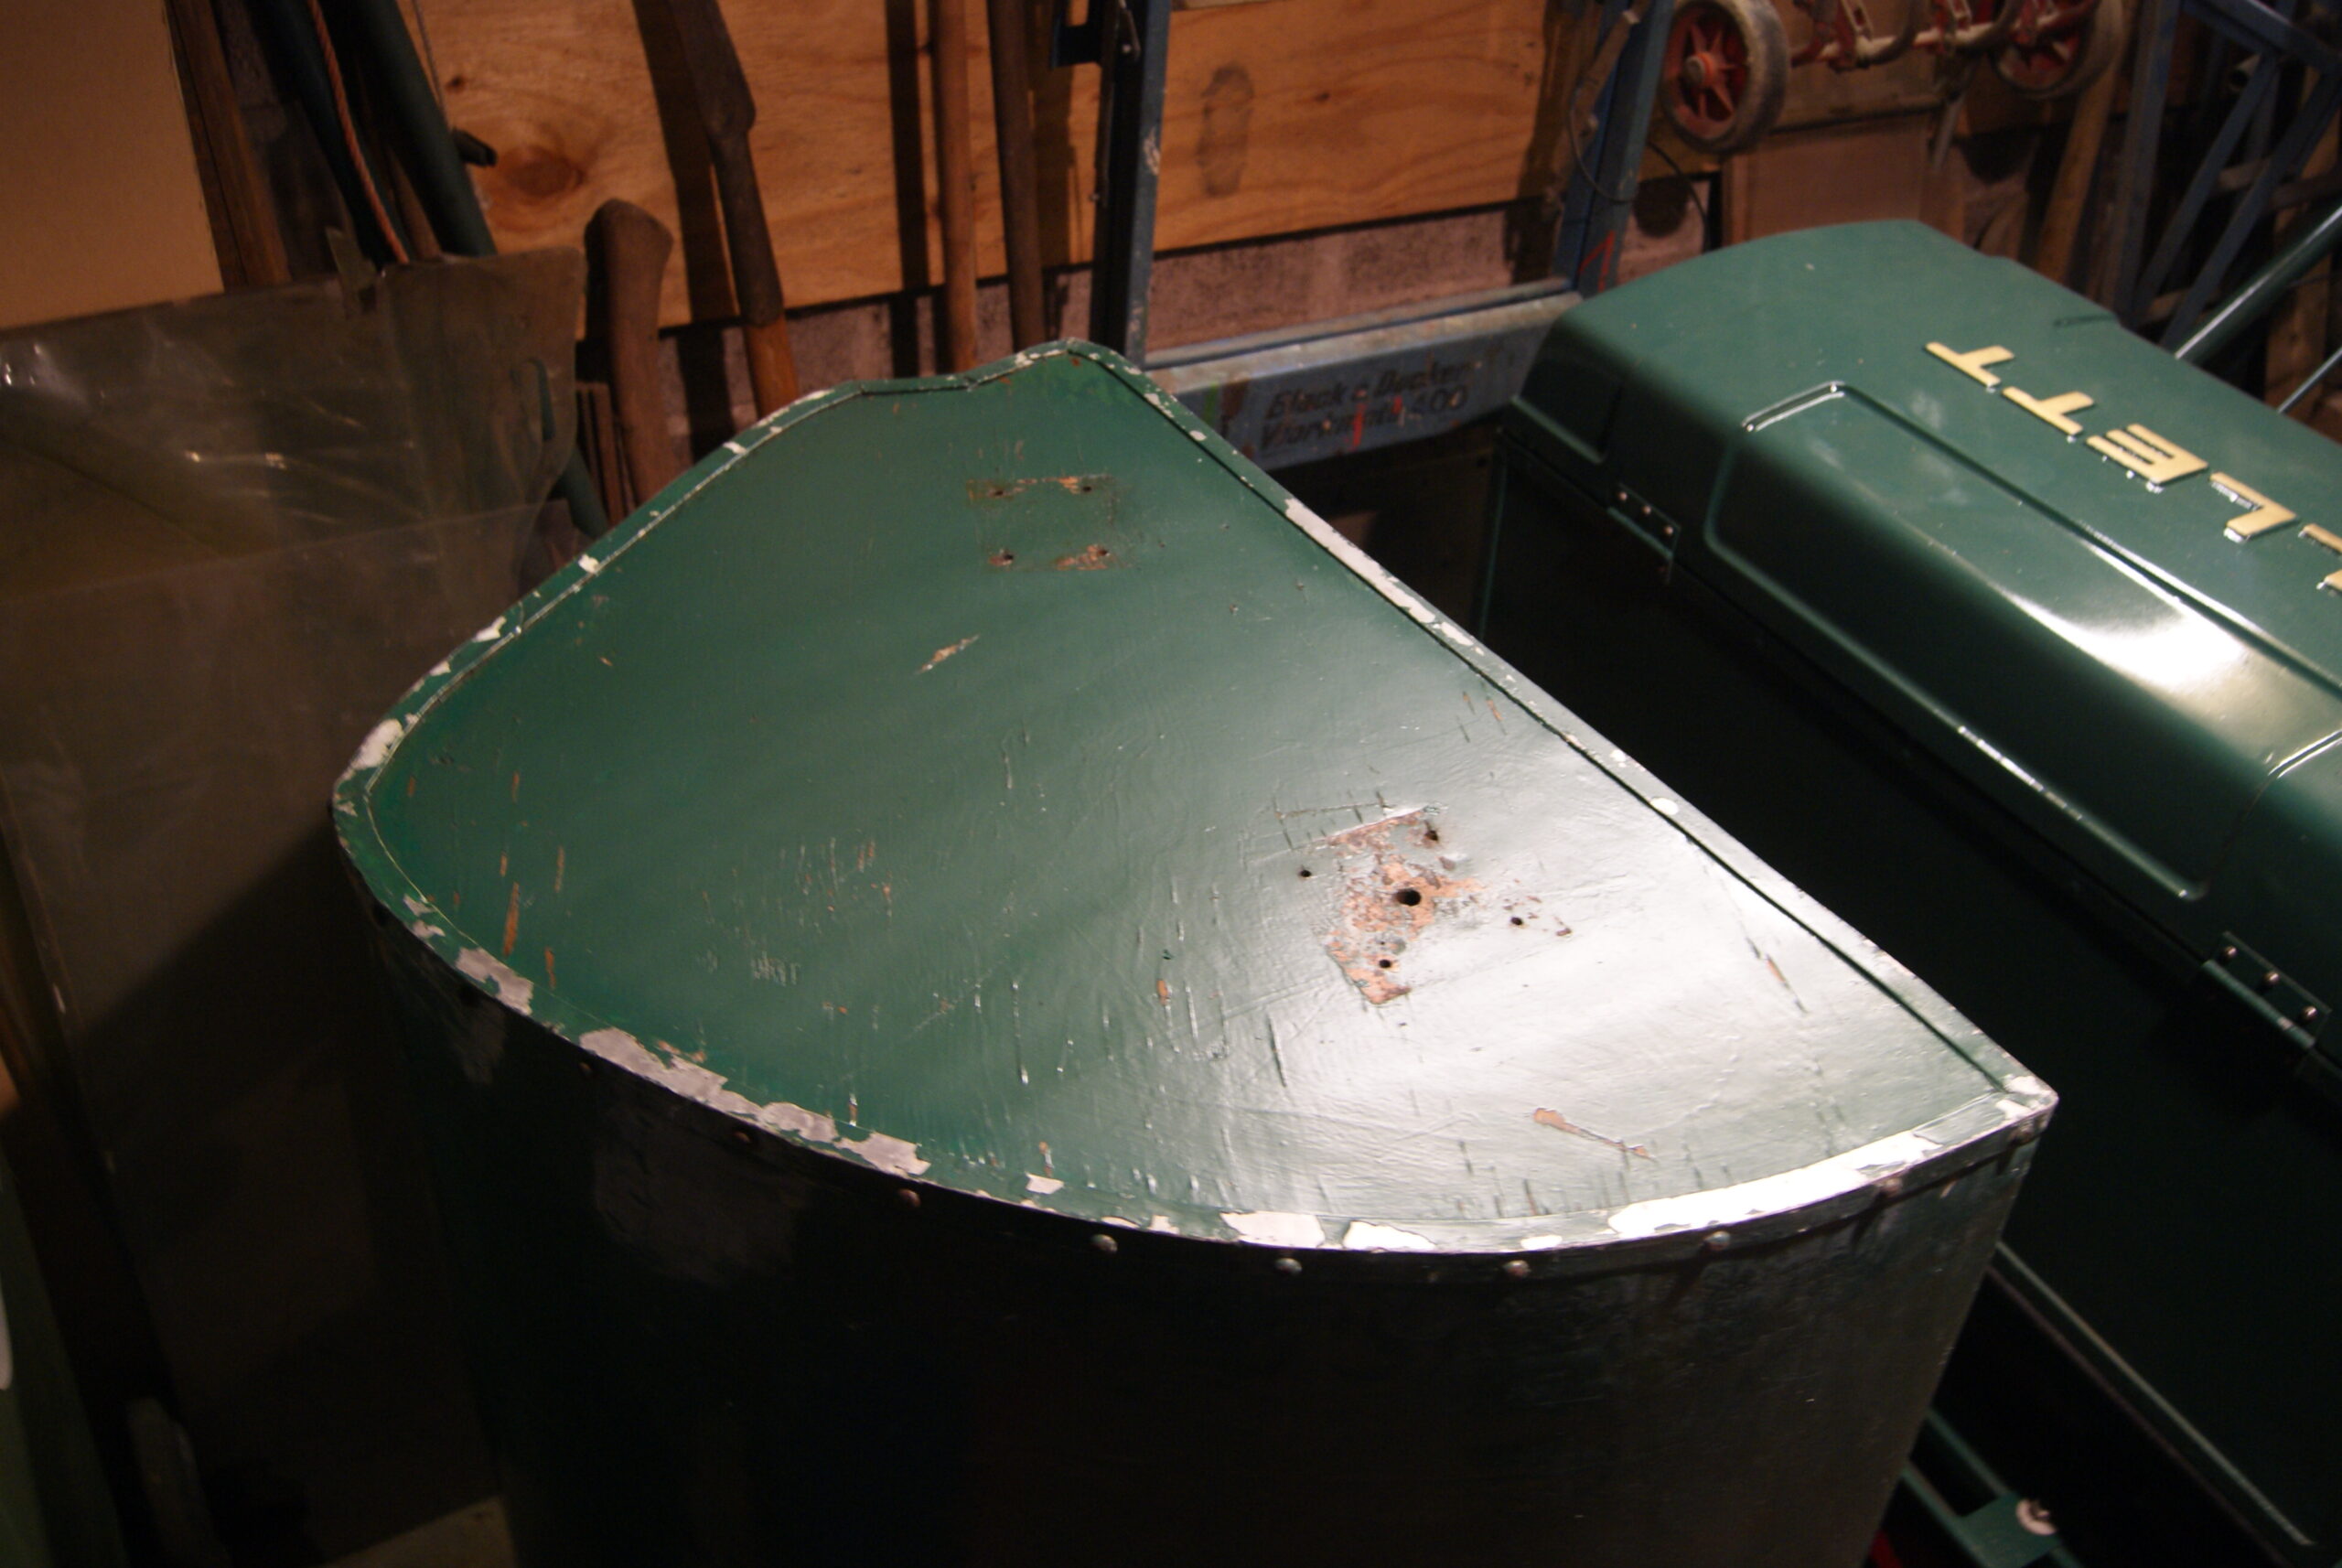
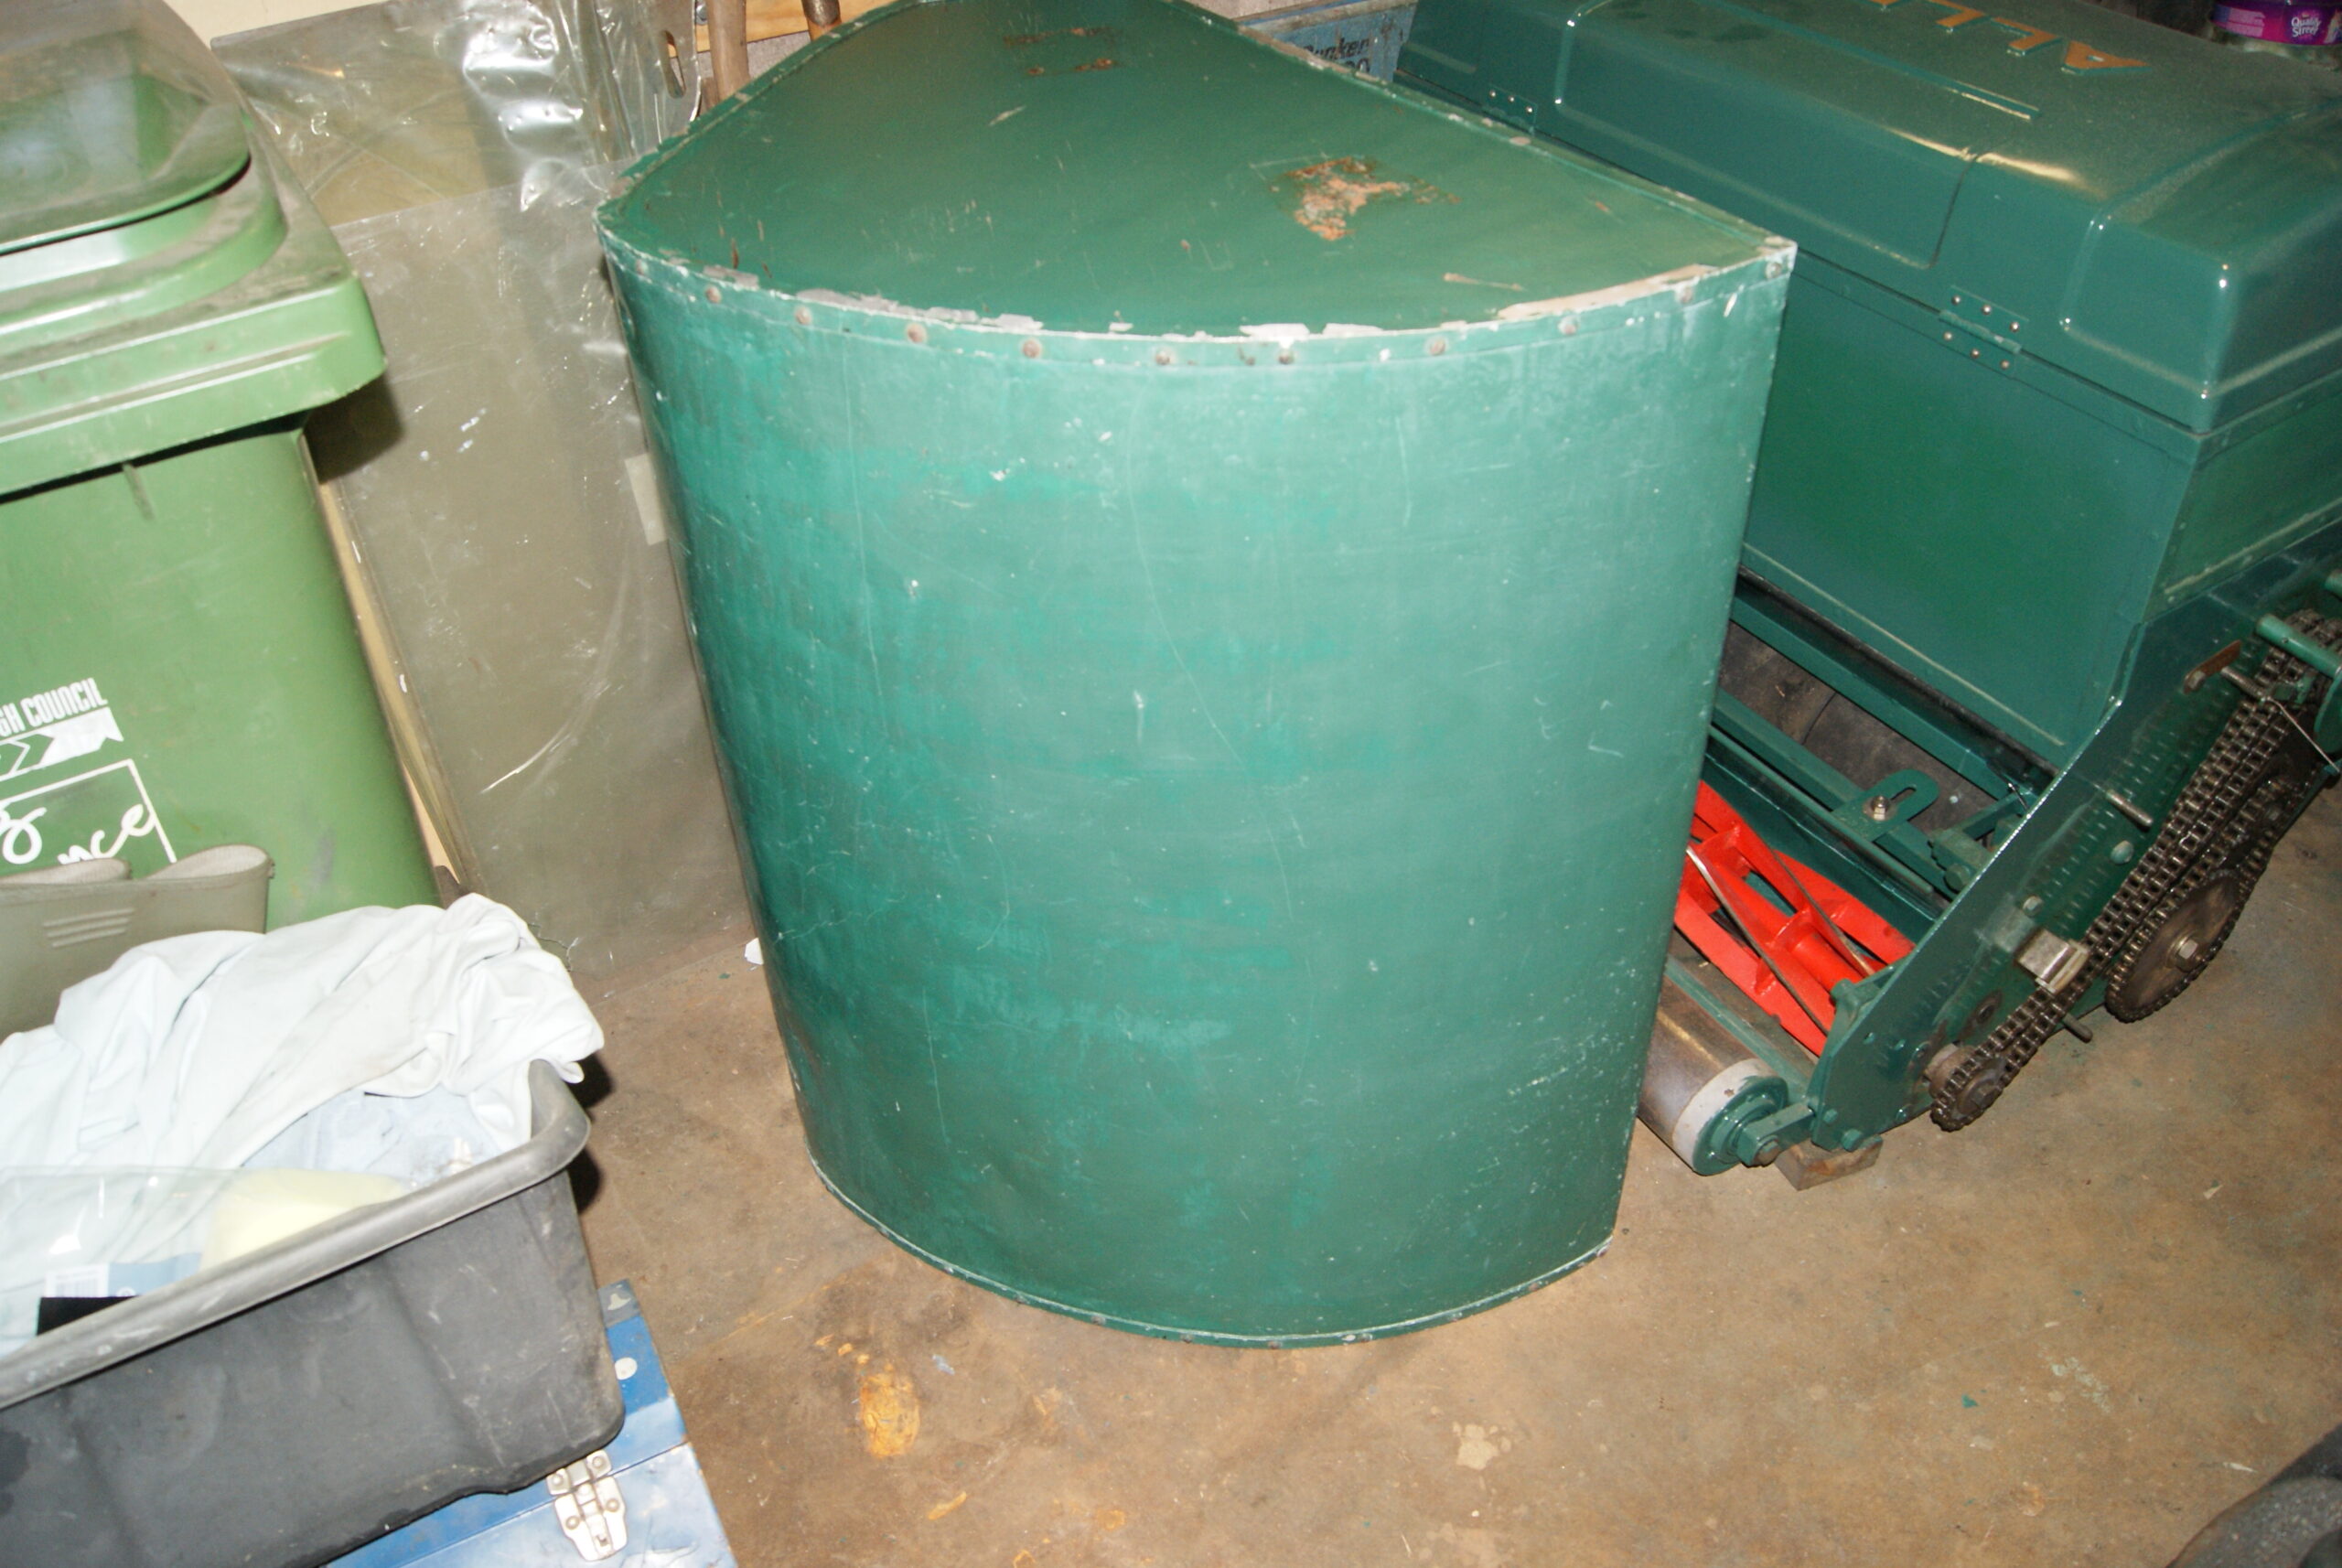
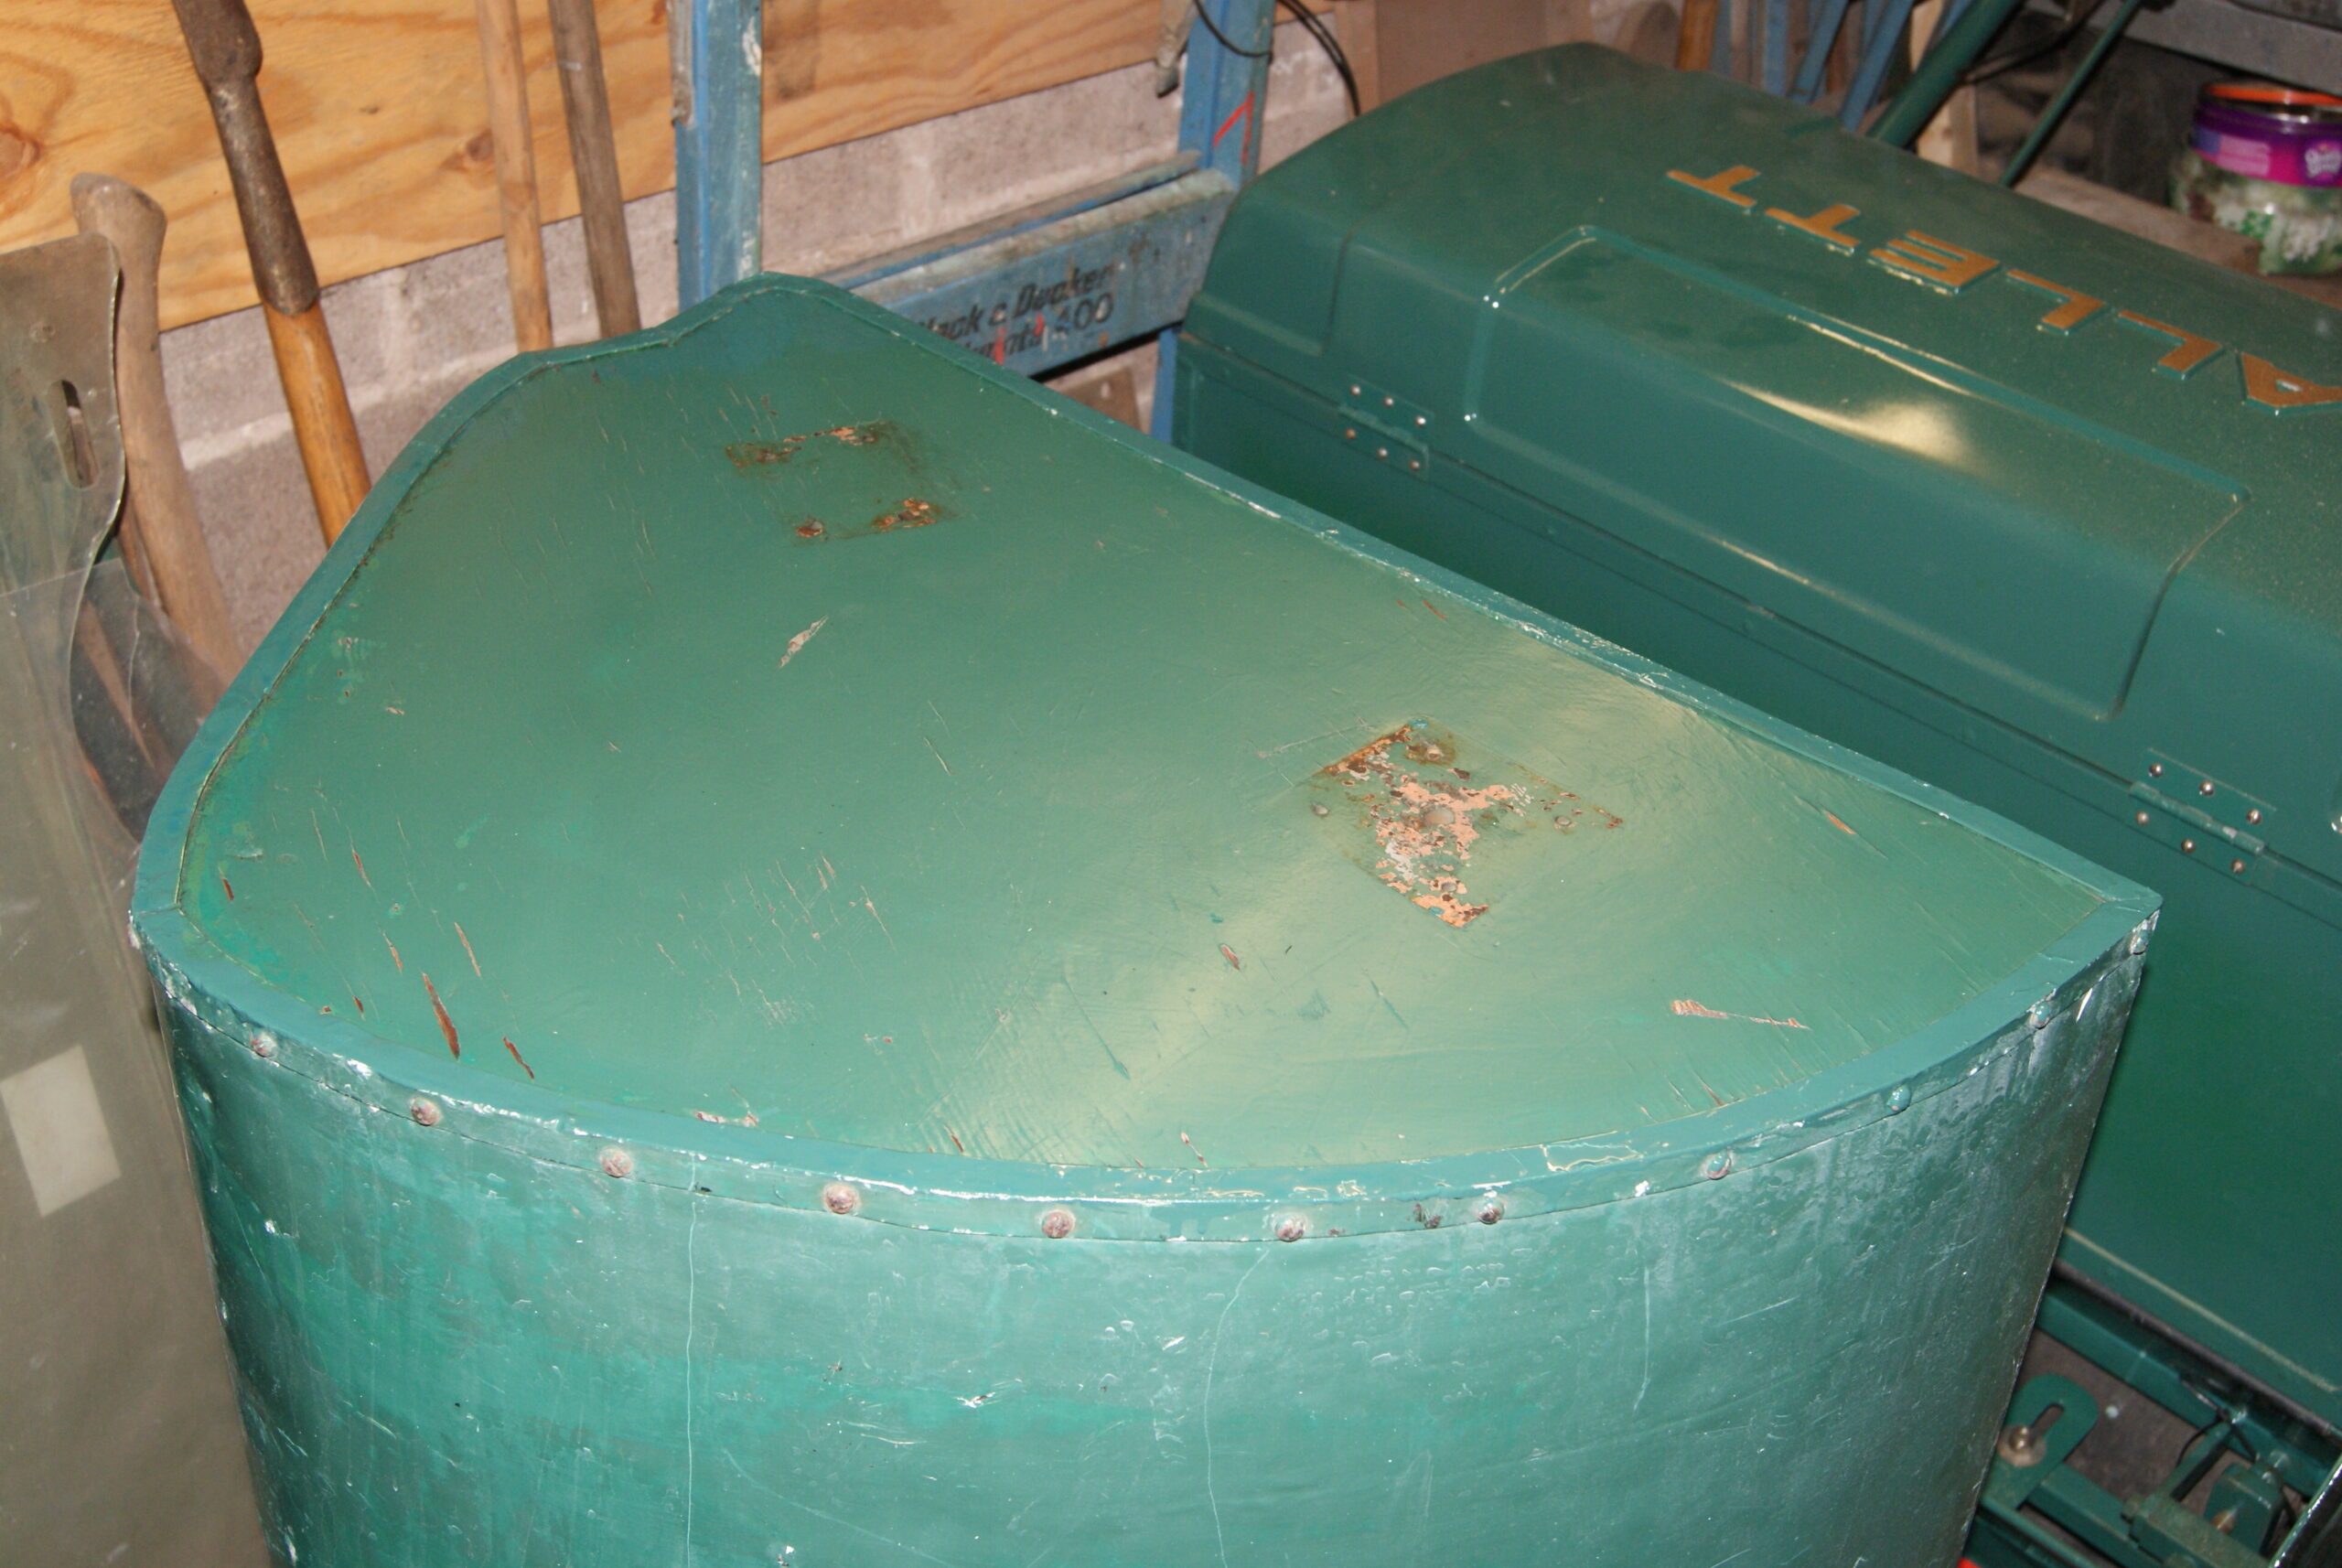
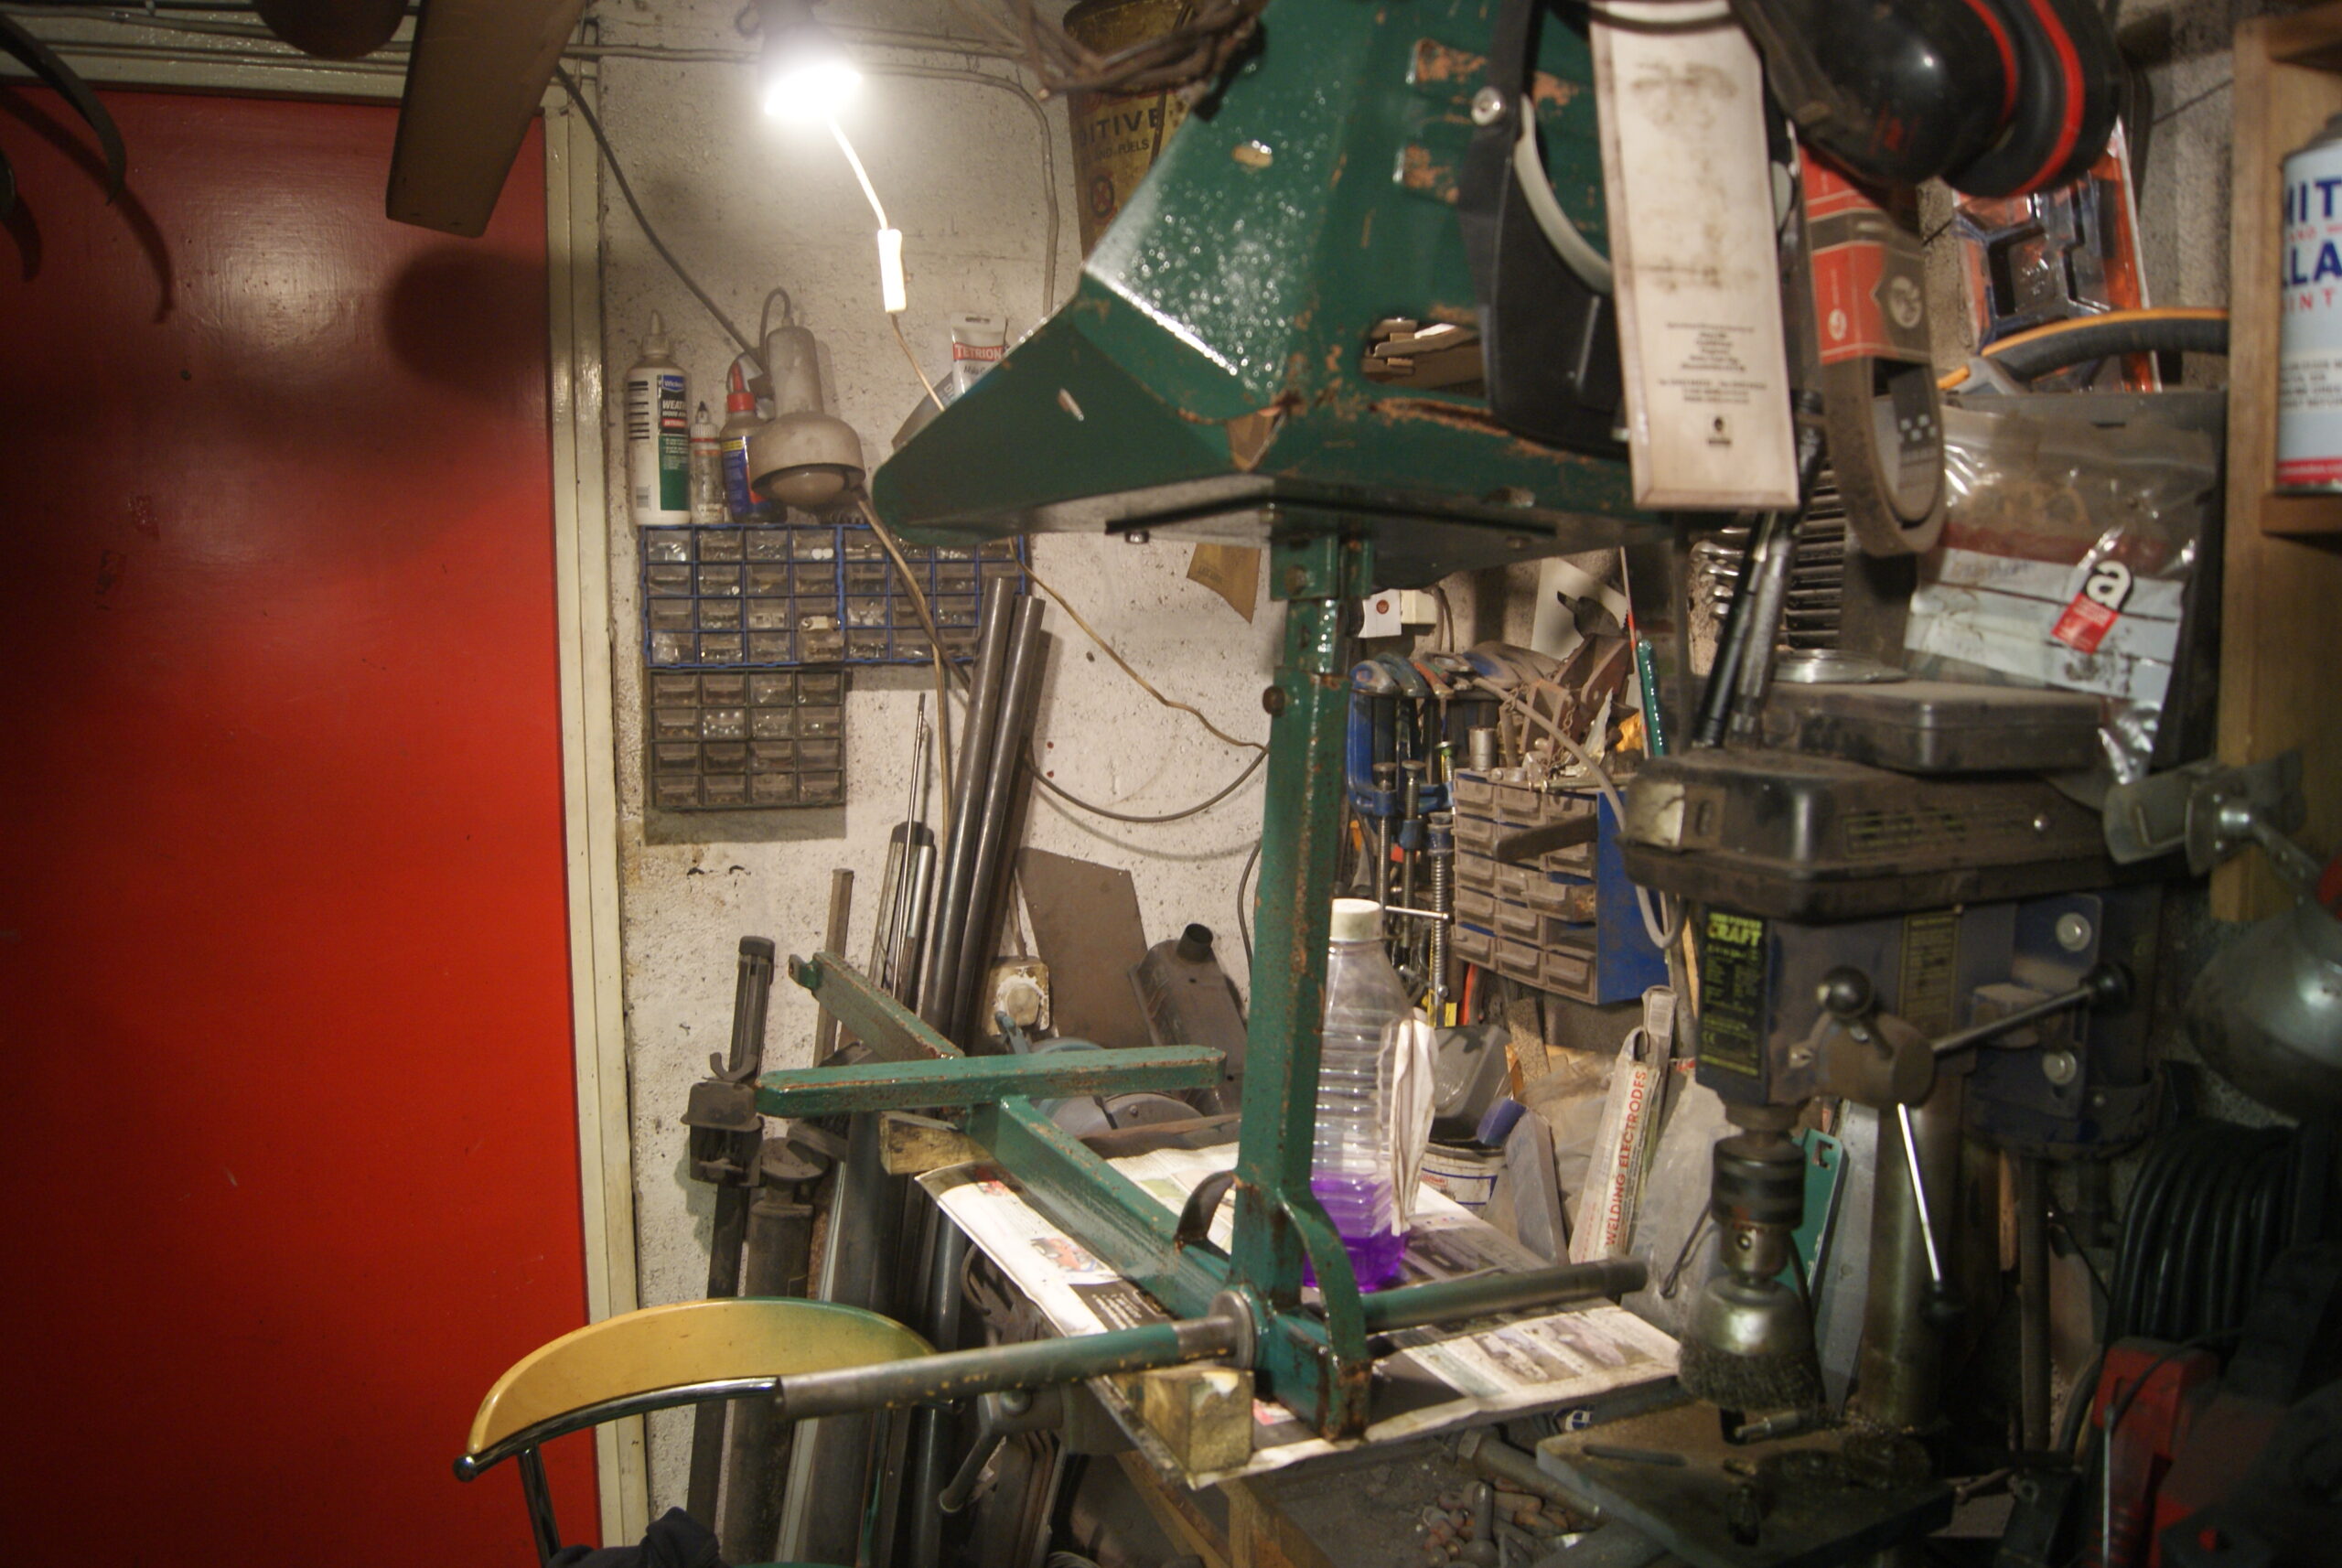
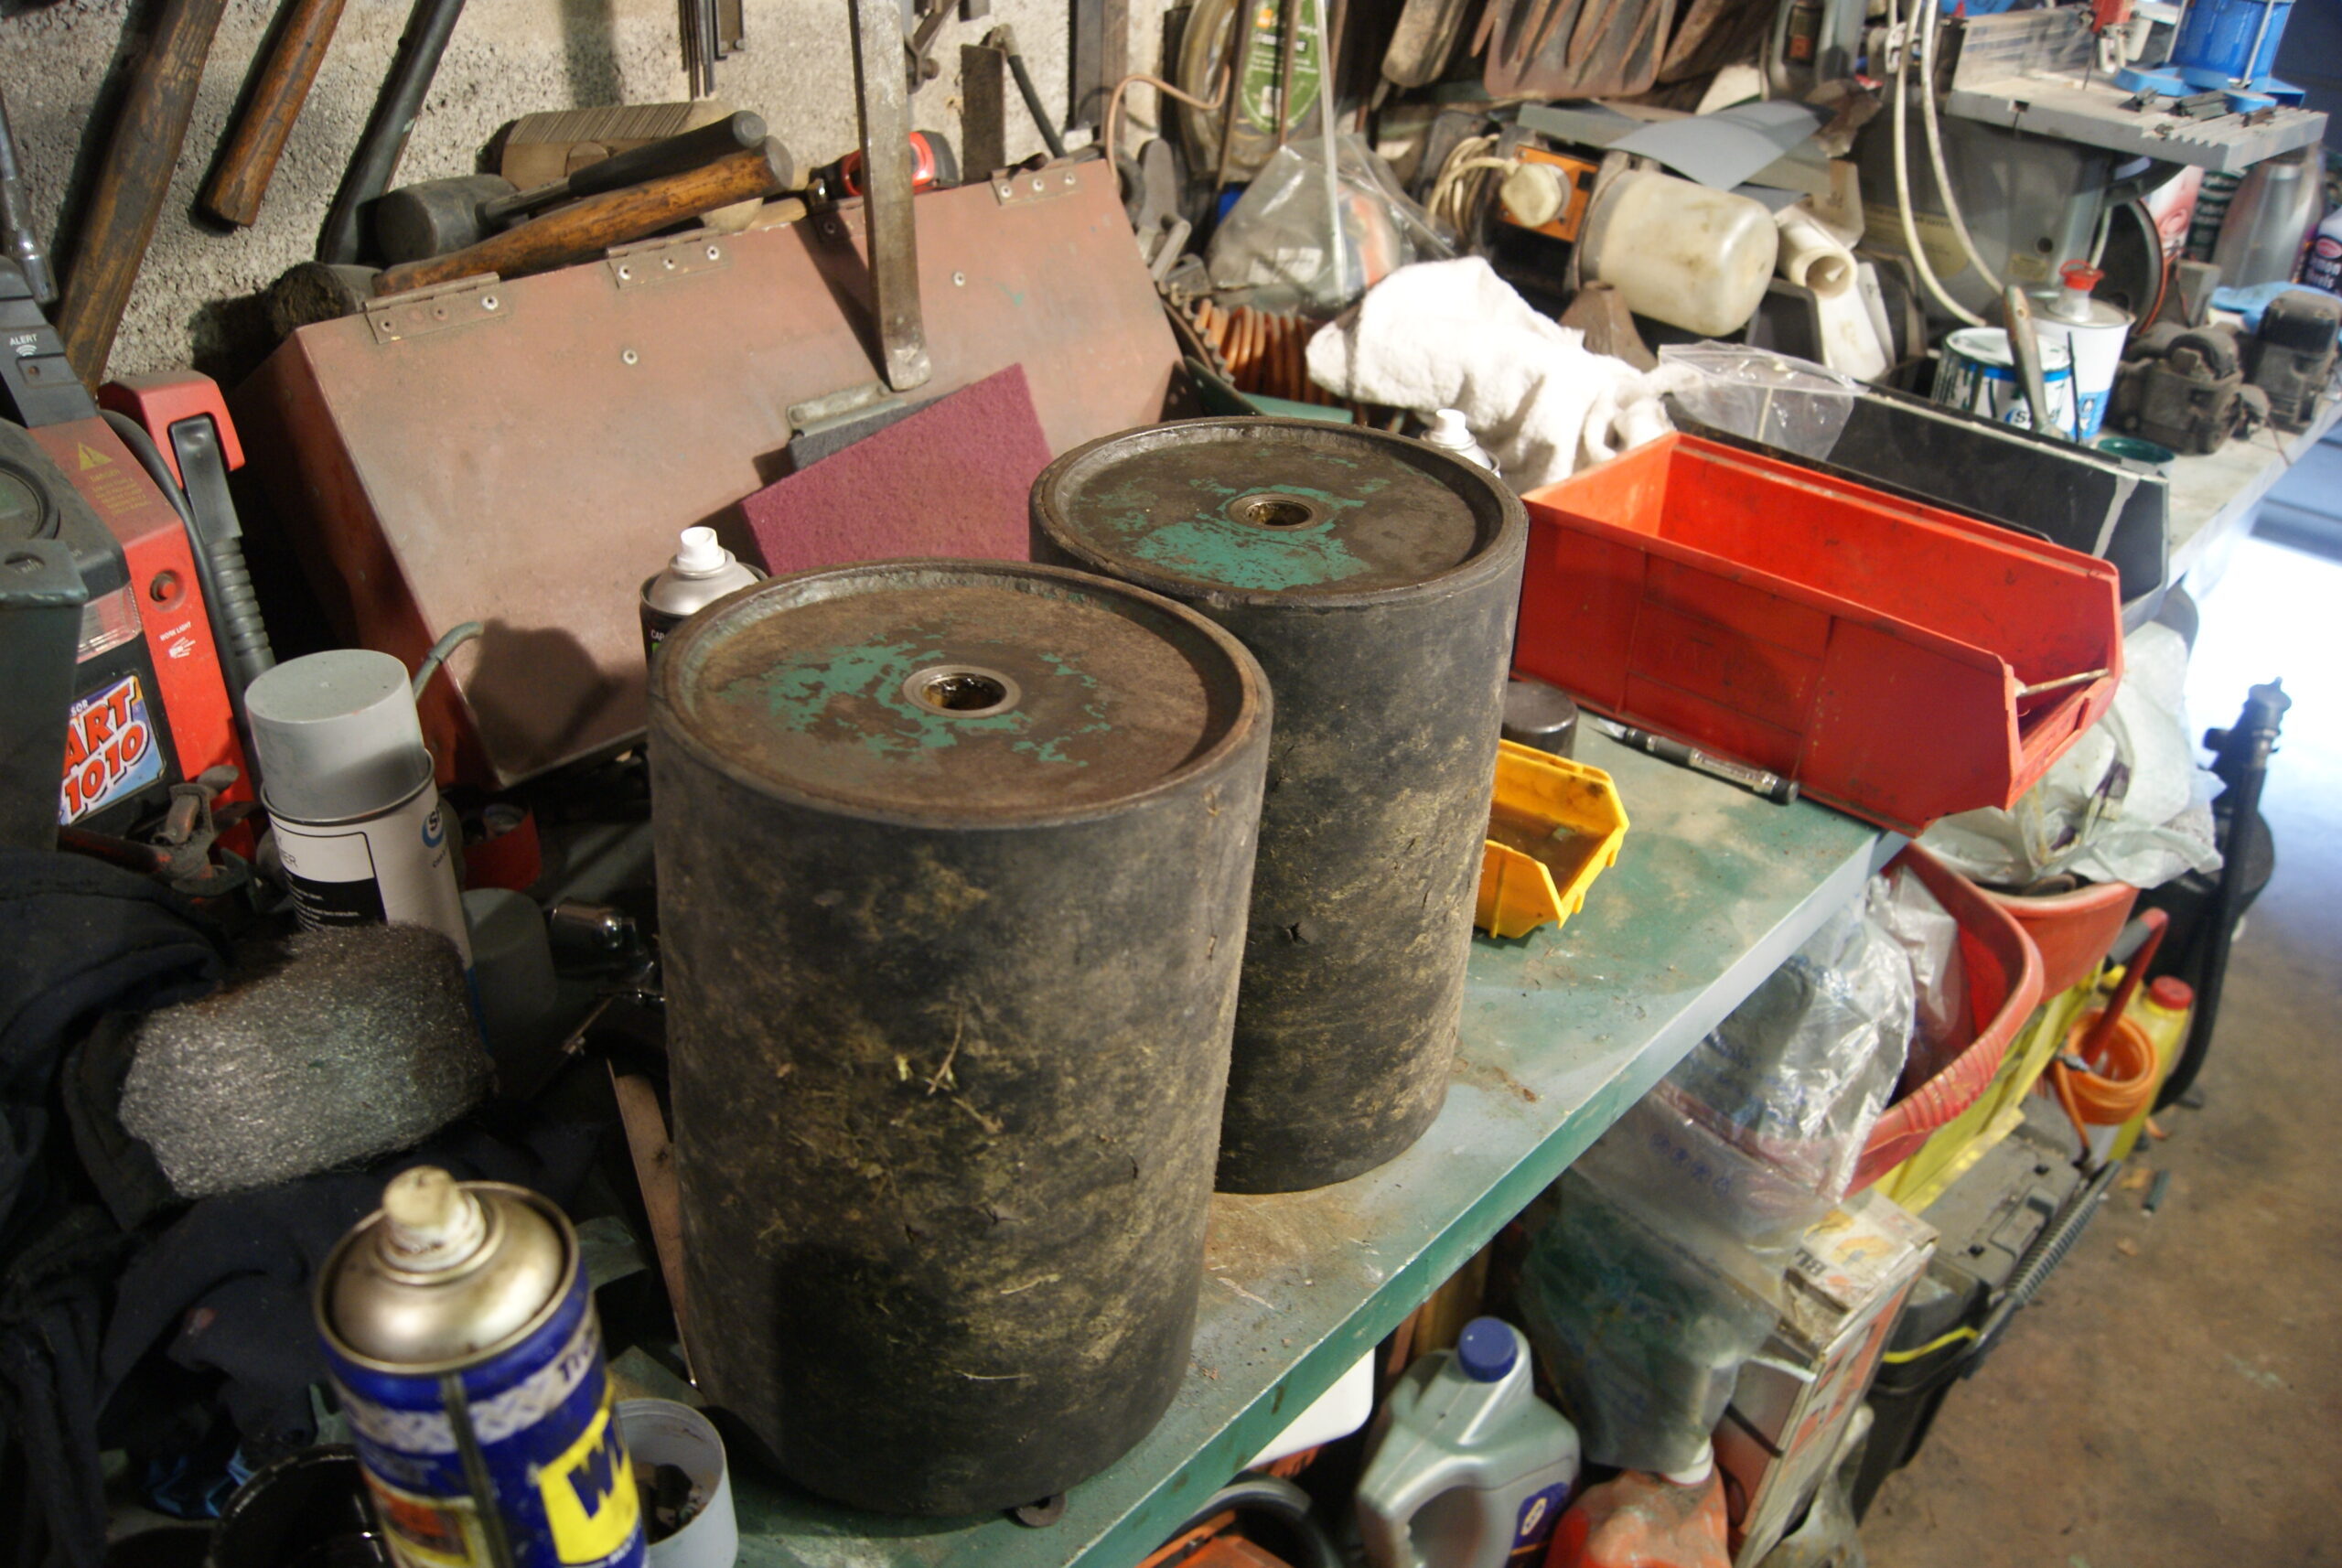
August 1, 2022 at 5:32 pm #39587trusty220KeymasterIt was the turn of the grassbox today. According to my sources there were only six of these grassboxes made as the “proper” ones were still being designed. This one consists of two 3/4″ thick plywood sides with an aluminium wrapper plate screwed to them. They also have an aluminium angle profile strip around the edges to afford a little extra protection, but what I thought were dome-headed rivets turned out to be woodscrews with a slotted head.
First job was to wash it all down to get the muck off, then a good hour spent with the rotary polisher fitted with a sponge pad and cutting paste. It has come up quite well but there are quite a few scratches on it- these haven’t had a detrimental effect on the paint as the metal is aluminium and hasn’t corroded so I think I’ll leave it and see what it looks like.
The woodwork has also largely escaped damage but the top veneer has started to lift in places so I rubbed it down with a fine scouring pad then treated it to a coat of clear satin polyurethane varnish. This seems to have gone into the cracks and sealed the surface so I was happy with that.
The worst part of the grassbox was the steel bracketry that holds it onto the machine. Rust had got under the paint and bubbled it up; it looked a mess so I took the decision to strip them back completely to bare metal and repaint. The woodscrews holding them on had also been on and off a few times, so much so that many had a very wide slot in the head that was difficult to get the screwdriver to engage in.
At this stage it was apparent that the grassbox had been hand made as the woodscrews had been shortened from 1 1/2″ to 1″ long so that they didn’t protrude into the inside of the grassbox. That will be tomorrow’s job- to find some more woodscrews to match these originals.
Have you ever tried to find a woodscrew these days with a slotted head? Most of them seem to be crosshead or torx. Nobody said it was going to be easy though…….
Attachments:
August 1, 2022 at 7:51 am #39576trusty220KeymasterThey do come apart very simply but you will have to remove them from the machine first. There are two calipers for each wheel- one does the foot brake whilst the other does the handbrake- both need to work for safety reasons.
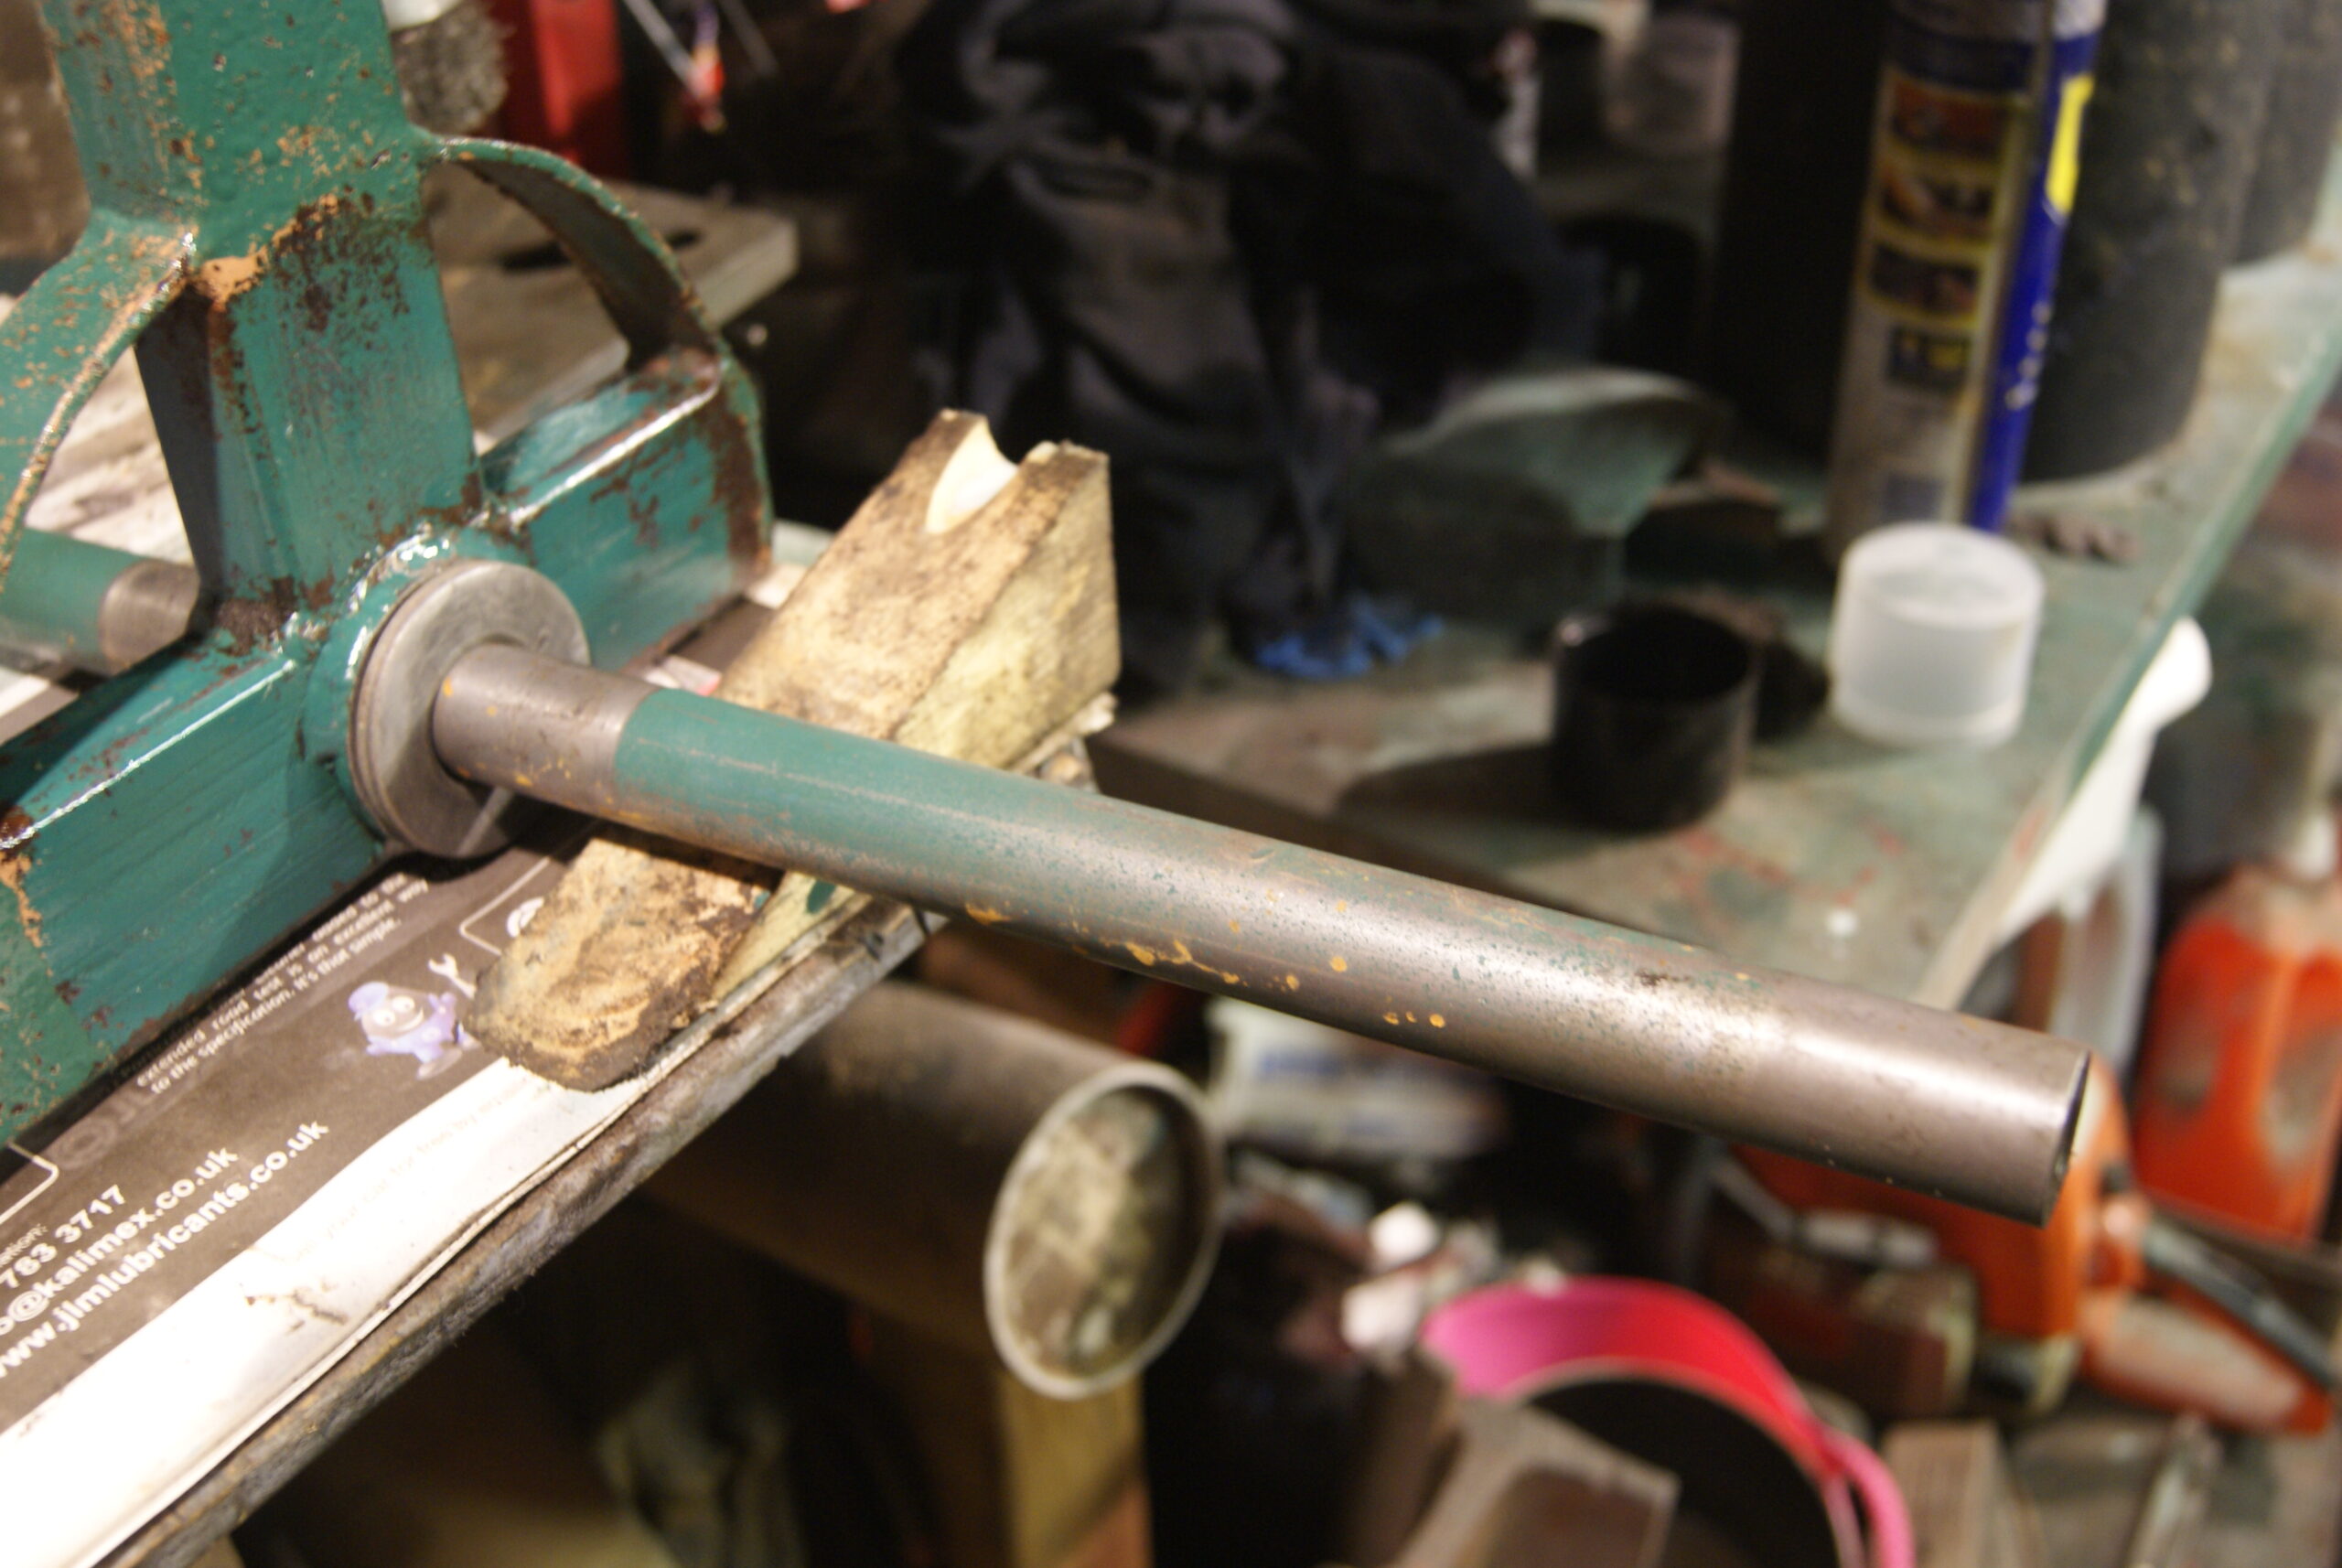
Removal is simply done after you remove the road wheel then the cast iron cover over the top of the calipers. Disconnect the operating rods and then you can loosen and remove the two bolts holding them to the axle; from memory they are 3/4″ AF spanner size or 19mm if you’re younger than me!
Now is when the fun starts. If they’ve been left for some time the inner sliding portions will no doubt be rusted into their outer sleeves and so the best way to approach it is to remove the brake pads through the slot that the disc fits into; it helps to remove the large adjusting bolt on one side, then you can insert a pin punch down the hole to tap the back of the one brake pad to get it to move. The next stage will be to give them a good long soak in a penetrating fluid, then mount the caliper in a vice and keep tapping the inner slide backwards and forwards until it comes out. You may have to use progressively bigger hammers to start the inner slide moving, but be careful as the slide locates in a key in the outer sleeve- the slide will only come out on the side of the actuating arm, so hit the side with the adjuster bolt in. We always used to leave the bolt in the hole to stop any distortion of the metal if you have to use excessive force.
It reminds me of one of Charlie’s sayings- “Don’t force it, get a bigger hammer!”
On re-assembly use grease on the inner metal to metal surfaces to stop it happening again. Calipers used to seize up regularly in service as the metal heats up and the grease melts, so keep them lubricated on a regular basis but don’t put too much grease on or it gets on the friction surfaces.
July 31, 2022 at 2:16 pm #39566trusty220KeymasterI wouldn’t waste my money on the stuff, Angus! Give me a pint of Marston’s Pedigree any day!
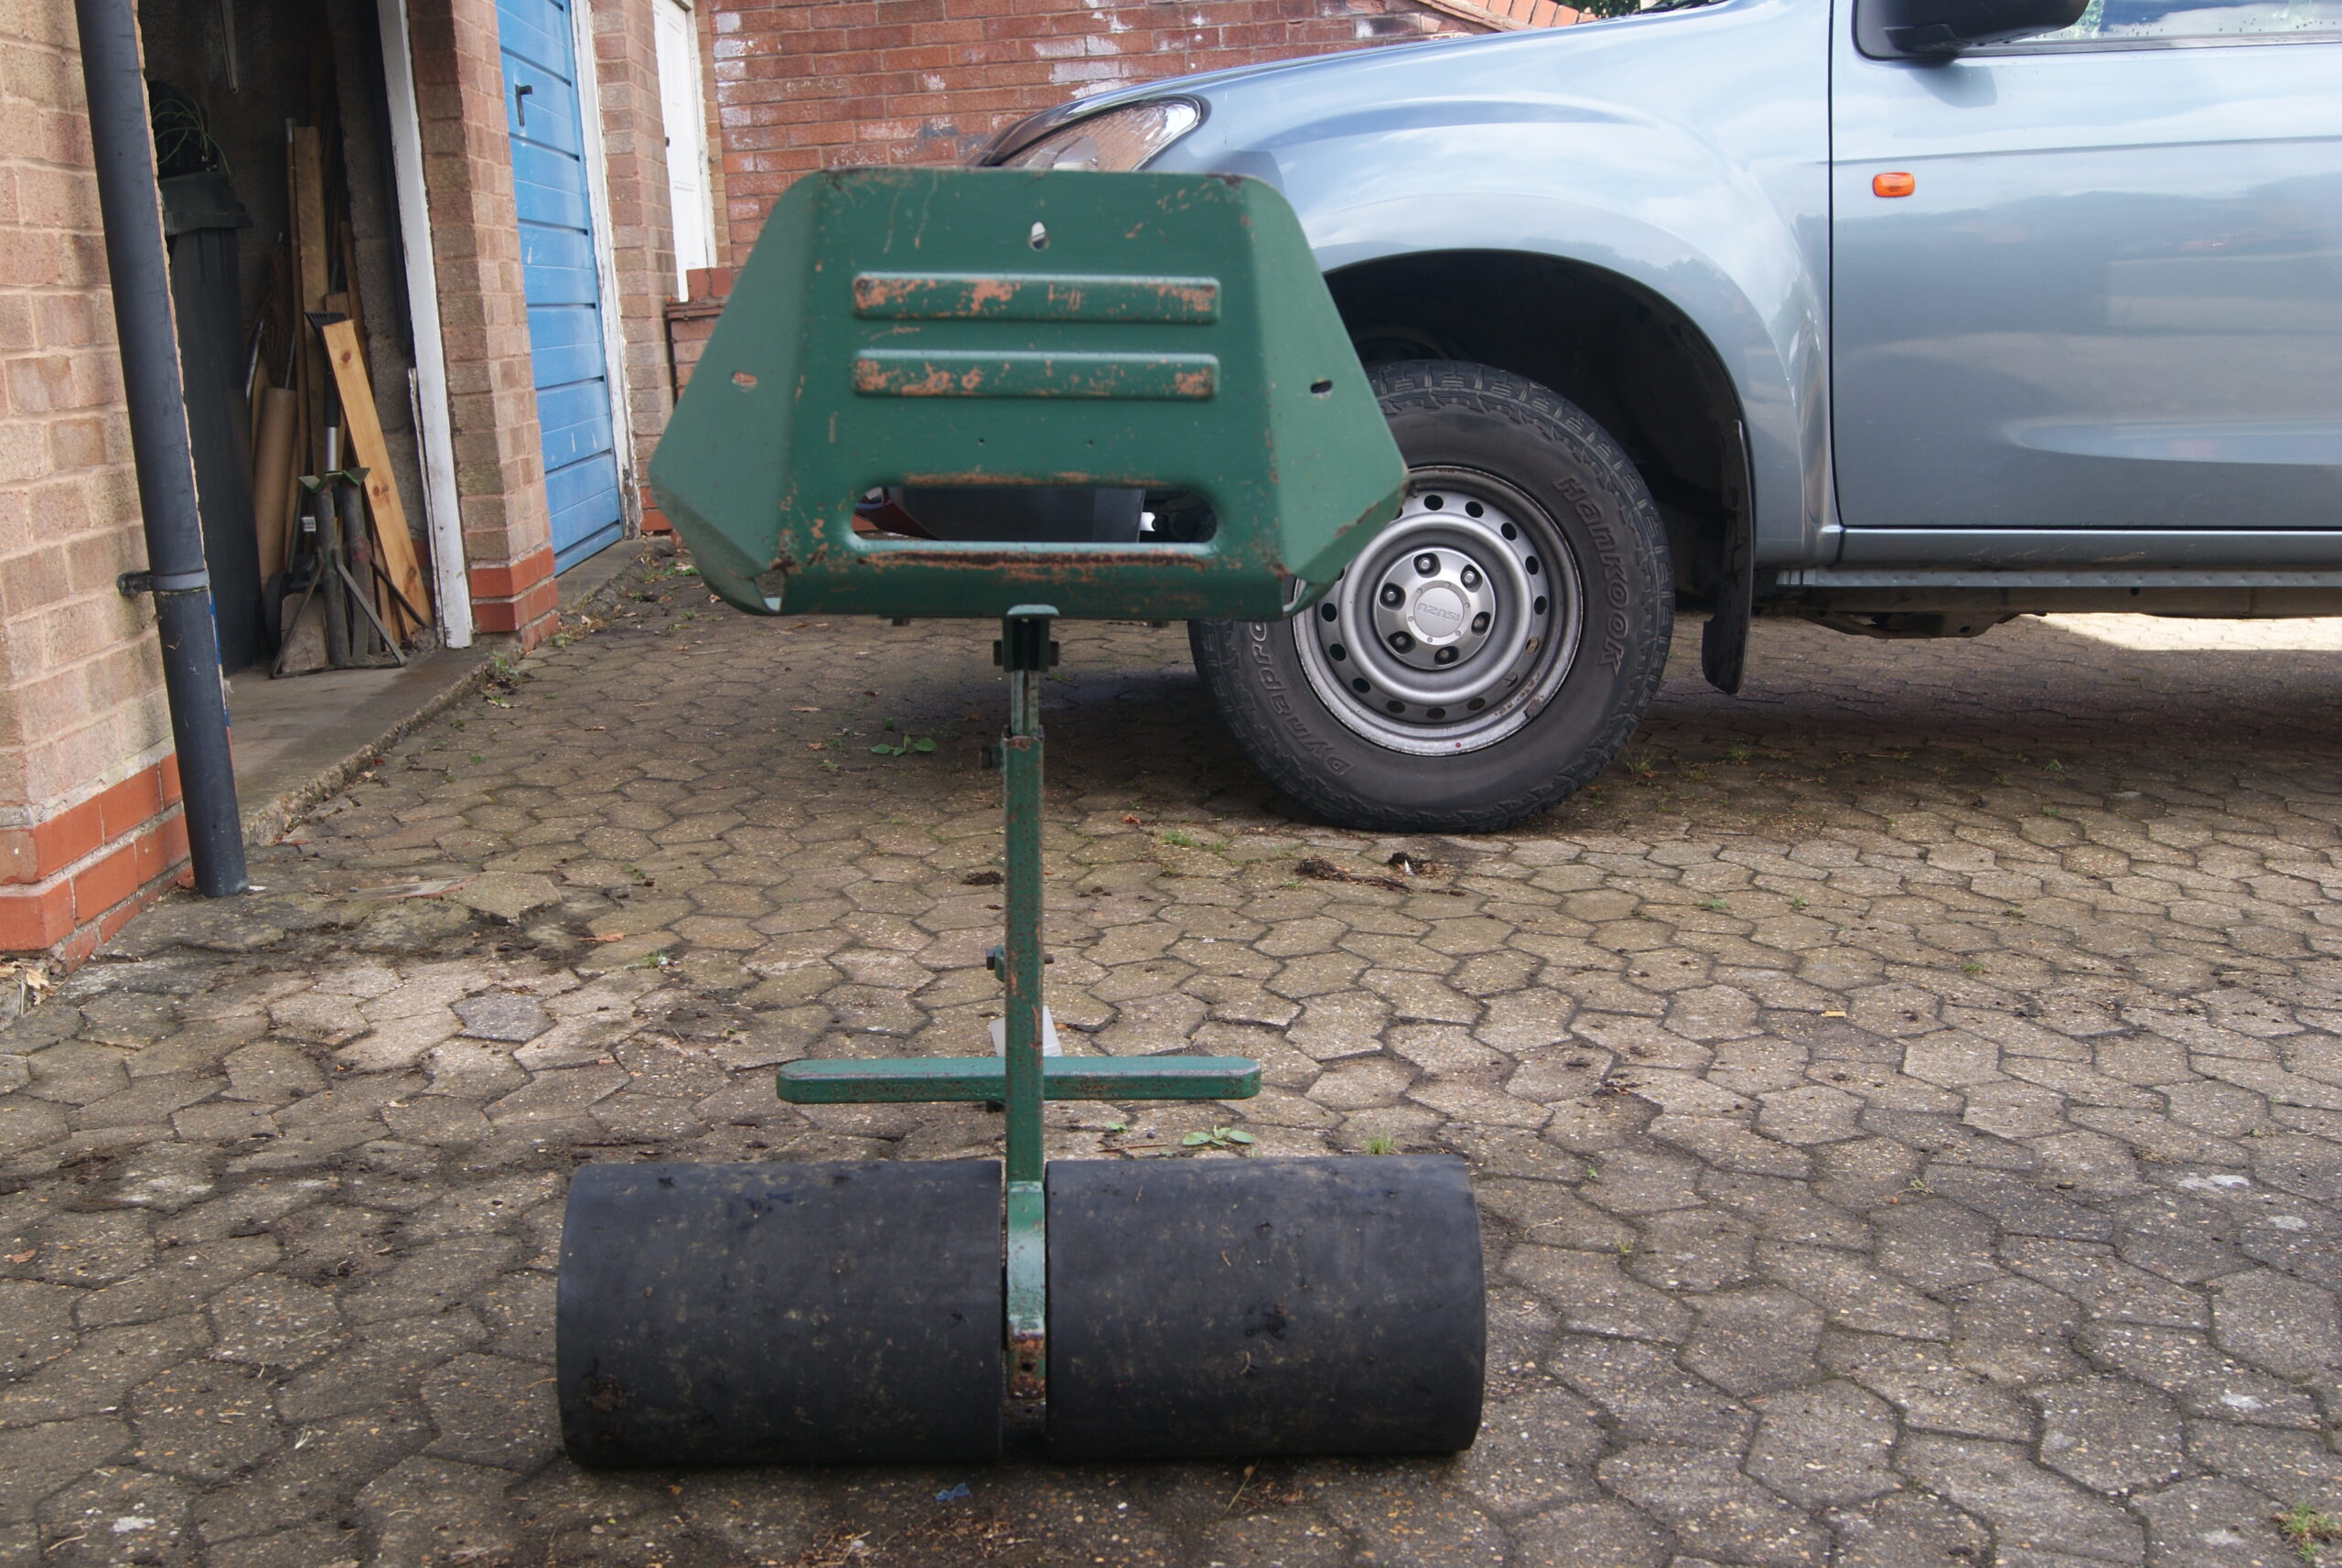
Not too much action today as I’ve been at the farm loading up ready for South Cerney next weekend. One thing that I’ve managed to do is to clear my bench of all of the odd jobs, such as bolting the trailing seat back together and giving it another coat of varnish to seal it.
One thing I did notice was that the one thrust washer which mounts against the frame inside the roll had obviously been given to the apprentice to do. The centre hole has been drilled off to one side giving the whole washer a lop-sided appearance but it shouldn’t affect how it works. Things like that are part of it’s history and should stay like it, I feel.
Anyway, the only thing left to do to it now is to attach the seat cushions which will be away for at least another week, so it’s keeping the GT6 company in the other garage.
In the words of British Rail in the 70’s, we’re getting there!
Attachments:
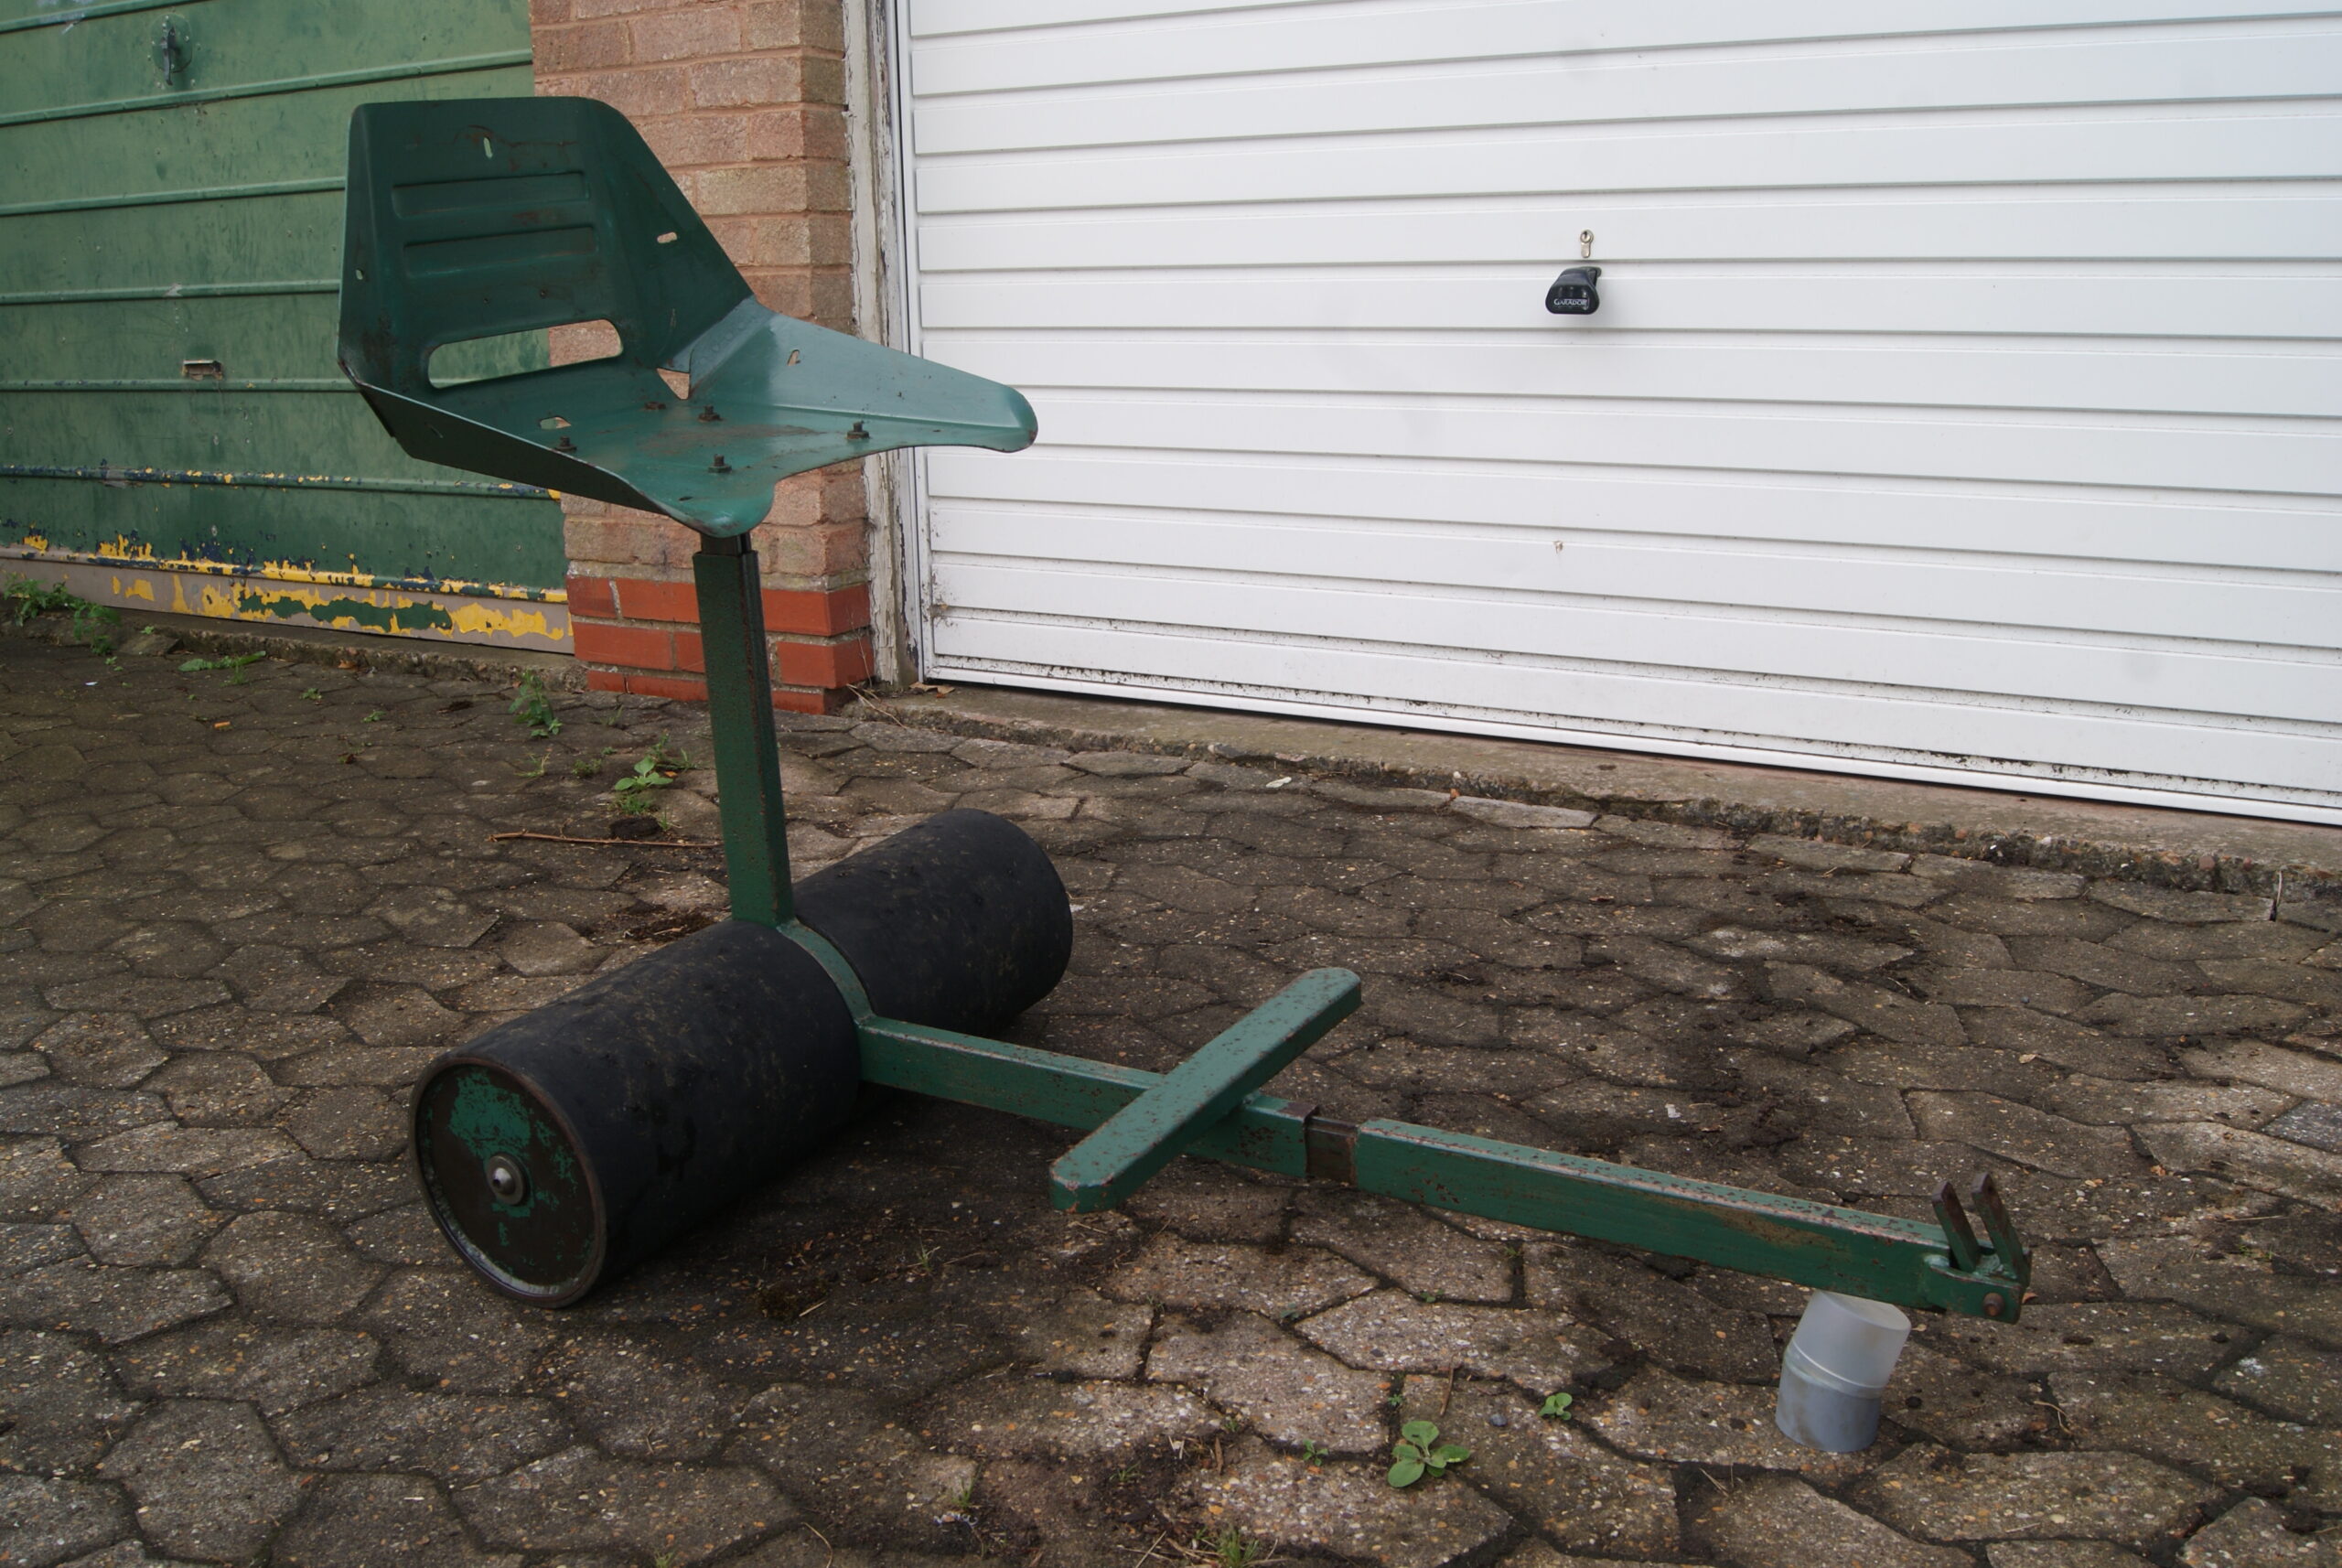
July 30, 2022 at 2:33 pm #39559trusty220KeymasterI’m not having any of you accusing me of slacking so I’ve been in the garage again today. Not too much more to report apart from the fact that the axles on the trailing seat seem to be in remarkably good condition with original paint still showing through where it hadn’t been worn off by the rollers. All of the bolts have been cleaned up and re-entered into their respective holes so that they are now doing the job they were designed to do. All of the thrust washers and retaining screws for the rollers are still serviceable and so will be used again, but I’ve spent the morning wiping everything down with meths and spraying it with satin-finish varnish to preserve it. It’s all got to dry now before I do any more building up; now it’s Saturday afternoon, where did I put that beer….?
Attachments:
July 28, 2022 at 5:49 pm #39557trusty220KeymasterBeing the modest person that I am, Angus, that is not for me to decide!
The gold paint ended up a mixture of gold leaf and brass colour- brass being quite a bit darker but not as dark as bronze; I used Humbrol enamel, mixing gold and brass in equal amounts to get the shade right.
I do intend to present the owners with a file of photographs of the rebuild together with some sort of background story. Let’s finish the hard work first, though, then I can get on with the fine details. And no, it wasn’t gold leaf!
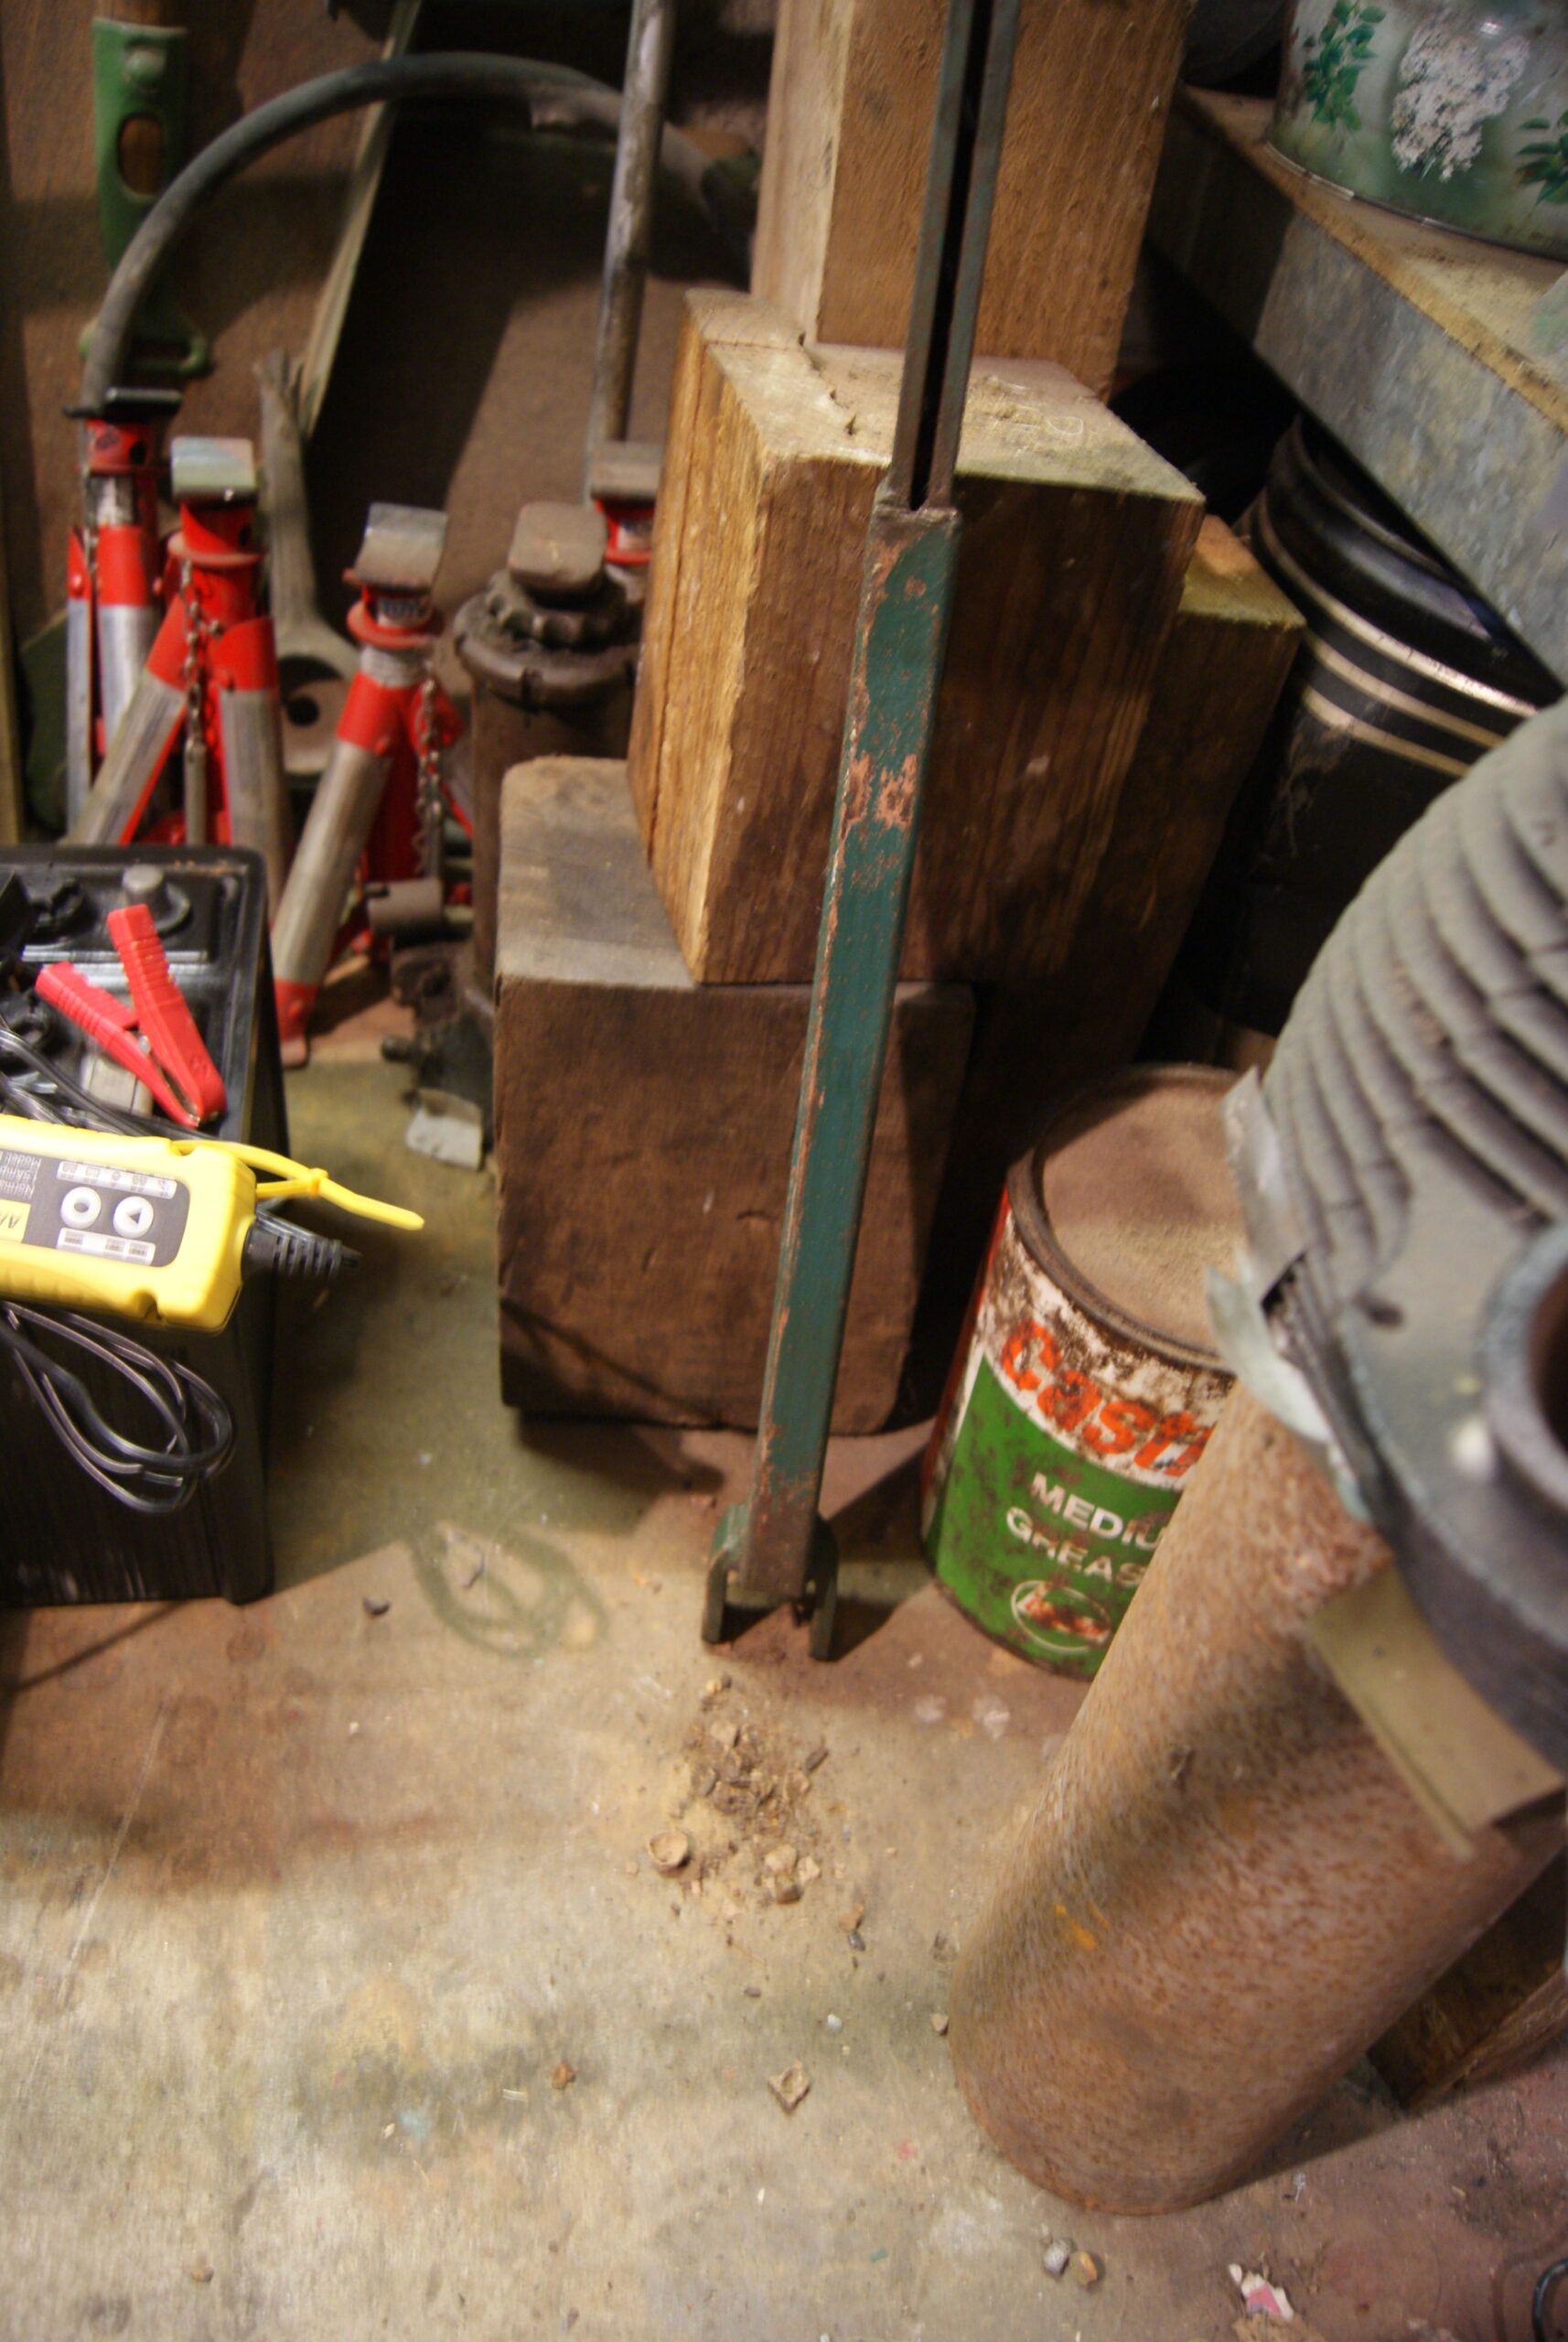
July 27, 2022 at 1:02 pm #39546trusty220KeymasterBefore getting stuck into the polishing and fettling I had one last dusty job to do, so I thought it best to get that out of the way first. I’m talking about dismantling the trailing seat and it fought me all the way.
The seat pan has already been cleaned and rubbed down; the cushions are away at the trimmers to get repaired, so the drawbar and rollers were next on the agenda. It really is a weighty piece of kit so to reduce the weight I decided to remove the rollers first. Somebody had really tightened up the securing screws at the ends of the axles and it didn’t help that they were dome-headed with a recessed hexagon for an Allen key- I was convinced that each one was going to round off just before they cracked and loosened. The drawbar is adjustable and is slotted into the front of the seat platform but the locking bolt had not been tightened for some time, being only two turns in. This meant that the drawbar was absolutely solid inside the outer tube and only plenty of oil and knocking it backwards and forwards got it loose enough to come apart.
It’s now all rubbed down with wire wool and WD40 then cleaned up with the Screwfix degreaser, although a lot of the grease build up I chiselled off with a paint scraper beforehand. All of the smaller parts are soaking so as soon as they are clean I’ll start on re-assembly. An interesting aspect of the clean-up was that the drawbar had been filled with nuts by some industrious little rodent; I do hope that he didn’t go short of food when the last owner got rid of the mower!
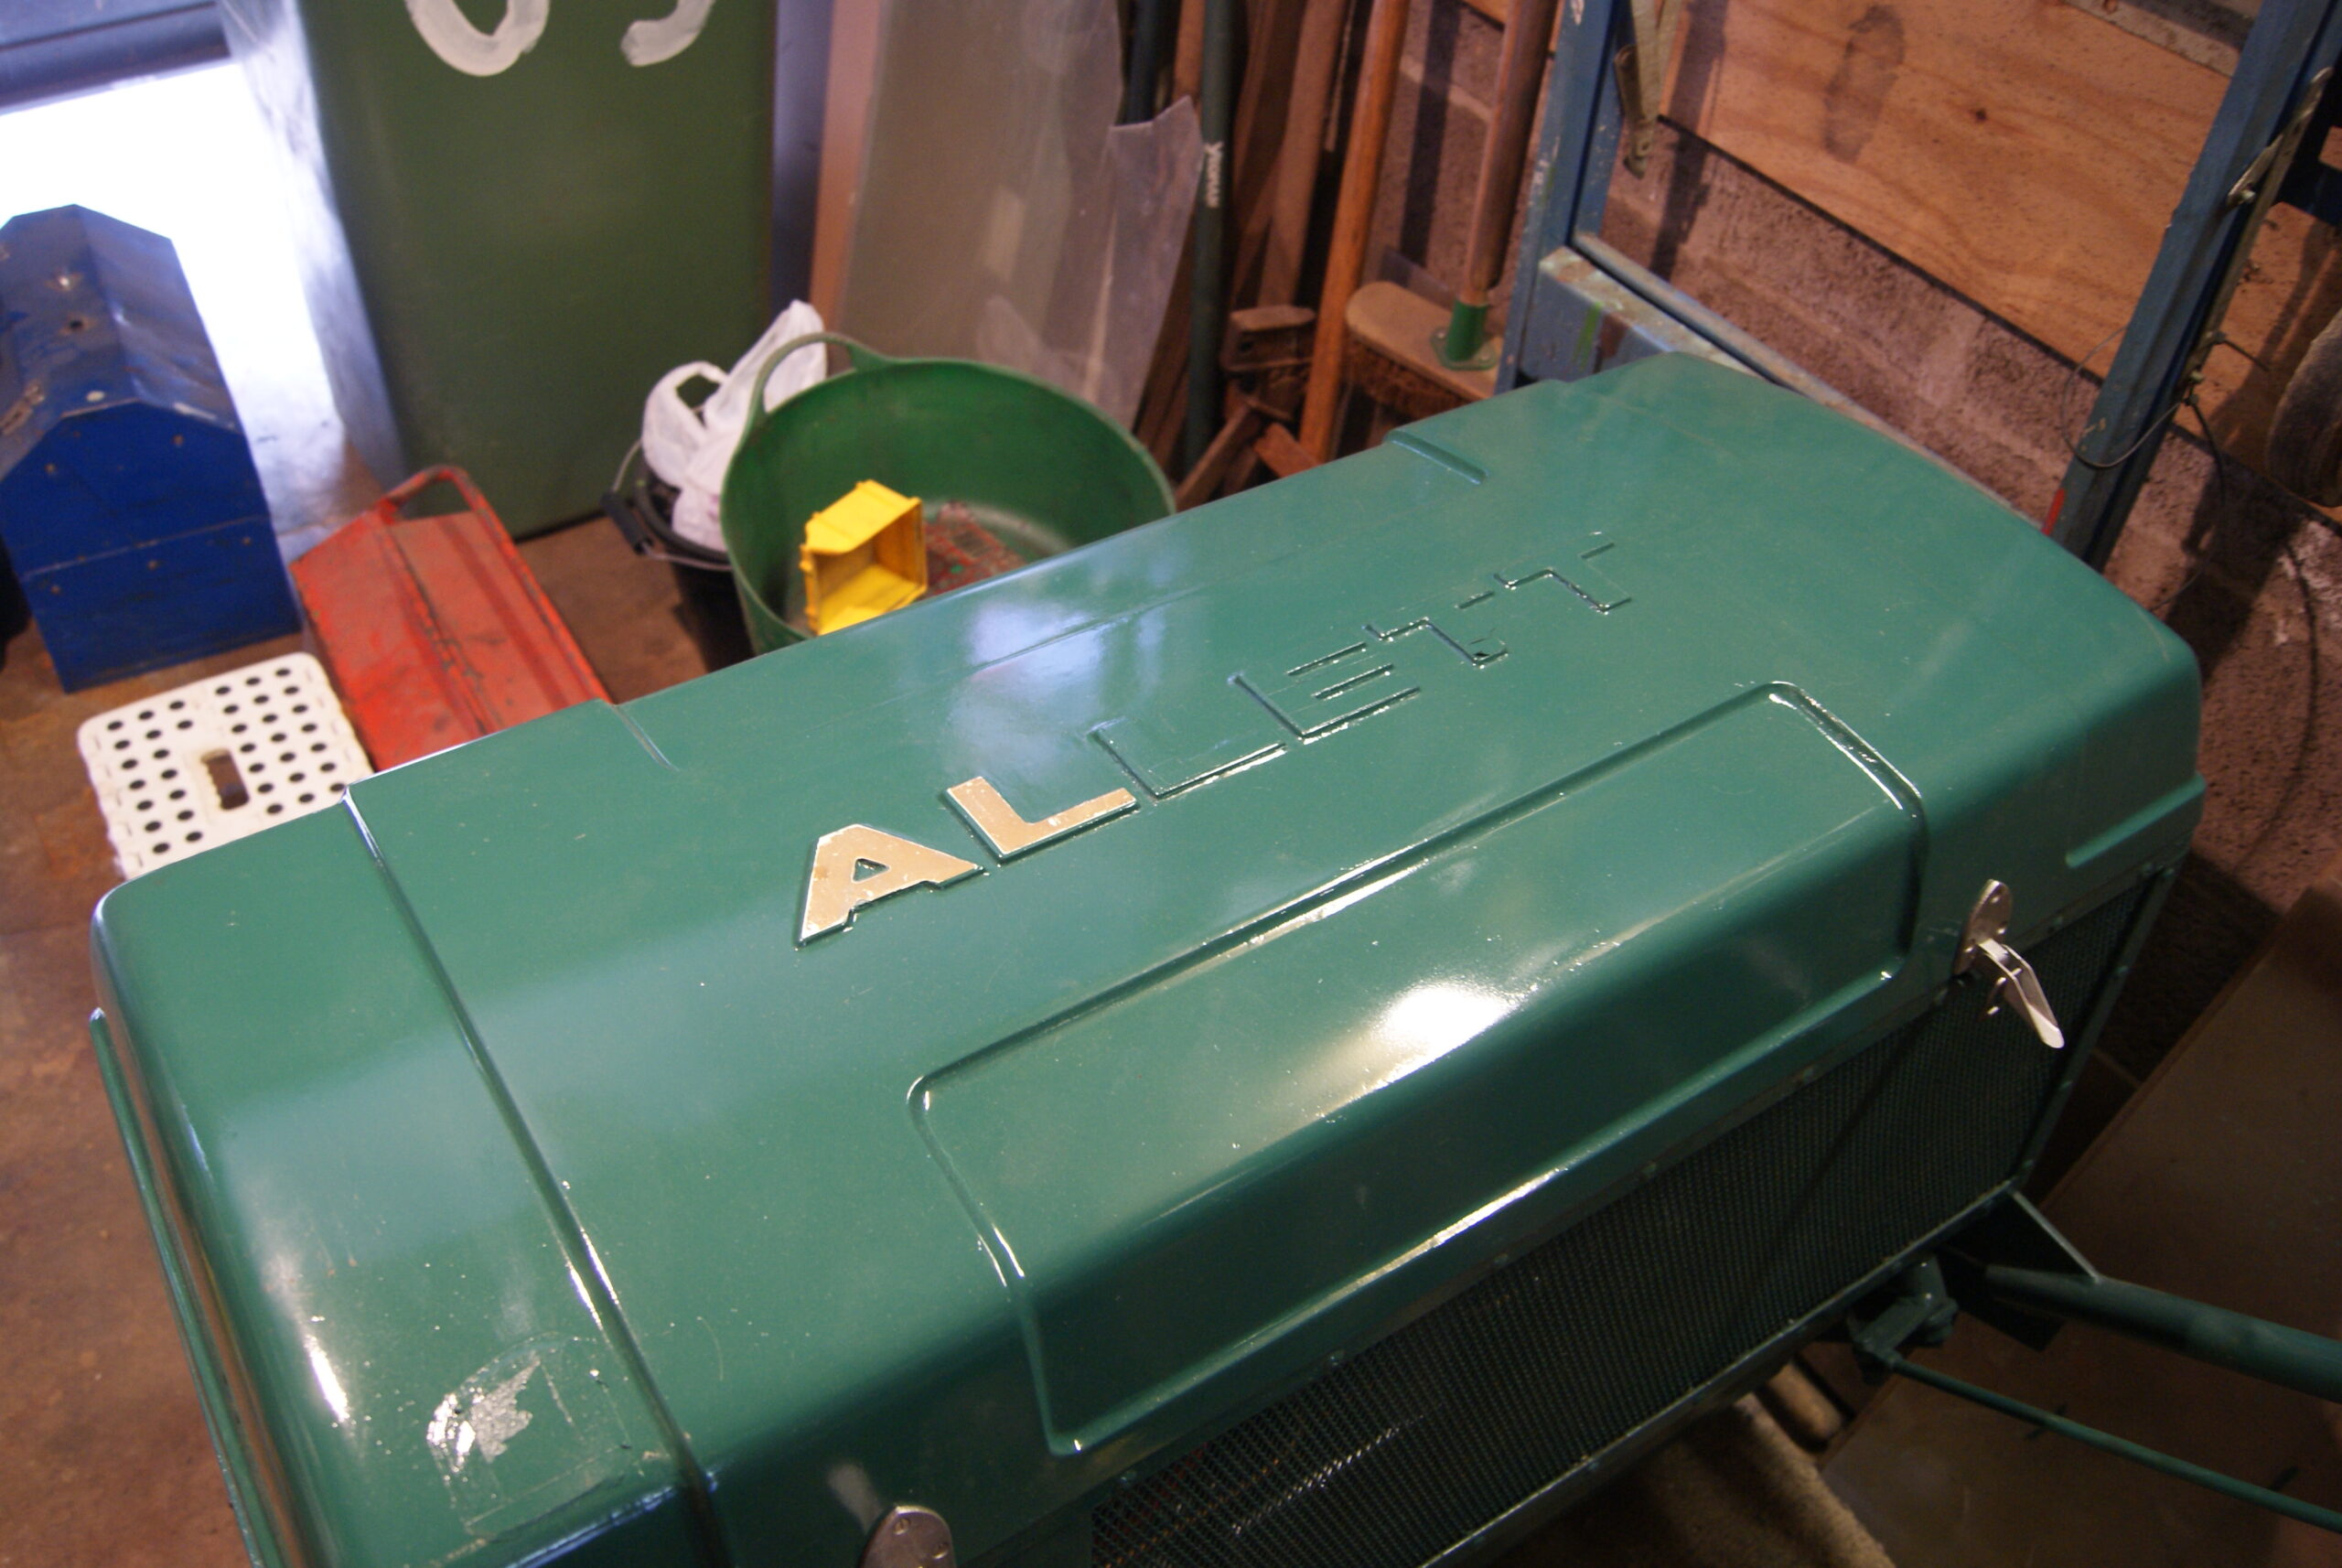
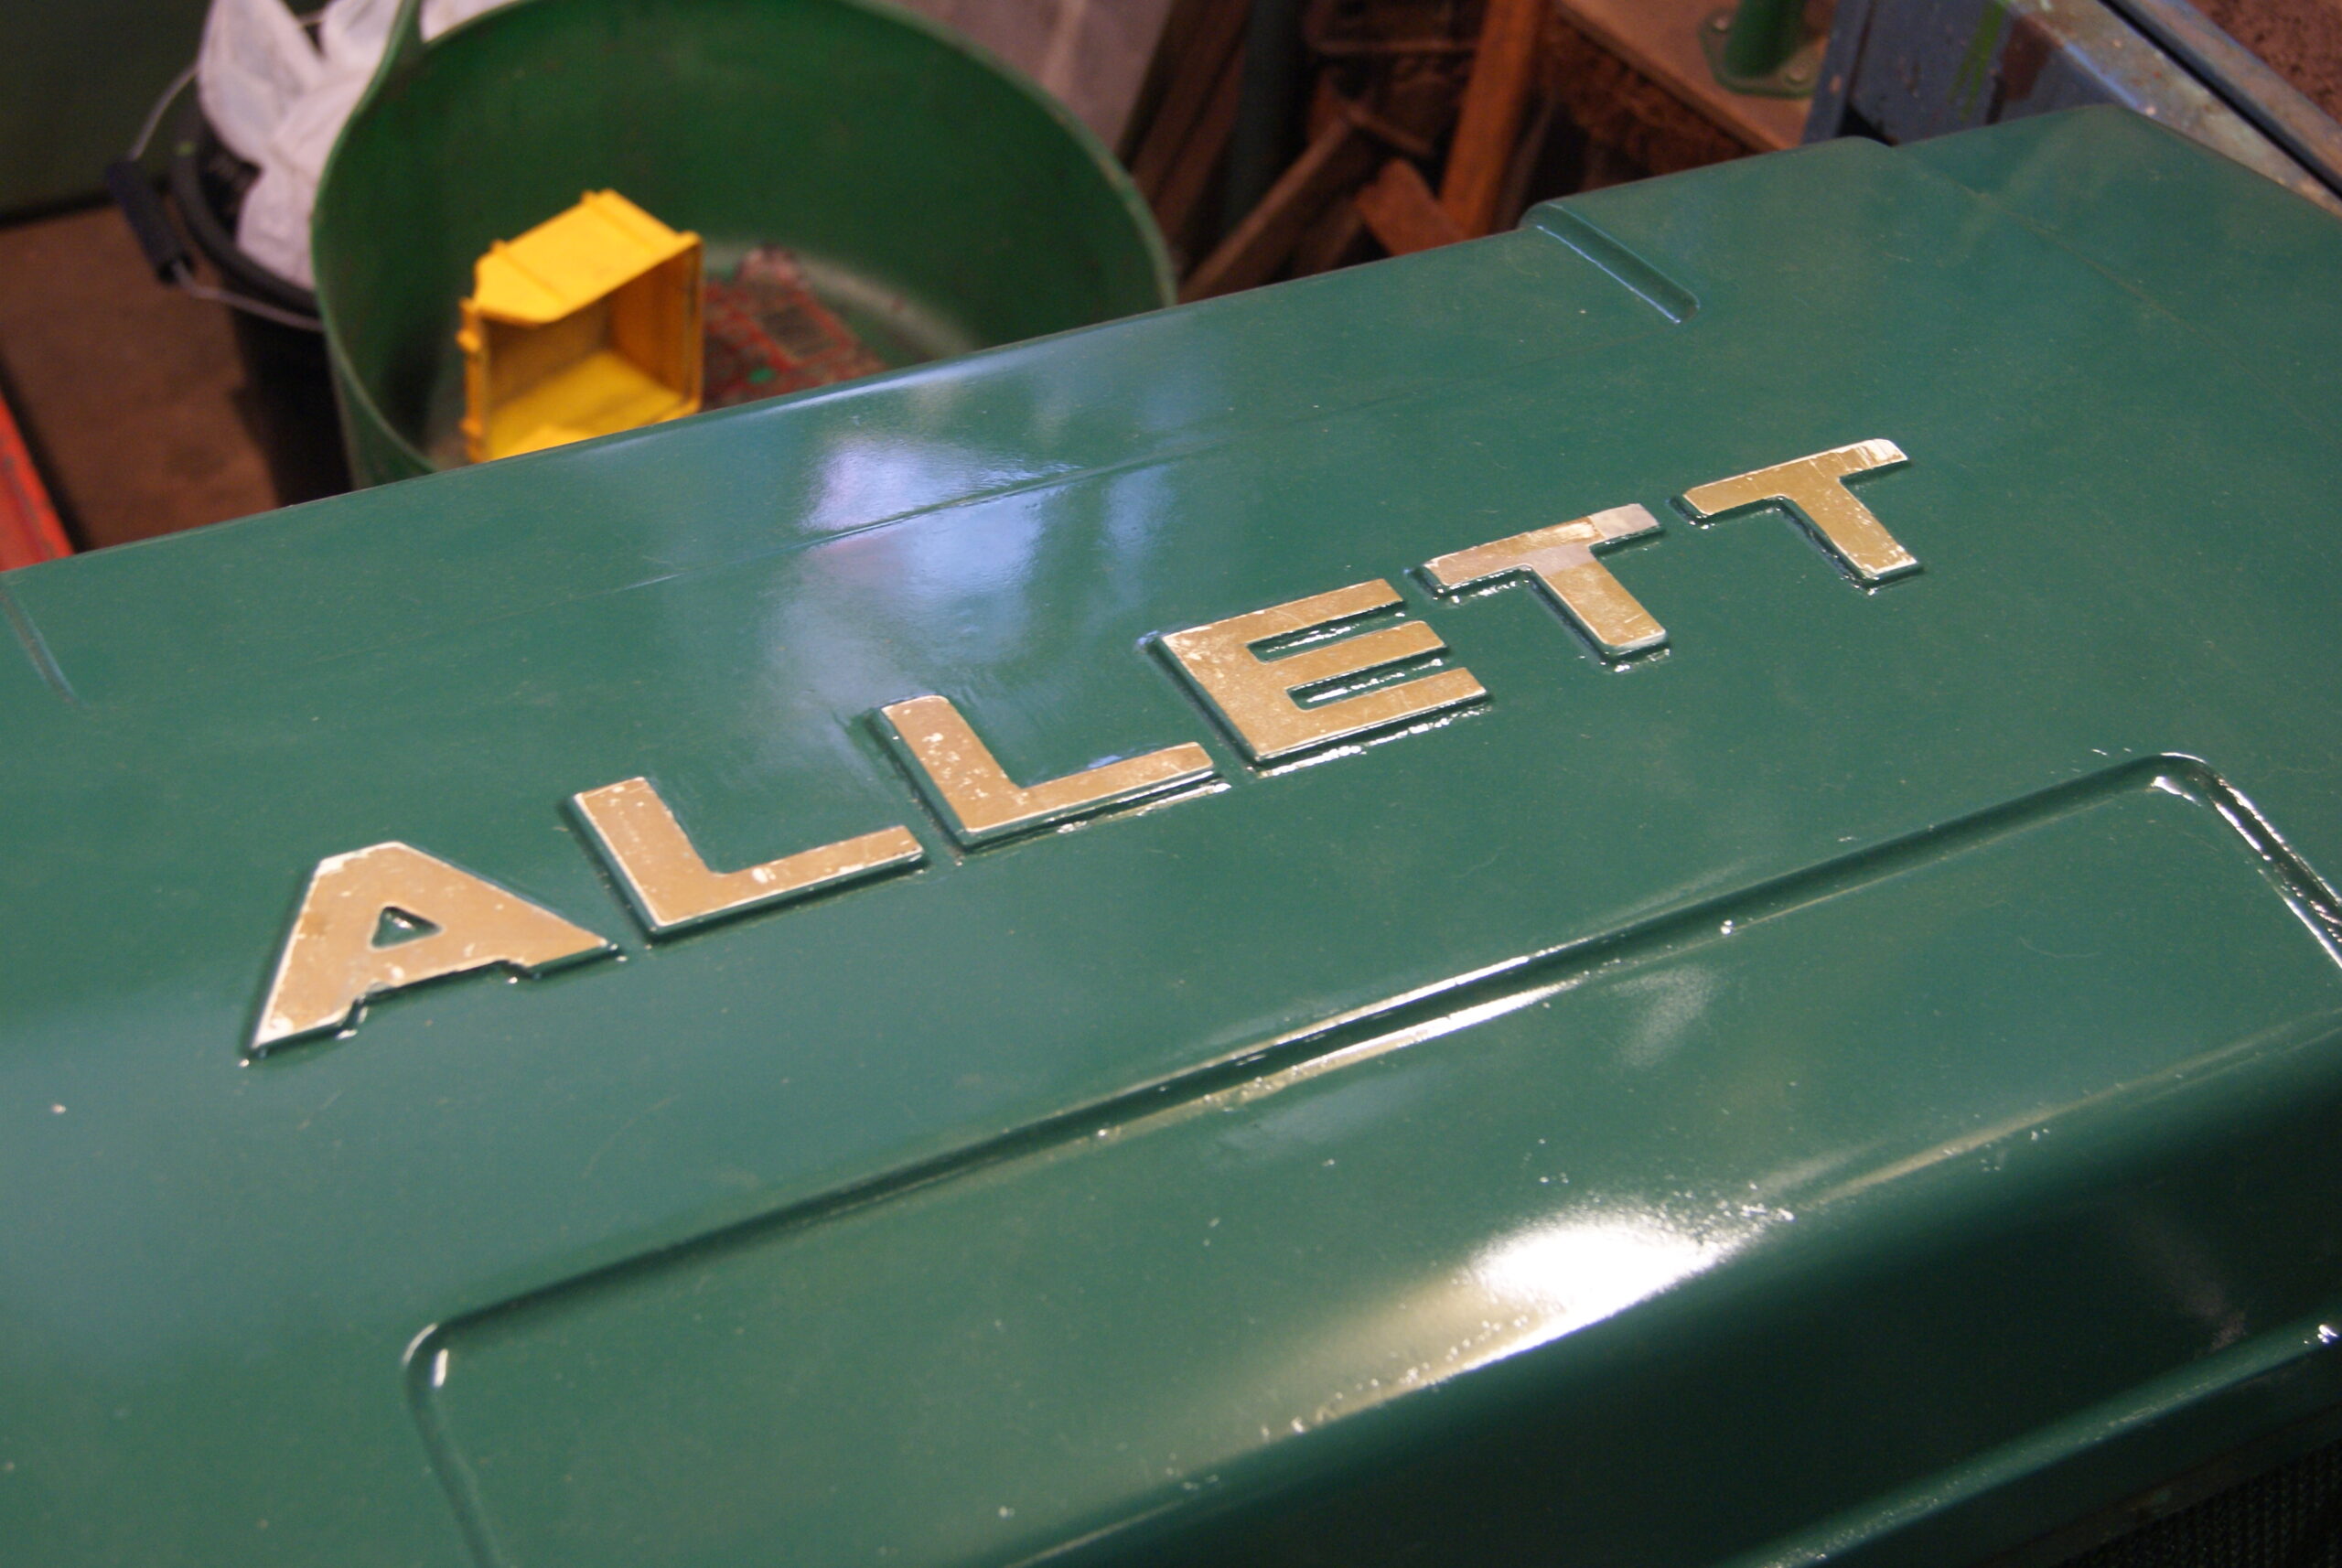
I’ve also included some pictures of the lid now that I’ve removed the masking tape from the lettering. Unfortunately I don’t have the correct shade of gold paint to touch up the letters, so that will have to wait until I’ve been to the shops again.
Attachments:
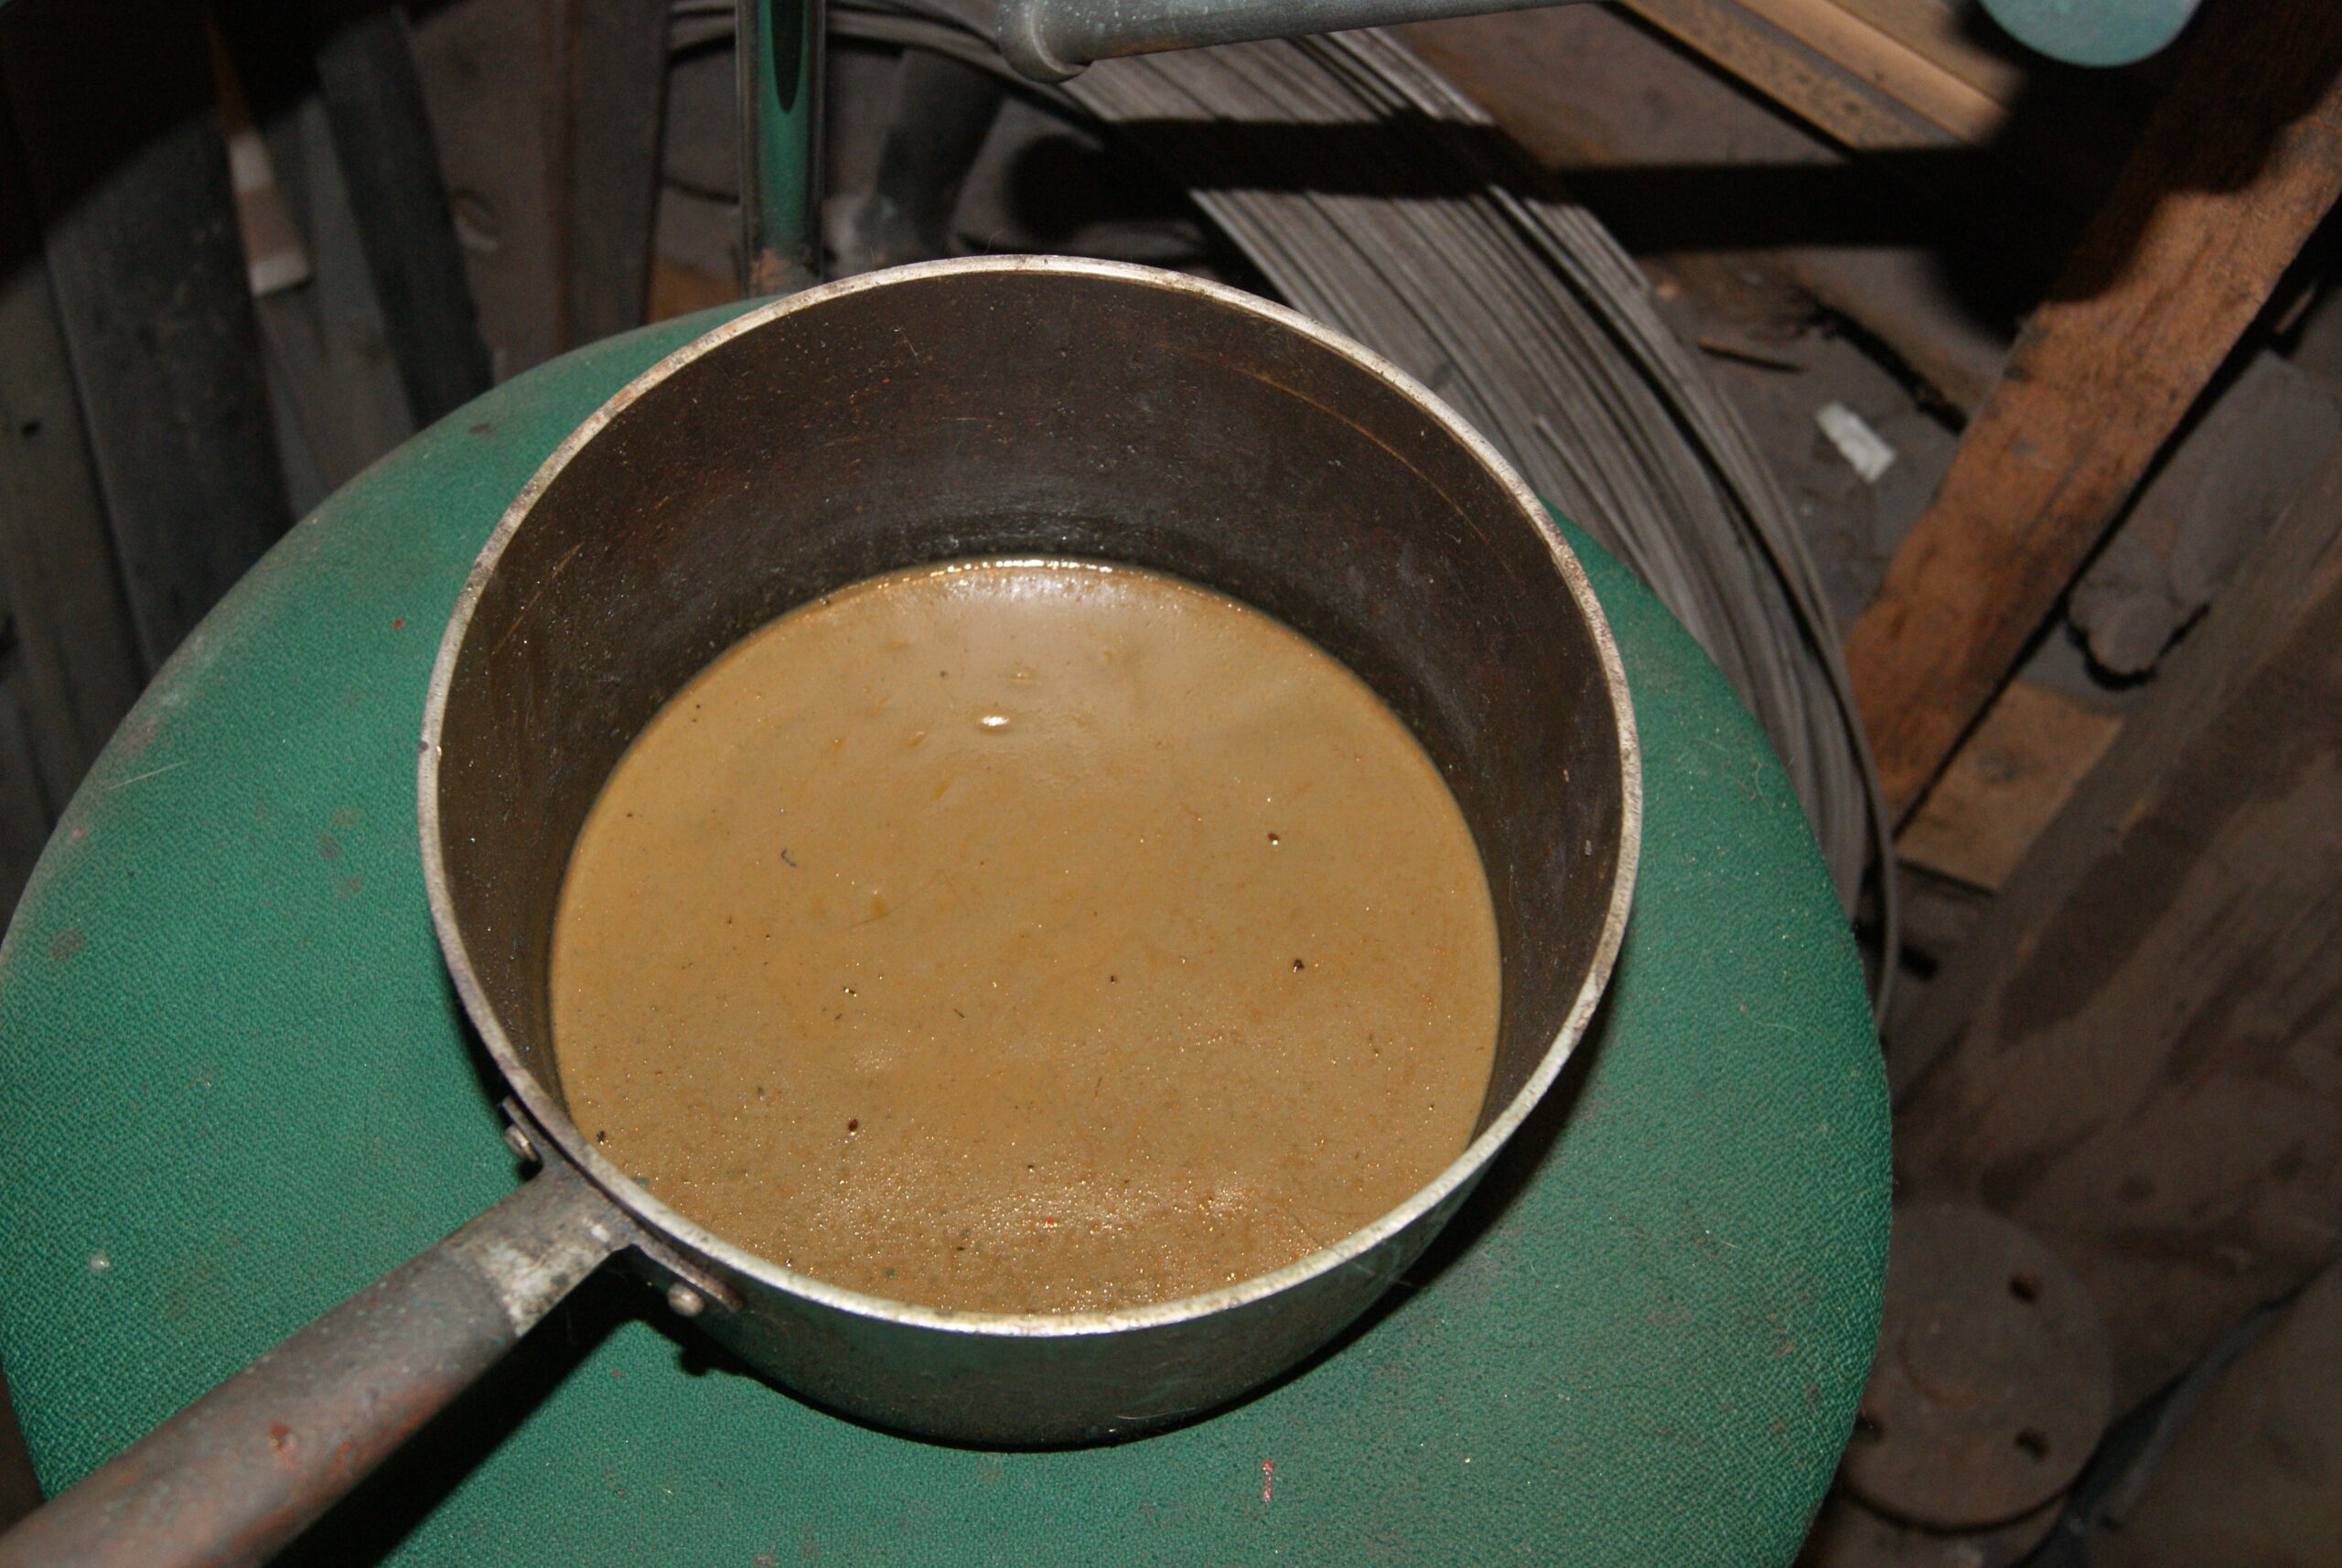
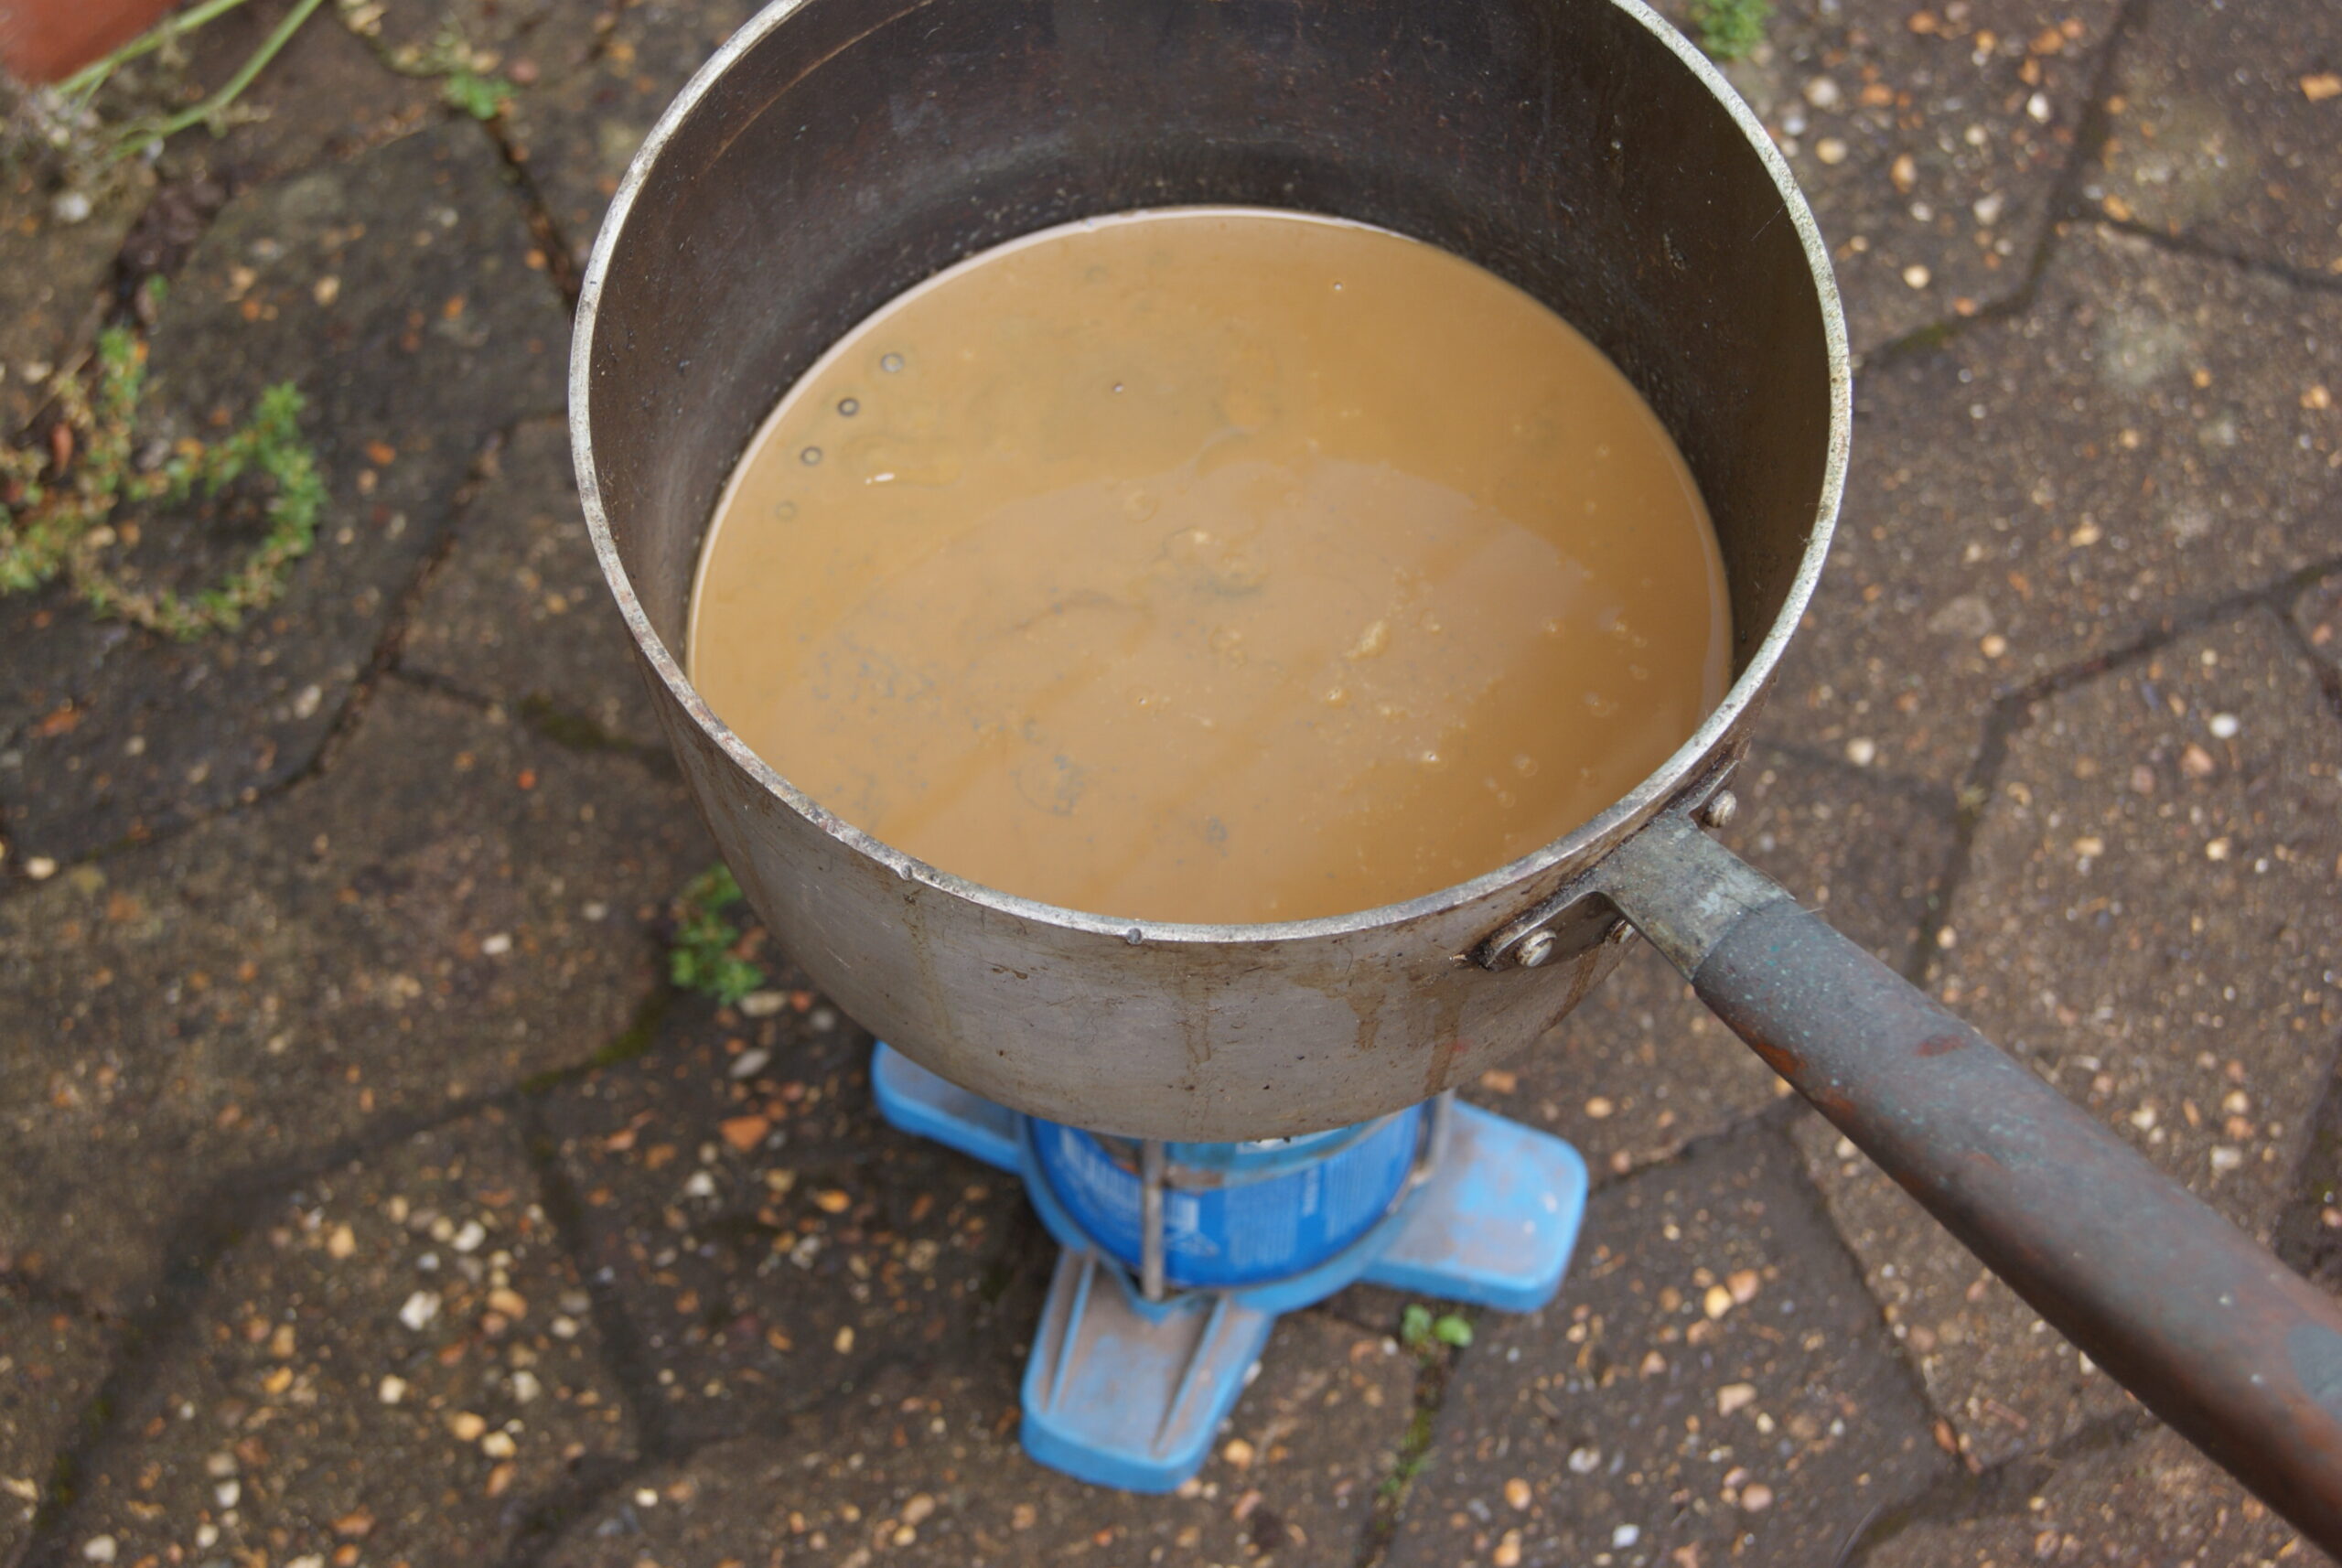
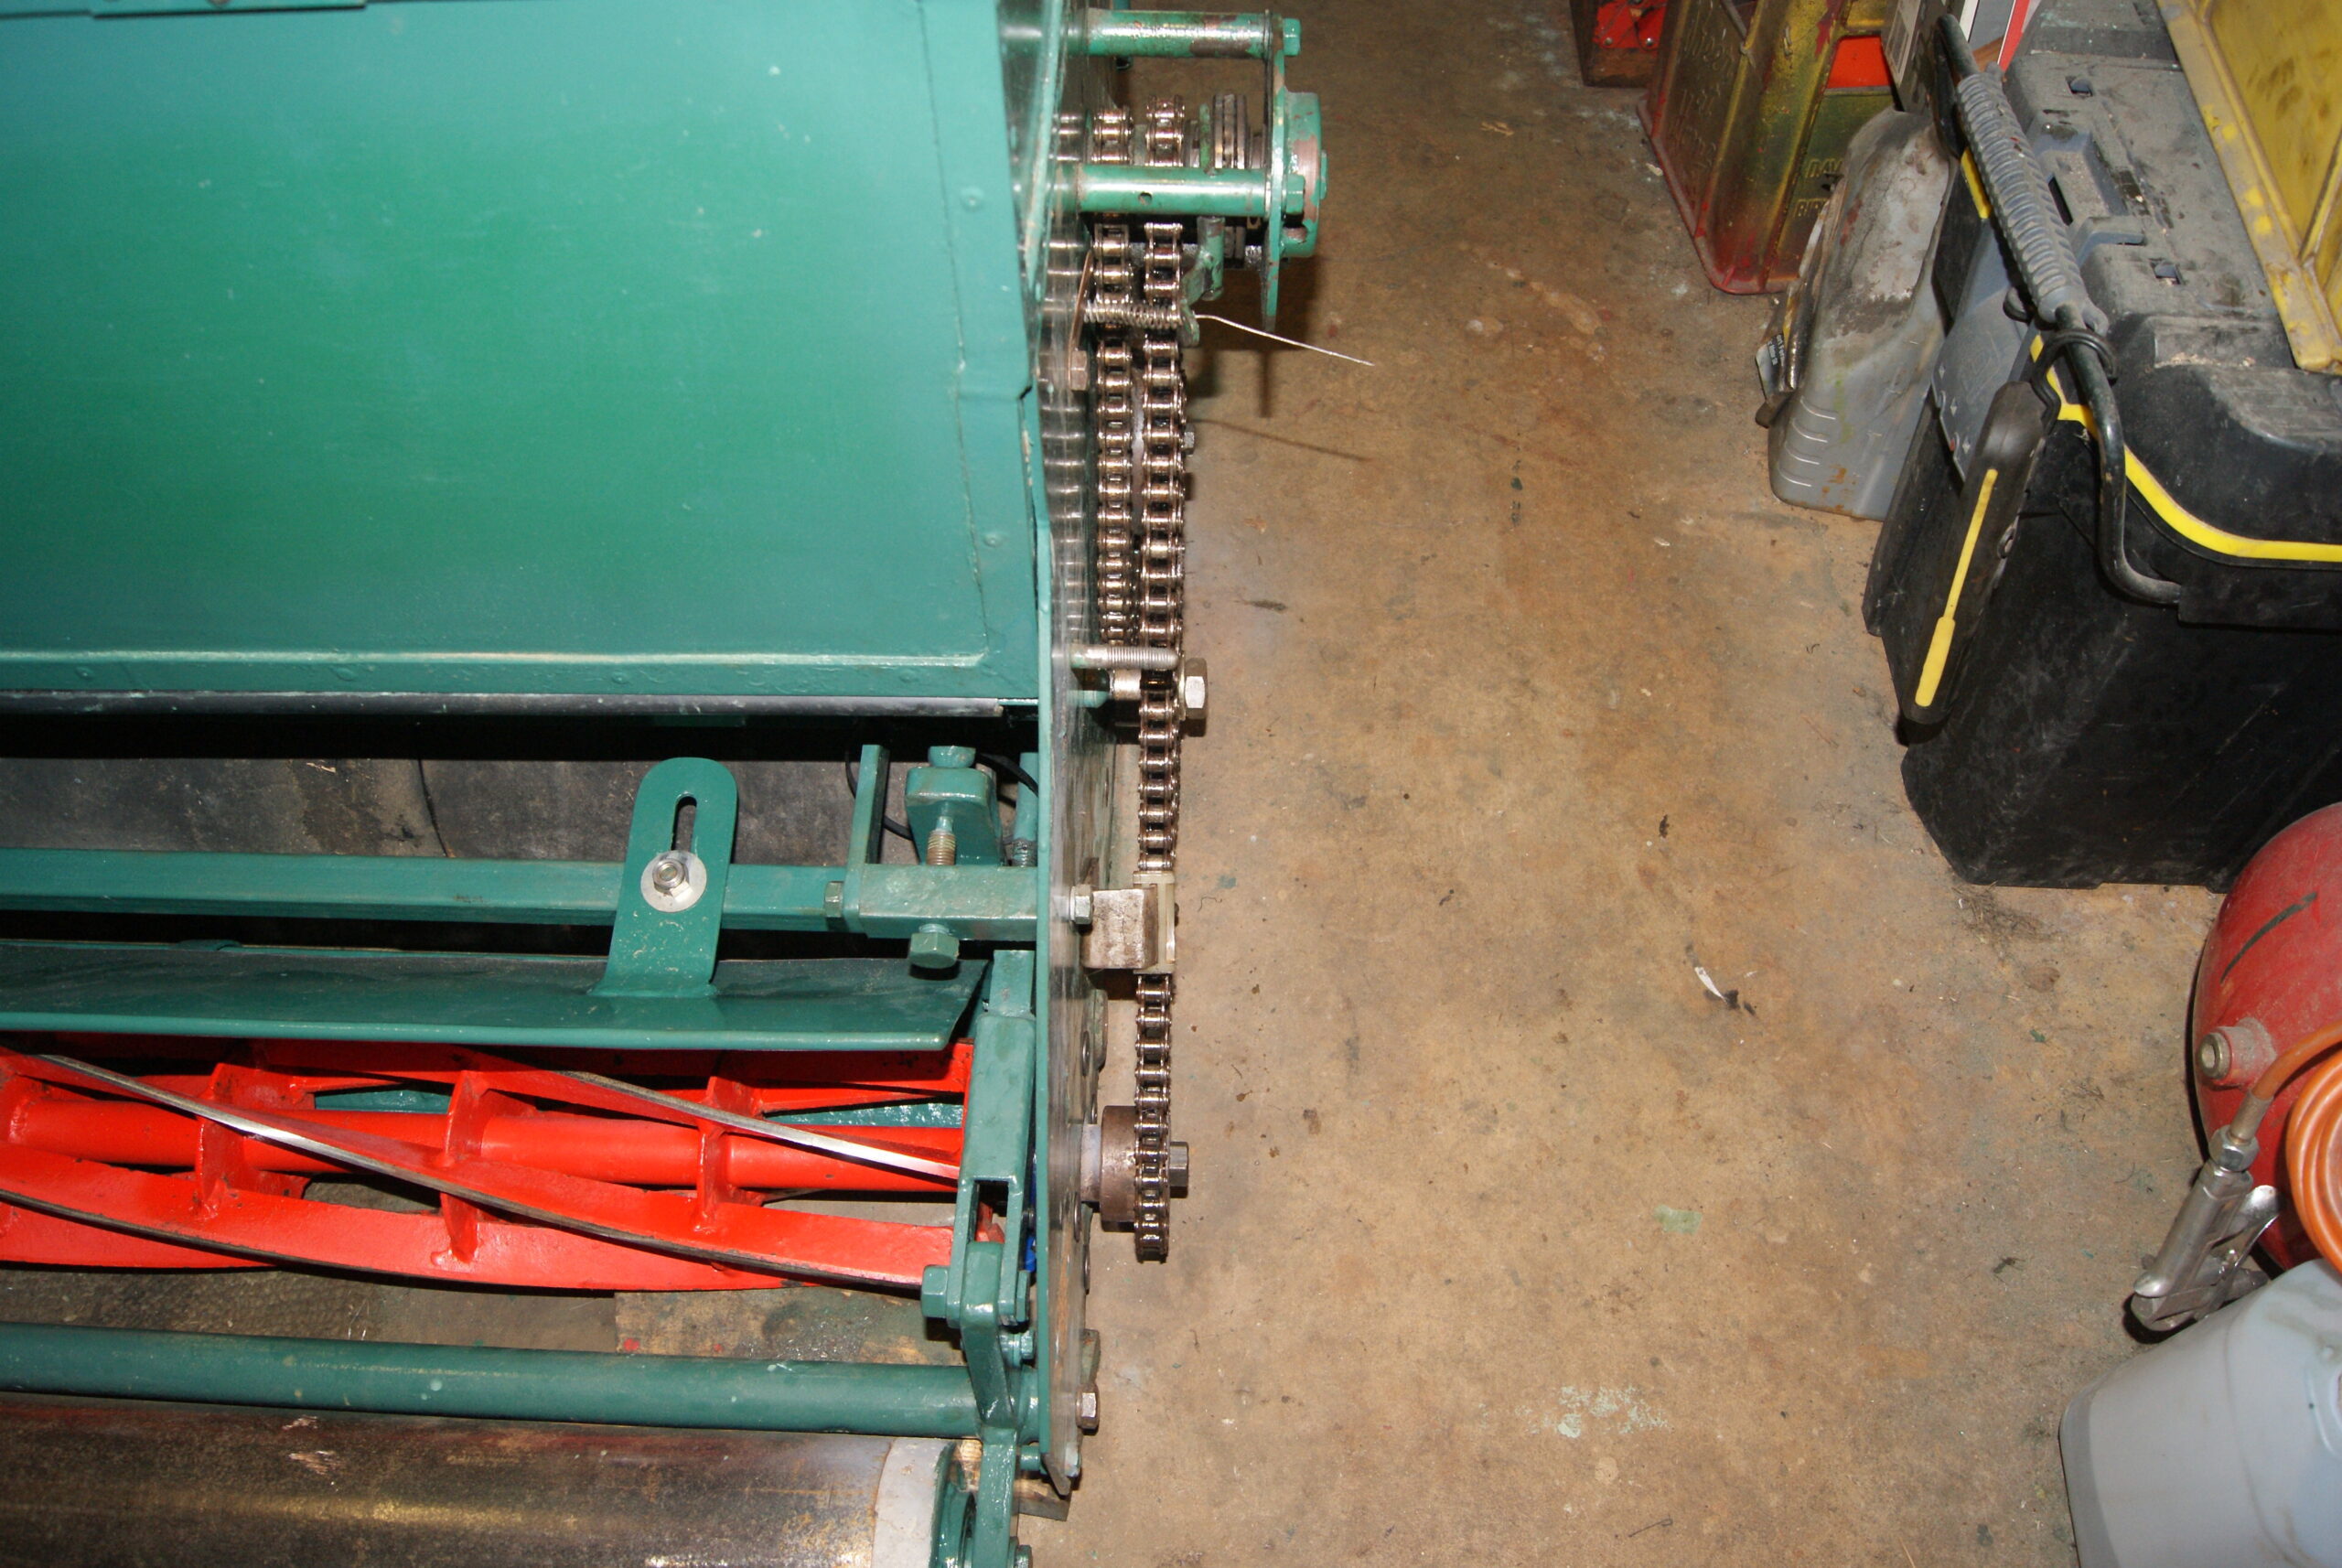
July 26, 2022 at 7:17 pm #39538trusty220KeymasterChains are always difficult things to clean properly and if you leave dirt in them they have hundreds of places that it can grind away at. Putting grease on the outside just makes up a grinding paste and accelerates the wear, so cleanliness is very important.
When I took these chains off a few months ago I put them straight into a bath of petrol to give them a good long soak. That soak took two weeks before I got around to getting them out again and all of the old oil had been dissolved. Once the chains had dried out I then worked them backwards and forwards to make sure all of the dried dirt was removed, then hung them up to dry. That was about six weeks ago, so when I came to re-oil them this morning they were well and truly clean and dry.
What I find best these days is to heat up a pan of grease on a camping stove- Mrs. Geoff won’t let me do it on the house cooker- and drop the clean chains into the boiling grease and leave them boiling away for about ten minutes so that they reach the same temperature as the grease. At this point most of the air has been pushed out of the spaces in the chains and I then leave it all to cool naturally; that way the grease is sucked into the cavities on cooling.
I then heat it up again to a liquid and fish the chains out, wiping them with a cloth to clean the excess off and then I can pour the grease back into the tin to use next time.
Anyway, that gets the chains clean so then all I have to do is fit them to the mower. That’s exactly what happened without any further dramas, so tomorrow’s work will be cosmetic I think.
Attachments:
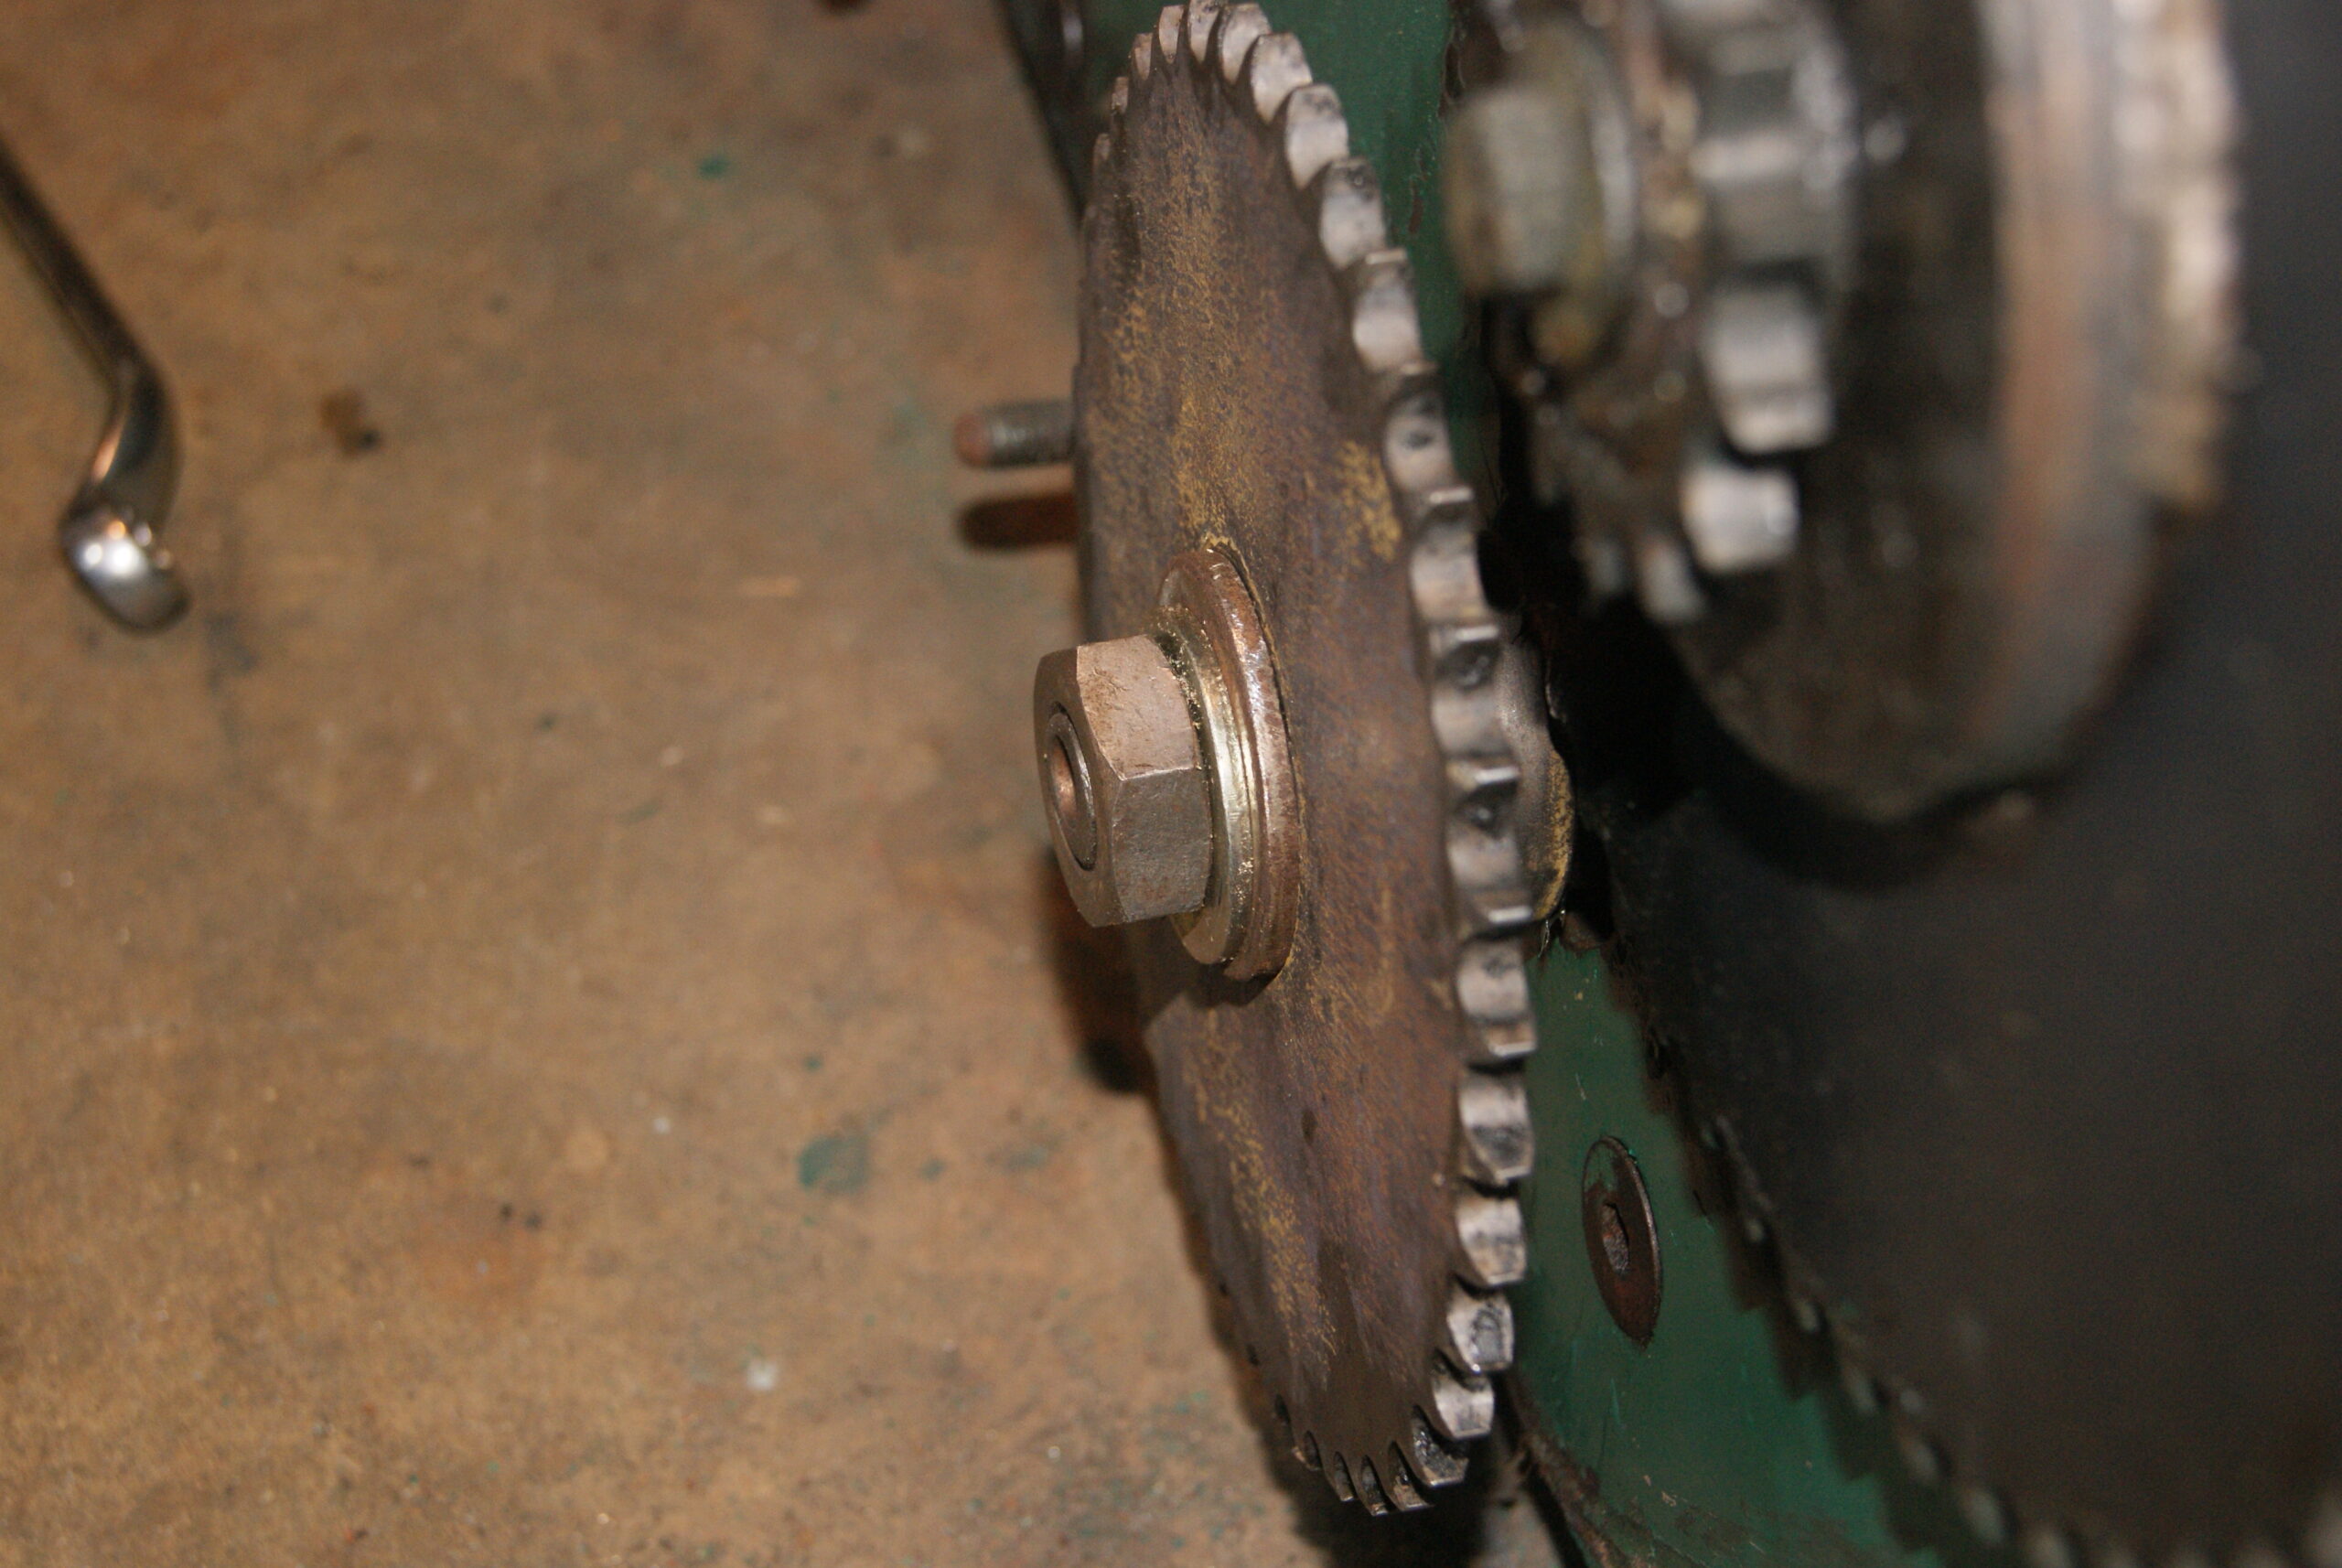
July 26, 2022 at 6:57 pm #39529trusty220KeymasterI managed to avoid a soaking this morning, but only just! No sooner had I turned the mower around and dragged it back into the workshop than the heavens opened. Phew!
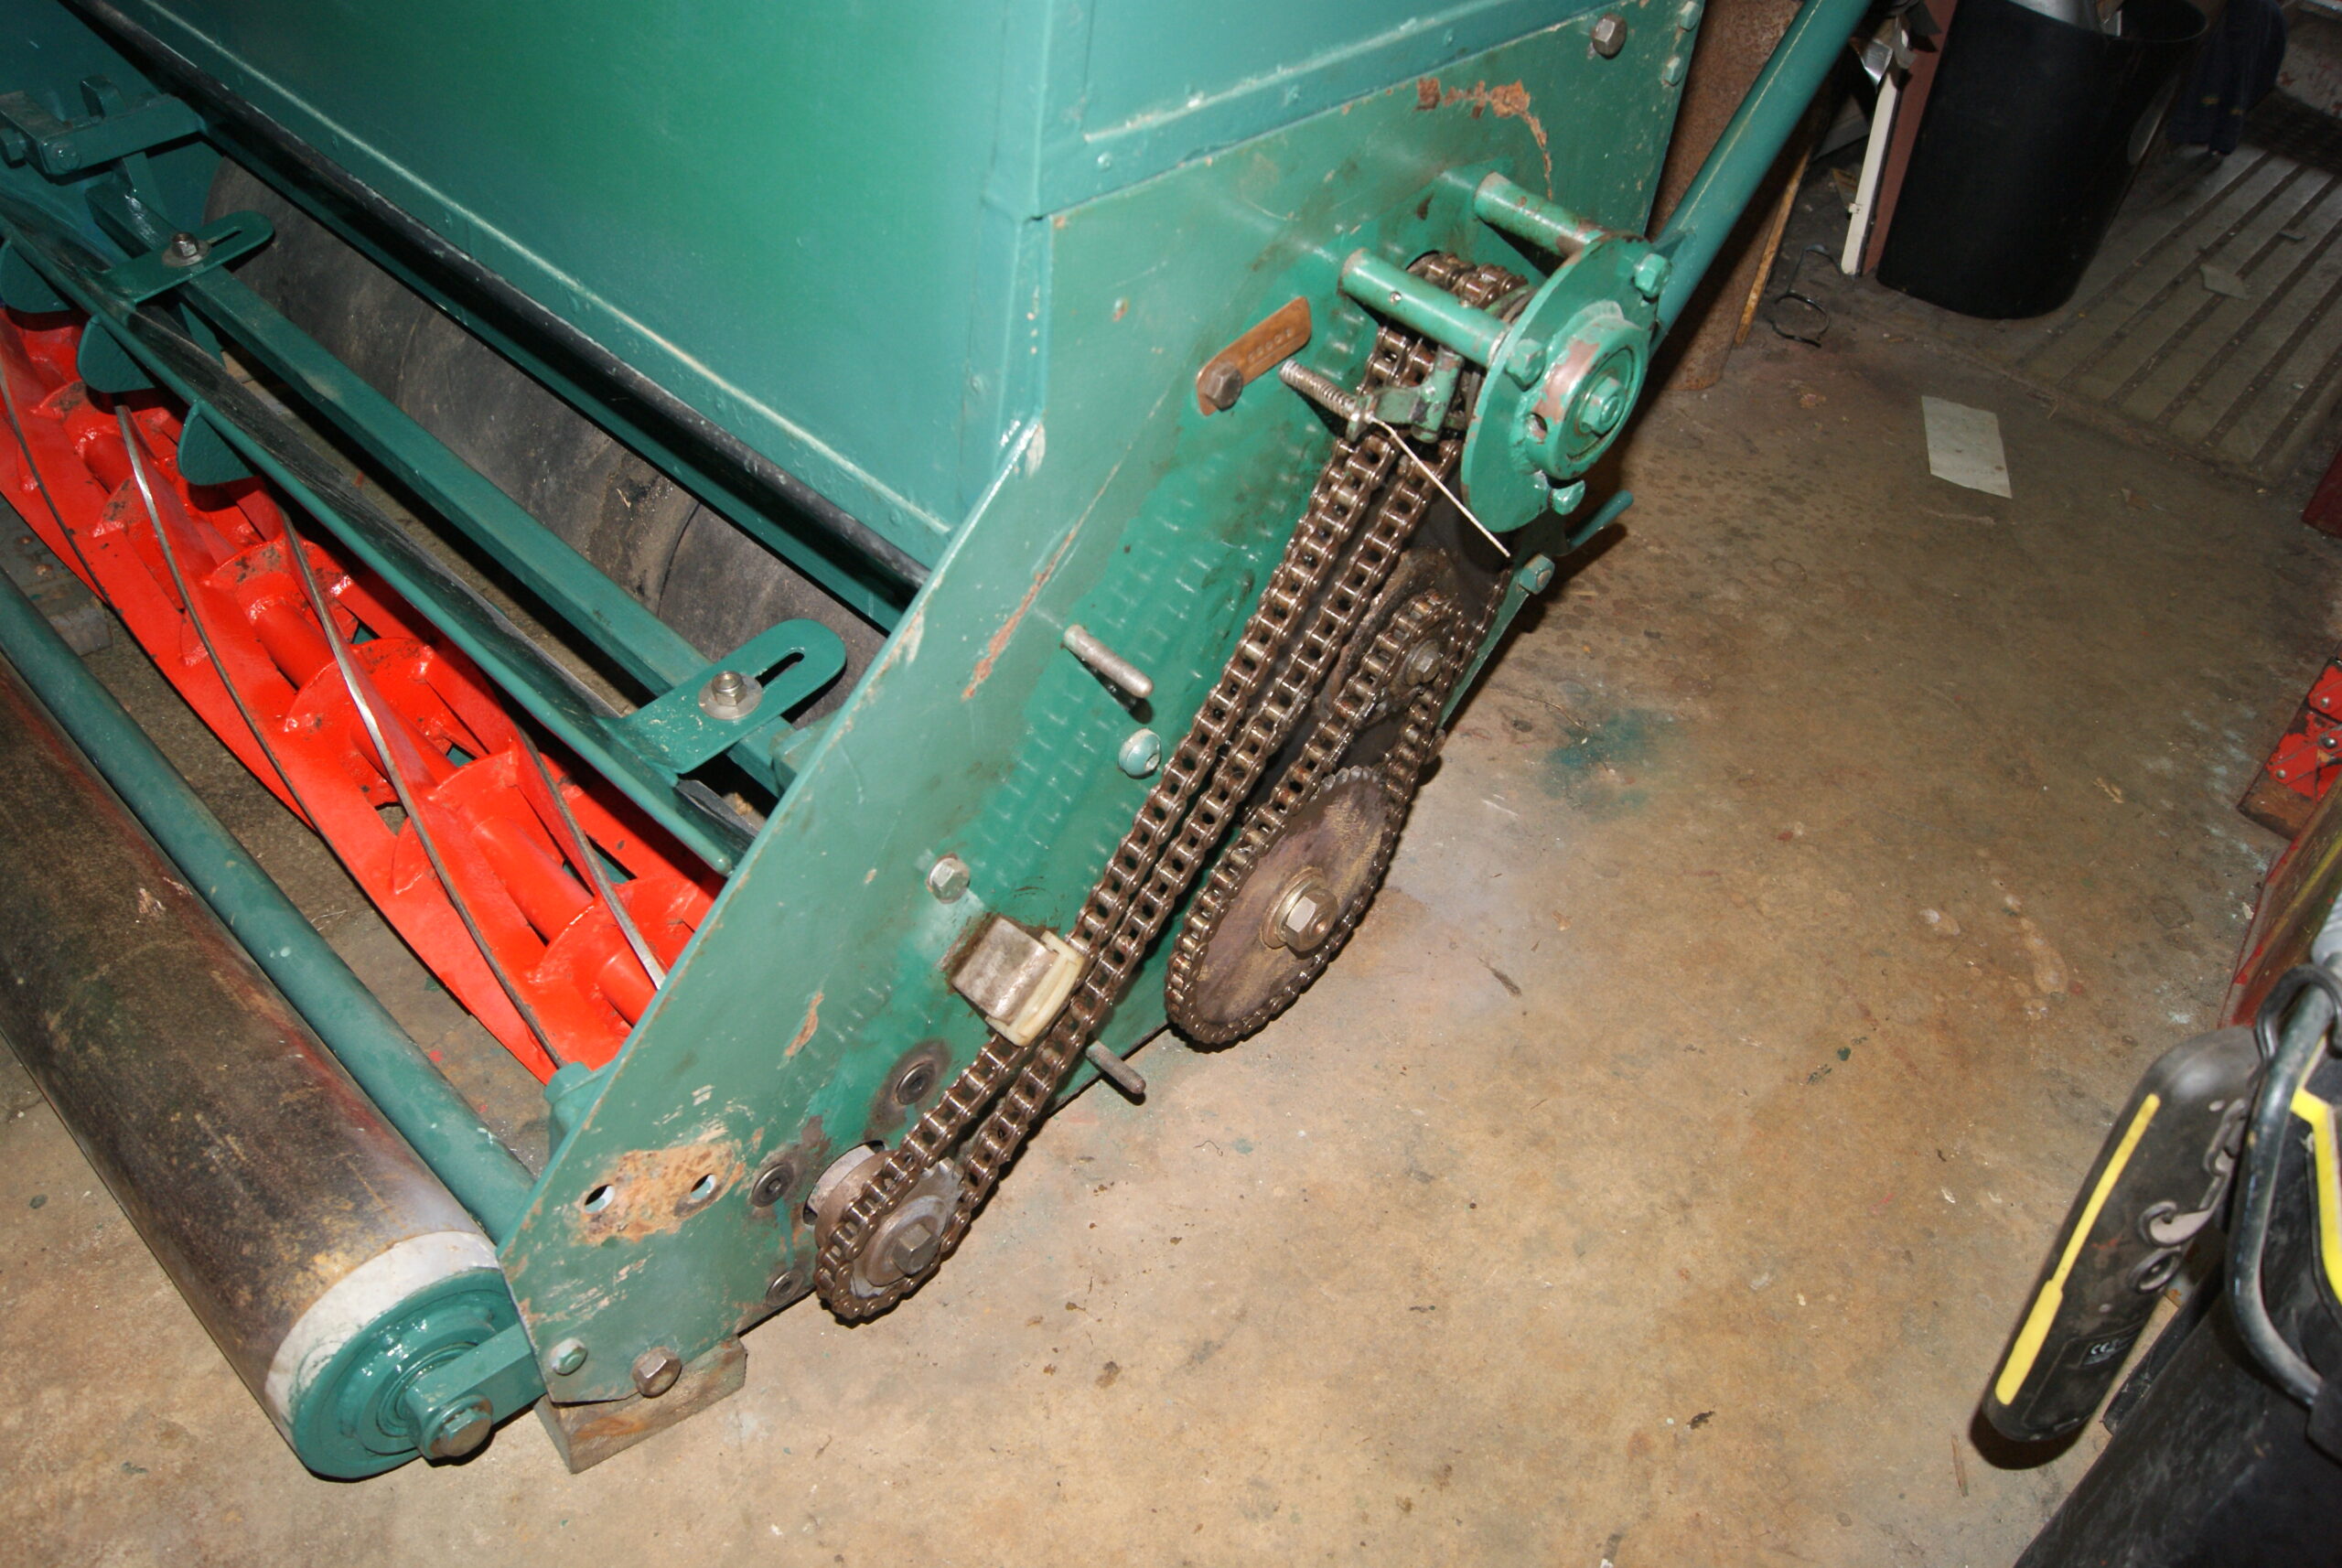
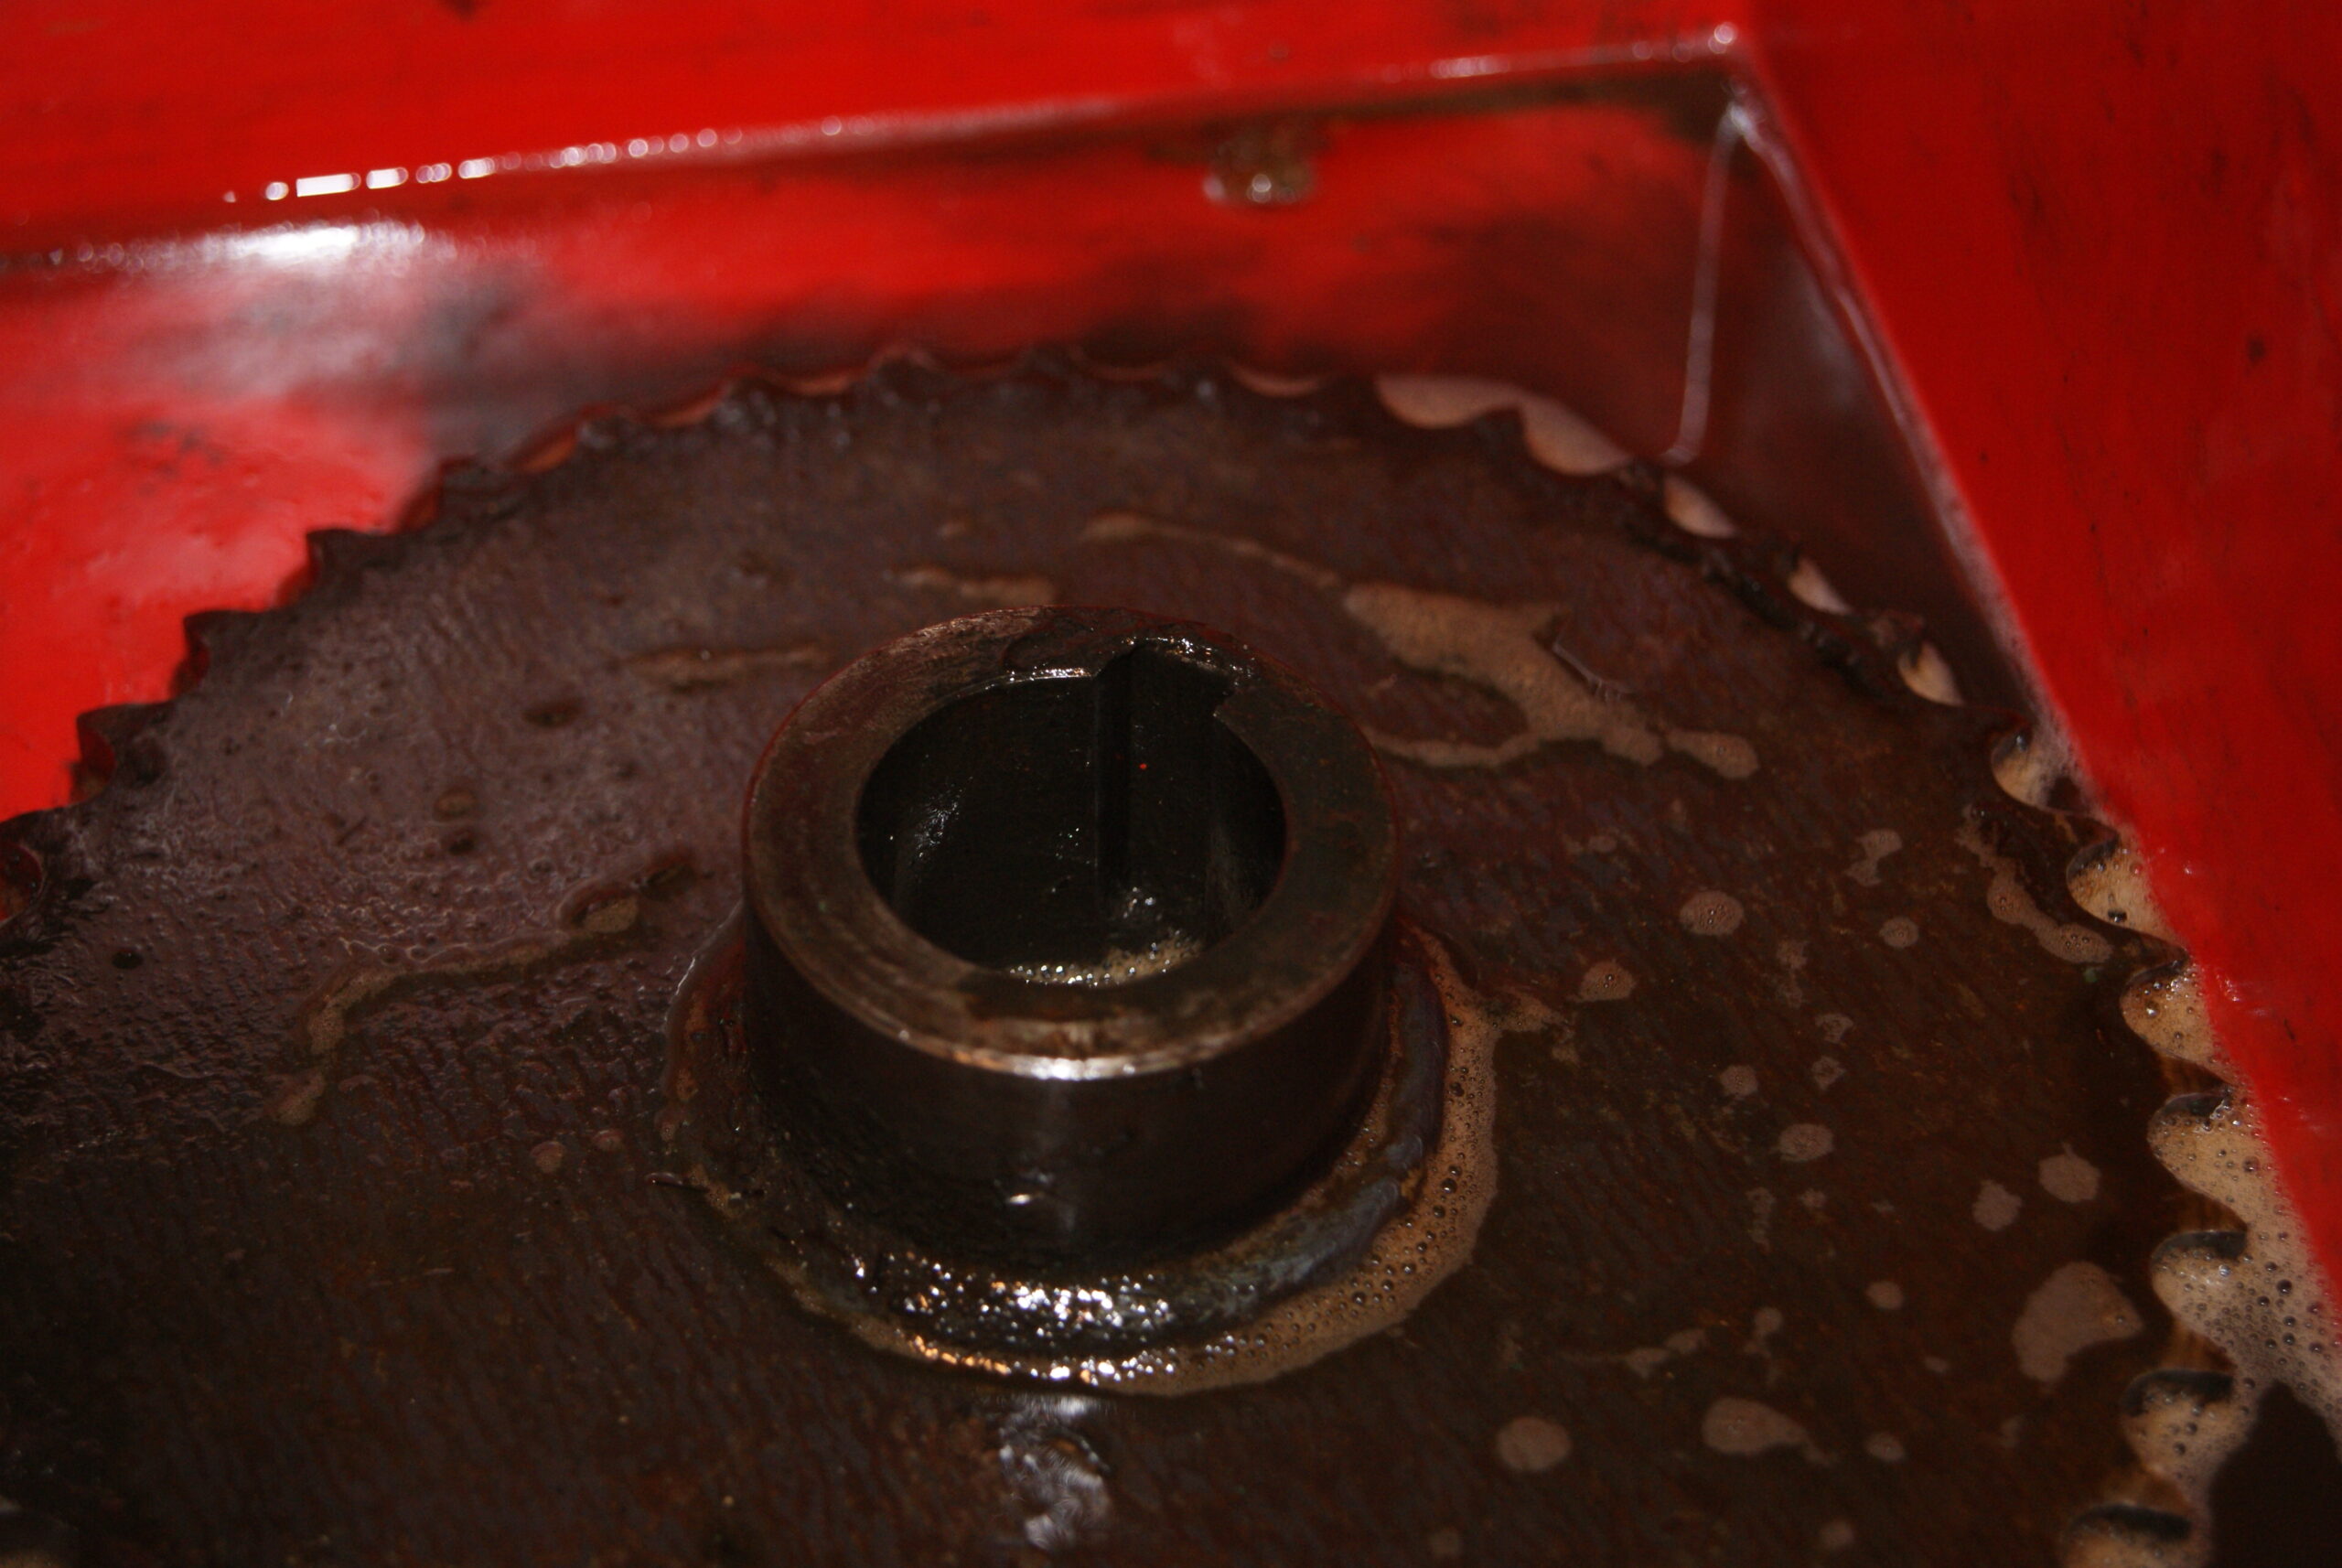
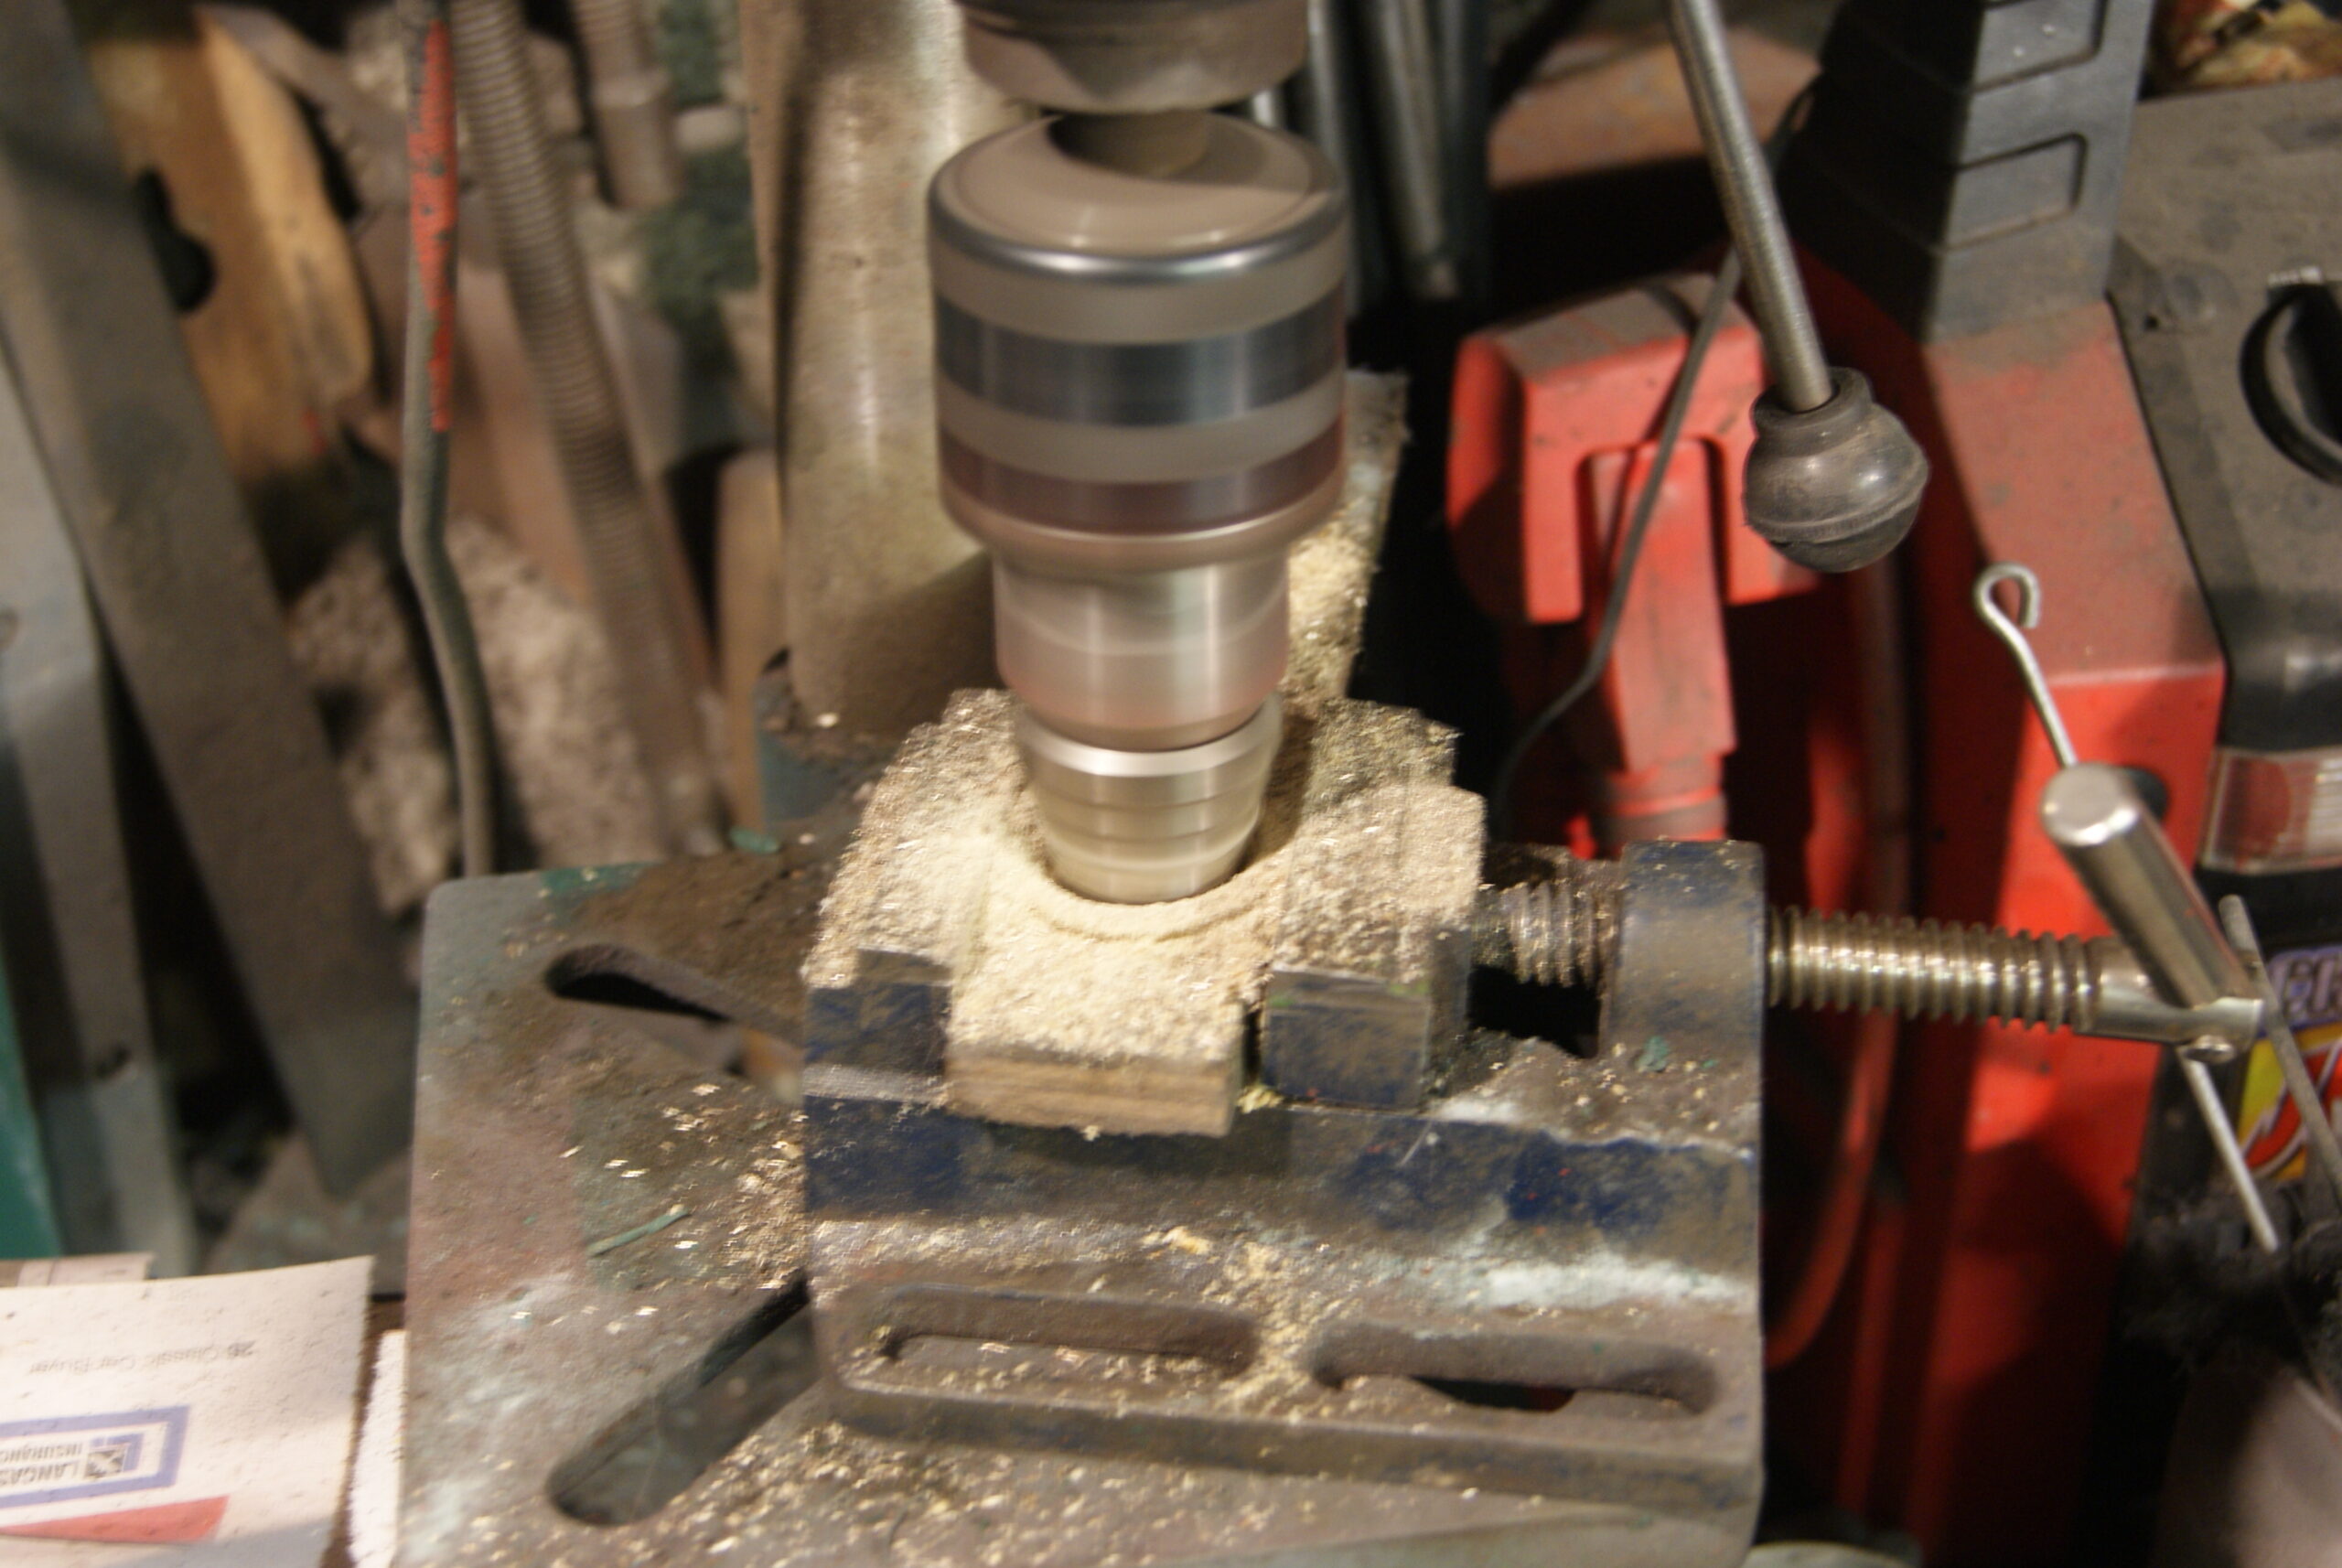
Starting on the cutting cylinder, I thought it would be the work of a couple of minutes to re-attach the drive sprocket. No such luck! I think it must have had some mishap when it was away because the centre bolt just would not enter the thread perpendicularly (a good word, I hope I spelled it right!). Luckily I had the correct taper tap for that thread, so gently and using plenty of patience I managed to restore the thread to how it should be. A good dose of grease and it all went together perfectly.
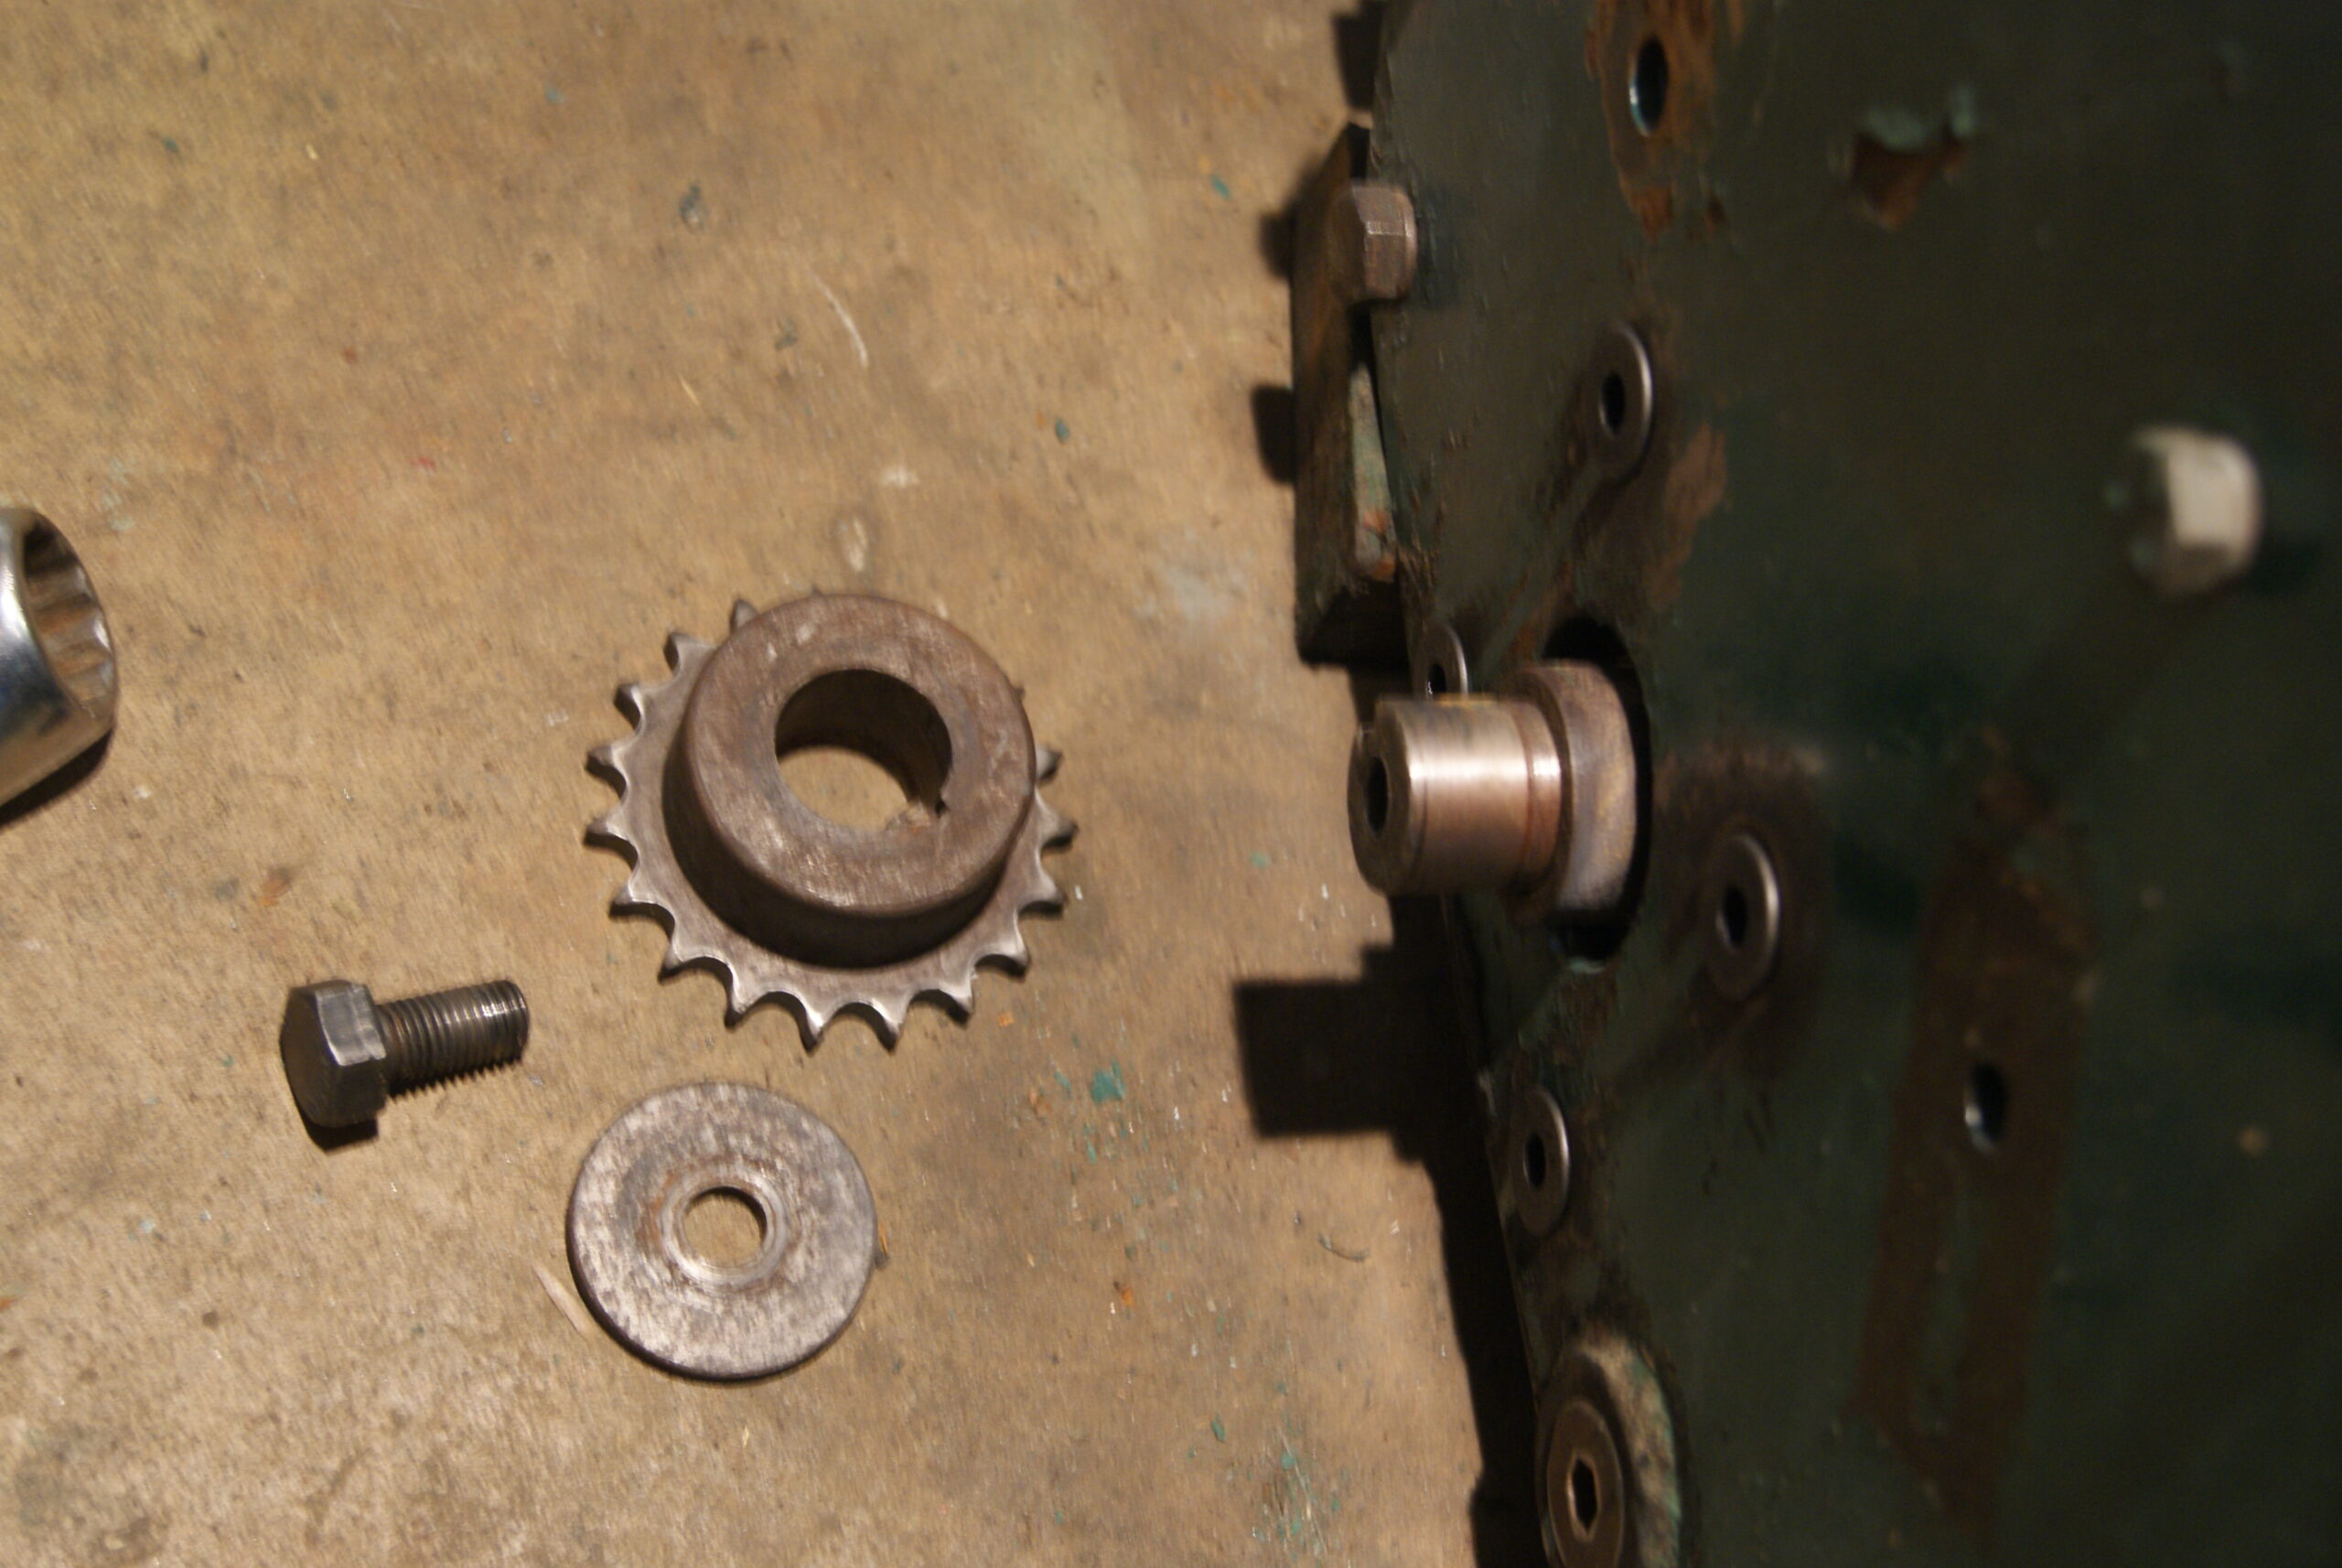
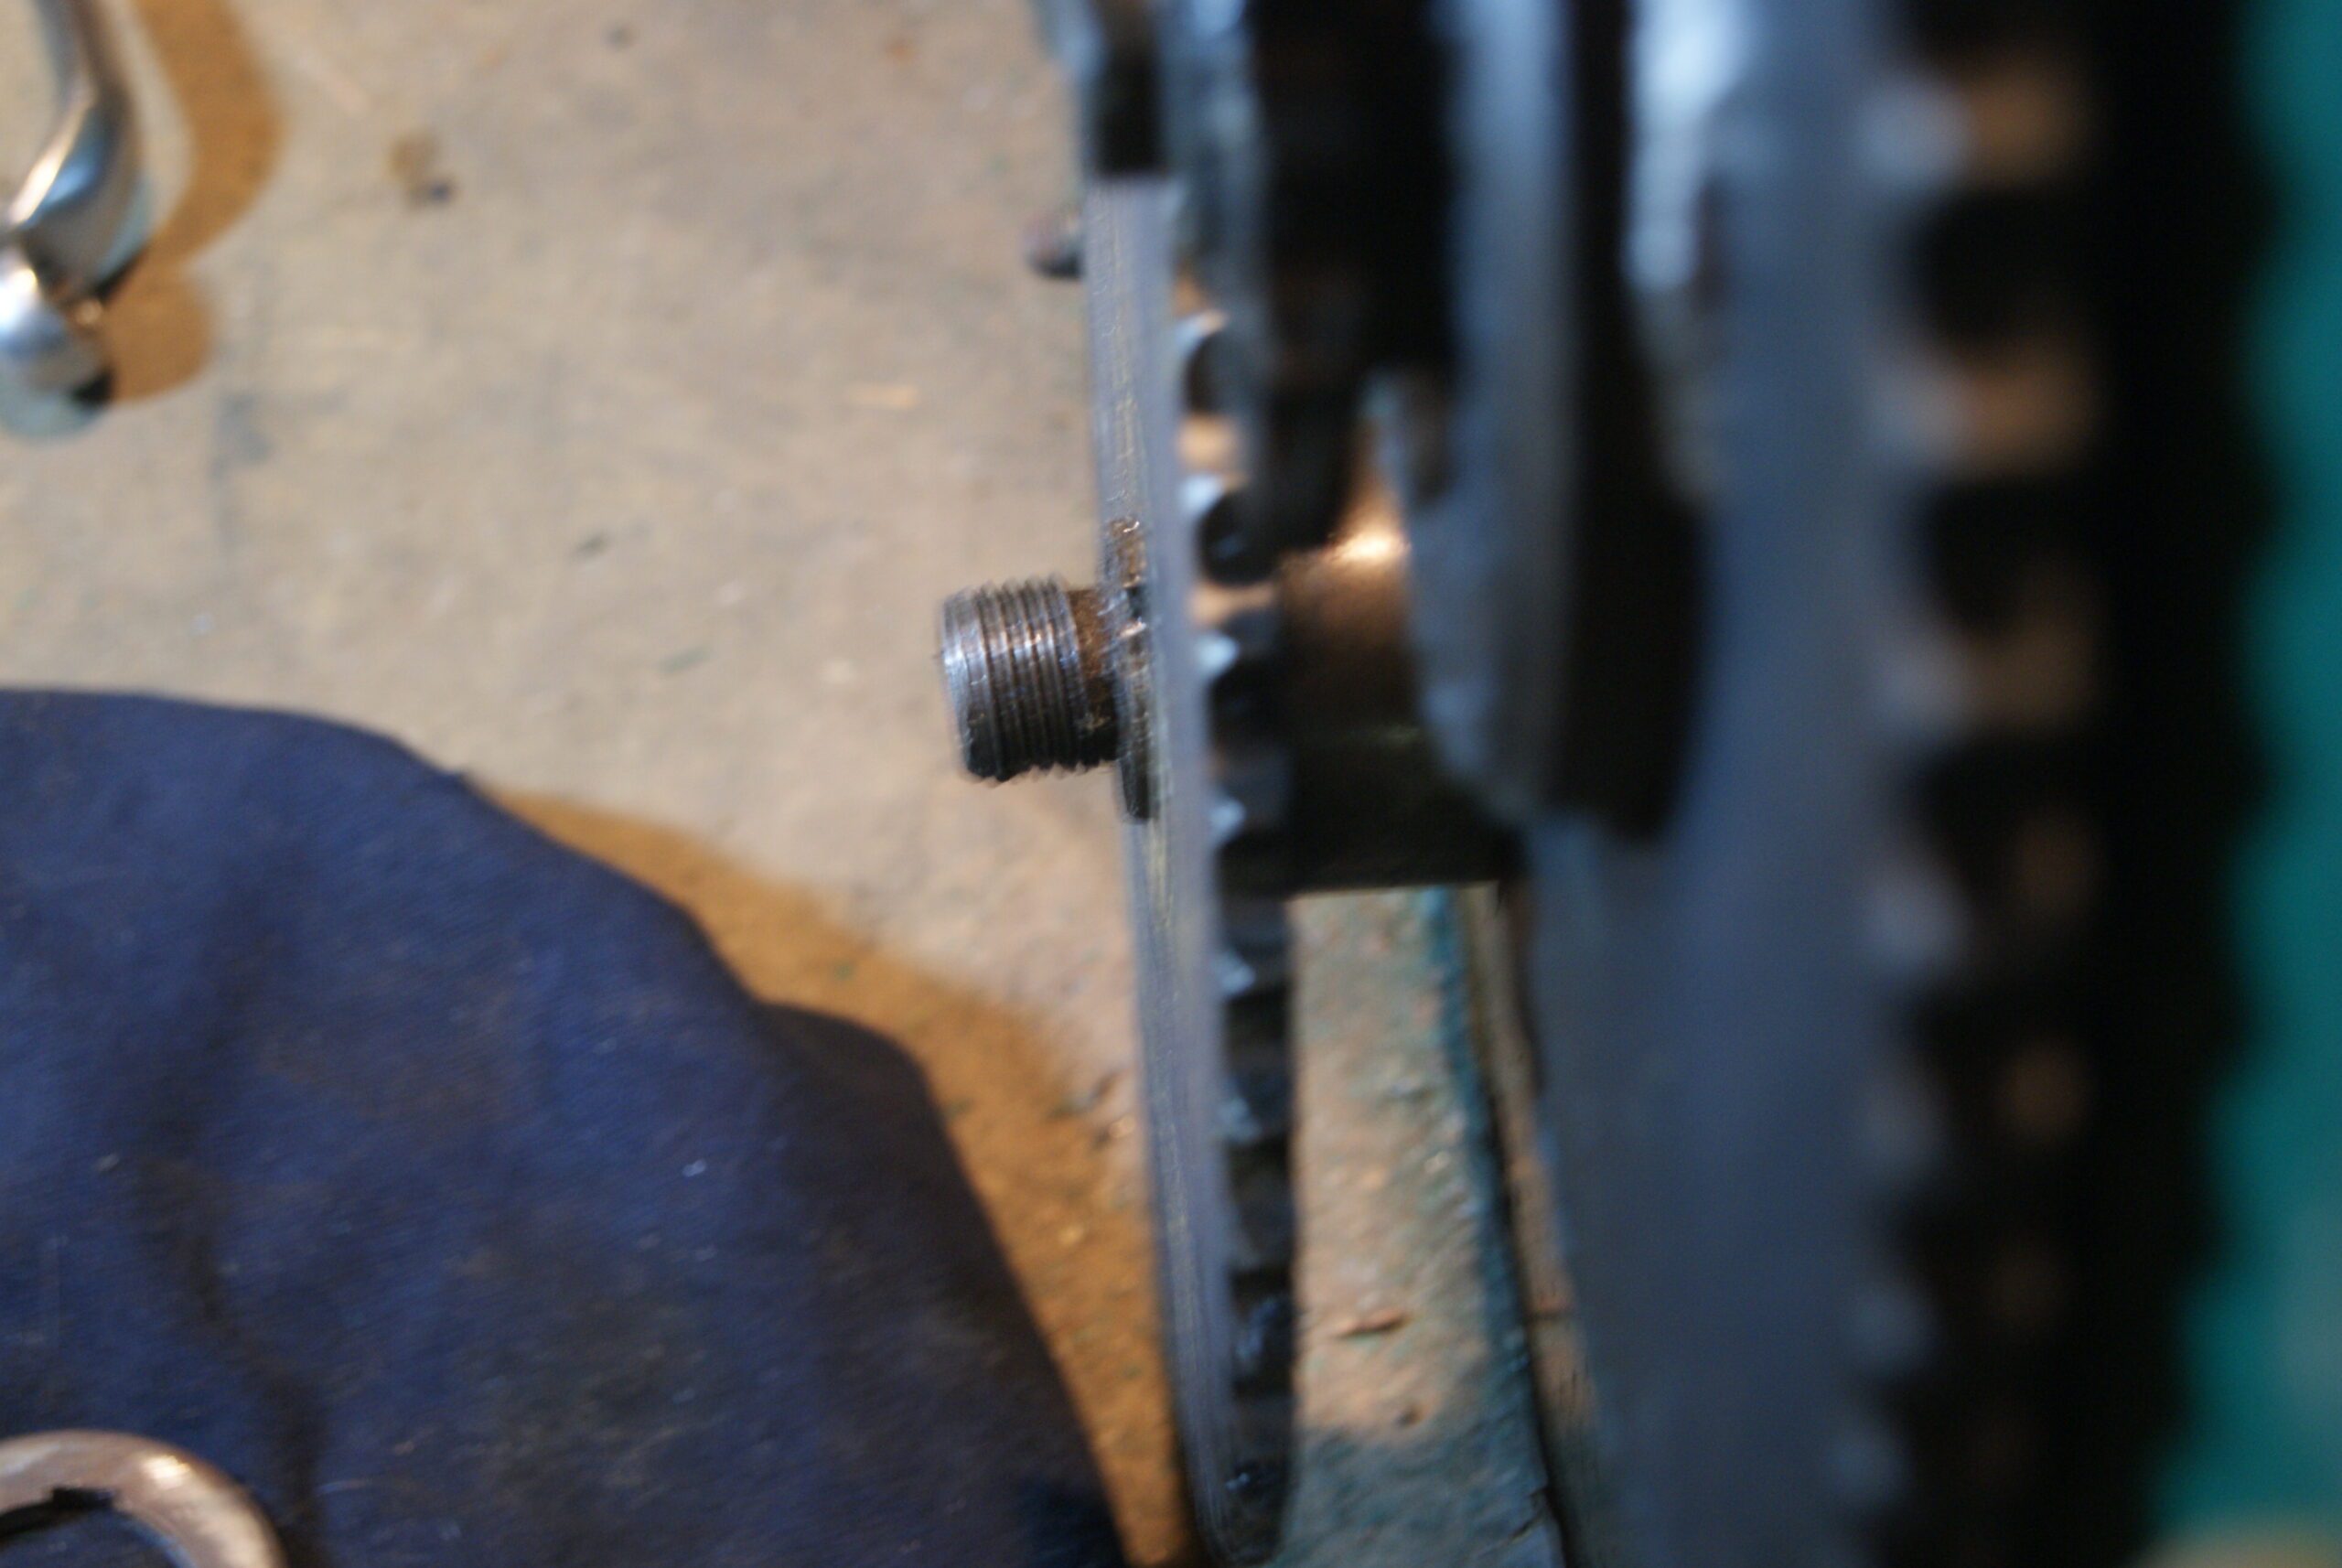
Next came the roller drive sprocket, and I suspect that somebody was in the middle of a repair when it was decided to replace the mower as the sprocket was loose on the shaft and the nut barely threaded on. On closer inspection it appears that somebody has made a new sprocket and made quite a good job of it; the shaft it fits on looks like the Woodruffe key that locates the sprocket has worn and rolled somewhat in it’s groove, then somebody has cut another groove on the opposite side of the shaft. That would have been fine, but the new keyway has been cut too far towards the centre of the mower and cuts into the shoulder that the boss butts up against. To compound the problem even further the external thread for the locating nut has been bent slightly out of true. I’m not going to swear, not yet anyway.
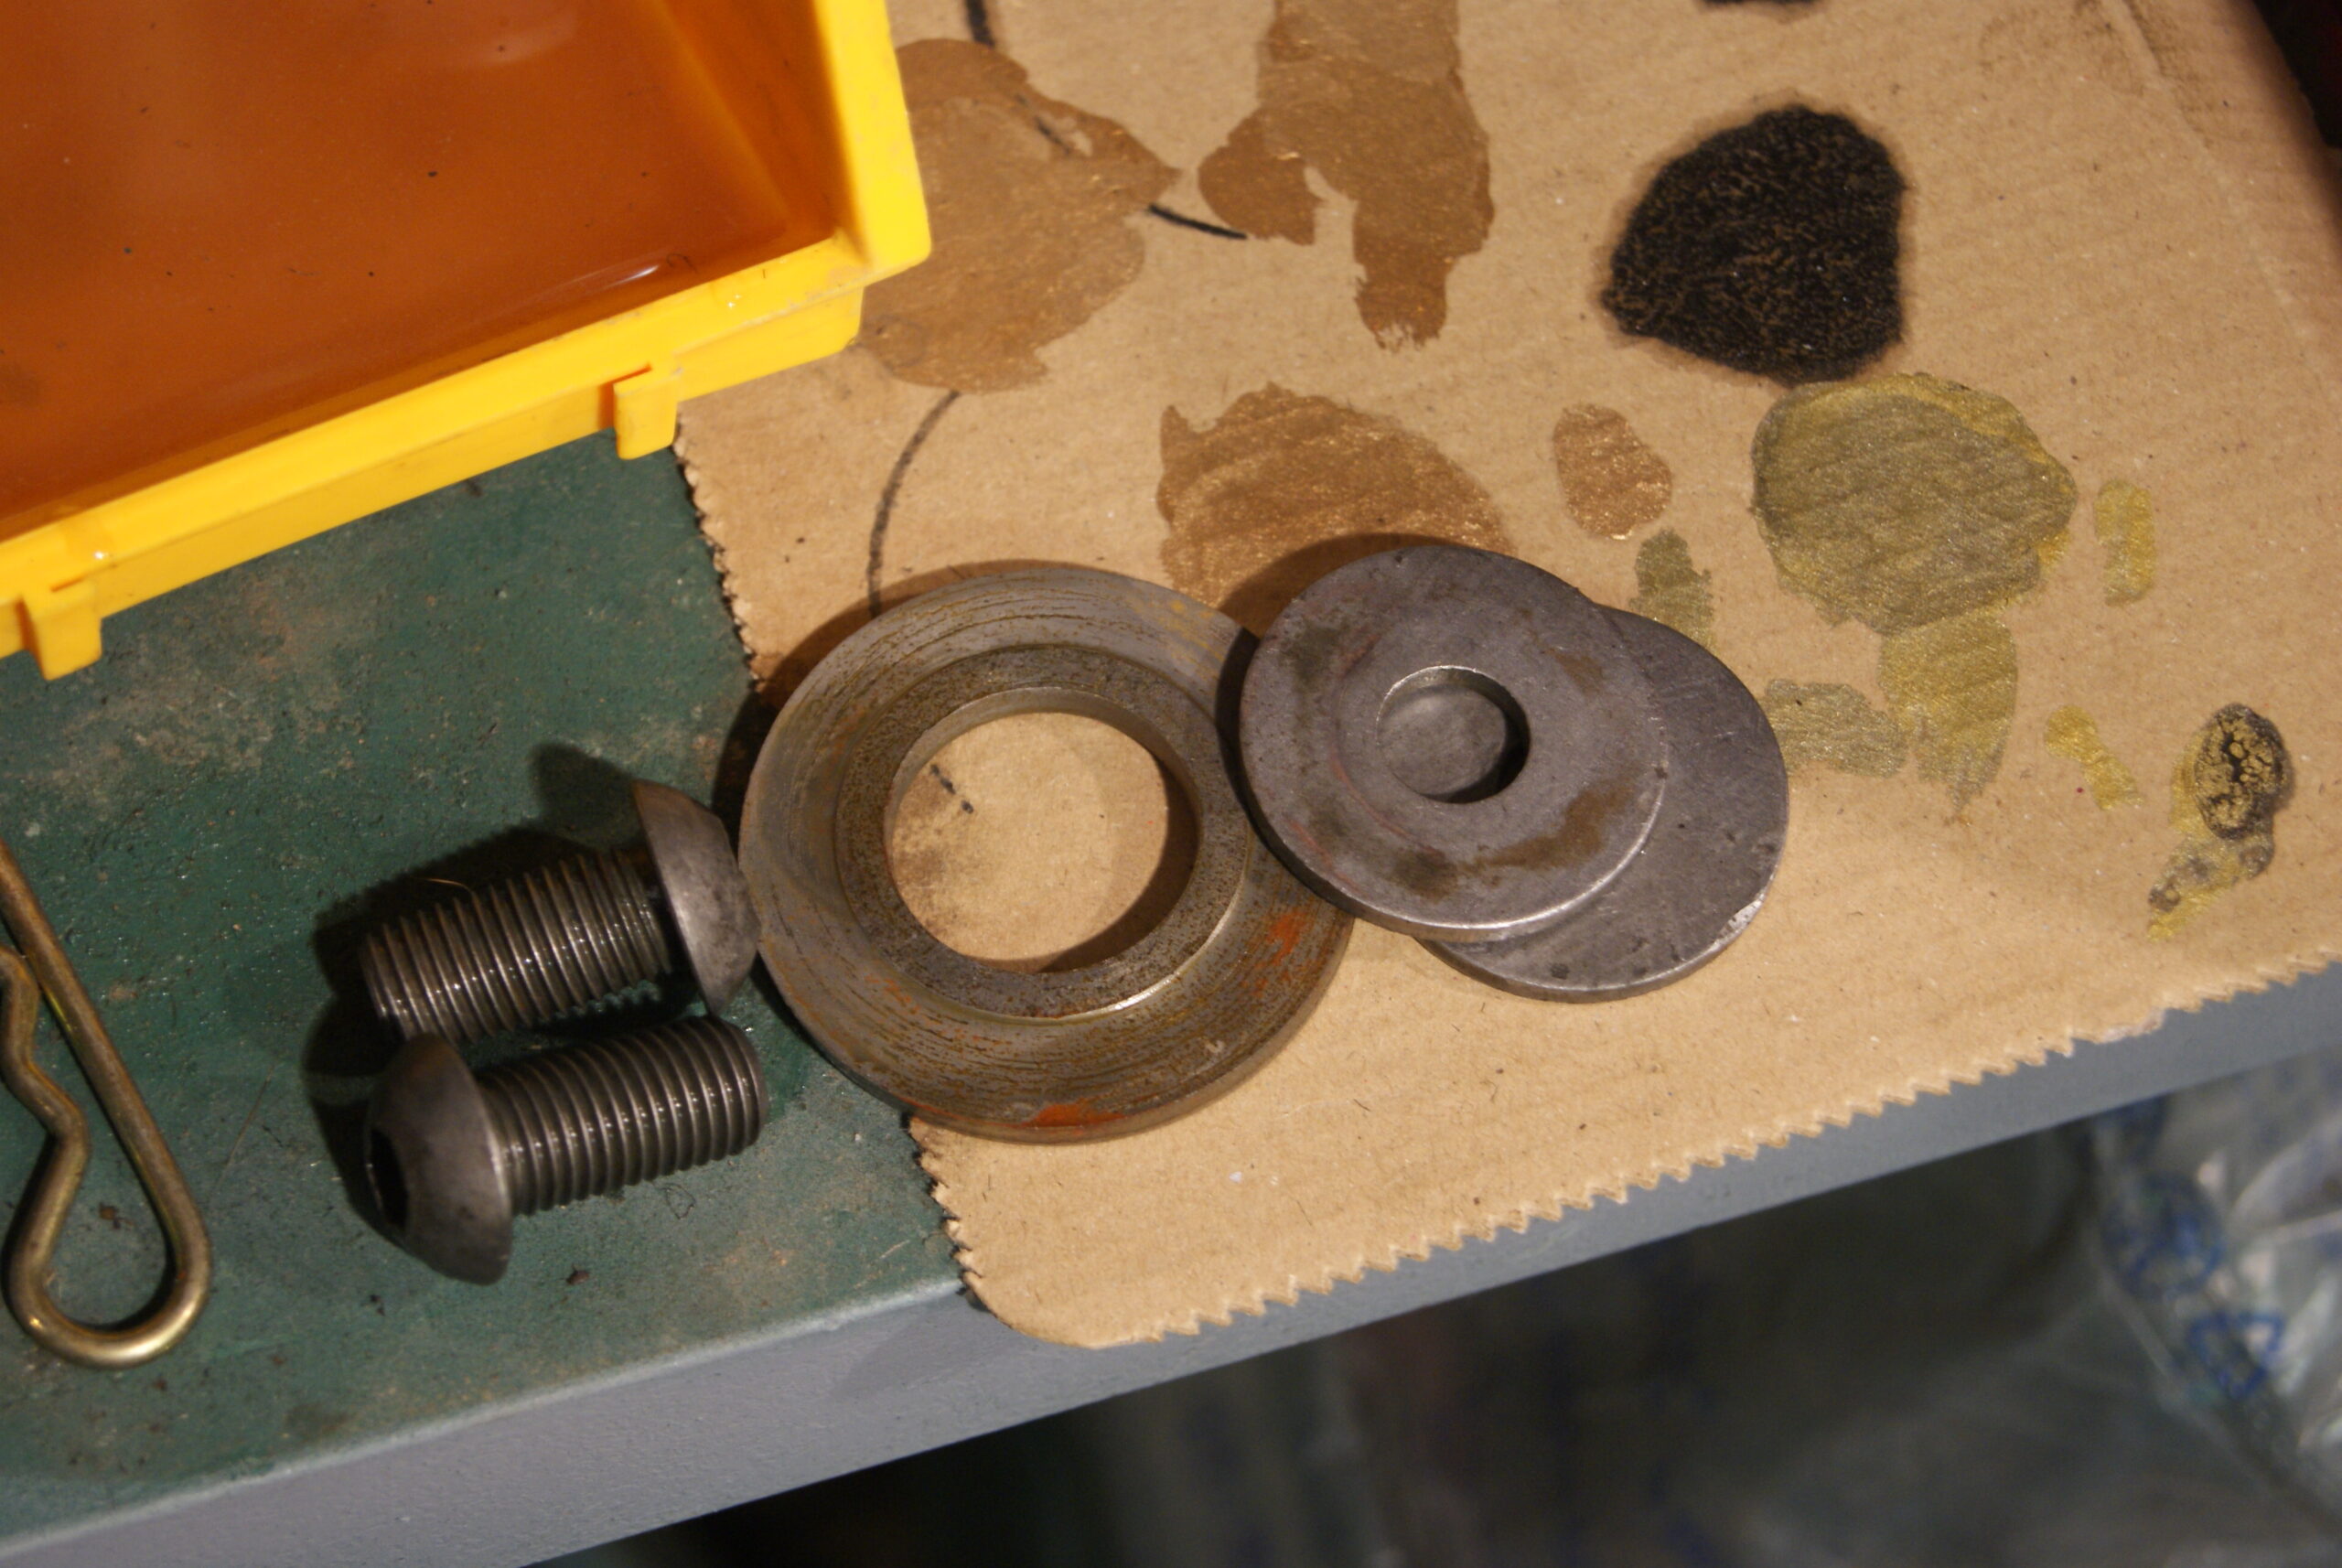
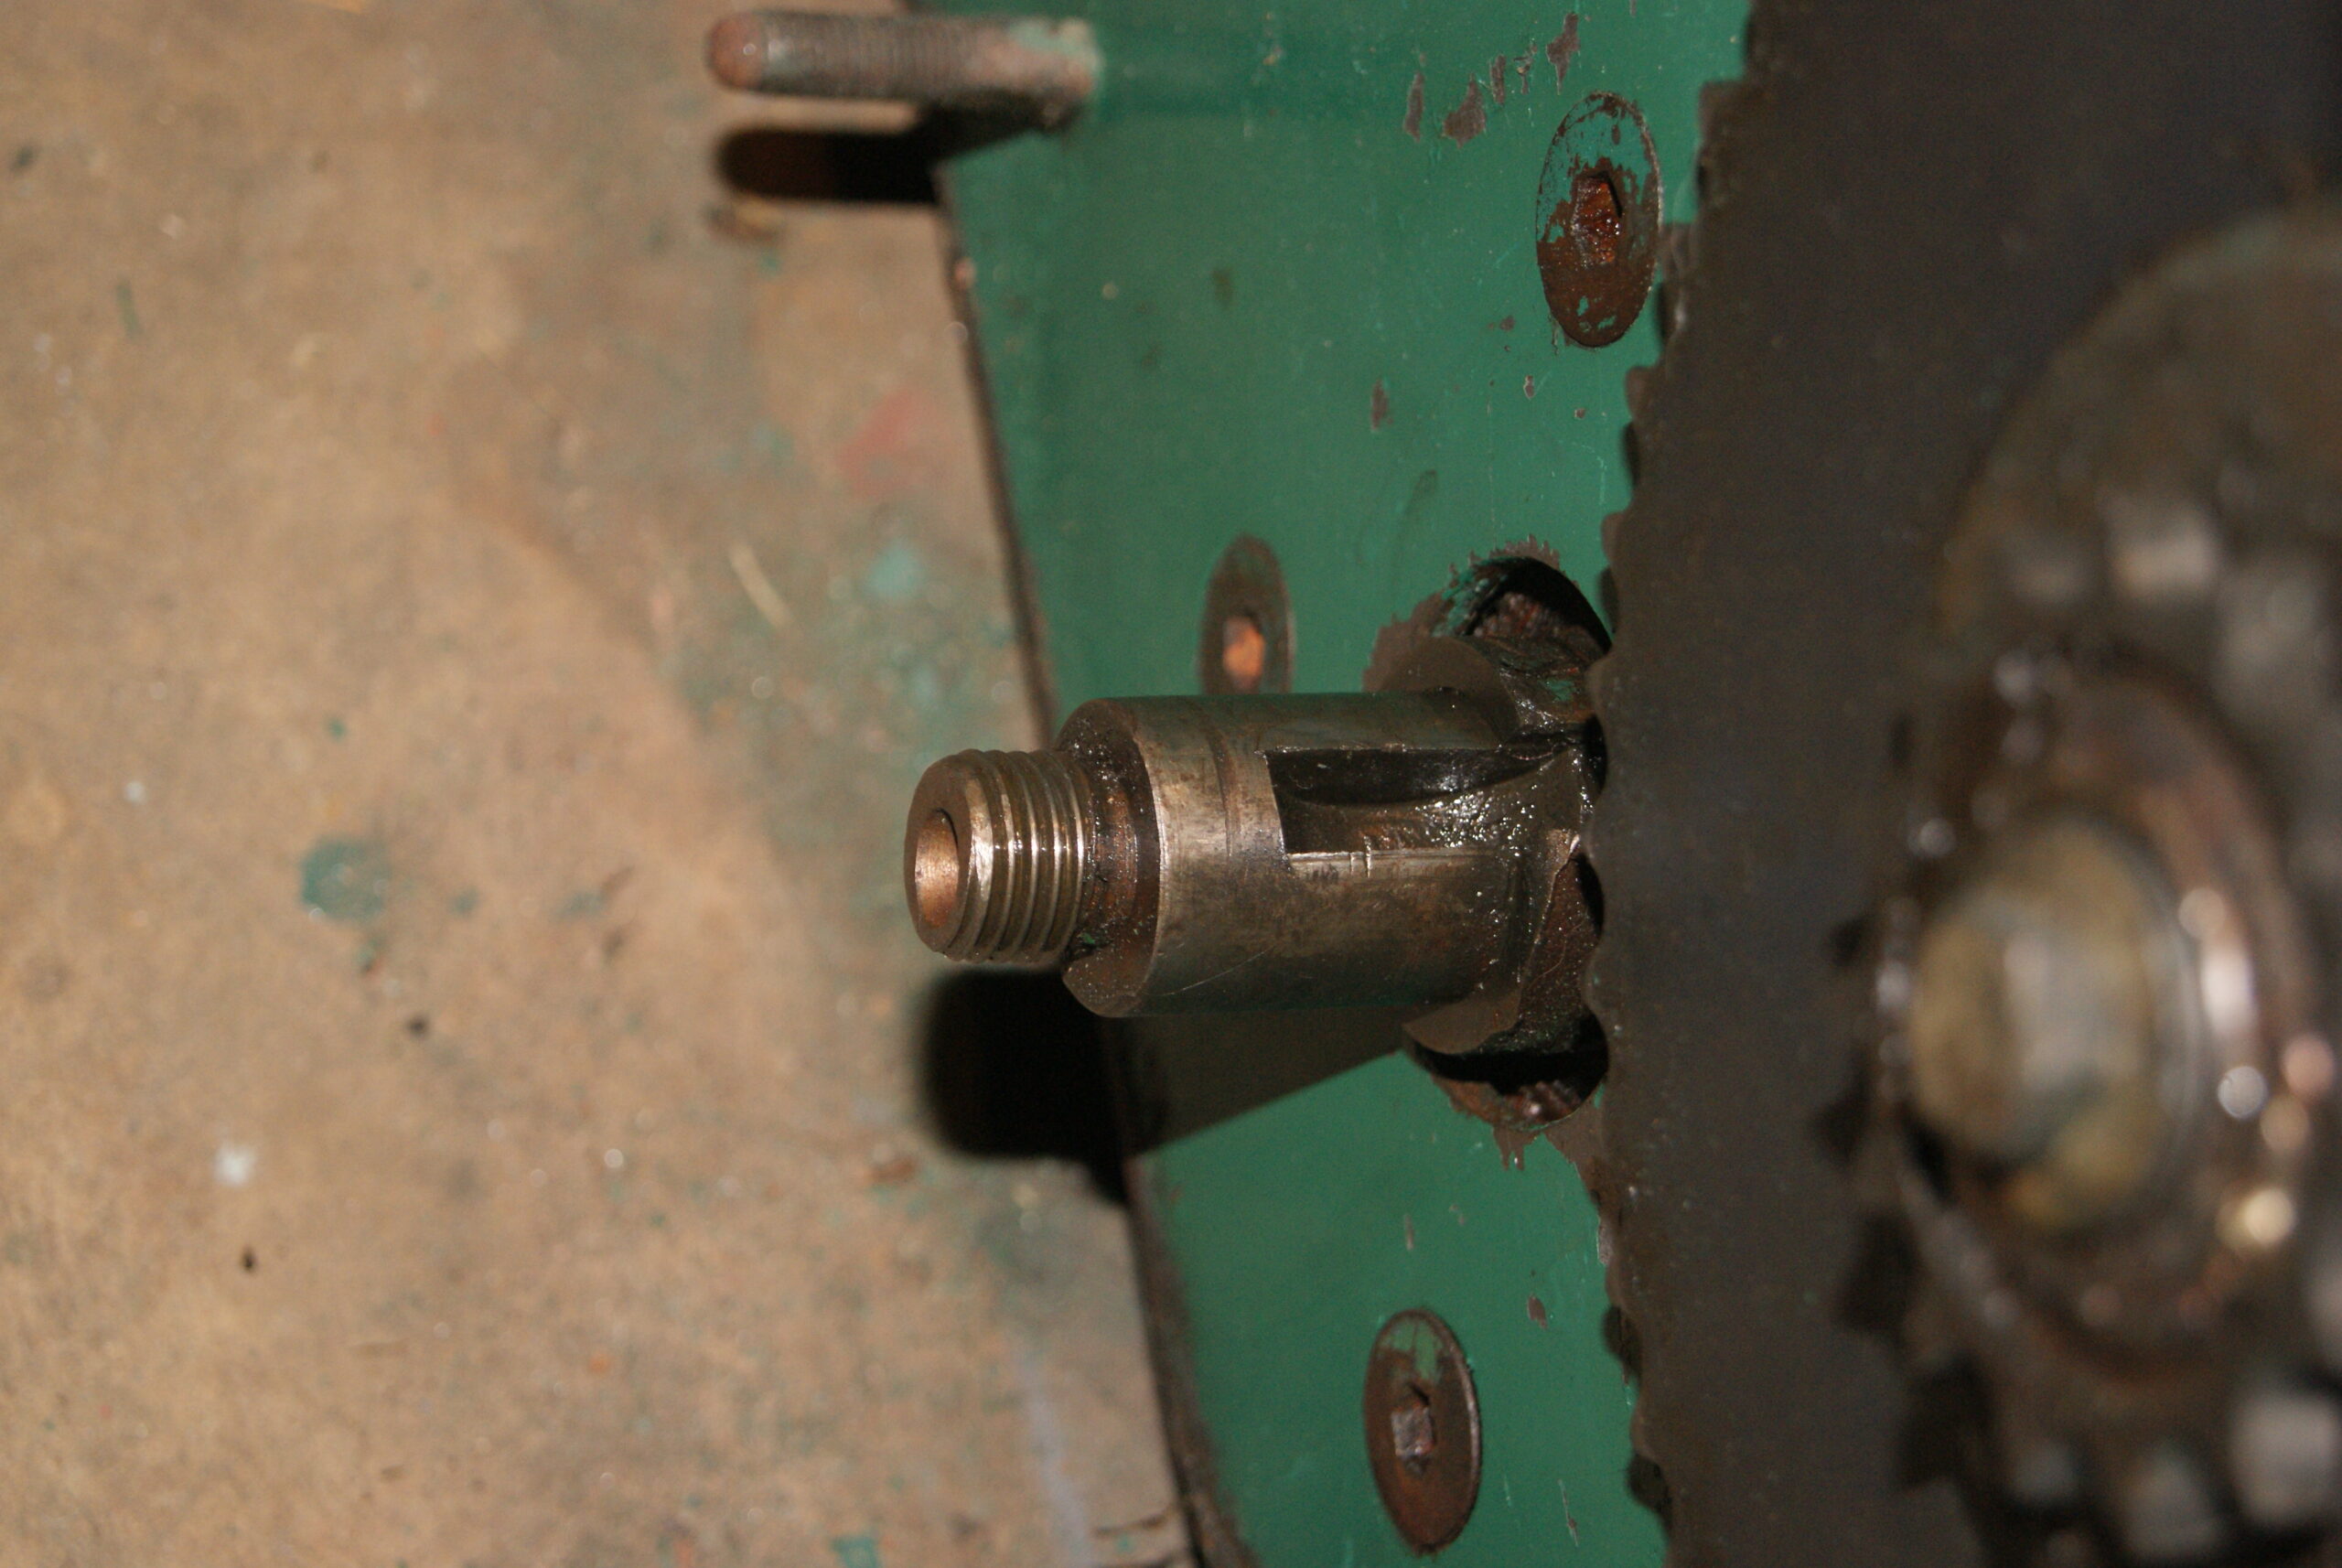
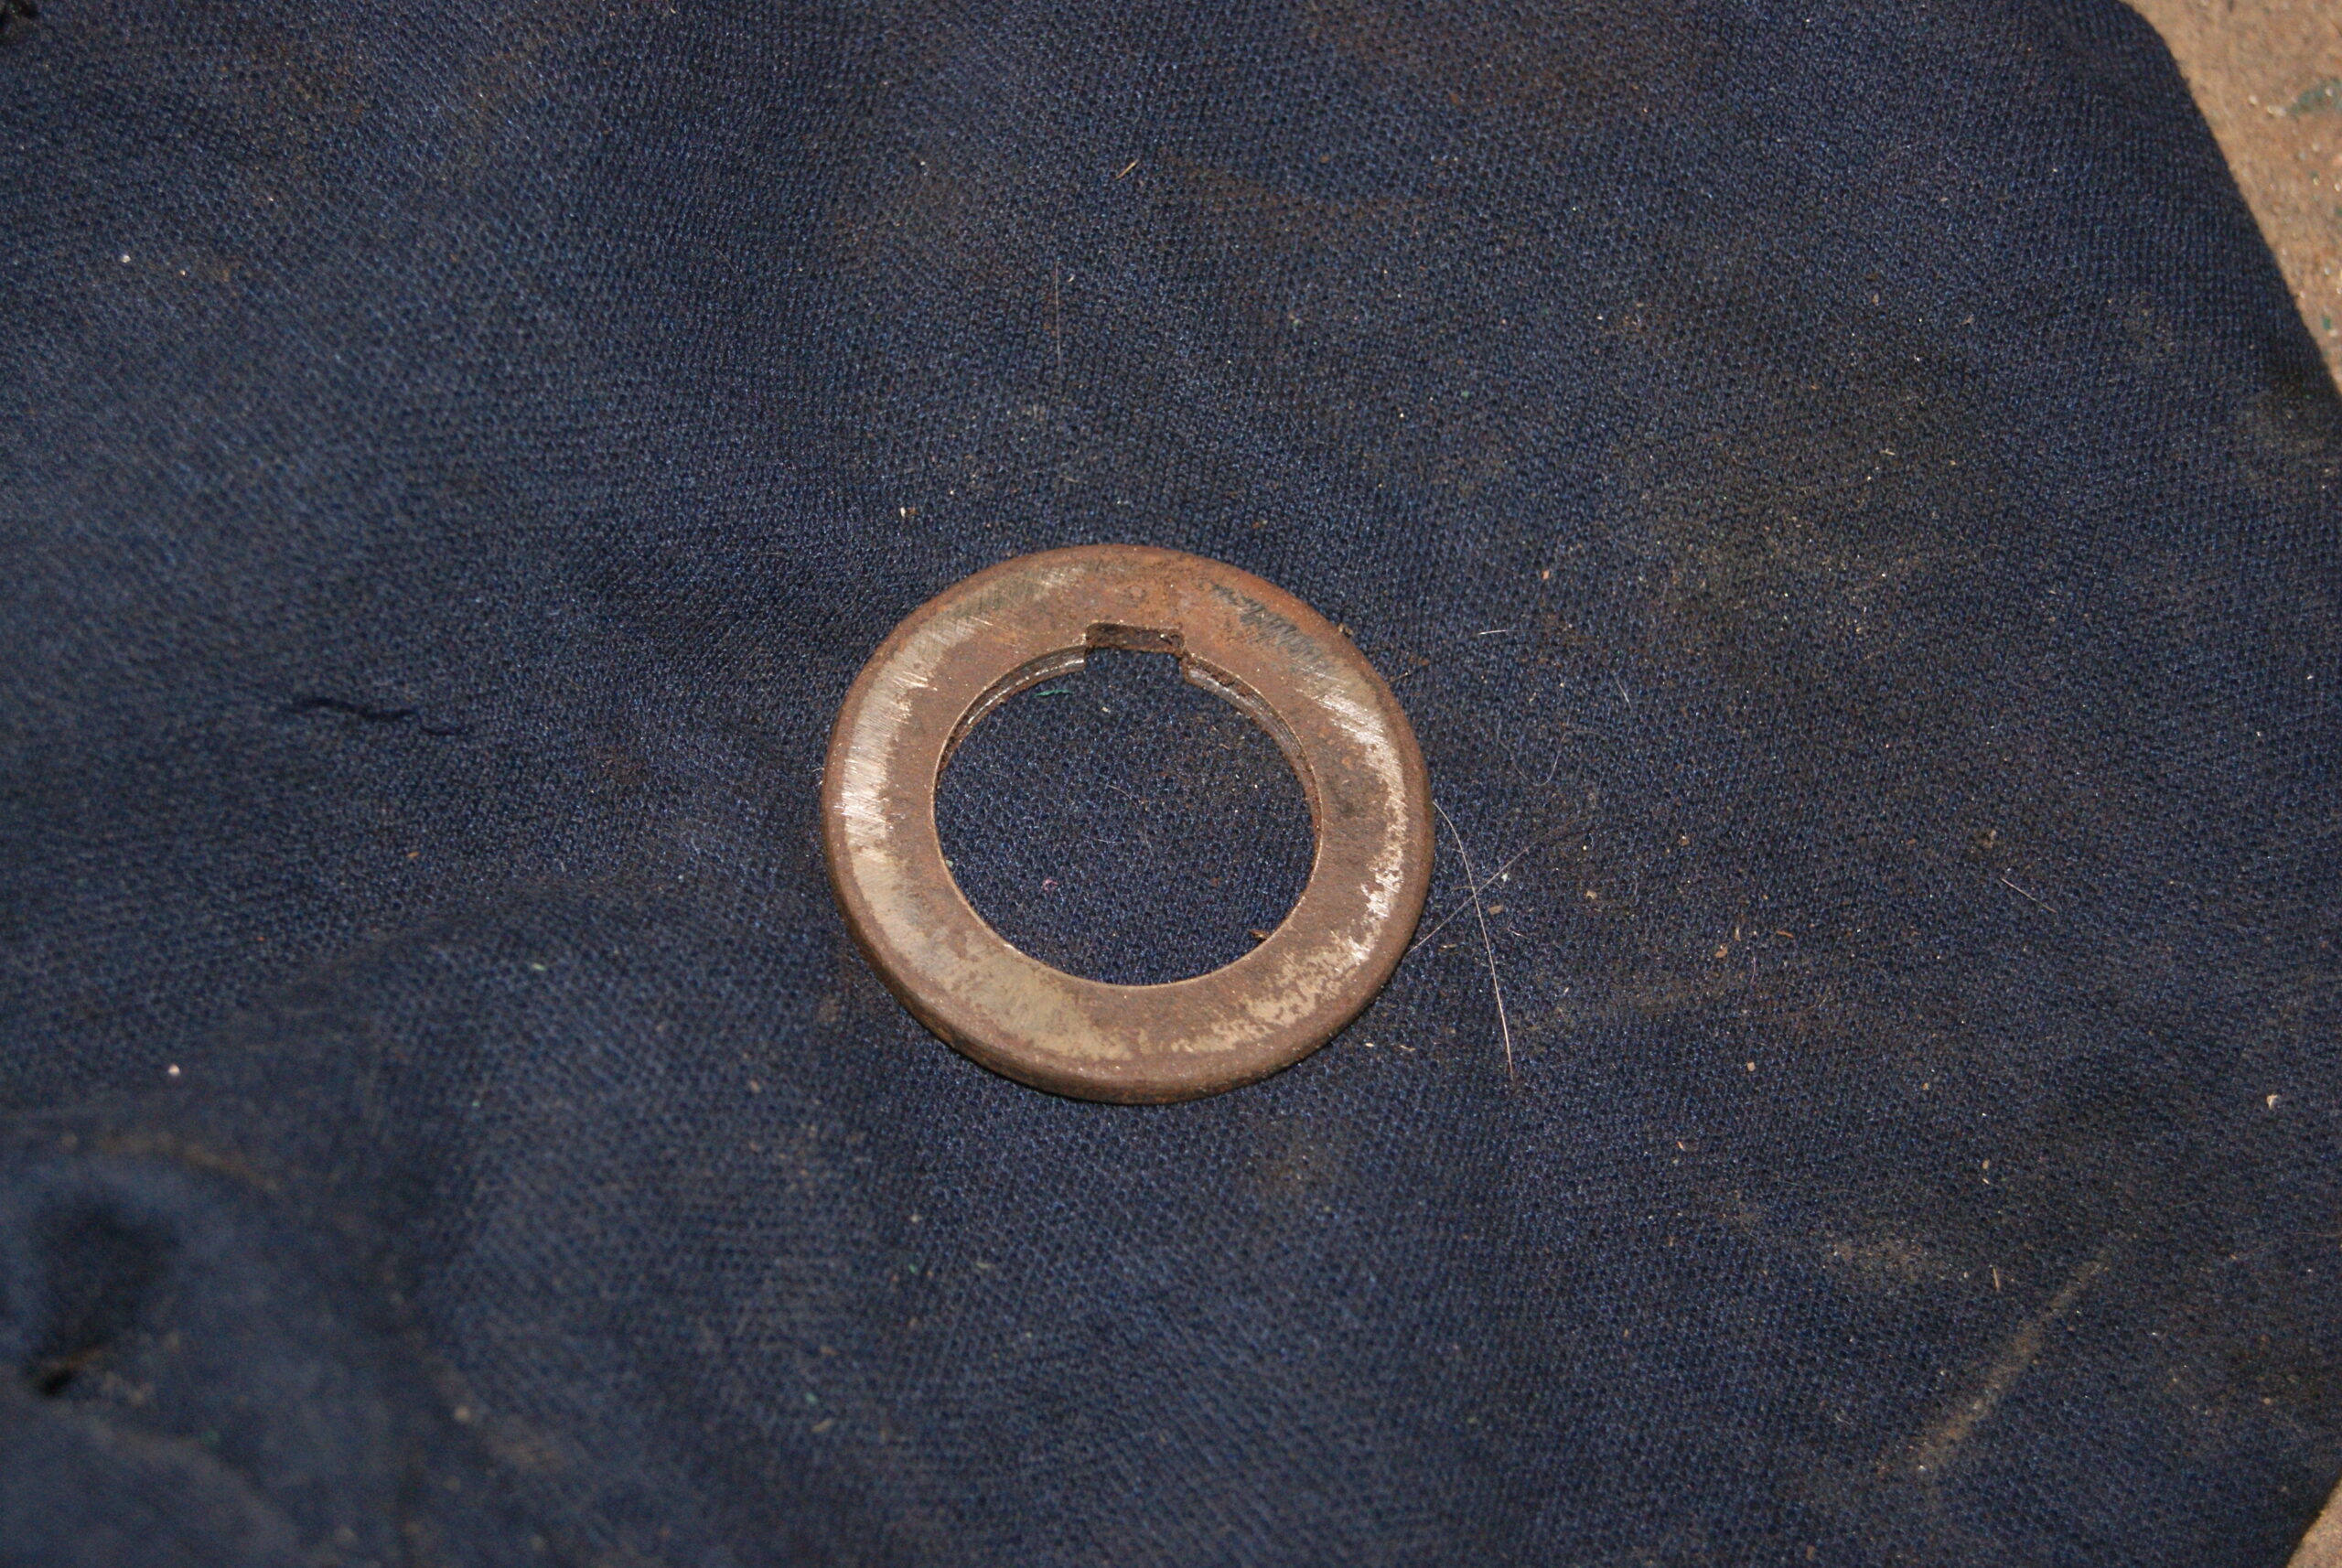
A new key was filed up and the old keyway used to seat it in. The sprocket was then pushed onto the shaft right up to the shoulder- it was then that I discovered that the boss was too short by about 60 thou and the shaft was still sticking out of the end of the sprocket. An appropriate spacer needed to be made, so an old Trusty washer was cleaned up and opened out with a step drill then a slot filed in it to clear the key which was also making a short appearance. Once that was on, a plain washer and the nut were then wound down and a finish tighten applied. It all looks tight and business-like so I think I’ll breathe a sigh of relief at that stage.
Chains next….
Attachments:
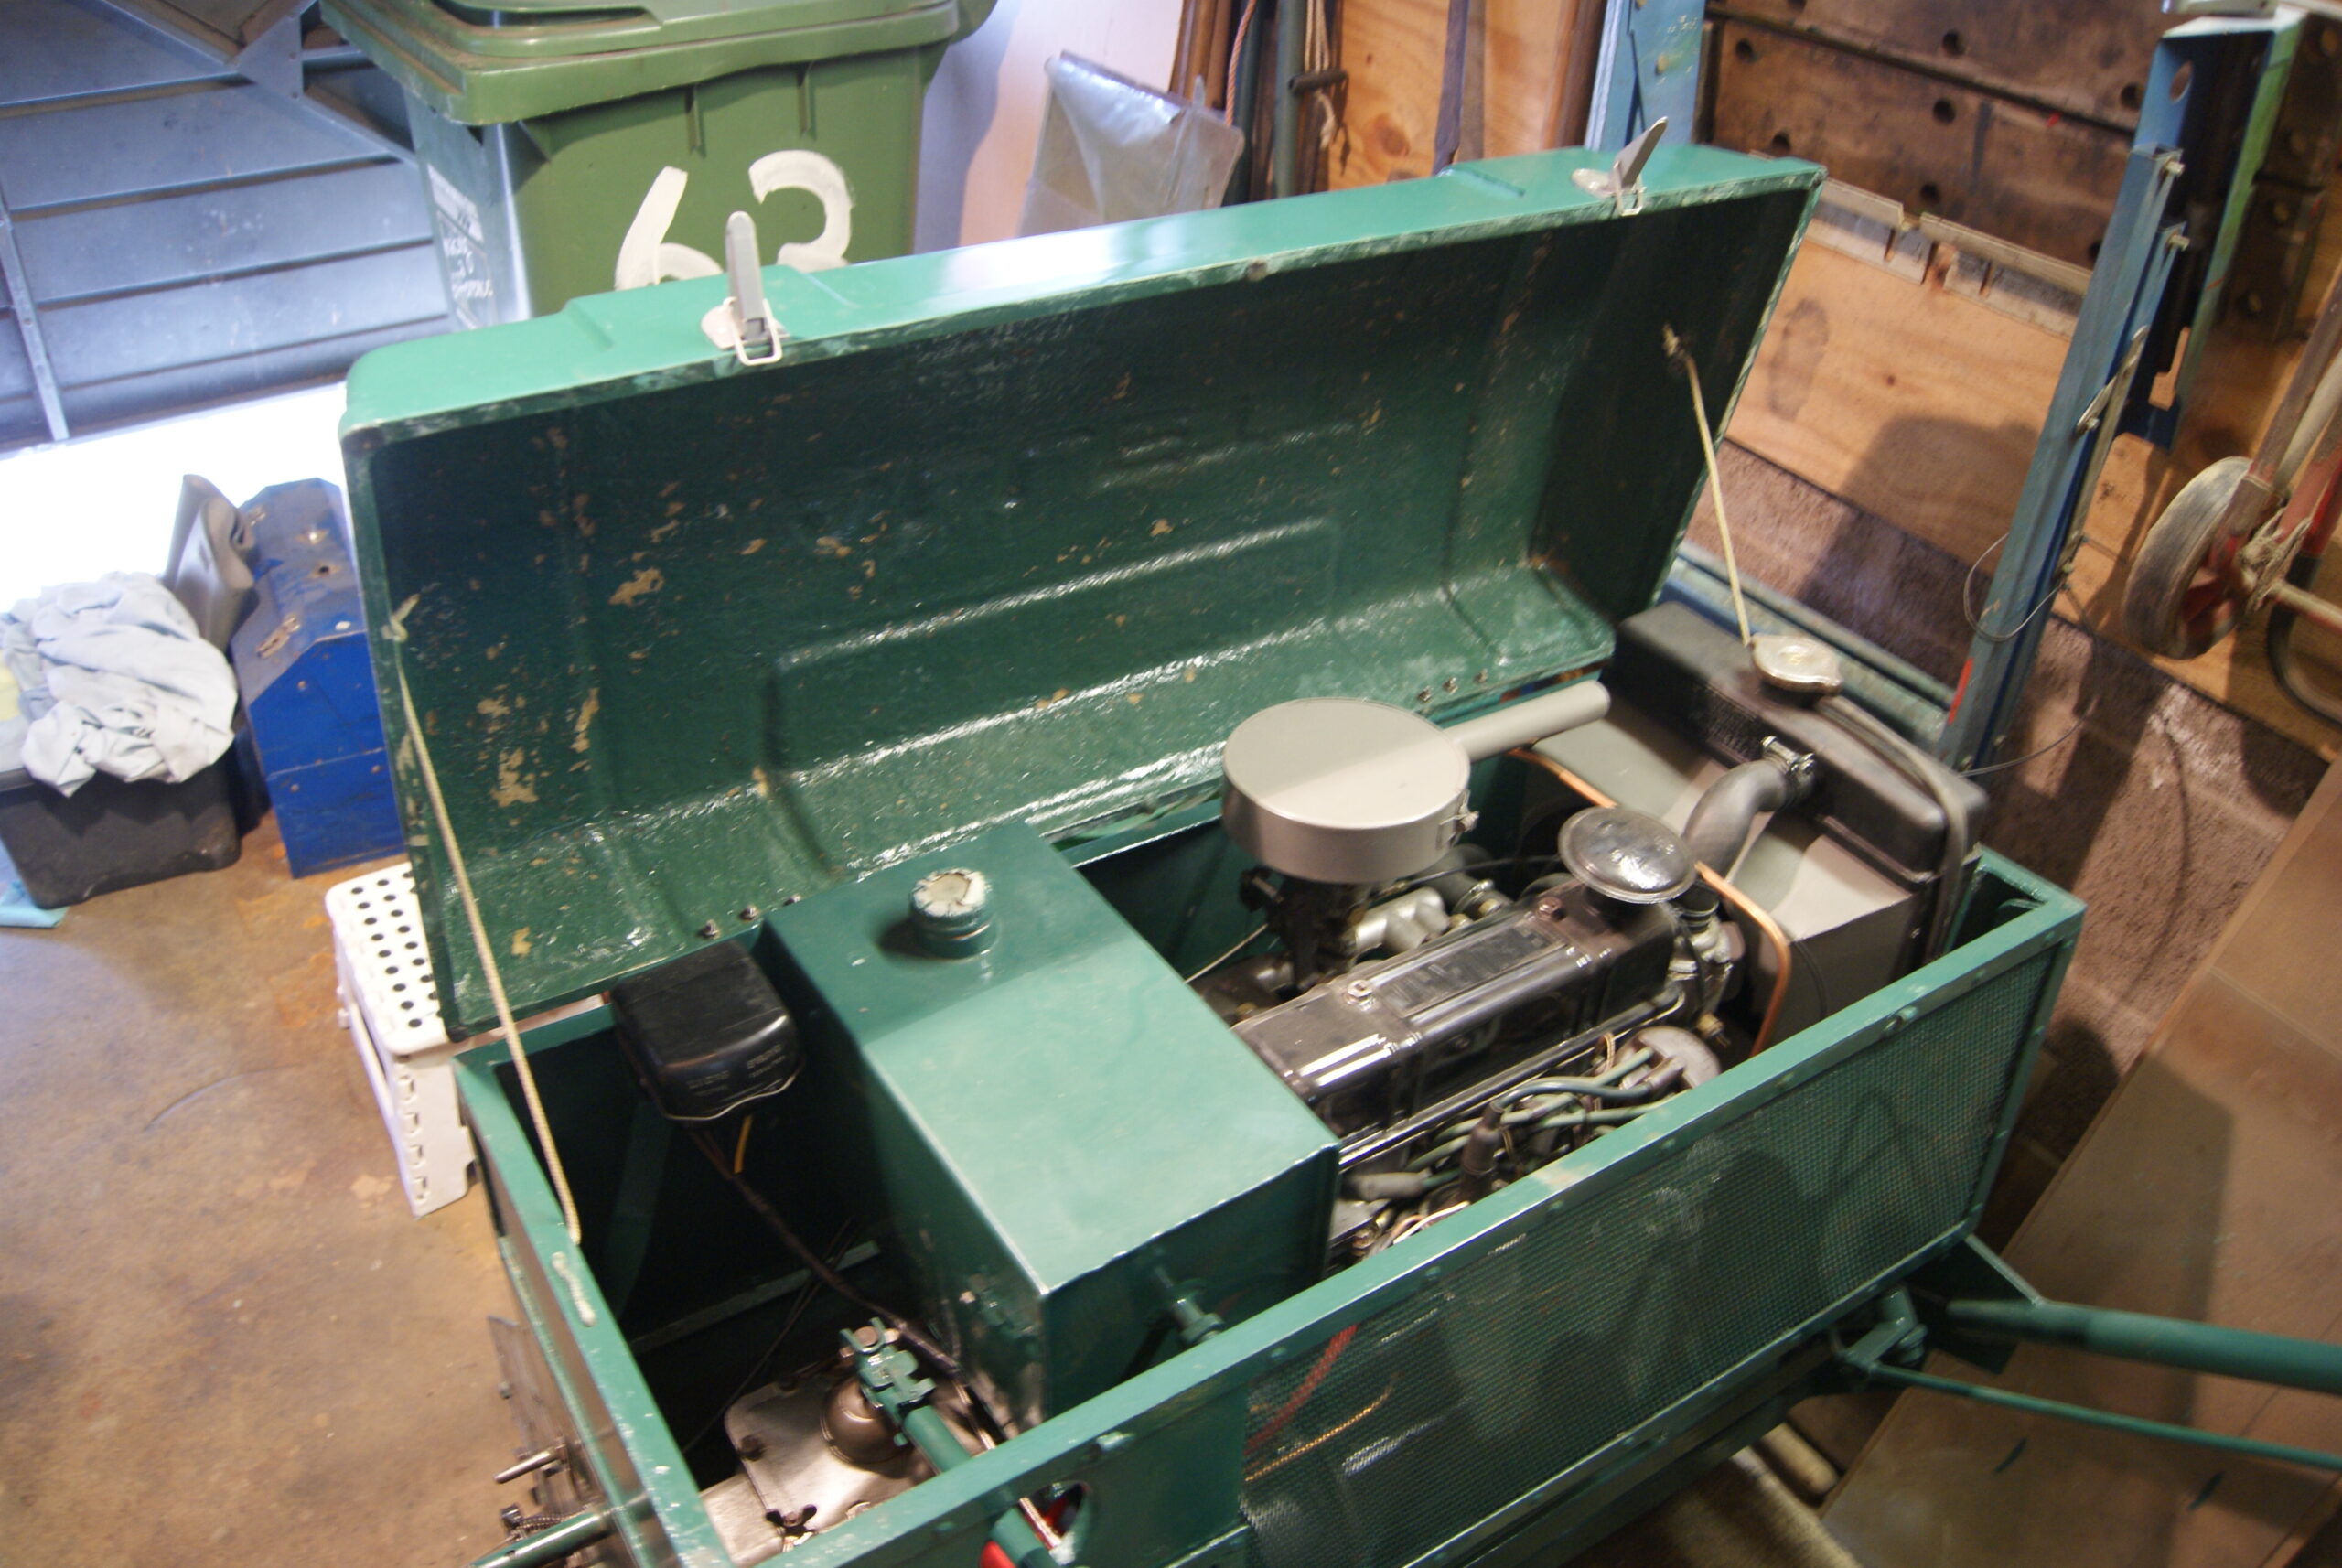
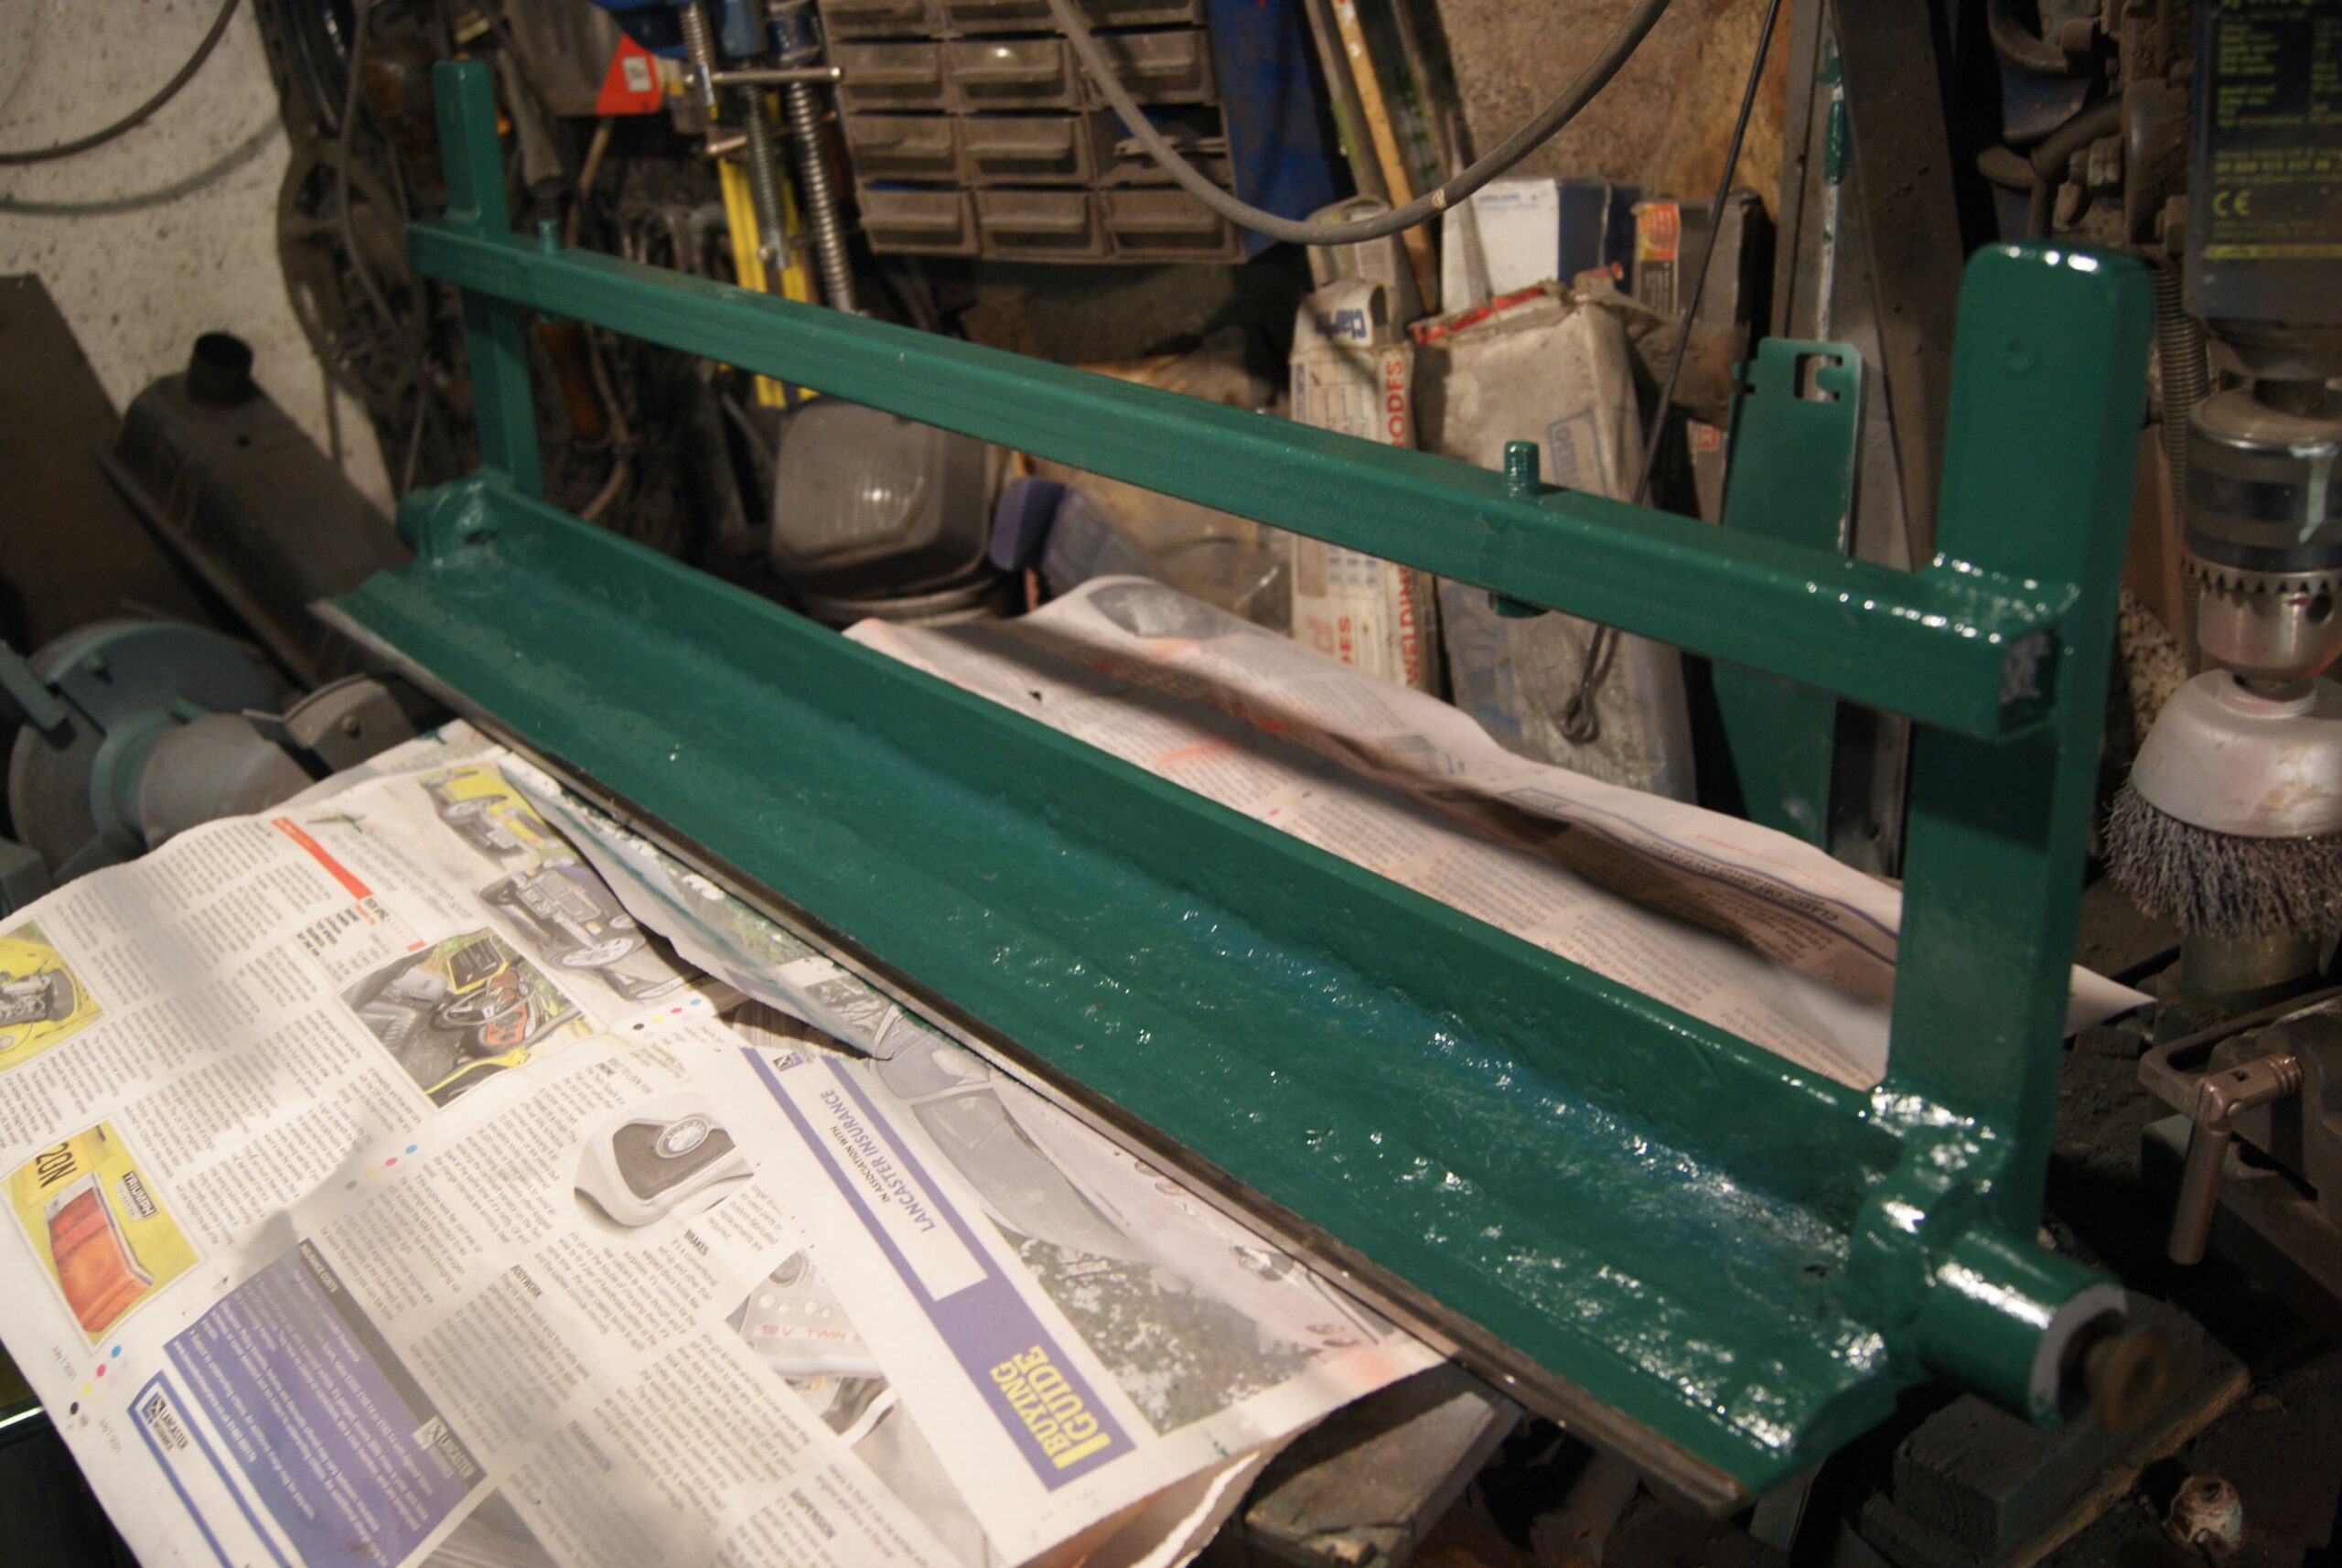
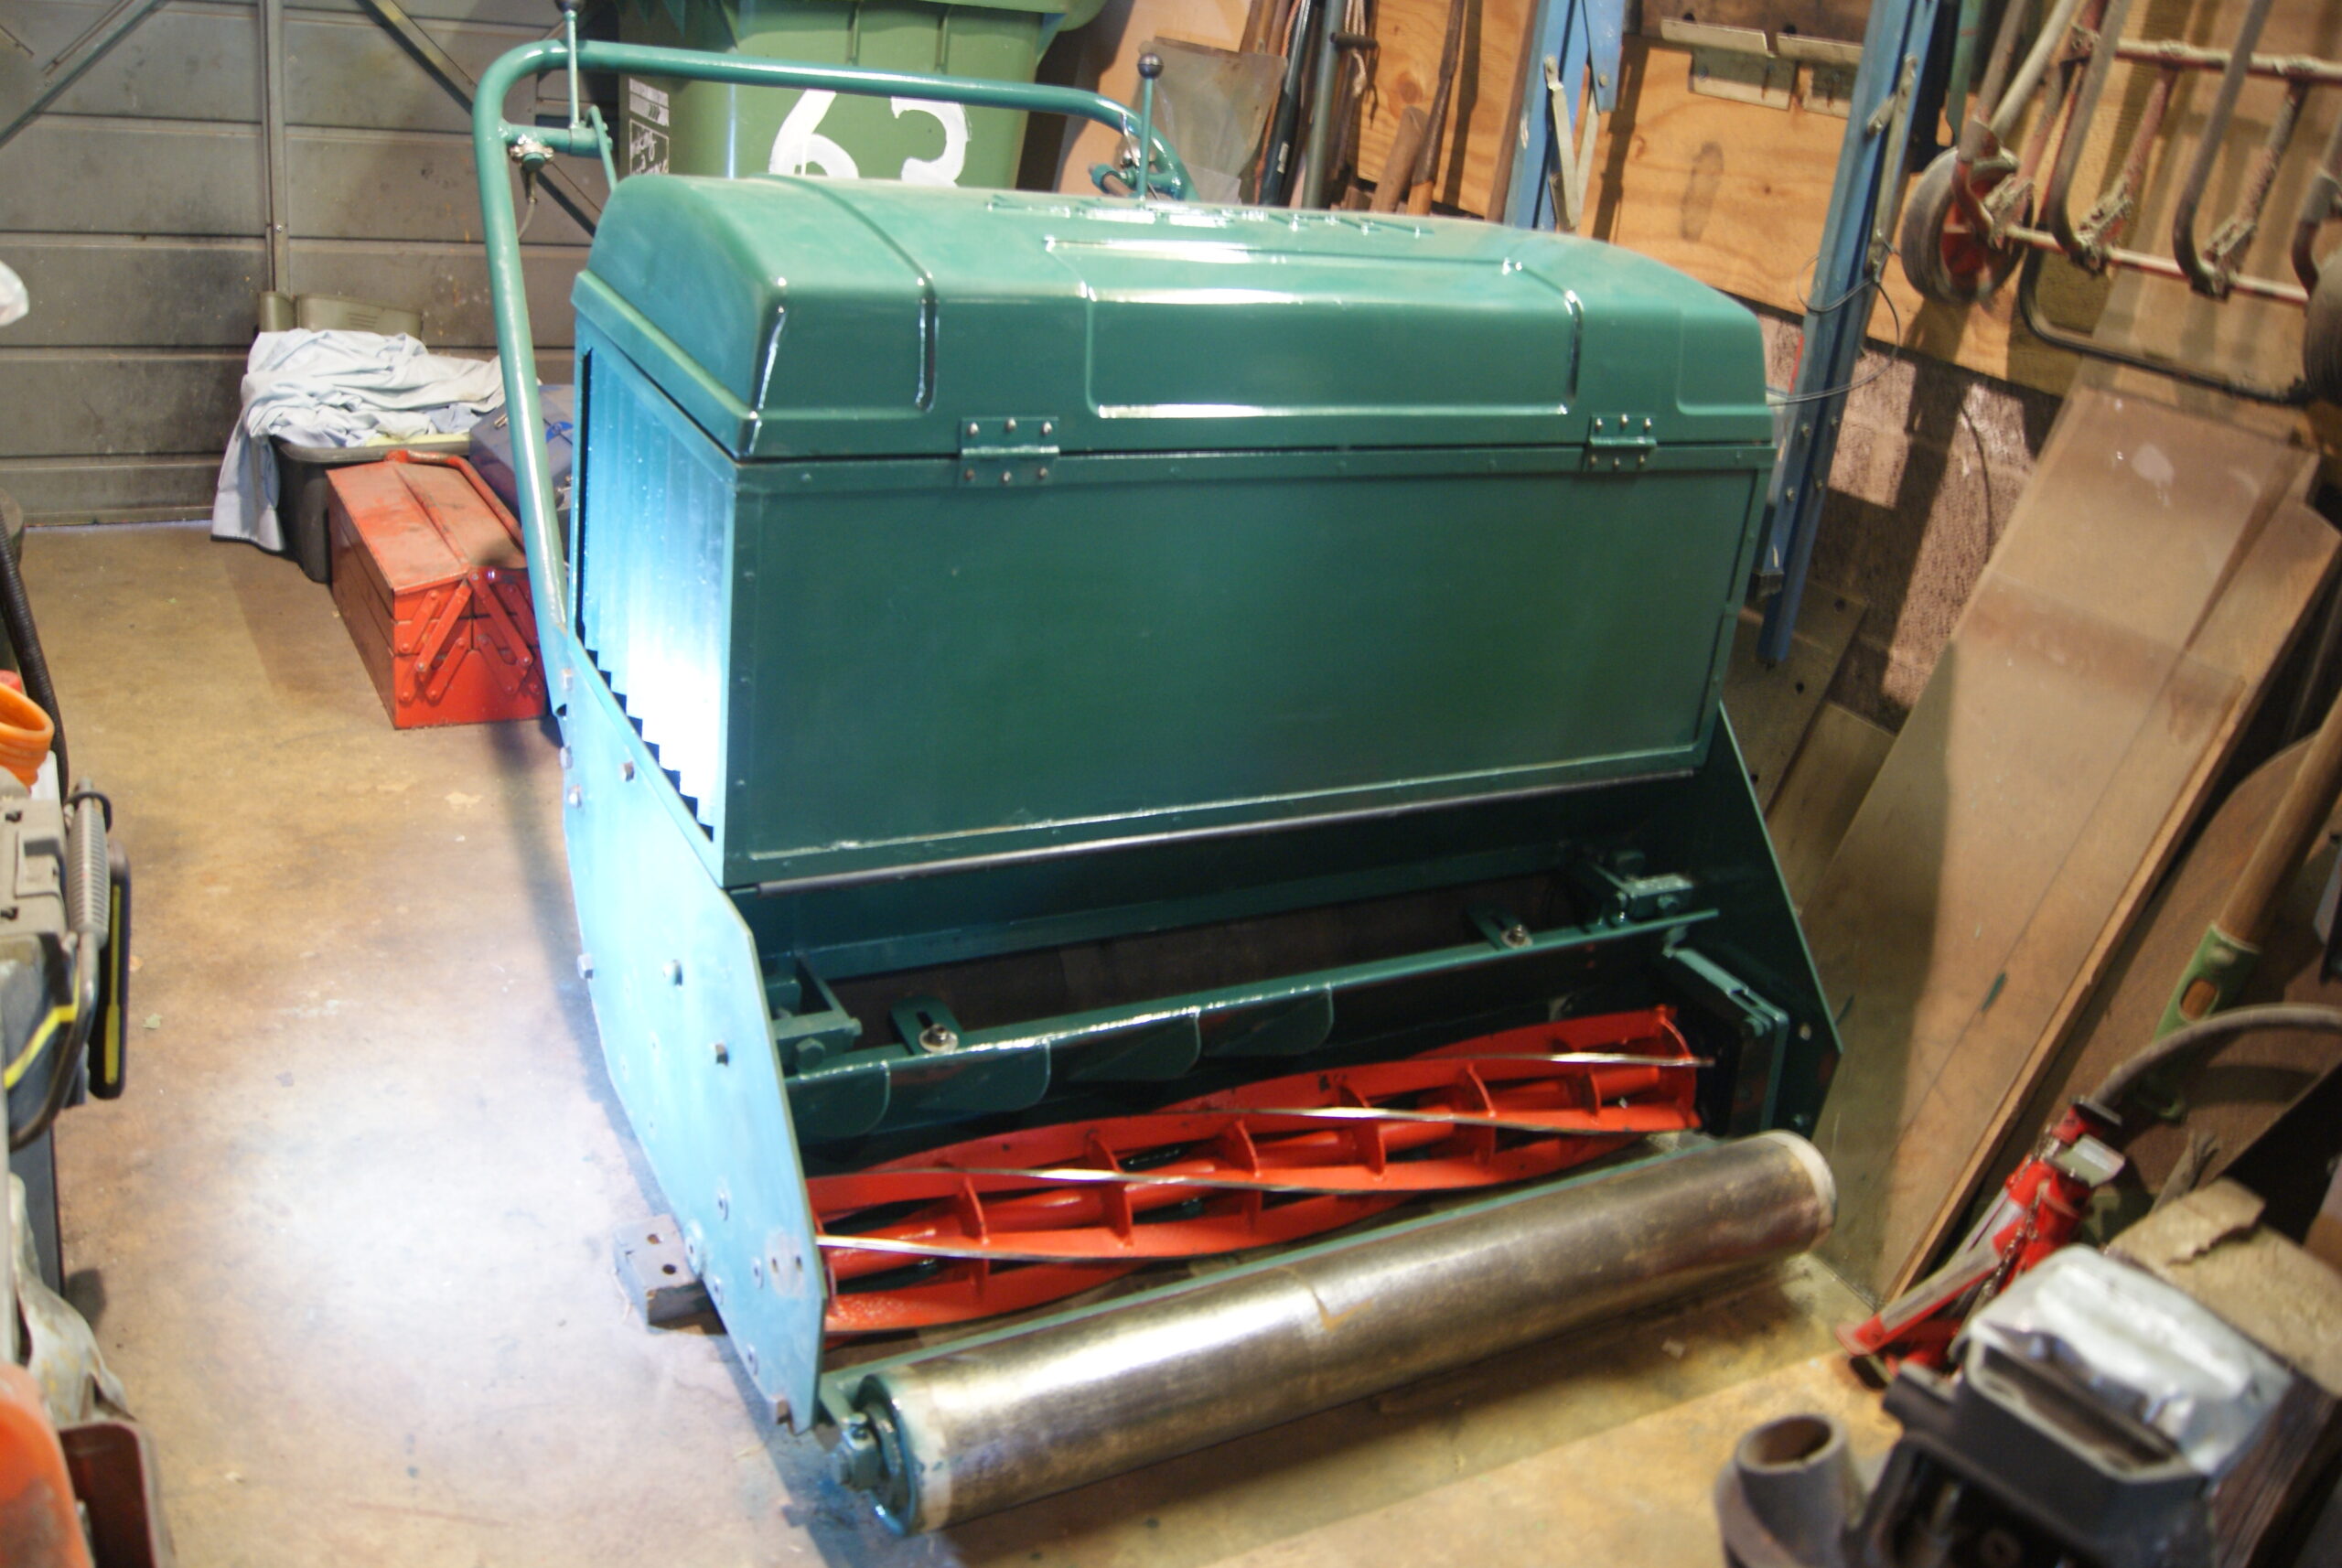
July 25, 2022 at 4:11 pm #39522trusty220KeymasterBack to the workshop today. The cylinder fitted in very nicely with the new bearings and screws kindly supplied by Allett Mowers; the old cylinder bearing that I couldn’t get off the shaft had obviously posed a problem for somebody as the red paint had turned brown with the heat applied to get it moving, so a quick dose of grey primer and then Ford Sunburst Red over the top sorted that one out.
On Sunday I masked up the cutting edges of the bottom blade then gave the whole carrier assembly a coat of primer and Allett Green. This morning it was dry enough to handle, so I fitted that as well and adjusted it up using the four-point adjusters. In this machine the cylinder is bolted rigidly to the frame and adjustment is done by moving the bottom blade up to the cylinder; the advantage in this is that the cutting height remains constant as the bottom blade wears. If you bolt the bottom blade rigidly to the frame it does give a very strong structure but the height of cut gets lower as the bottom blade wears.
Anyway, enough of the sales patter (but it’s difficult not to after thirty years!). The concave had been repaired at some point in it’s life but the repair looked to be a good one. It’s also part of the machine’s history so I thought I’d just tidy up the frayed bottom edge to smarten it up a little; it fitted well with the three clips that fit over the bottom blade carrier and two 3/8″ BSF nuts on the top secured it in place.
The rest of the day was spent tidying up loose ends such as attaching the hinges to the lid, the catches on the back of the lid and touching up heads of bolts that needed a coat of green paint. I’ve even gone to the trouble to wash the stays for the lid- these are made from lengths of recoil rope that loop through parts of the framework and stop the lid from going too far and breaking. It would have been easier to use some new rope, but there wasn’t much wrong with the originals and I’ve tried to keep as much of the original machine as I can with this rebuild.
Tomorrow will come the big move outside so that I can turn it around and work on the drive chains. I wish I had the luxury of a large workshop again!
Attachments:
July 25, 2022 at 3:47 pm #39521trusty220KeymasterWhen I need new linings on the Trusty clutch shoes I use our local Truckstop branch- they send them away and get them re-lined with new material, but beware! If your shoes have rubber buffers on the floating end or rubber bushes on the fixed end they need to be removed before sending them off, otherwise they will come back melted. I did it once with some Trusty shoes and I think they must put them in an oven to cure the adhesive that the linings are attached with because they were very burnt and unusable when they came back- I had to make some new ones.
Definitely replace both springs together as well and you will notice quite a difference straightaway. Don’t be tempted to keep using the triple- our council operators used to keep going with broken springs and very soon afterwards the gear selector ring for forward and reverse gear used to shed it’s teeth inside the gearbox. The fastest I did that job was eight hours and I had all of the lifting gear, so be warned!
Well done for getting it off, though. I only asked where you were from in case you were local to me in Redditch and I’d come over and lend a hand.
-
AuthorPosts