Forum Replies Created
-
AuthorPosts
-
July 24, 2022 at 7:33 pm #39517
 trusty220Keymaster
The only thing I could add to Angus’s suggestions are to make a more rigid bar so that you can get more pressure on the faceplate. PlusGas should get it moving but I’ve never had one that has been this stubborn, they normally pull off quite easily if you give it a straight pull.
What part of the country are you in?
July 24, 2022 at 12:32 pm #39514trusty220KeymasterA slightly different way of doing the same job but it should work. You are definitely on the right track; if it still doesn’t move you may want to give the central bolt a smack or two with a copper mallet to try to get it started, but it’s important that you draw the plate off evenly otherwise it will bind on the crankshaft.
If it’s still tight and refusing to move, have you tried knocking it the other way (i.e. towards the engine)? If it’s rusted on that might just do the job.
Keep going and good luck!
P.S. Thanks, Angus, for the updates on who owns what down that part of the country- as you can probably guess, I’m a little out of date! I’m sure Ernest Doe’s will be able to source the part.
July 22, 2022 at 7:45 pm #39510trusty220KeymasterSame here- a very good company to deal with and a good source of parts that otherwise would be unobtainable.
July 22, 2022 at 7:42 pm #39509trusty220KeymasterI think the debate about the best alloy for blades will go on for ever. The manufacturers who choose a hard material always harp on about the sharpest cutting edge which lasts for many seasons. My experience with Ransomes machinery is that their blades will take a certain amount of re-aligning after a foreign body has distorted them, but if it’s large enough it will snap a spiral.
Most of the cylinders that Ransomes make are to fit to their local authority ride-on machinery. Although unconfirmed, we always used to reckon that they were designed to cope with beer cans without damaging the cutting surfaces. The newer cutting units have tapered roller bearings which are tensioned by a heavy duty compression spring so that the cutting cylinder can move in relation to the bottom blade; this does go a long way to prevent damage on the modern machinery.
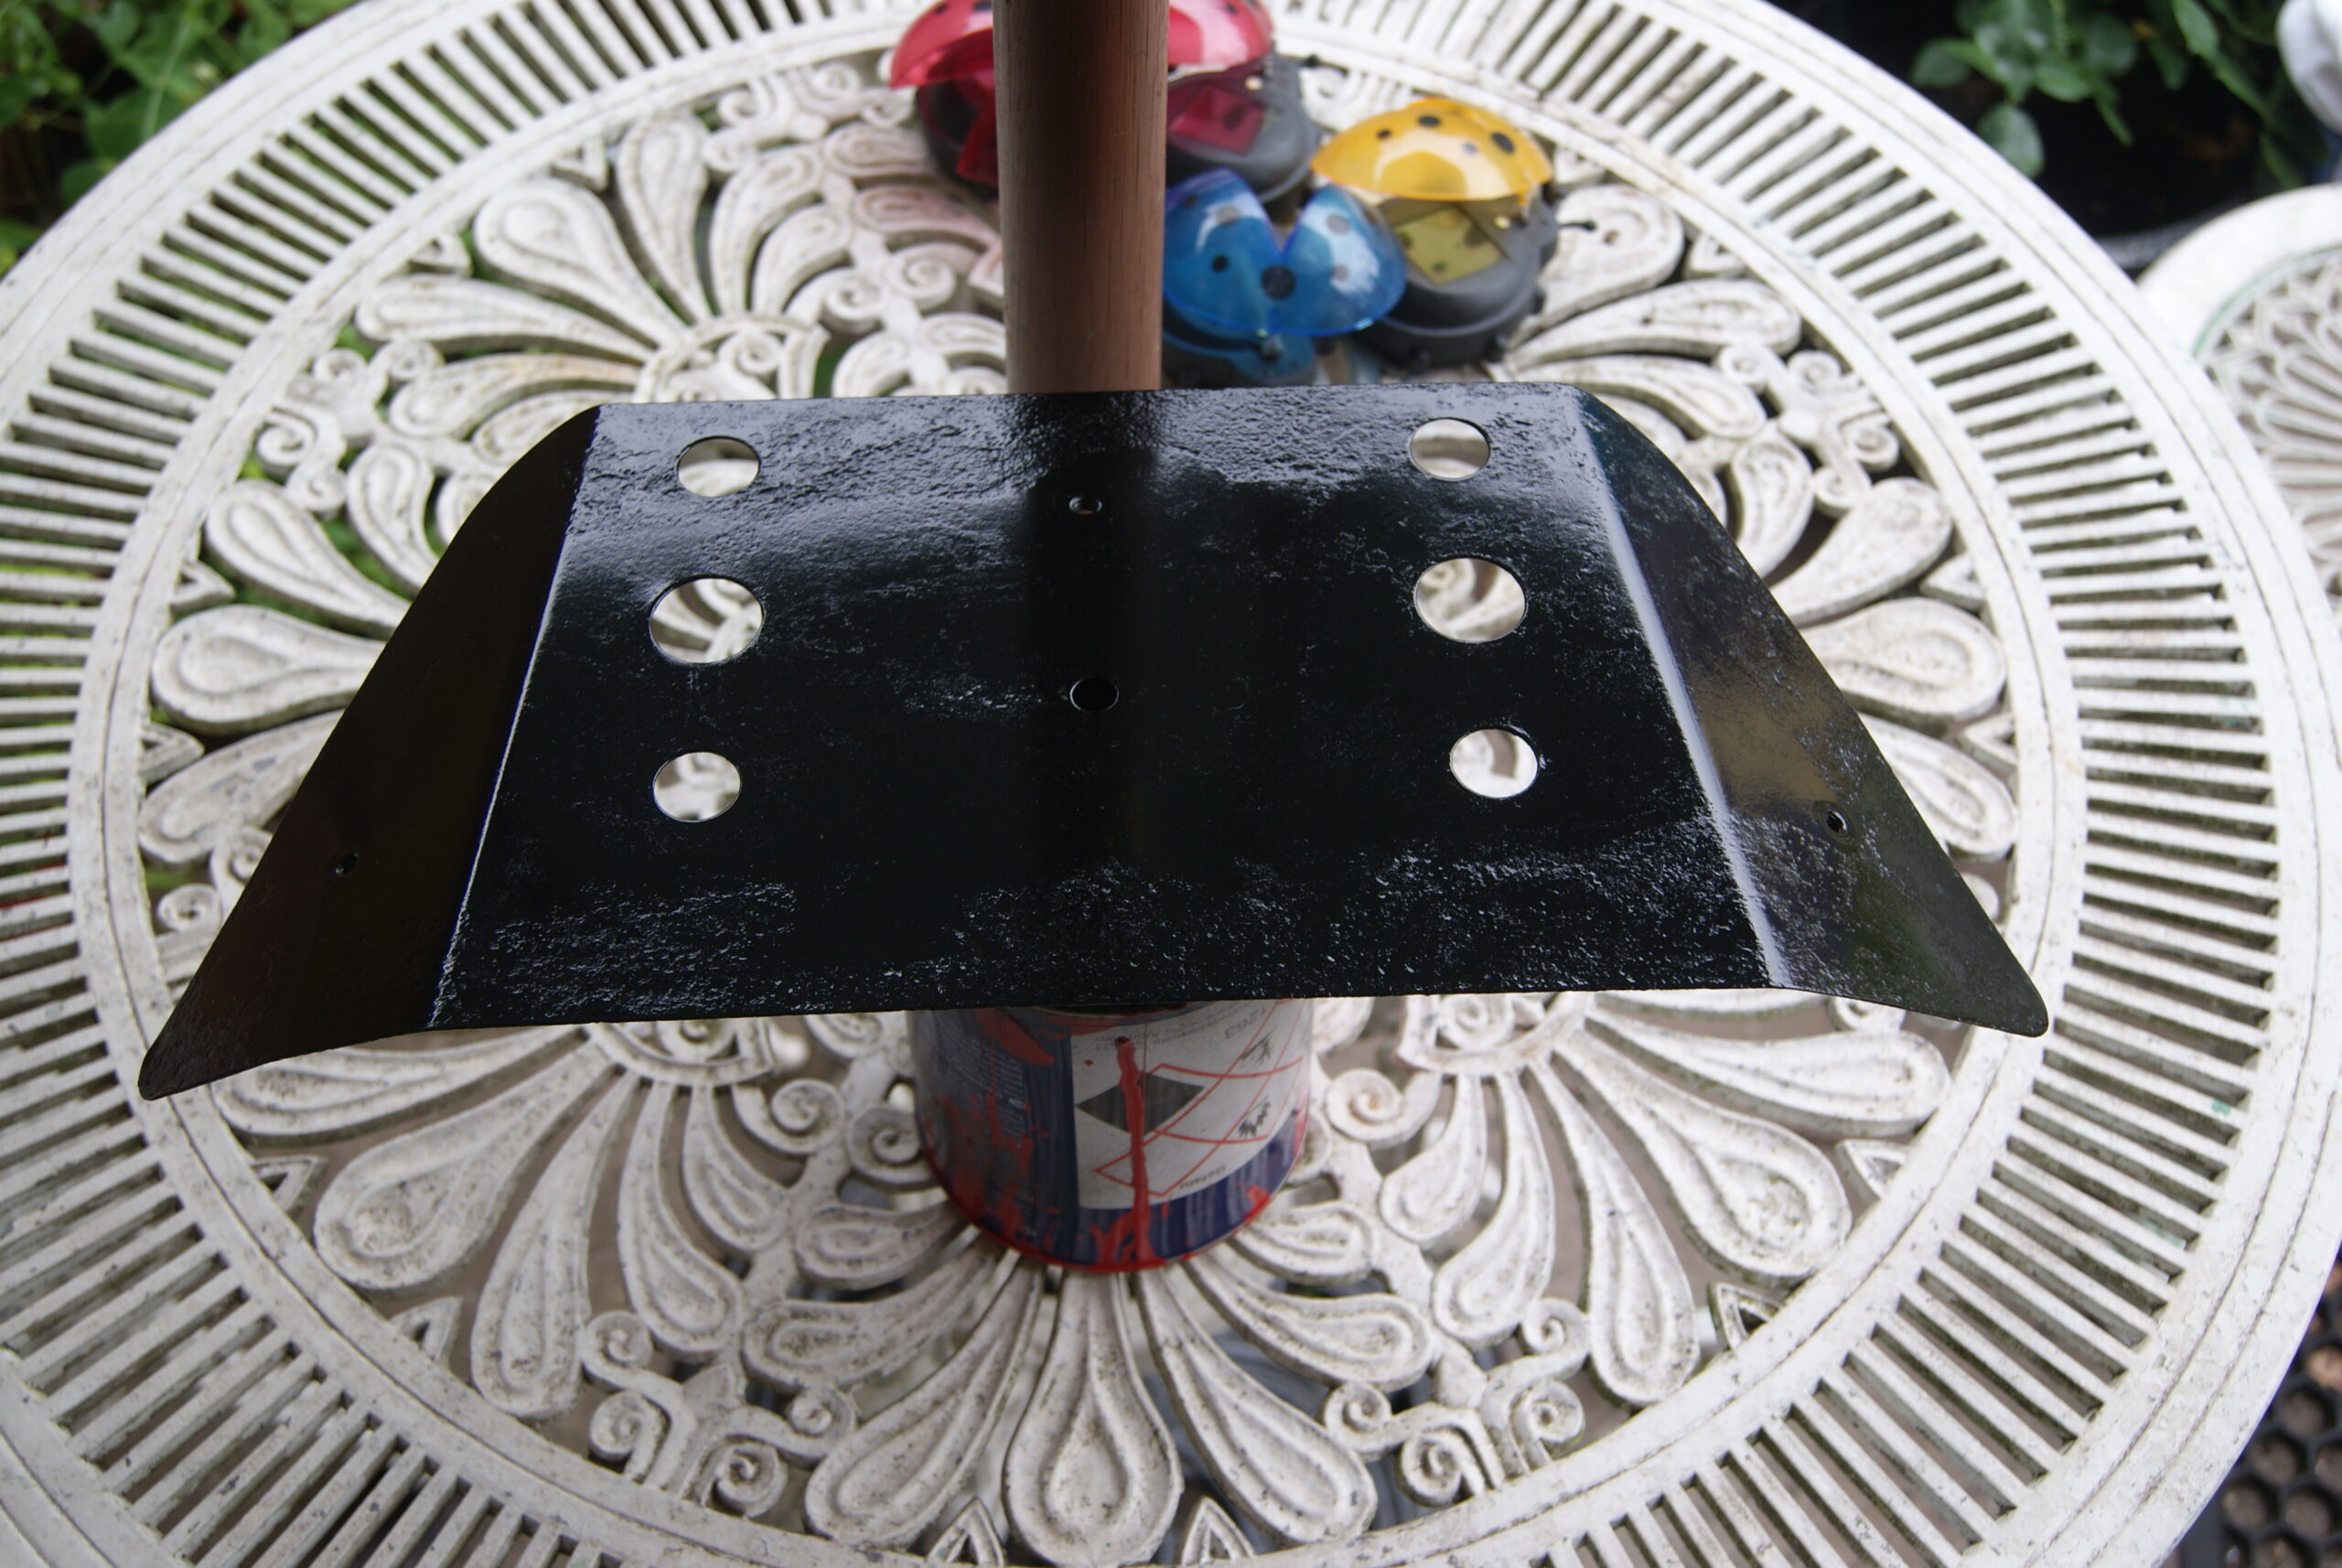
July 22, 2022 at 6:20 pm #39508trusty220KeymasterIt will definitely be something amiss inside the main drive clutch. The two large nuts that you’ve removed hold the shoe pivot posts to the backplate and did not need to come off- they stay attached at all times.
There used to be a special tool supplied by Ransomes for removing the drive clutch. You can make one quite easily- it was 1″ thick steel bar, about 2″ wide with three holes drilled through it. The centre one was tapped for (I think) 1/2″ UNF with a long-ish bolt through it, the outer two holes were plain with no thread but drilled for a clearance to allow two 3/8″ bolts to pass through. The two threaded holes in the clutch backplate are tapped 3/8″ UNF, so you need two bolts long enough to pass through the puller and give at least eight complete turns through the backplate. All you do then is to take the centre bolt out, remove all of the washers and re-insert it to give something for the puller to push against. It should then be a simple matter of winding the 3/8″ bolts in, then tensioning the centre bolt to withdraw the clutch evenly. I’ve never had to hit it with a hammer to release it but there’s always a first time!
What you are most likely to find inside is one broken return spring out of the pair. The part number is MBA3474 and you really need to replace them in matched pairs. If you put one new one in and leave the old one in place you will find that the clutch will not engage evenly and you run the risk of having the old spring break in the same way that the first one has!
When refitting the shoes pay attention to the direction of rotation- centrifugal clutch shoes should always be fitted in a trailing position, that is with the fixed end leading and the floating end trailing. This is to allow the shoes to disengage when the revs drop; if you fit them the wrong way around (as you would in a drum brake) they will drive and they will “bite” but they won’t disengage.
I doubt that Ransomes dealers will have the parts you need but try Bartrums Mowers, I think they bought all of the Ransomes stock of Motor Triple parts when they had a clear out.
Let us know how you get on.
July 21, 2022 at 6:55 am #39497trusty220KeymasterThat will be something to work on in the future. I know that you could buy spirals from Ransomes in the 80’s because one job I had was to re-spiral some of our hire Motor Triples to save the expense of replacing cylinders in them- a false economy as it turned out, the labour to remove the old ones and weld in new spirals just made it too much work.
My theory- and I don’t base it on any evidence at this stage- is that Allett made the centre shaft and the webs and bought in the spirals from Ransomes. These would be made from a special alloy as they are the wearing part of any cylinder and if you get it wrong it reflects badly on the whole machine. If it’s too hard it keeps a sharp edge but if you hit a stone it can shatter or crack; too soft and it won’t keep a sharp cutting edge, so the metal needs to be a compromise between hard and soft- hard enough to keep sharp, but soft enough to bend if it meets a foreign object. Ransomes have a long history of getting this right so it may be the way they decided to go.
Of course, somebody may have re-spiraled the Allett cylinder at a dealership using Ransomes spirals. No doubt the secrets will come to light in time, but we have to ask the questions first!
This is getting deep, isn’t it…?
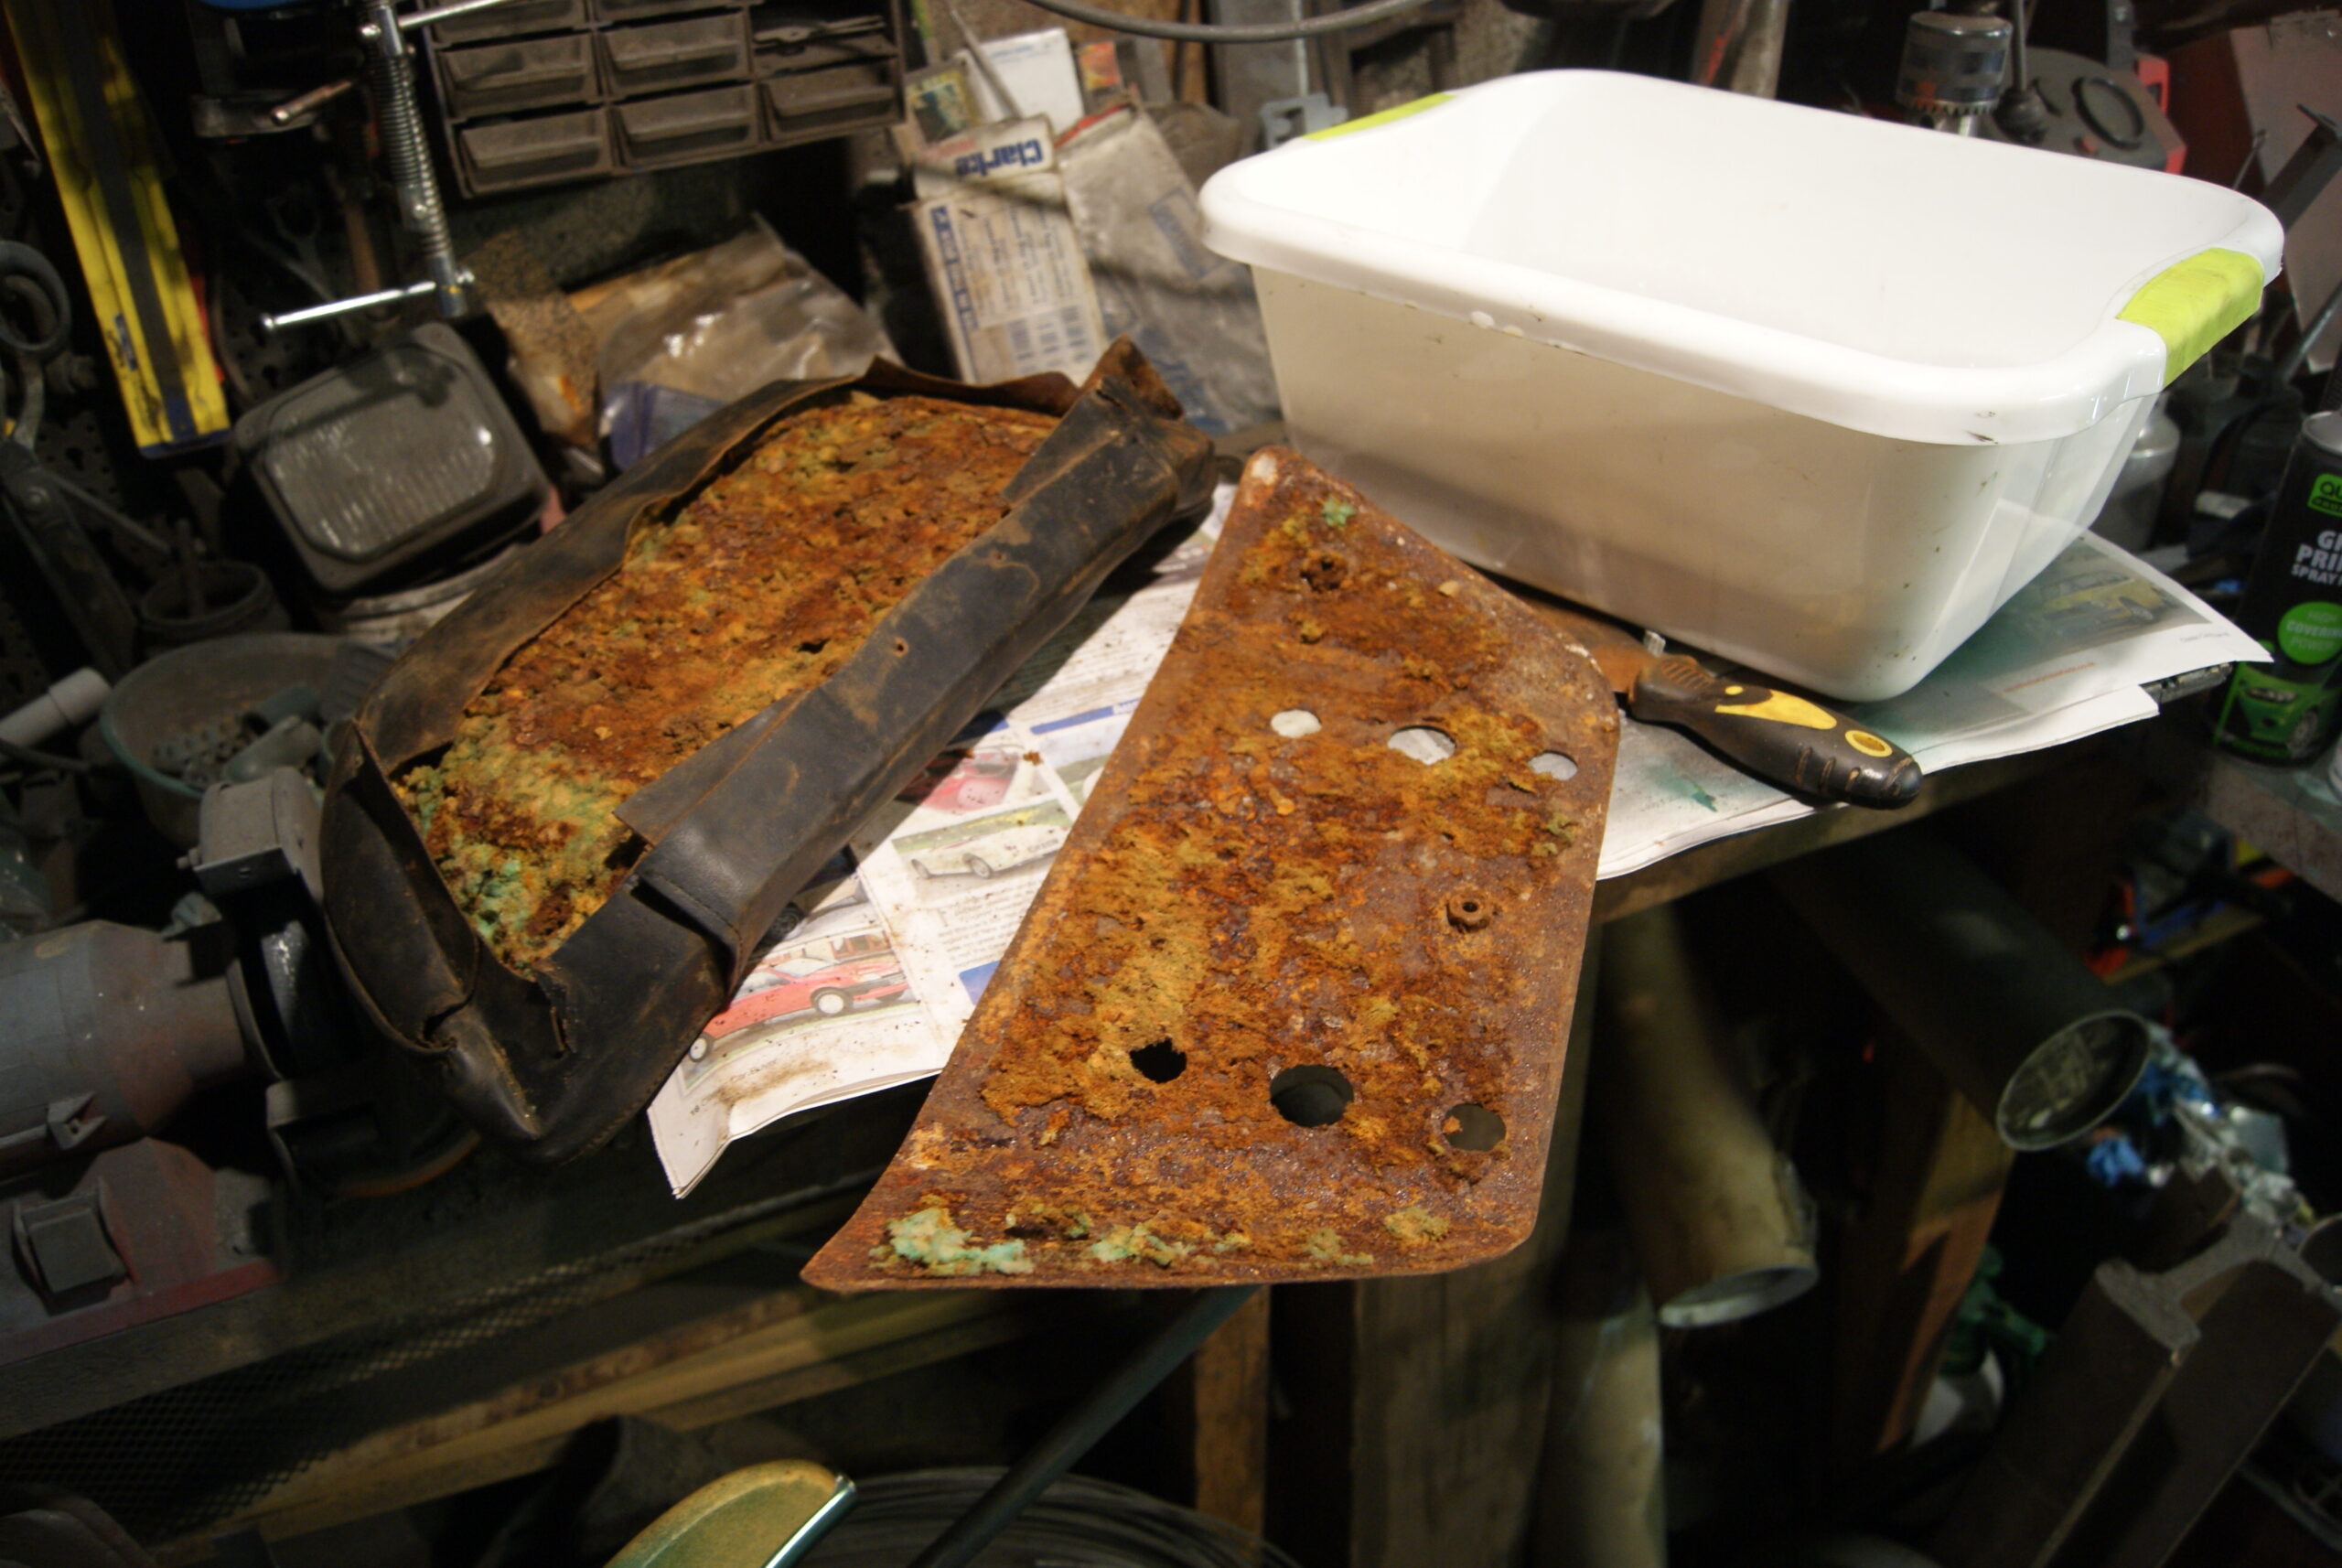
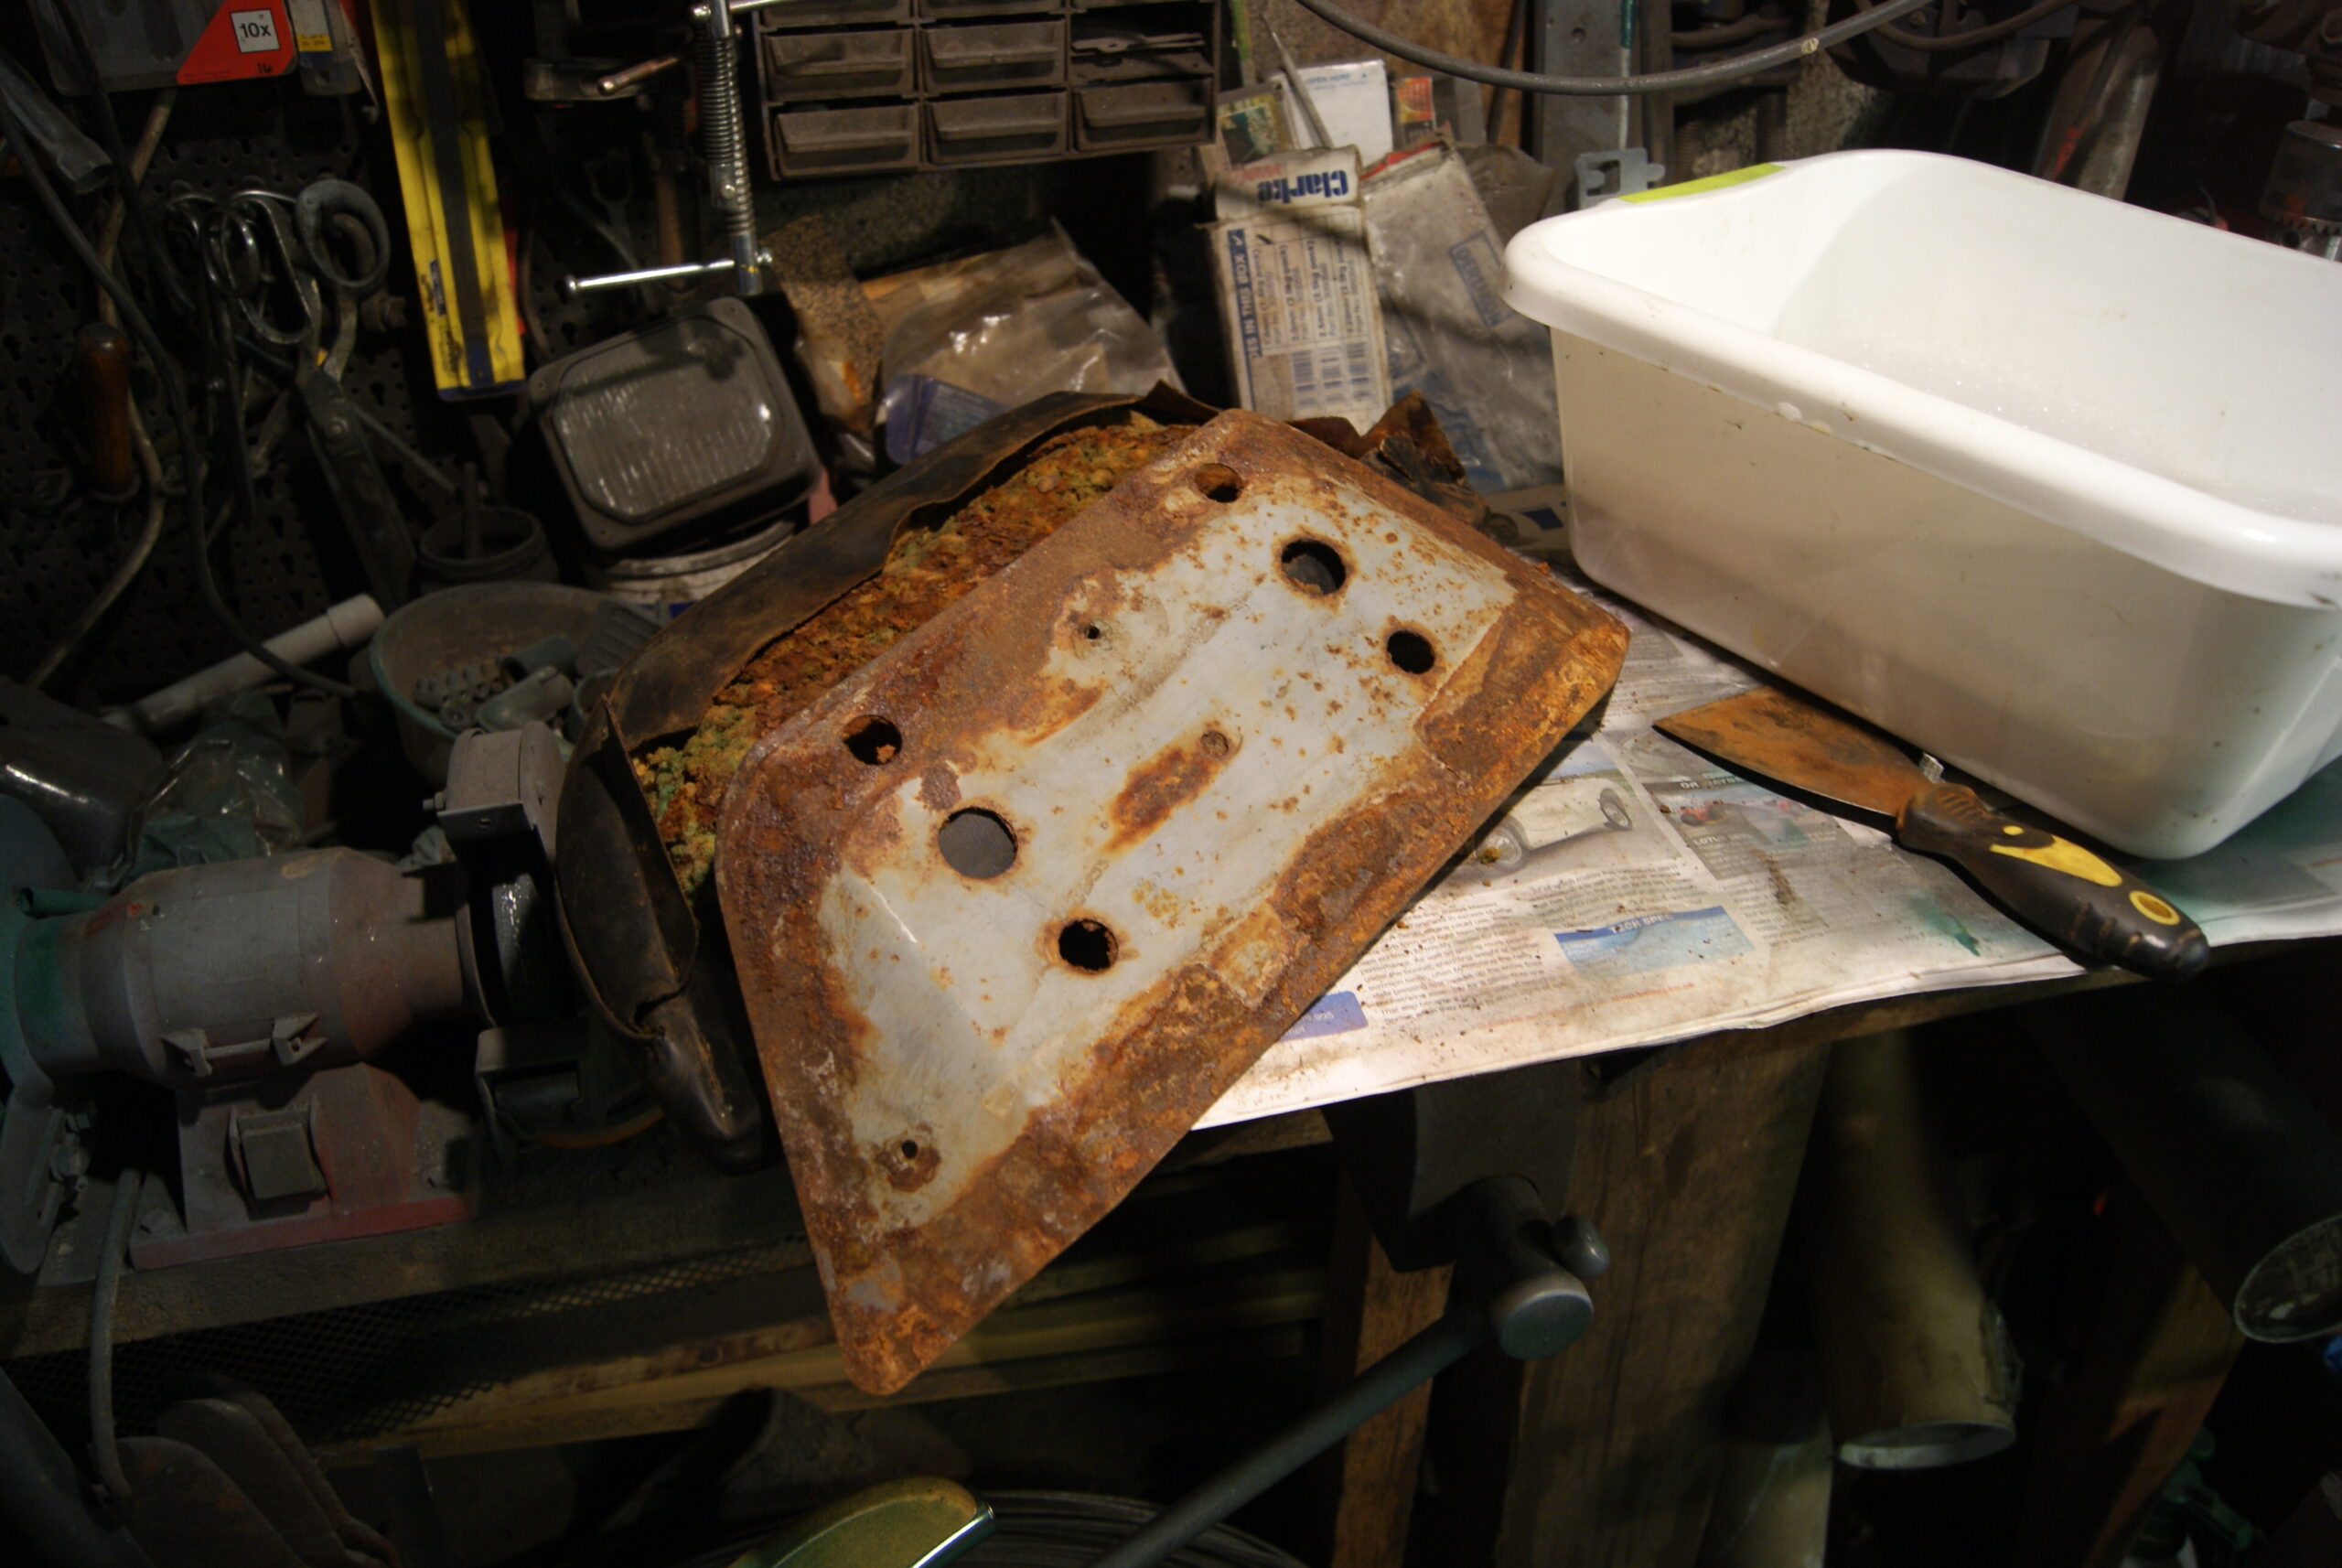
July 20, 2022 at 4:12 pm #39490trusty220KeymasterOn closer inspection the seat cushions were suffering from age and the foam filling was starting to go hard. I’ve got the same problem with the GT6 and every time I sit in the driver’s seat a trickle of powder comes out of the bottom of the seat; I’ve tried losing weight but it doesn’t seem to make any difference. Fearing that this seat is getting close to the same state I think it best to get the cushions re-padded and at least that will be good for a few more years yet. You will also see that once I separated the foam from the steel backing plate, the rust had just taken over inside so it was a good thing to dismantle it. I have now cleaned the plate up and it’s sitting in the garden with a good coat of black Hammerite on it; I haven’t taken much care over the finish as it won’t be seen once assembled, and the rough surface will give glue on the outer cover something to grip to.
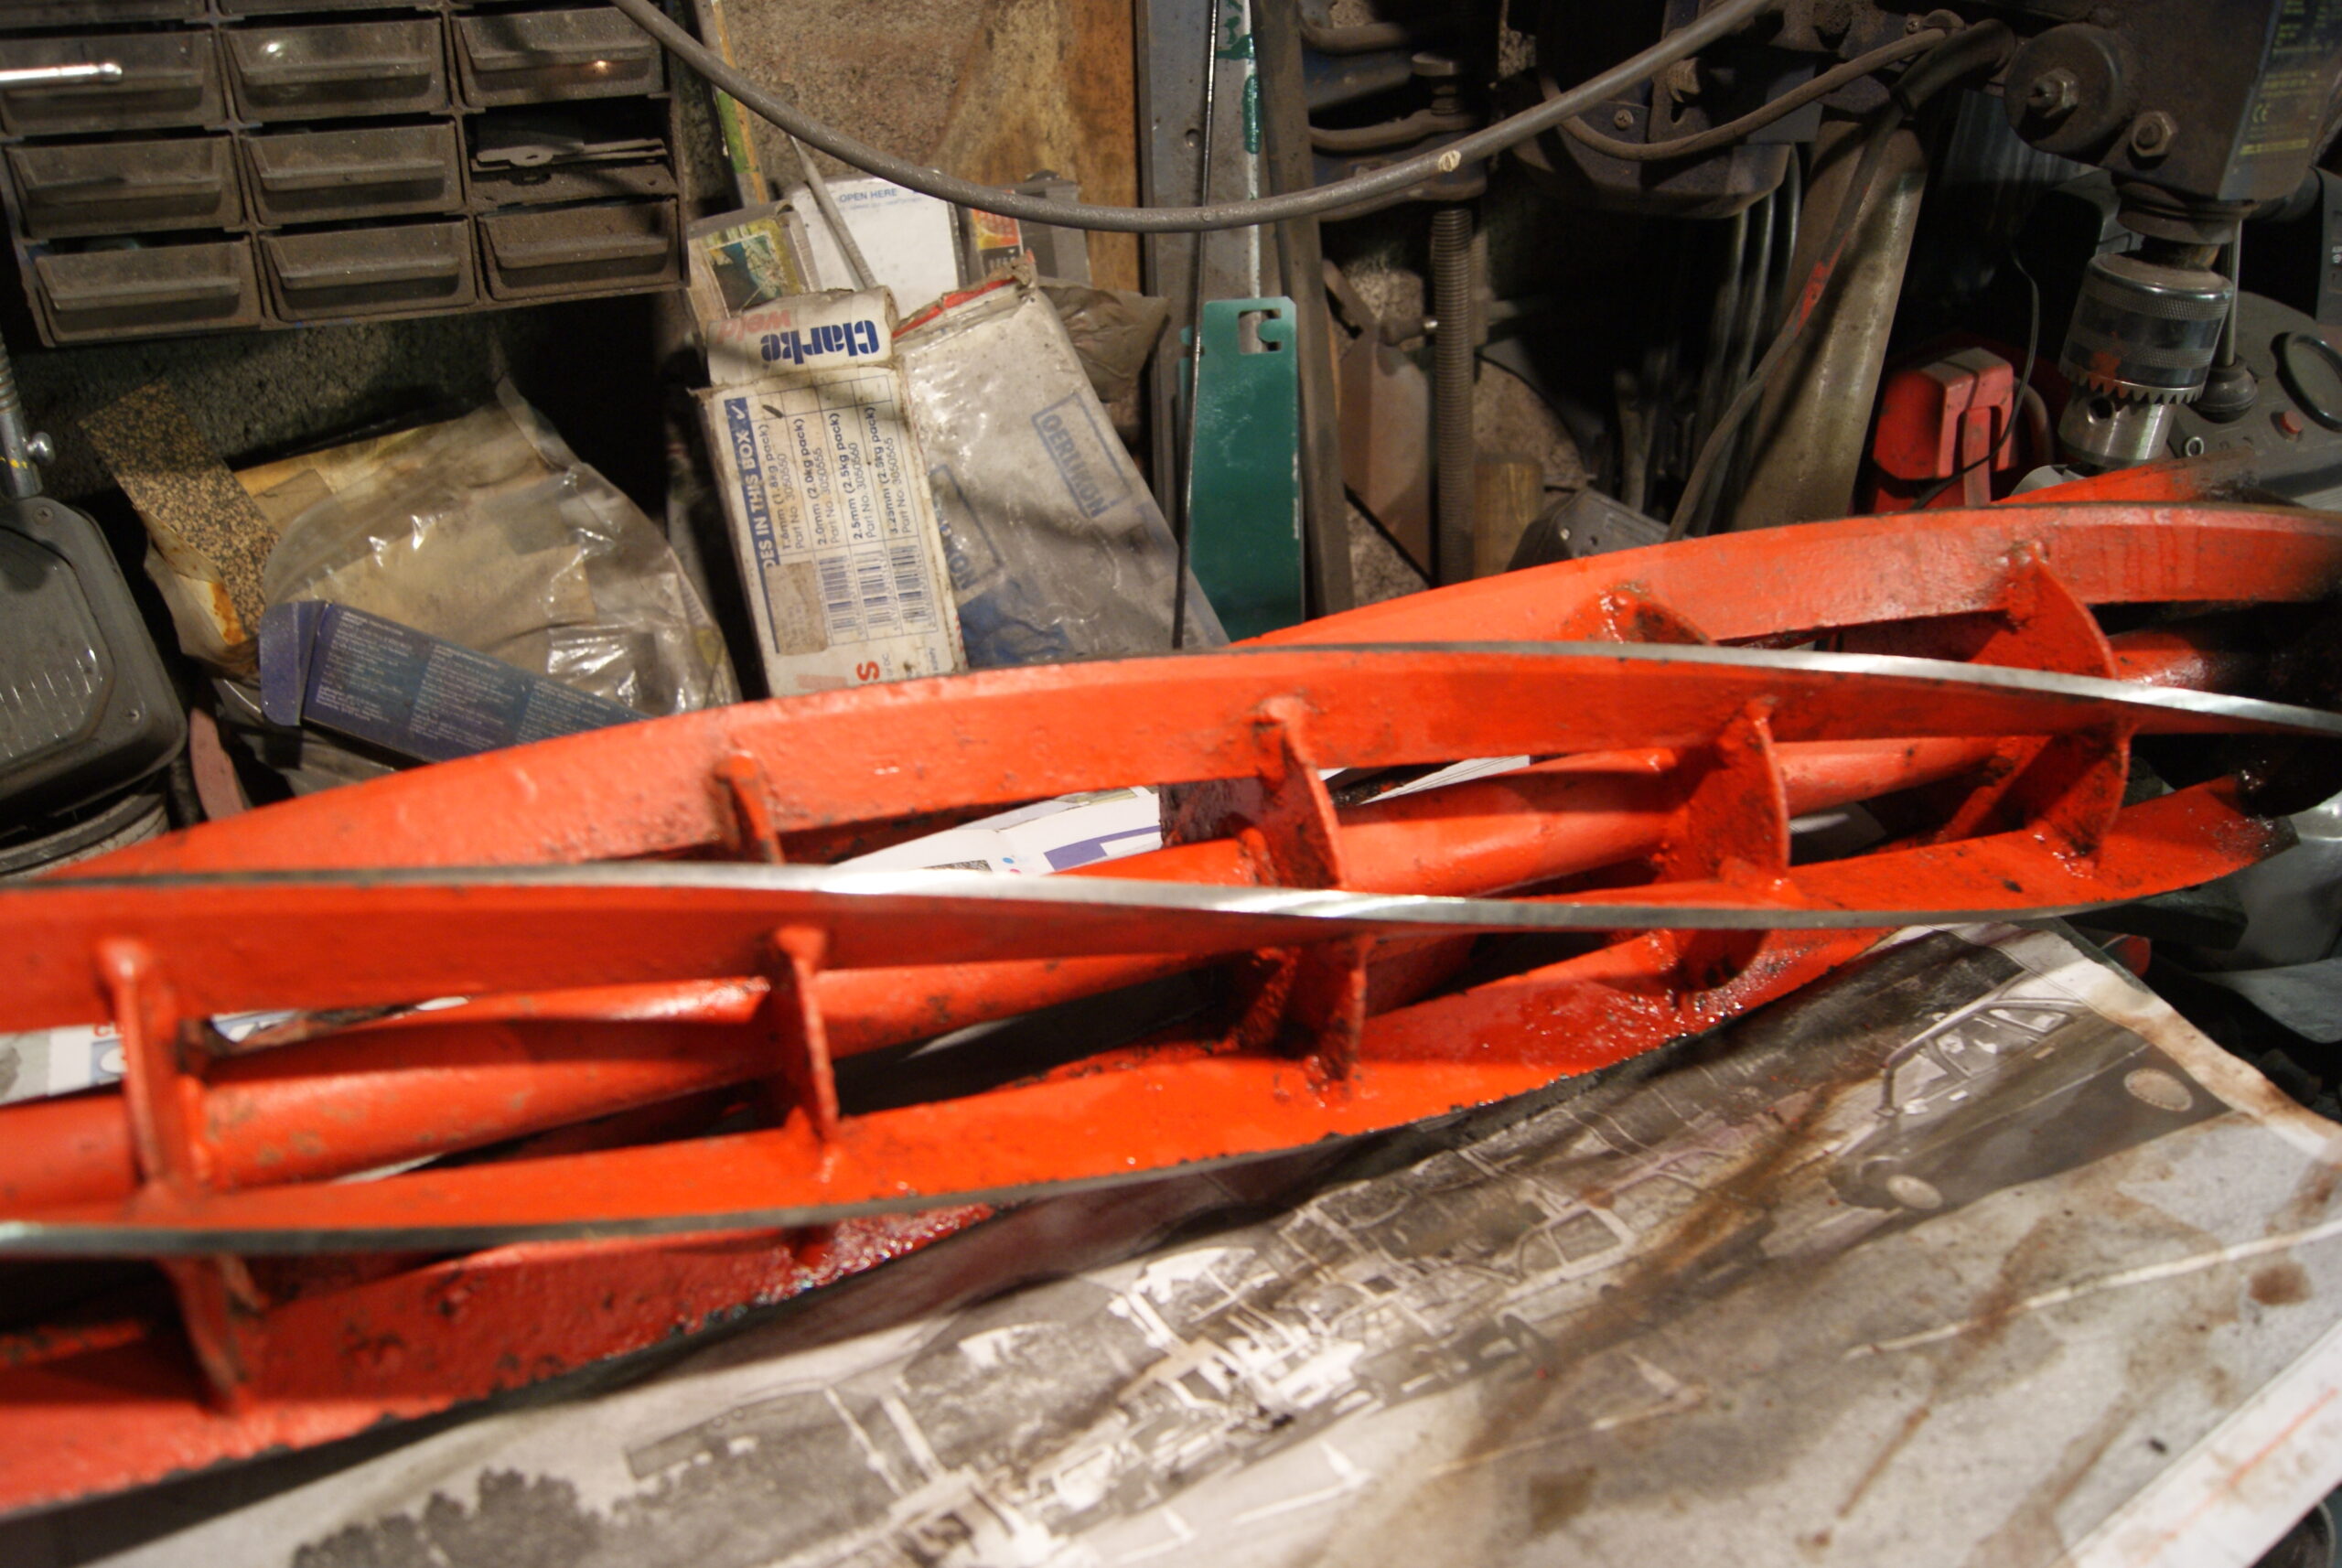
The cylinder and bottom blade arrived back today complete with a pair of new cylinder bearings and a new set of countersunk screws to locate them with. The new bearings are imperial sized but the threads are different; the old bearing housings were tapped out 1/2″ BSF but the new ones are 1/2″ UNF- same diameter but different TPI, hence the new screws.
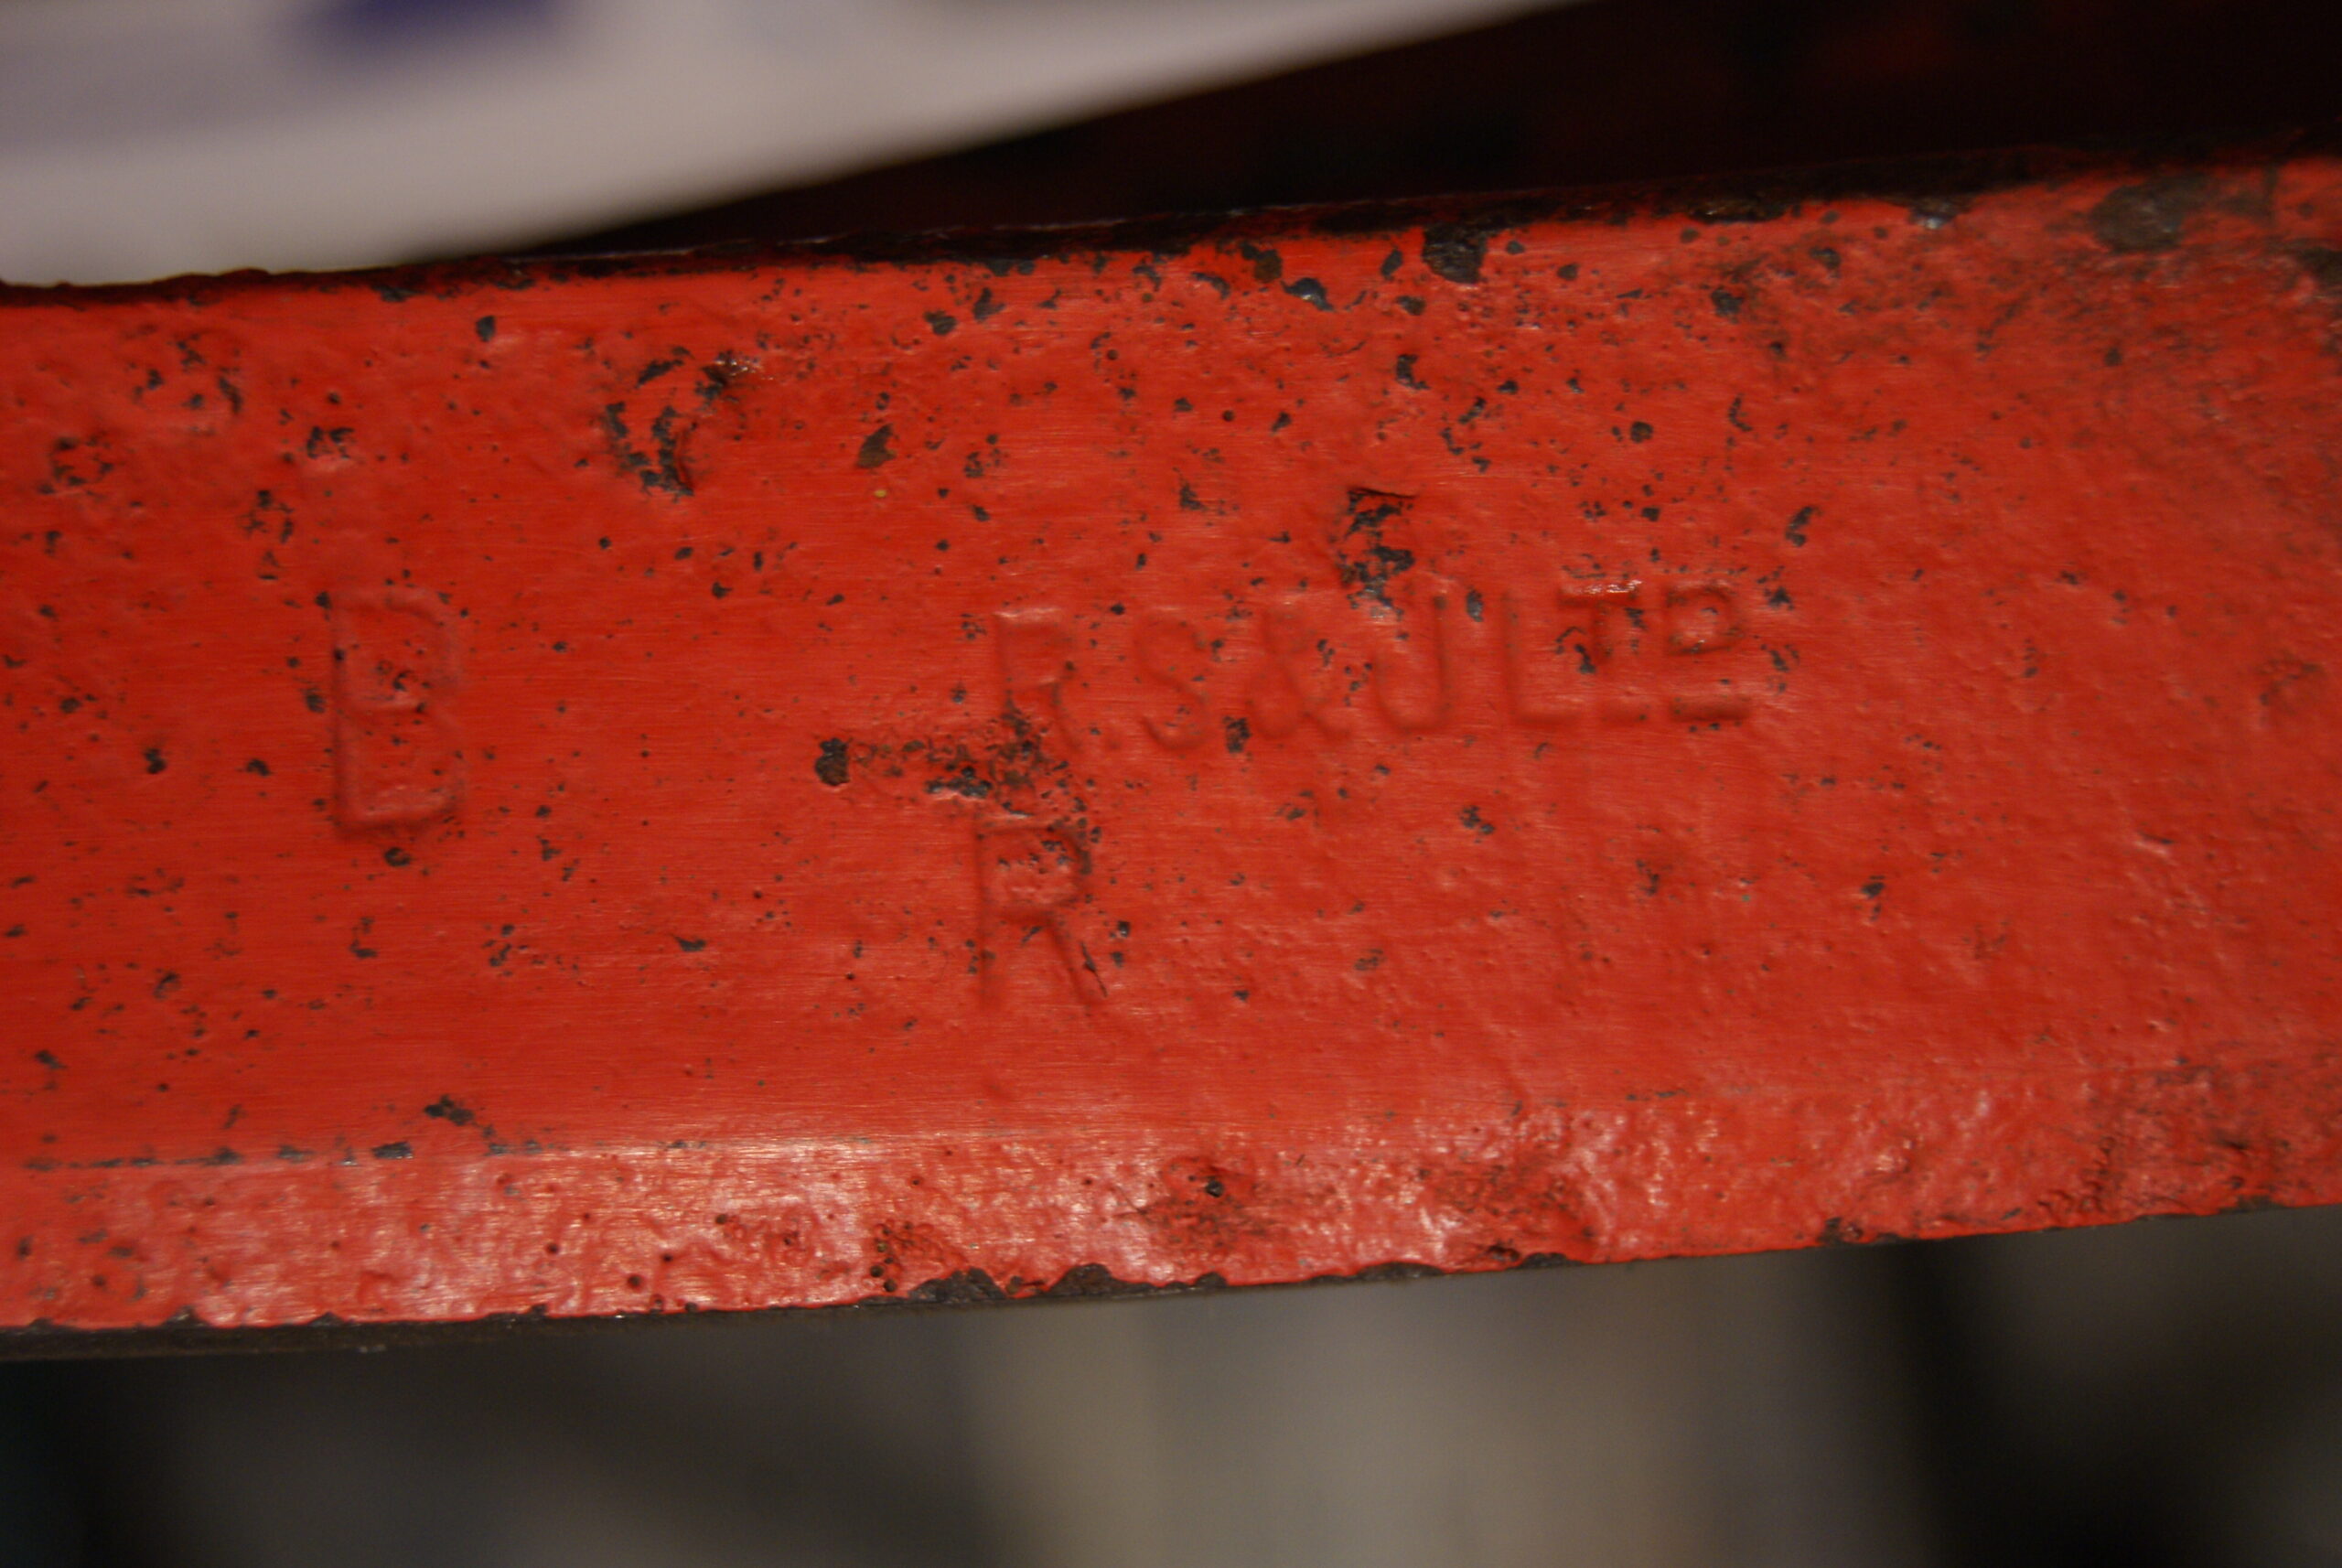
When cleaning up the cylinder I came across a reminder of my past- each spiral is stamped RS&J Ltd- so it looks like somebody at some point has either re-spiraled the original cylinder, or maybe Allett used Ransomes spirals at some point in their production. I’m not suggesting that this is the original cylinder as a mower of this age will no doubt have got through quite a few cylinders, but it is an interesting find all the same.
That’s enough for one day, time for that kettle again!
Attachments:
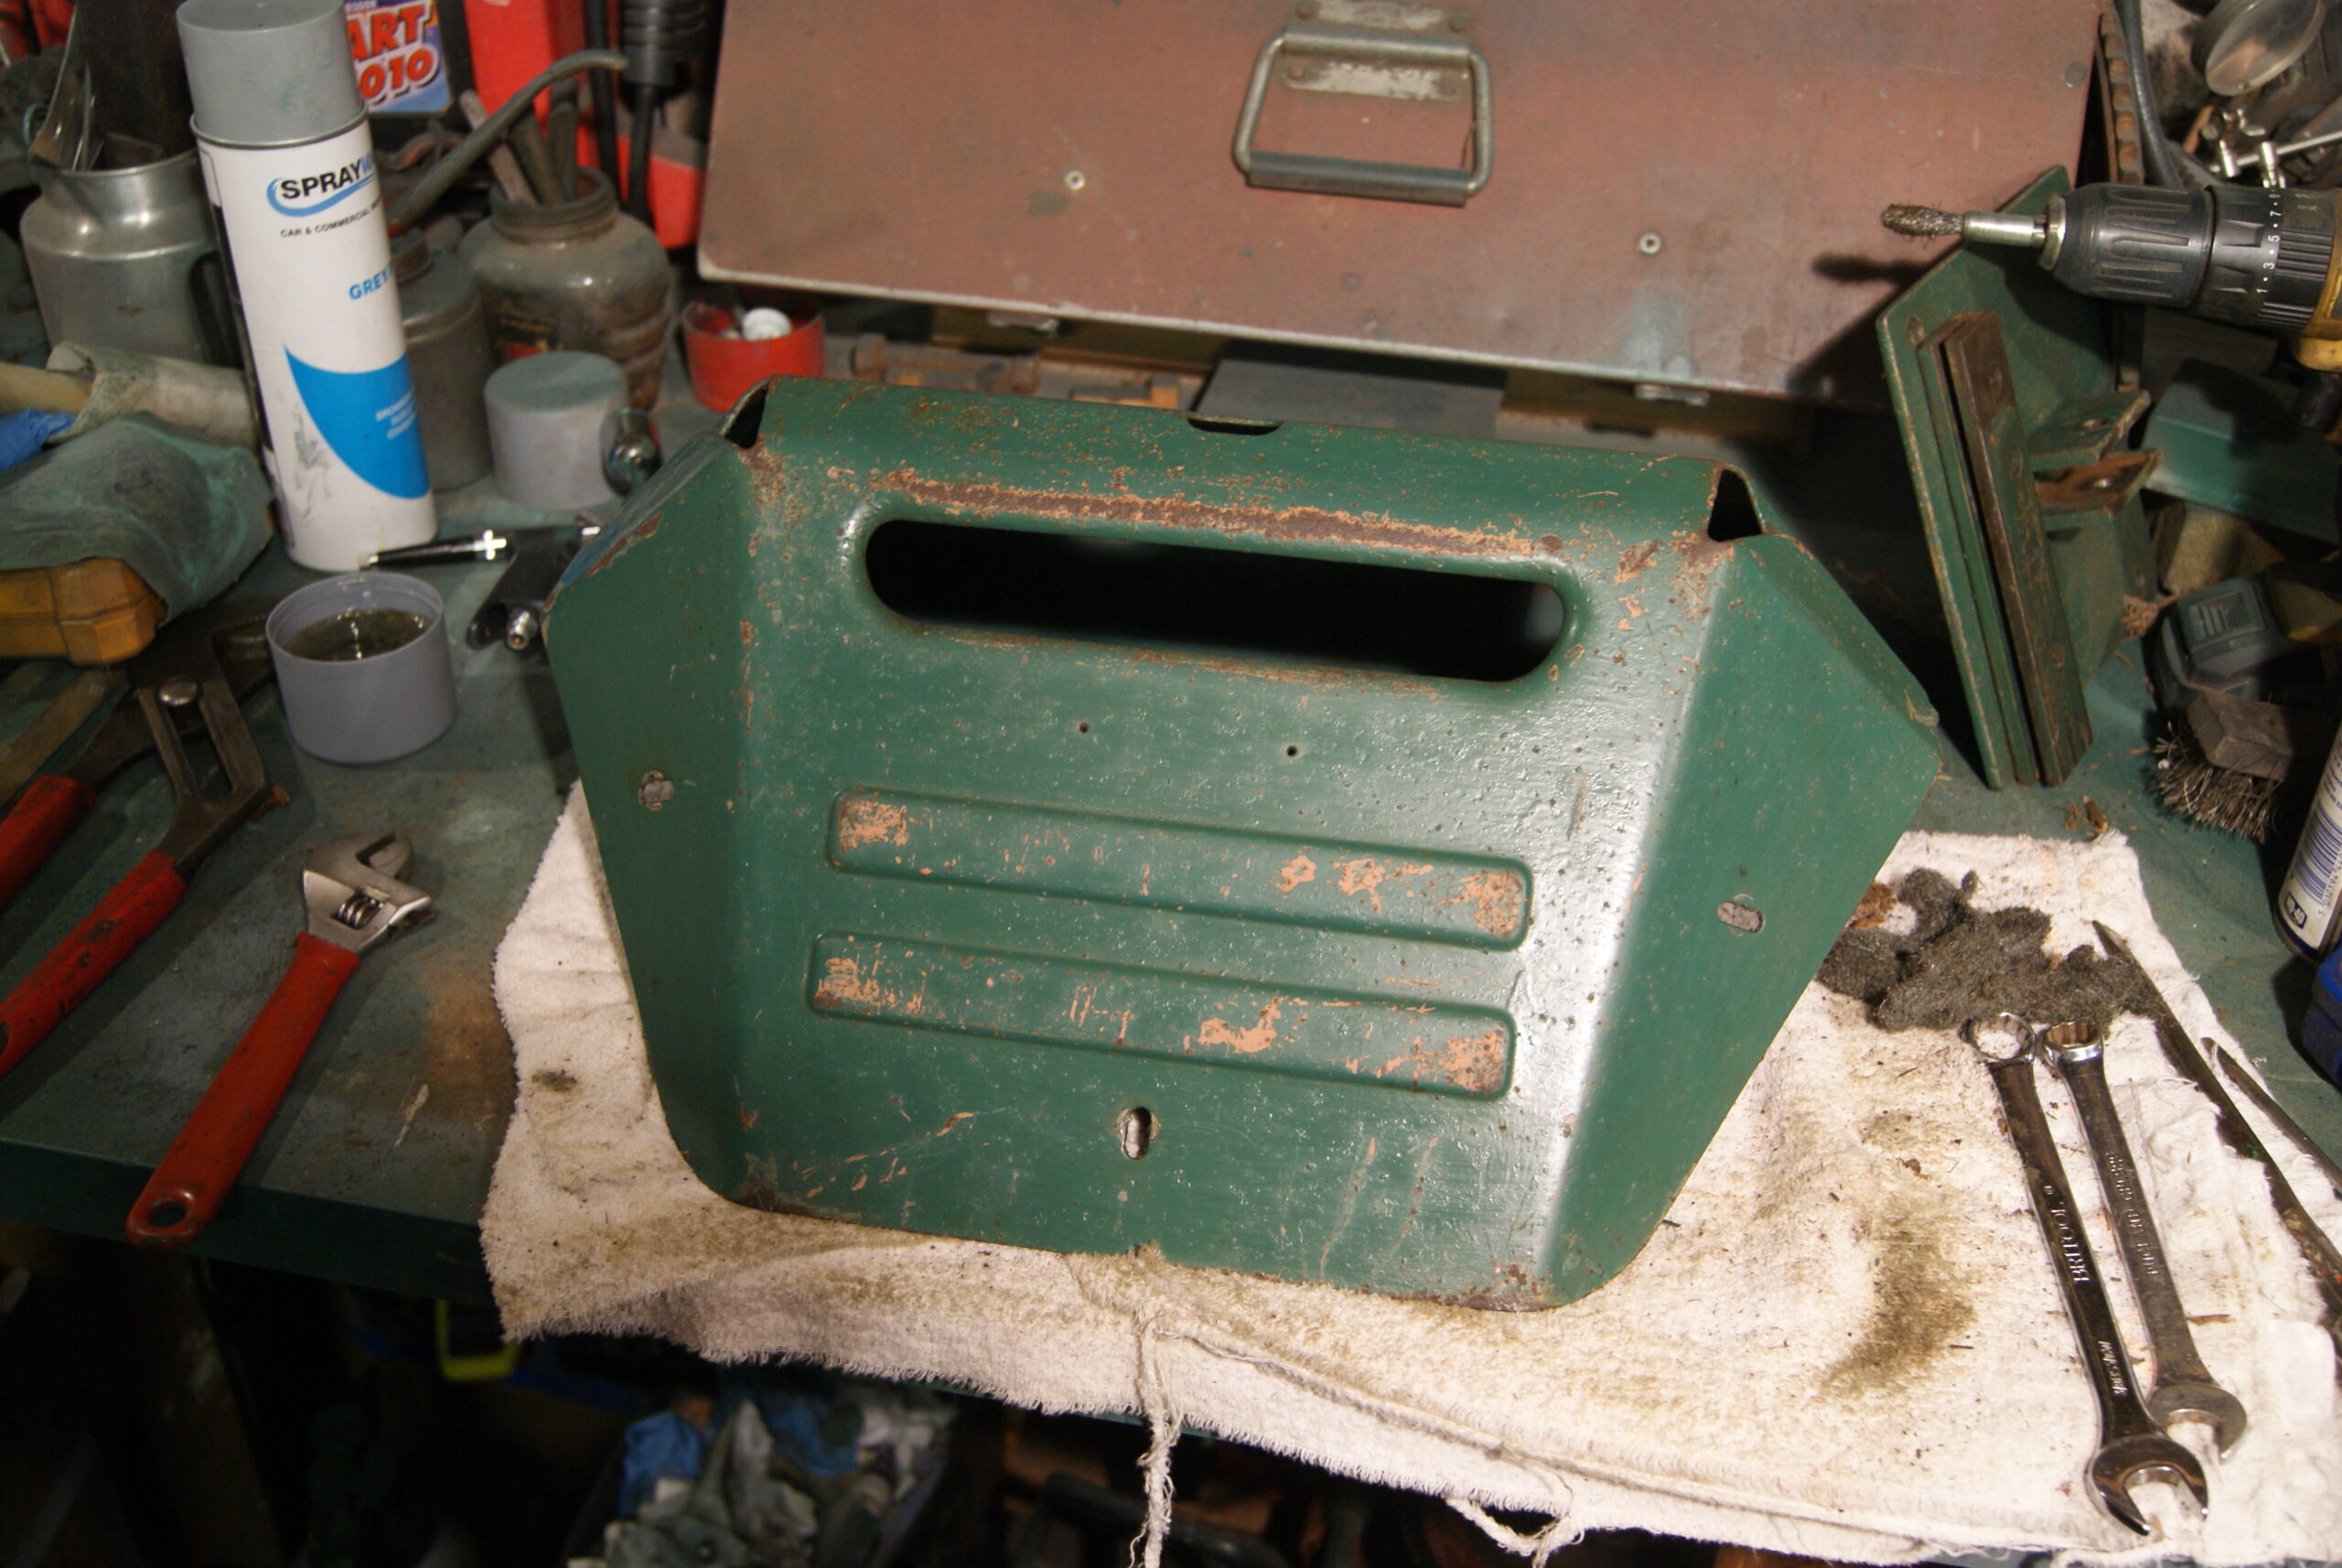
July 20, 2022 at 9:18 am #39481trusty220KeymasterI’ve been battling that primer again today and I’m sure you’ll see from the pictures how much of a problem it was. I think I’ll have to modify my diagnosis of the microblisters on the lid, though- I decided to tackle the chain guard which looked decidedly the worse for wear with great long rust streaks, deep brush marks and big runs and drips in the paint.
The guard is a steel fabrication, made up of various parts all welded together. When attempting to flat out the brush marks I came across the same orange pimples showing through the green topcoat, and on closer inspection it appears that the primer used was very thick and lumpy, probably a result of using an old tin and not being too careful about straining it before use. The brush marks simply would not flat out before the orange primer made an appearance so the whole guard was taken back and re-finished; at least that explains the lid! The inside of the cover looked to be the original green paint, applied with no primer, and so I thought I’d leave that untouched as it is as a record for future restorers to use as a reference to match the paint, plus they can see what the original finish was like.
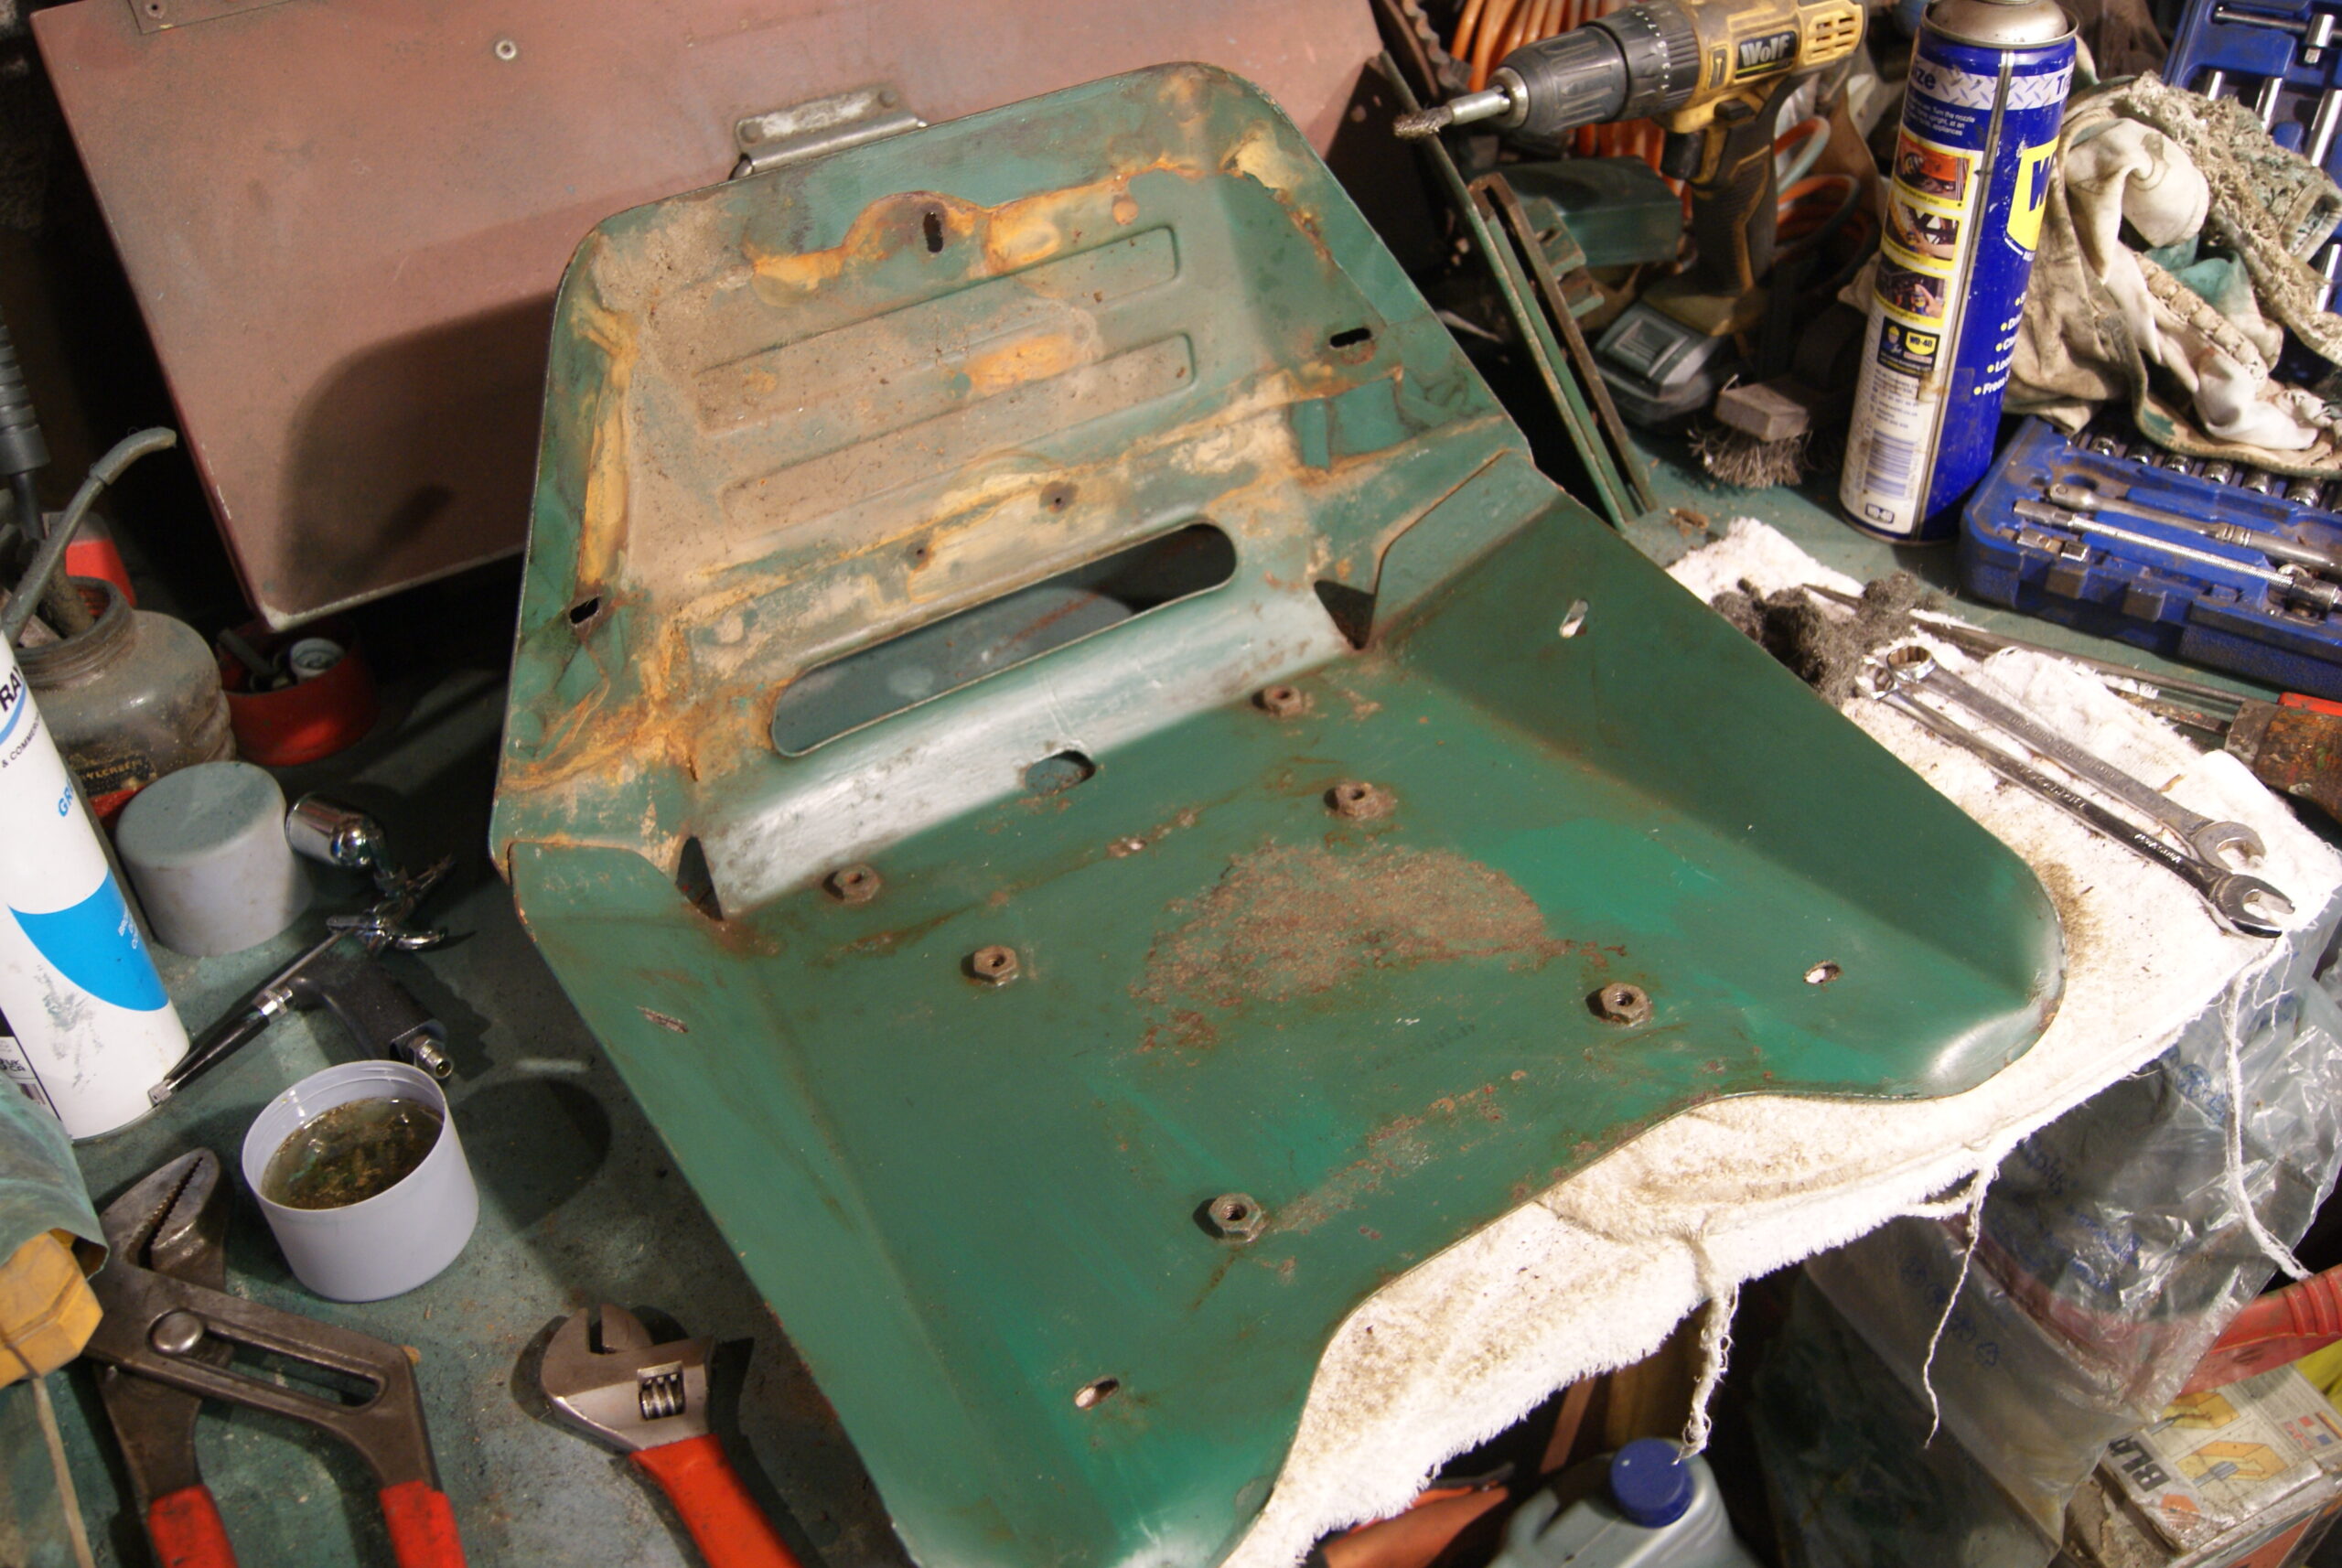
Before I can get any further I have to wait for the paint to harden and so I thought I’d start on the trailing seat. This is an important part of the machine as there is no way that you’d walk behind this mower when it’s in the faster gears. Apart from everything being seized solid with rust it did eventually come apart with plenty of patience and WD40.
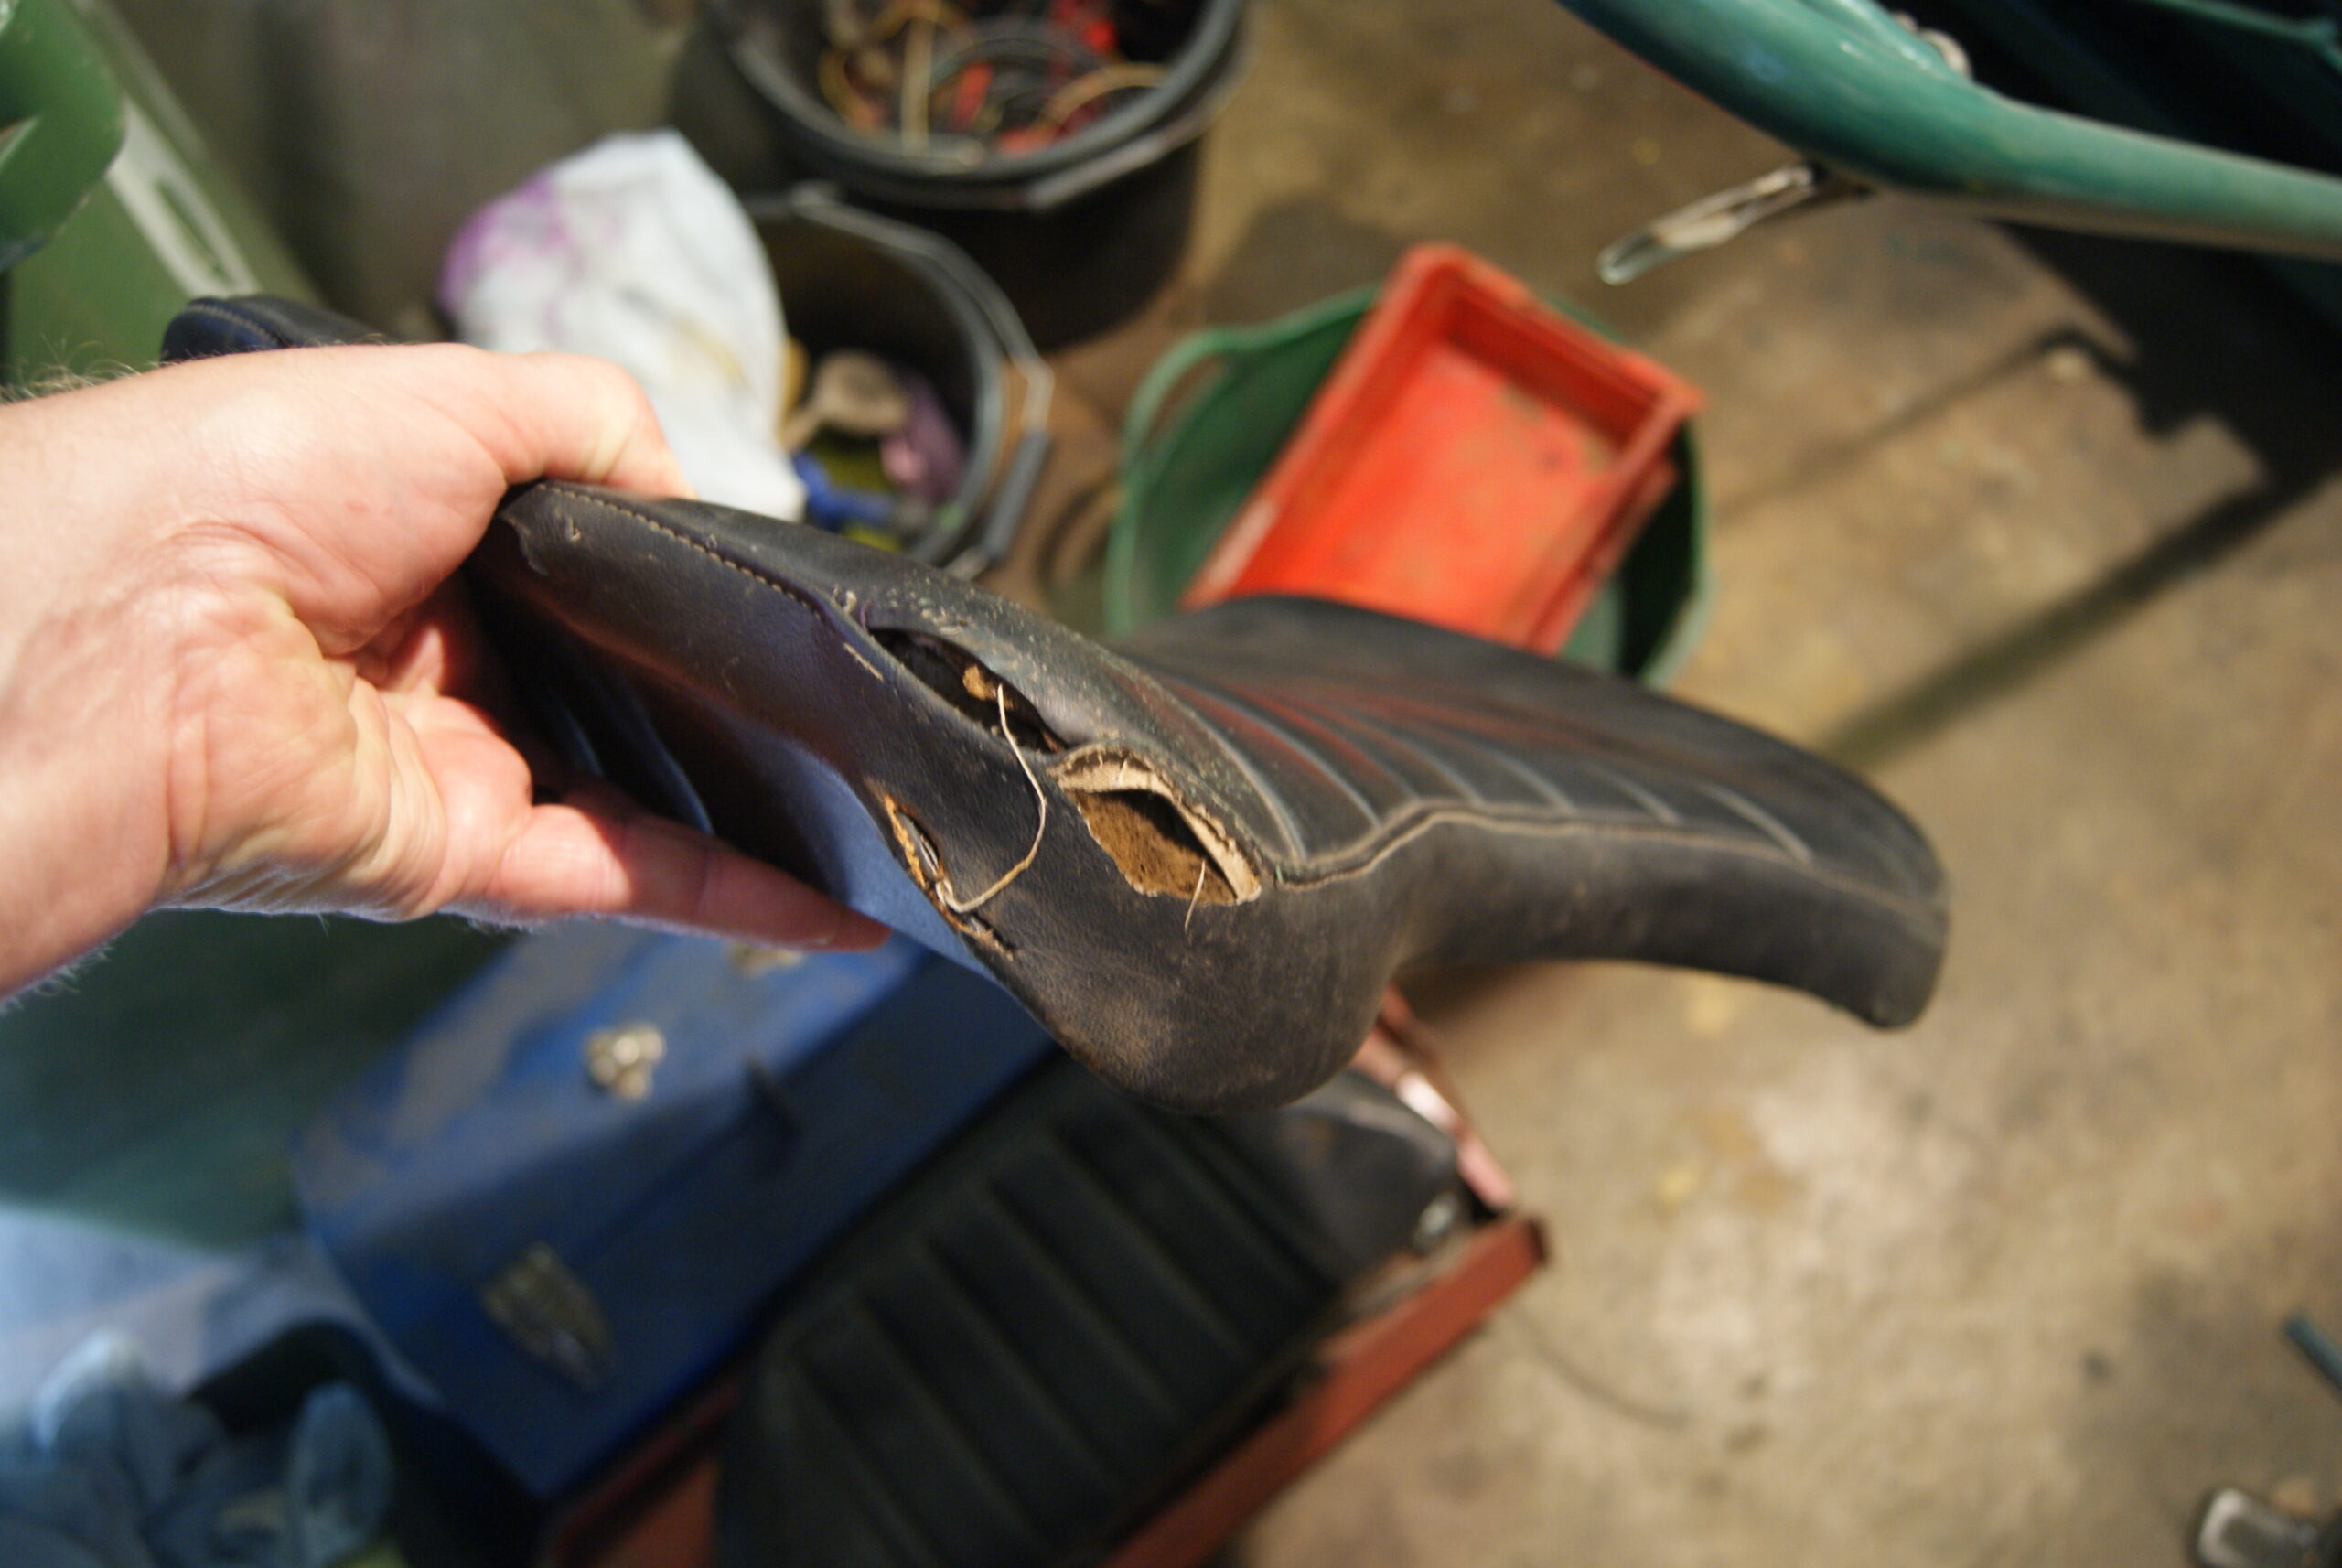
A judicious amount of elbow grease and wire wool later the seat assembly does look acceptable; it has rust and primer showing in a few places but nowhere near as bad as the mower was, so I have every confidence that it will clean up with no trouble. There is a split in the front edge of the cushion where drivers have got on and off over the years, so I’ll have to hunt out a vehicle trimmer to see if it can be repaired easily. To my untrained eye it looks straightforward, but then I’m no expert!
Now, where’s that kettle…..?
Attachments:
July 18, 2022 at 7:23 am #39468trusty220KeymasterI’m pretty sure the gel coat is intact, Angus, but the thickness of the primer/filler they used on the repaint is the main culprit. With successive heat and cooling cycles from the engine this would be sufficient to make the primer lose adhesion if the preparation had been poor in the first place.
I seem to have used the wrong photo on the sequence but it should show the lid with most of the paint and primer removed. Now that it won’t be used for extended periods the temperature build-ups shouldn’t be a problem anyway, but the action I’ve taken in removing the thick coat of primer should correct the fault anyway.
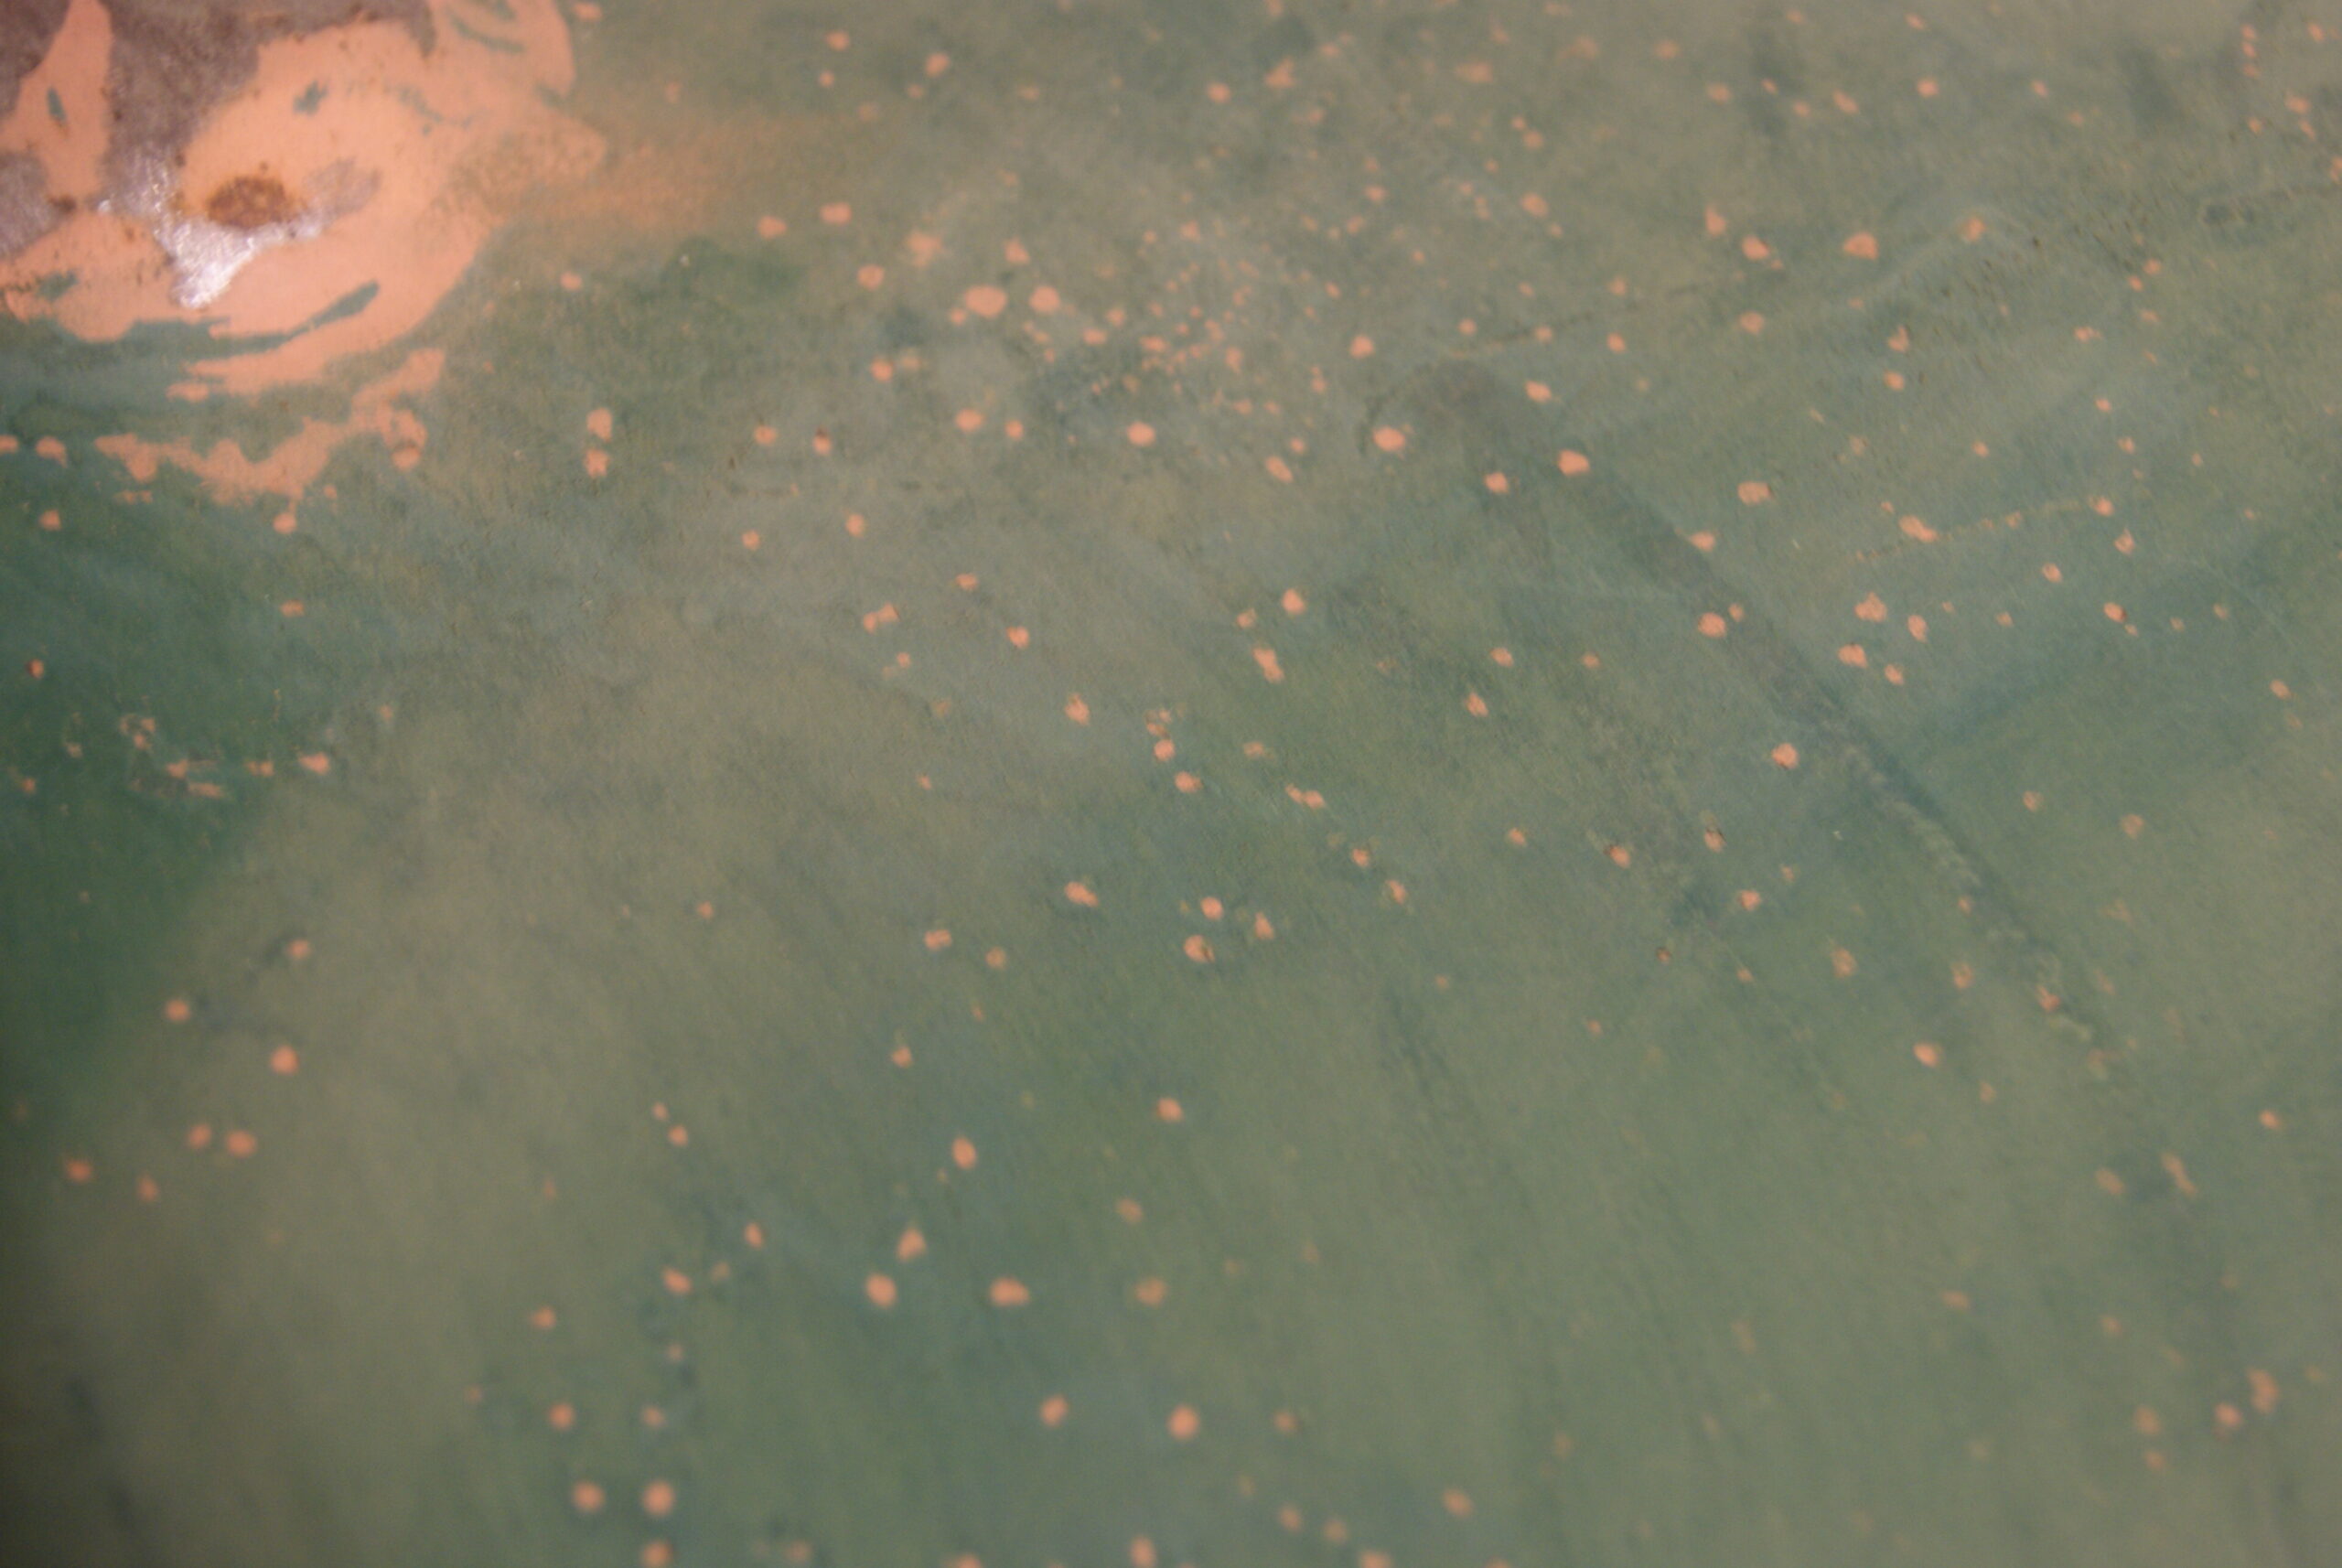
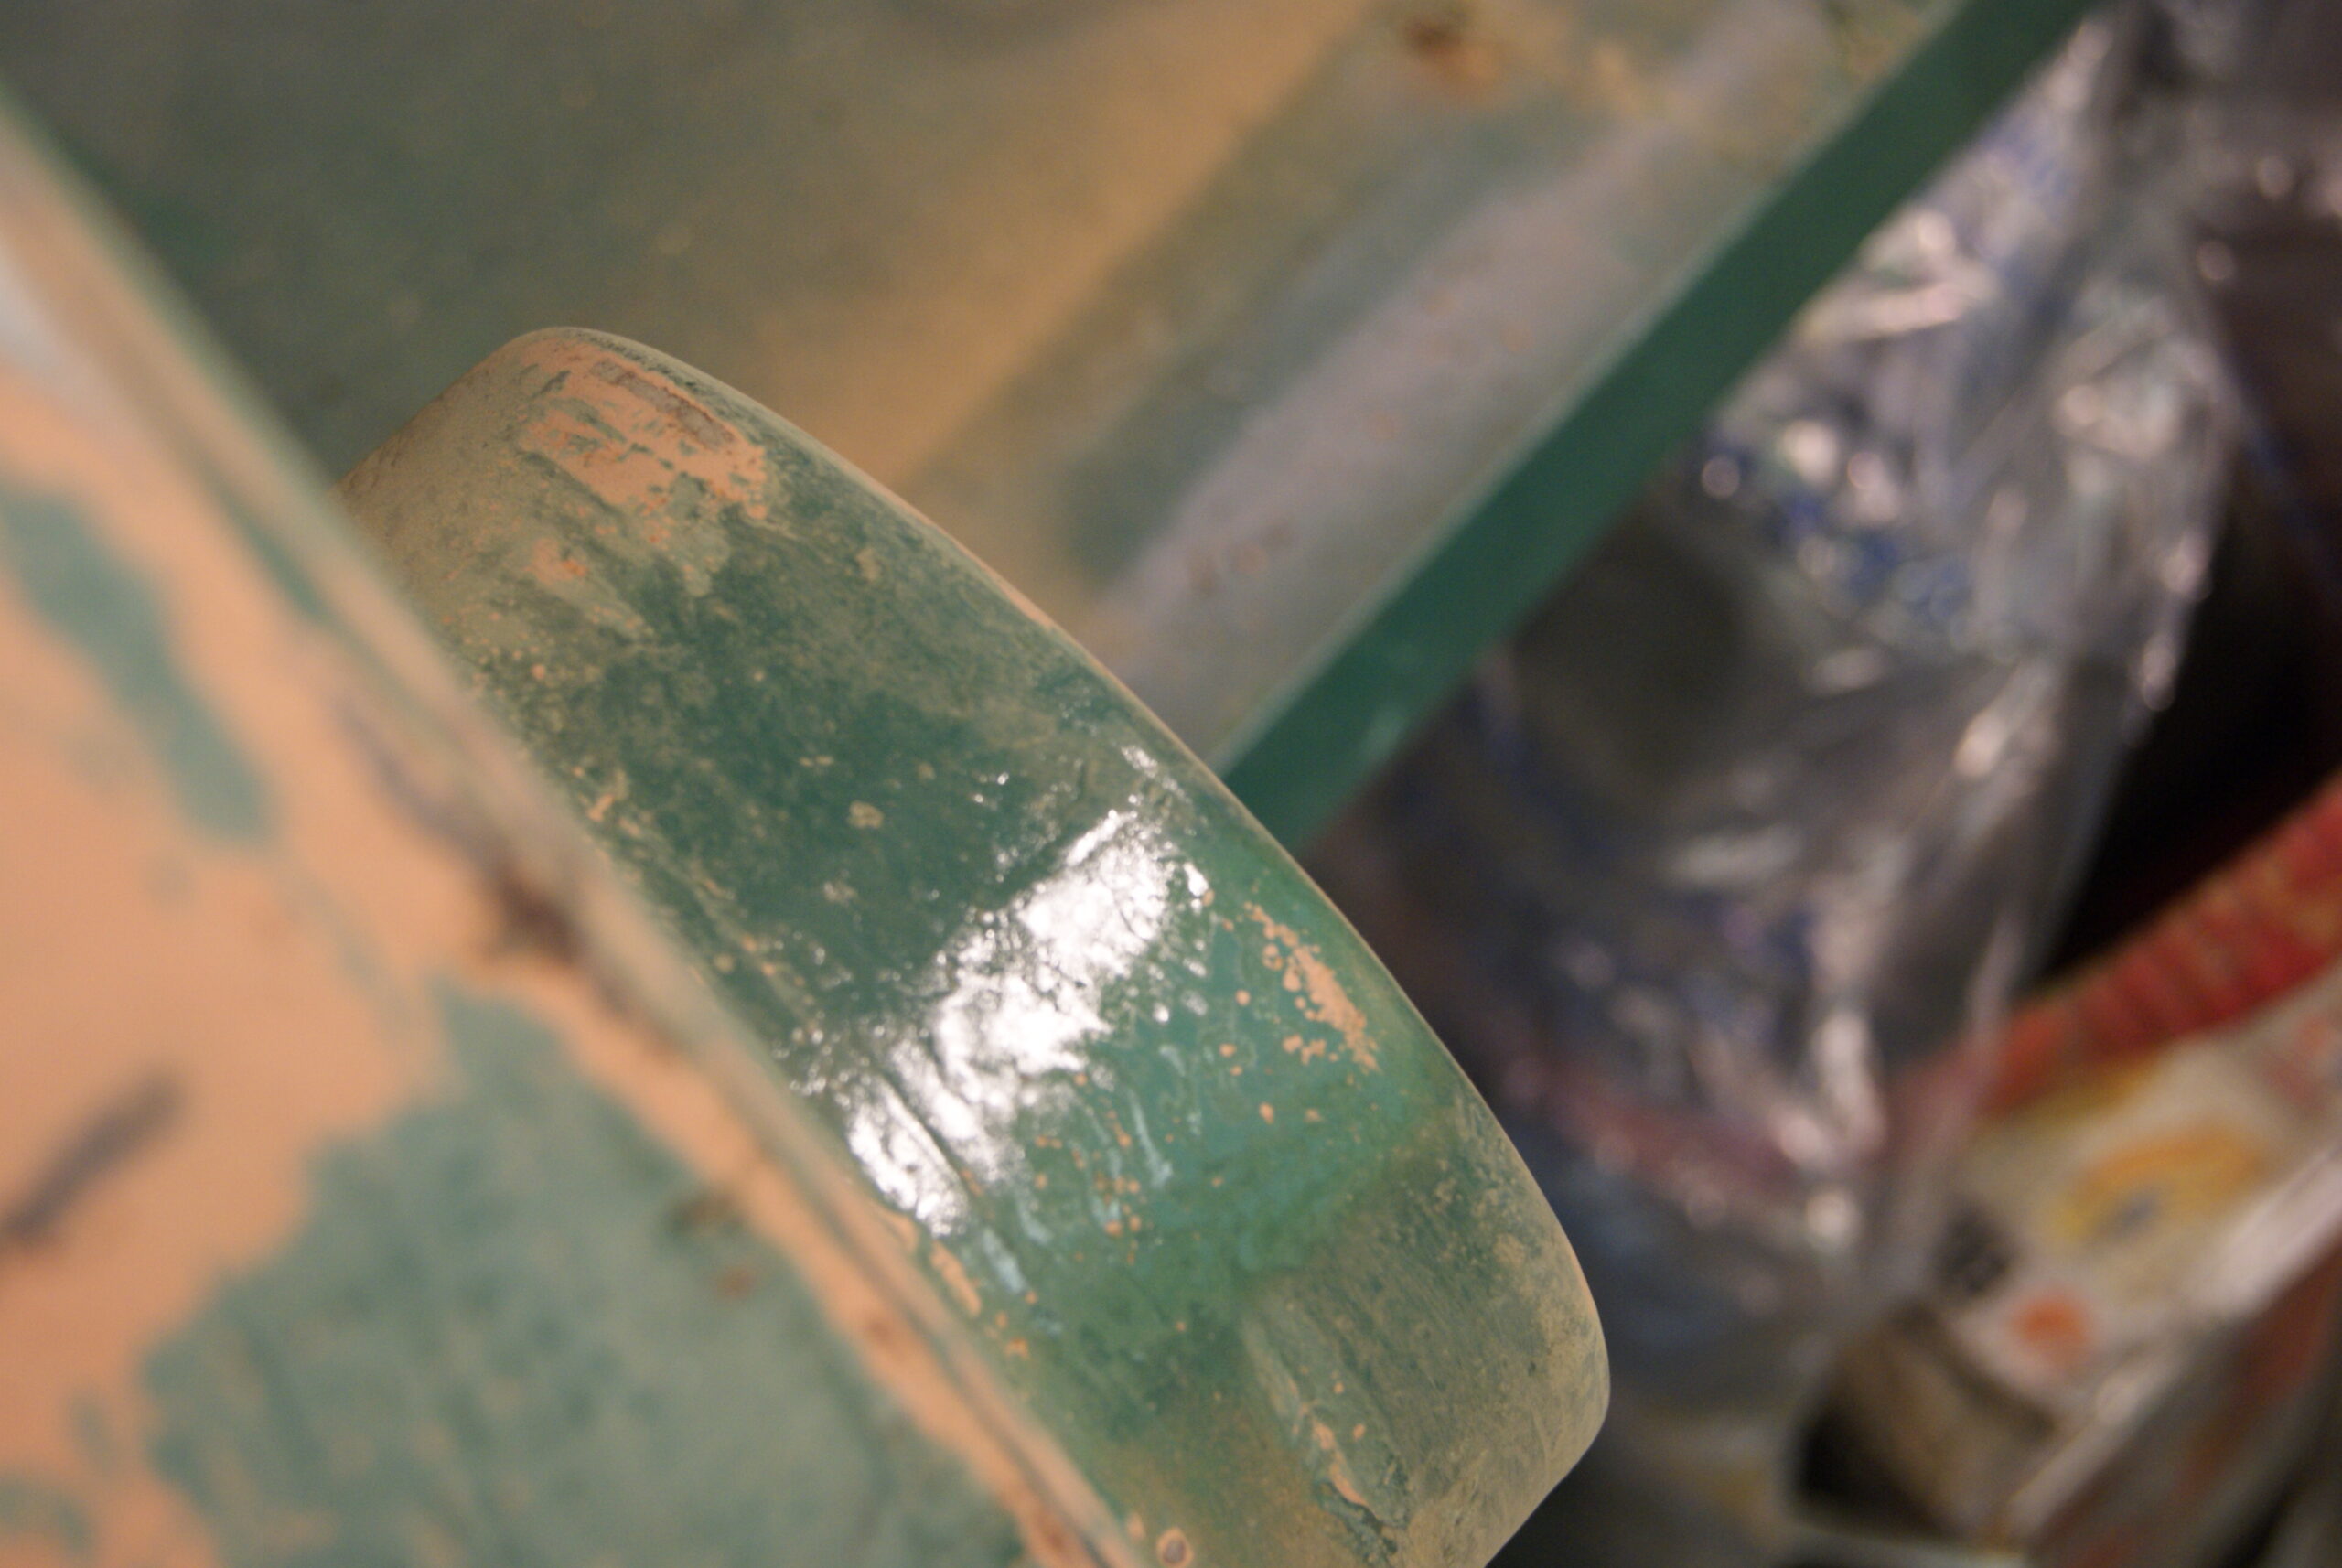
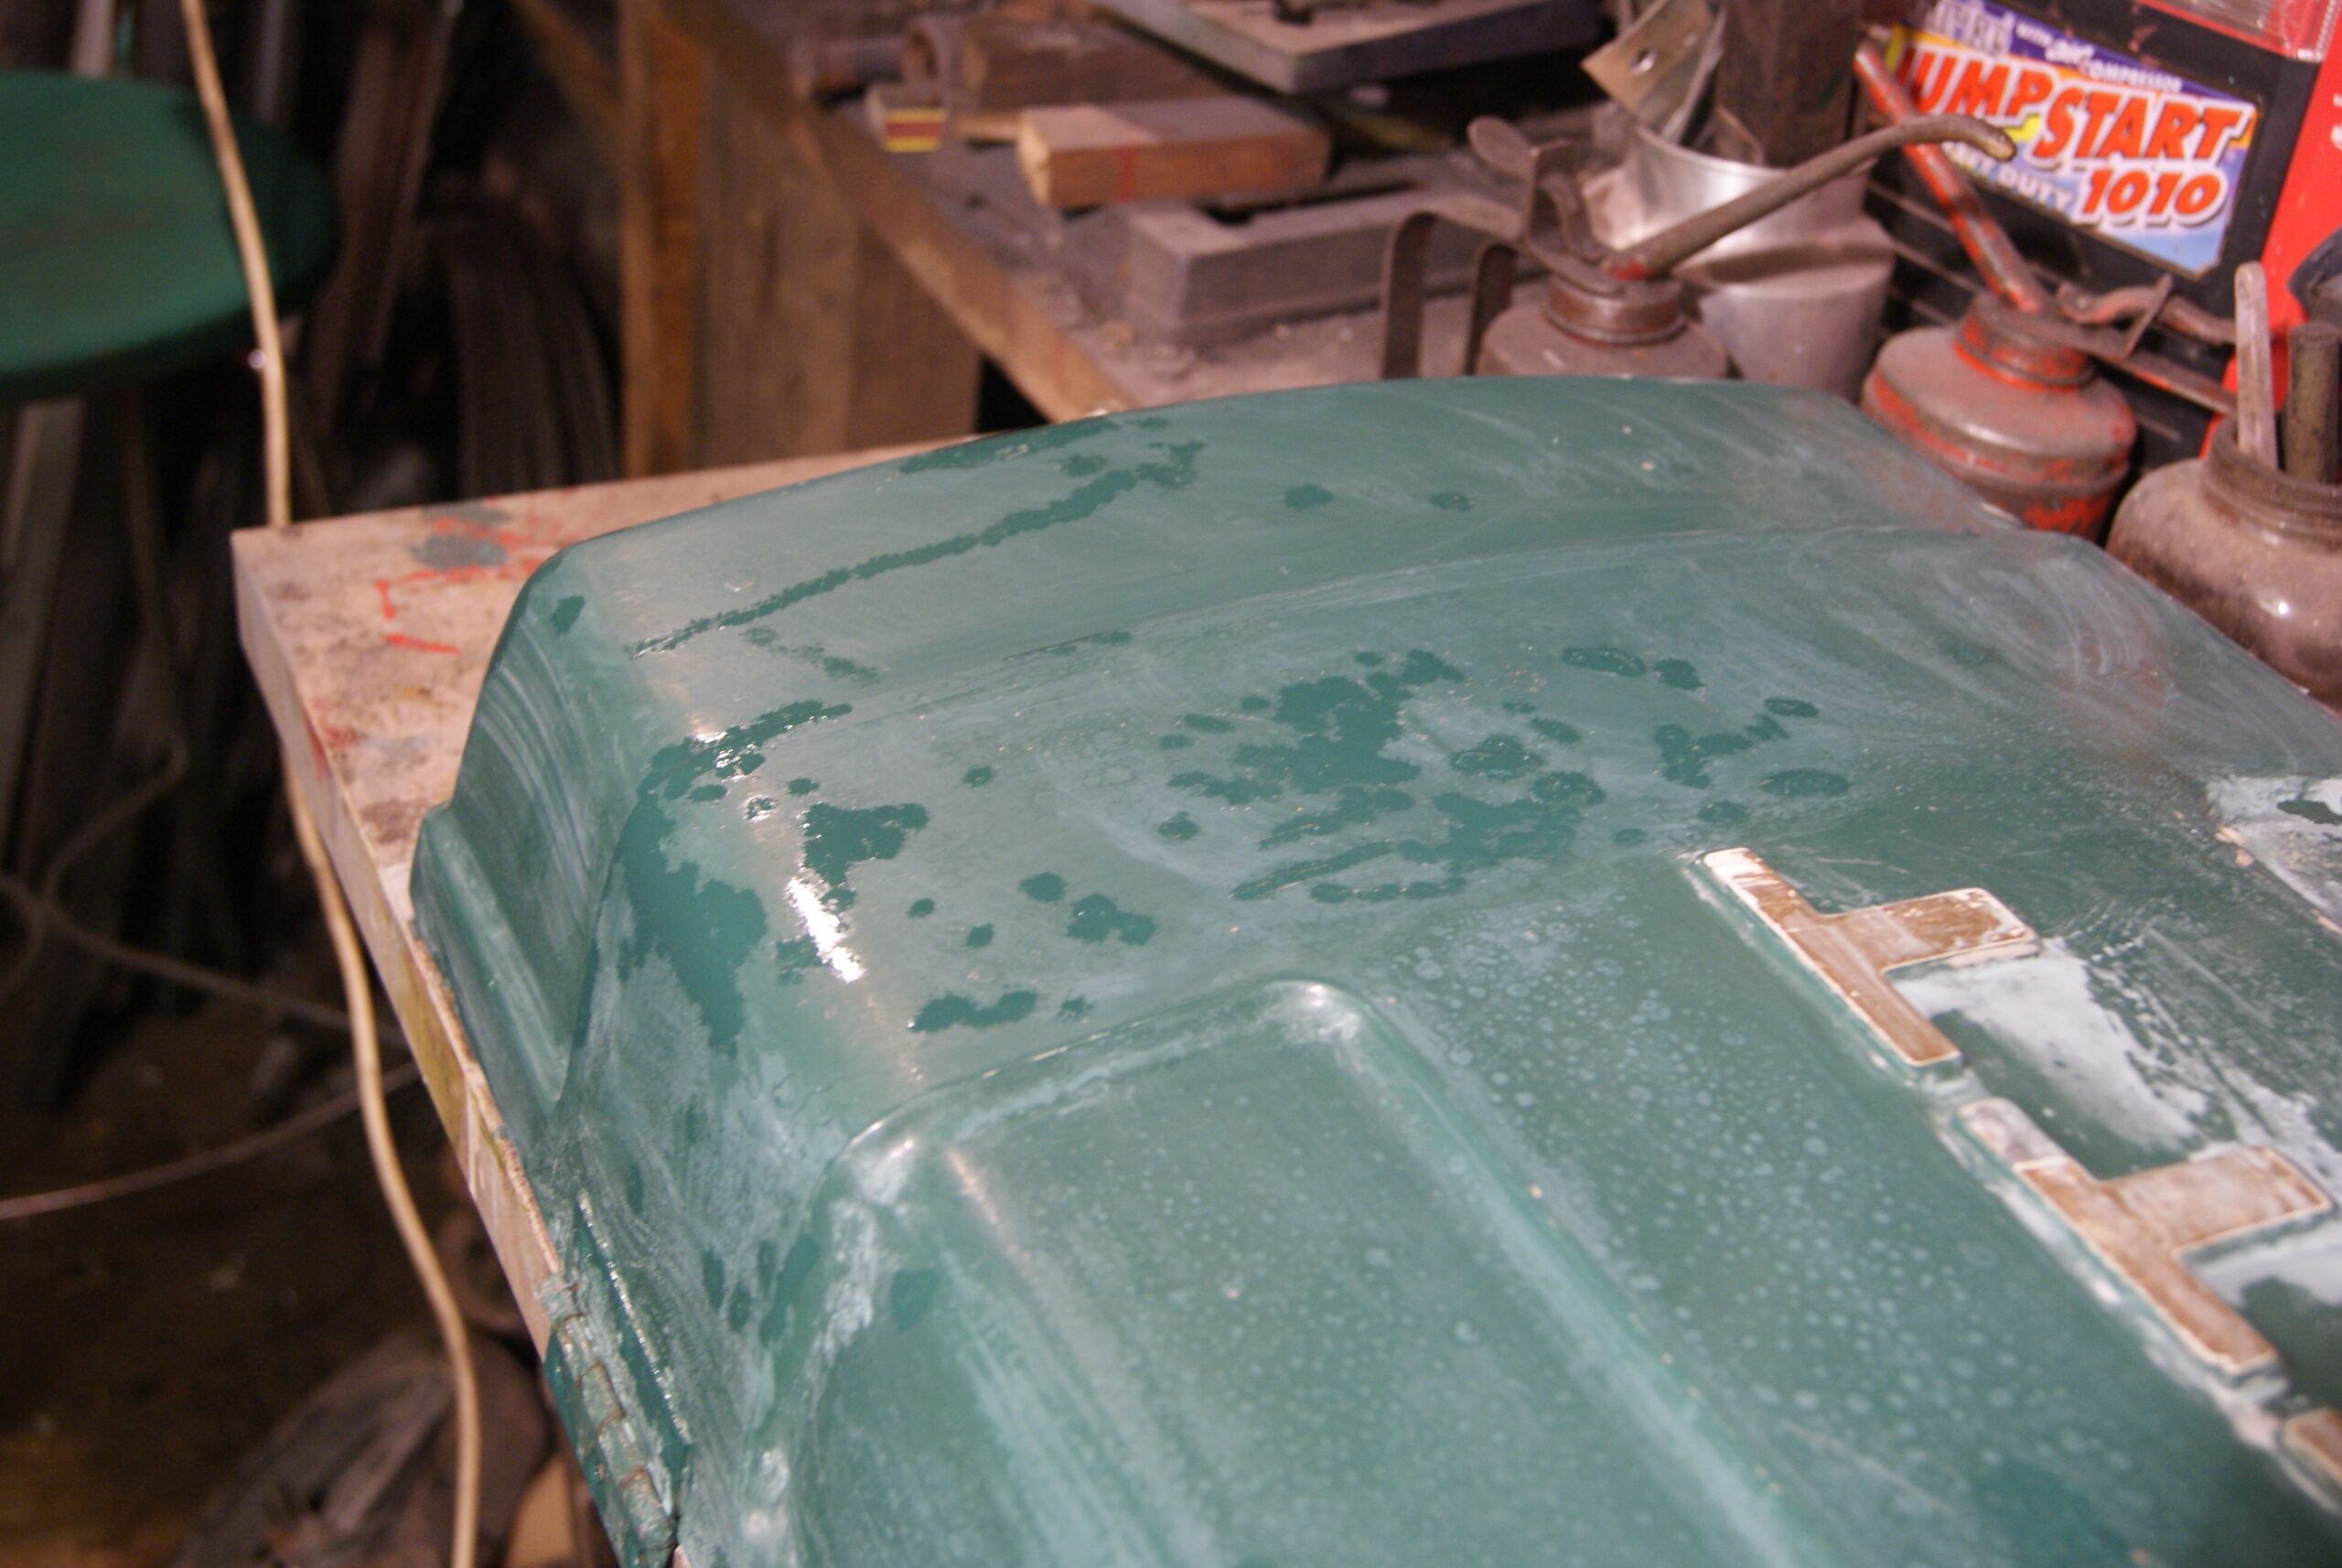
July 17, 2022 at 1:17 pm #39458trusty220KeymasterIt really has been some time since I updated this story but I haven’t been slacking. The main piece of news is that I’ve had a minor disaster with the fibreglass lid; it had many dents and scratches which I was filling with stopper (a very fine filler used for small imperfections) but when I went to flat them back to blend them in with the rest it proved impossible without rupturing hundreds of microblisters. It looks like somebody in the past has repainted the lid with a high-build primer/filler; this was coloured orange. The green paint was applied over the top of the orange primer but because the surface preparation was not good enough at the time, the primer/filler has lifted in hundreds of blisters and lifted the green topcoat with it. What this meant in this case was that when I flatted it down it left lots of orange spots in the green paint- not a good look!
I have now flatted it all down, filled the blemishes and it has had a coat of grey primer and the first coat of green. I’m currently waiting for it to dry.
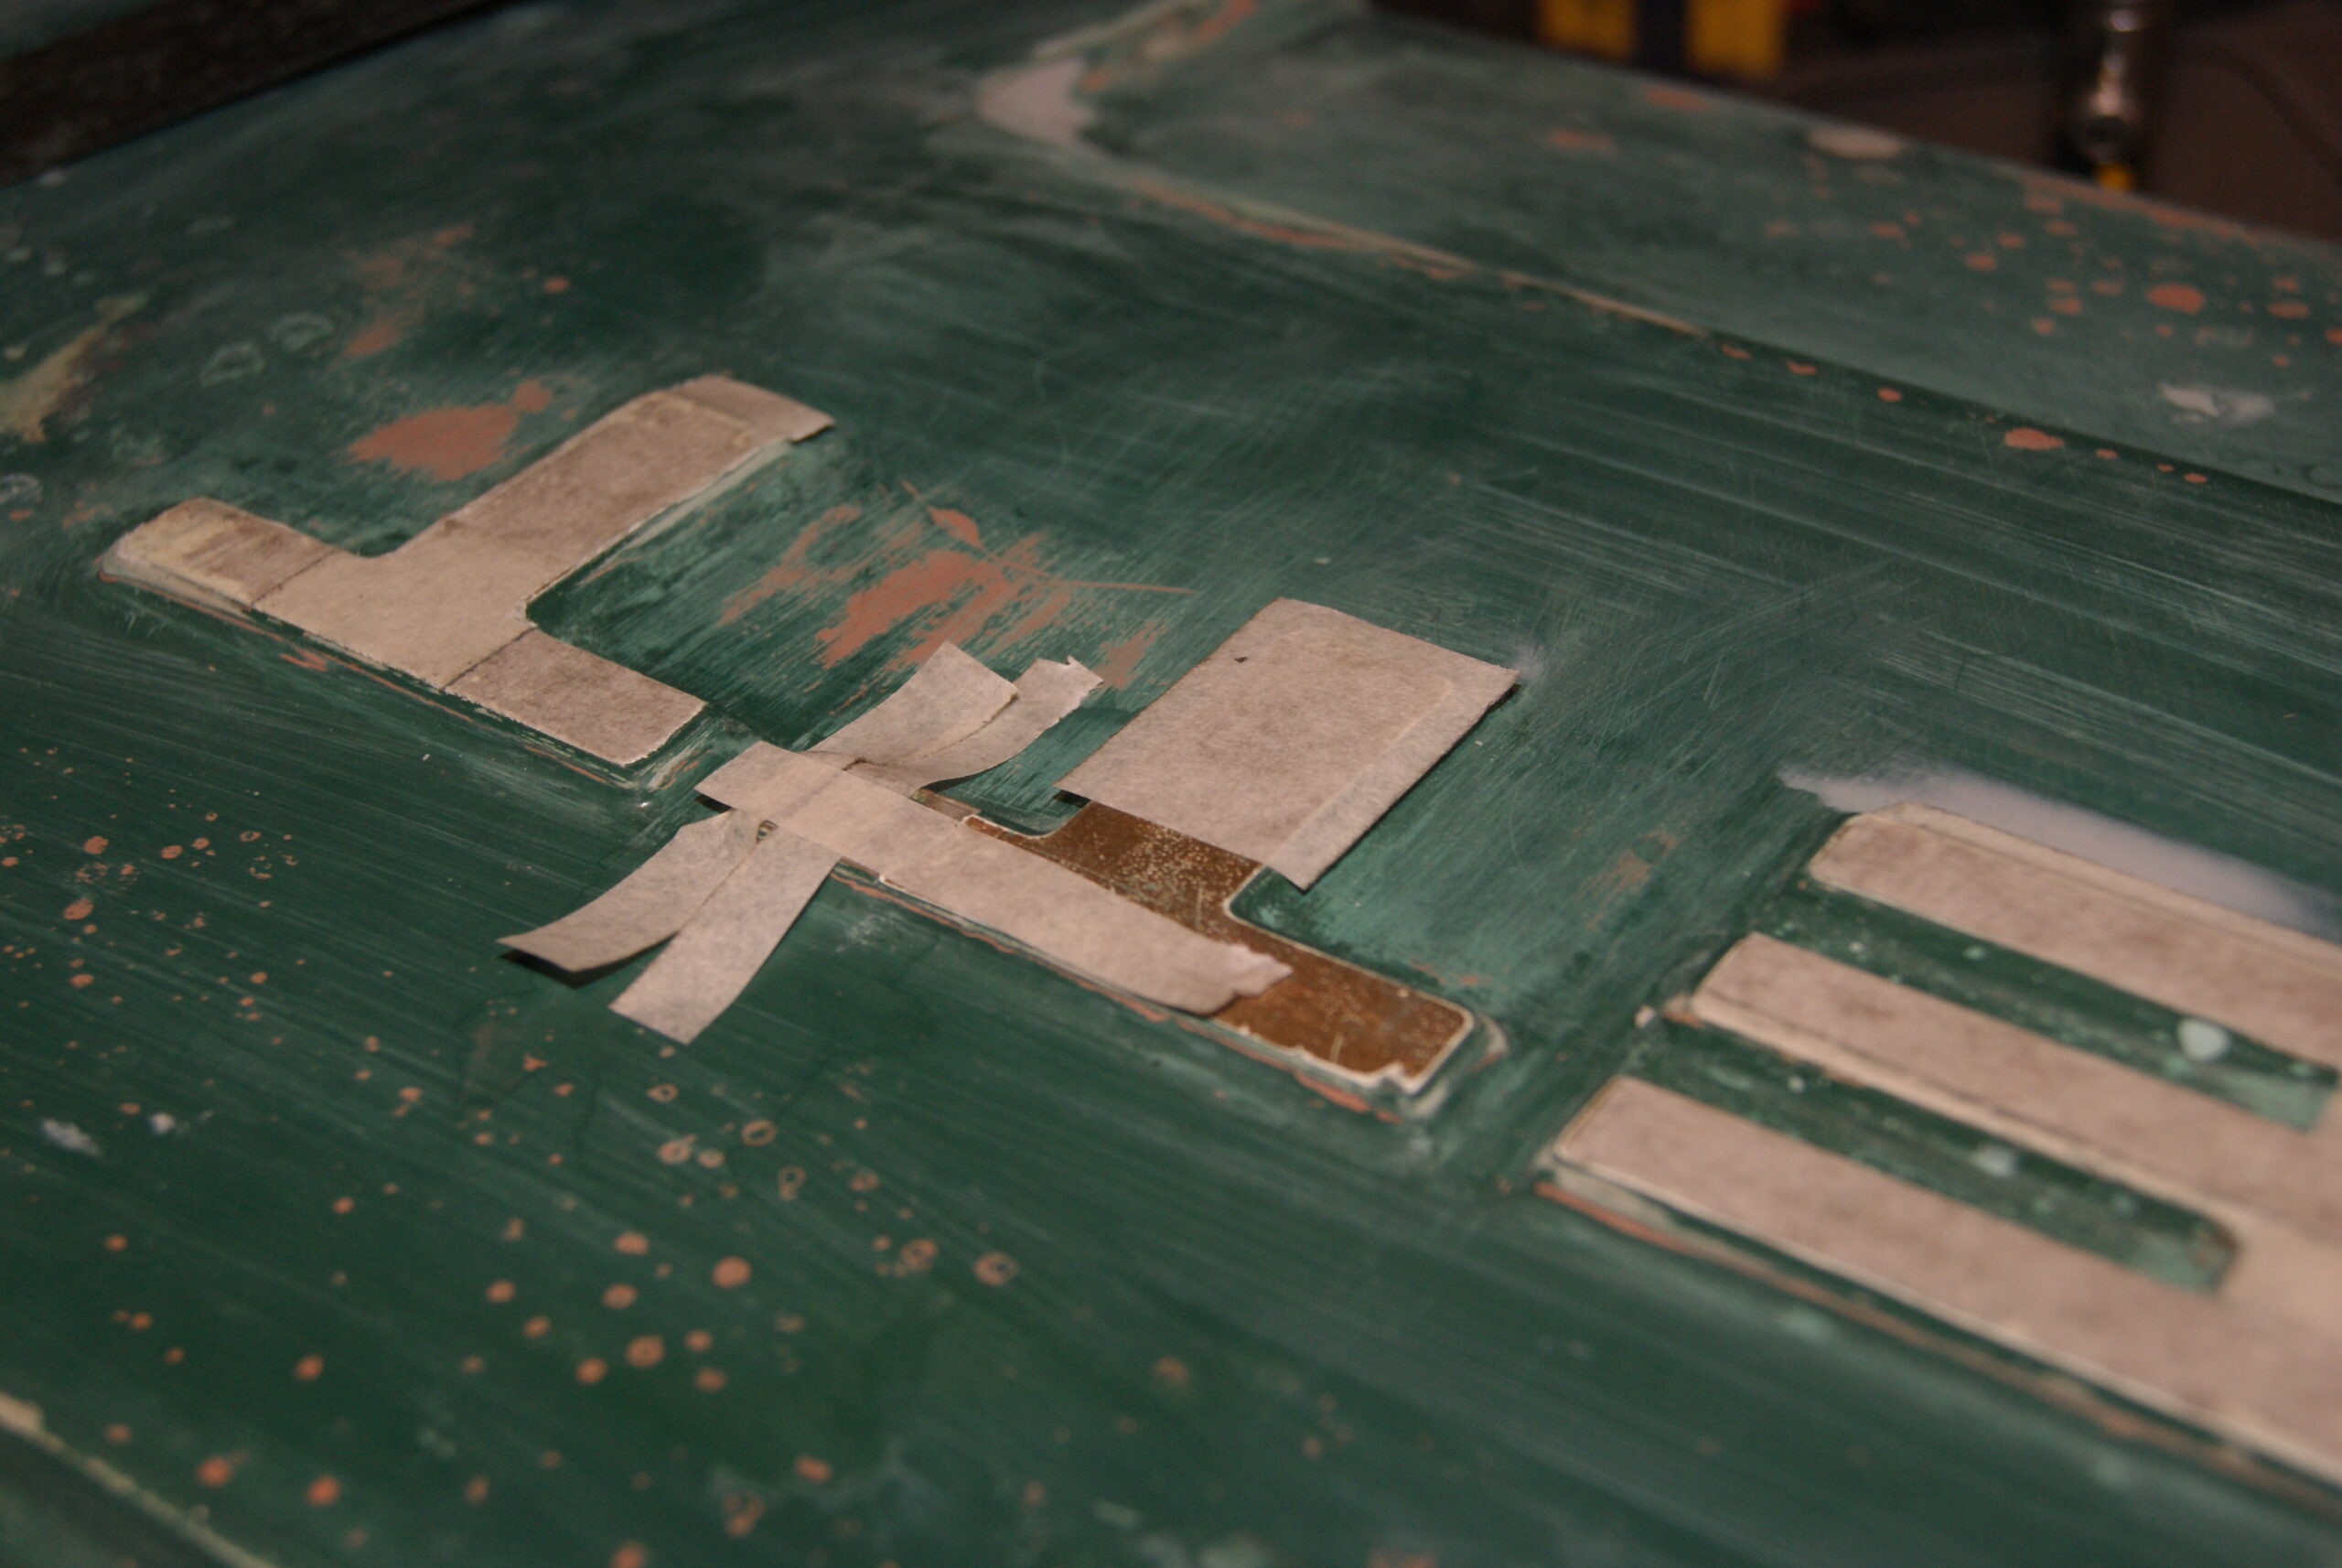
Another part of the job involved preserving the lettering on the top which is applied to raised pieces of fibreglass. The letters themselves are cut out of plastic and glued on, so I wanted to try to preserve them as best as I could. Masking tape was applied to each one in turn, then carefully cut around with a very sharp scalpel to leave a close cut mask on each letter. This seems to have worked fine so far, but I also had to make up a piece to repair one of the letter “T’s” which had become broken; a piece of 10 thou plastic card sorted out the job, secured with epoxy adhesive. When finished I’ll take off the tape and give the letters a light coat of gold, then rub it back with fine wire wool to age it.
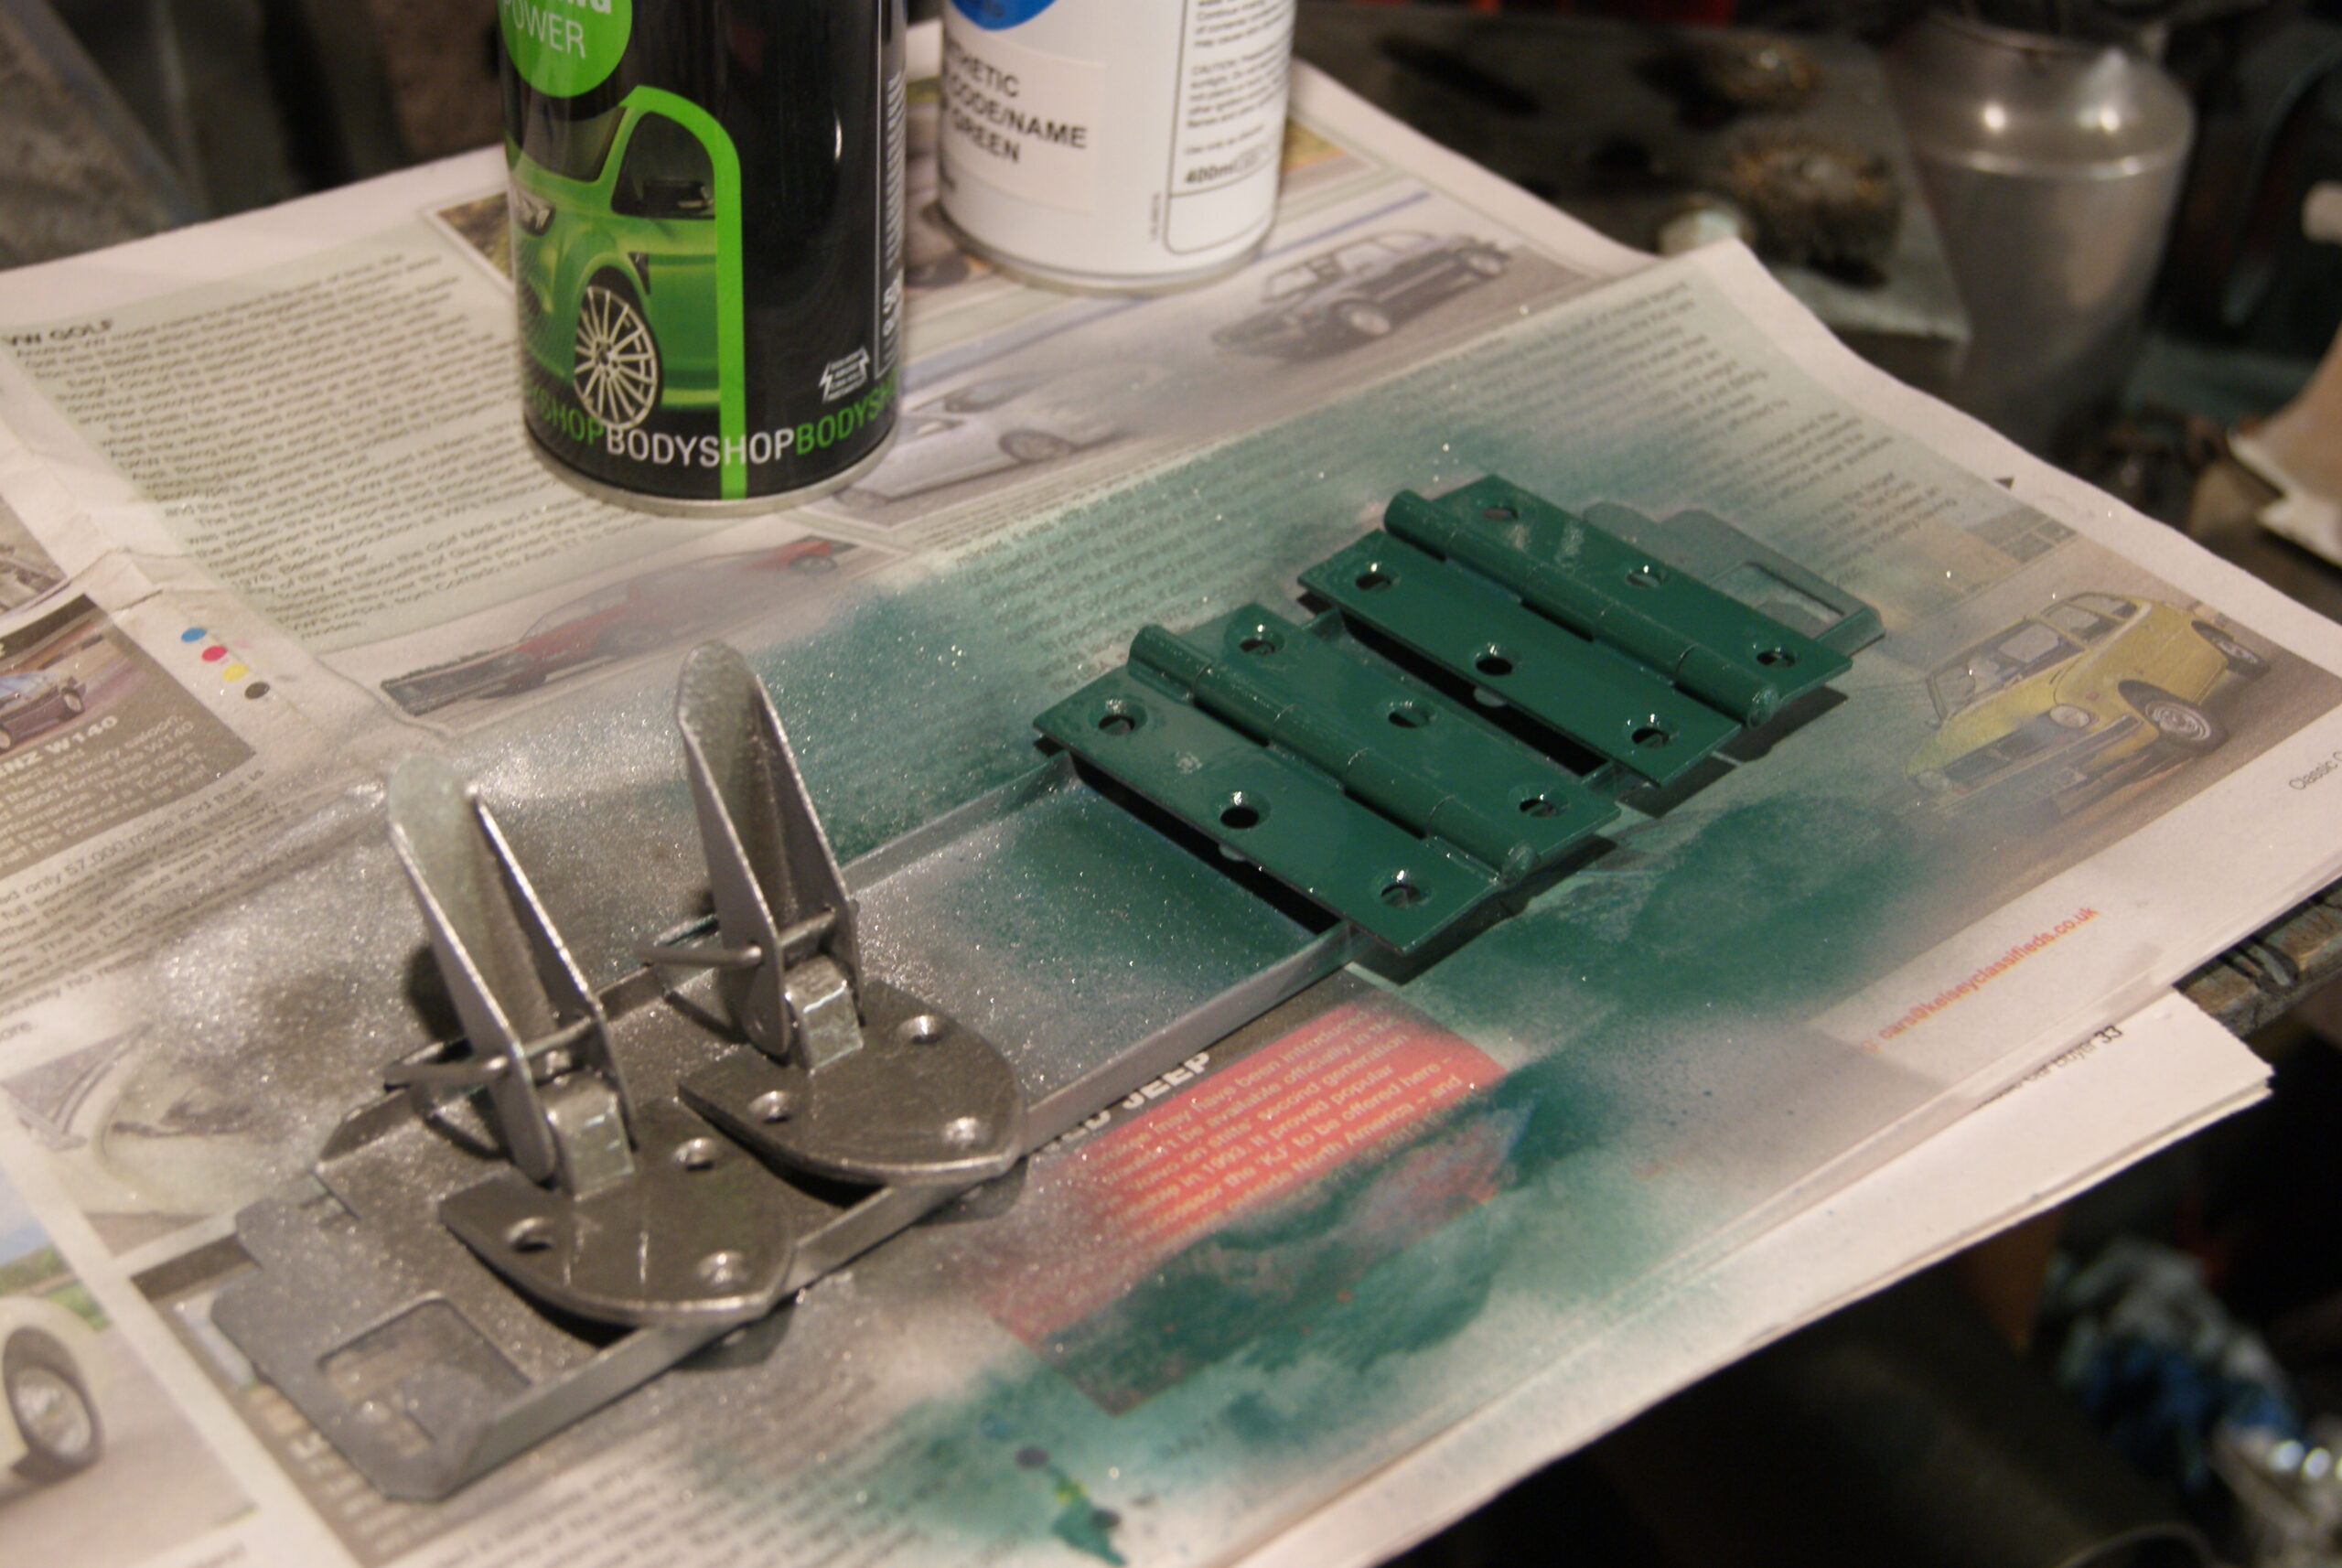
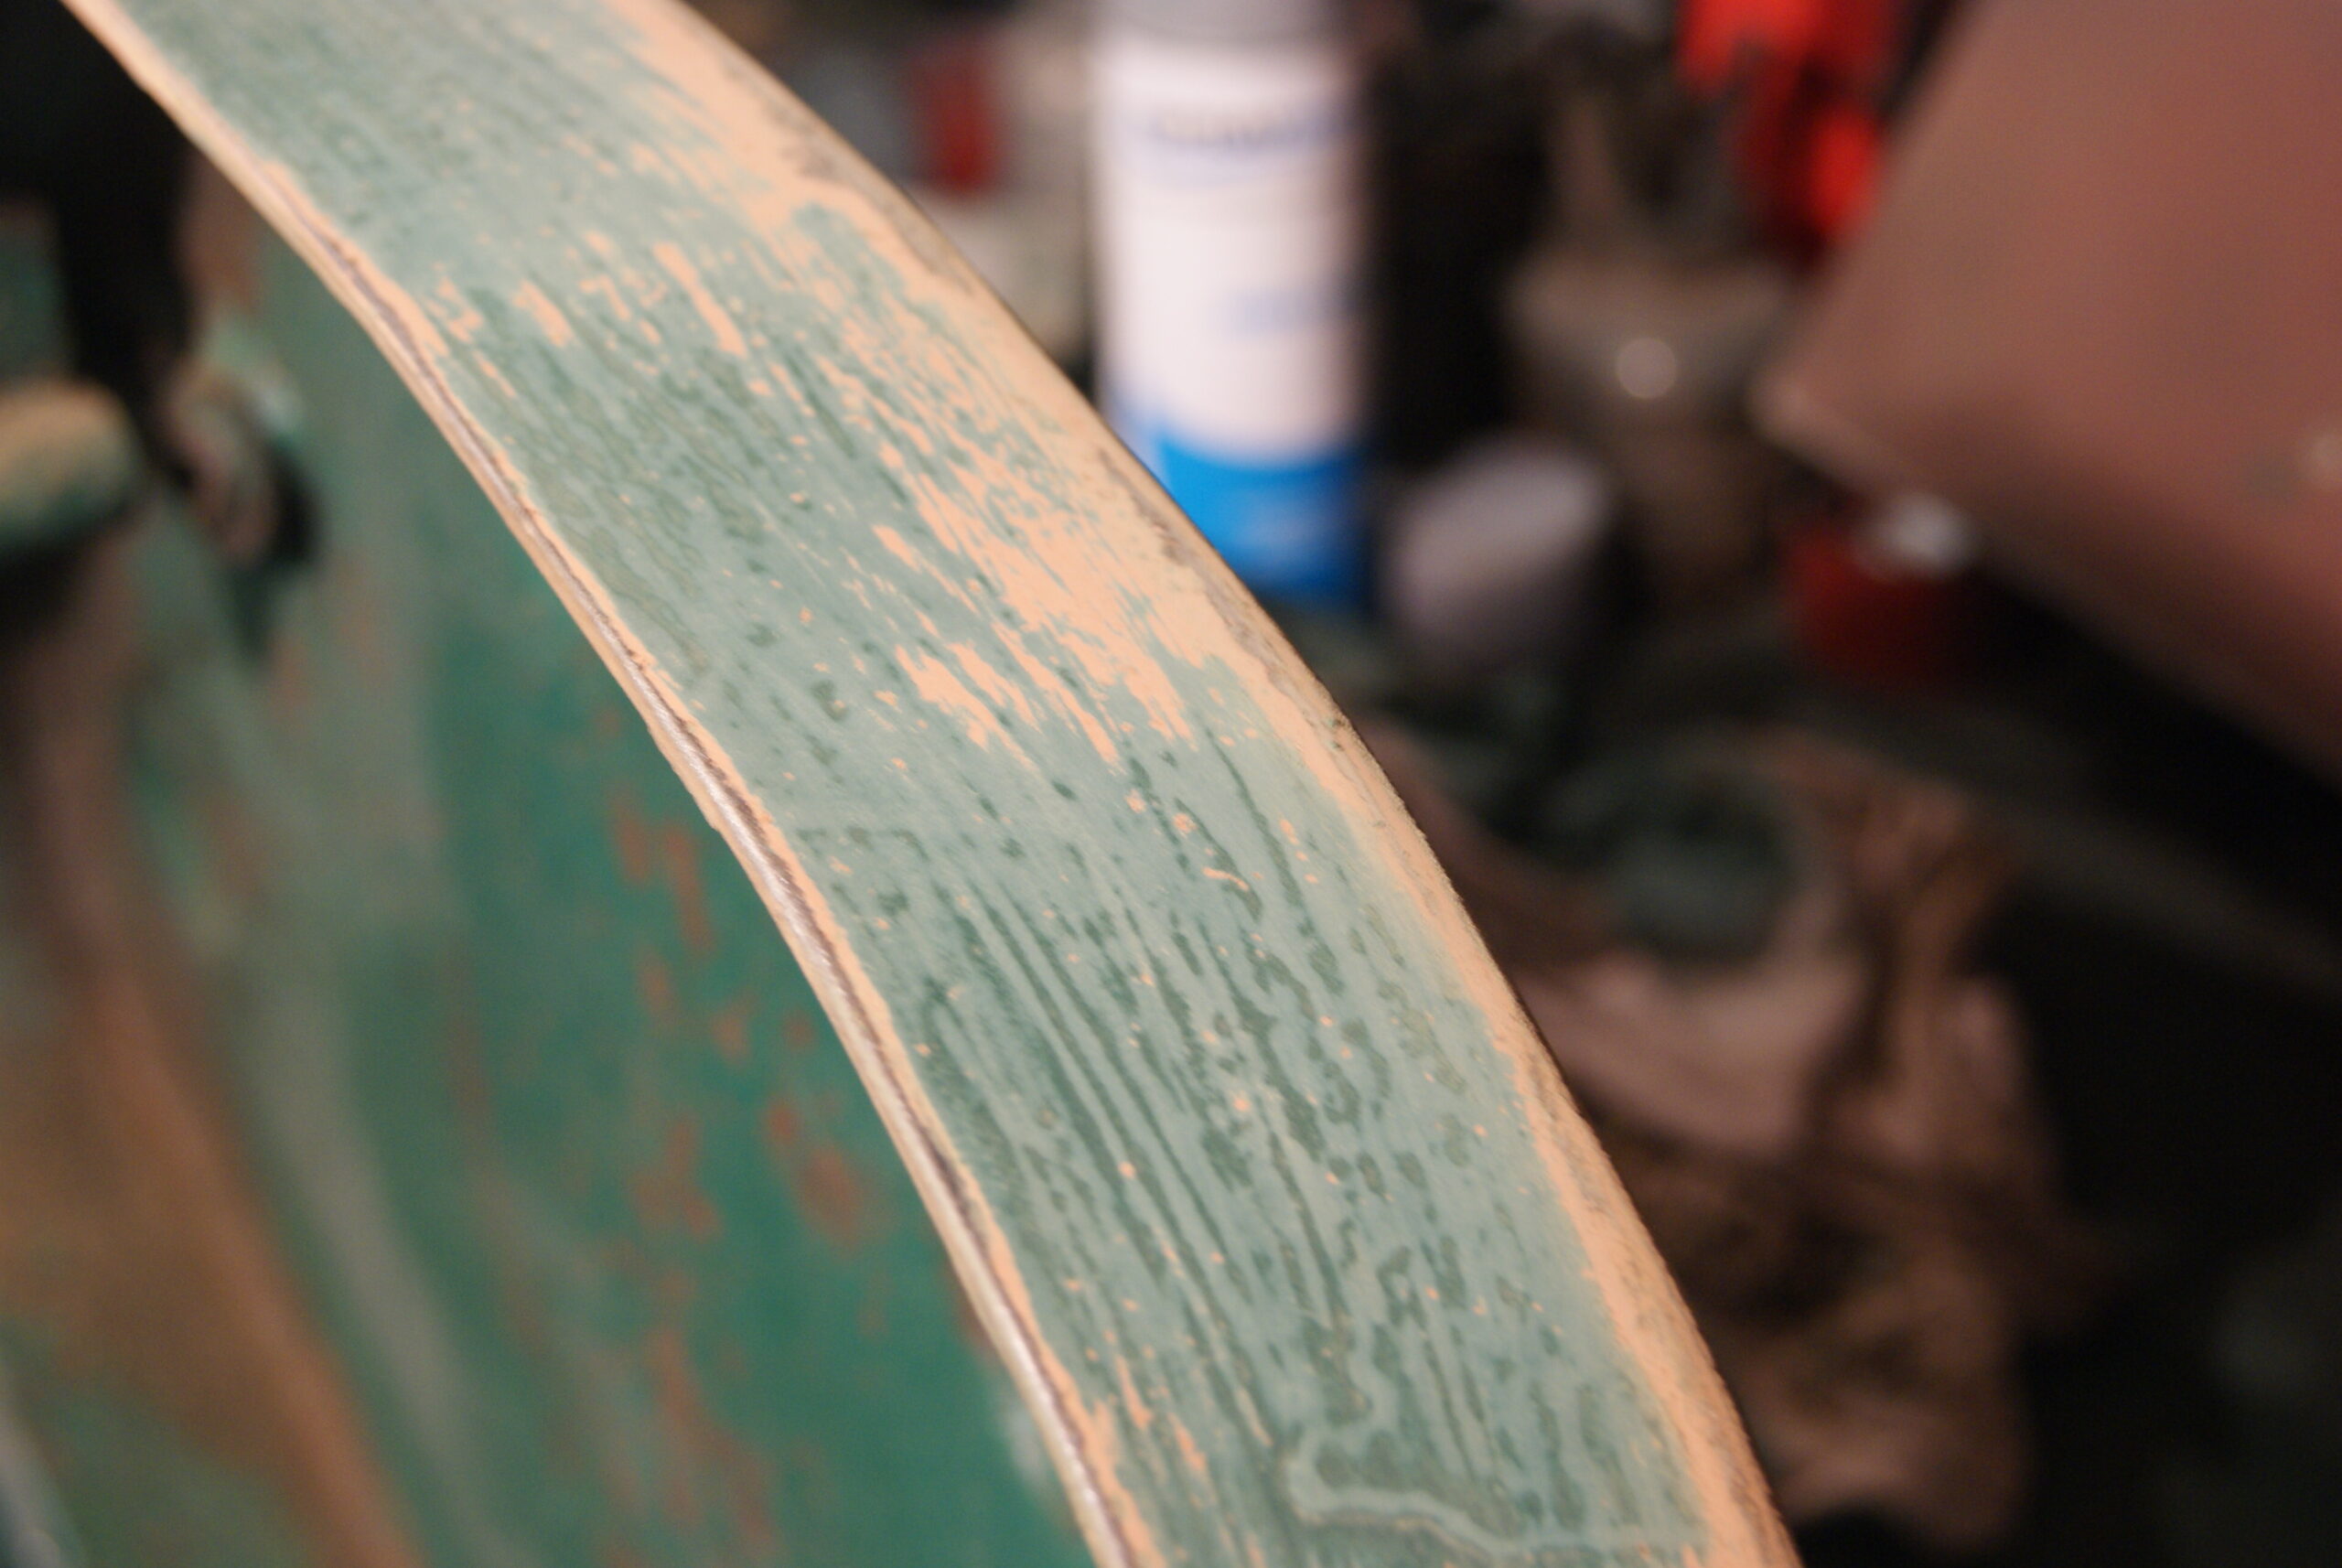
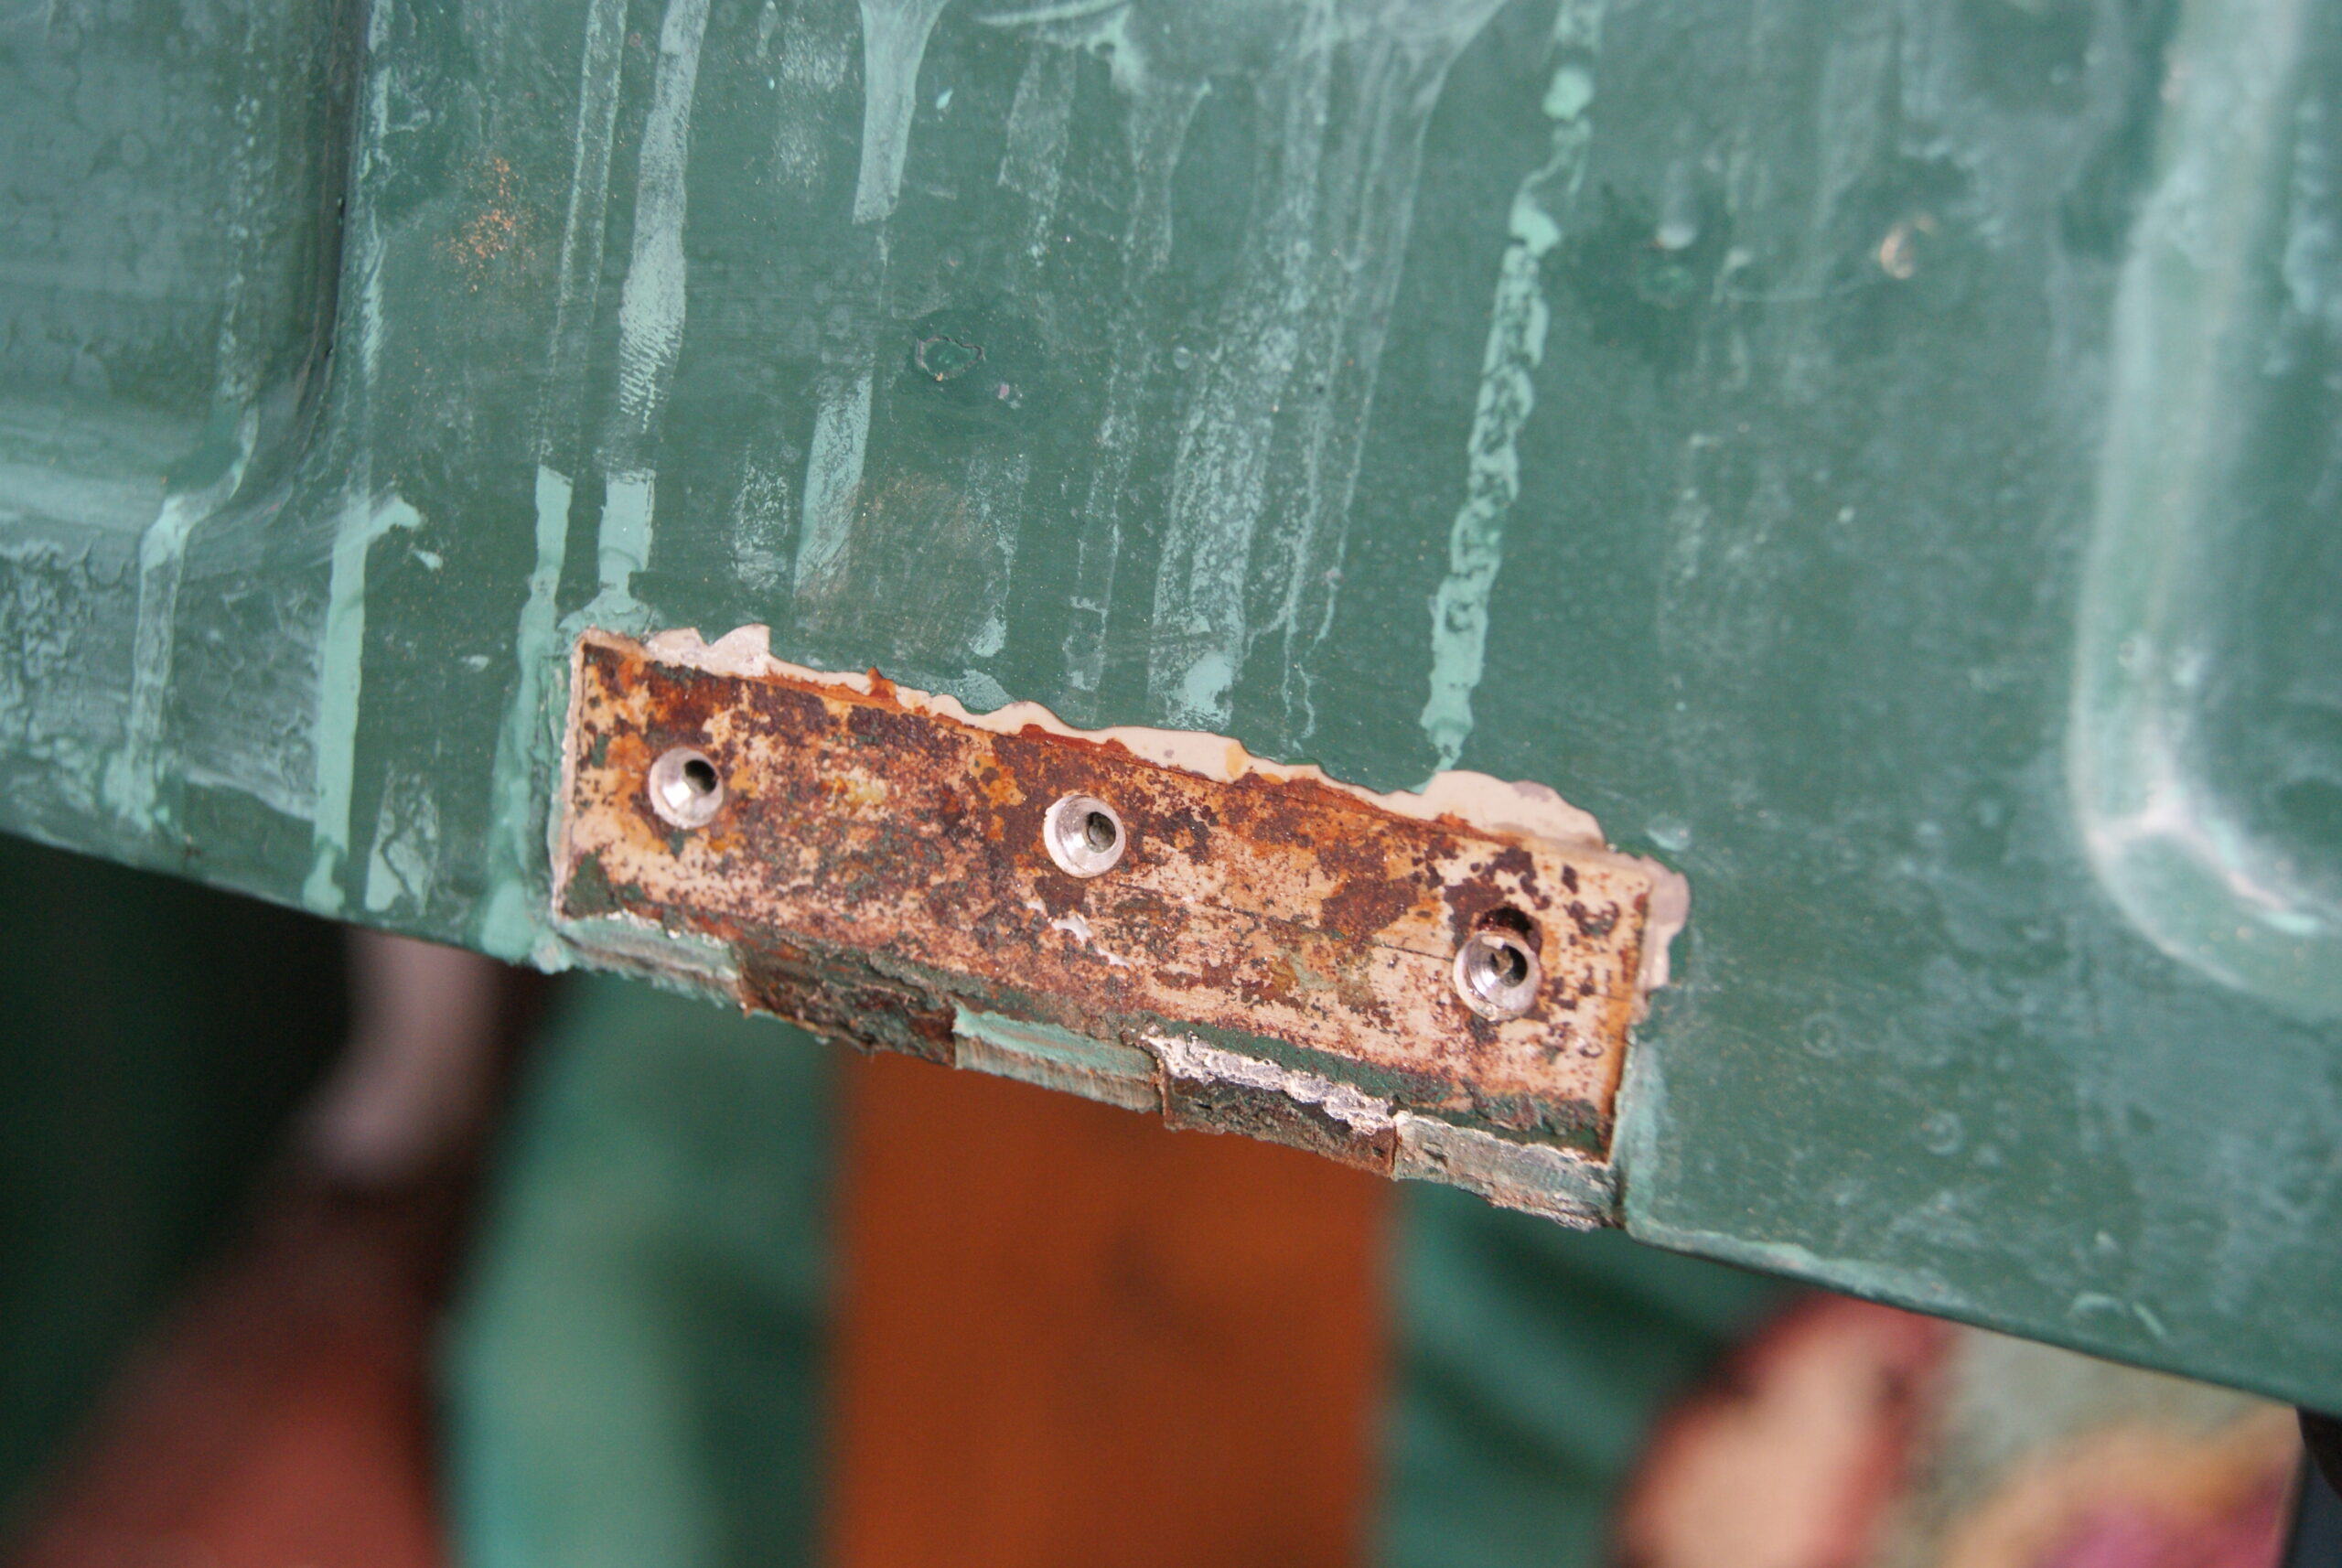
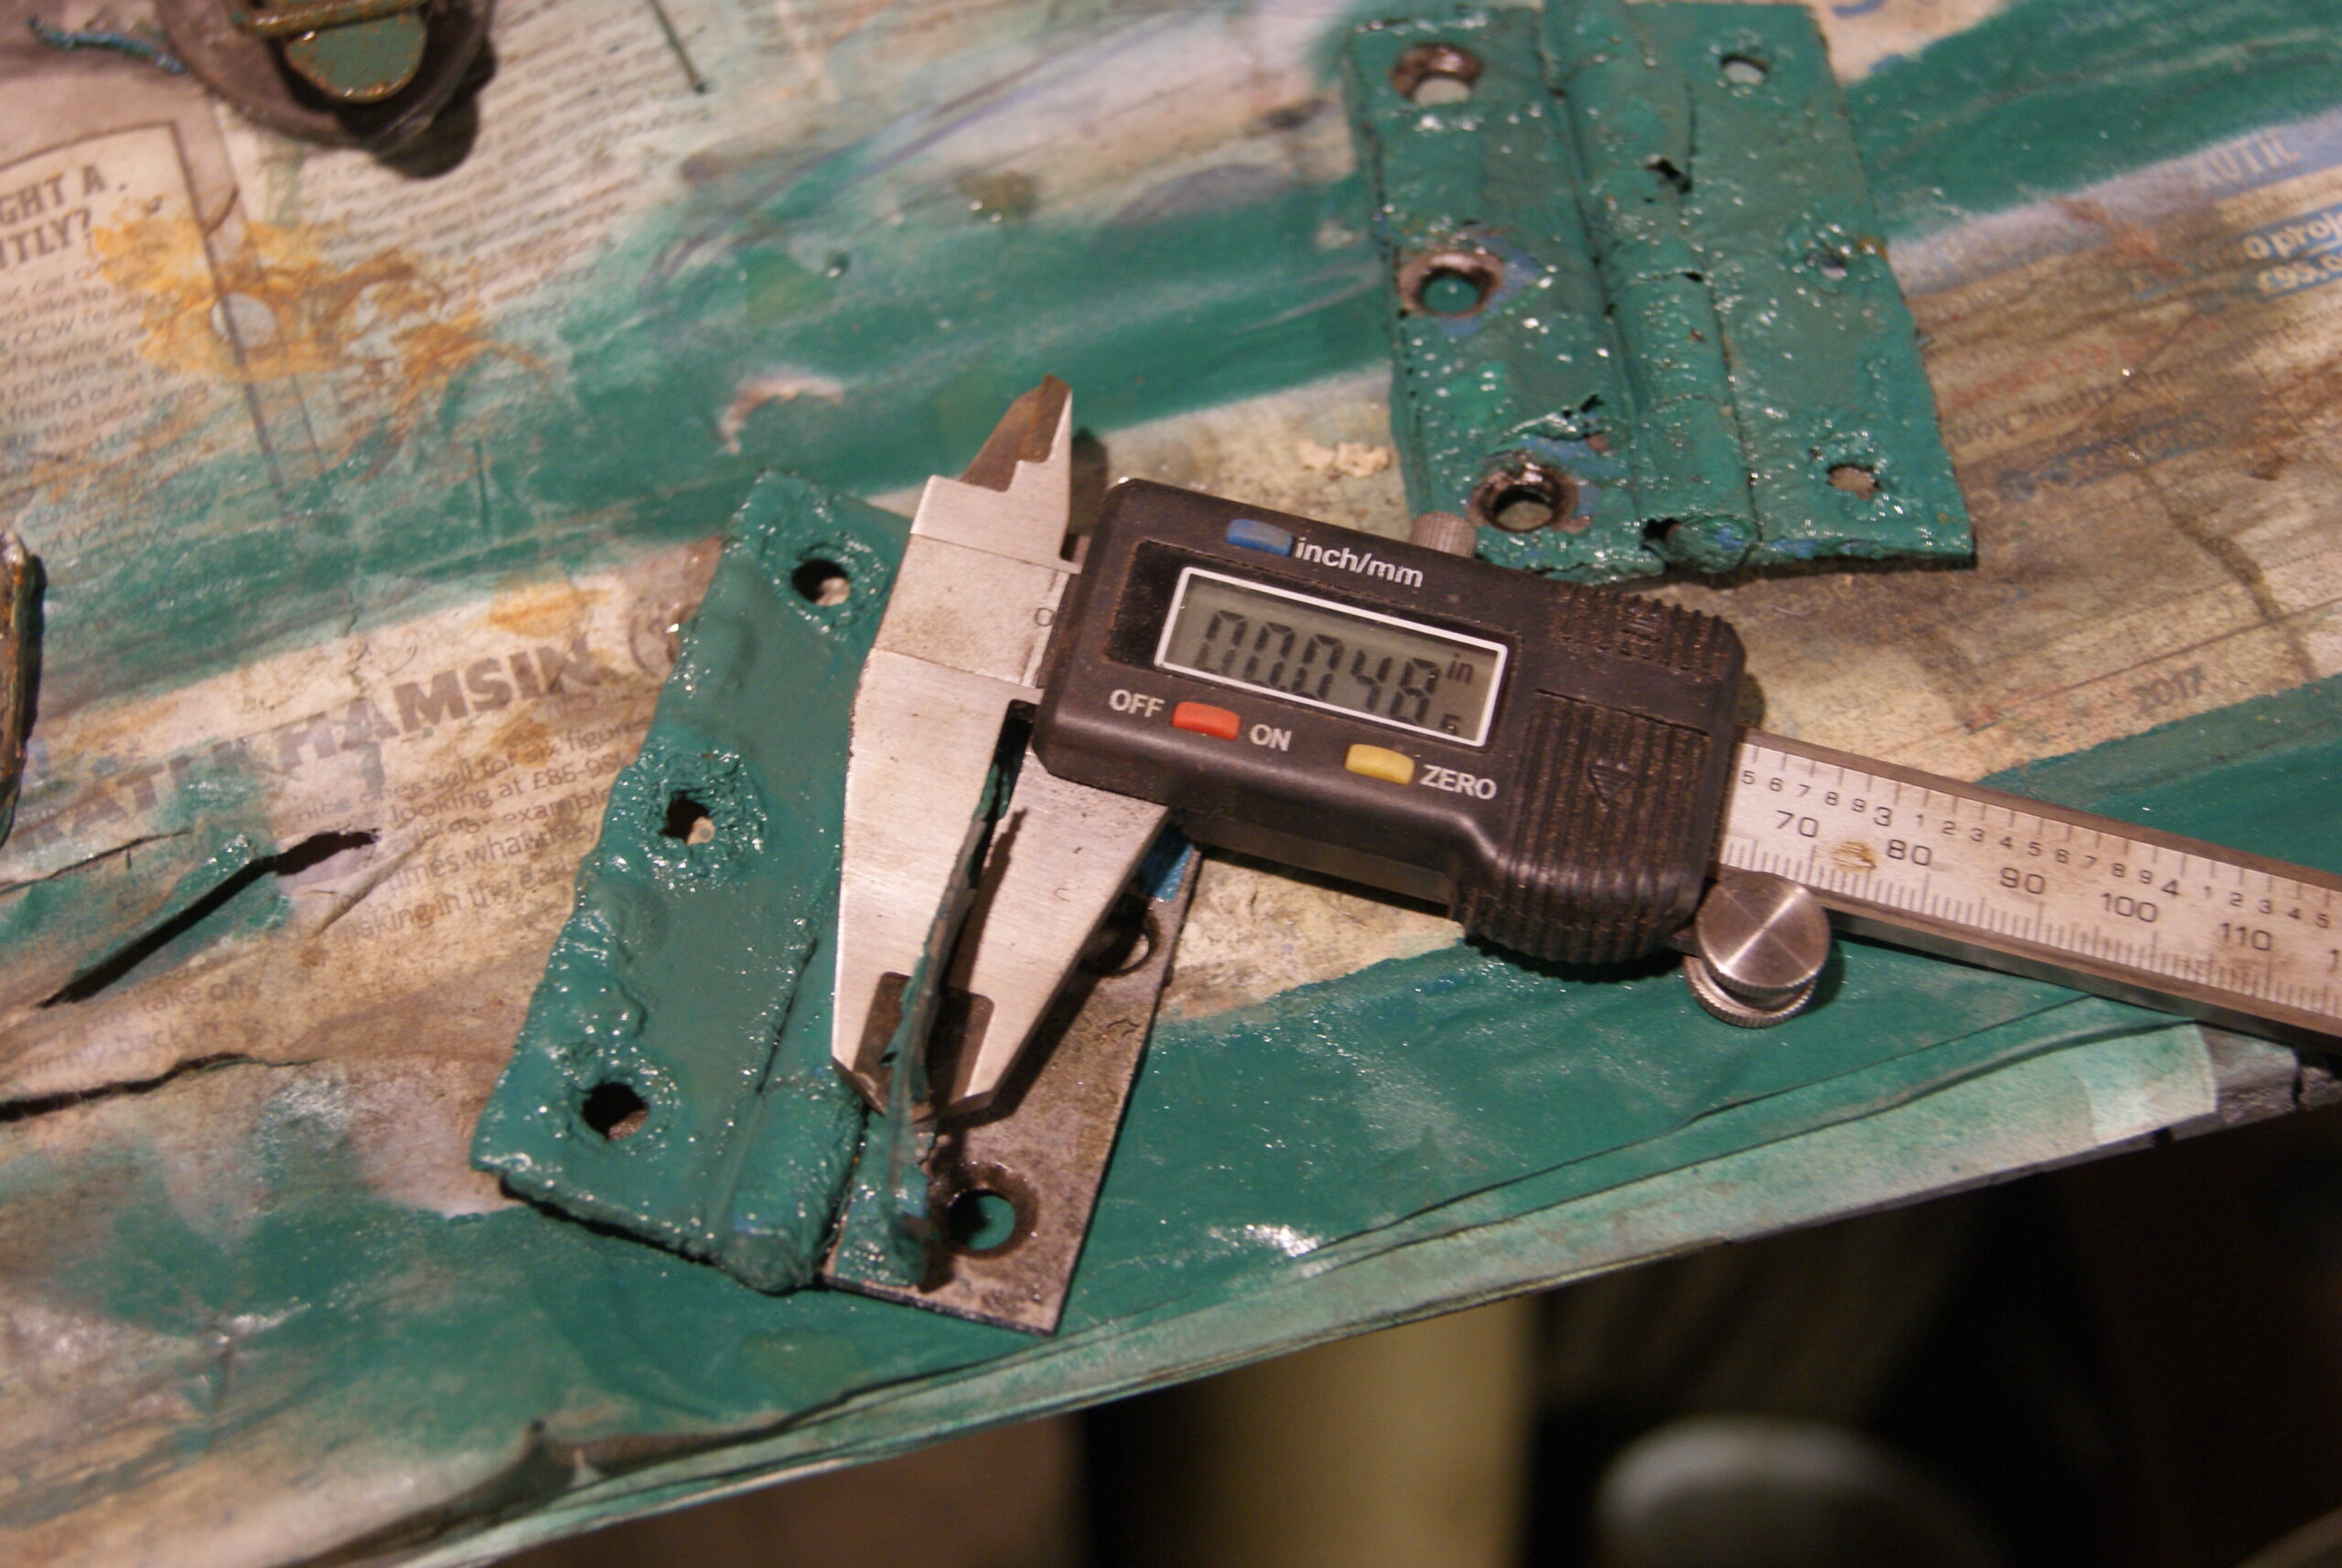
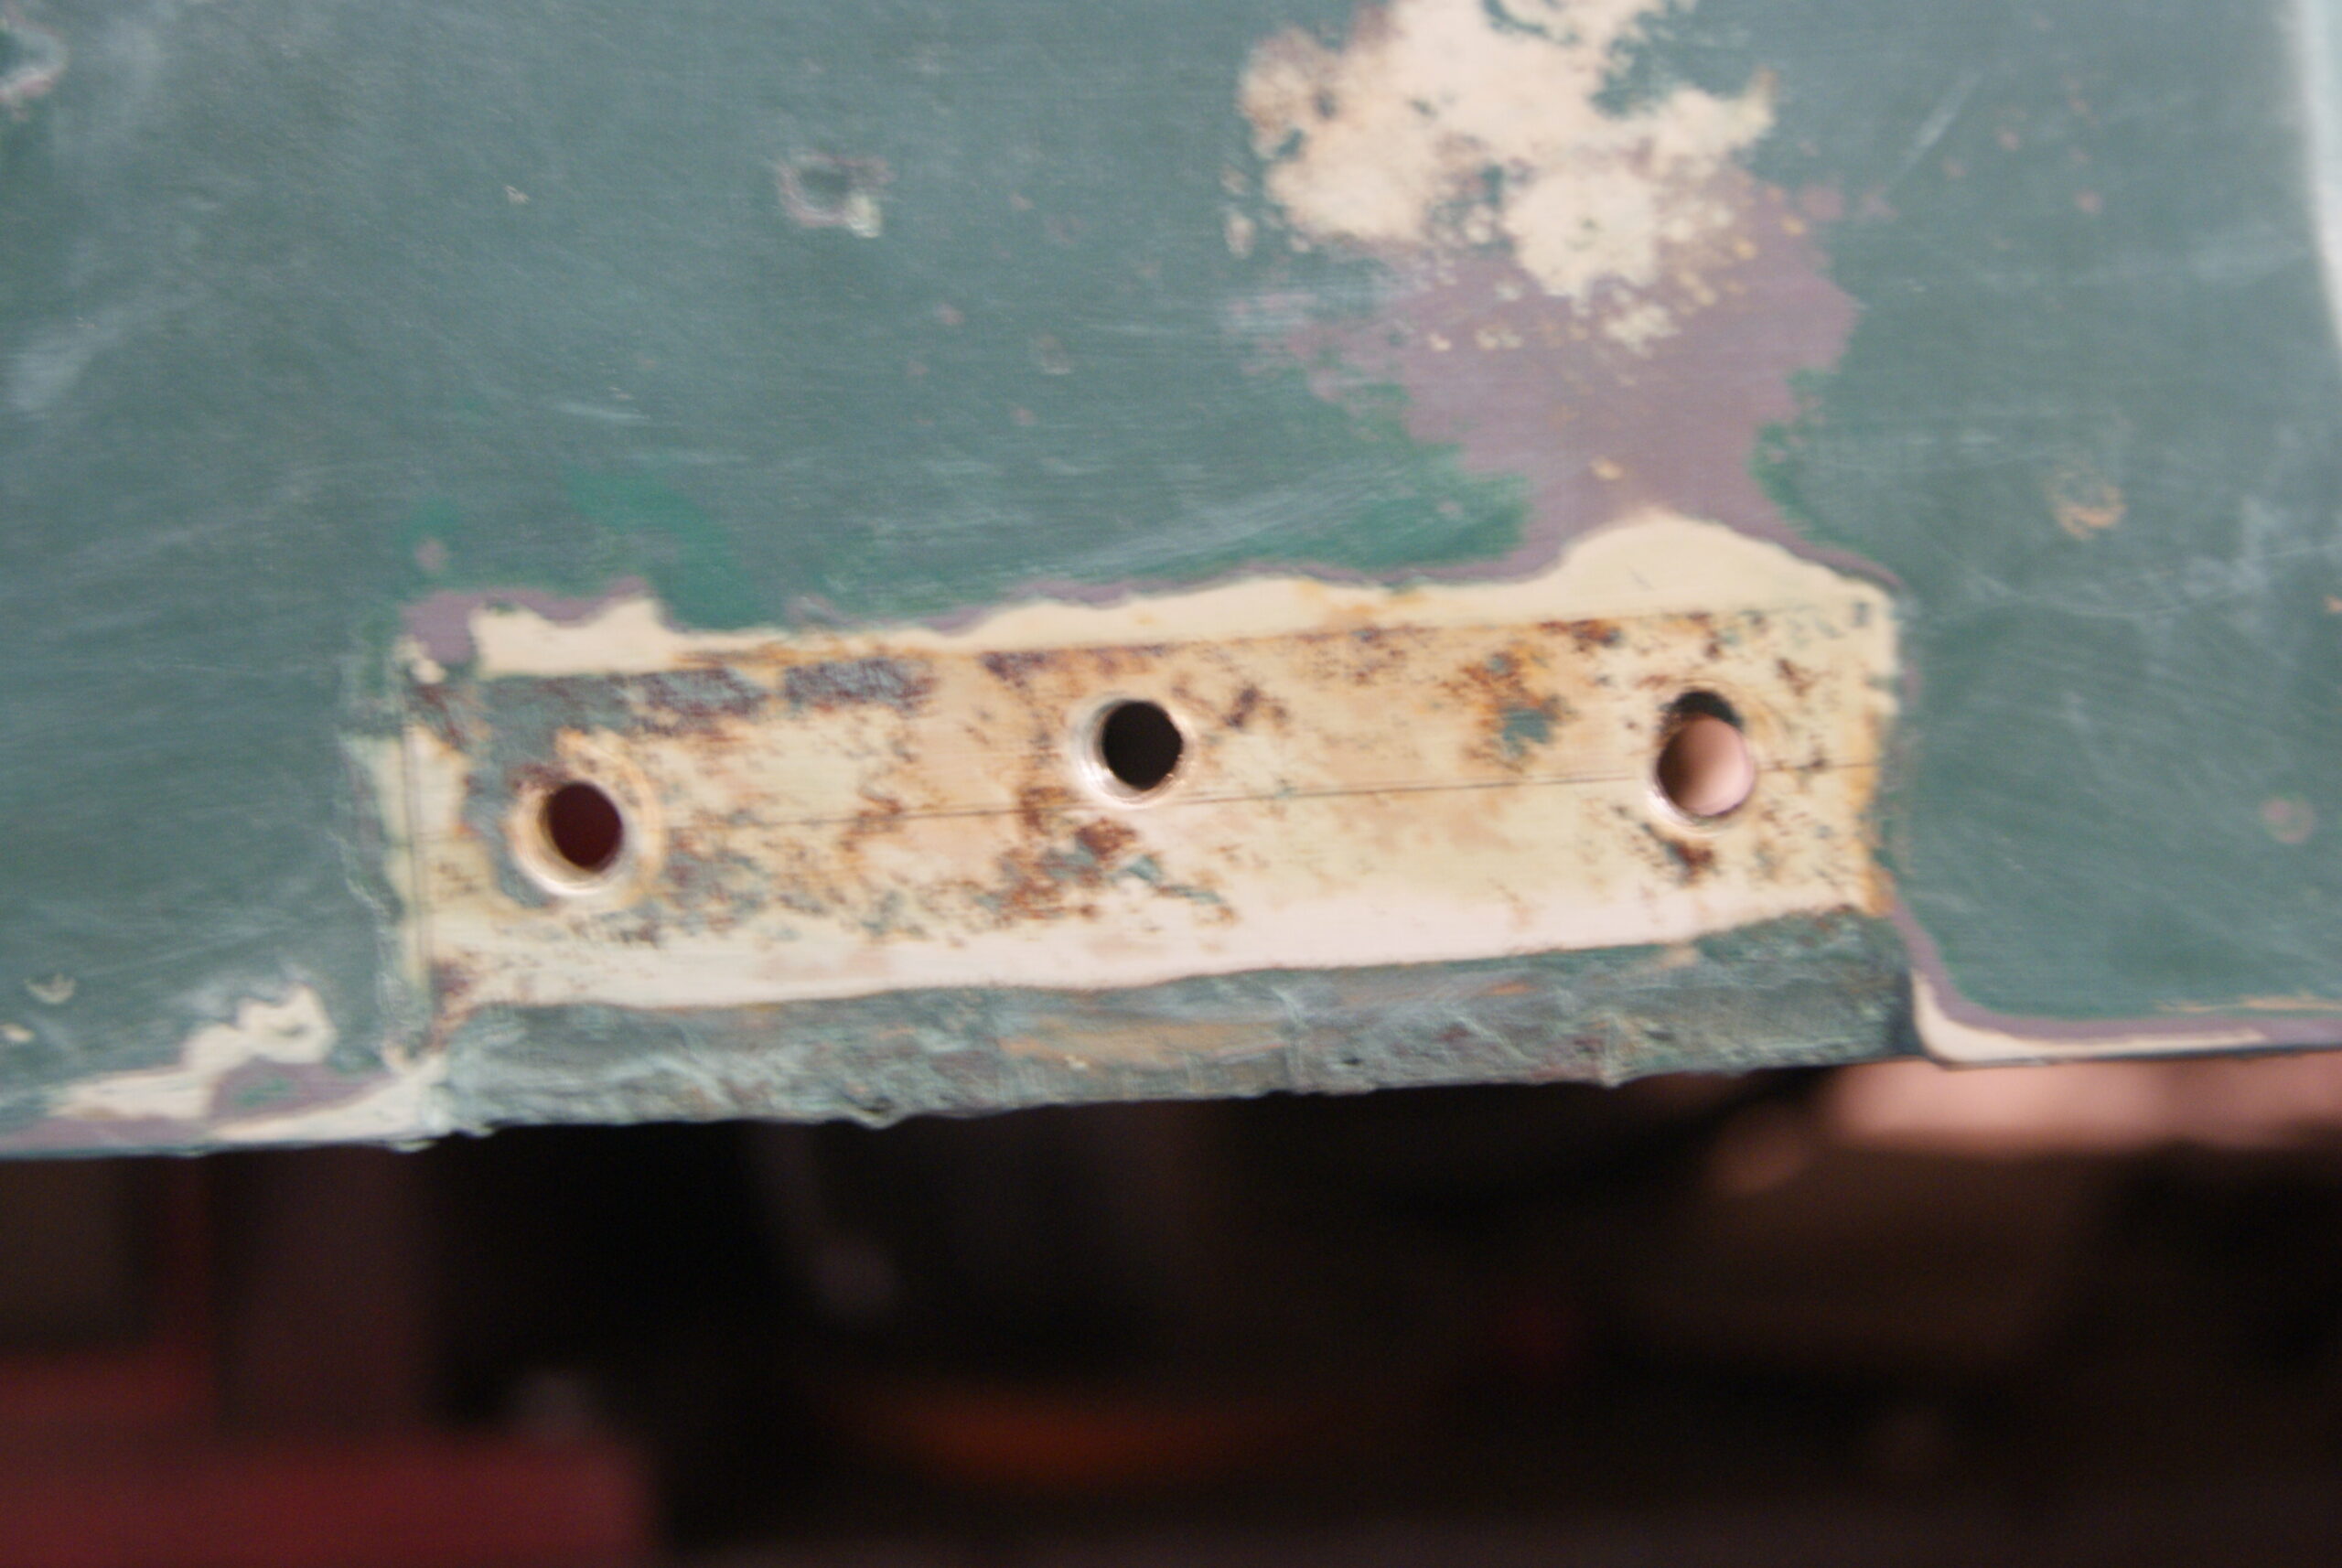
To give some idea of the thickness of the paint I have included a photo that I took whilst stripping the hinges off- the screen on the digital vernier is set to imperial and it is showing just under 50 thou. I just couldn’t leave the metalwork looking like that, it looked awful! I’ve included another photo of the place where the hinge was mounted and you can see the original pencil marks that the builder used to mark out the position of the hinges. I wonder how long before these see the light of day again.
The cylinder and bottom blade will be coming back tomorrow so that will be another part finished. Unfortunately I couldn’t re-use the cylinder bearings as one was showing signs of wear and the other broke when the factory people tried to remove it from the cylinder shaft. They are still available but the modern equivalent has the four holes tapped 1/2″ UNF, whereas the original used 1/2″ BSF, so that means I’ve got to wait for some 1/2″ CSK screws to arrive.
Oh well, we’ll get there one day!
Attachments:
July 5, 2022 at 3:35 pm #39413trusty220KeymasterI never knew that, Philip. If I’d seen someone hitting a scythe with a hammer I would have guessed he’d just injured himself with it and was getting his own back!
Congratulations on an excellent find and matching background story. I wonder how many of these have been thrown away in ignorance.
July 4, 2022 at 9:11 am #39406trusty220KeymasterThose people on Repair Shop make it look so easy, don’t they? Ever tried doing it yourself?
Trying to match paintwork has got to be one of the most awkward and difficult things to learn, but you can see from the pictures how far I’ve got. The biggest problem at the moment is putting the paint on and then waiting days (literally!) for the paint to harden enough to stand being worked on. That’s something they don’t show you on the telly- you would think it was quite a quick process from some of the programmes, but all these things take time and one thing you can’t rush is how long paint takes to harden.
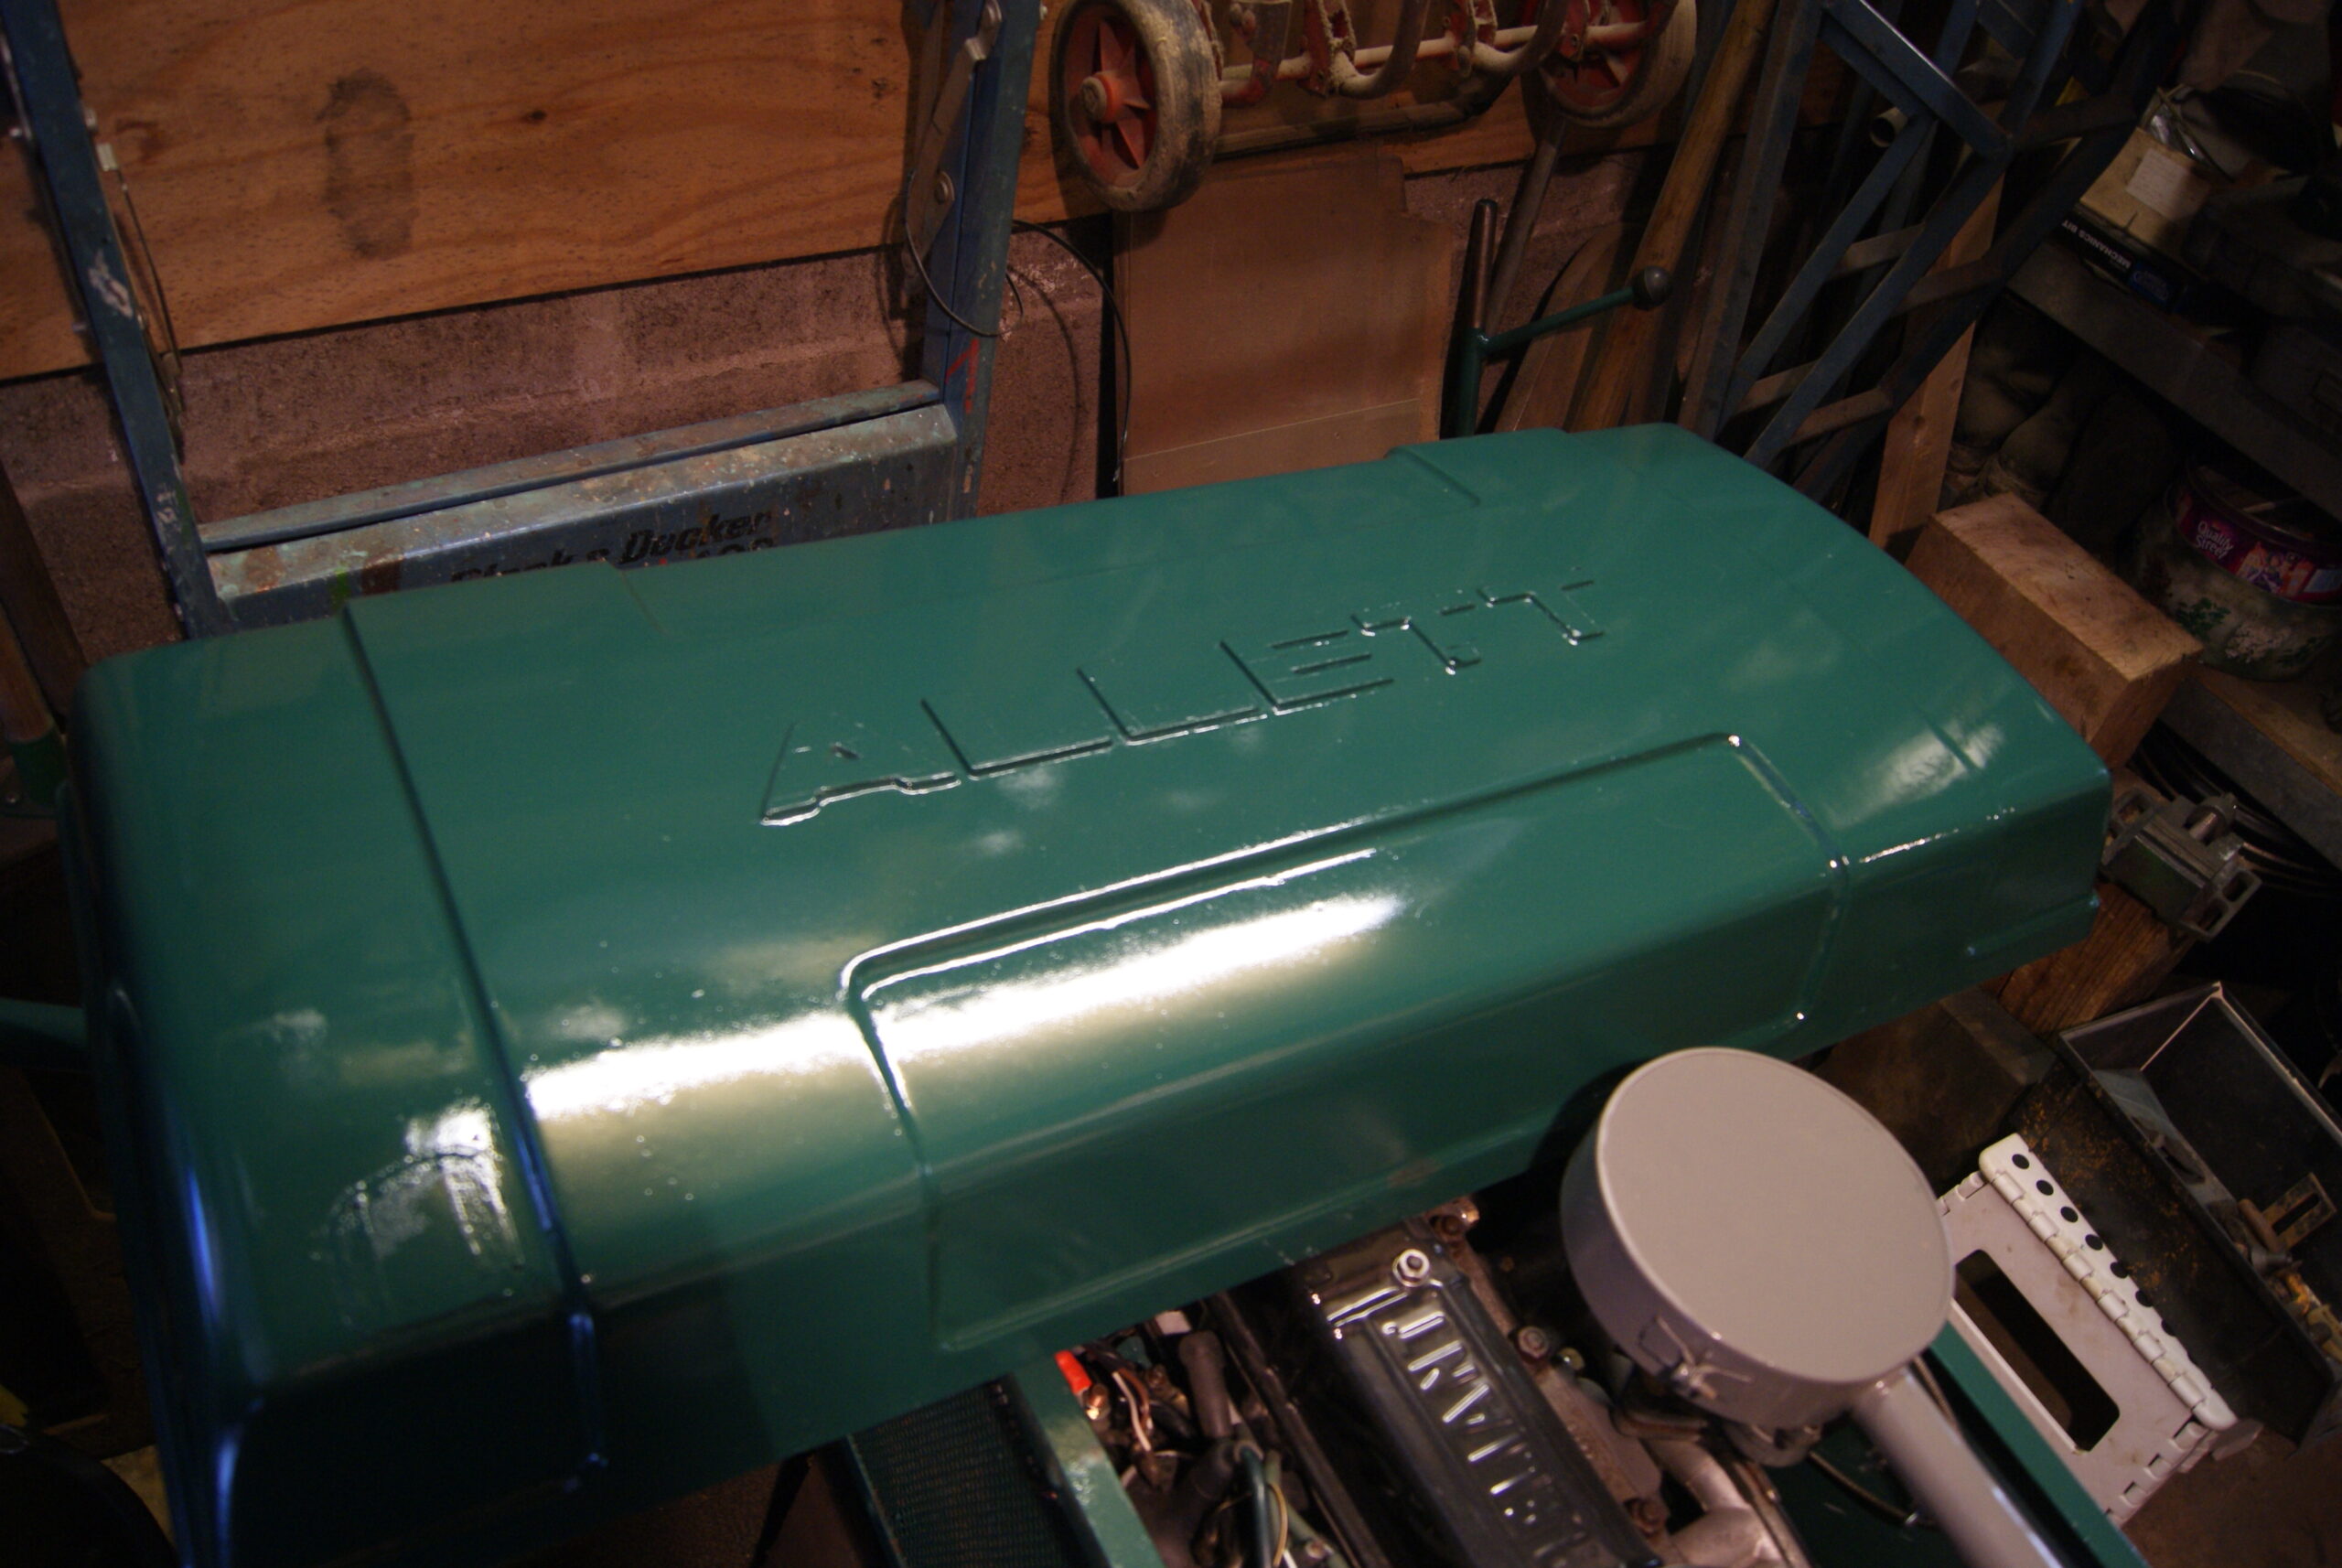
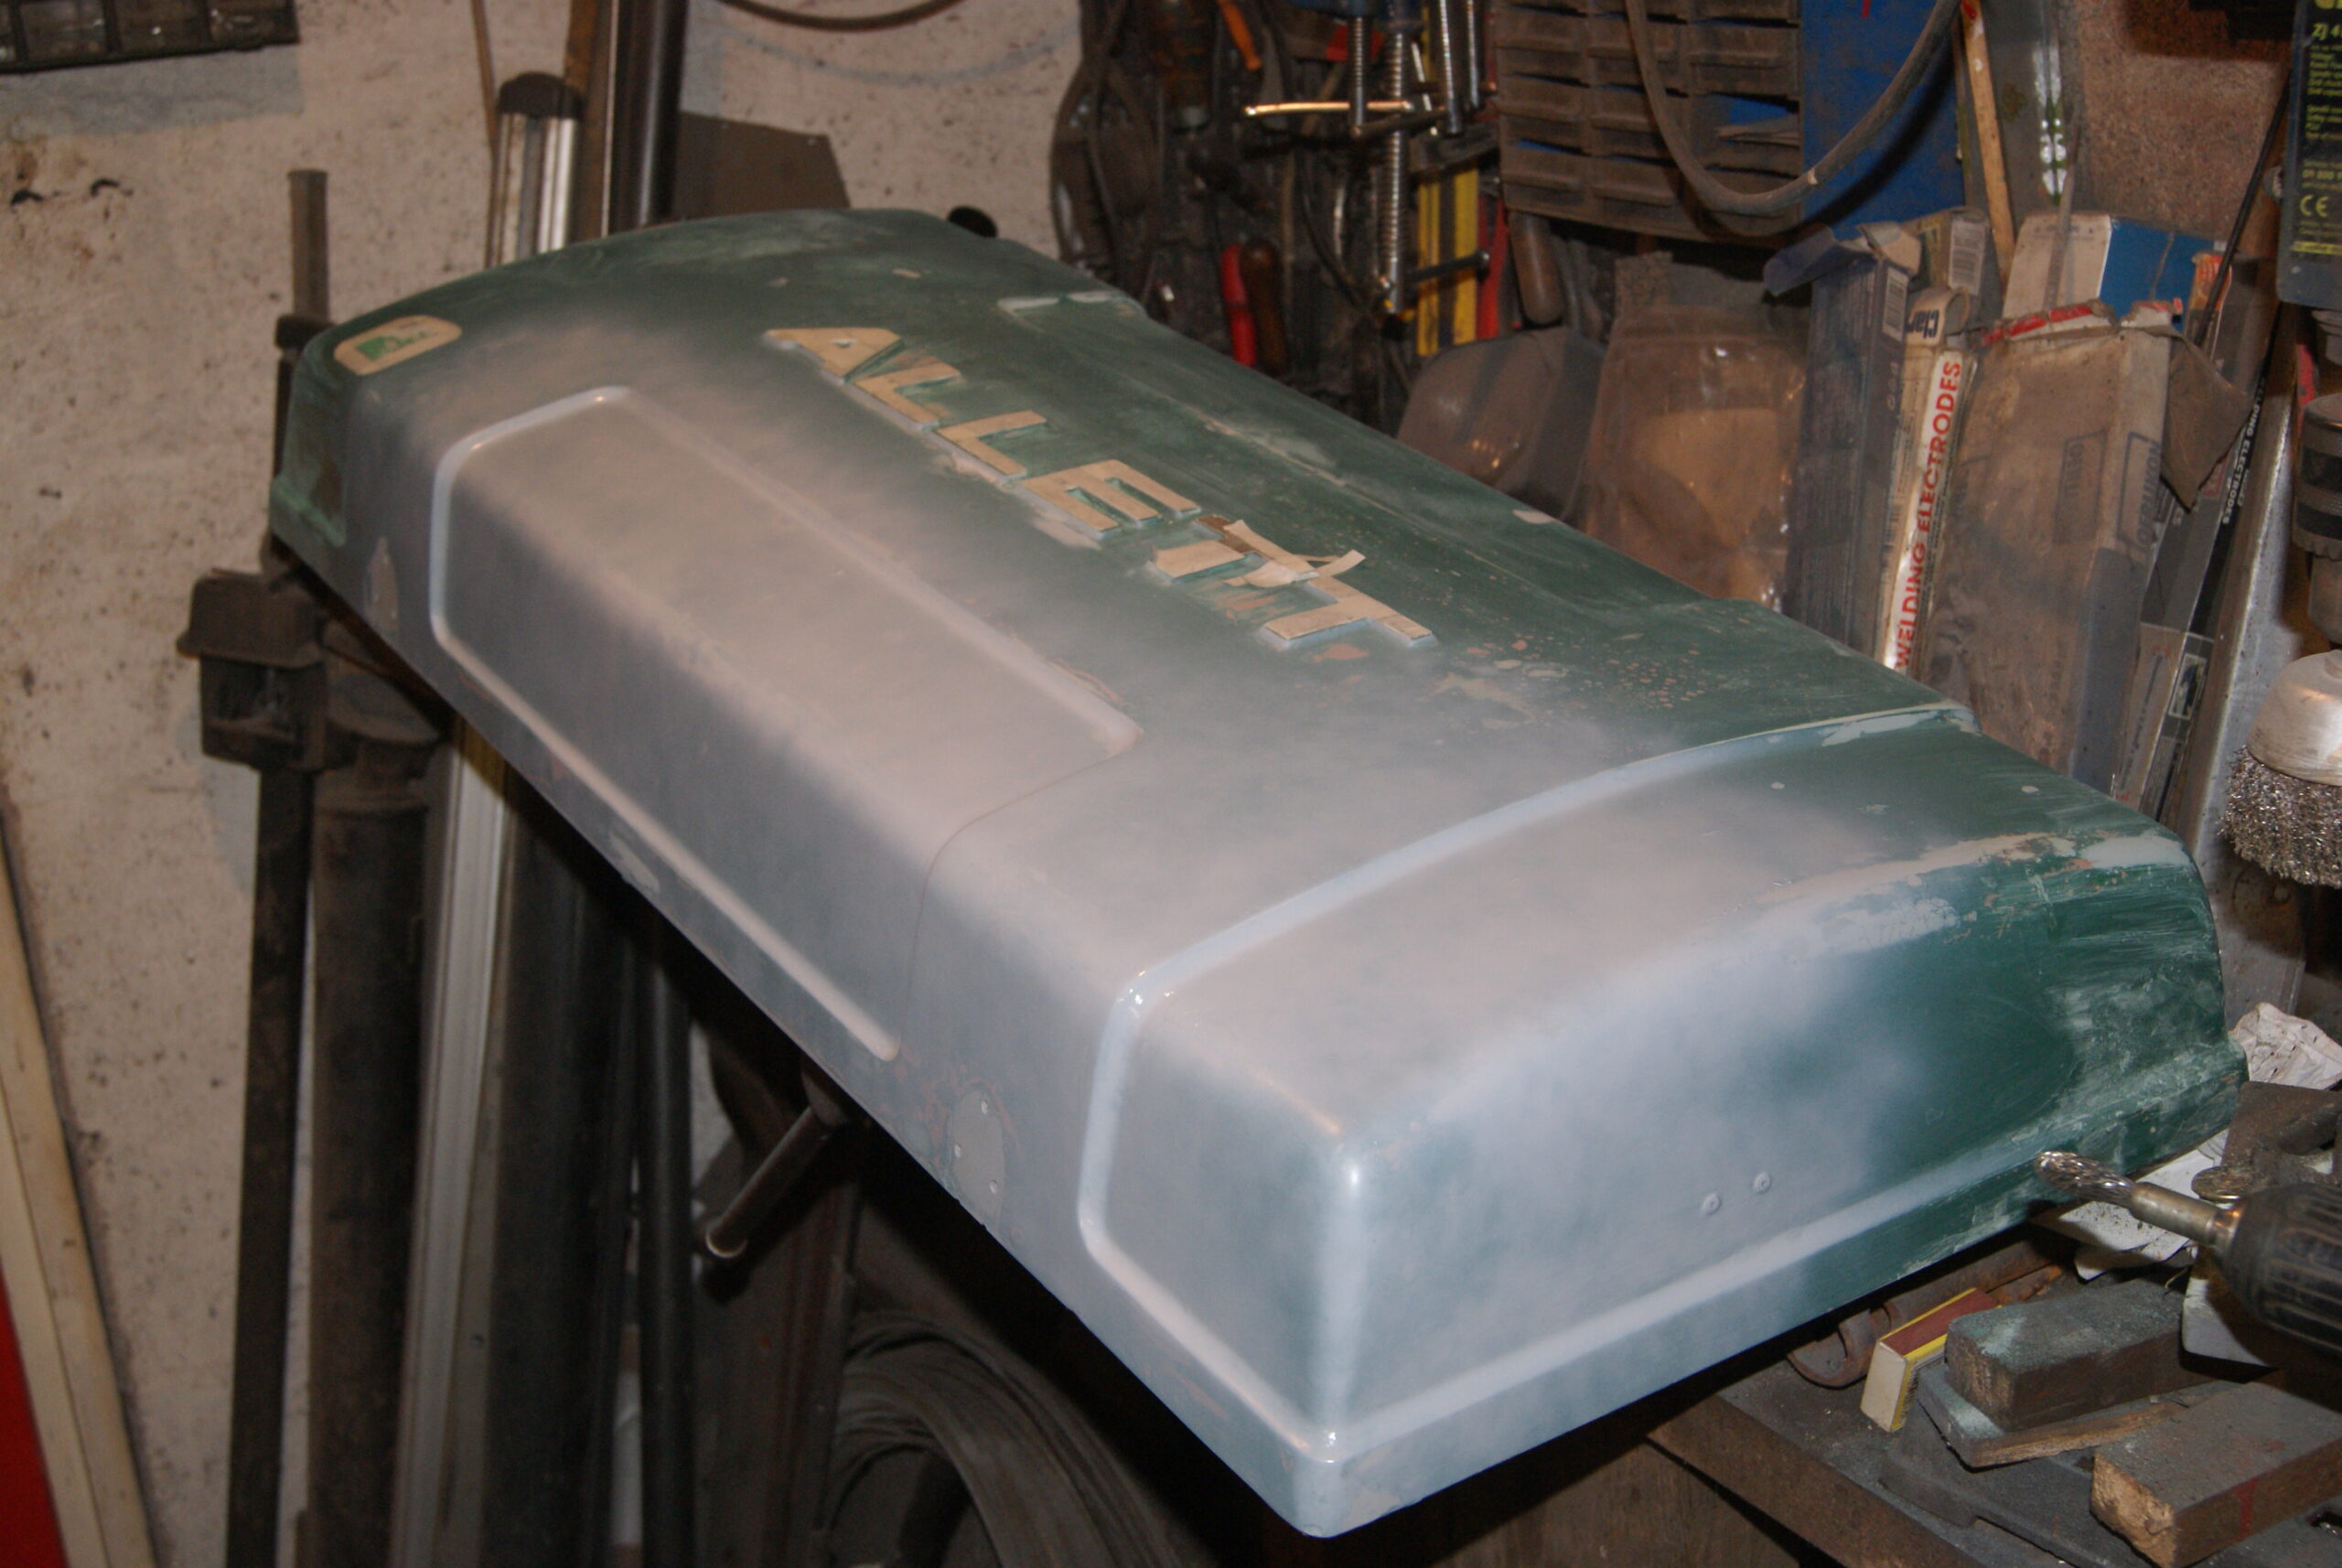
The front panel of the engine cover has come up quite nicely and no trace of the later “Allett” logo that had been applied. The framework is a little more of a challenge as it has plenty of rust patches that need flatting back and it has many places where flatting paste can accumulate, unseen until you turn it over! The fibreglass lid has had the tarbrush treatment in the past with a very thick coat of paint slapped on: this is my main concern at the moment but I’m carrying on with the filling and patching, hoping that when I flat it all down again it will polish up and not show the repairs.
Honestly, it would be easier to flat it all down and repaint so it looks like new, but then that would be my last resort; as I said before, preservation of the original is the aim in this case and it looks achievable at the moment, so press on.
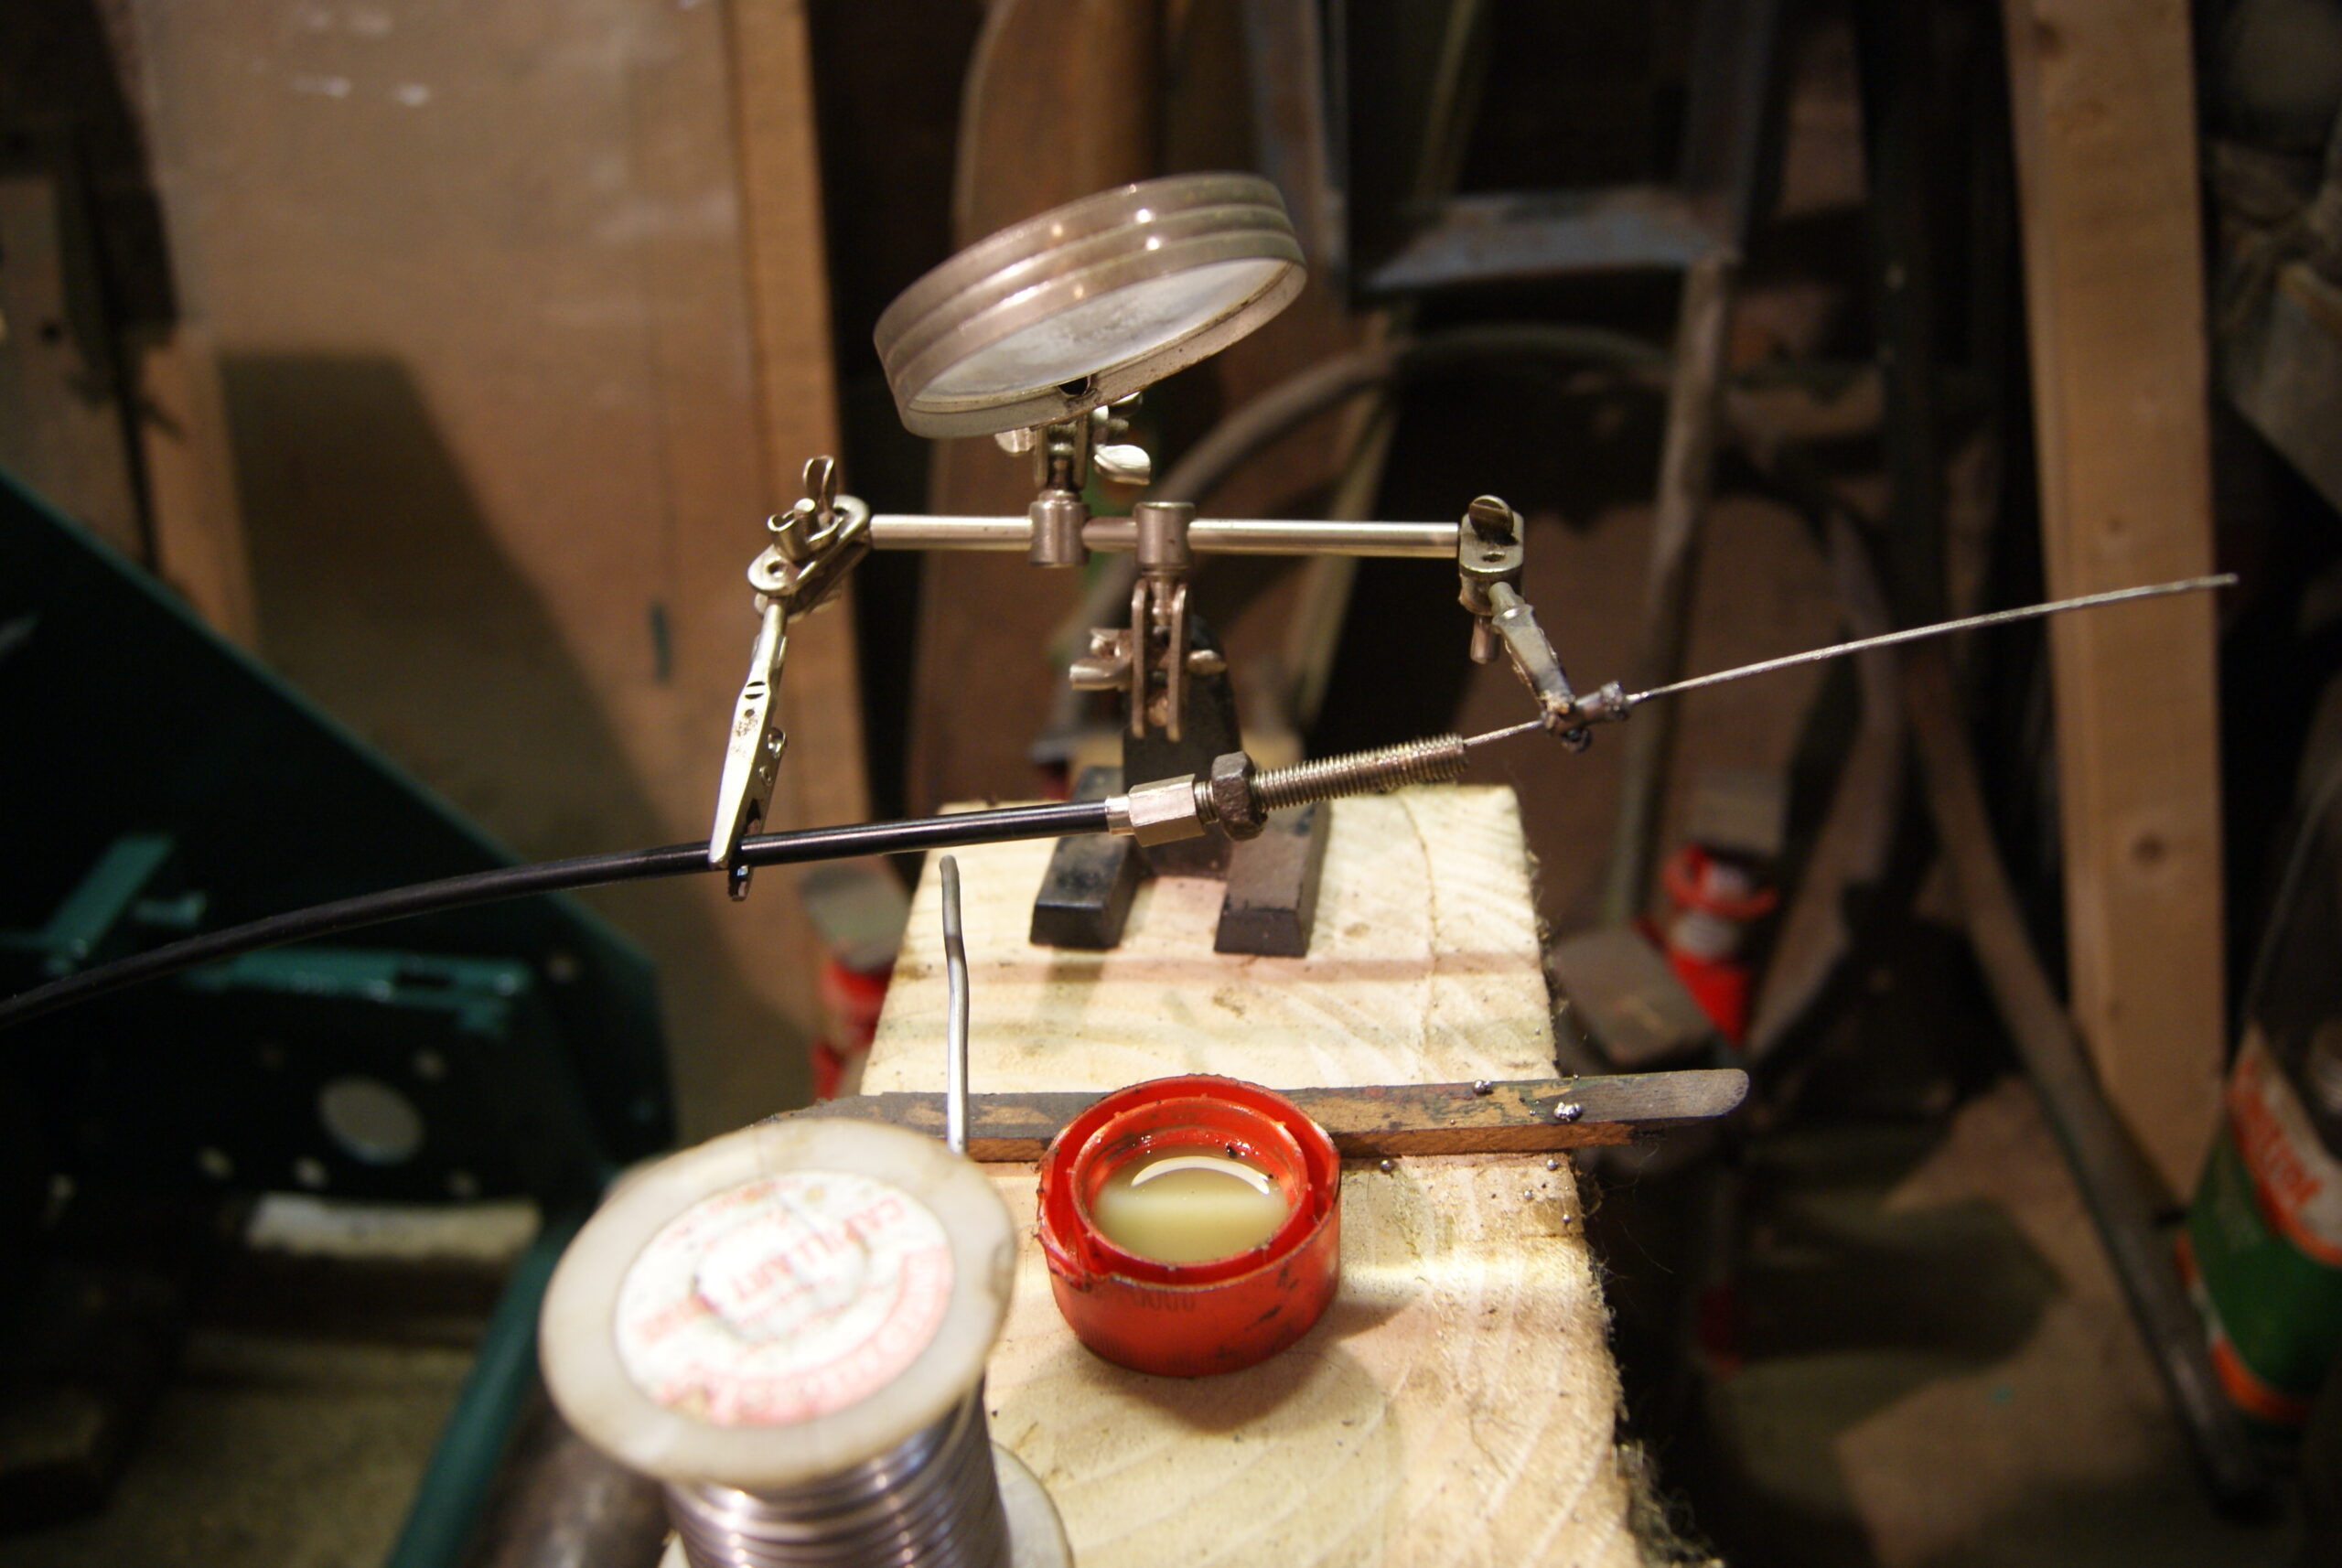
In between coats of paint and filler I’ve been doing some other small jobs such as making up a new cutter clutch cable. You can see from the photo how I do it without burning my fingers or losing half of it on the floor- those “Helping Hands” stands are excellent for holding everything in position whilst you hold the solder and Butane torch to solder it all together. I’ll tackle the cutter clutch and chain drives this week as a diversion from watching the paint dry!
Have a good week!
Attachments:
July 3, 2022 at 9:22 am #39403trusty220KeymasterIt just goes to show that the stuff is still out there, but it helps if you know what it is when you see it! Many people would have walked past things like that because they don’t know what they’re looking at- a display like this at a local show can really turn up some hidden gems afterwards with people clearing out sheds because they’ve seen something similar!
Well done for a great display with some really unusual items.
June 27, 2022 at 7:59 am #39331trusty220KeymasterThe difficult bit is finding the right balance between abrasiveness and carefulness! I’m going to try with more T-Cut today but may have to go to very fine wet’n’dry paper then re-polish.
Nobody said it was going to be easy!
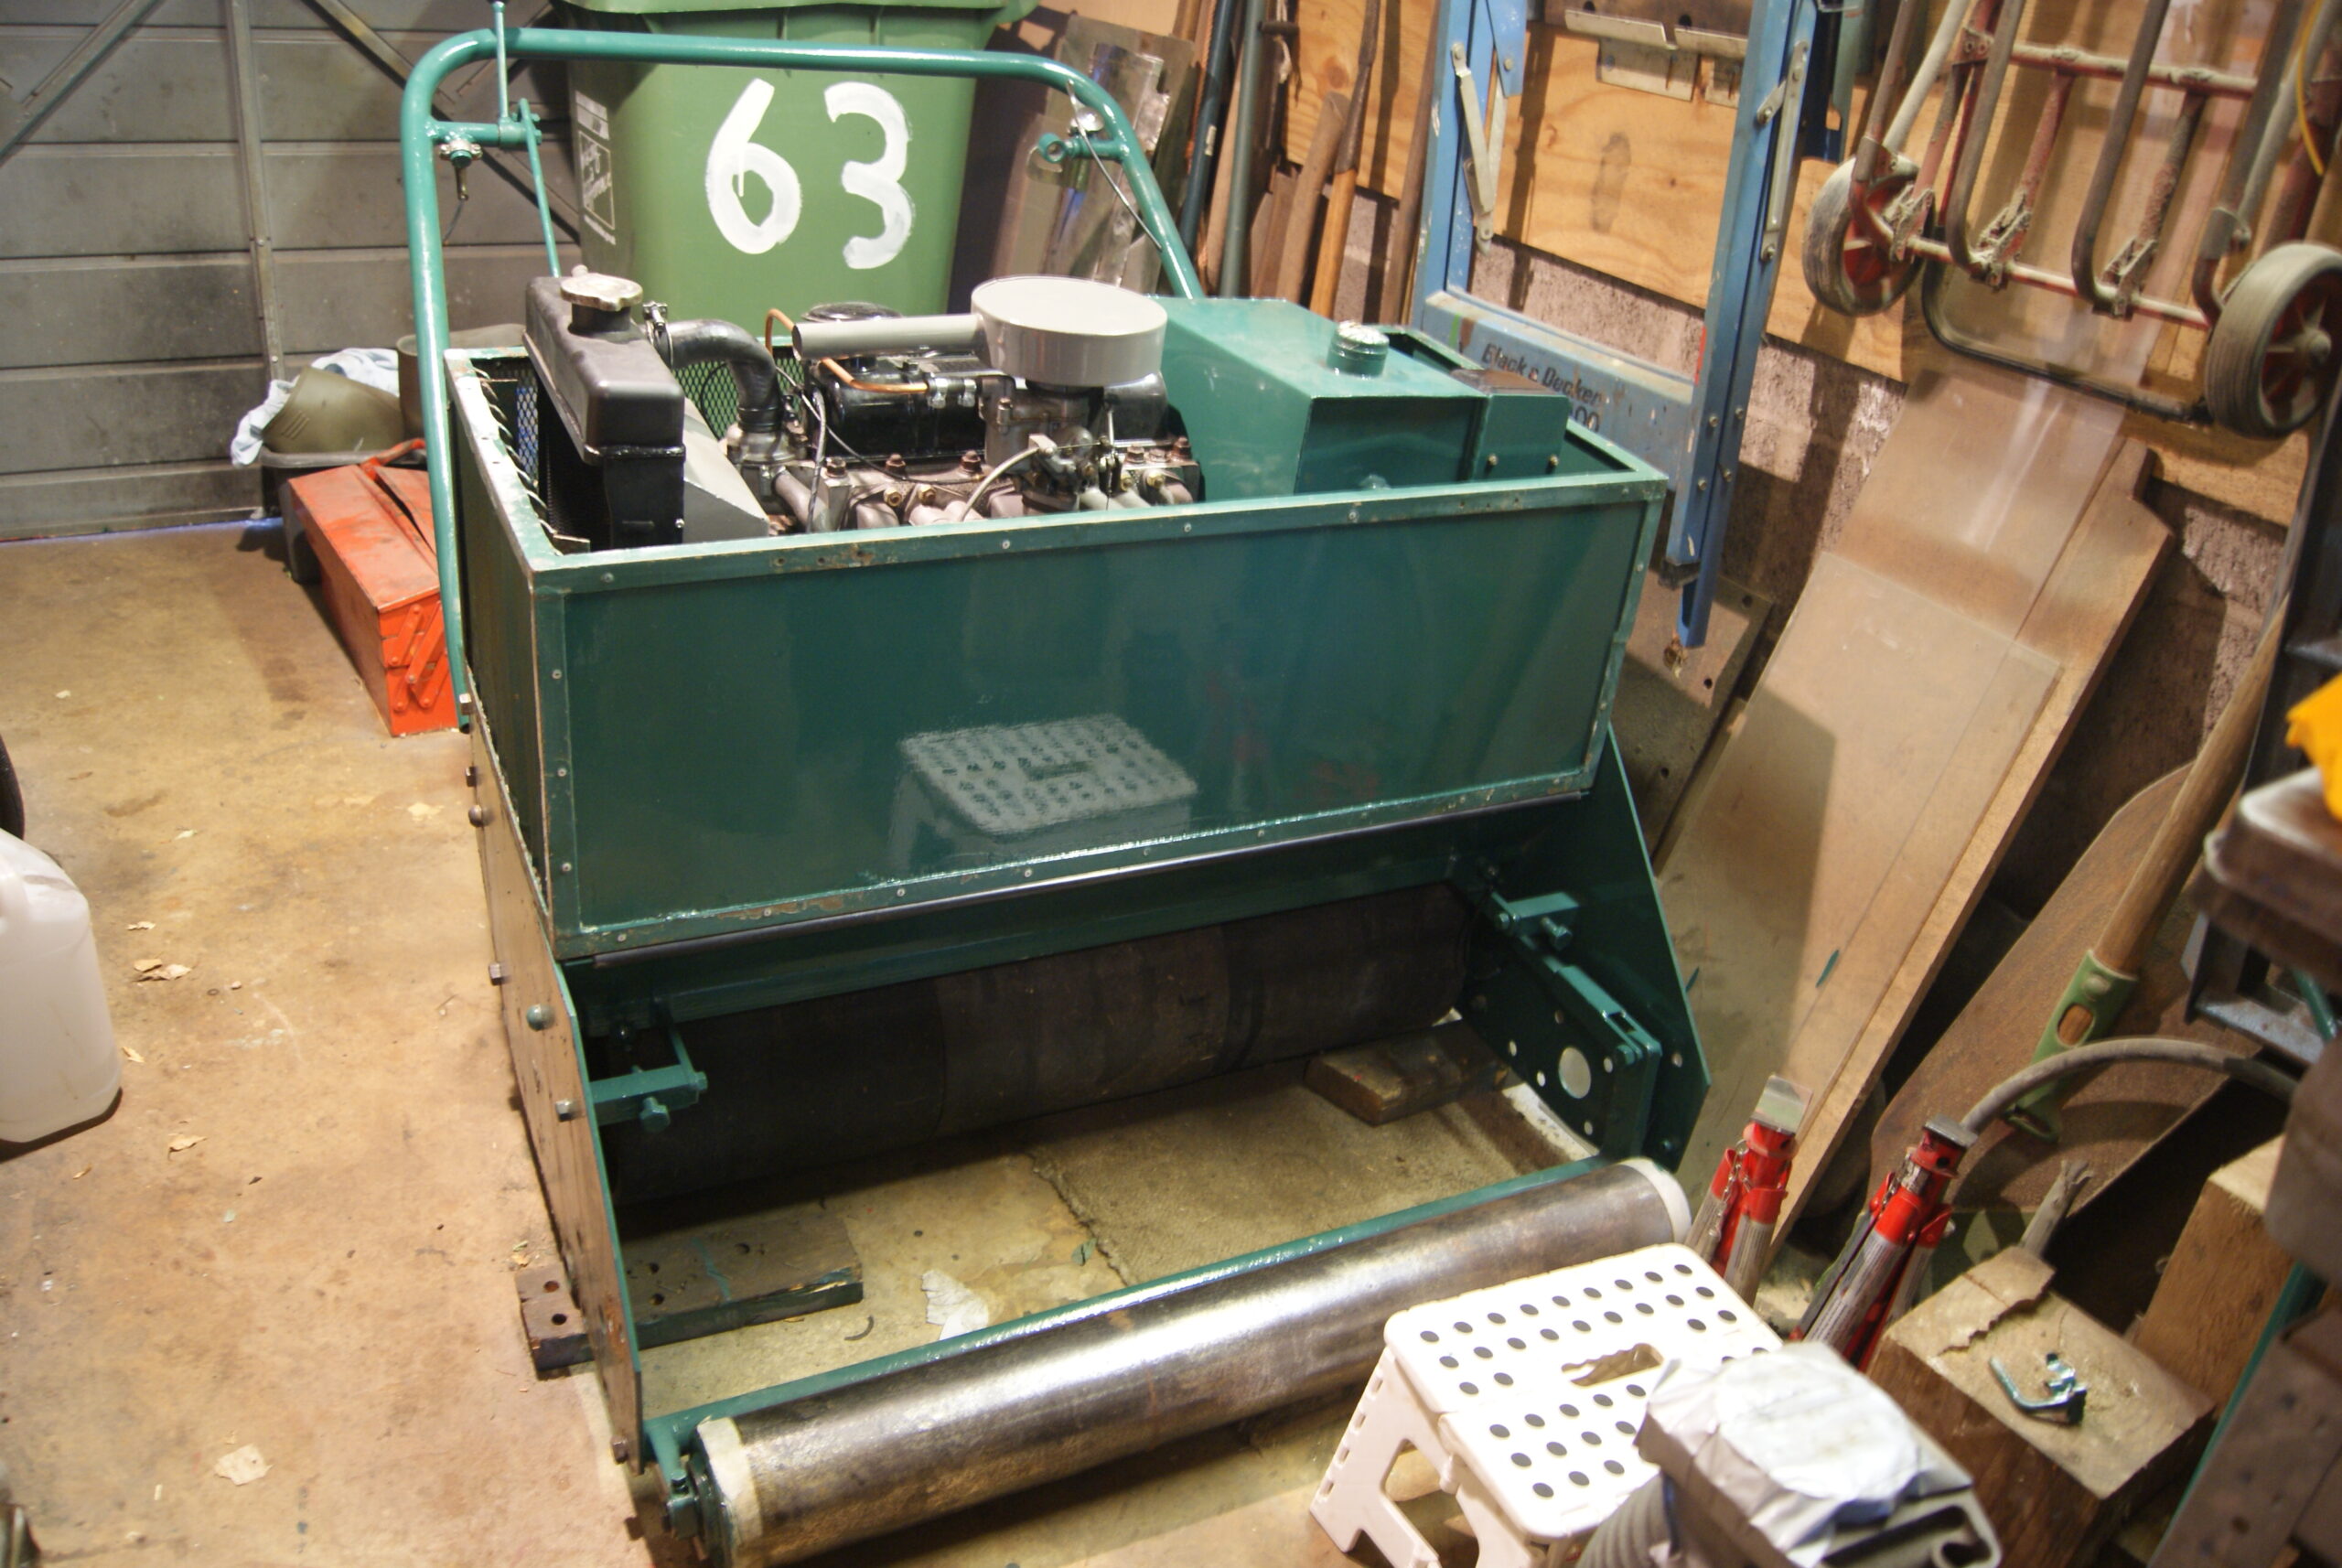
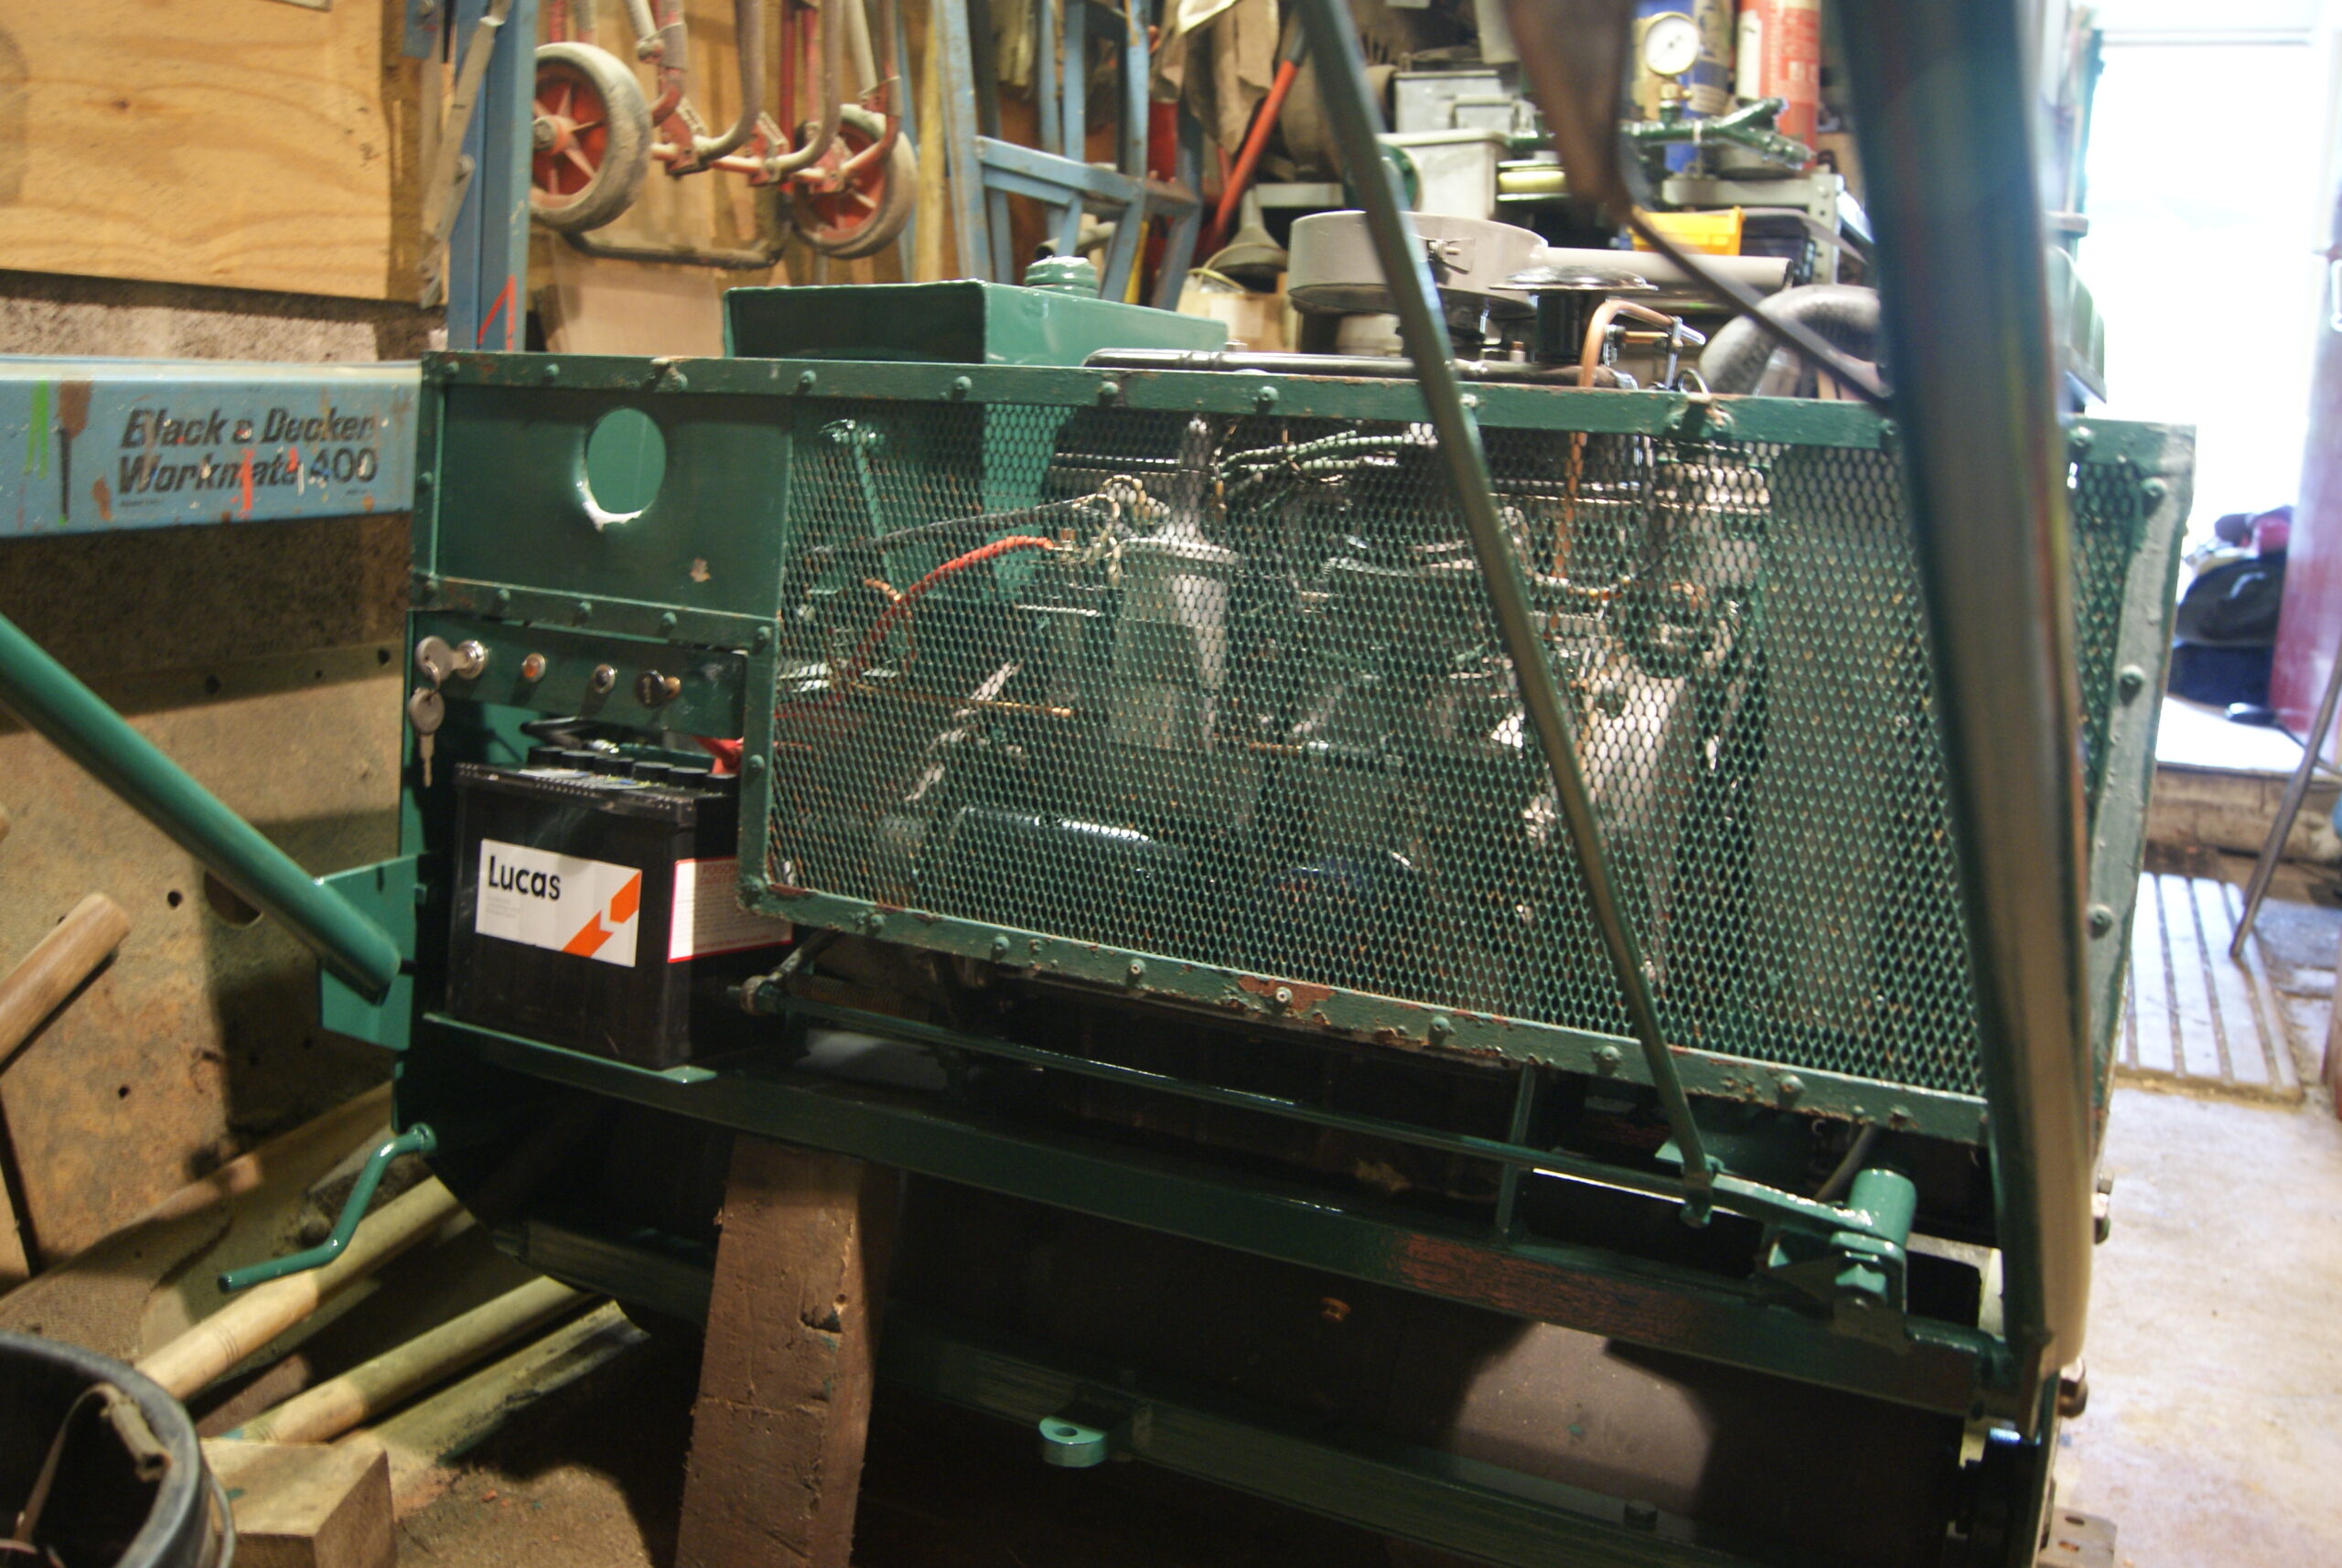
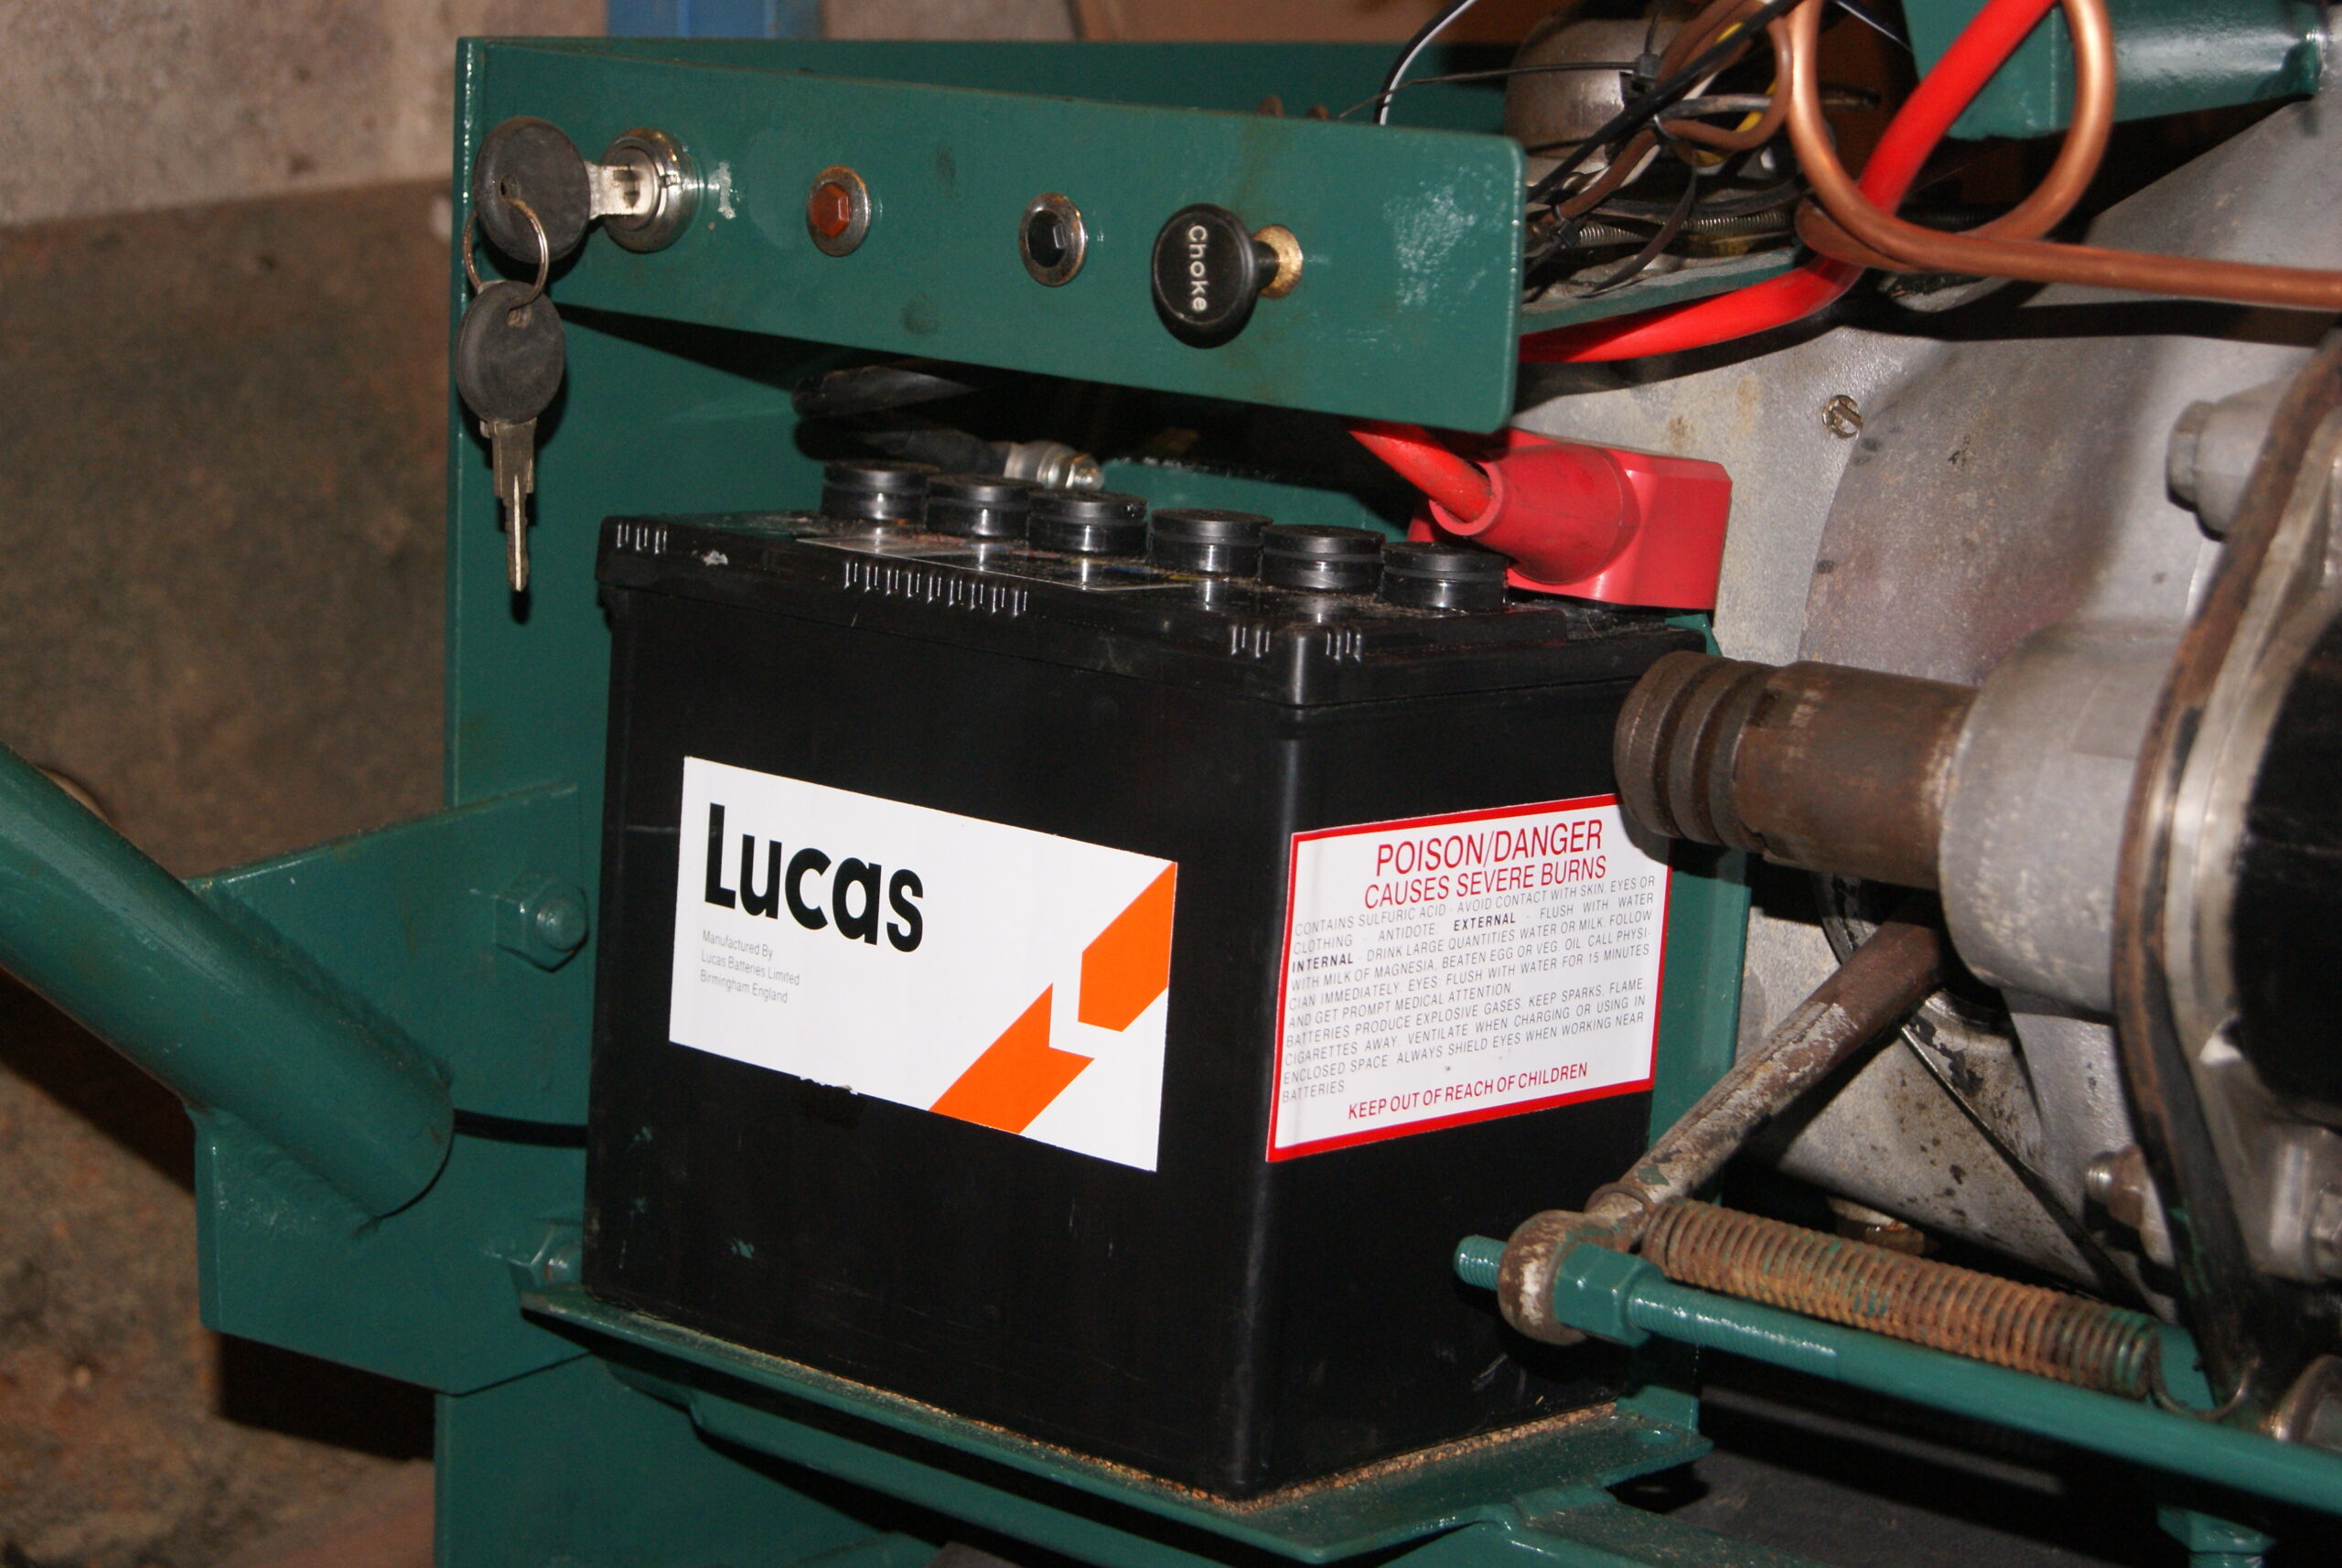
June 26, 2022 at 4:00 pm #39306trusty220KeymasterToday’s work started with a double check of my wiring and then (holding breath) turn the key and it started! The oil pressure light went out but the charge light stayed on- curses! The best thing to do in this situation is to put the kettle on, sit down and think it out. When I was a mechanic I used to stand back and roll a fag to give me time to think, but I haven’t smoked for over thirty years now so the kettle is the go-to choice these days.
Because it has a dynamo and a separate voltage regulator I was forgetting that the dynamo may need to be “flashed” to polarise the field coils. This is done simply by locating the field connection on the dynamo (normally the small spade terminal marked with a “F”), then taking a length of wire connect one end to the non-earthed terminal of the battery; with the other end of the wire stroke it over the “F” terminal on the dynamo and you should see a small blue spark if you’ve done it correctly. I said non-earthed terminal of the battery because some machinery of this age could be positive earth, in which case you would connect the wire to the negative battery terminal to polarise the field coils. In this instance I’ve wired the machine up as negative earth which shouldn’t present any problems to the next person to work on this in the future.
Next time I fired the engine up the light stayed on, so I gave the solenoid in the regulator a light tap and it freed up and clicked over! Now when I start the engine the light goes out almost immediately but does come on when the throttle is dropped down to slow idle after a brief period of flickering, which is exactly how a dynamo system should work. At slow idle the system is showing 12 Volts with the charging light illuminated, then when the engine speed is increased the light goes out and the system comes up to 13 Volts so I know it’s working as it should. I know that I can tape up the wiring loom now.
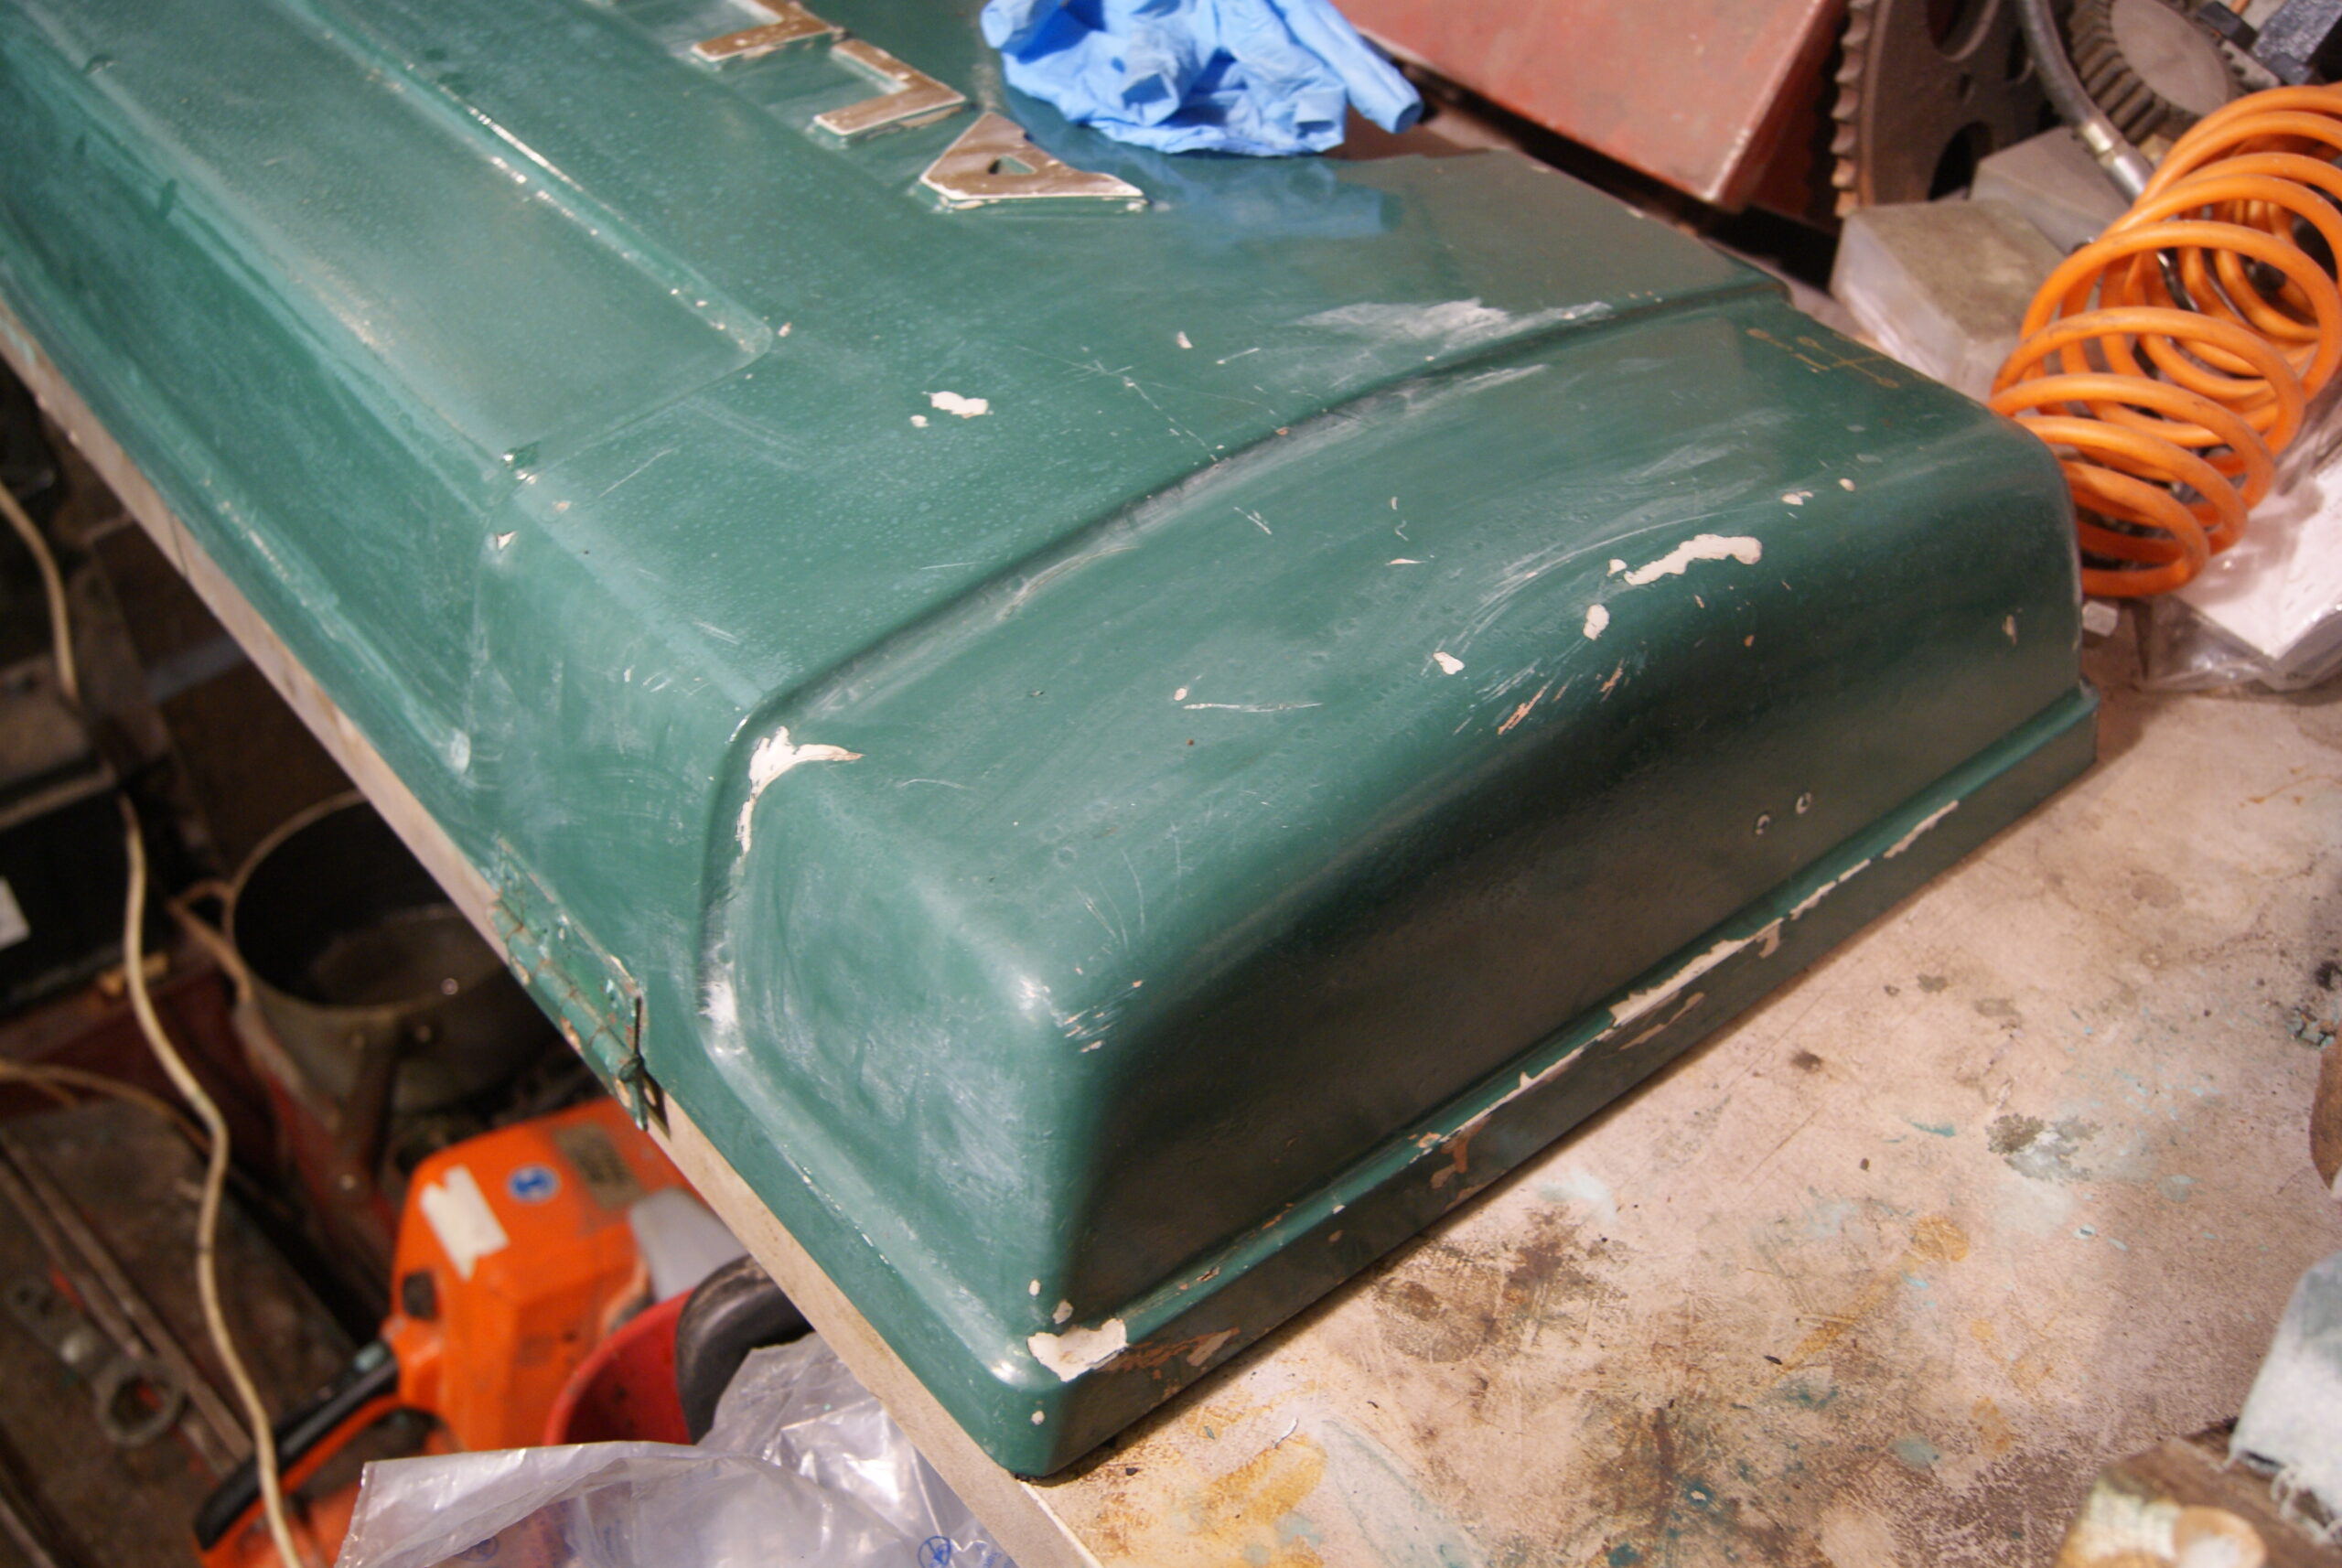
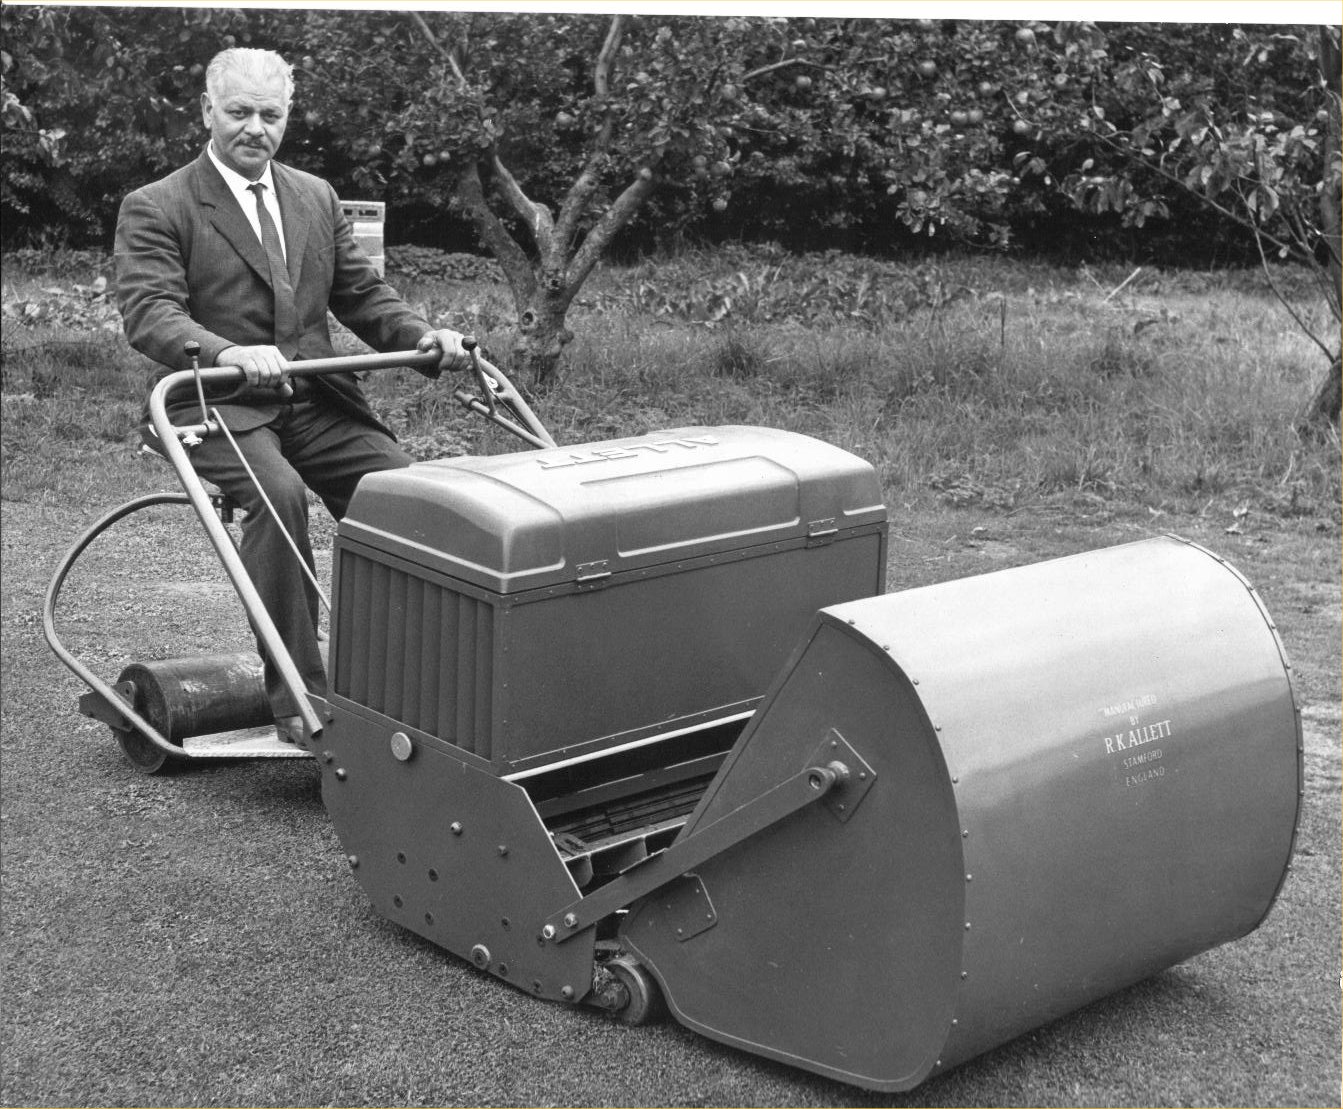
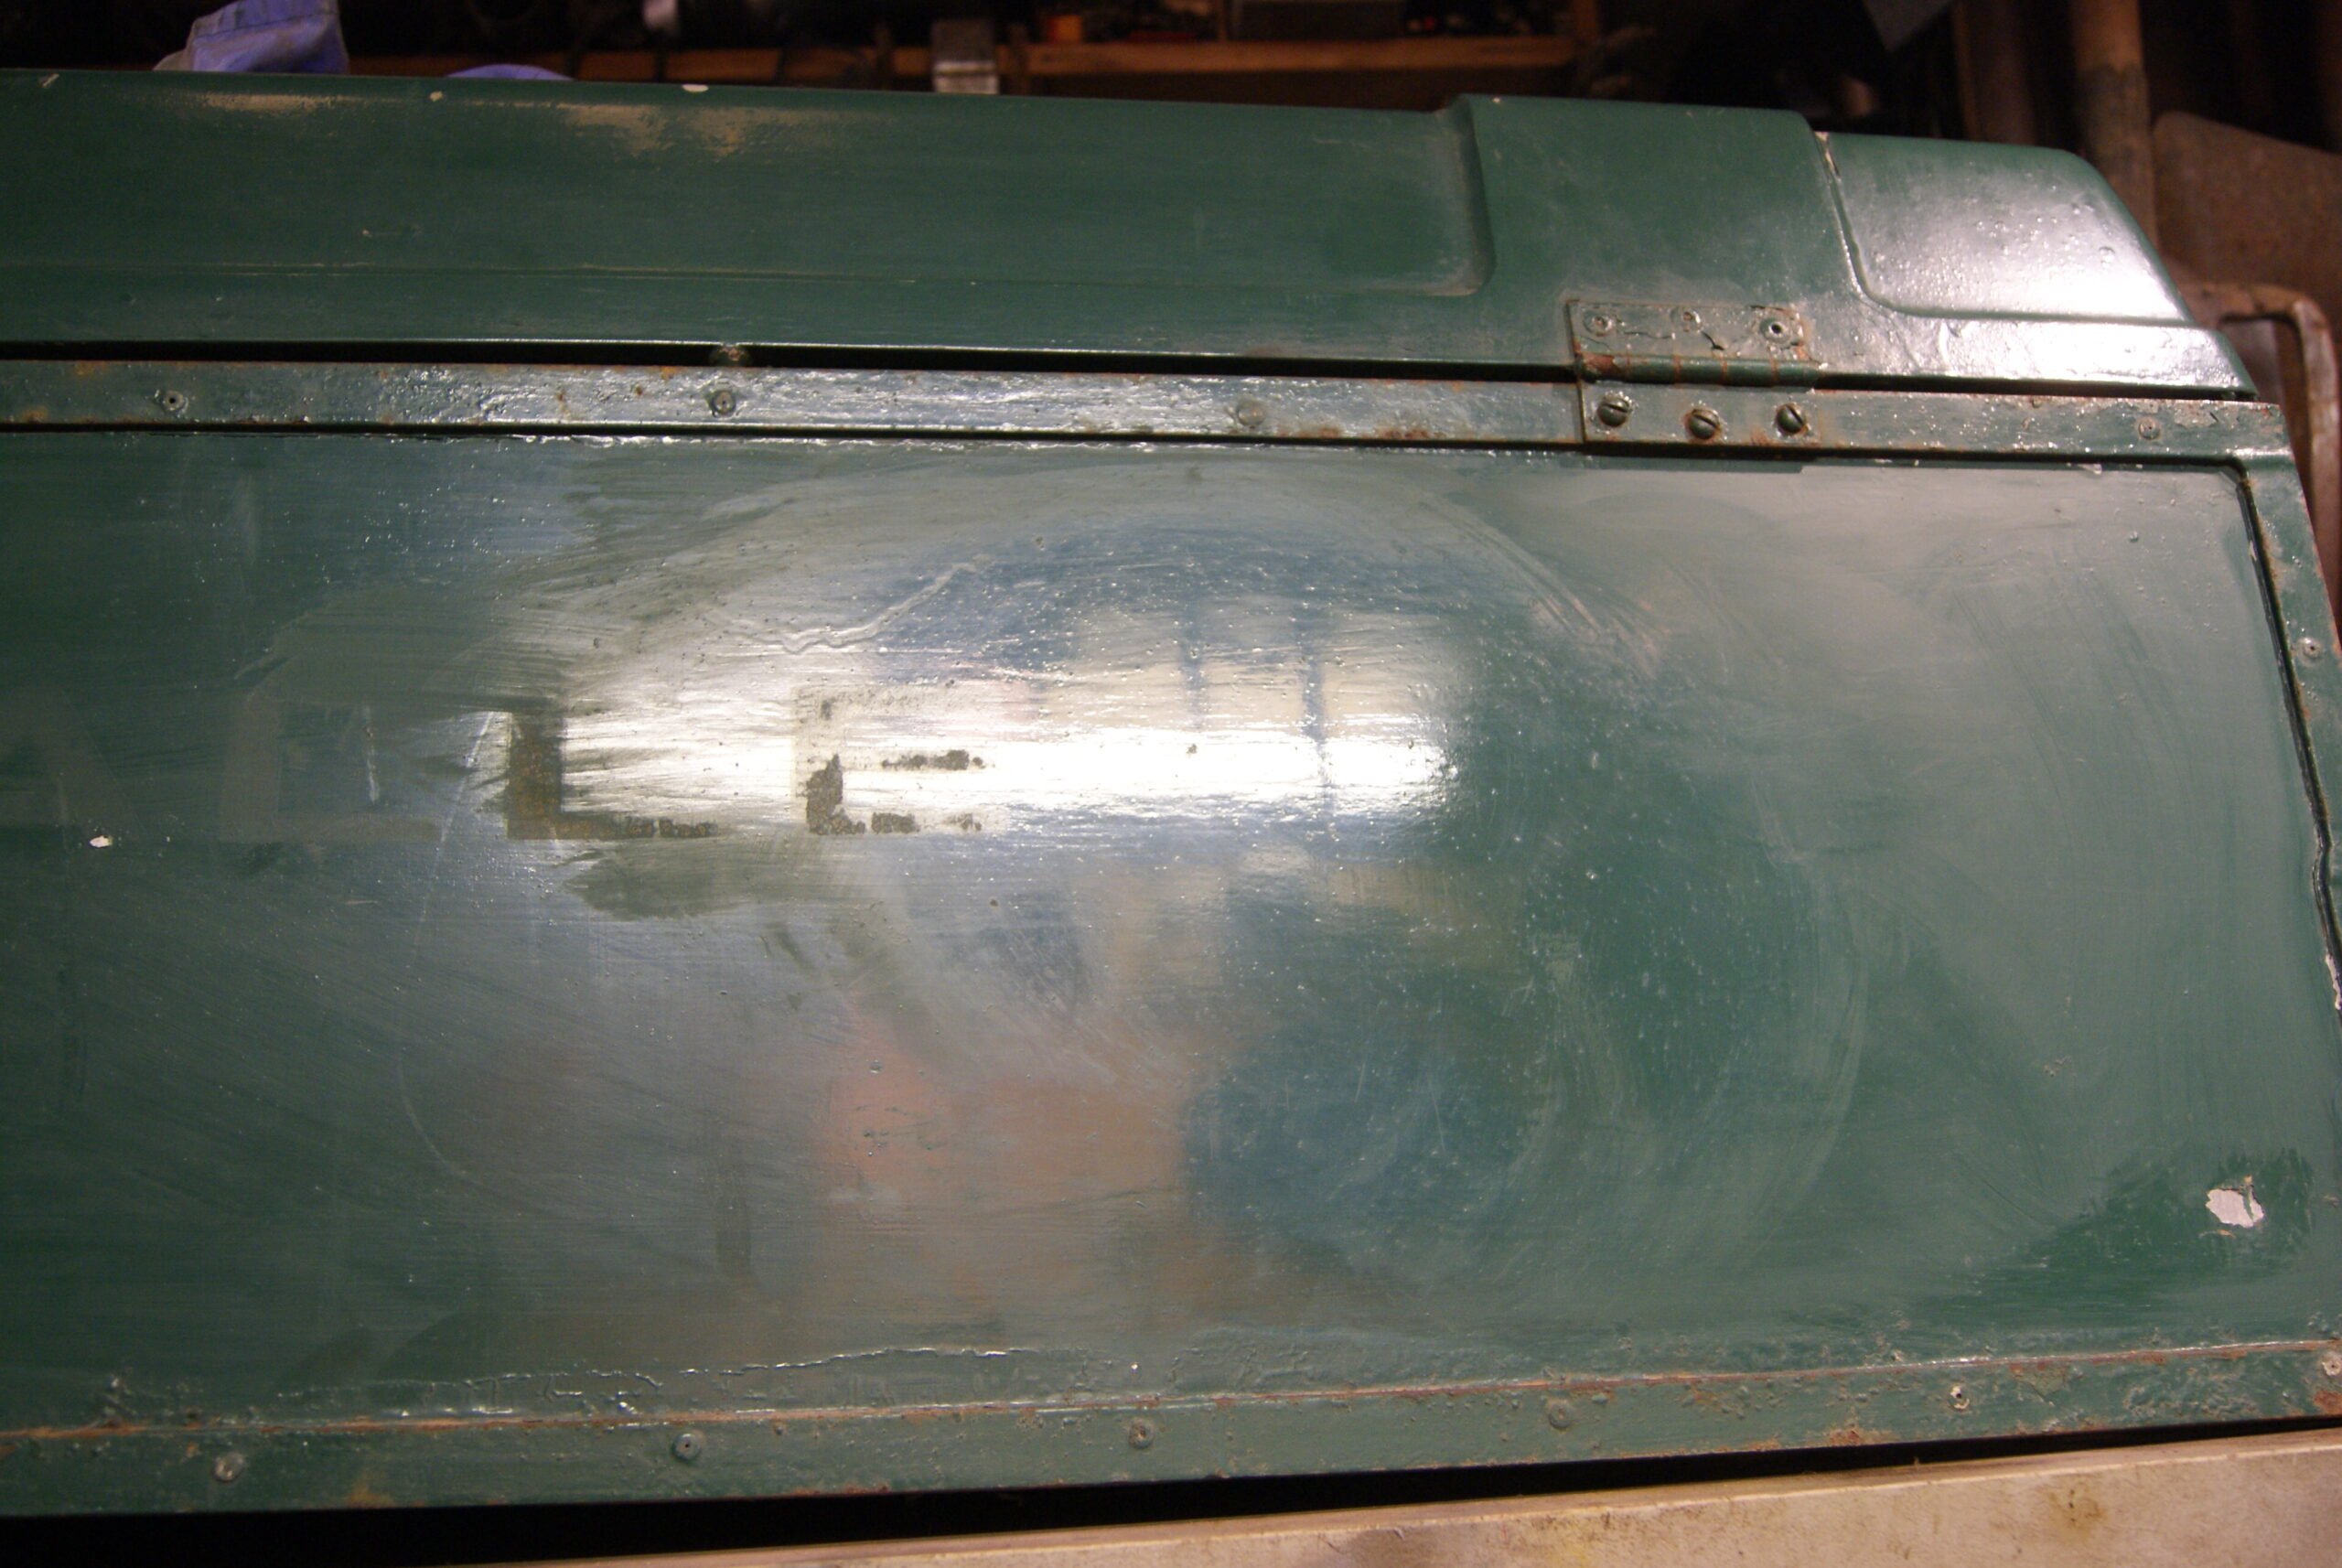
I’ve been tinkering with a few things as well today and got around to disguising the battery with the stickers; I think it looks convincing enough, so I moved on to the engine cover. If you compare the pictures with the original you will see that the Regal did not have the large “ALLETT” logo on the front when it was made, and the factory want it to look as close to the original as possible. Taking a tip off the experts on “Repair Shop” I thought it best to start with something that wasn’t too abrasive, so I tried T-Cut as my first choice. It worked! One of the photo’s below shows the front of the box with the two T’s polished away, leaving the rest of the lettering untouched for comparison. The only trouble is that the paint brush marks are more pronounced now, so I’ll have to do a bit more work on it to see how much more acceptable I can make it without taking the paint off.
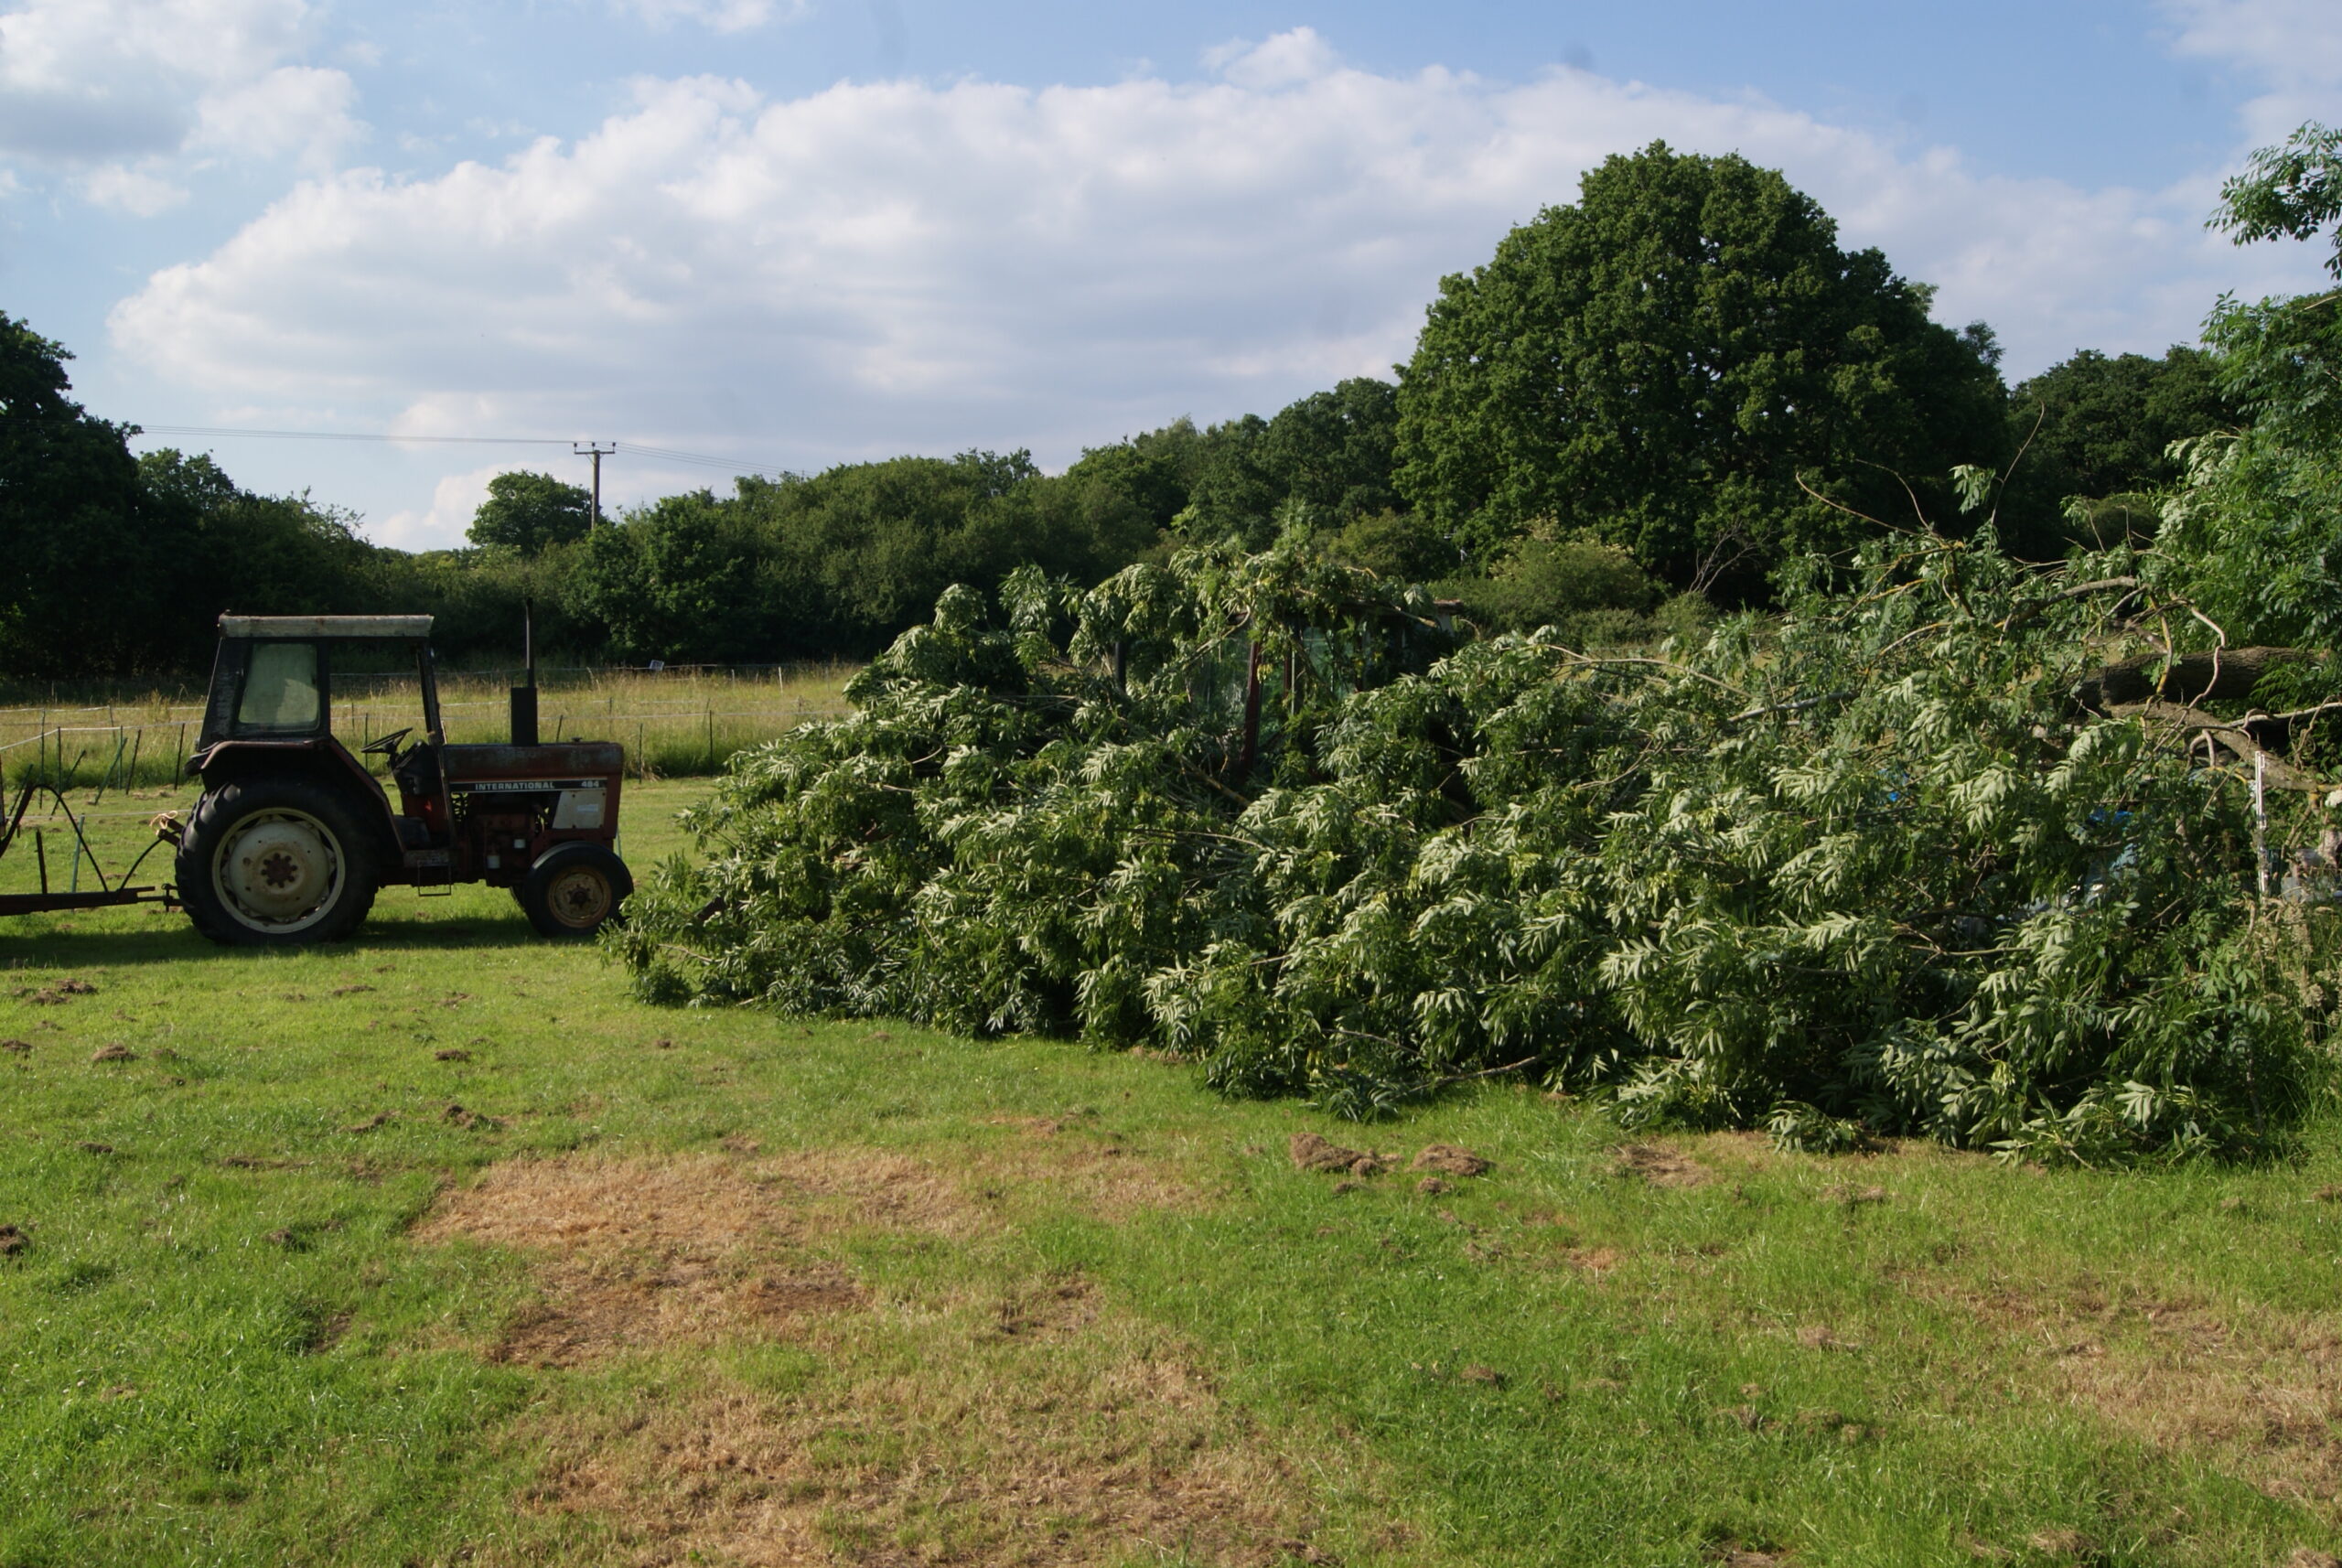
I thought you might like to see some pictures of the branch that fell off the tree as well- there’s an International tractor and three Trusty’s under there somewhere!
Attachments:
-
AuthorPosts