Home › Forums › Groundcare Machinery › Grass Cutting Machinery › Allett Regal No.1
Tagged: Allett Regal Mk1
- This topic has 96 replies, 10 voices, and was last updated 3 years, 8 months ago by
 trusty220.
-
AuthorPosts
-
July 31, 2022 at 7:48 am #39564
 wristpinParticipant
where did I put that beer….?
Soon be time for a bottle of bubbly !
July 31, 2022 at 2:16 pm #39566 trusty220Keymaster
I wouldn’t waste my money on the stuff, Angus! Give me a pint of Marston’s Pedigree any day!
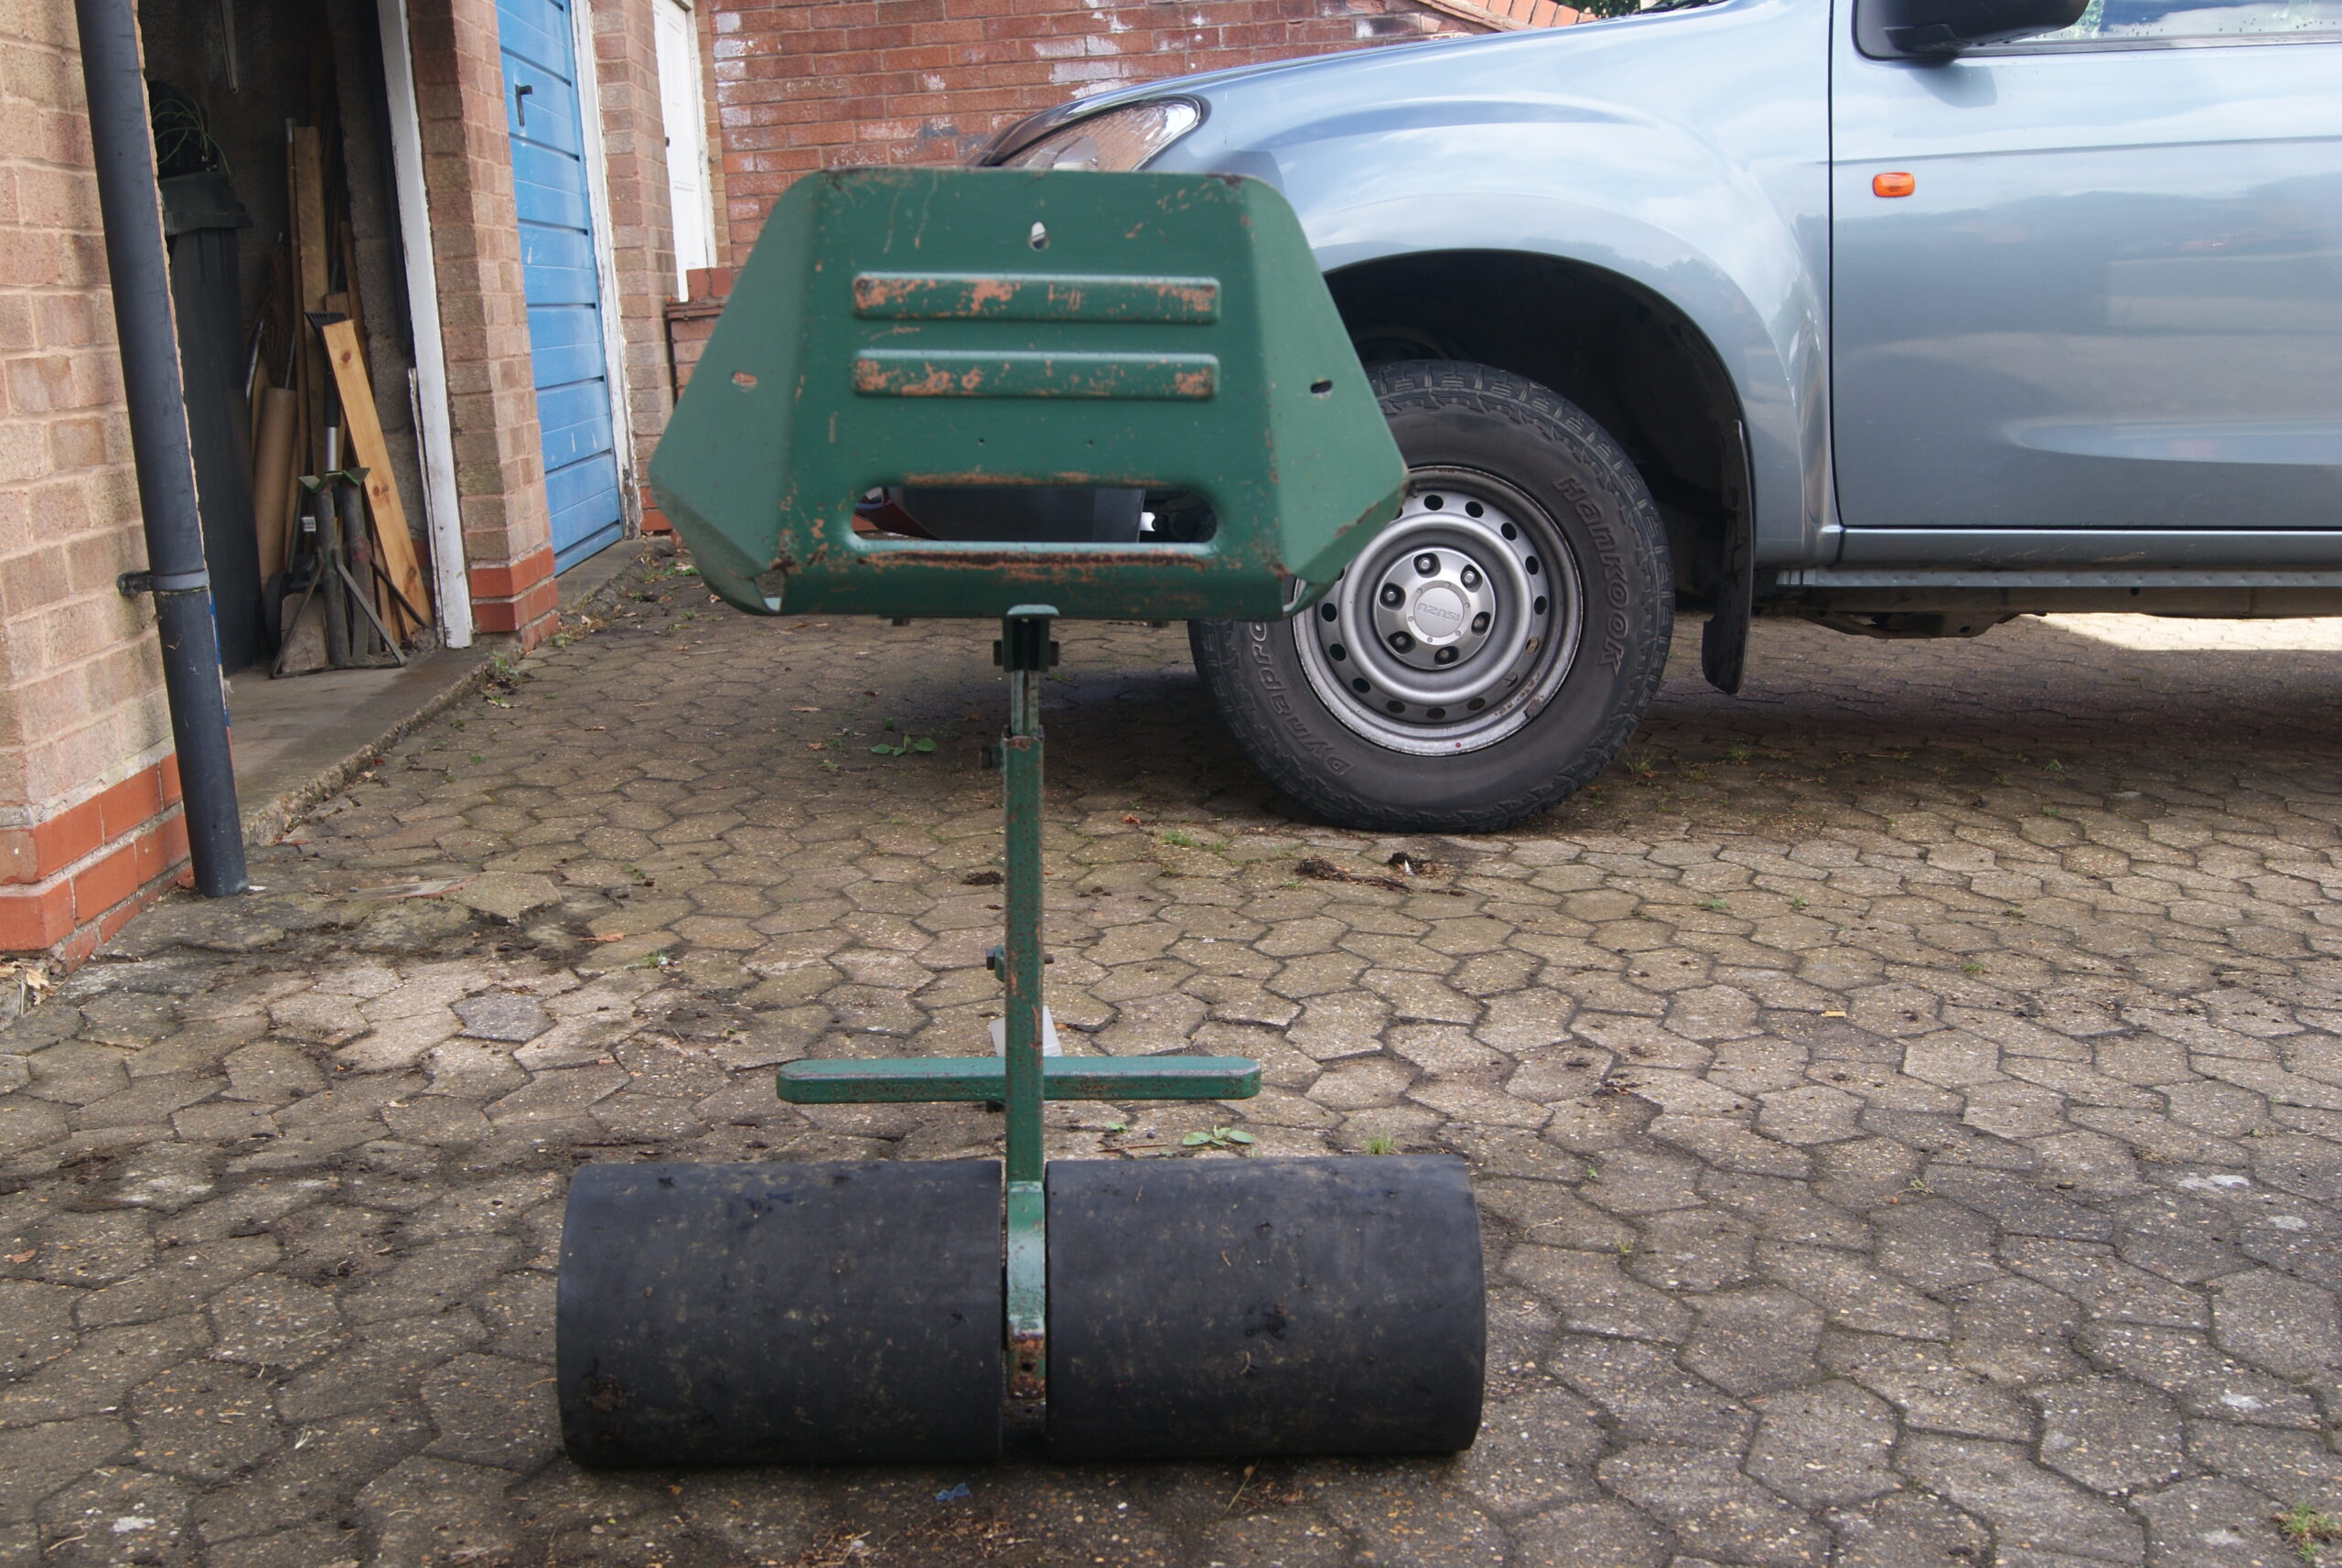
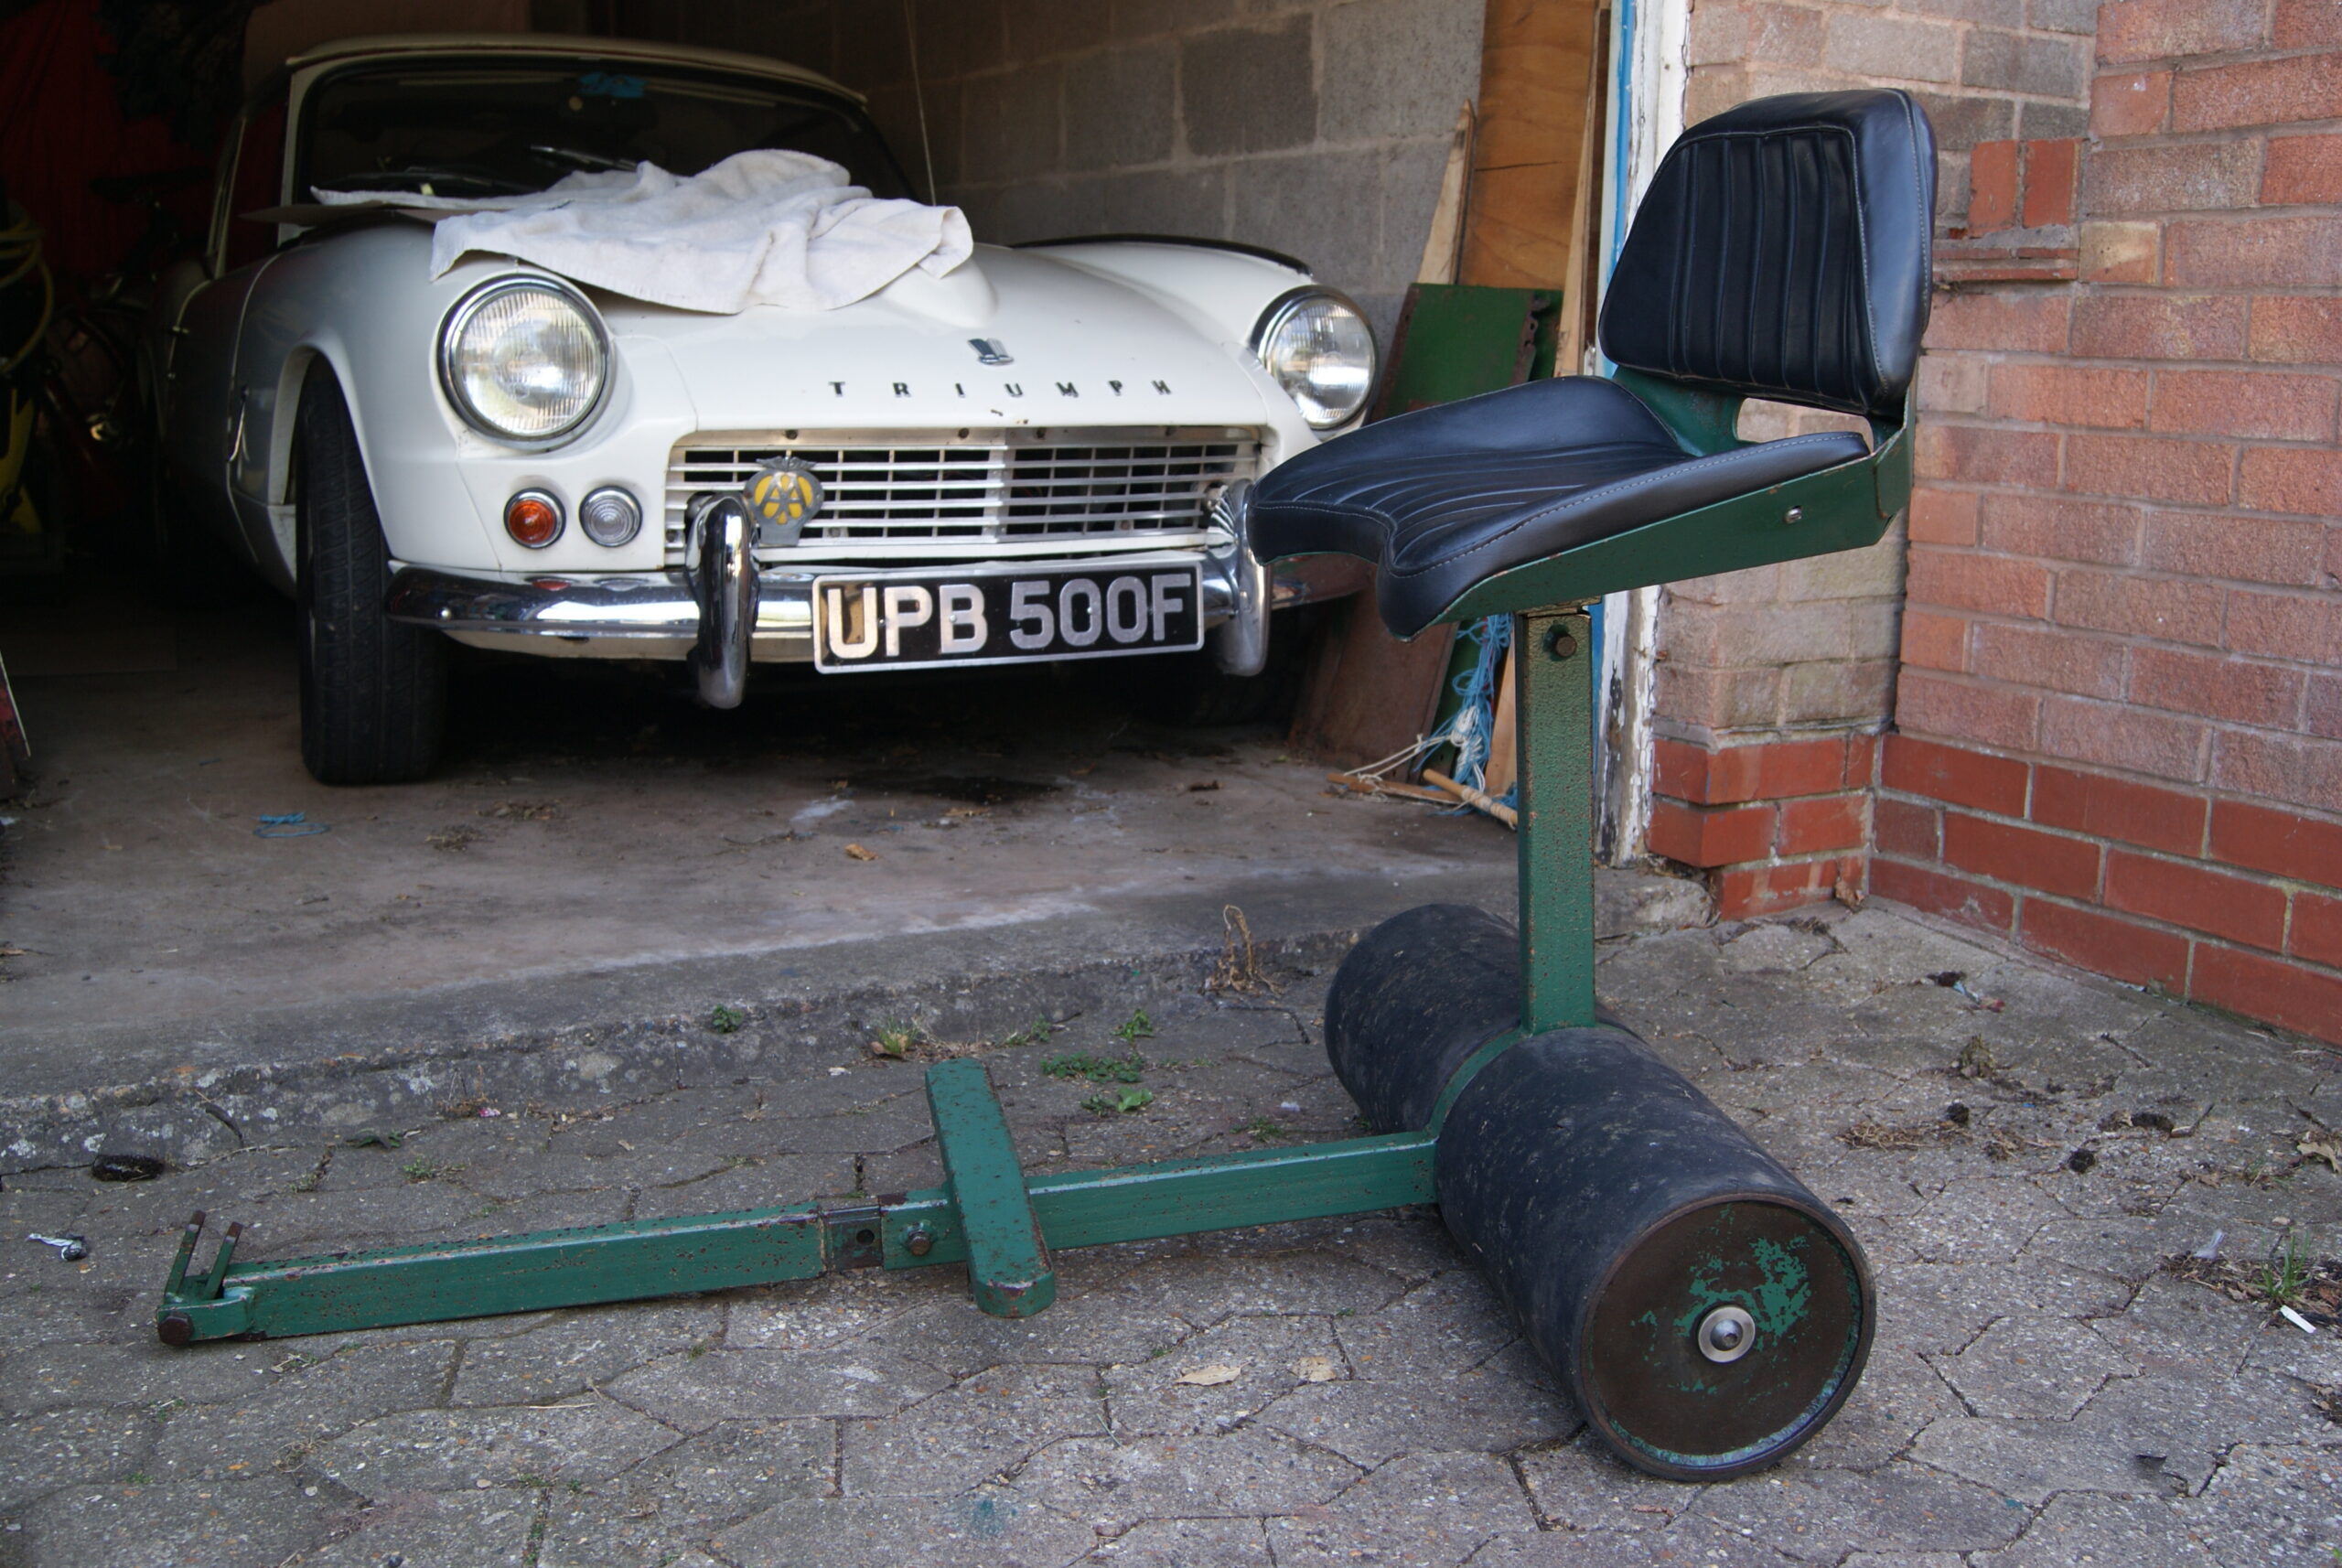
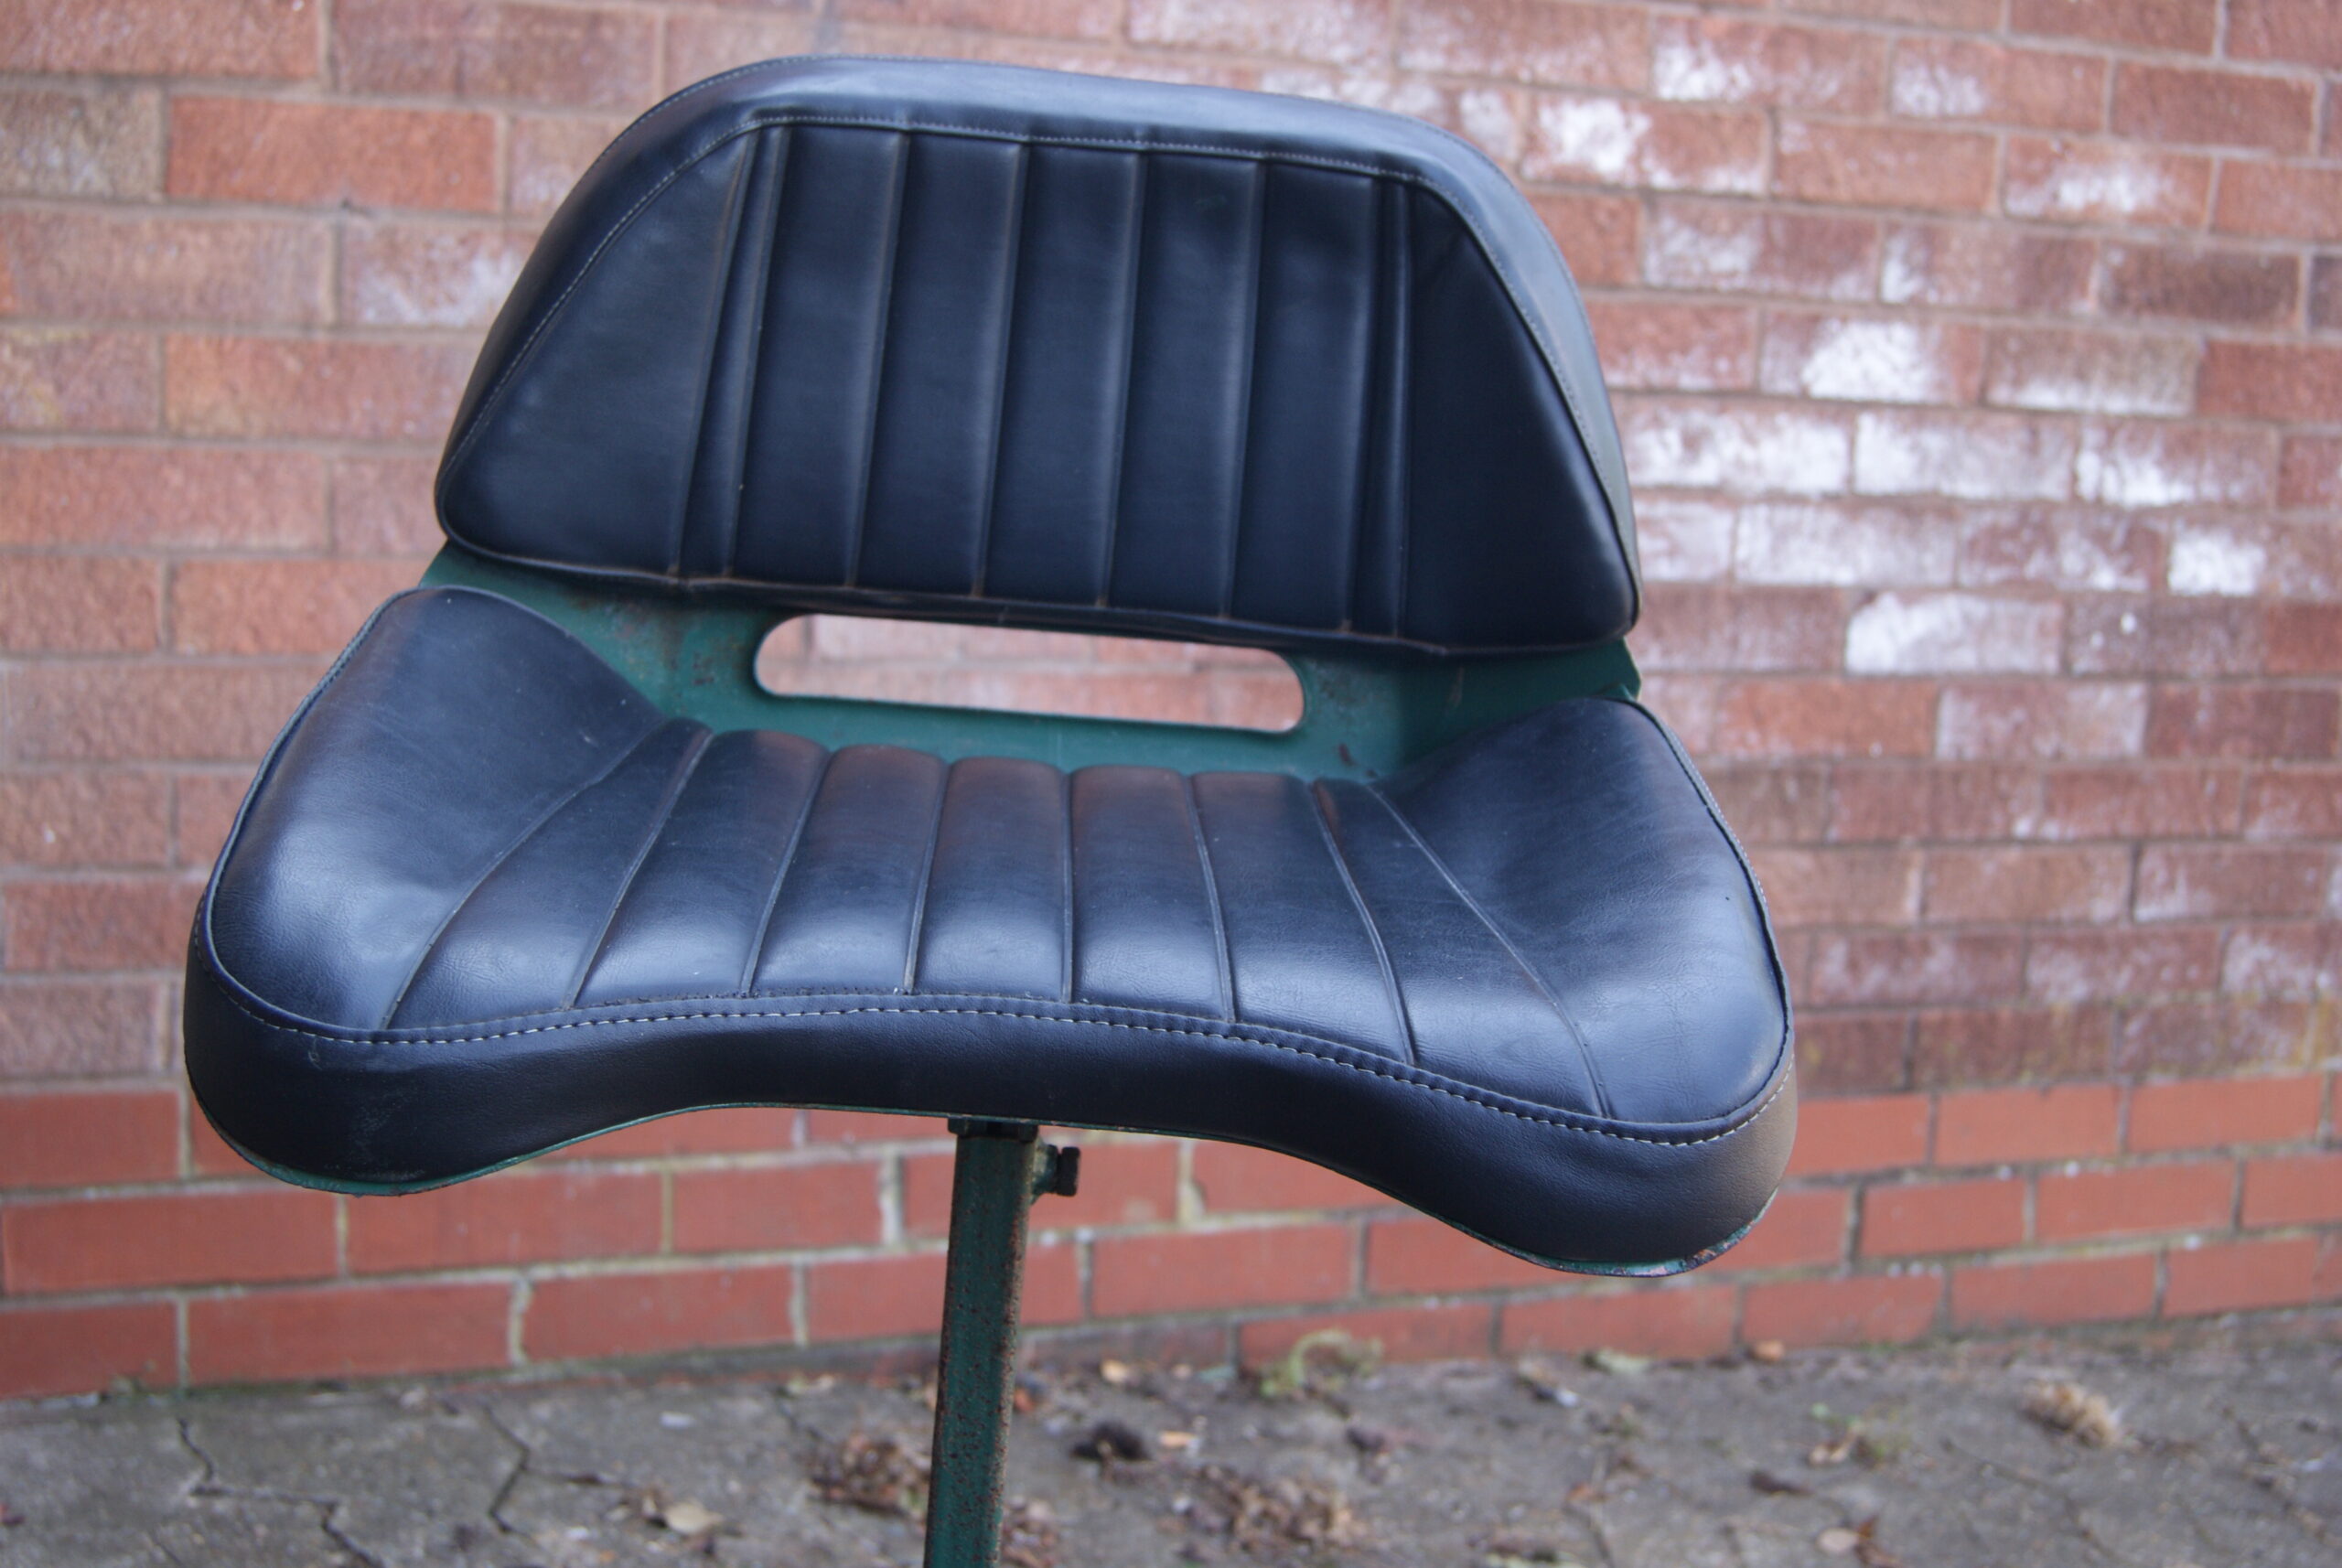
Not too much action today as I’ve been at the farm loading up ready for South Cerney next weekend. One thing that I’ve managed to do is to clear my bench of all of the odd jobs, such as bolting the trailing seat back together and giving it another coat of varnish to seal it.
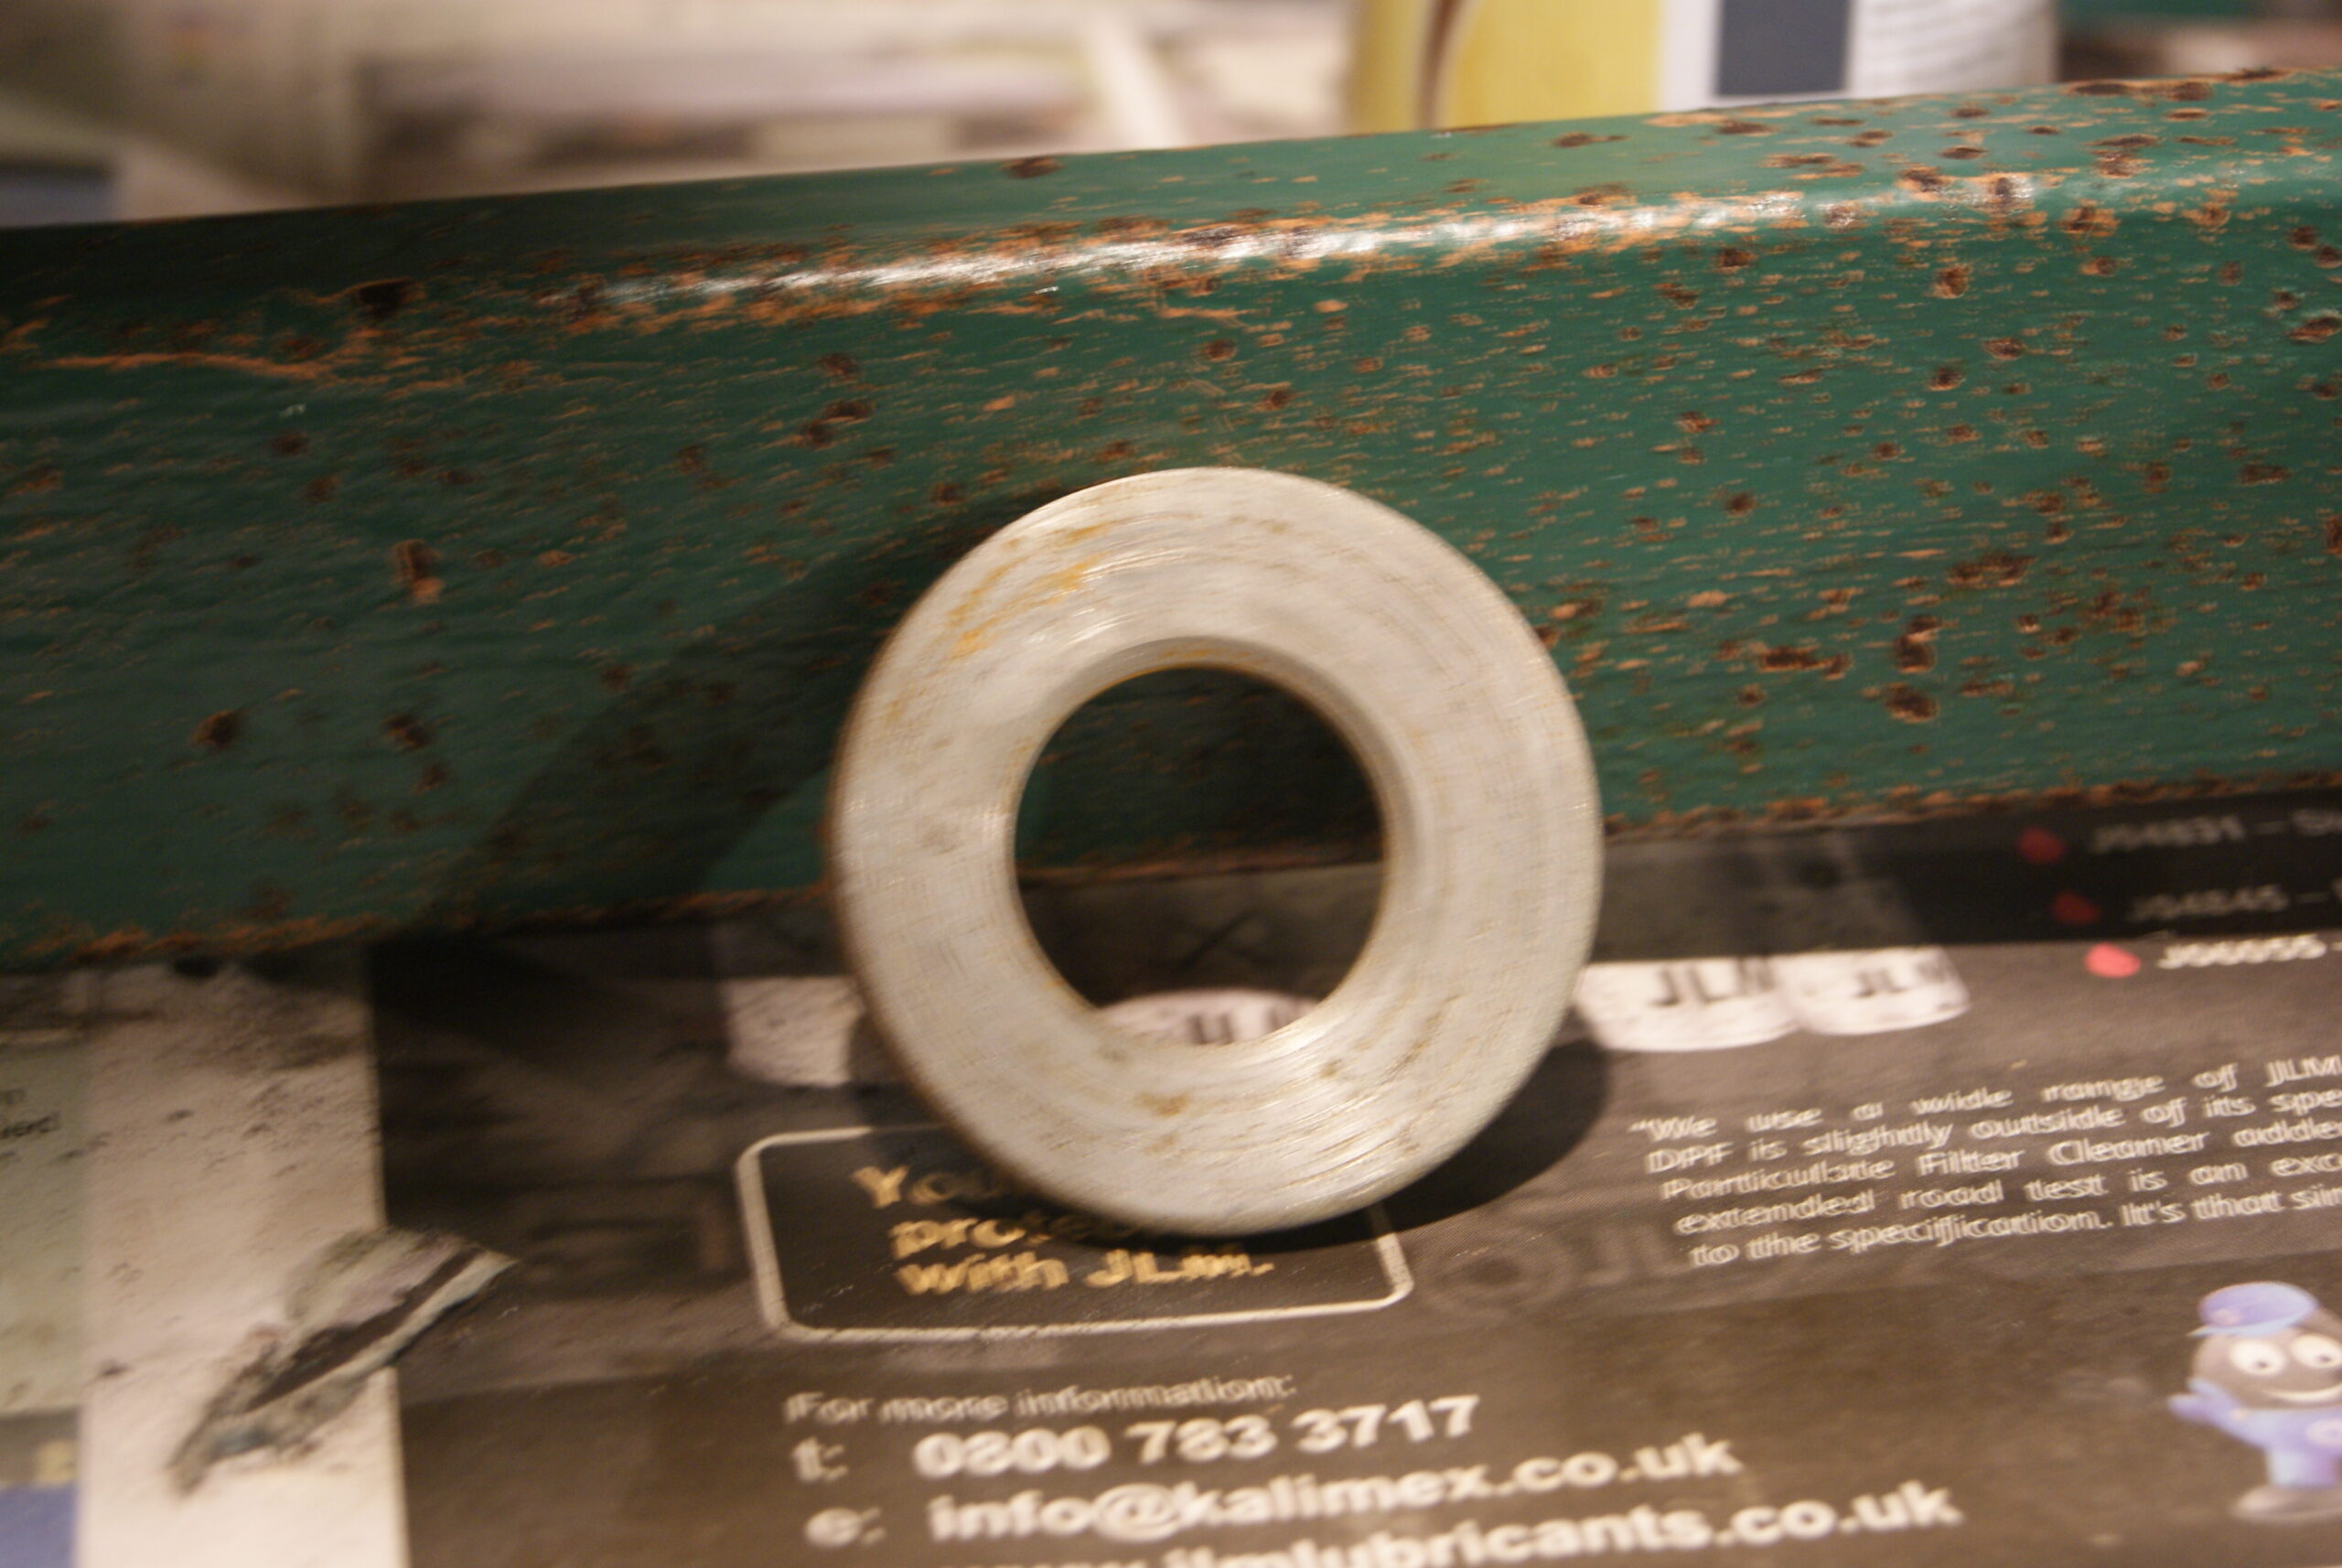
One thing I did notice was that the one thrust washer which mounts against the frame inside the roll had obviously been given to the apprentice to do. The centre hole has been drilled off to one side giving the whole washer a lop-sided appearance but it shouldn’t affect how it works. Things like that are part of it’s history and should stay like it, I feel.
Anyway, the only thing left to do to it now is to attach the seat cushions which will be away for at least another week, so it’s keeping the GT6 company in the other garage.
In the words of British Rail in the 70’s, we’re getting there!
Attachments:
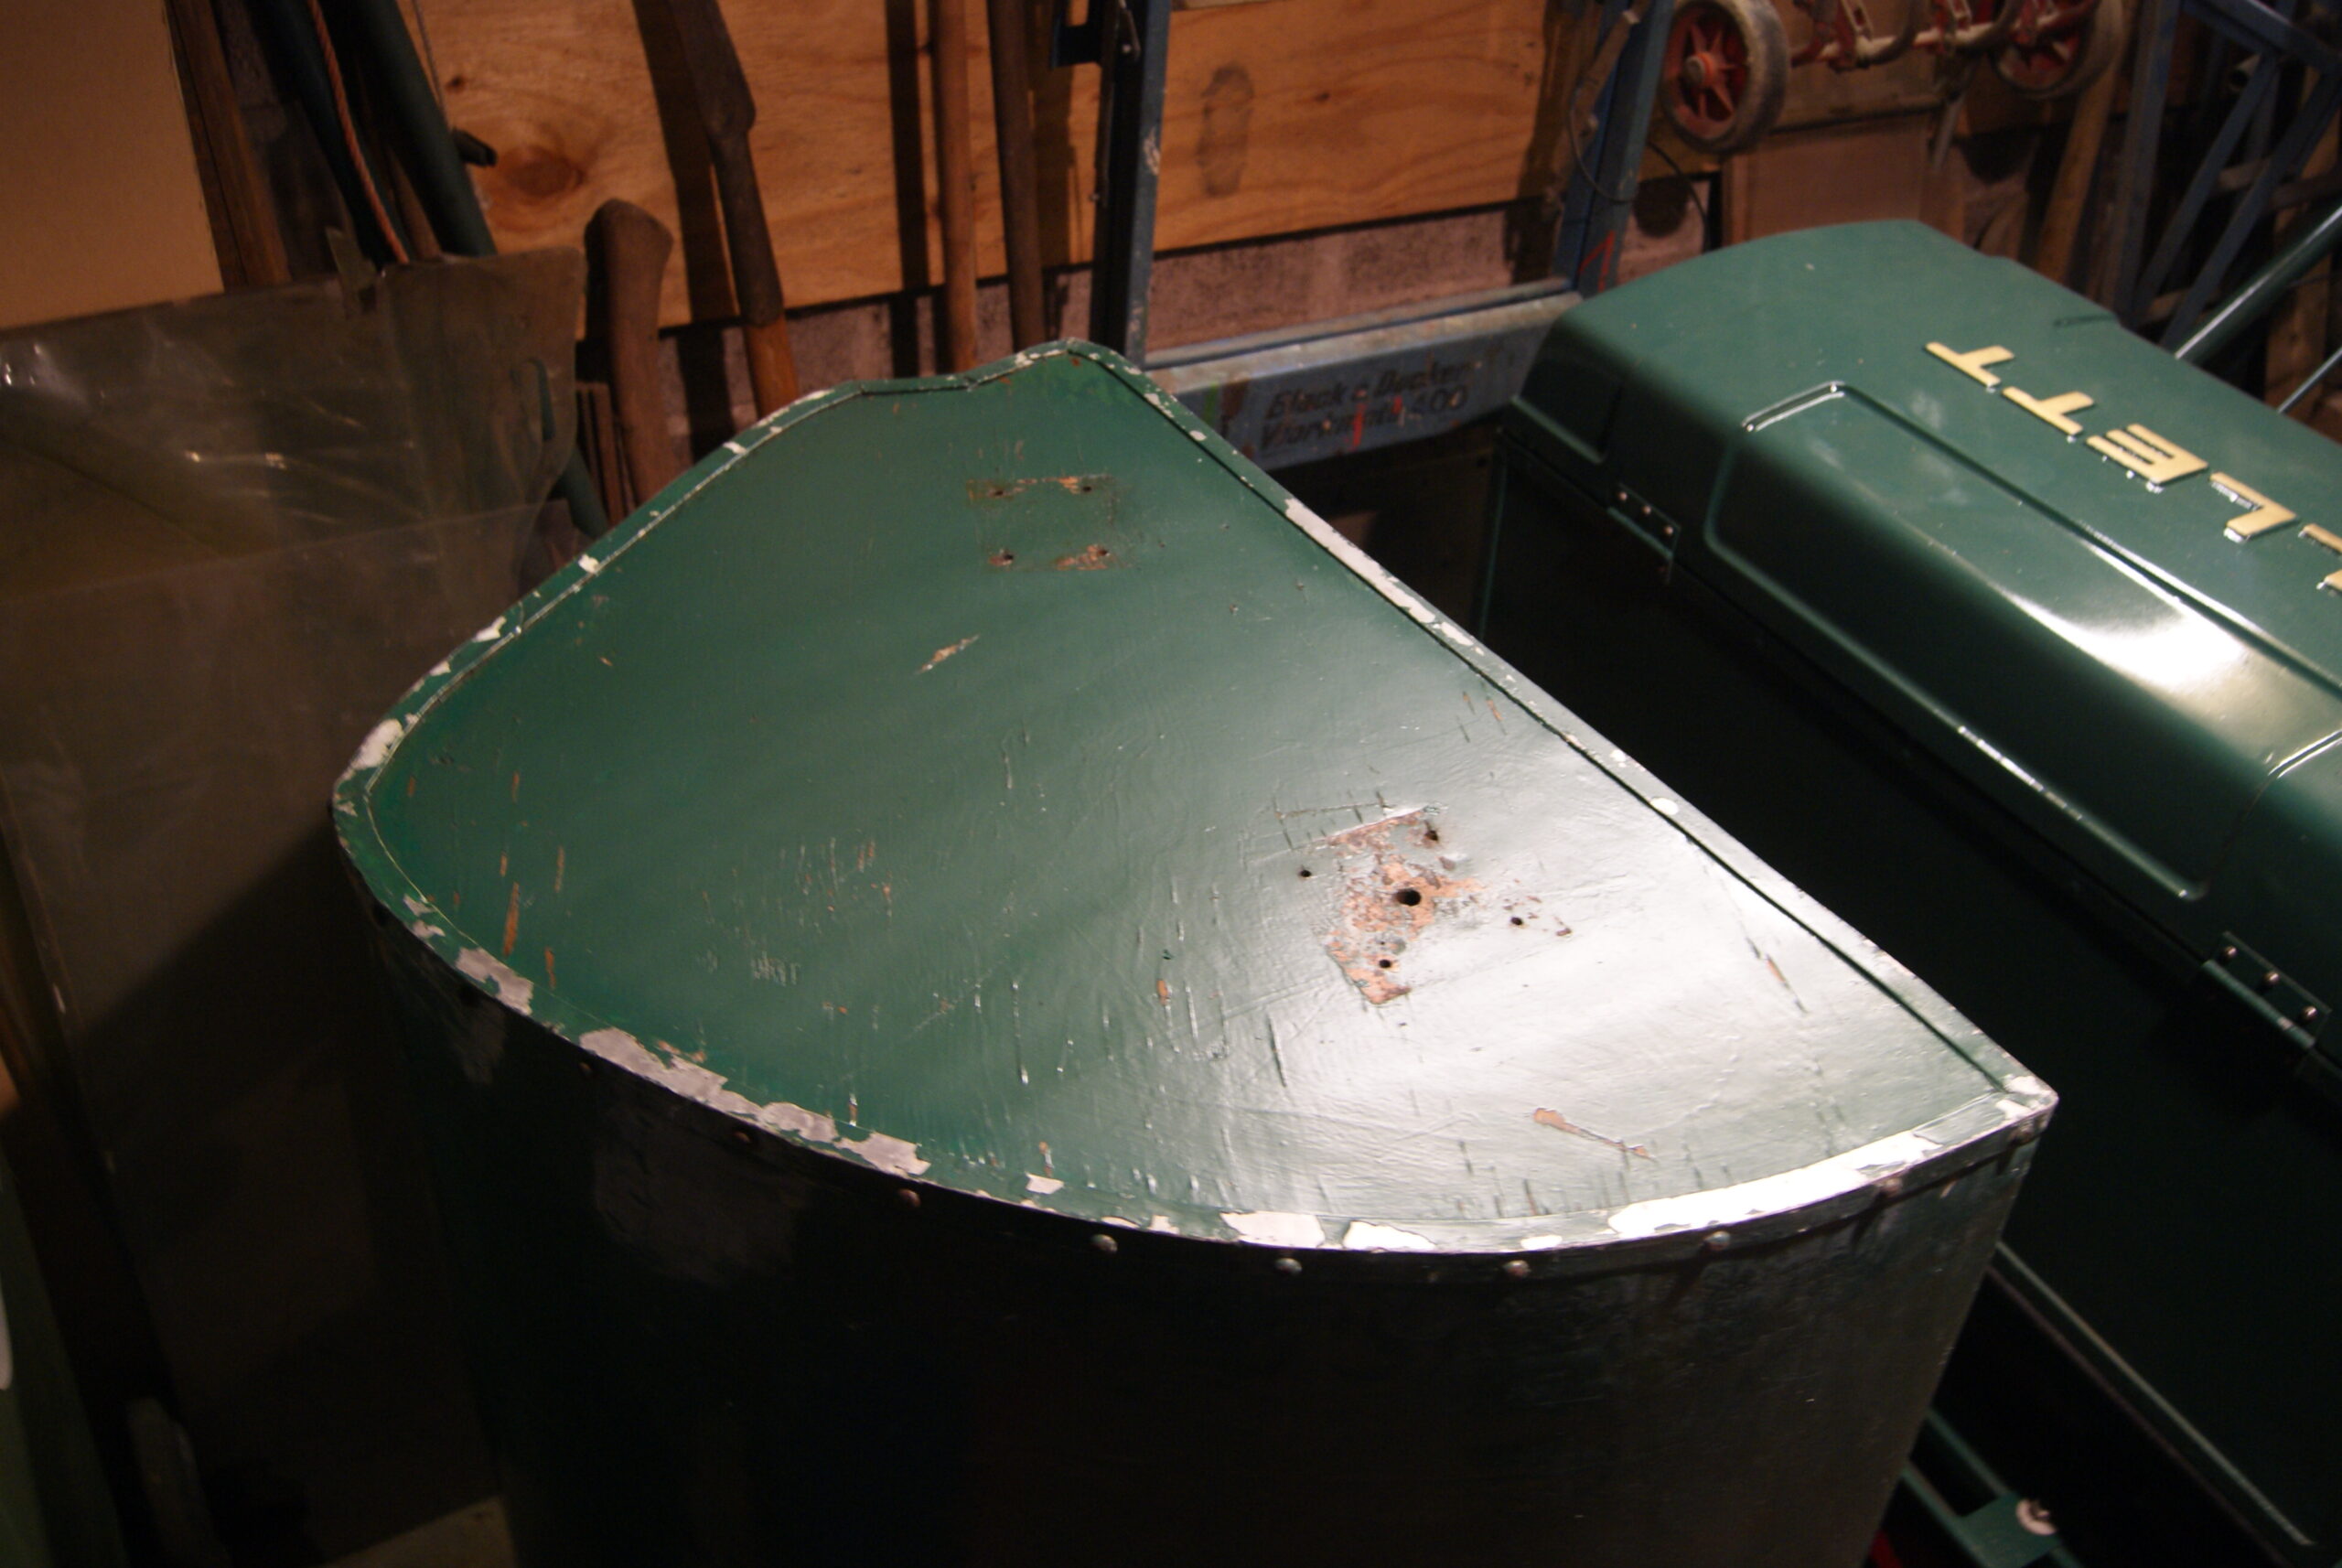
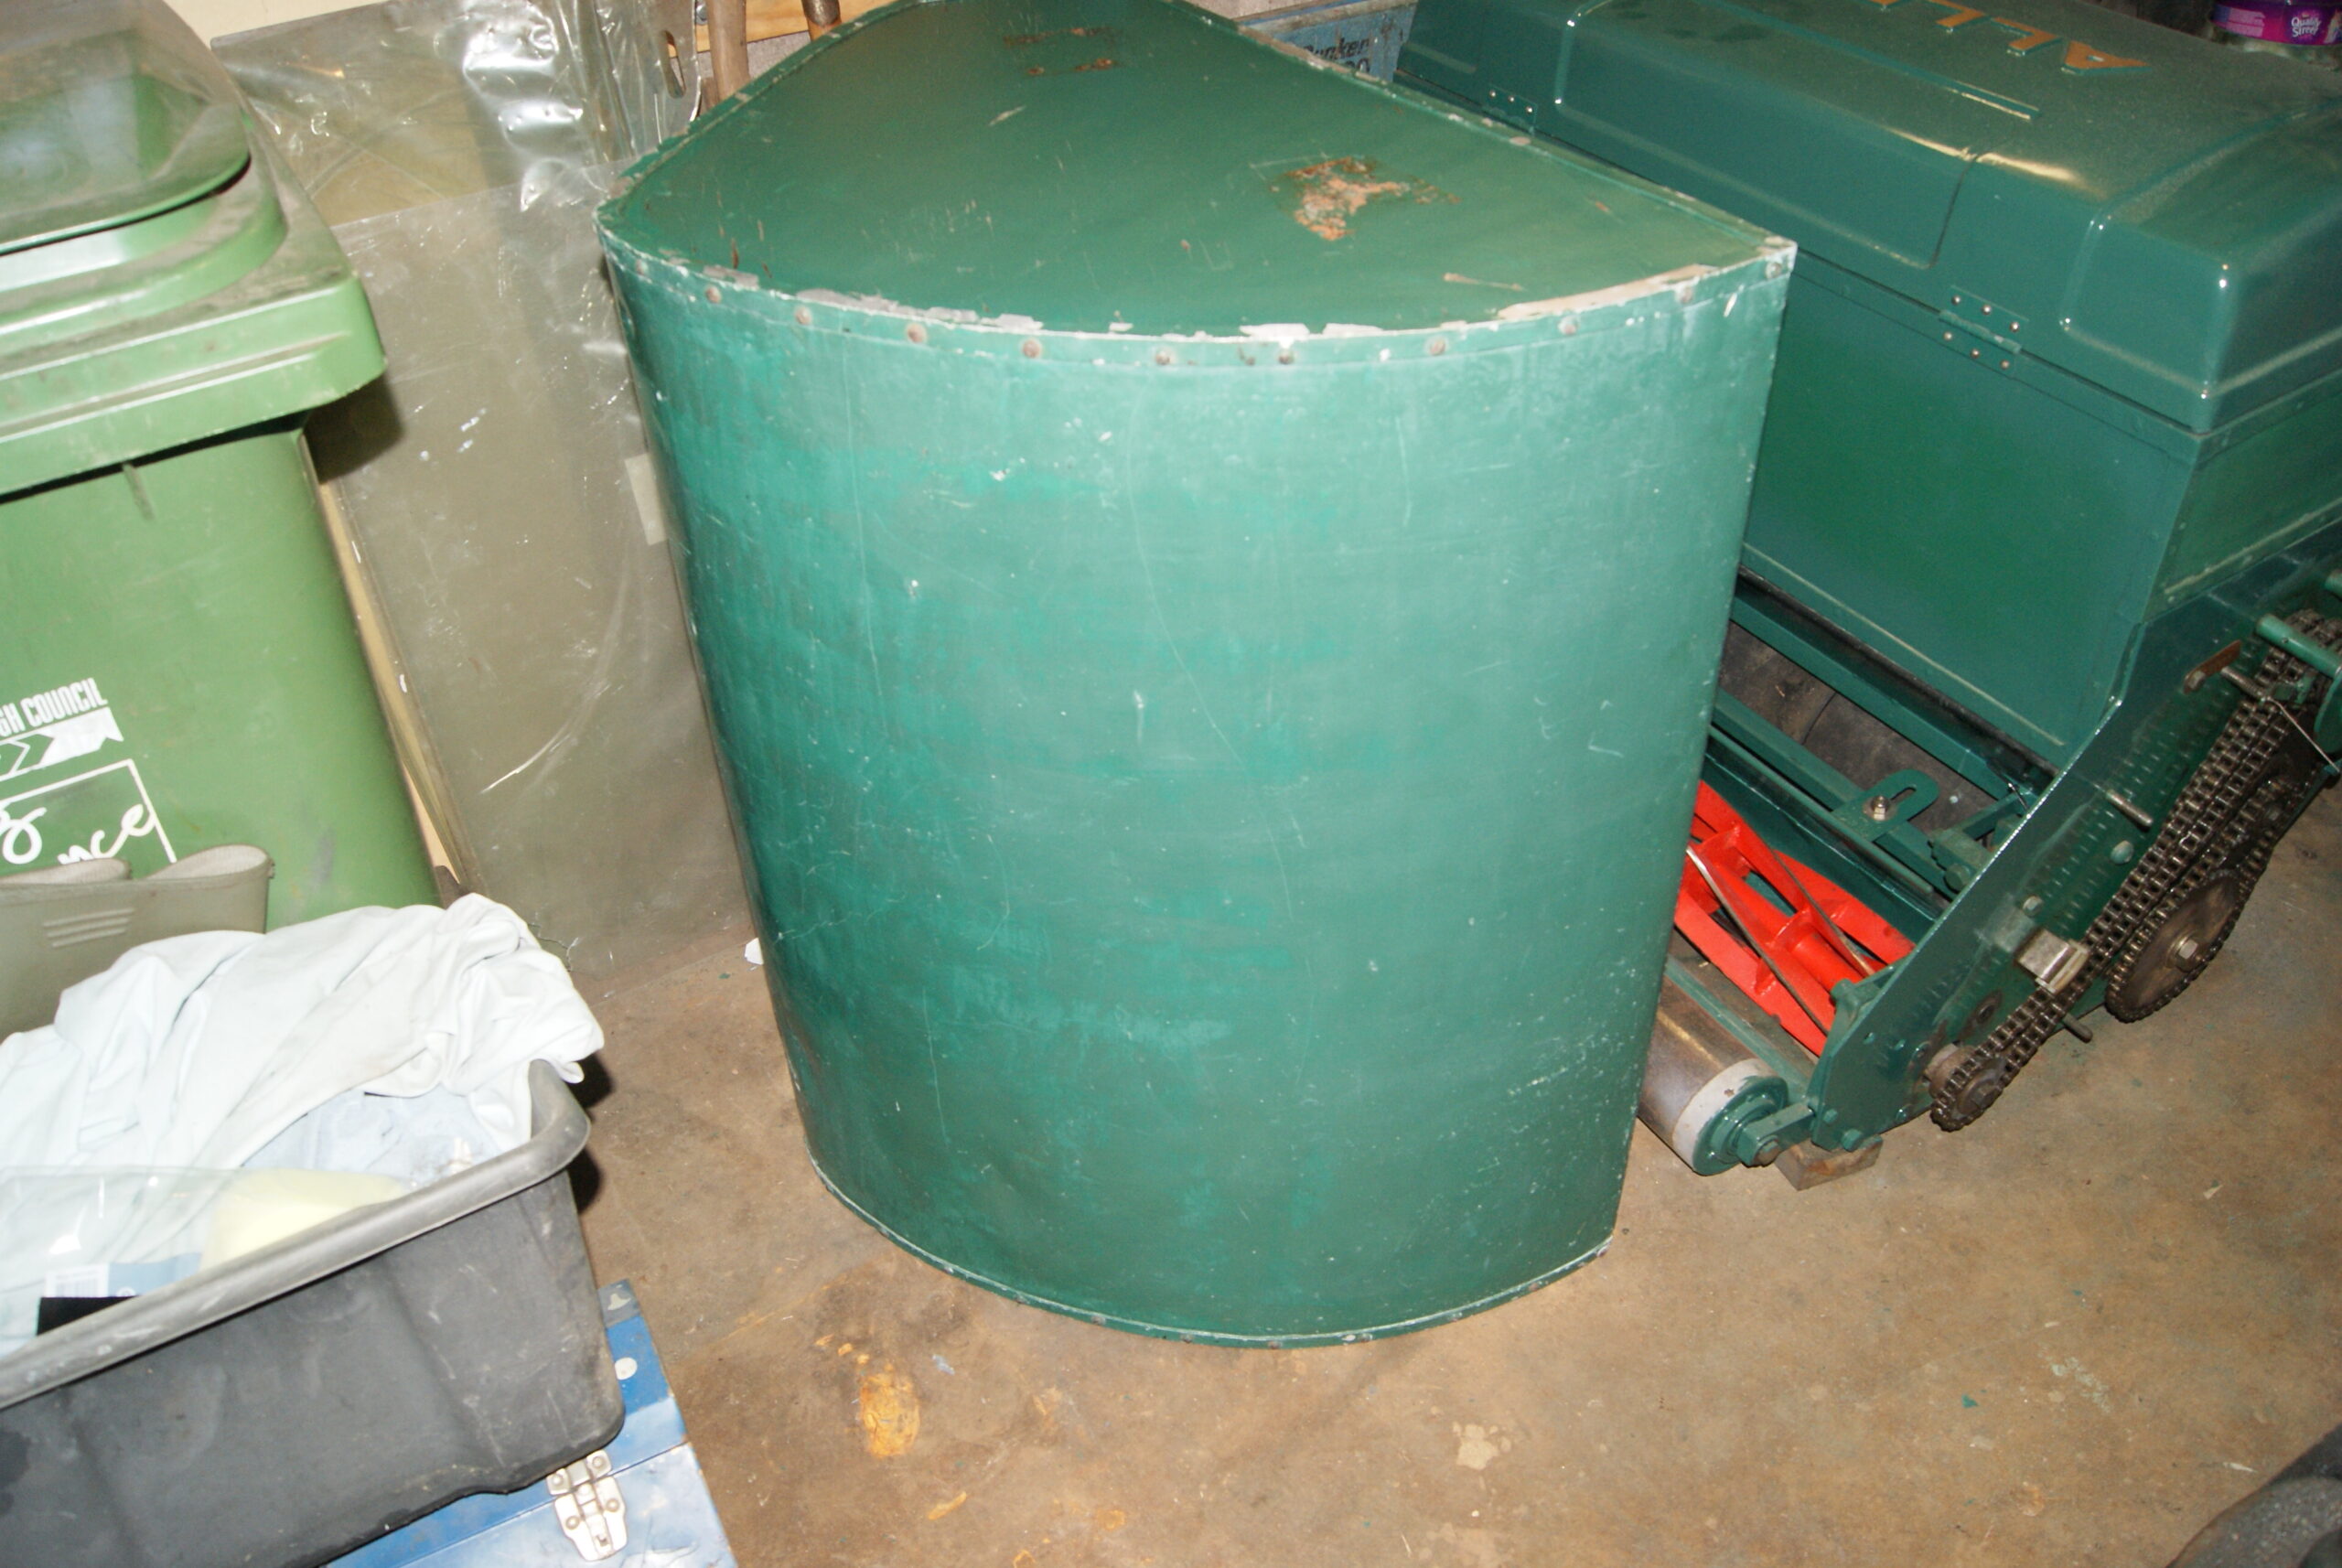
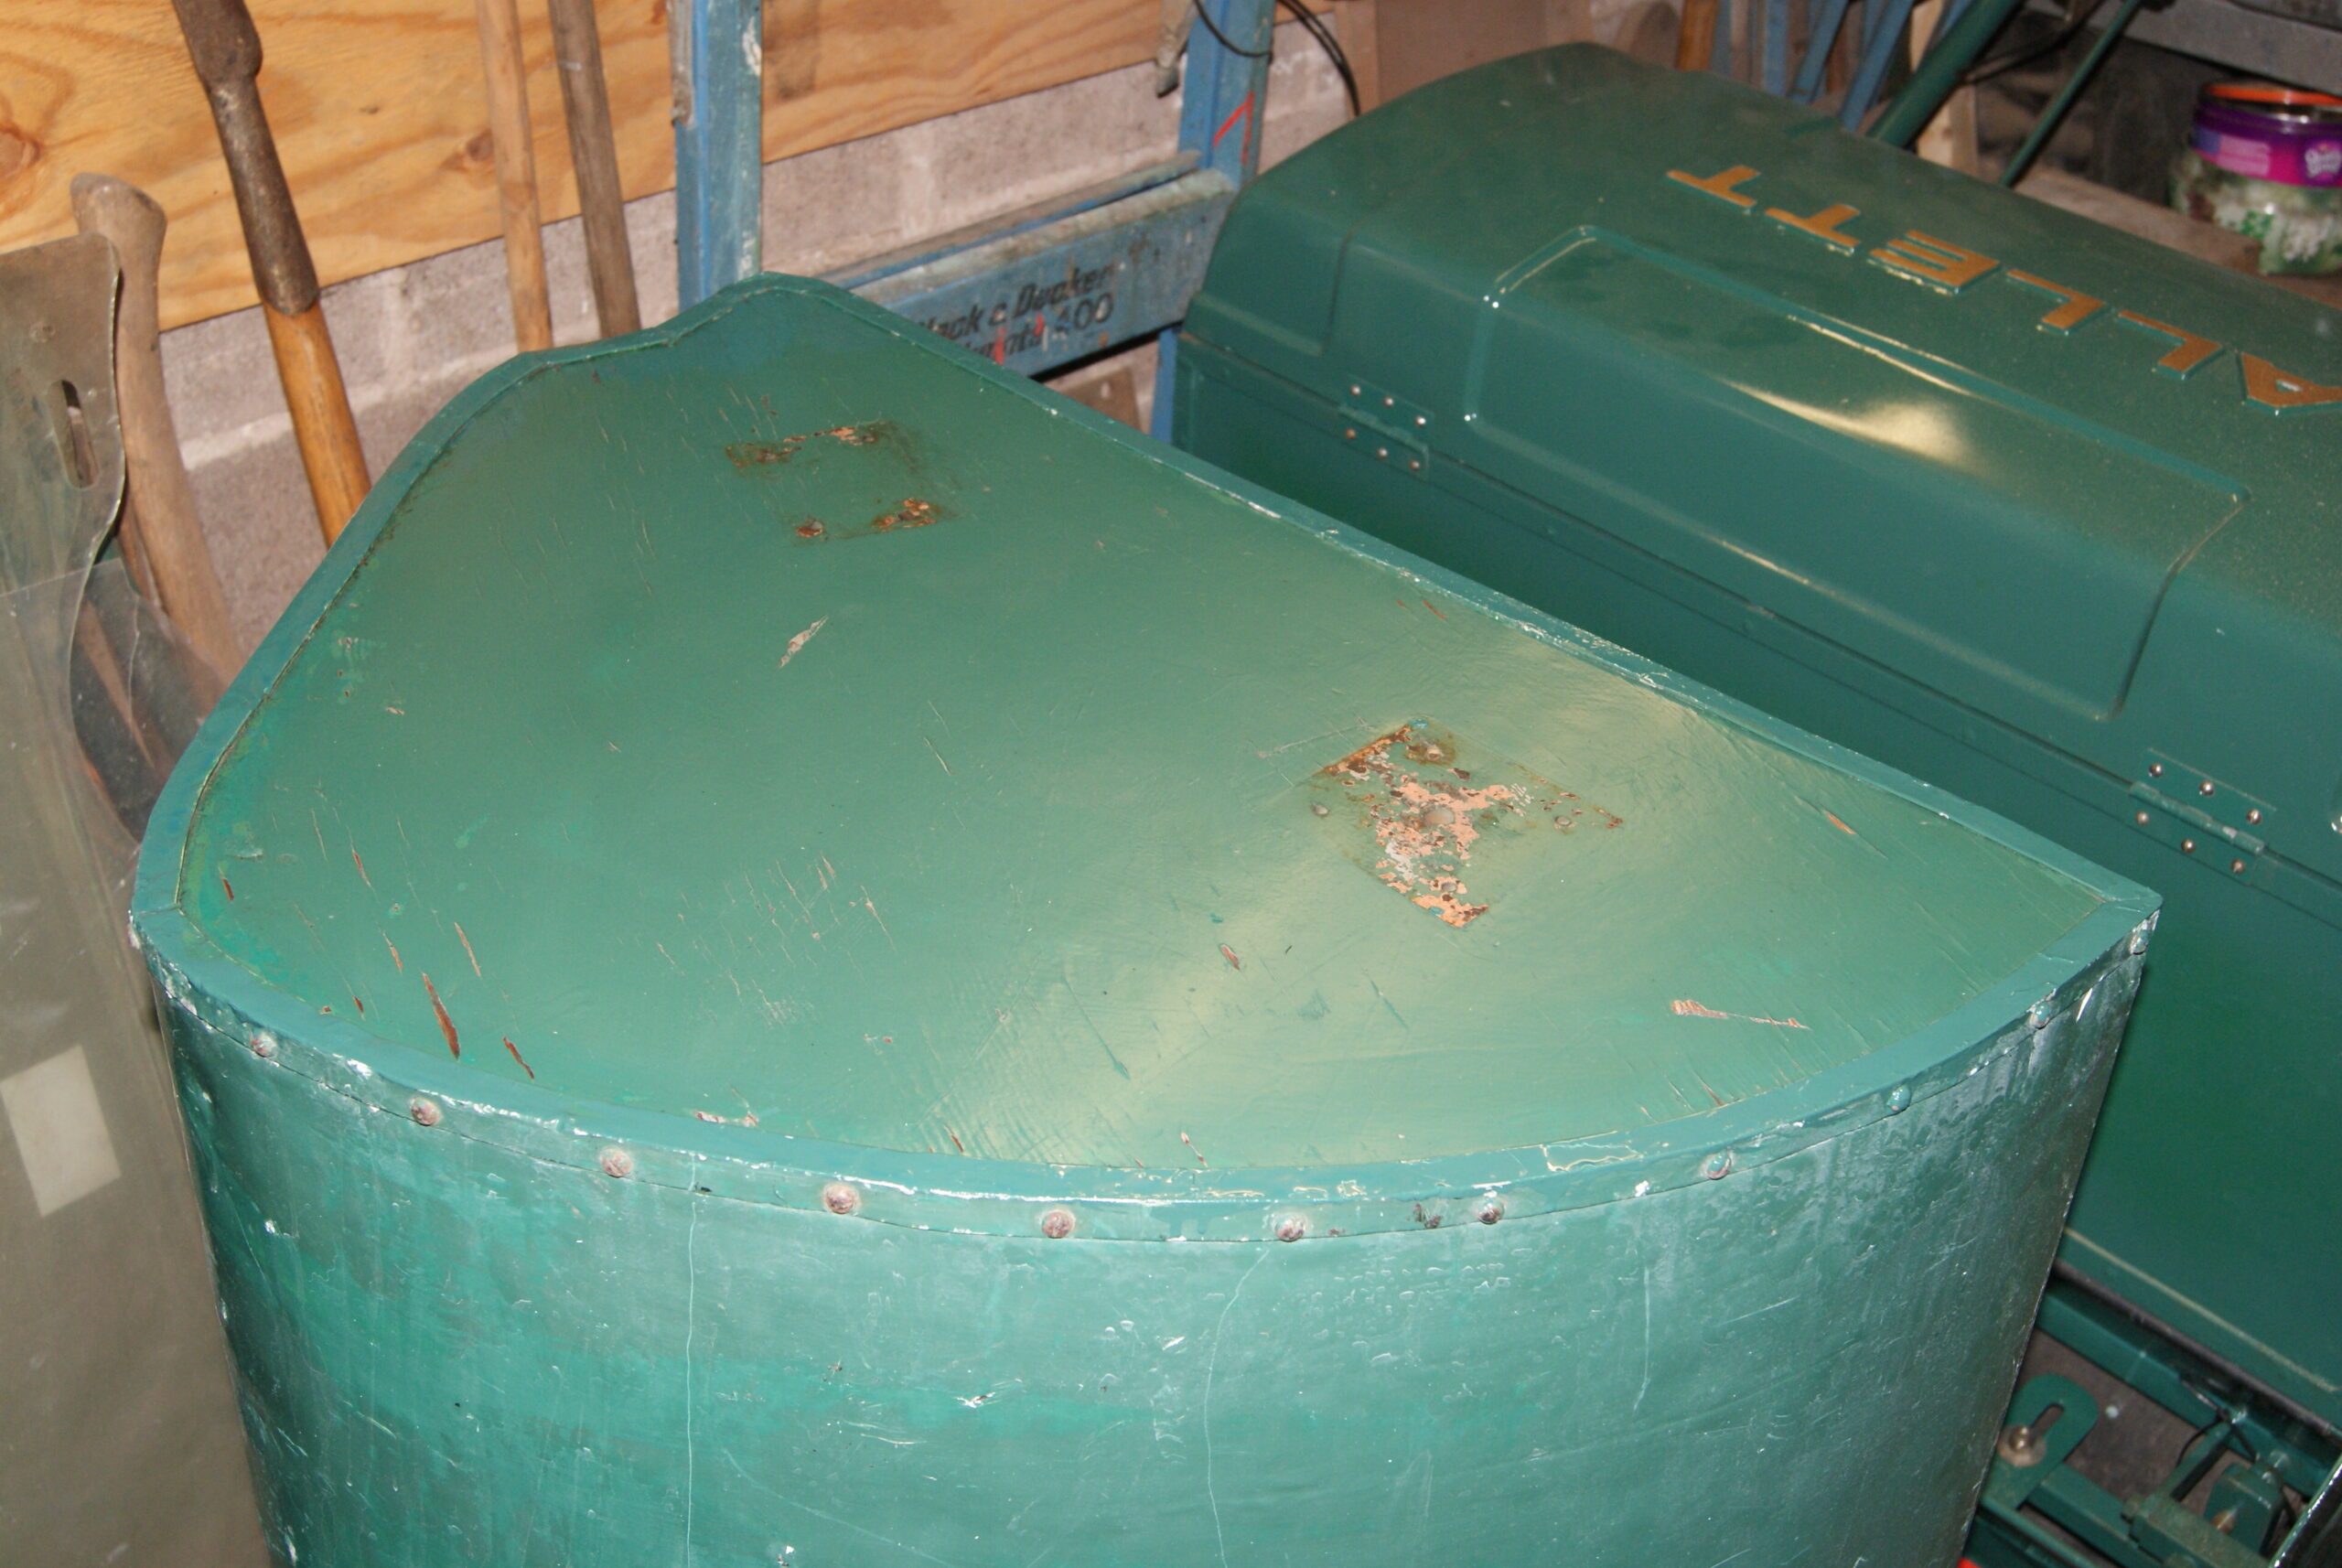
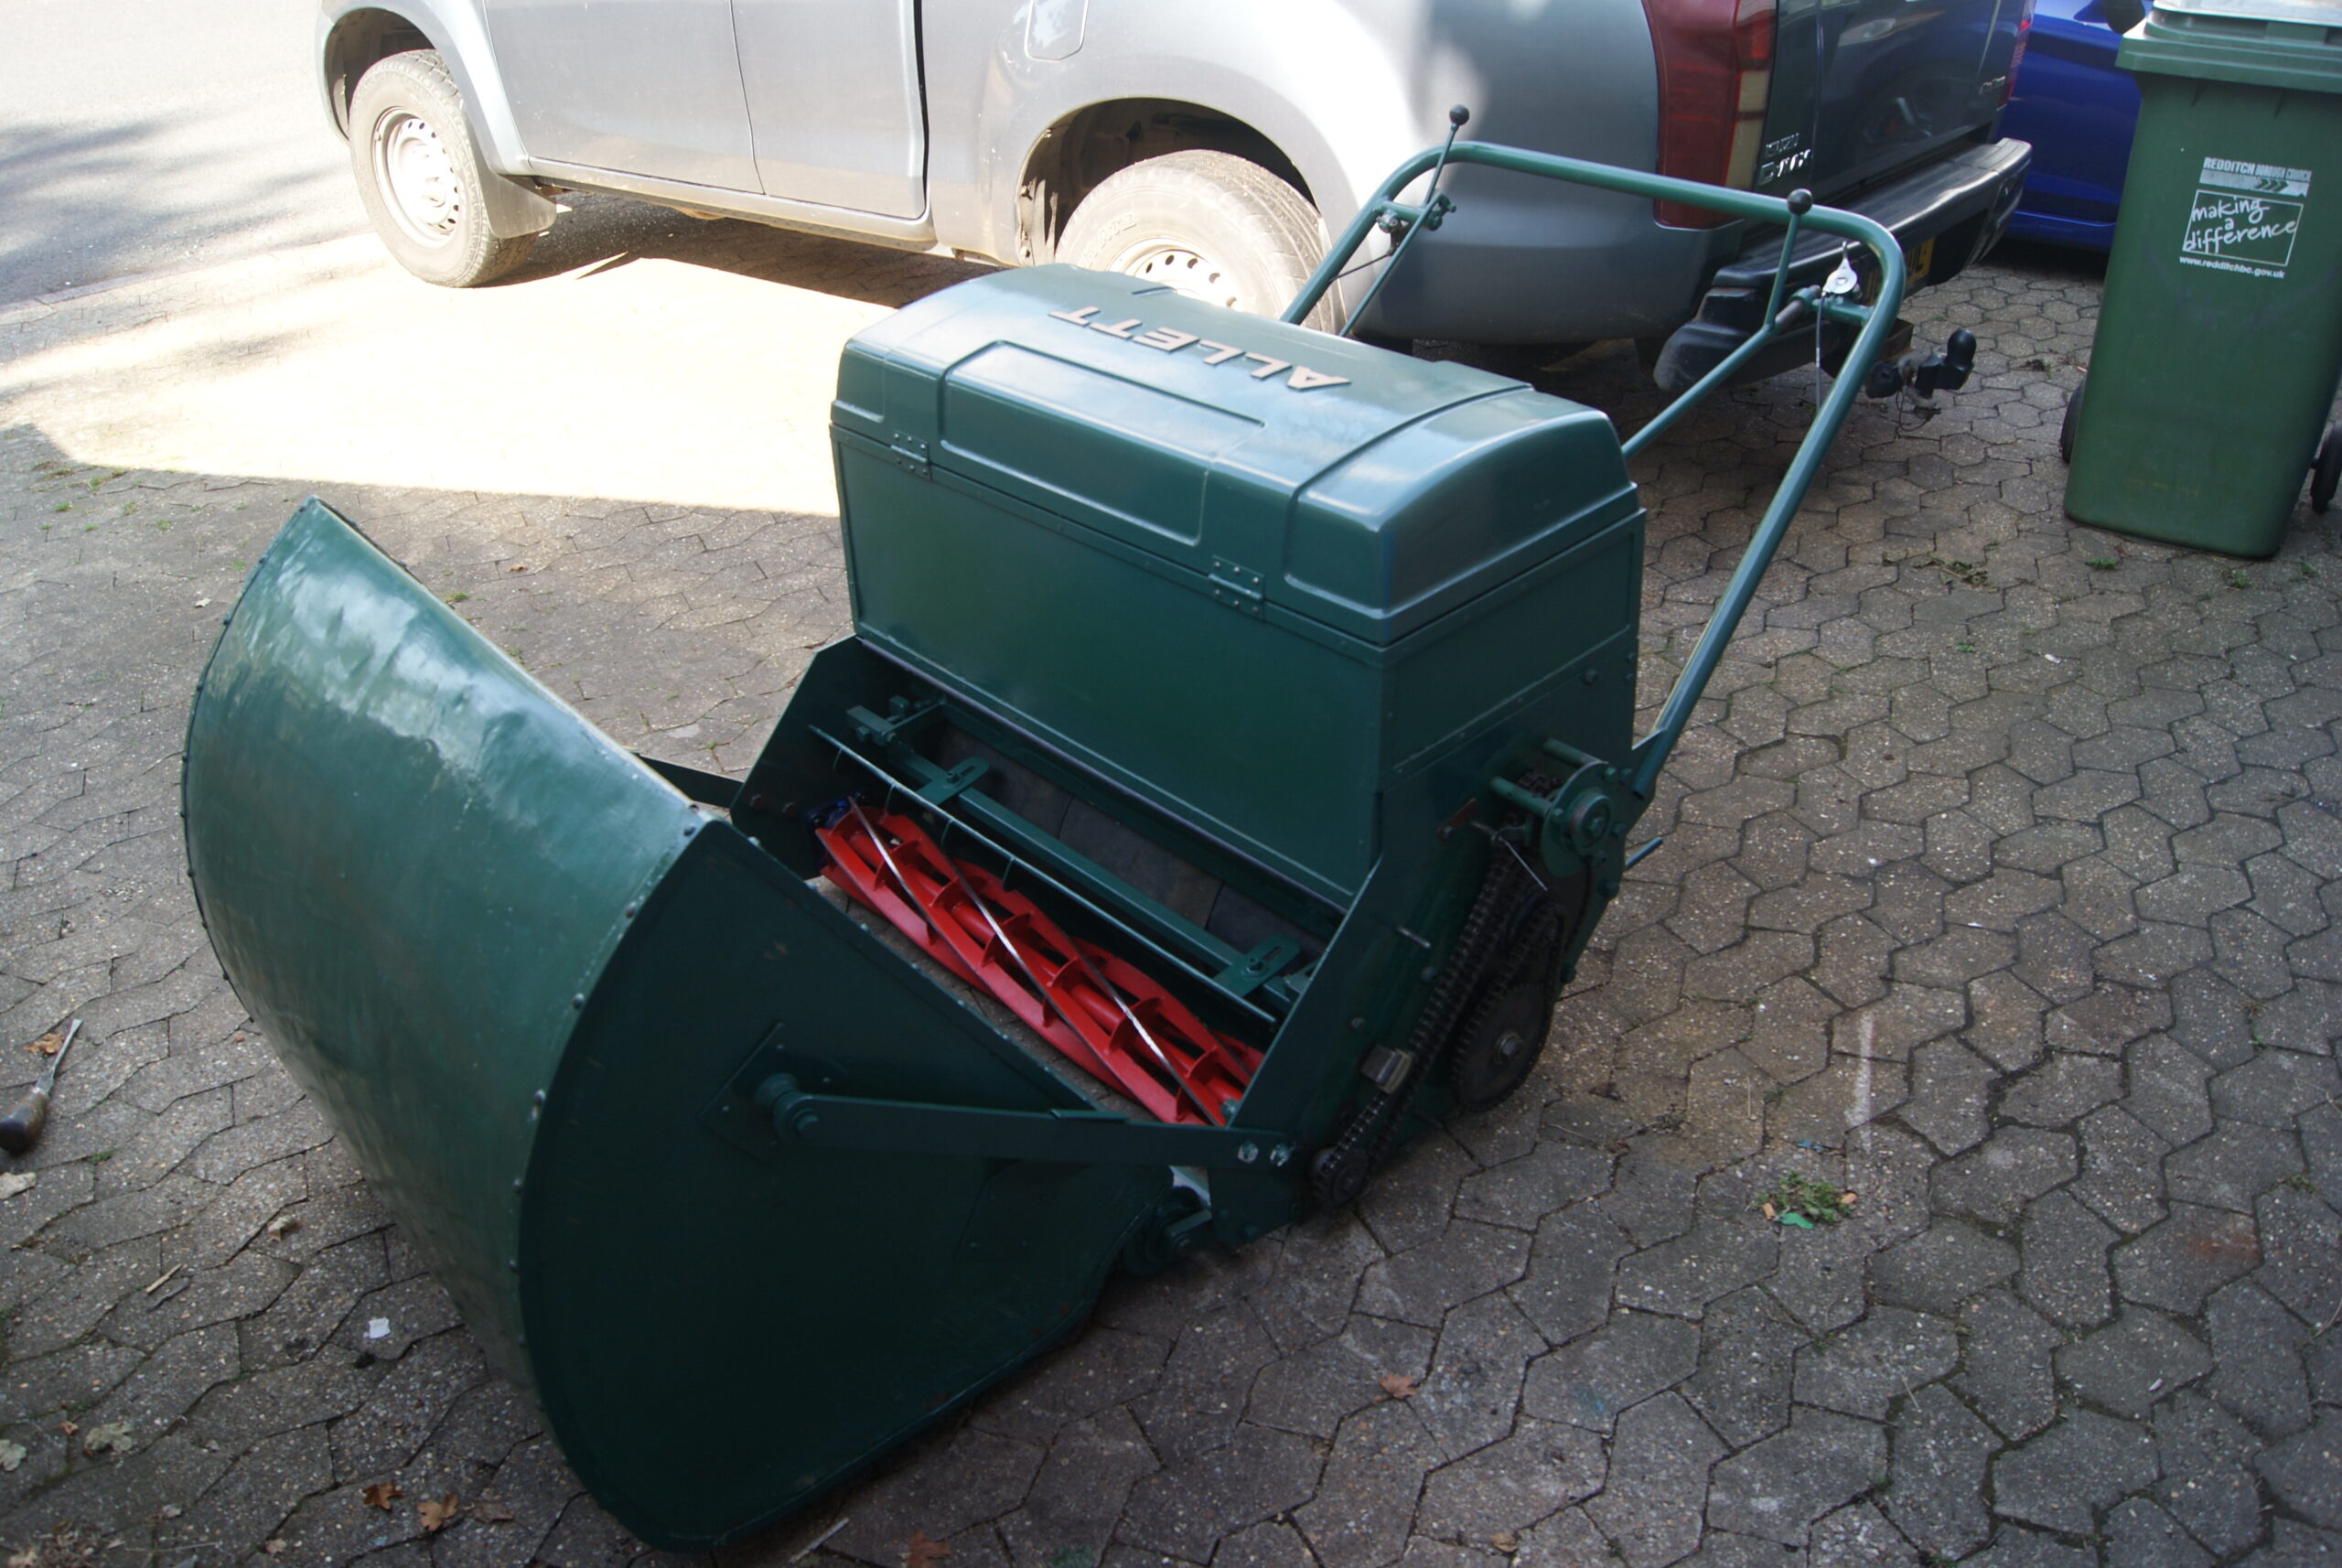
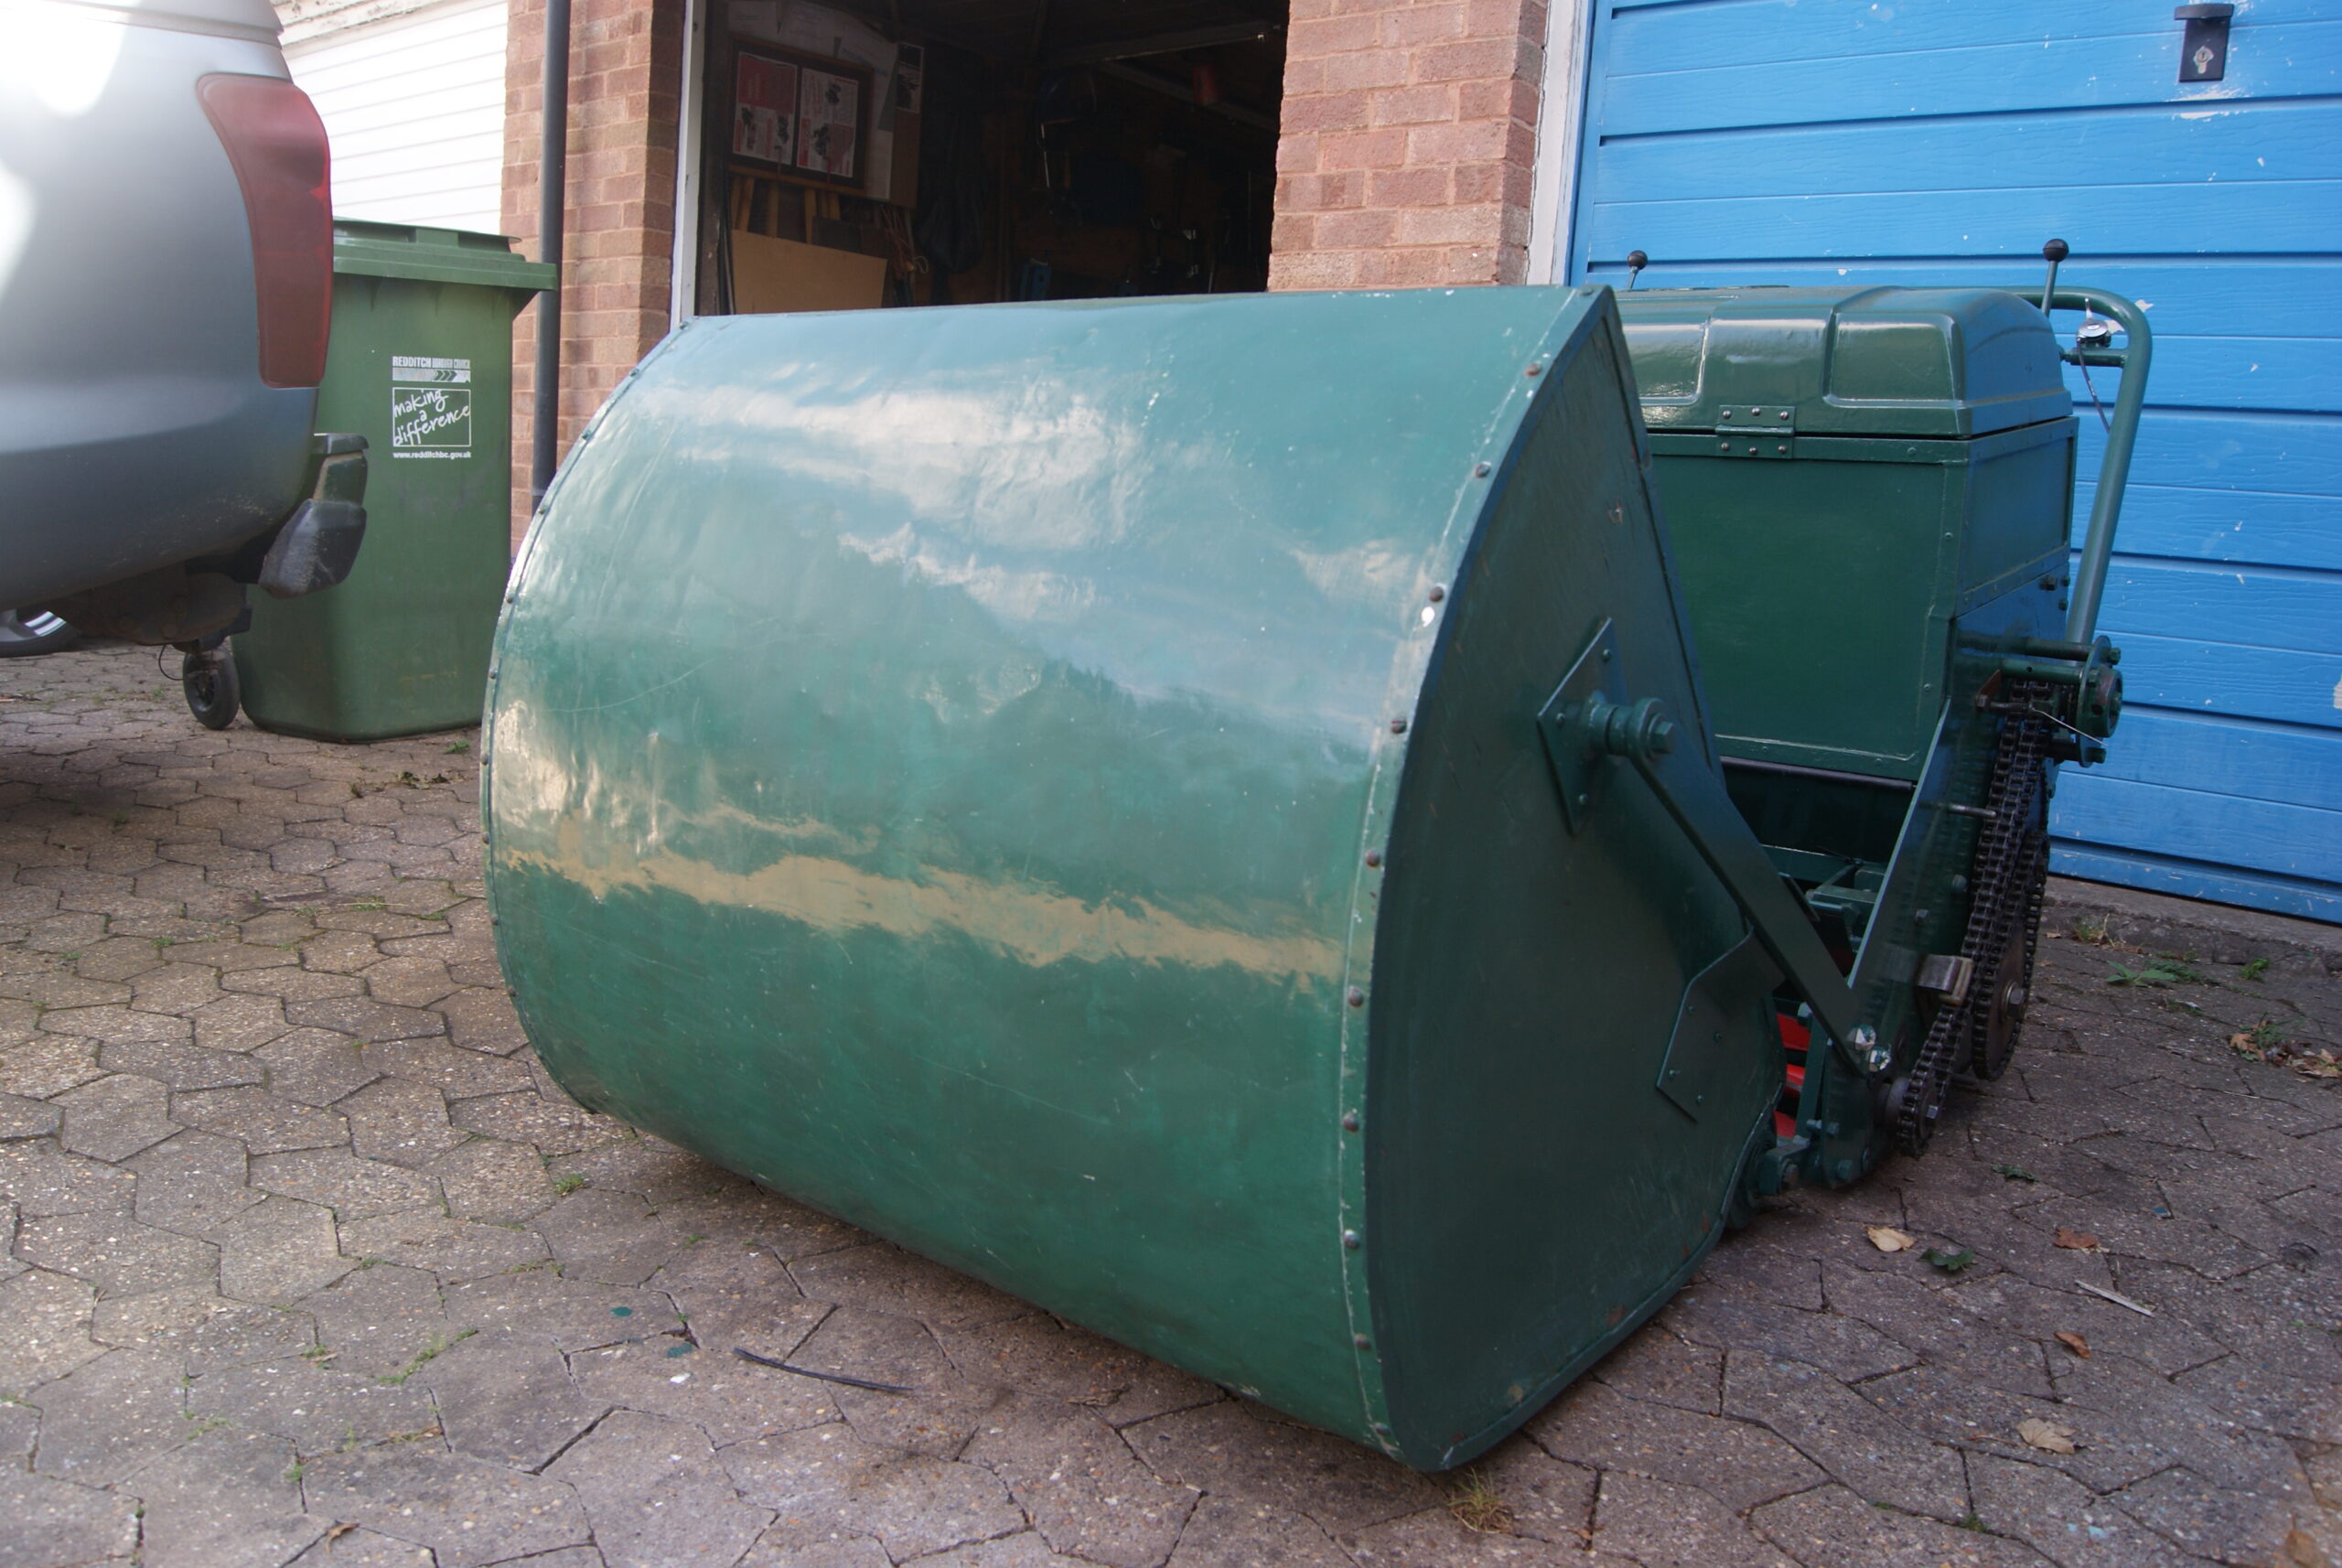
August 1, 2022 at 5:32 pm #39587trusty220KeymasterIt was the turn of the grassbox today. According to my sources there were only six of these grassboxes made as the “proper” ones were still being designed. This one consists of two 3/4″ thick plywood sides with an aluminium wrapper plate screwed to them. They also have an aluminium angle profile strip around the edges to afford a little extra protection, but what I thought were dome-headed rivets turned out to be woodscrews with a slotted head.
First job was to wash it all down to get the muck off, then a good hour spent with the rotary polisher fitted with a sponge pad and cutting paste. It has come up quite well but there are quite a few scratches on it- these haven’t had a detrimental effect on the paint as the metal is aluminium and hasn’t corroded so I think I’ll leave it and see what it looks like.
The woodwork has also largely escaped damage but the top veneer has started to lift in places so I rubbed it down with a fine scouring pad then treated it to a coat of clear satin polyurethane varnish. This seems to have gone into the cracks and sealed the surface so I was happy with that.
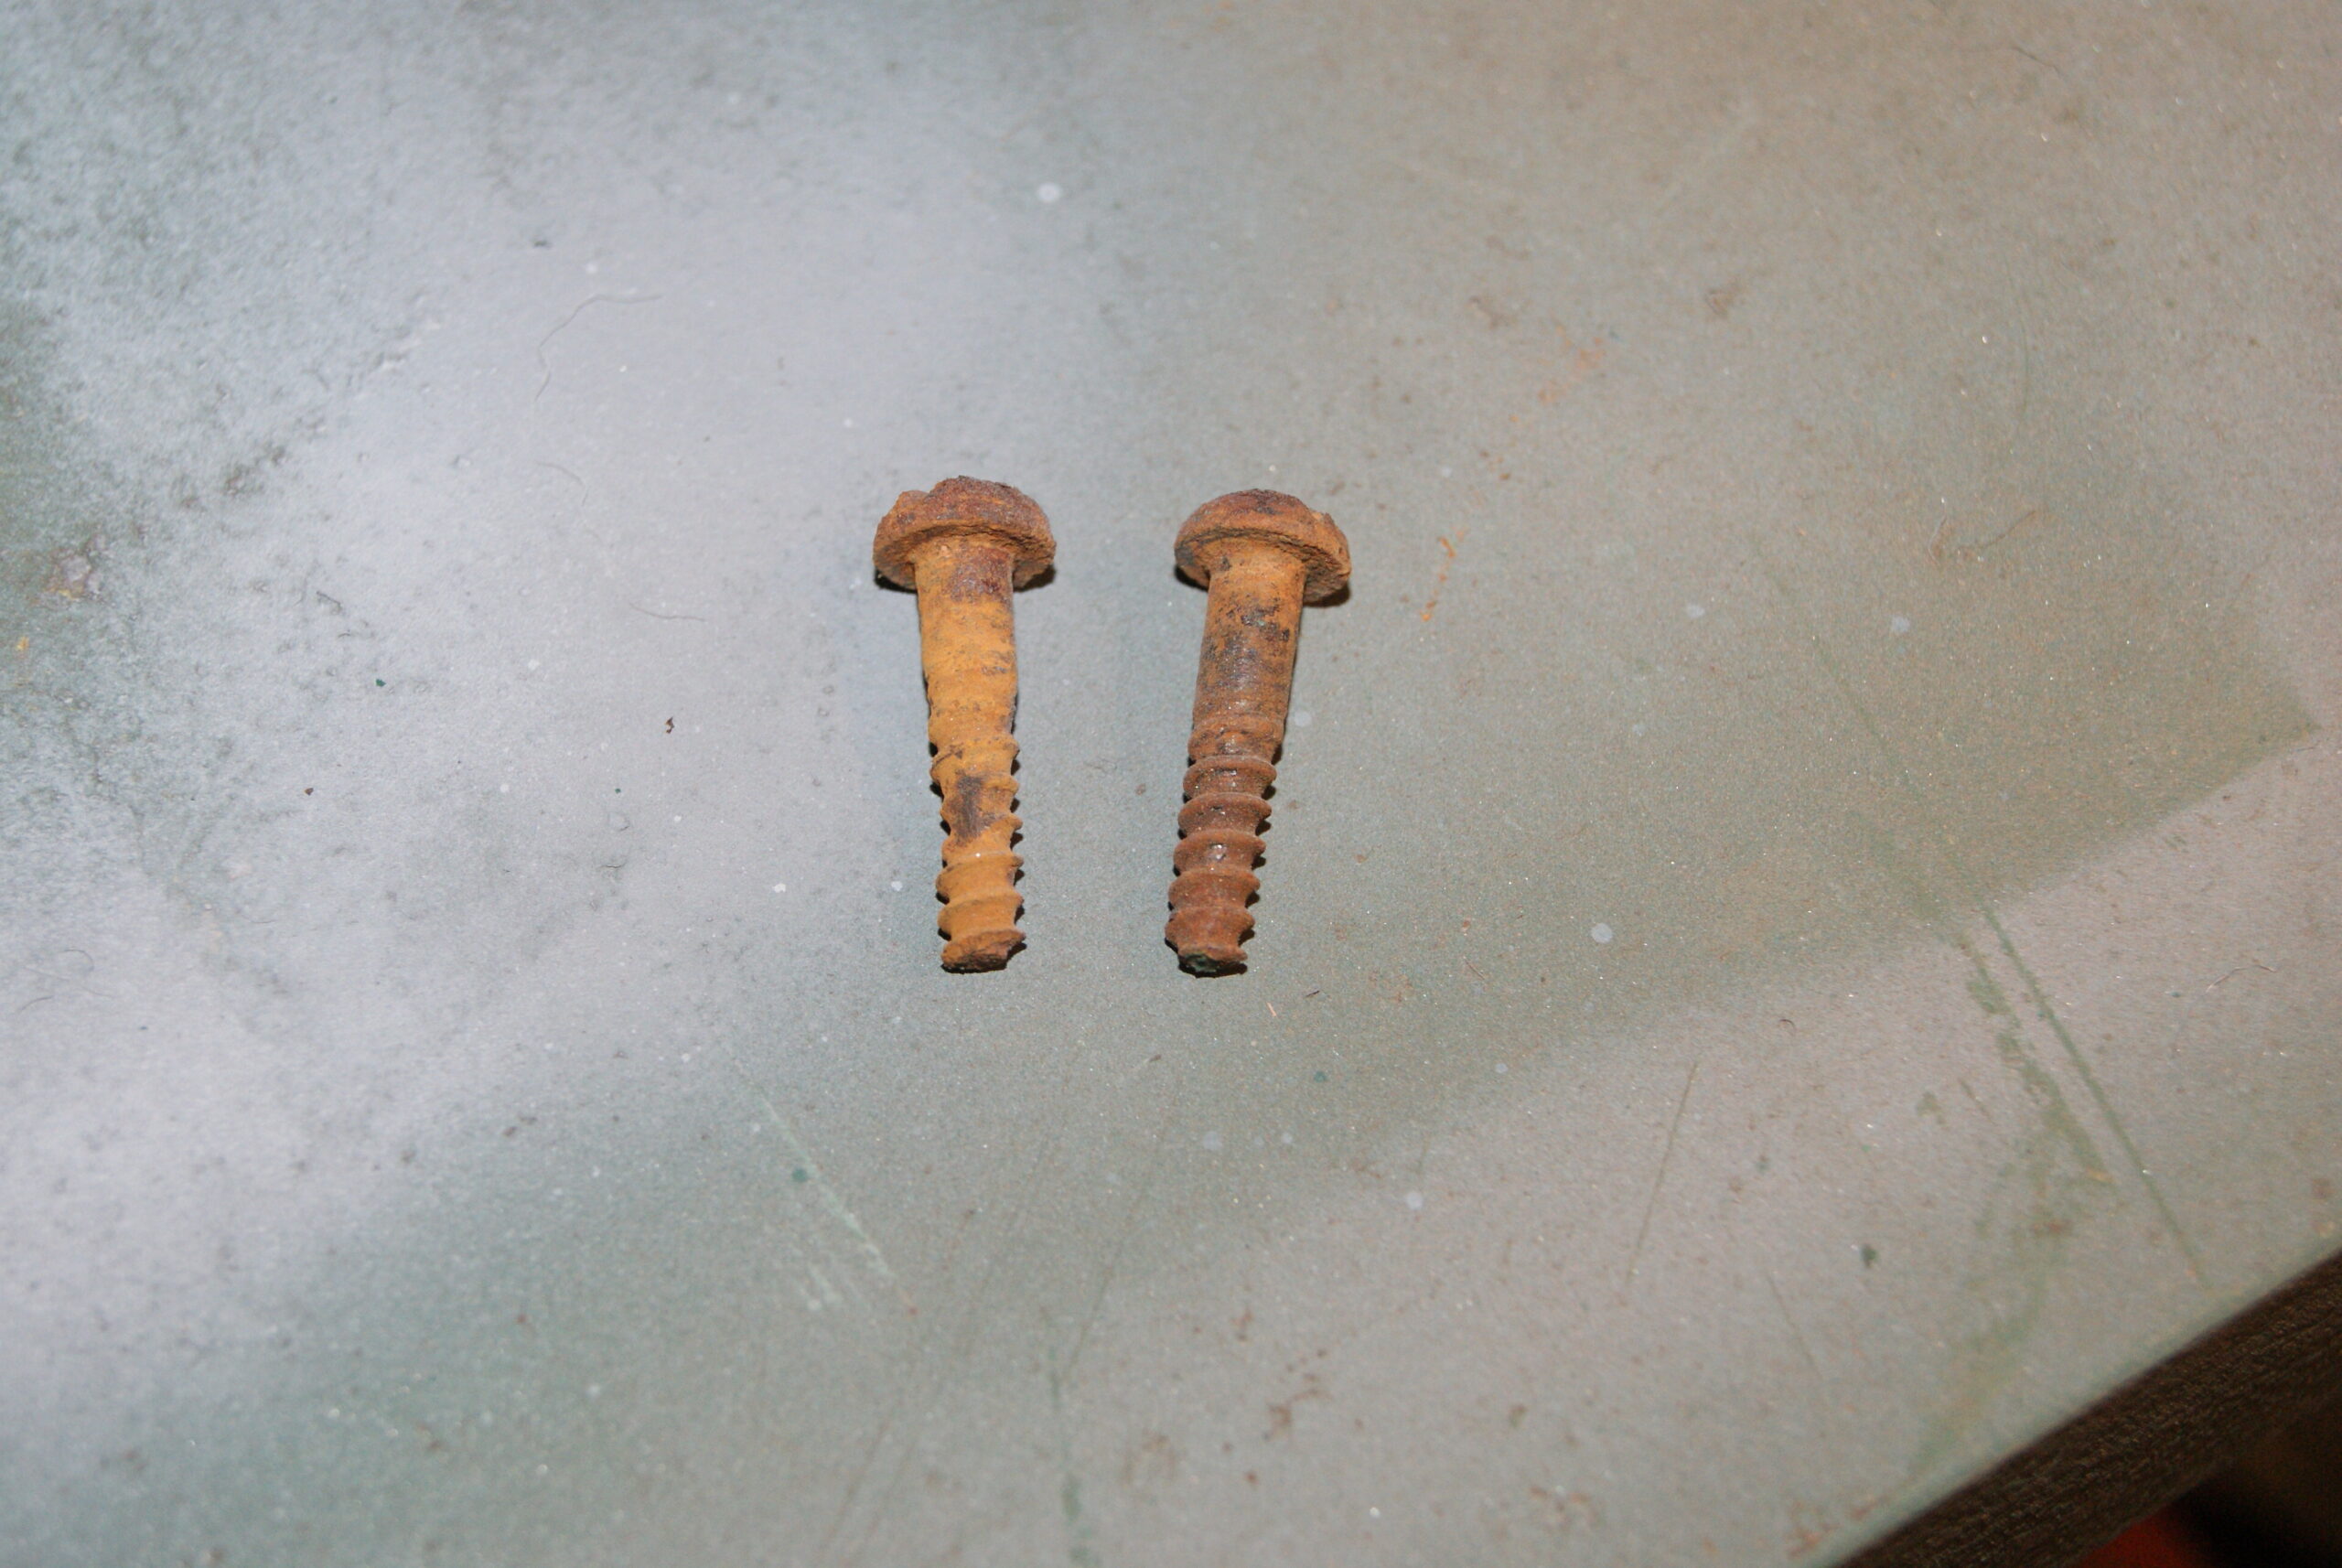
The worst part of the grassbox was the steel bracketry that holds it onto the machine. Rust had got under the paint and bubbled it up; it looked a mess so I took the decision to strip them back completely to bare metal and repaint. The woodscrews holding them on had also been on and off a few times, so much so that many had a very wide slot in the head that was difficult to get the screwdriver to engage in.
At this stage it was apparent that the grassbox had been hand made as the woodscrews had been shortened from 1 1/2″ to 1″ long so that they didn’t protrude into the inside of the grassbox. That will be tomorrow’s job- to find some more woodscrews to match these originals.
Have you ever tried to find a woodscrew these days with a slotted head? Most of them seem to be crosshead or torx. Nobody said it was going to be easy though…….
Attachments:
August 2, 2022 at 7:48 am #39594 charlieKeymaster
I managed to find some old style woodscrews online a number of years ago, unfortunately I did not make a note of the website, arghhh.
August 2, 2022 at 10:57 am #39596trusty220KeymasterI’ve got some brass ones from the local ironmonger this morning. Thankfully the national superstores haven’t put him out of business or I’d really be in trouble.
August 2, 2022 at 12:37 pm #39599trusty220KeymasterThis restoration is really using all of my skills! I’m now into woodwork which does make a refreshing change from oily stuff and paint.
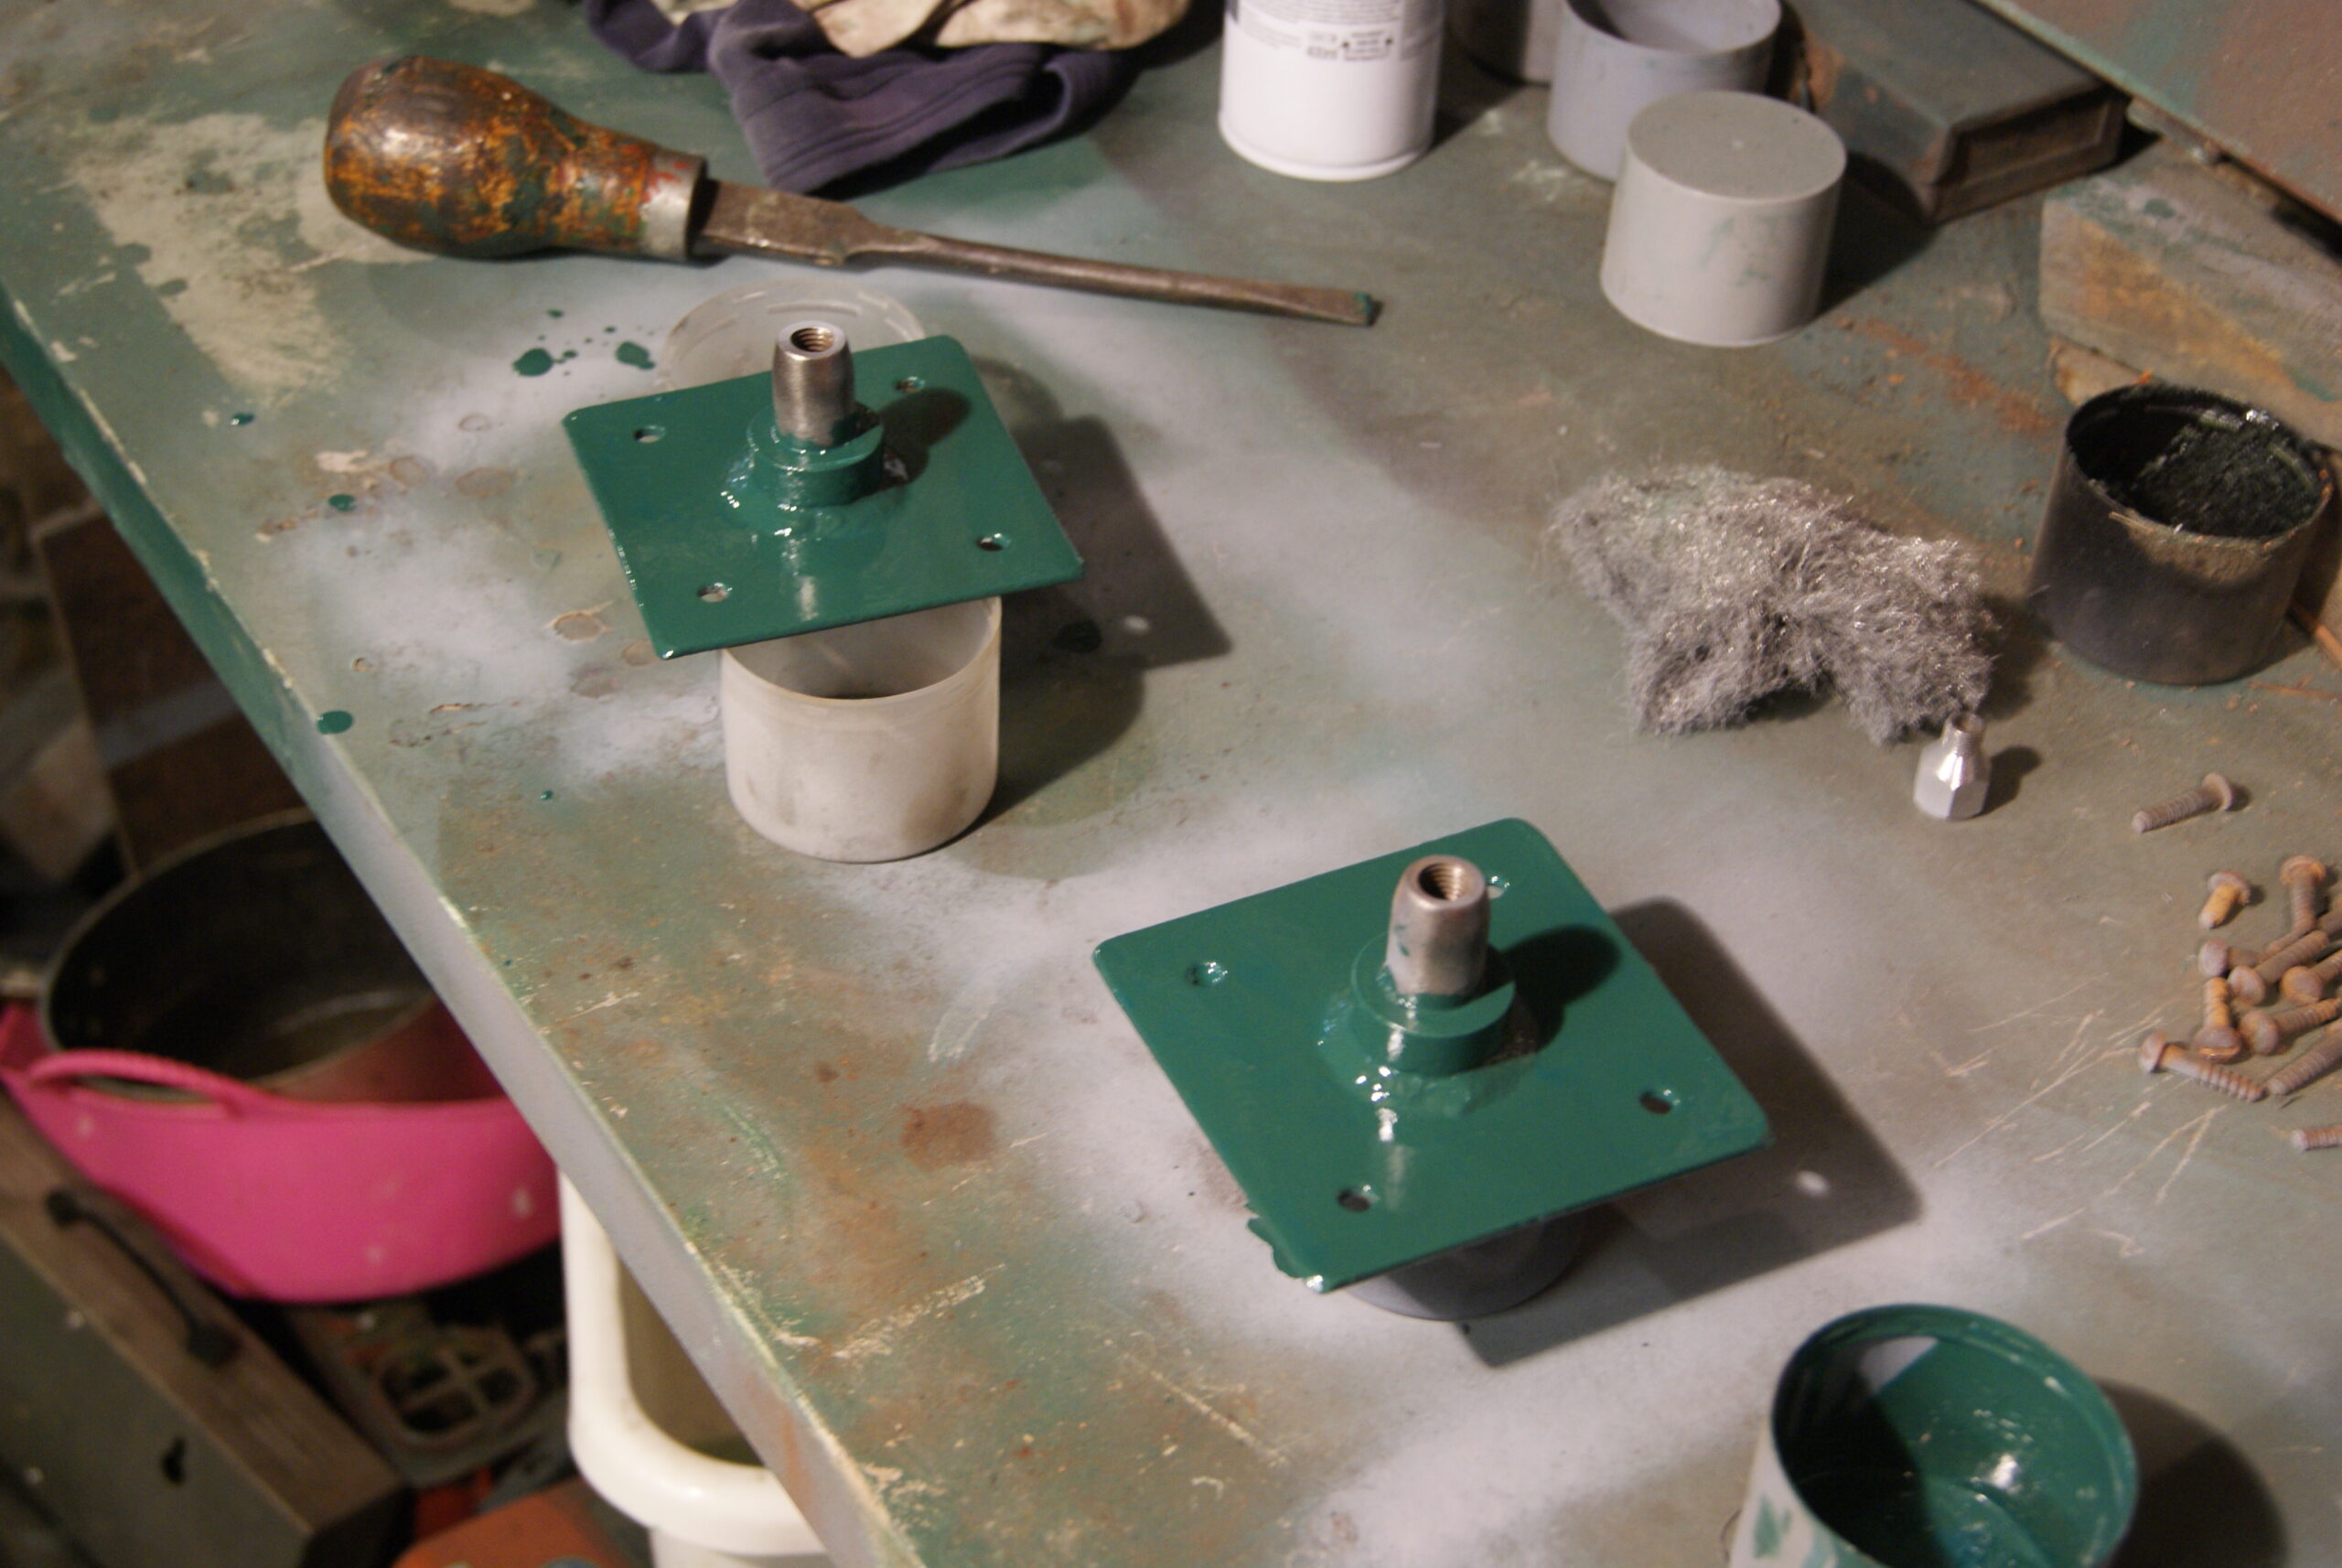
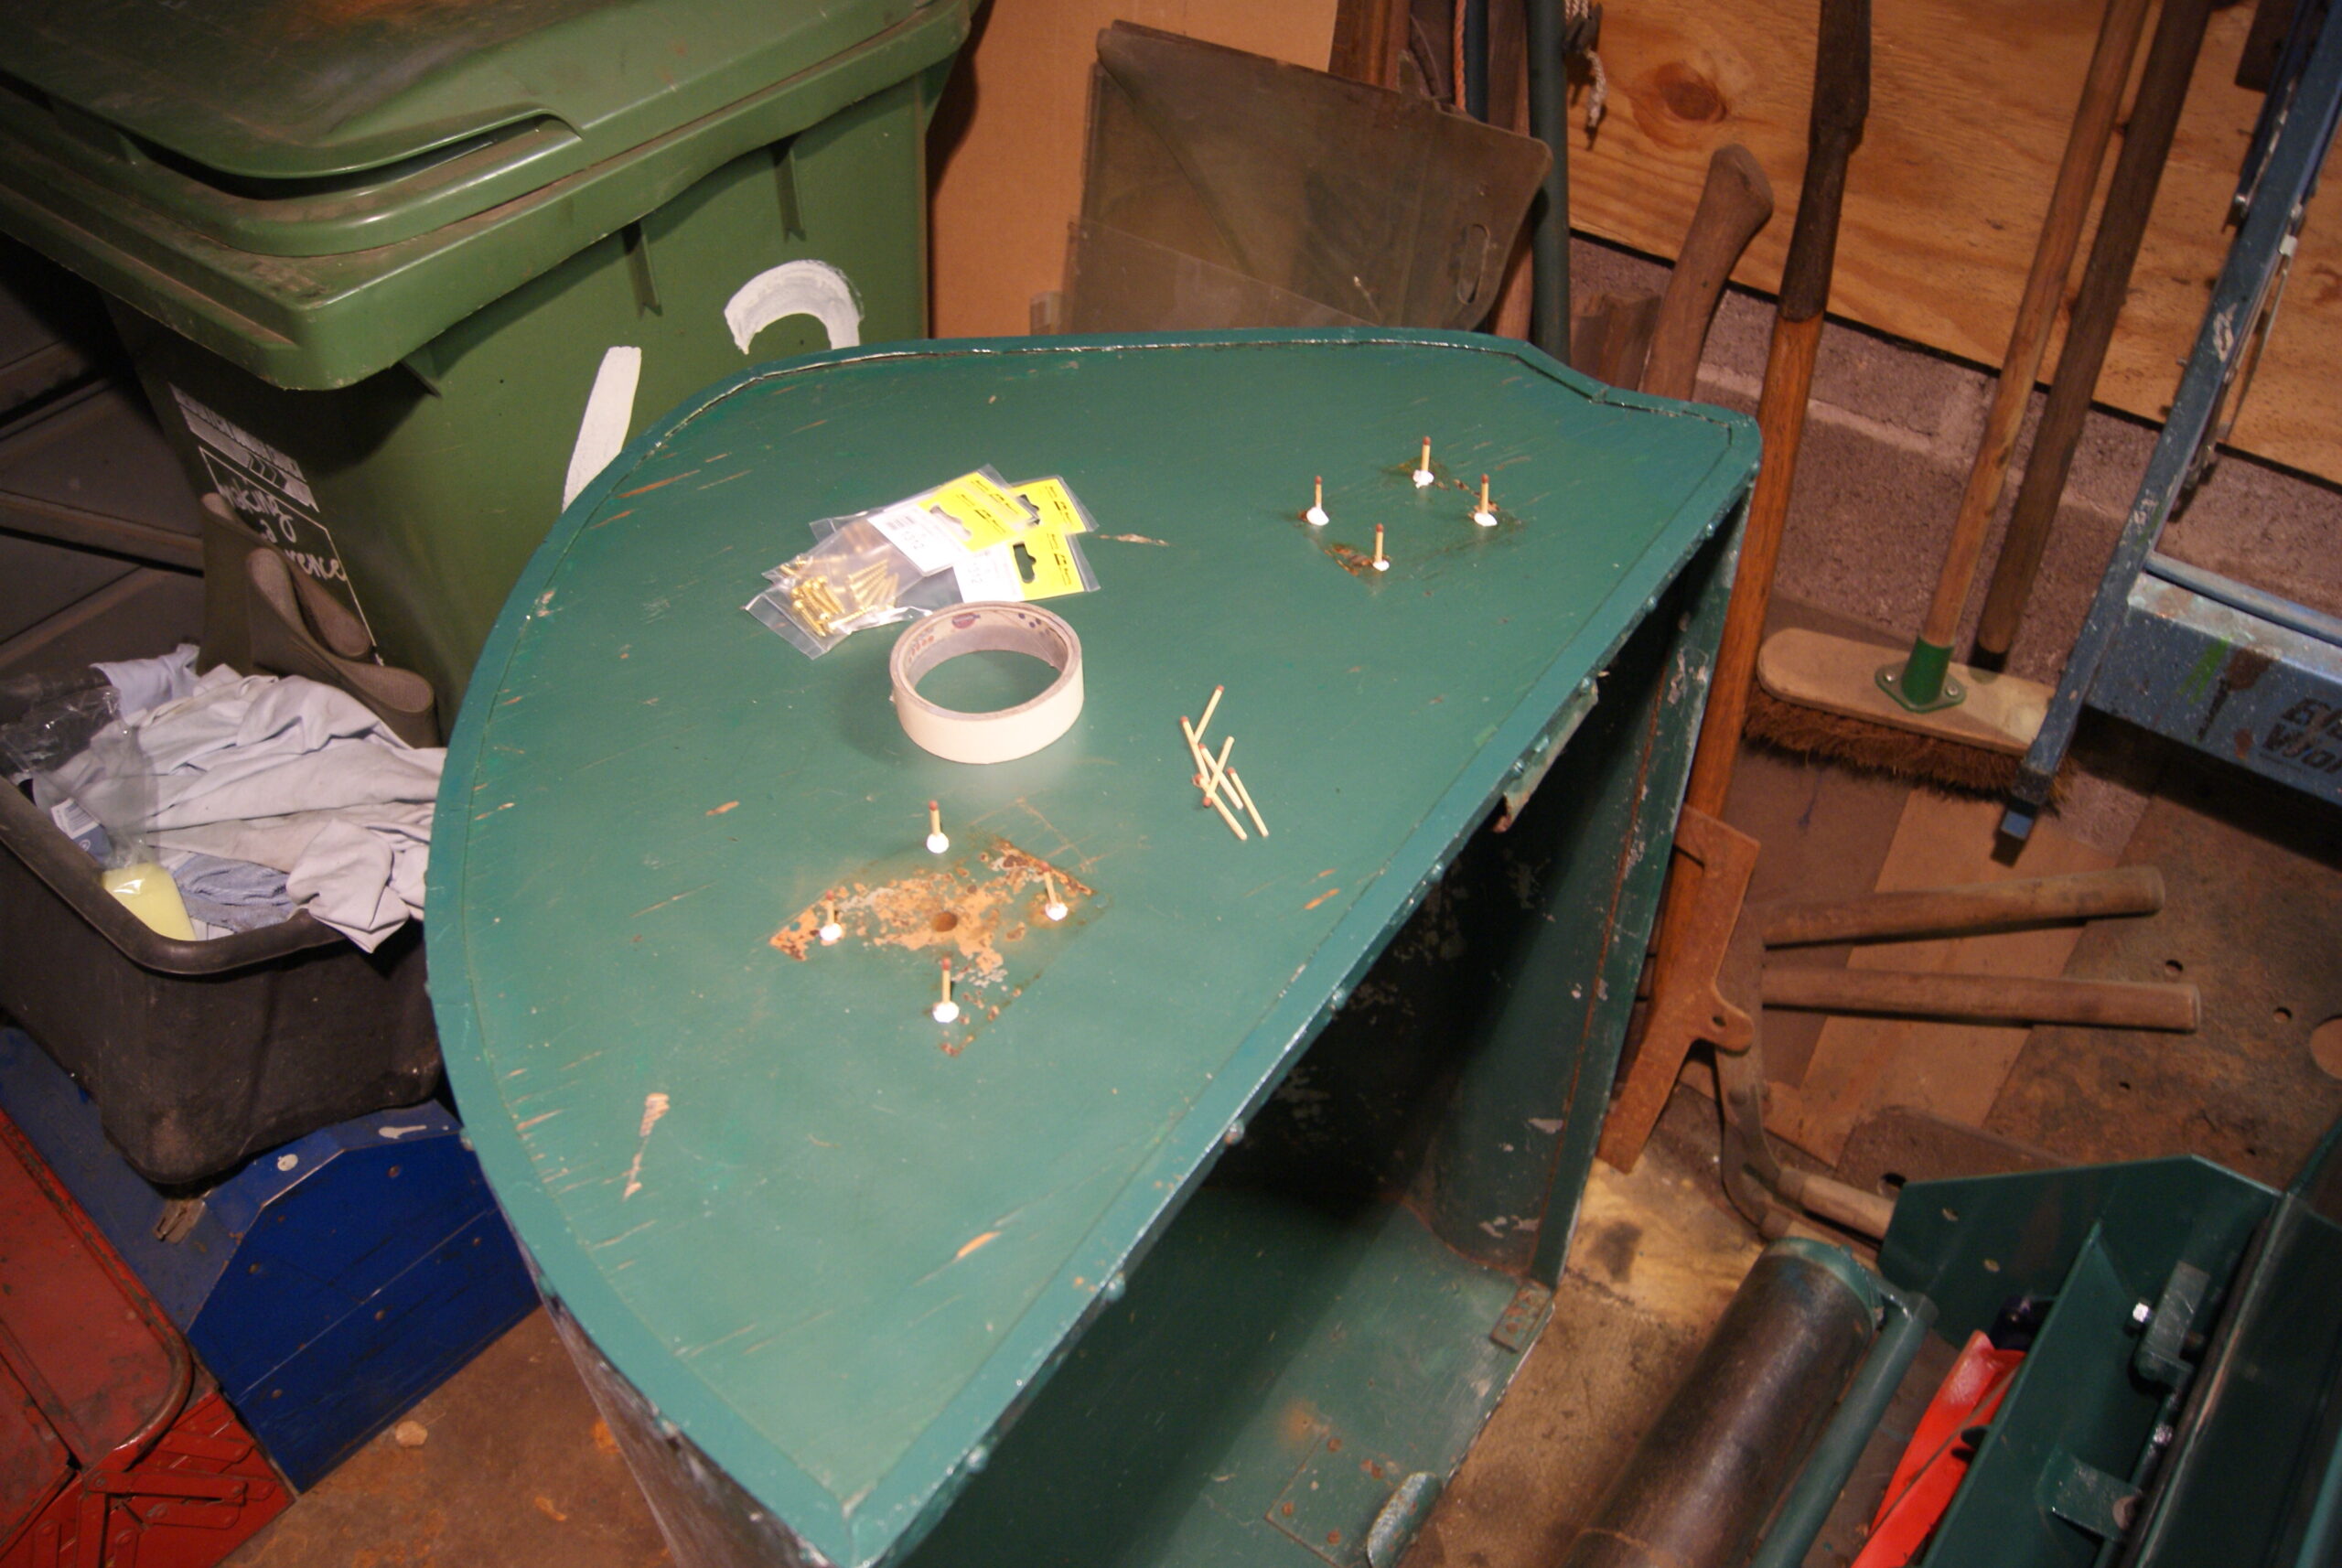
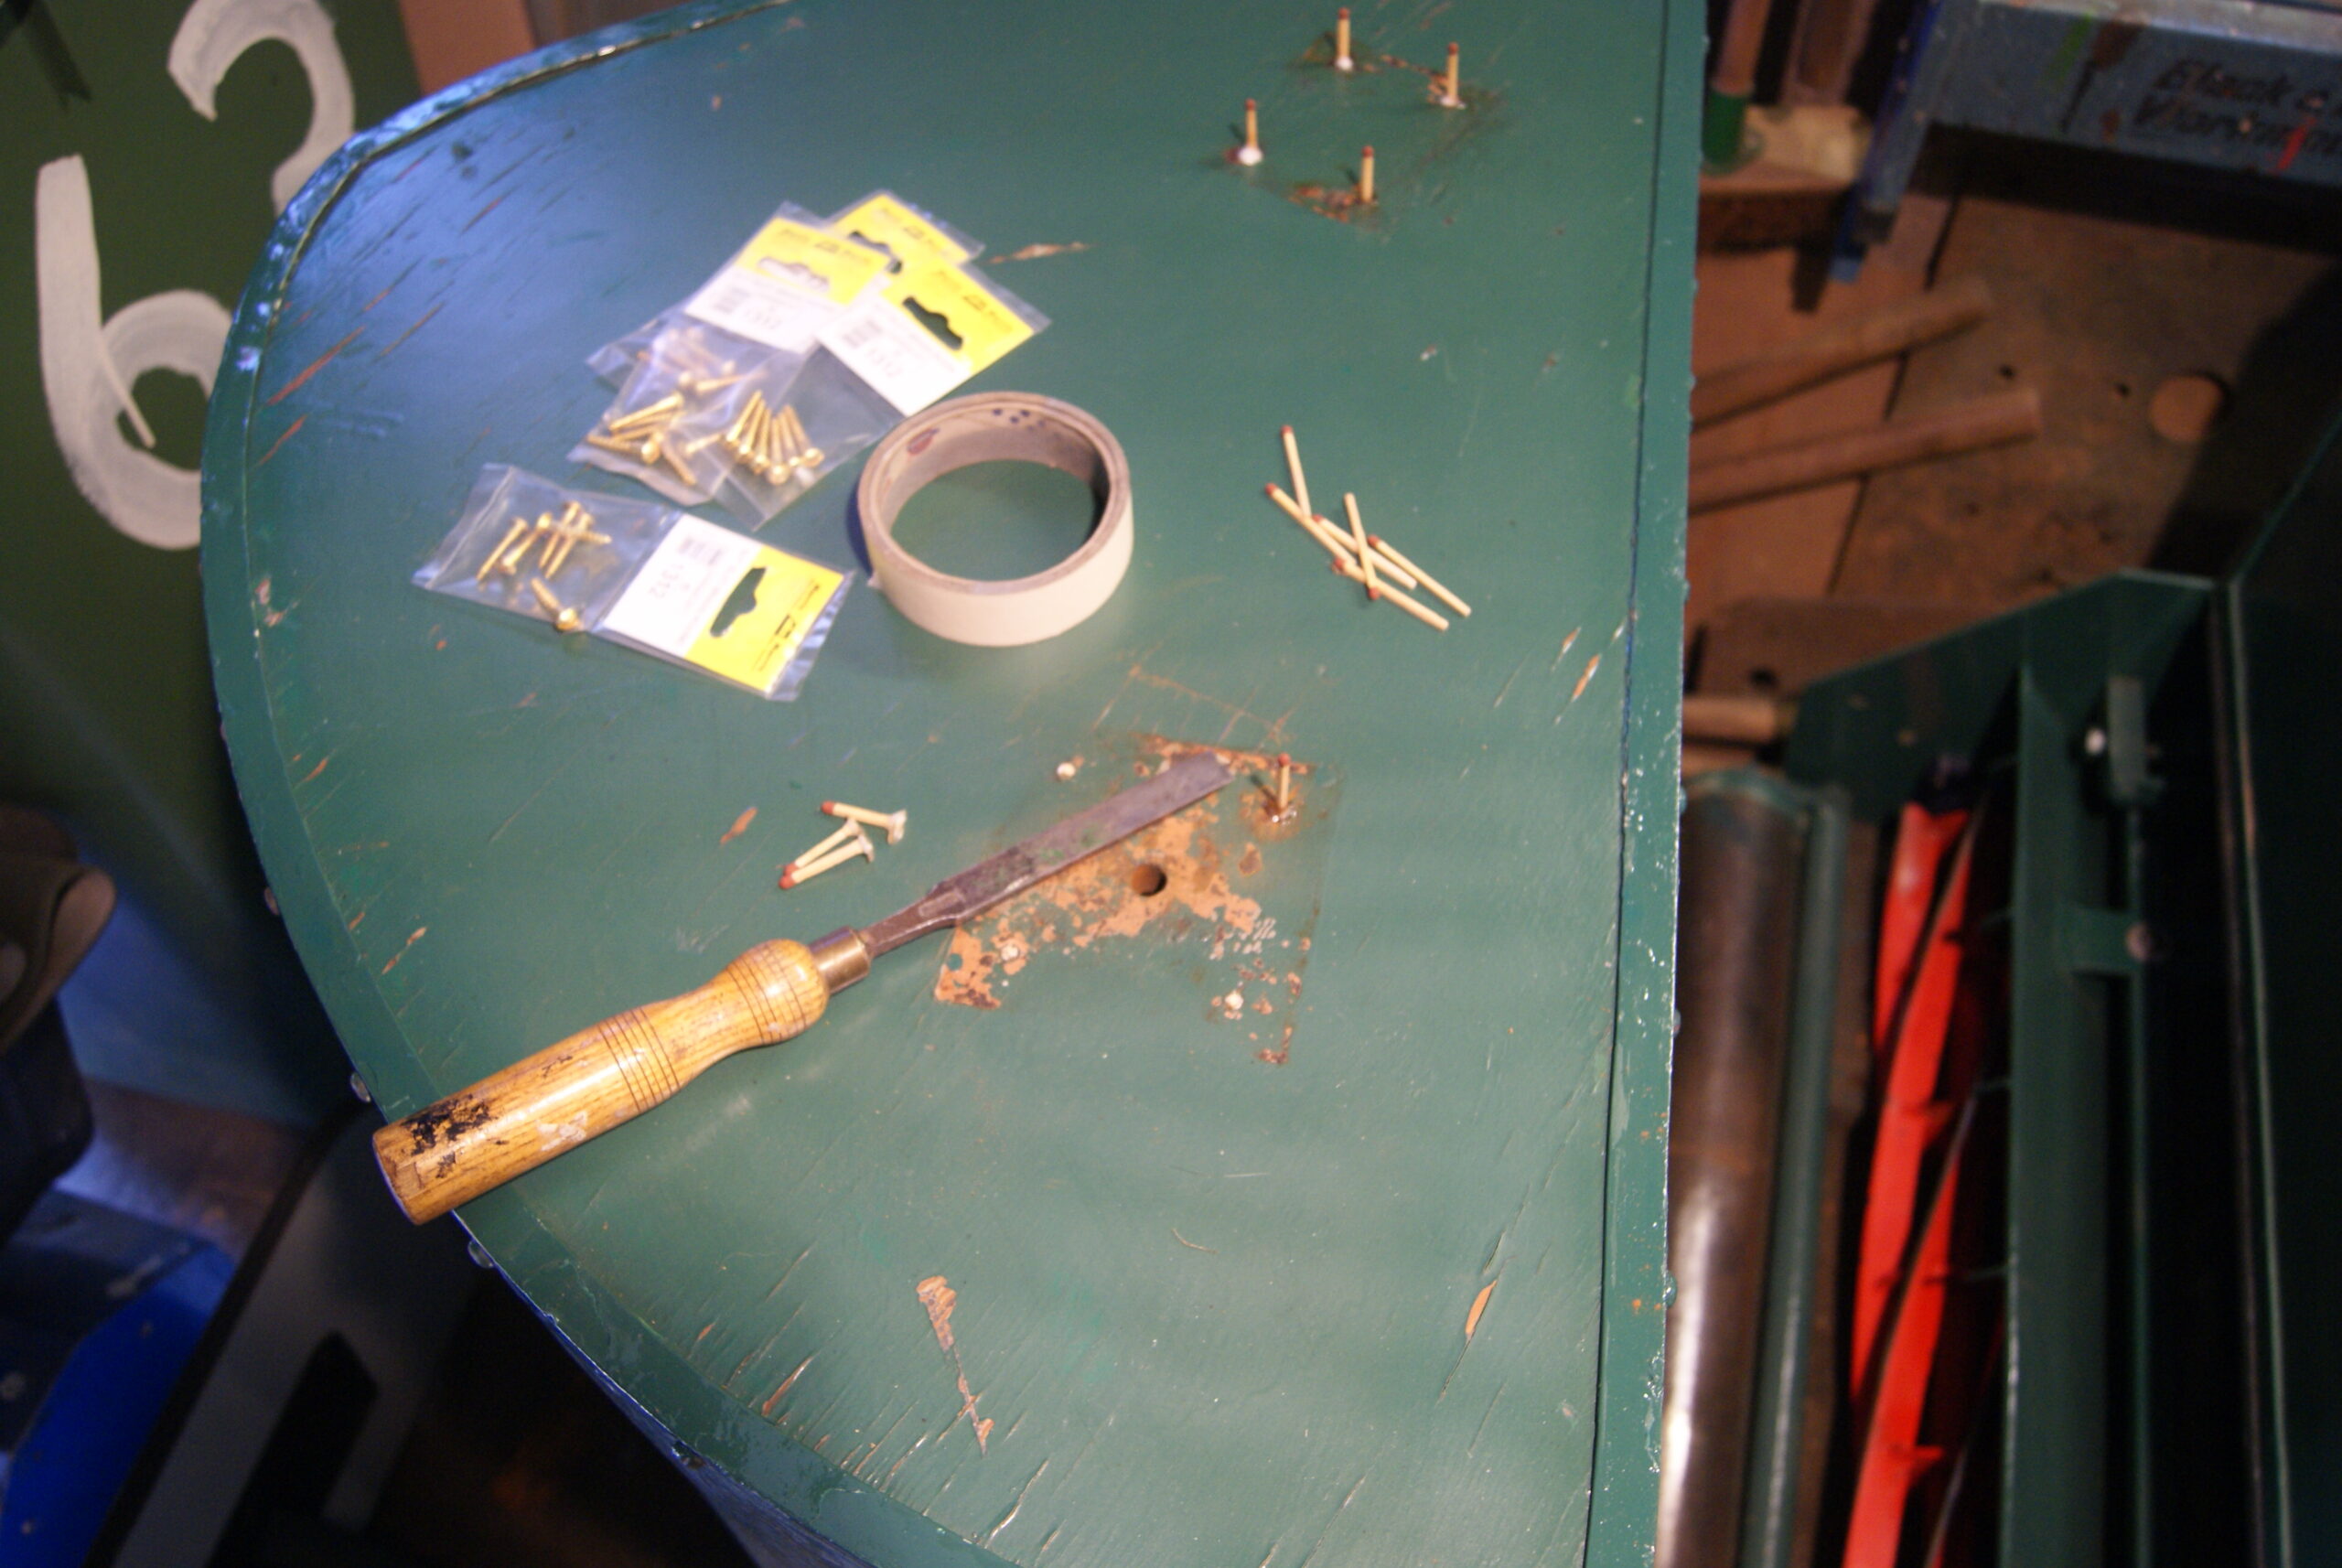
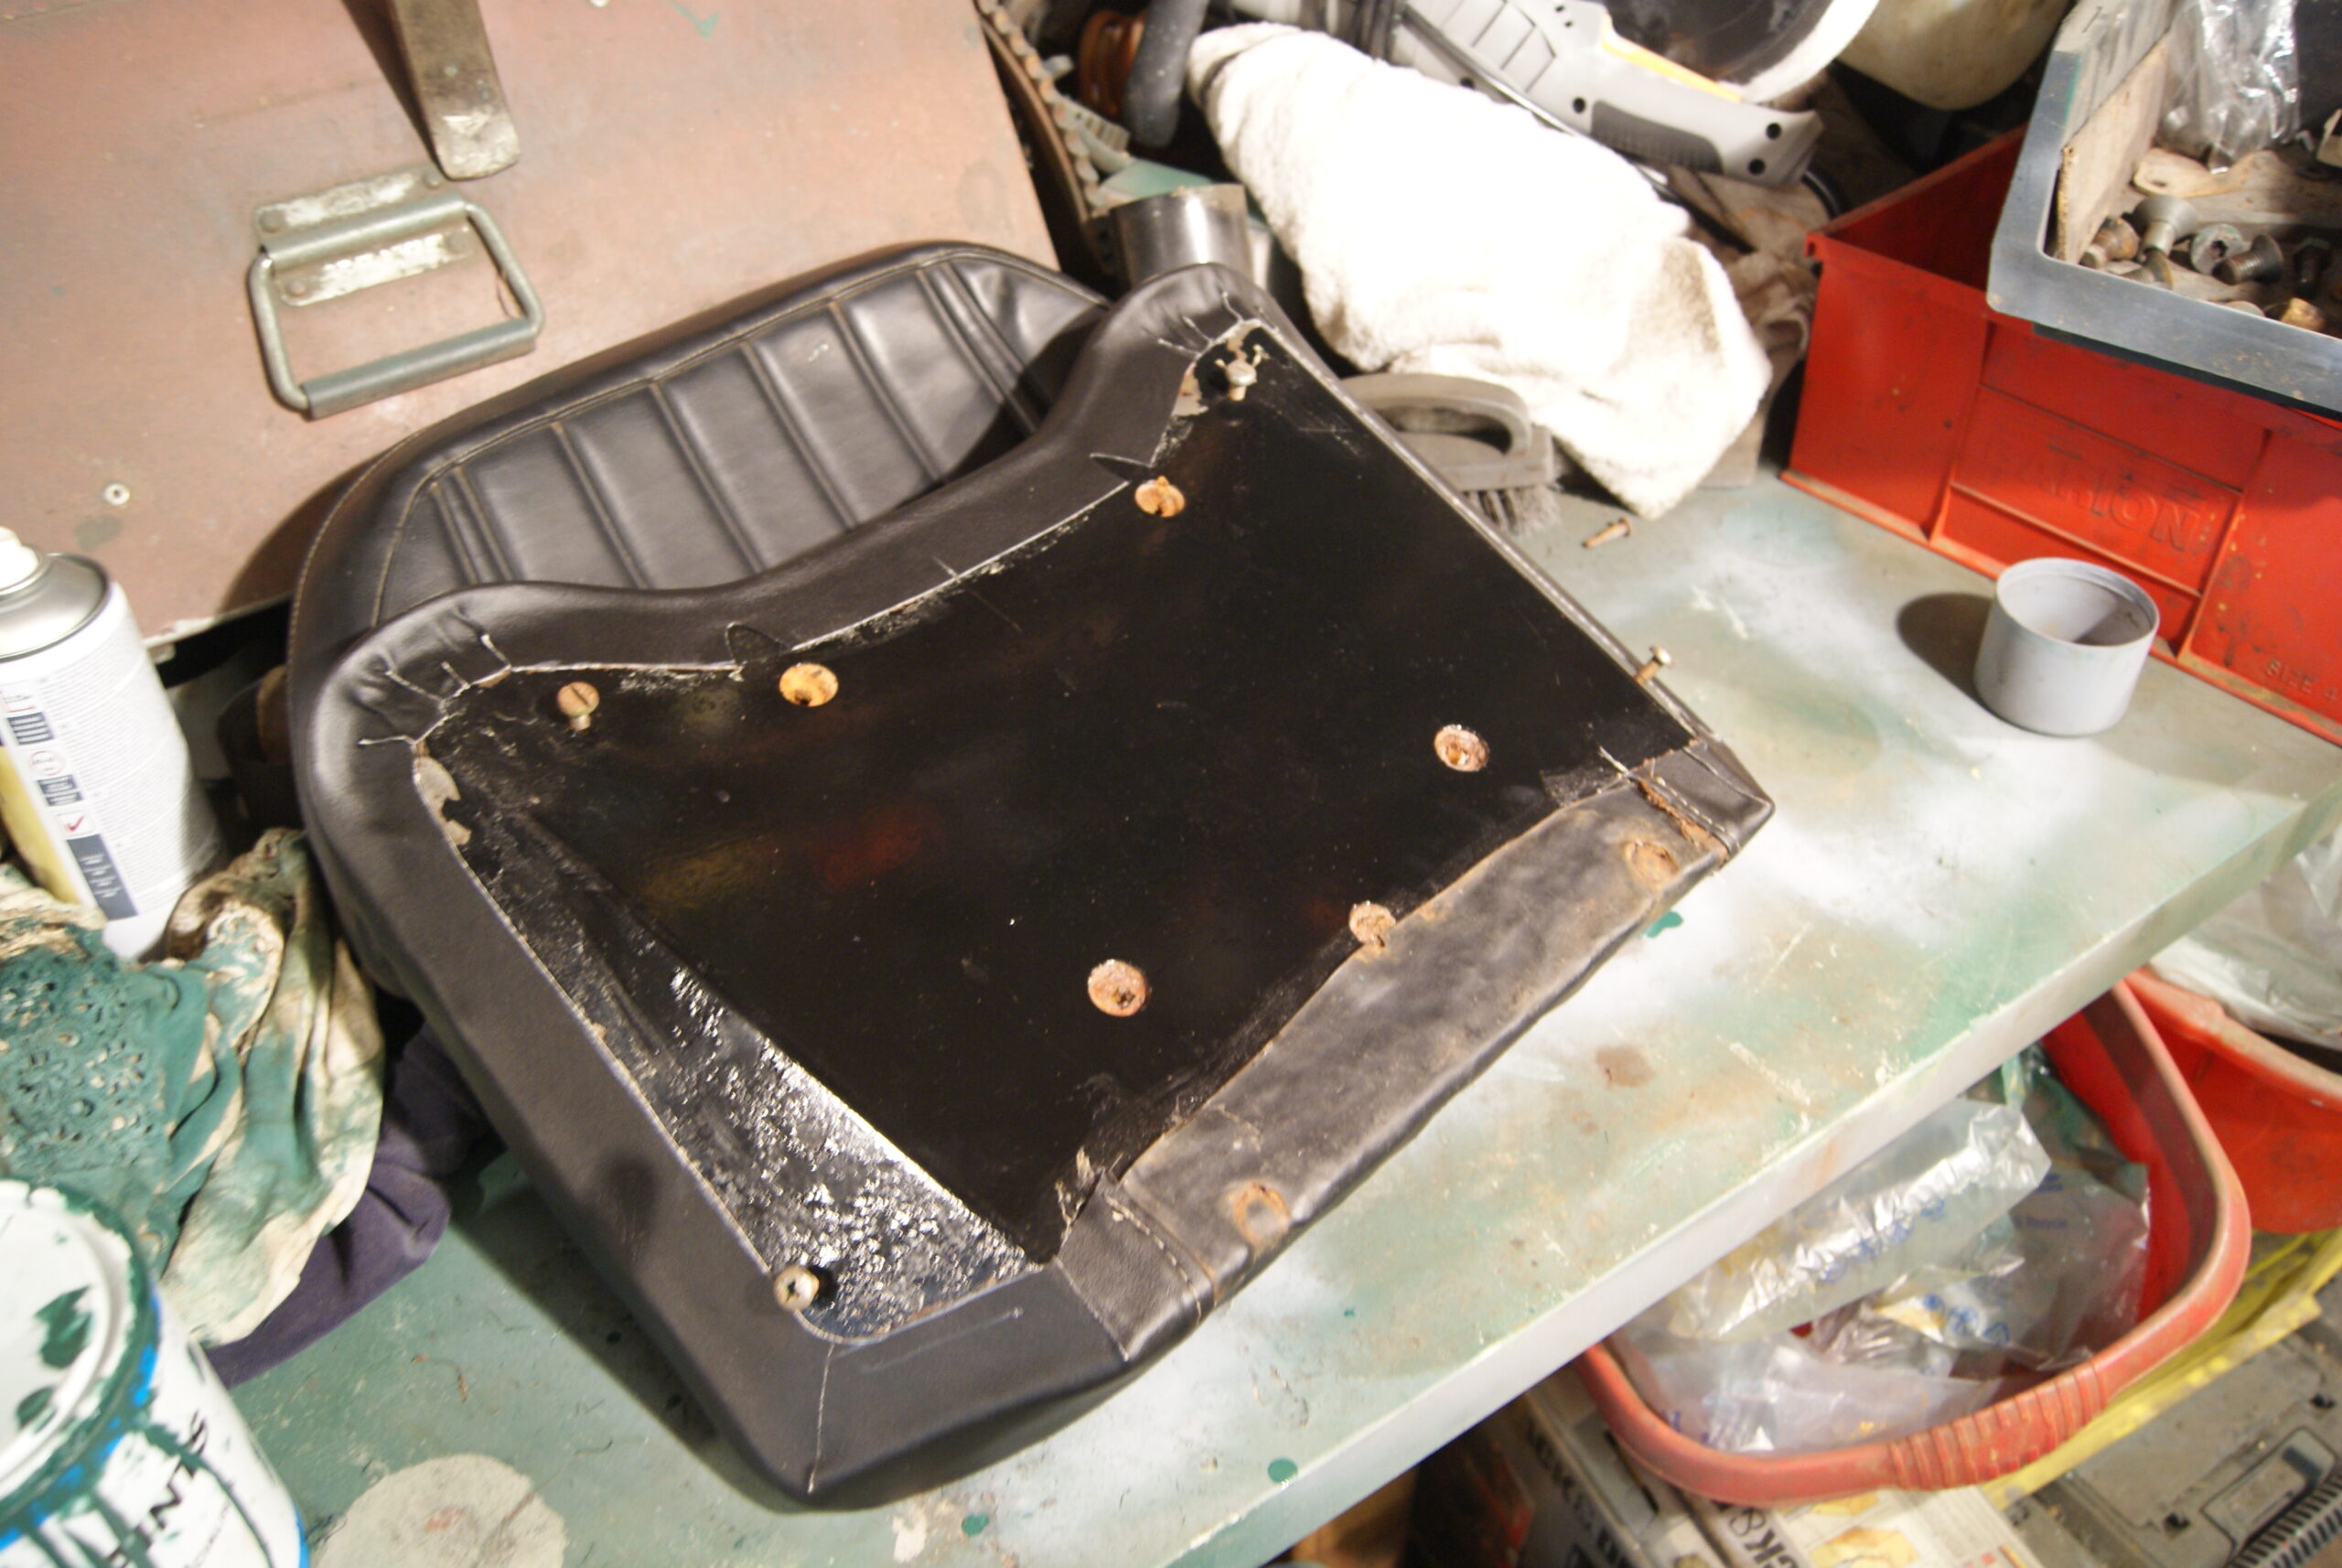
As I said before, the sides of the grassbox are made from 3/4″ plywood and the metal brackets that hold it in place on the mower are secured with steel screws that have been shortened down from 1 1/2″ to about 1″. This means that most of the screw that is in the wood is the smooth shank under the head with only a few threads that really grip the wood tightly. As a consequence many of the screws weren’t actually doing anything as they had chewed out of the holes they were in, so a remedy had to be found.
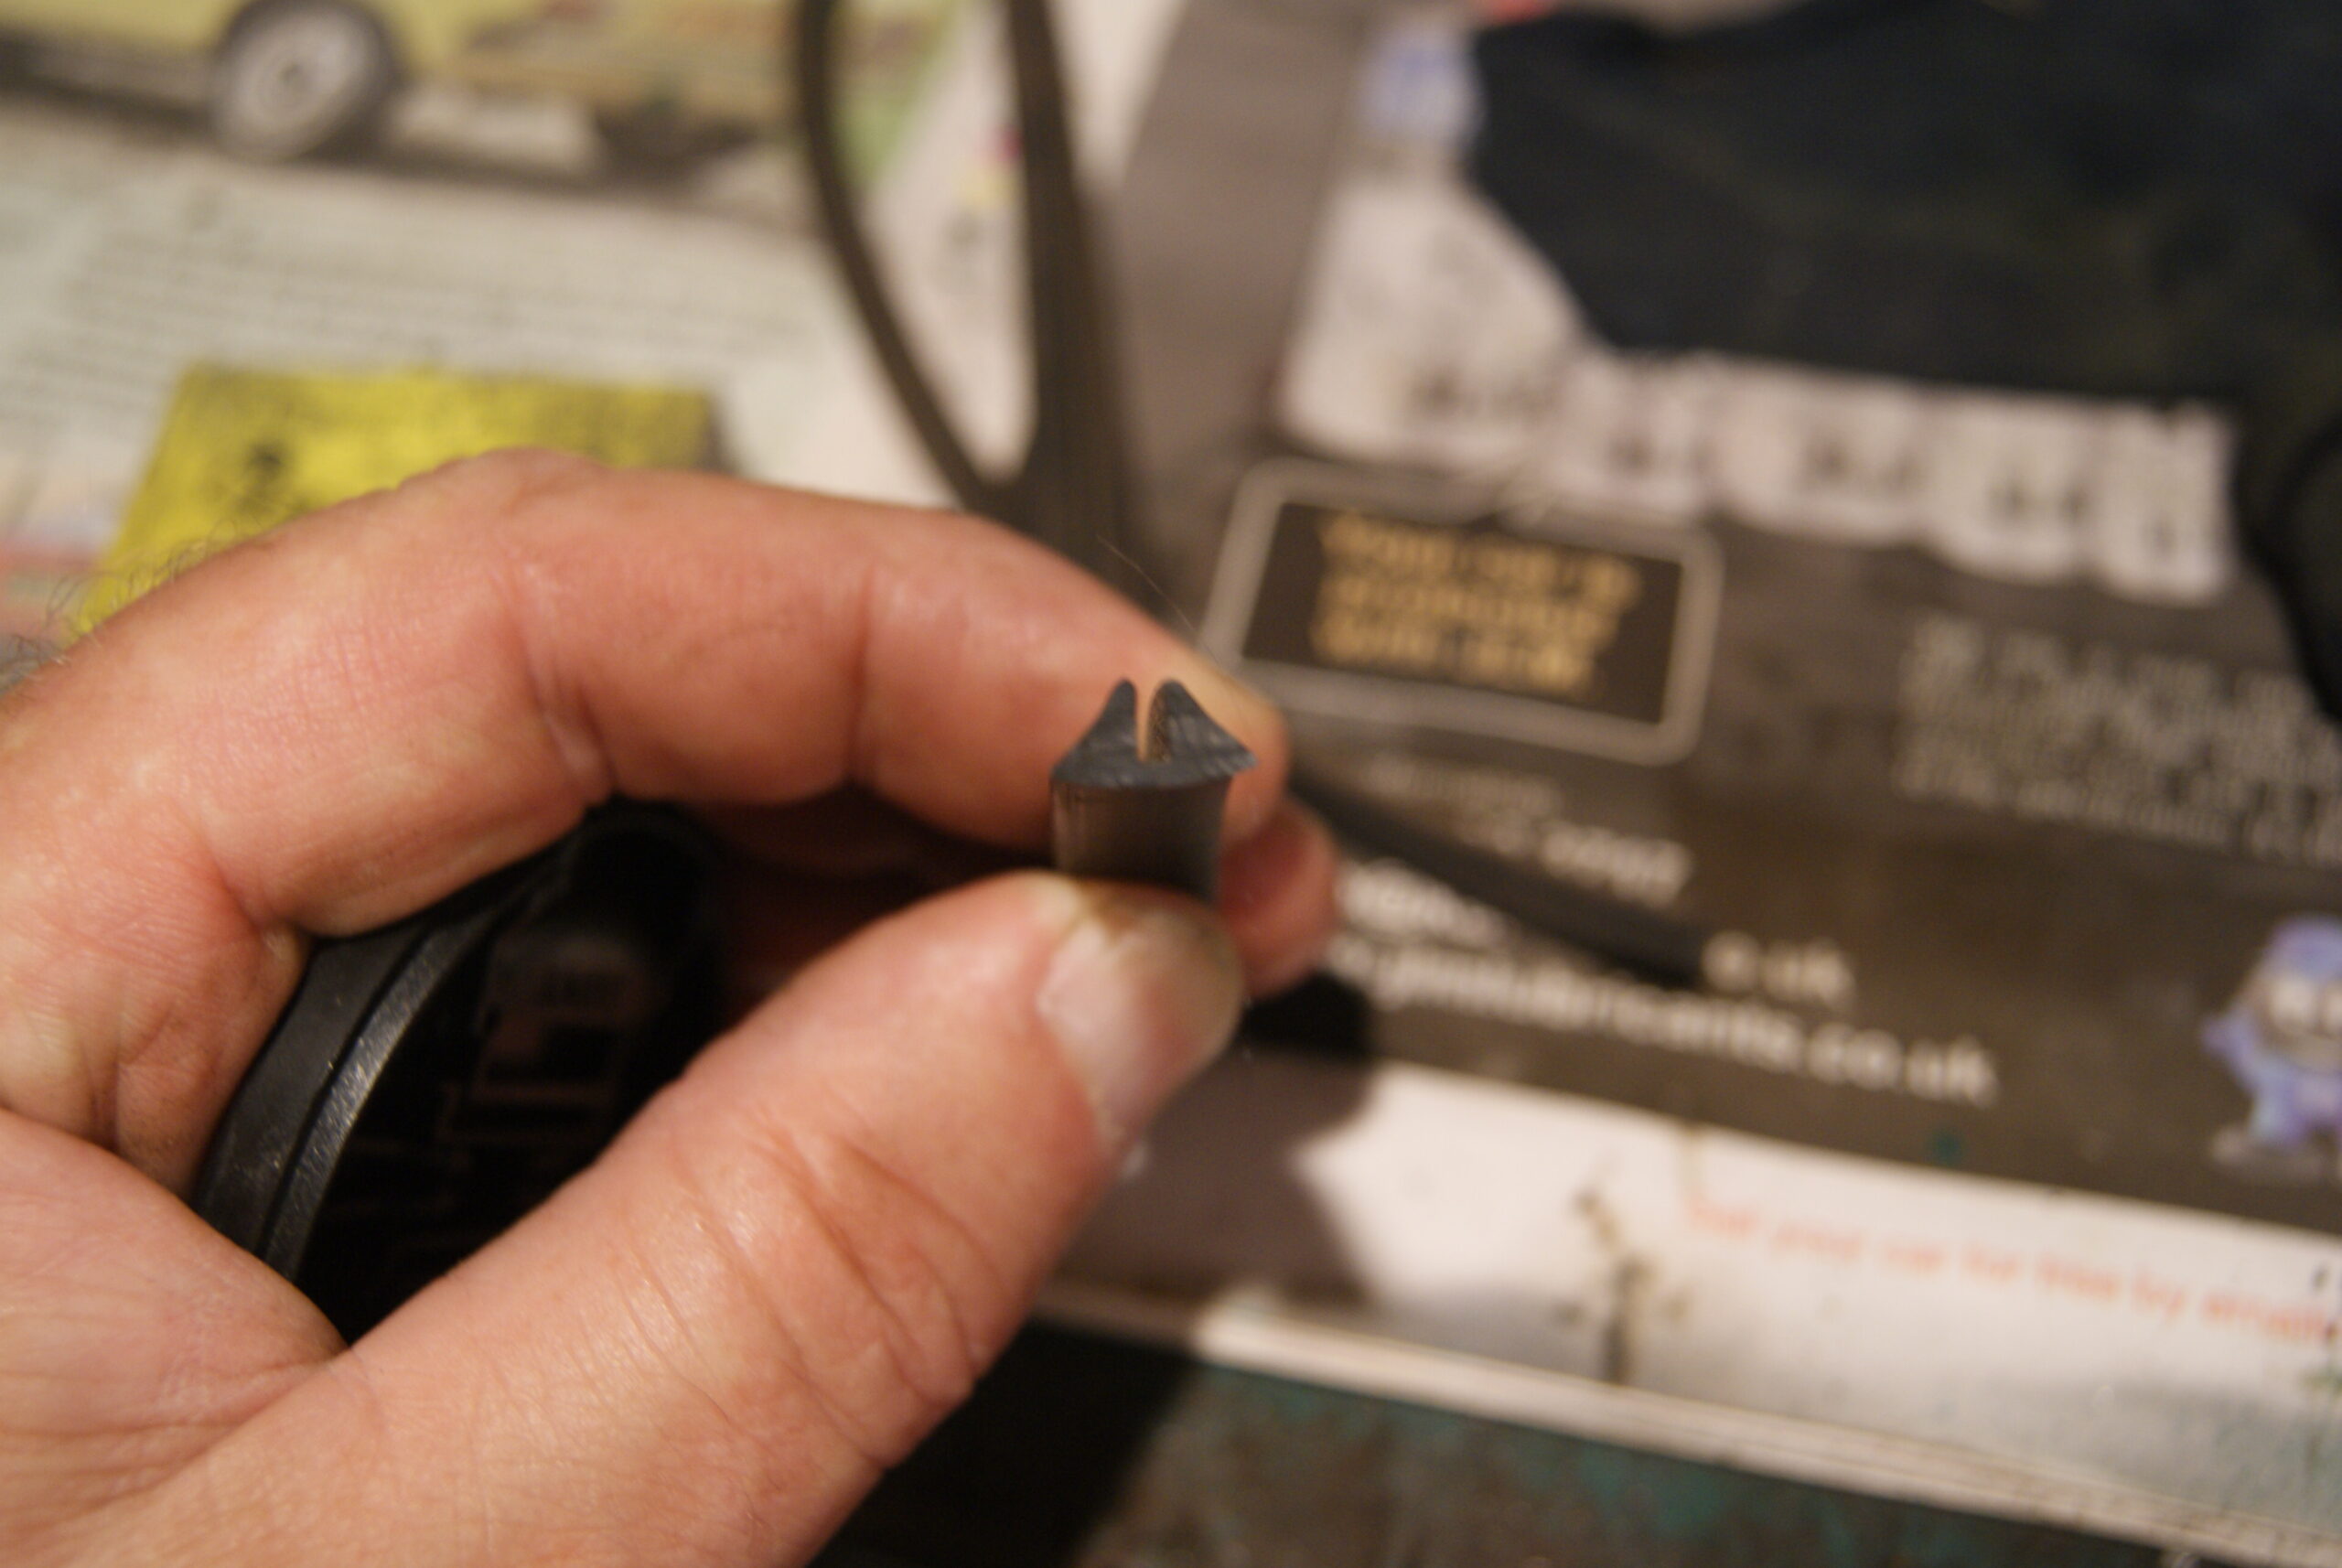
Each screw hole had been drilled through the wood and each one appeared on the inside of the grassbox. Masking tape was used to temporarily seal the holes then matchsticks were glued into each hole using PVA glue; the masking tape was there only to keep the glue in place whilst it hardened and will be removed as soon as it has set.
I’ve now put this to one side to harden whilst I turned my attention to the chain guard. This is now partially complete but needs a little more fettling, so that will be next inbetween stages on the grassbox. One thing I discovered whilst looking at the original photo’s was that the rim of the guard was edged with some dark coloured material, presumably to prevent it rubbing the paint. It hasn’t got it fitted now and must have been thrown away years ago but it rang a bell in the back of my mind- I had some ideal rubber strip hanging in the garage which I’d bought for edging the overiders on the GT6 a few years ago. I tried it for size and it fitted on the steel edge of the guard, but I’ve only got about 12″ of it spare so I’ll have to order another strip from the local Triumph dealer.
That’s it for another day. Mrs. Geoff is treating me to a fish and chip dinner!
Attachments:
August 3, 2022 at 7:20 am #39611charlieKeymasterThis restoration (conservation) illustrates the range of skills needed in our hobby. I spent the day cutting clear polycarbonate sheet to make covers for the sectioned Monrotiller gearbox as featured in the forthcoming August issue of The Cultivator.
August 3, 2022 at 8:01 am #39612trusty220KeymasterIt’s a pity I can’t do something along those lines with this job as there’s so much work that just won’t be seen under the covers. It’s the same thing with the classic car restoration people- most of the important work is underneath and you don’t get to see it beyond looking at the paintwork and lifting the bonnet!
The difference is that we all know what’s been done in this case!
August 3, 2022 at 5:04 pm #39619trusty220KeymasterOff to South Cerney tomorrow for the weekend so I’ve been trying to get all of those loose ends tied up.
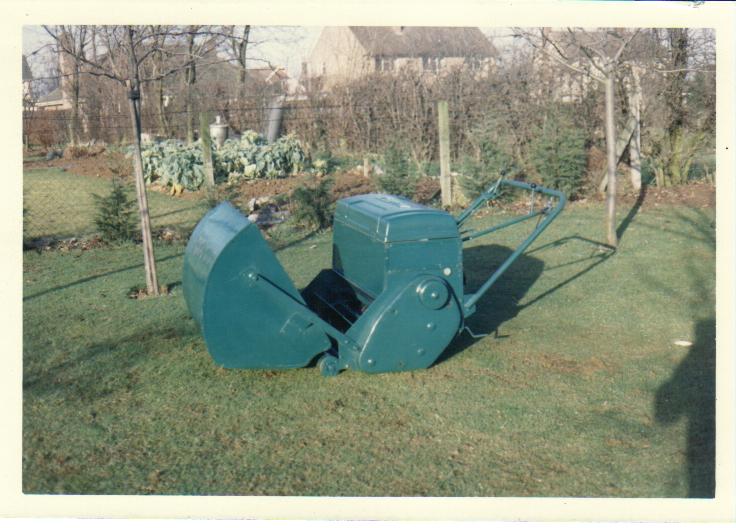
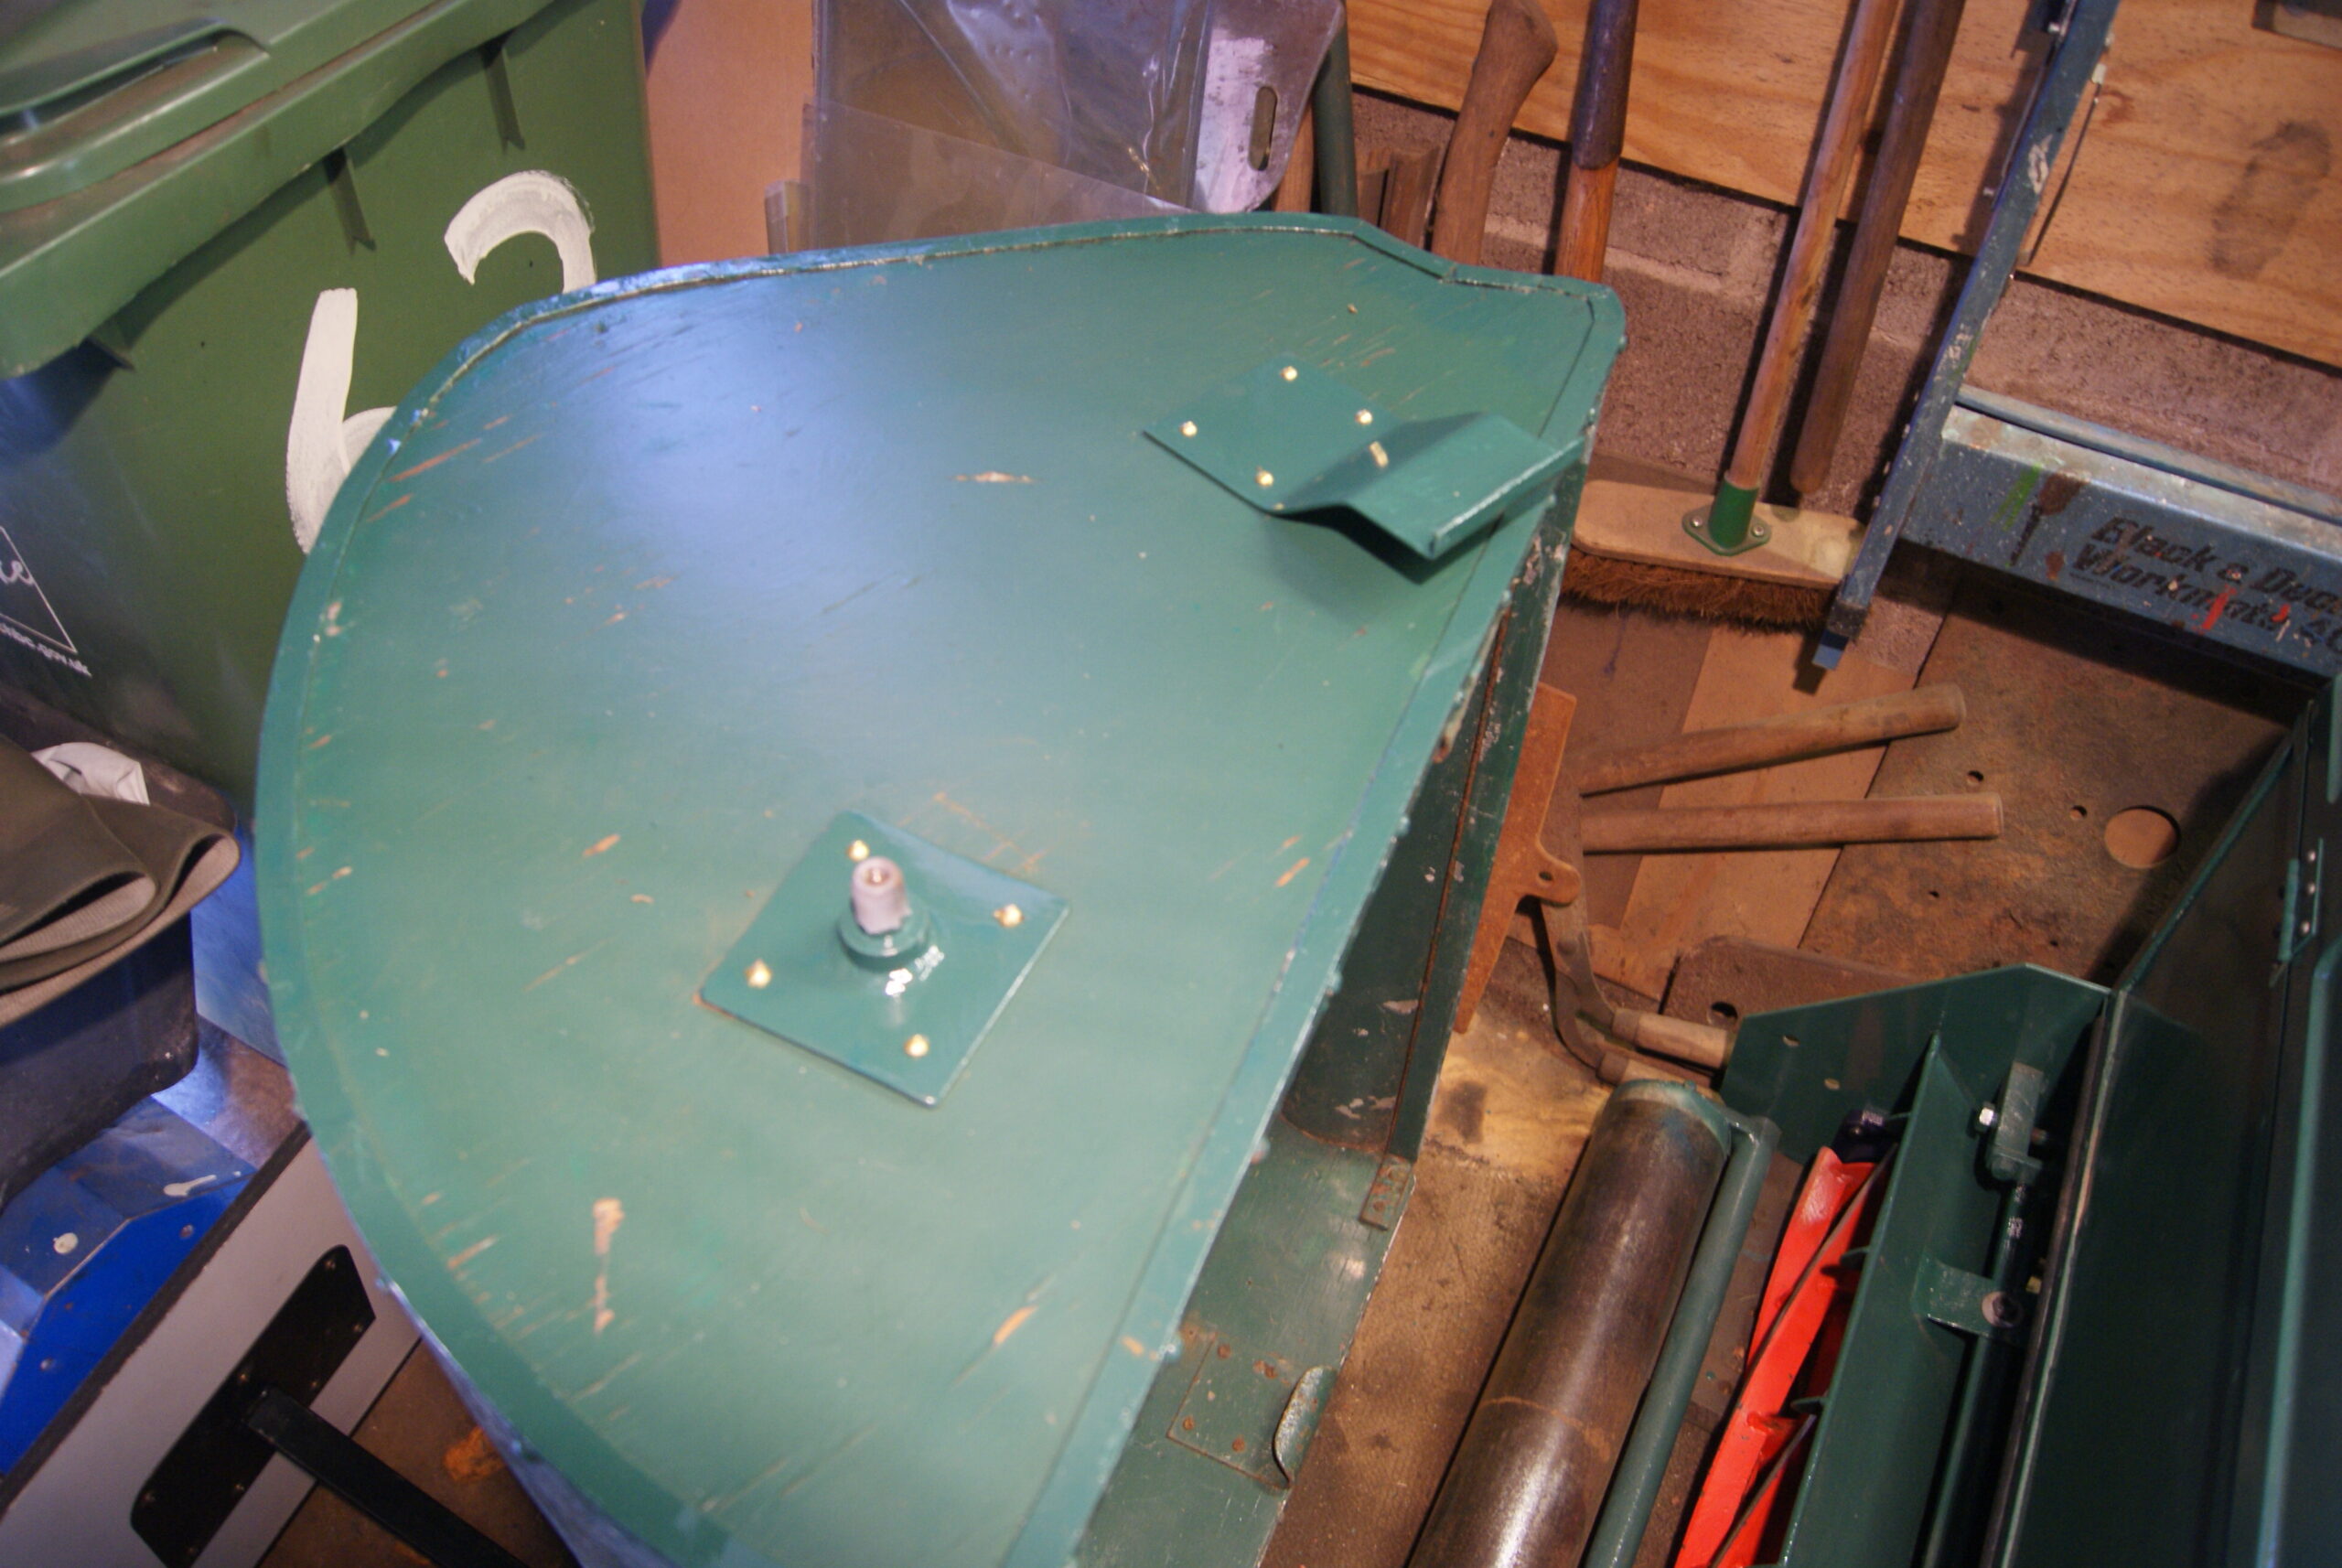
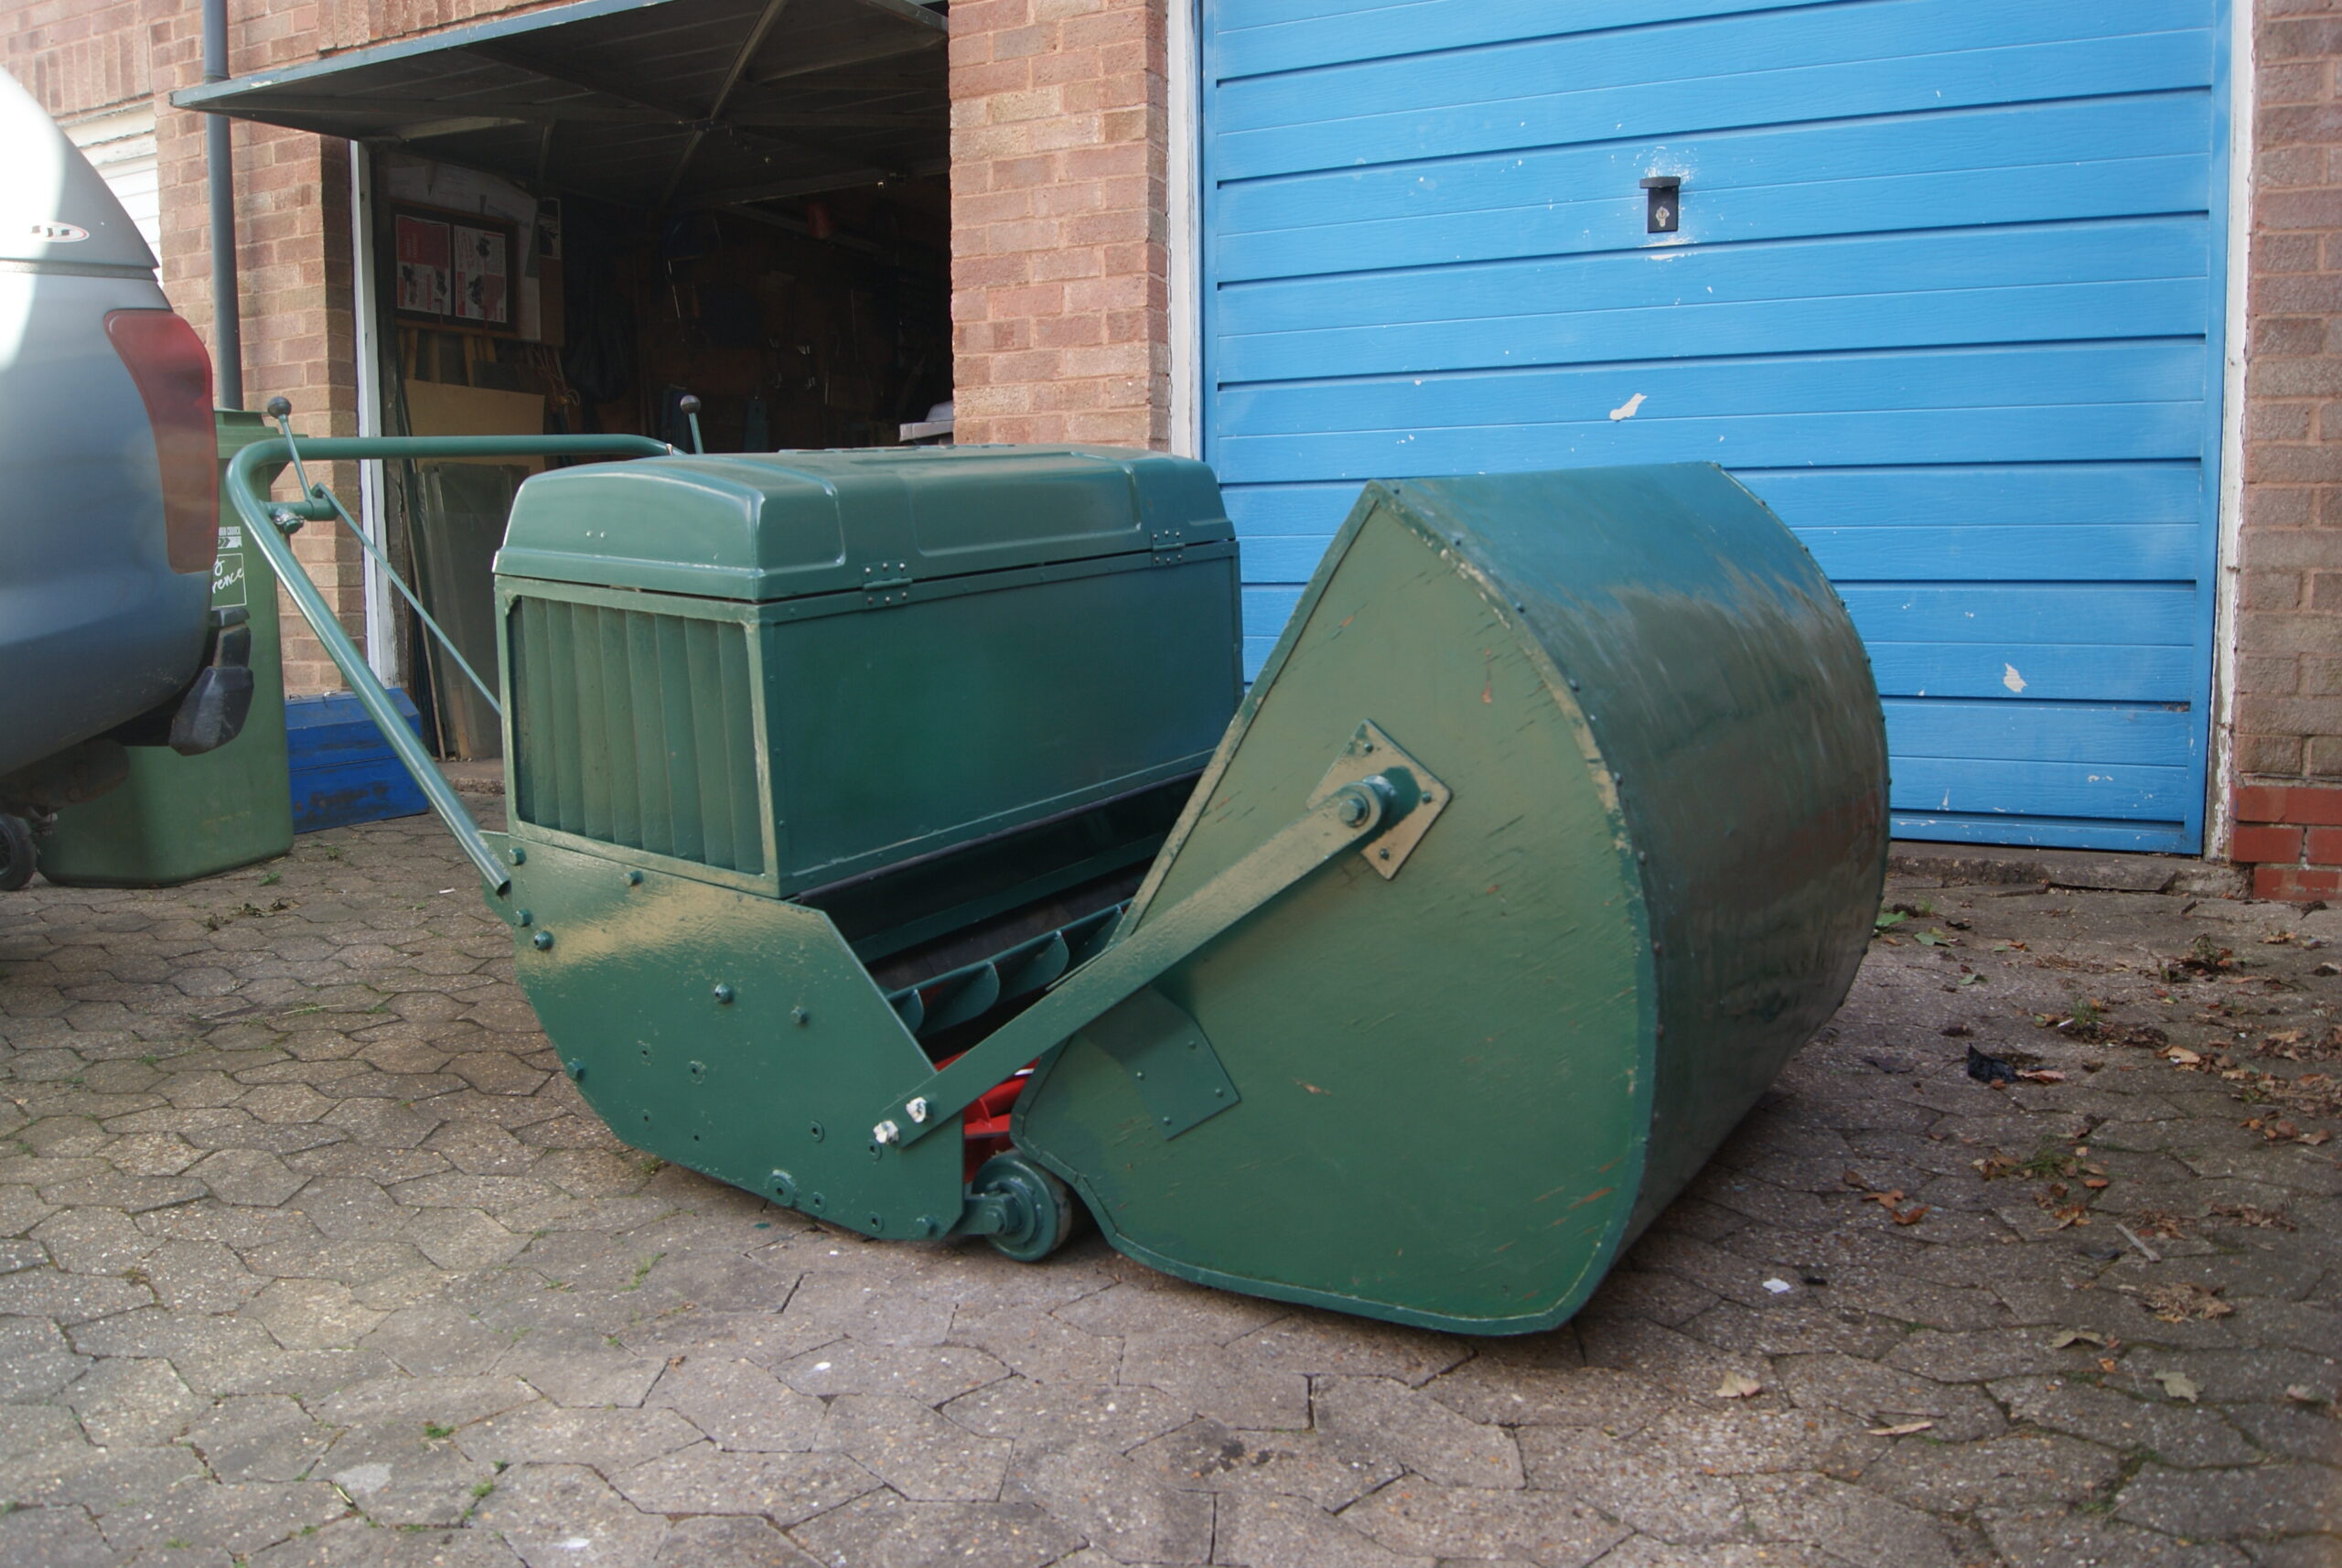
The glue had dried overnight in the holes and so I trimmed the excess wood off flush with the surface, re-drilled small pilot holes and screwed the side brackets onto the grassbox. This allowed me to then mount the carrying brackets onto the front chassis of the mower, then a quick lift each side and the box was on, secured with just one bolt each side. This style of grassbox would be far too heavy to manhandle when it was full and so it is permanently attached to the mower and the operator has to drive up to the pile of grass cuttings, dismount and then flip the box over to empty it. This operation alone would normally mean that a careless operator could easily misjudge his distance and put a dent in the front of the grassbox- this machine doesn’t look like it’s ever suffered in this way, so all credit to the operator(s) for looking after it so well since 1966.
If you’re going to South Cerney we’ll see you there!
Attachments:
August 4, 2022 at 6:47 am #39633charlieKeymasterThat really is looking very good.
August 8, 2022 at 4:14 pm #39679trusty220KeymasterI’ve done no work on it for a few days; the rally at South Cerney took up most of my time but I managed to fit in a trip to Wales to look at a smallholding as well, so I’m knackered!
Whilst I was away the trimmer called to say that the seat cushions were ready so I made a trip over to pick them up this morning. He’s done a good job of replacing the wrapper sheet around the edge of the lower cushion and replacing the foam in the upper one, then re-gluing everything back together using the steel backings that I painted earlier.
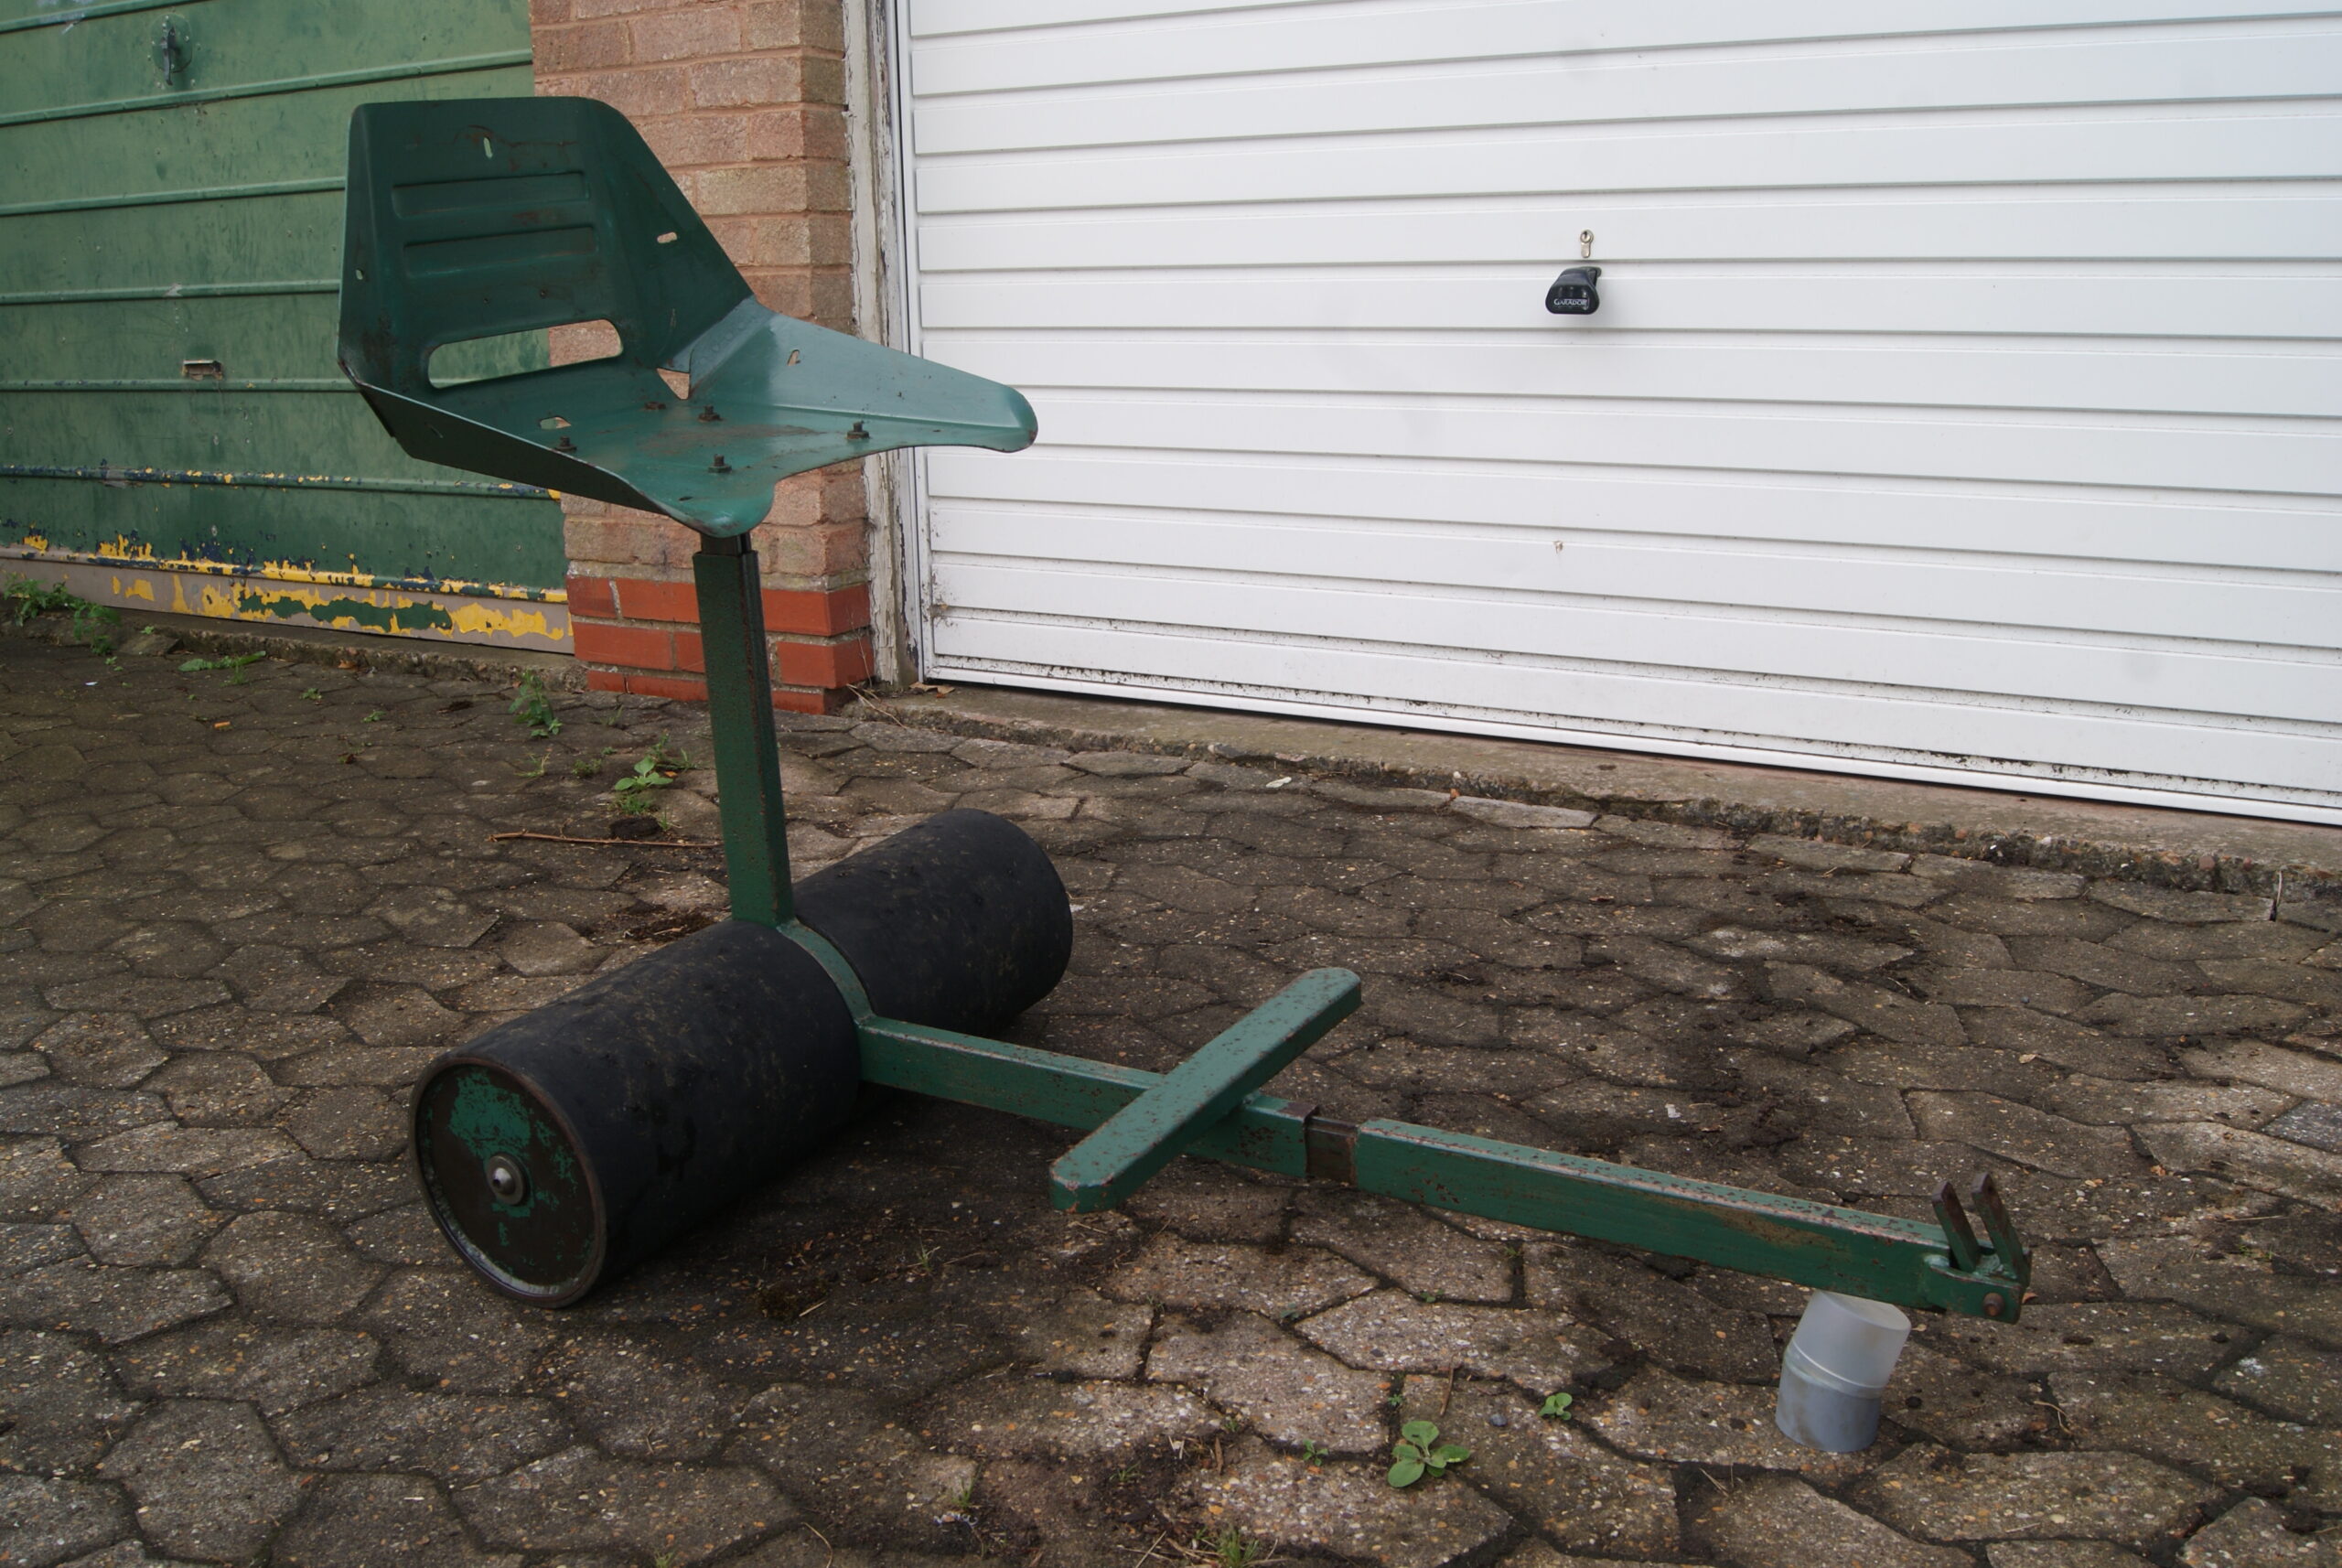
The trailing seat is now together and finished. I did try it for size- well, you have to, don’t you?- and found that the seat rocks backwards and forwards on it’s single bolt so I may find a piece of key steel to fit between the pillar and the seat to firm it up and take the play out, otherwise it’s finished.
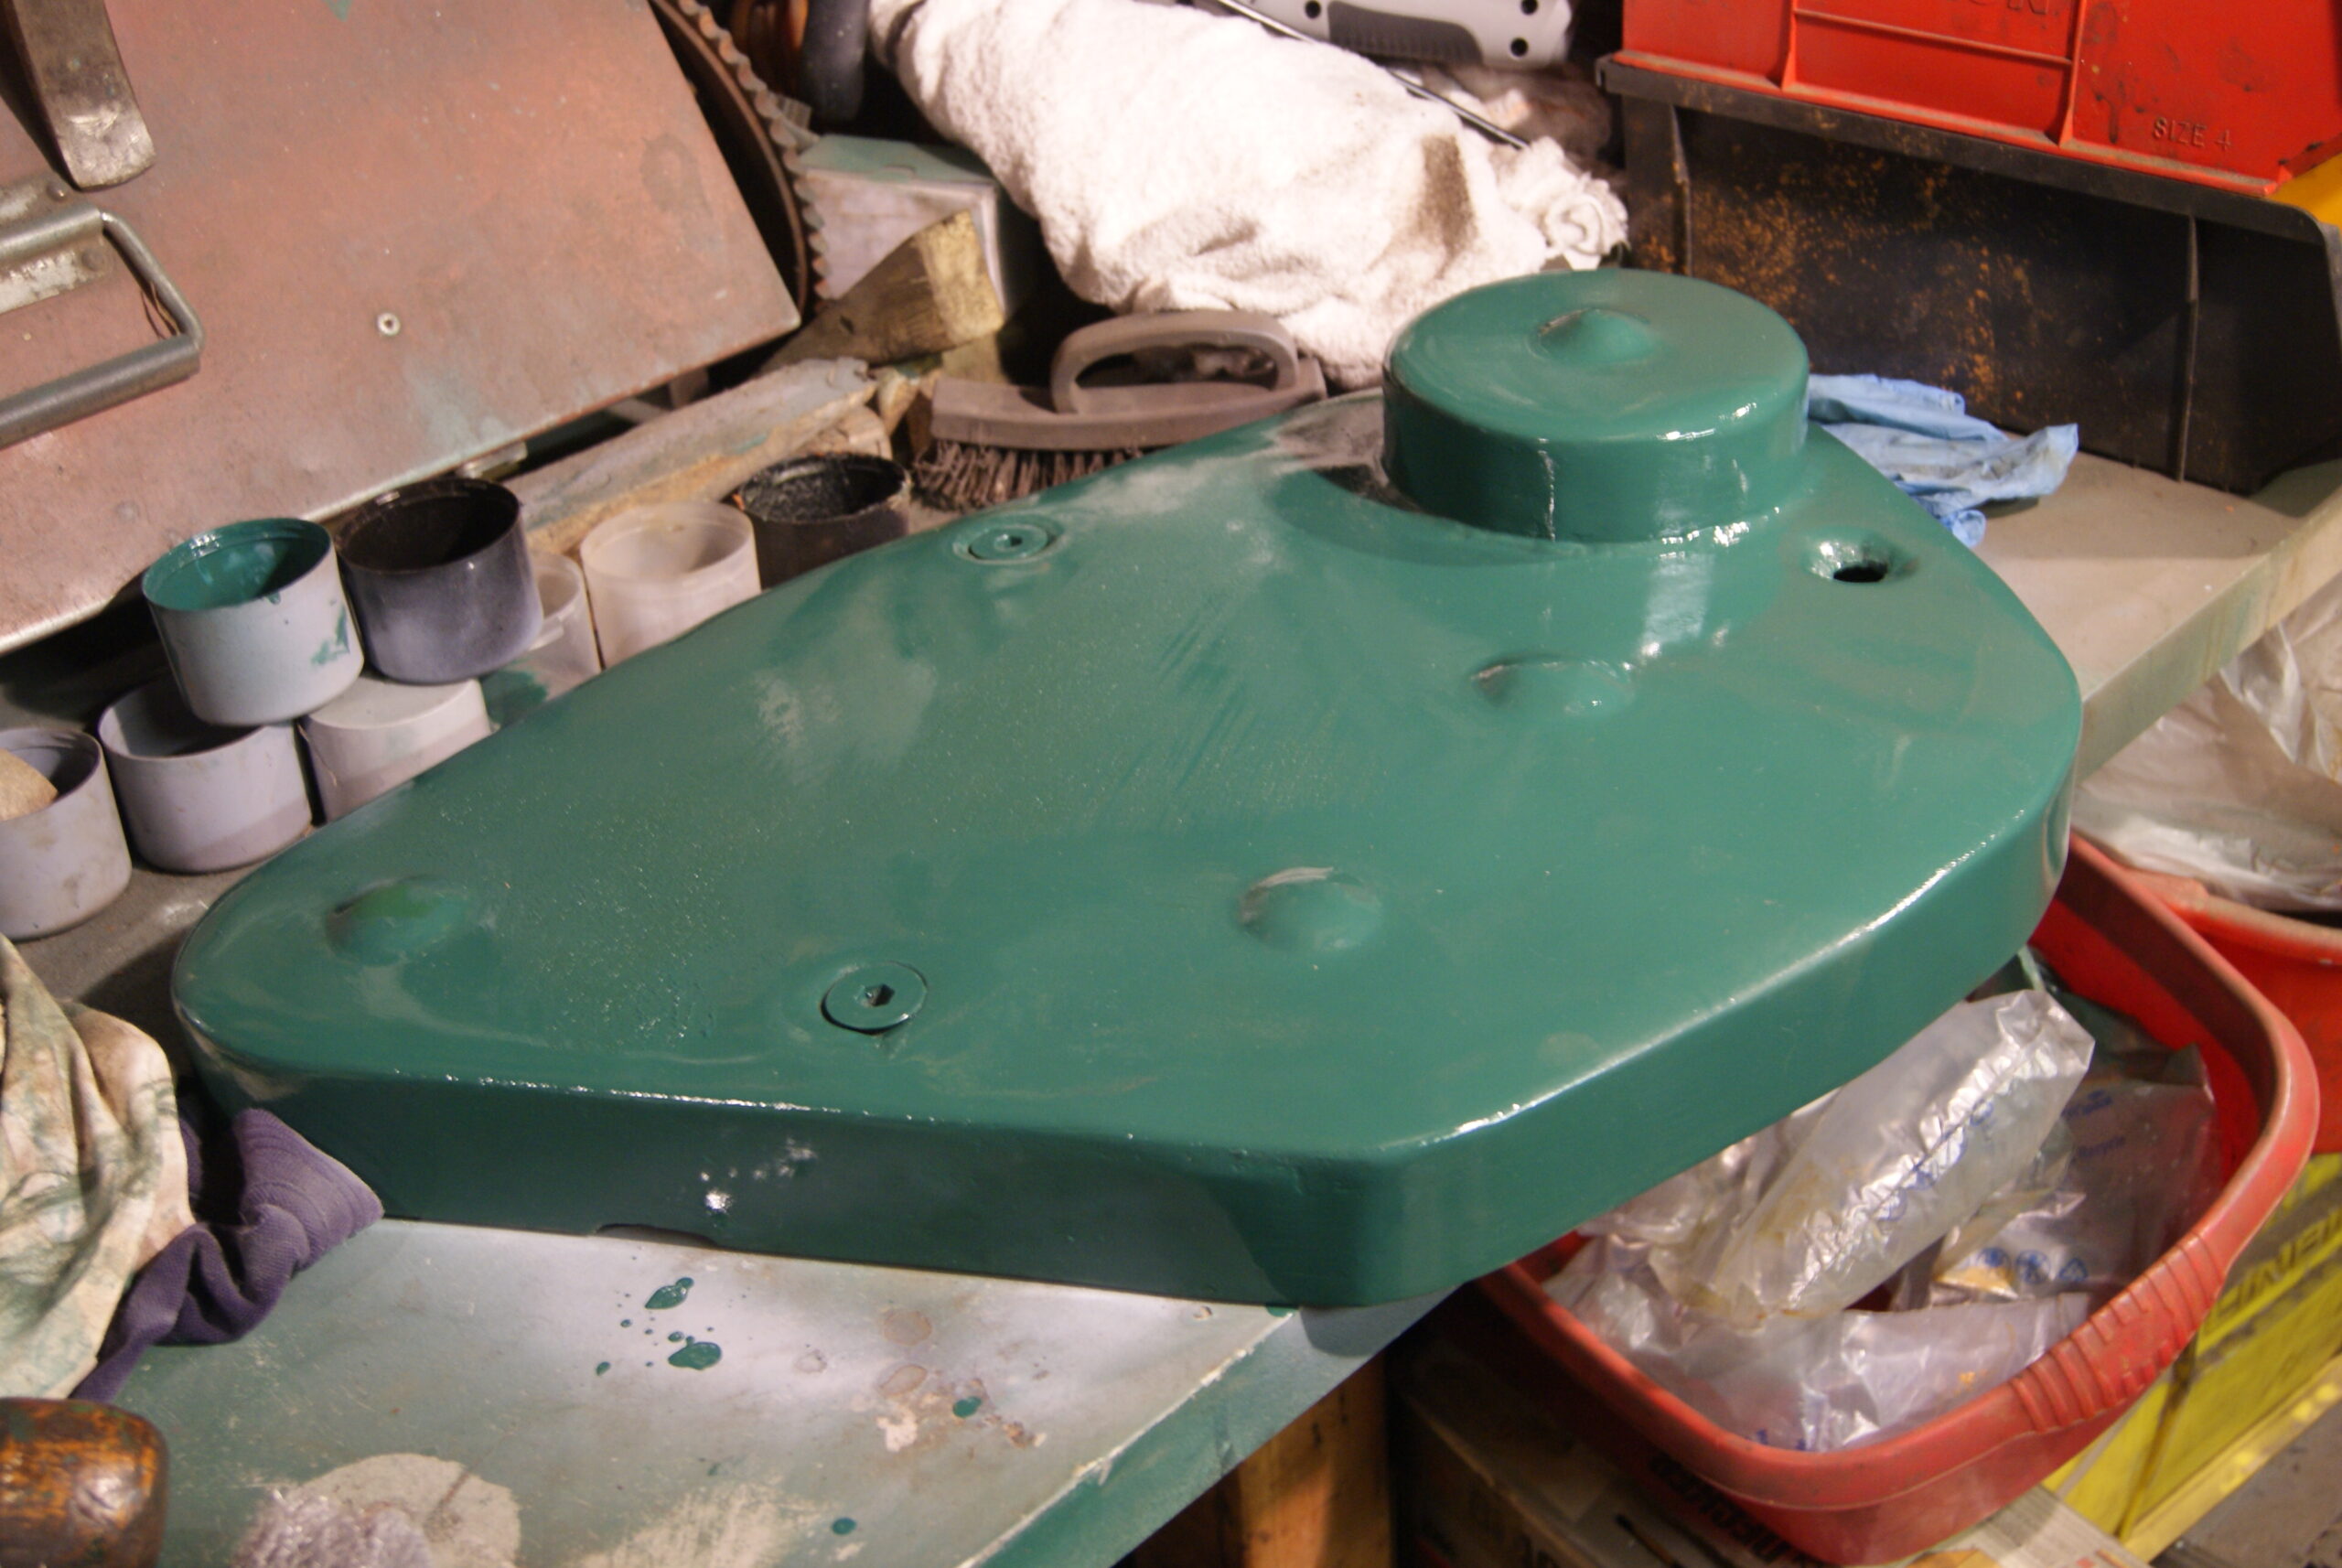
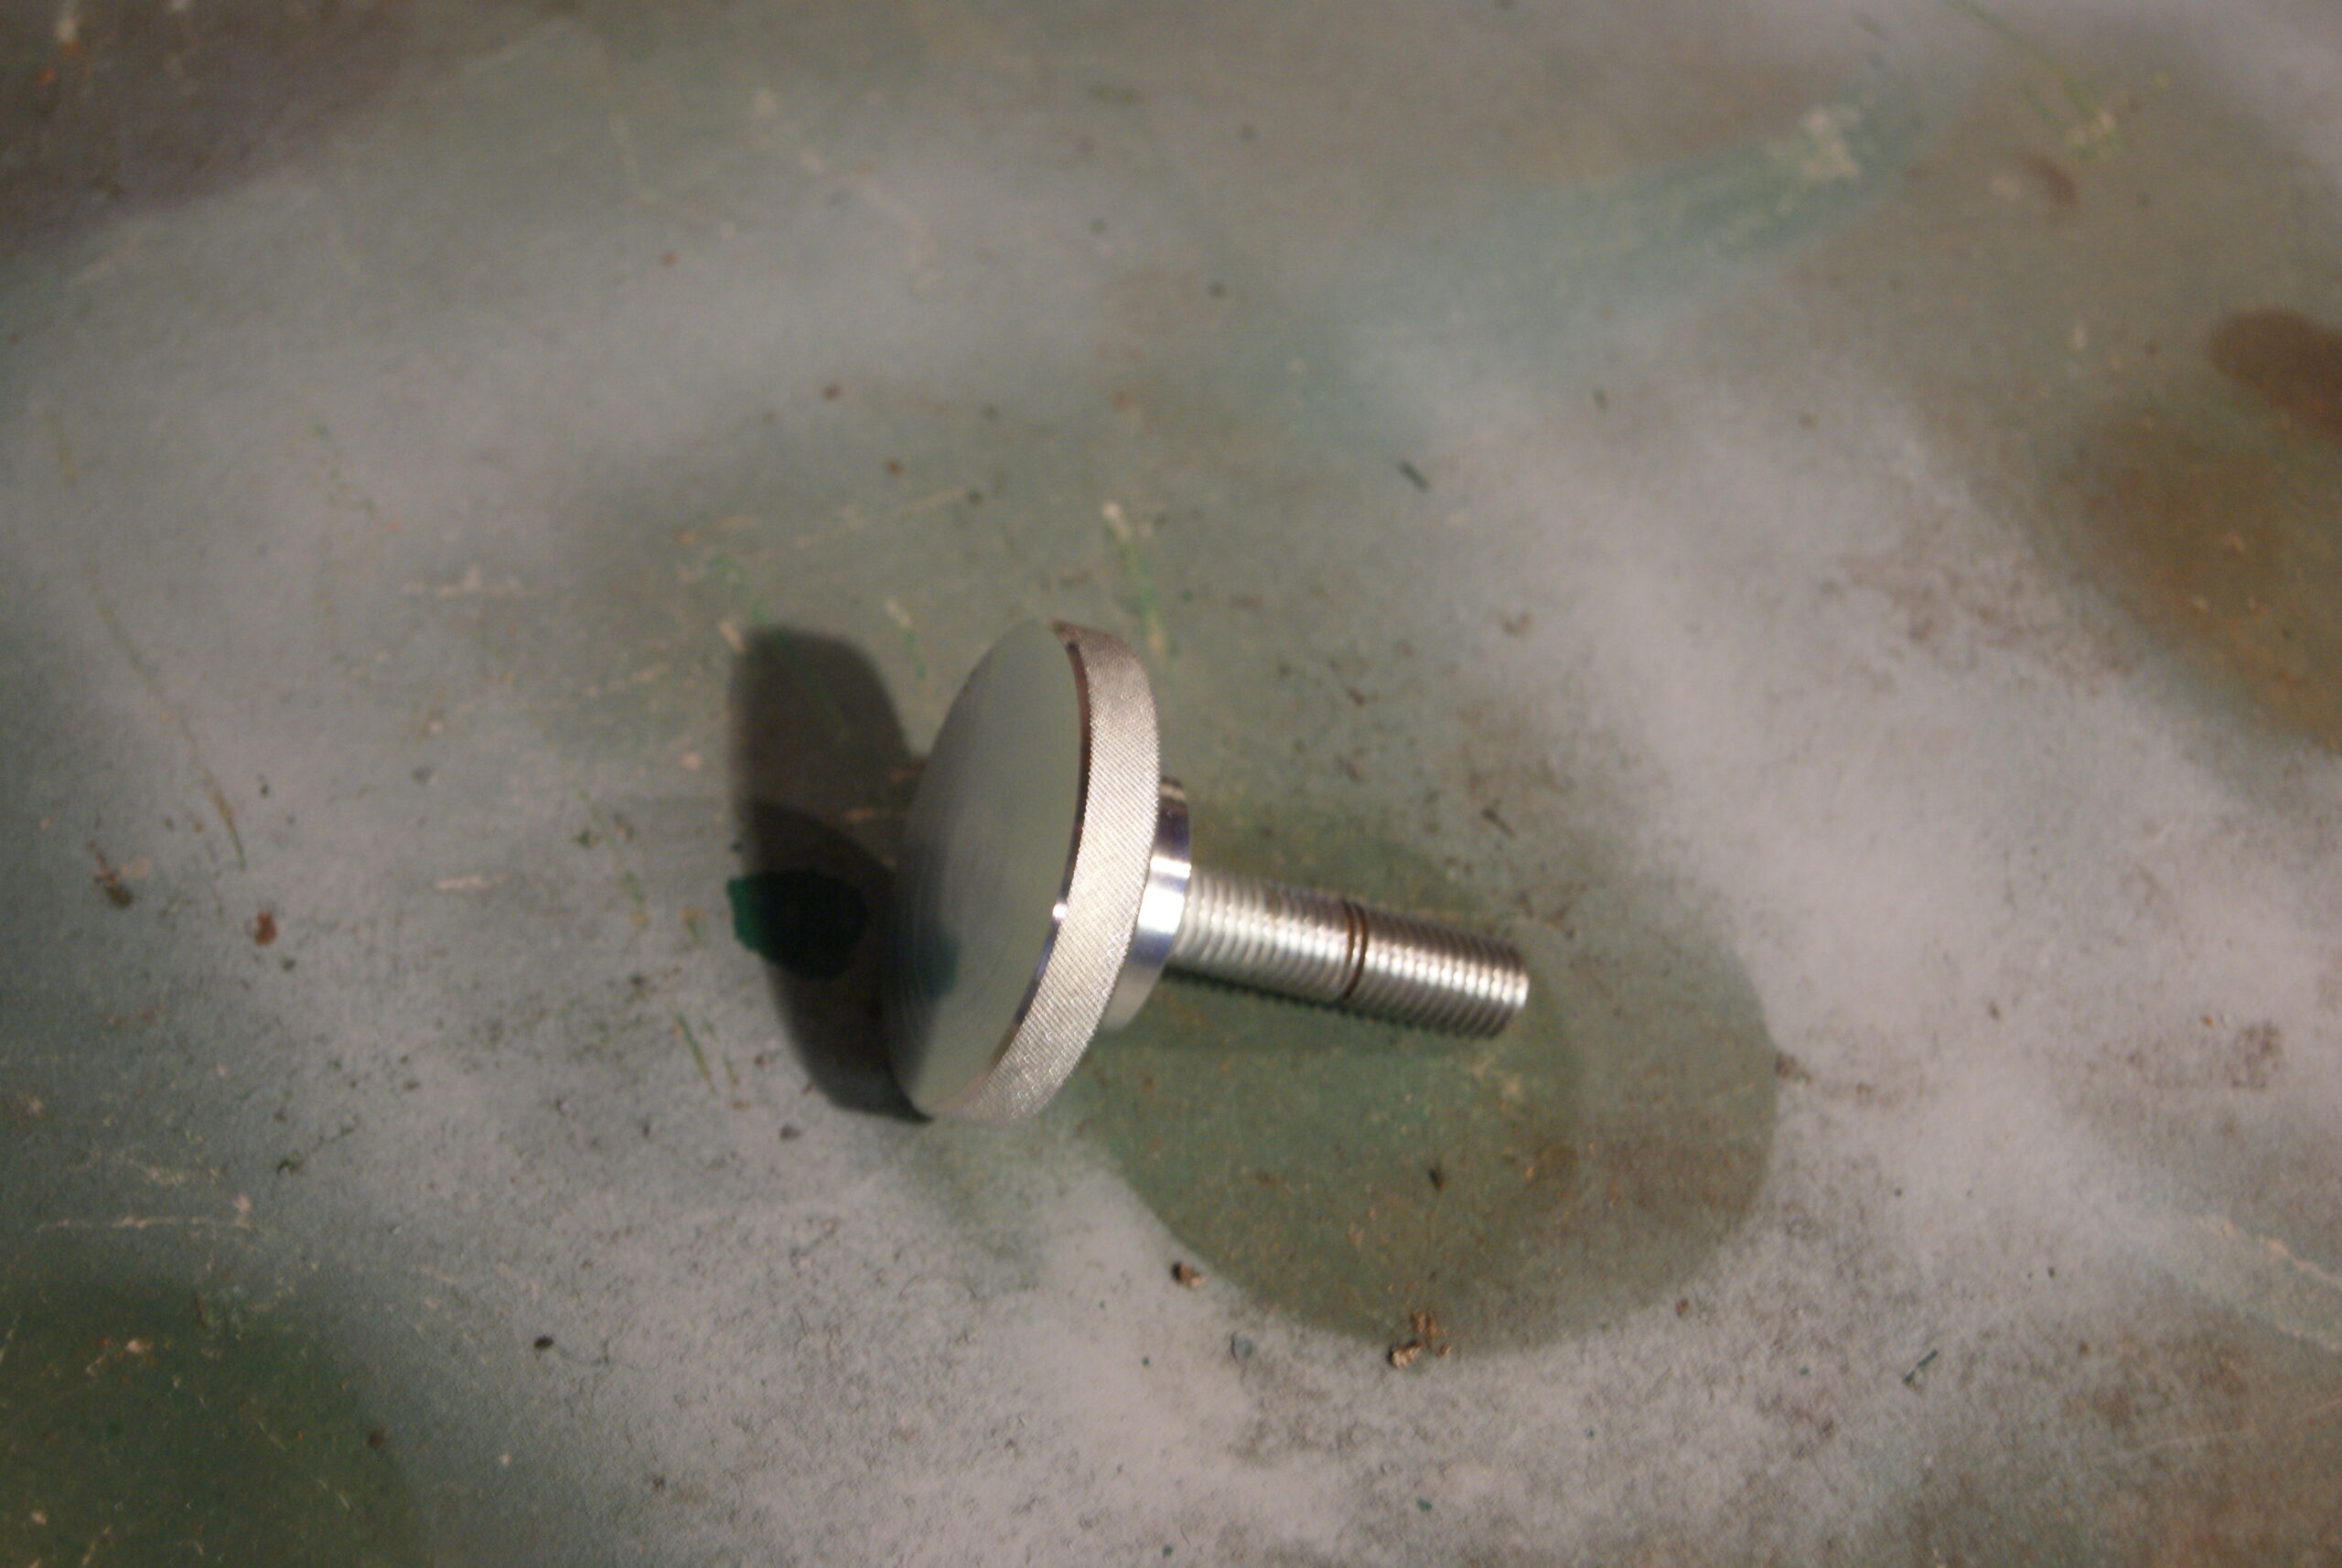
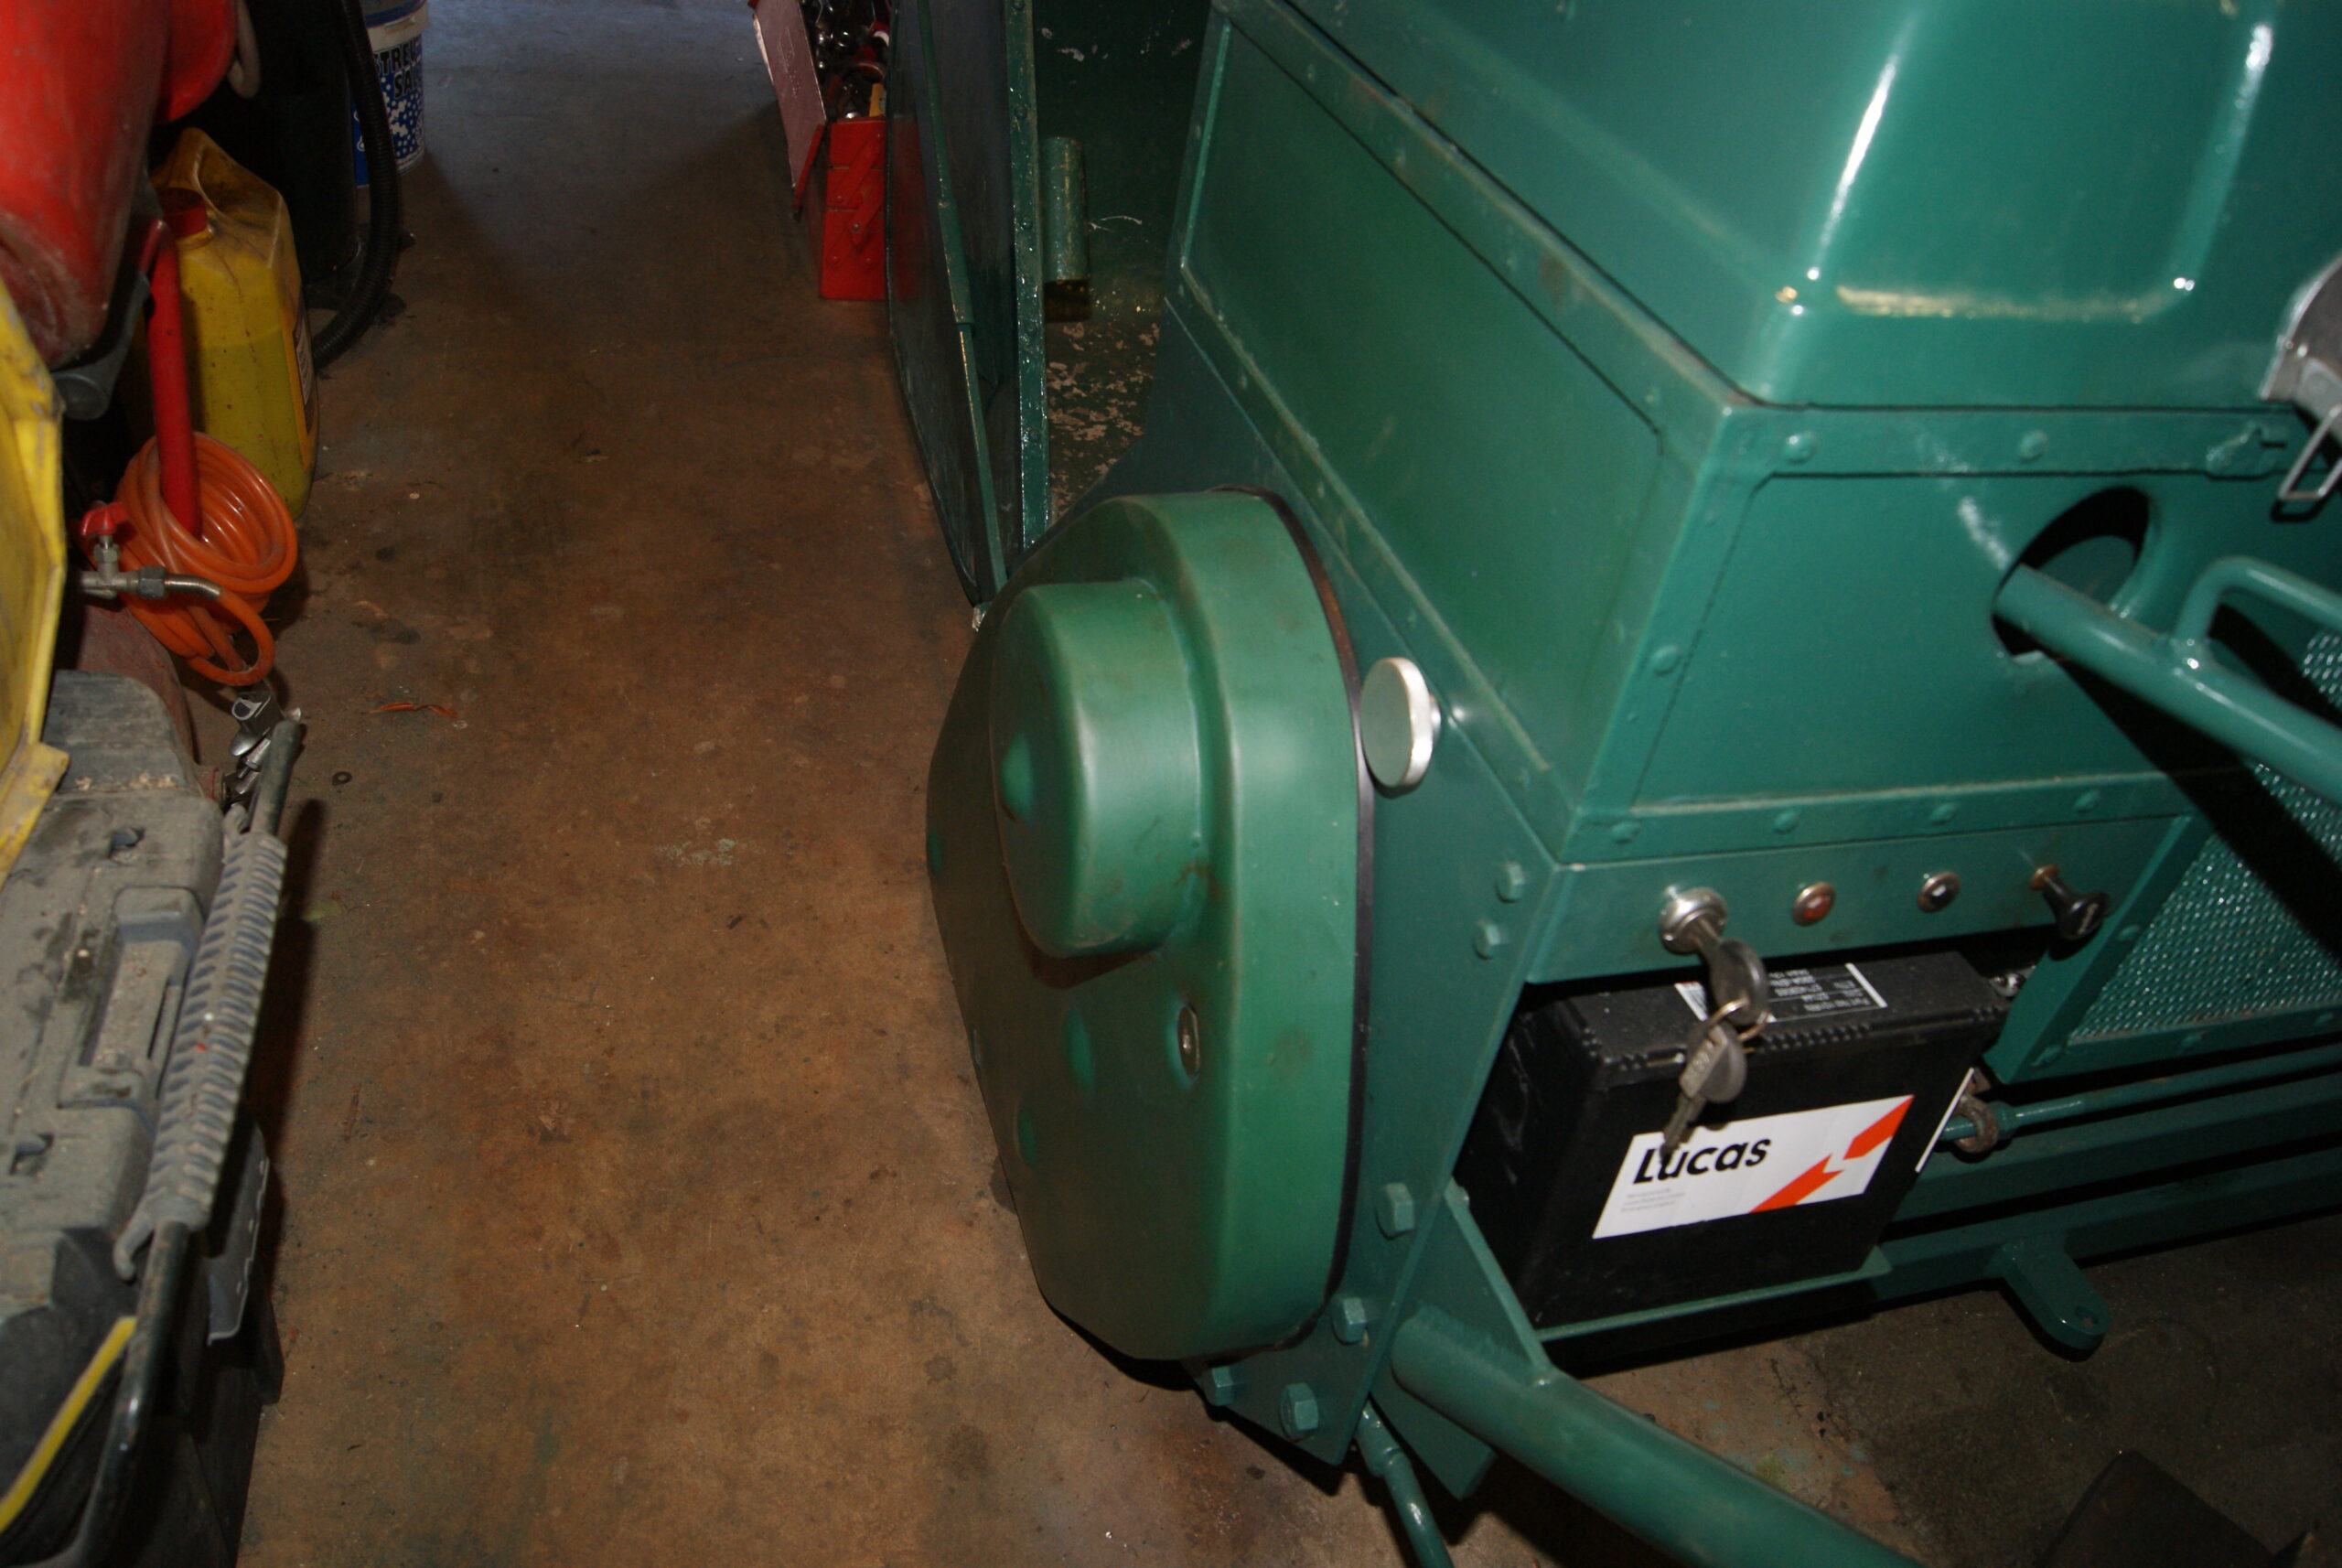
The factory sent me the two hand wheels that they had made and plated; they were delivered whilst I was away (thanks very much, everyone at Hixon!). The original ones were missing, replaced with a couple of M8 bolts and nuts through the original holes. Luckily the original threads were intact and I fitted the engine cover with standard 3/8″ bolts as a temporary fix, but now these have arrived they will find their rightful place on the mower.
I hope tomorrow’s going to be cooler; it’s getting too hot to do much! I know, there’s that other beer in the fridge……
Attachments:
August 14, 2022 at 11:40 am #39718trusty220KeymasterLast week was a bit of a trial to say the least!
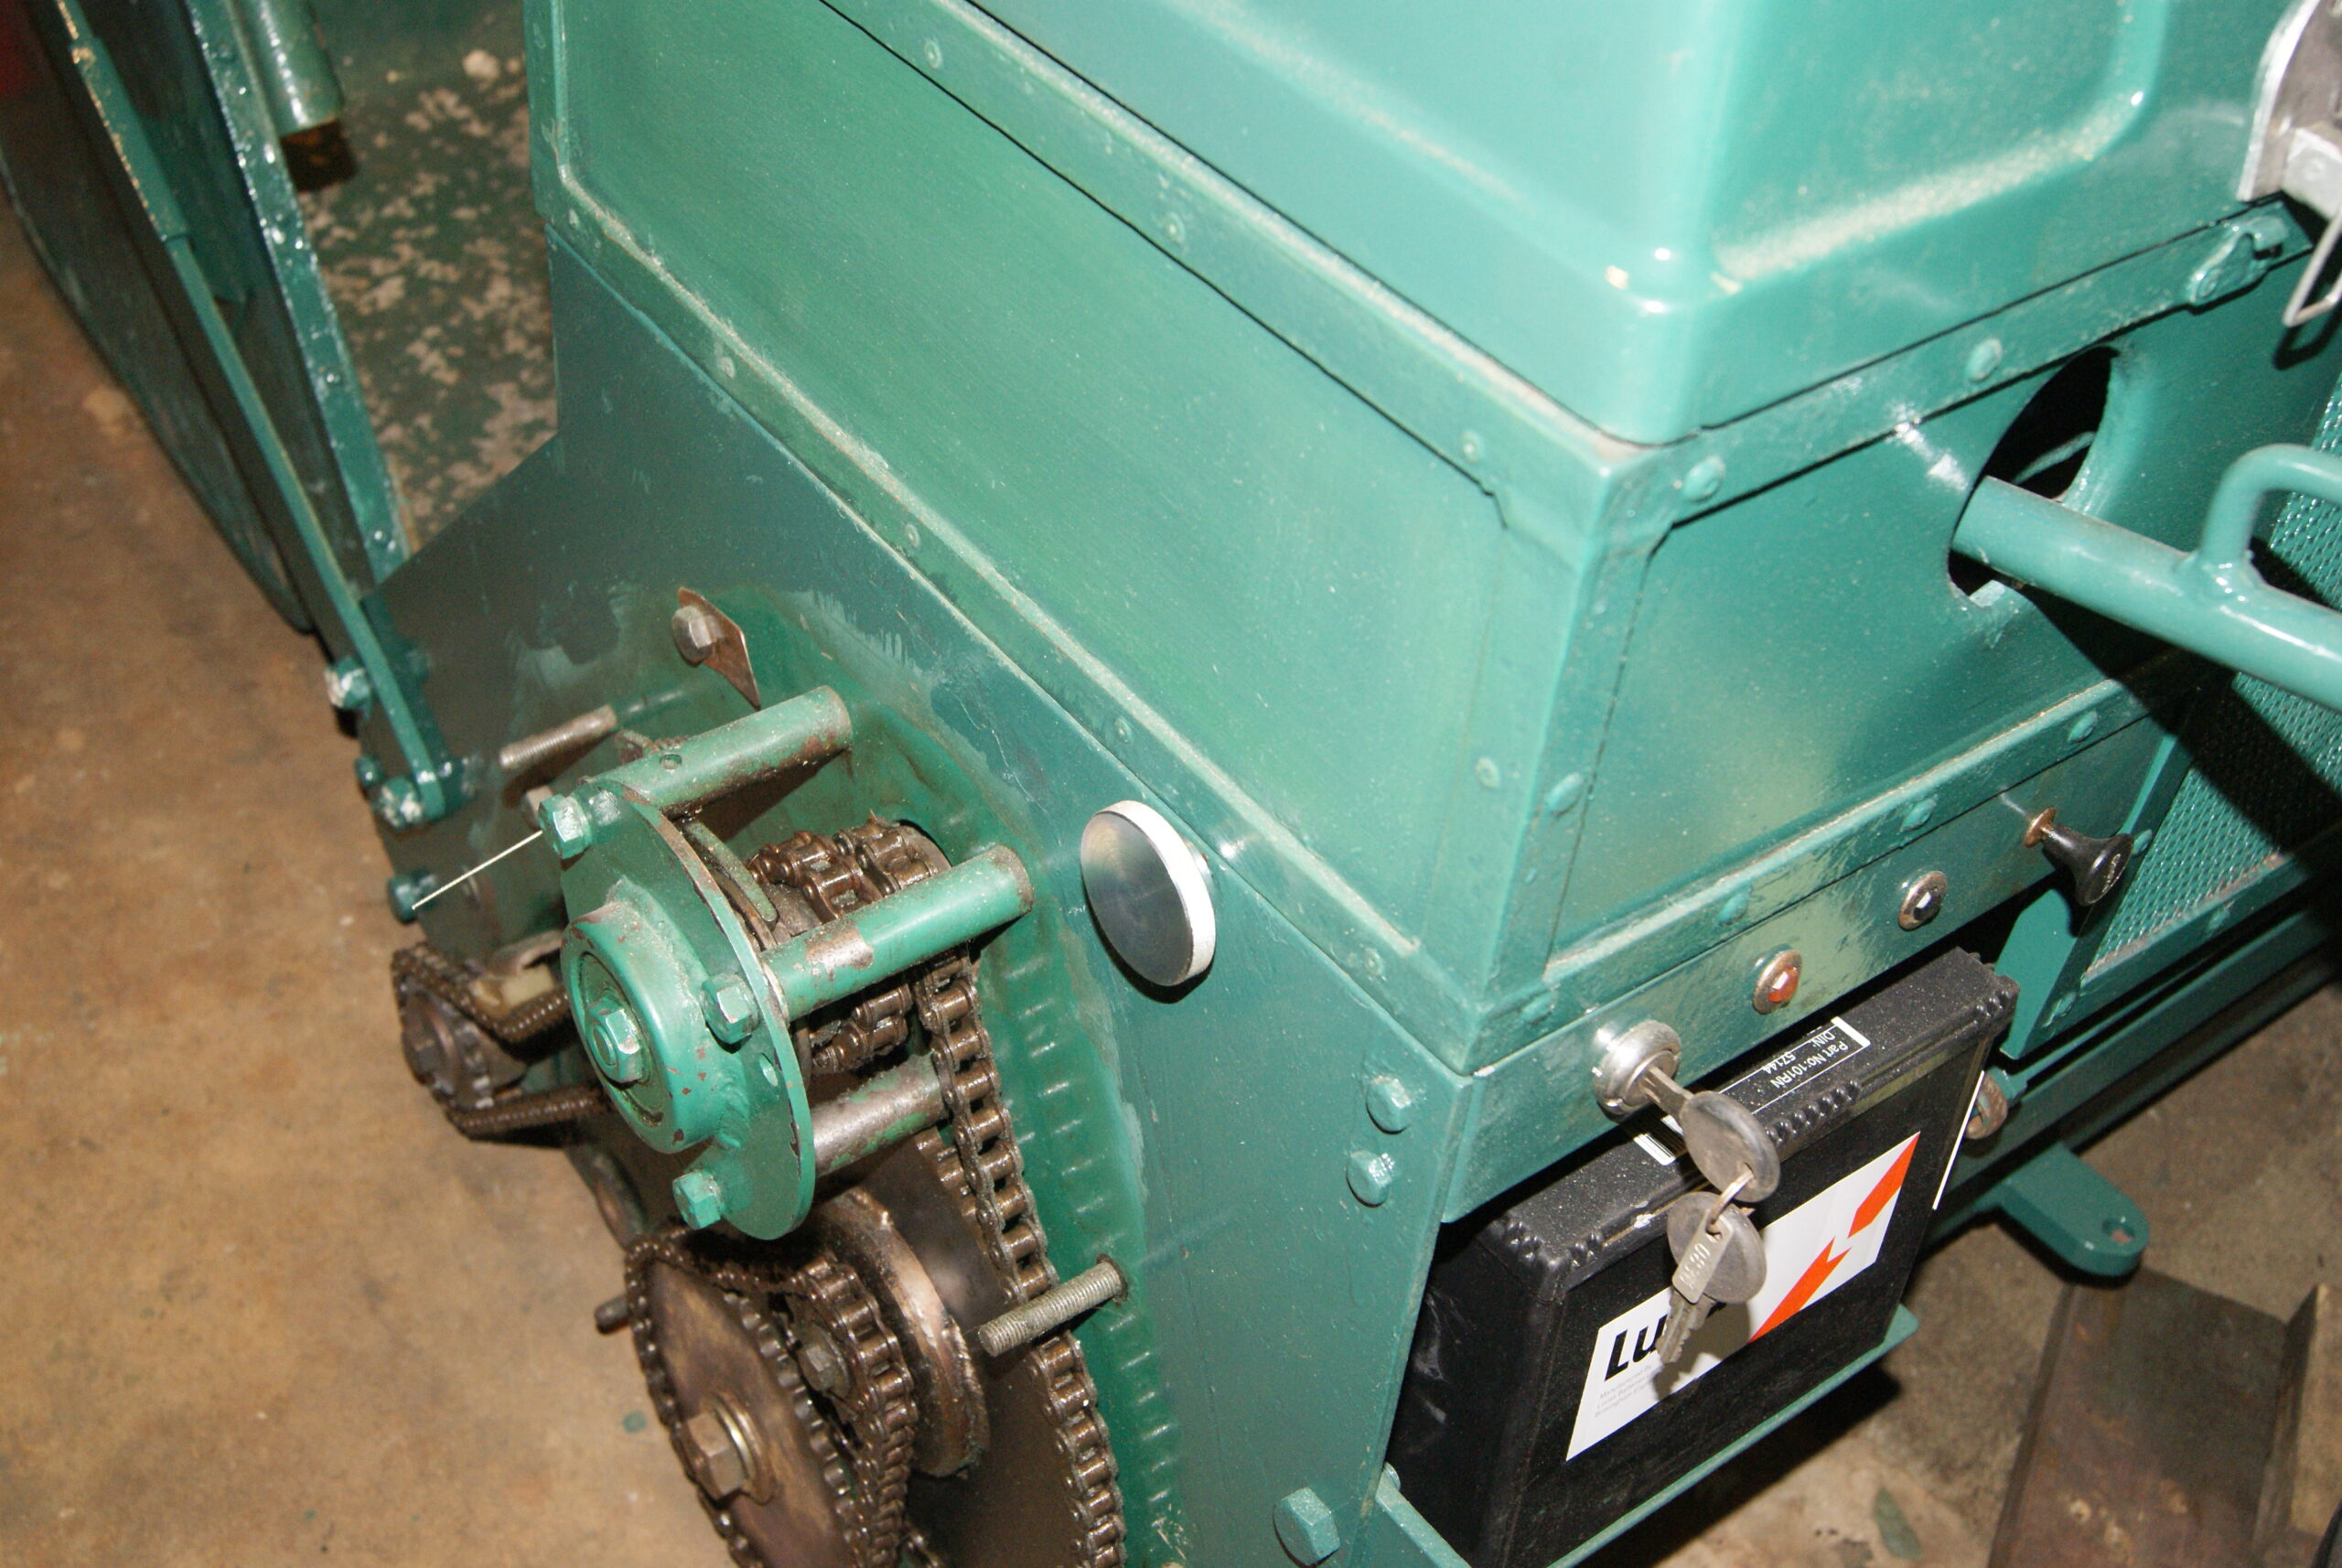
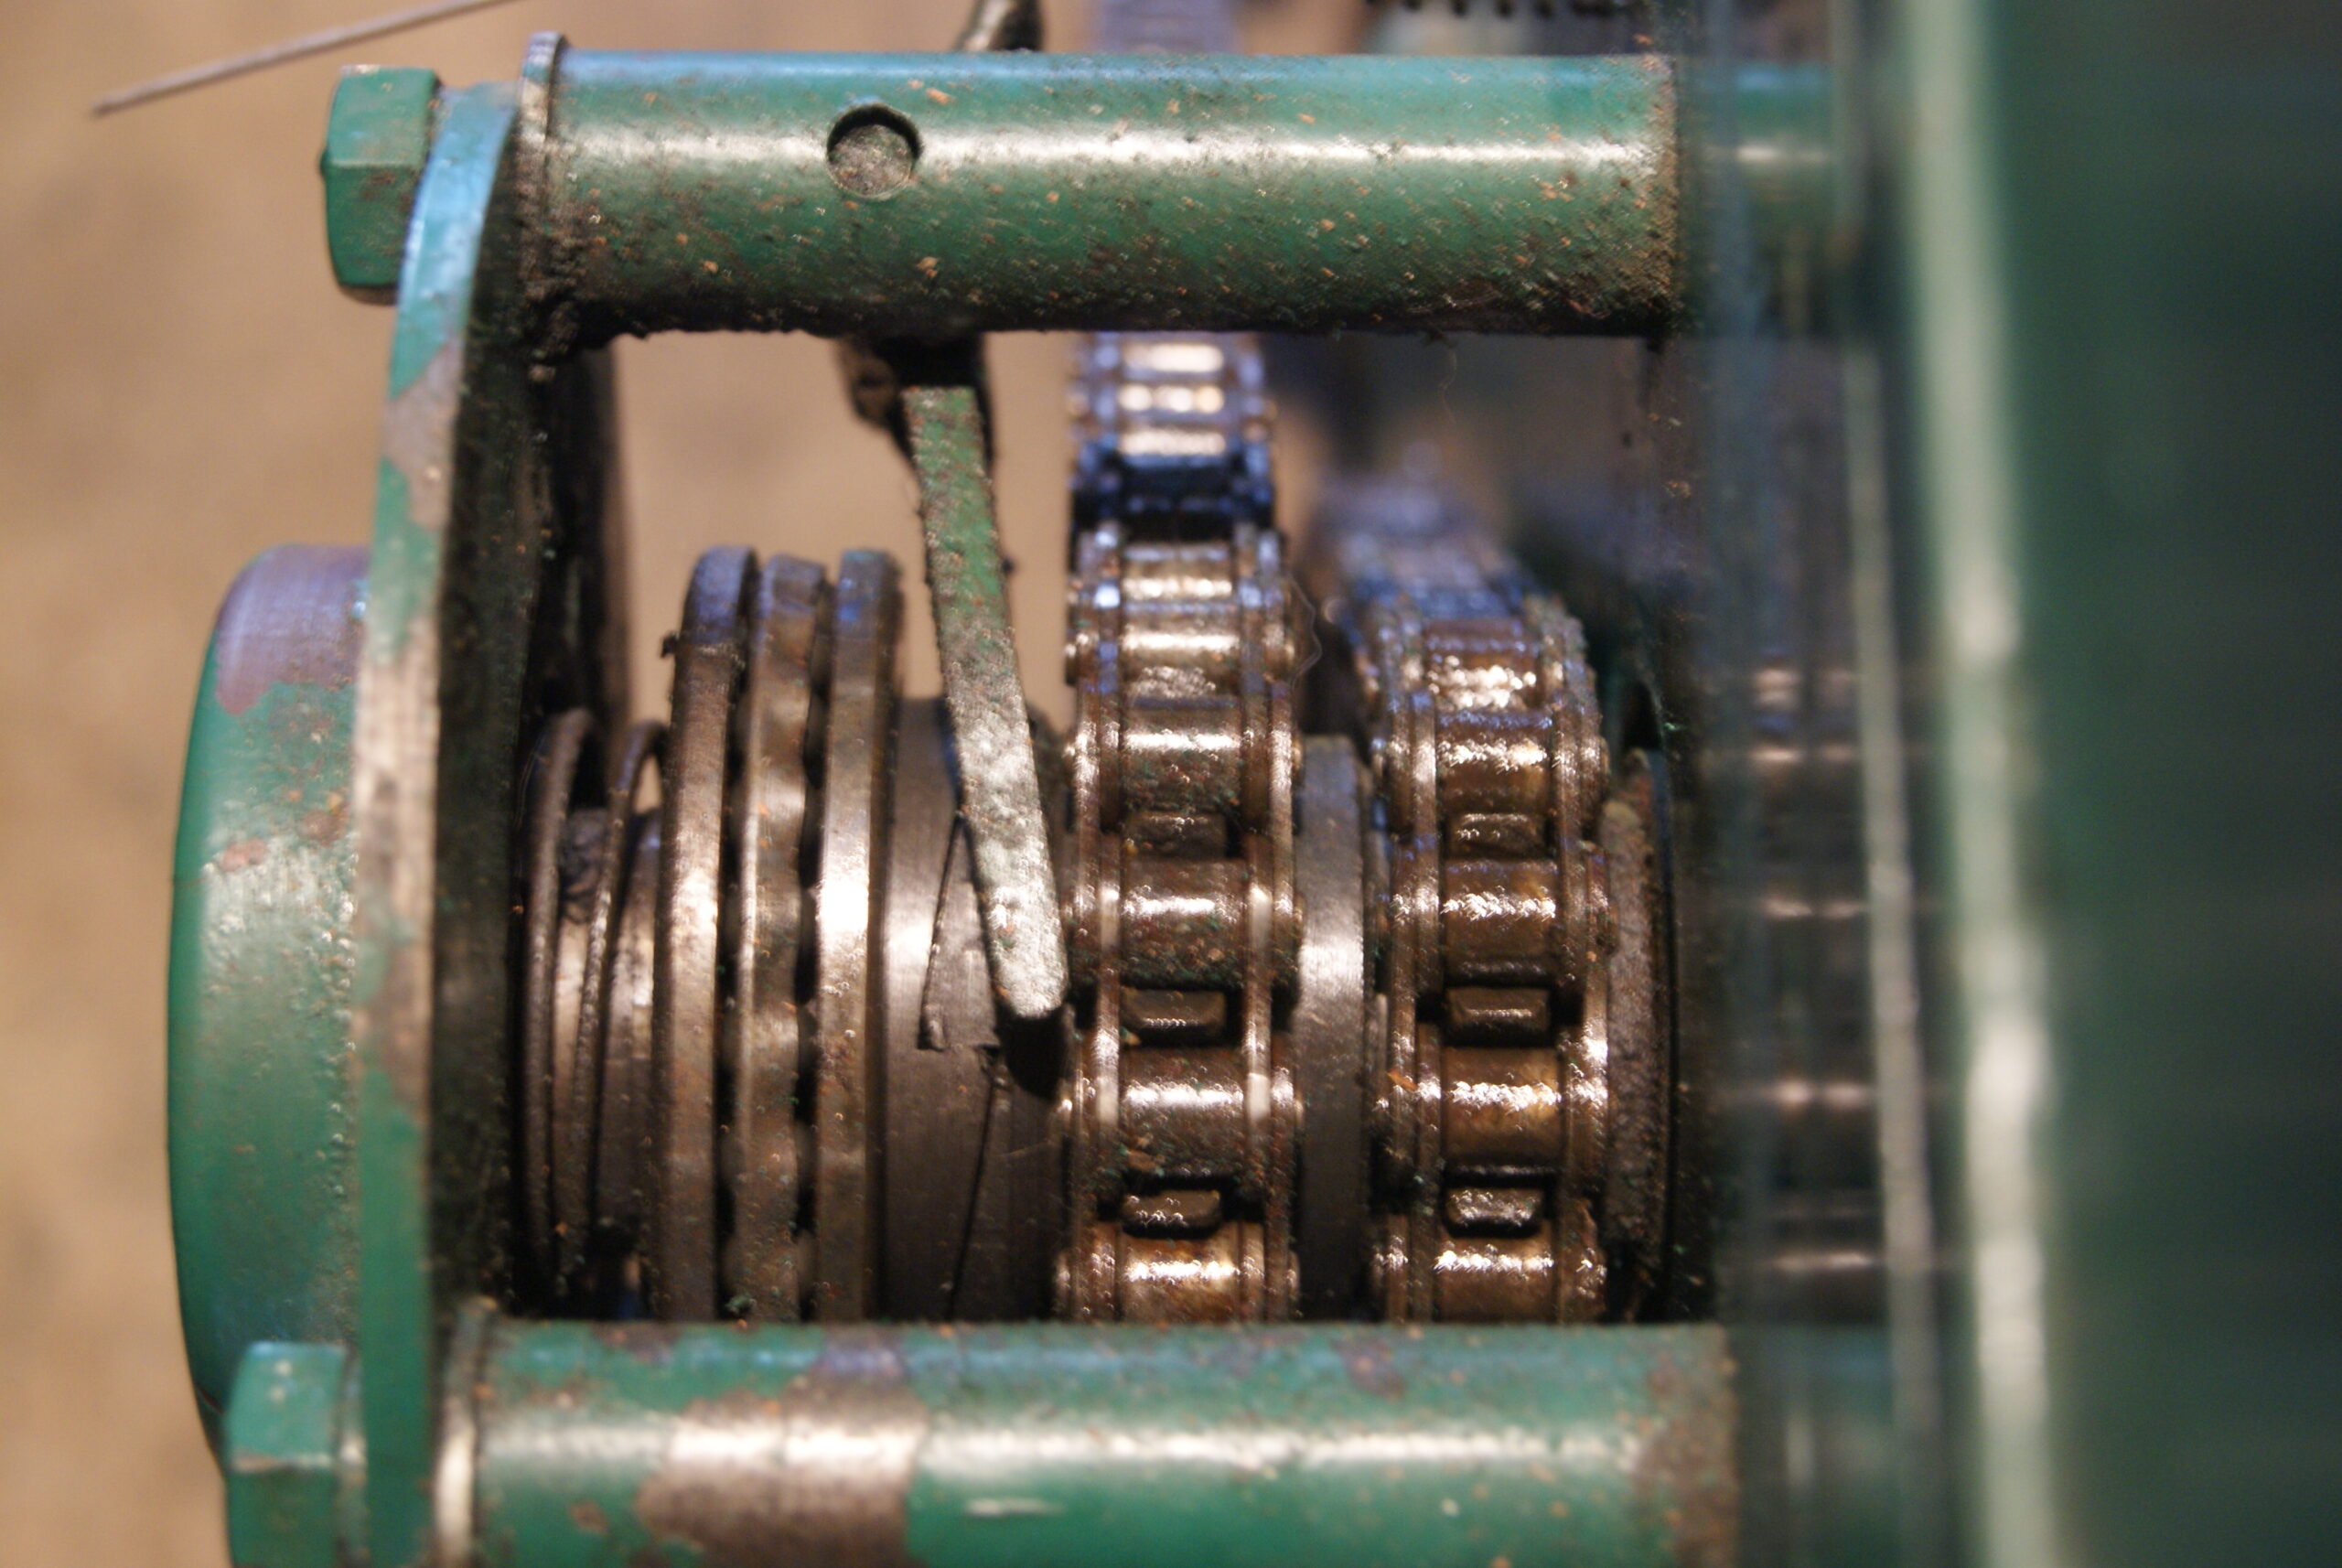
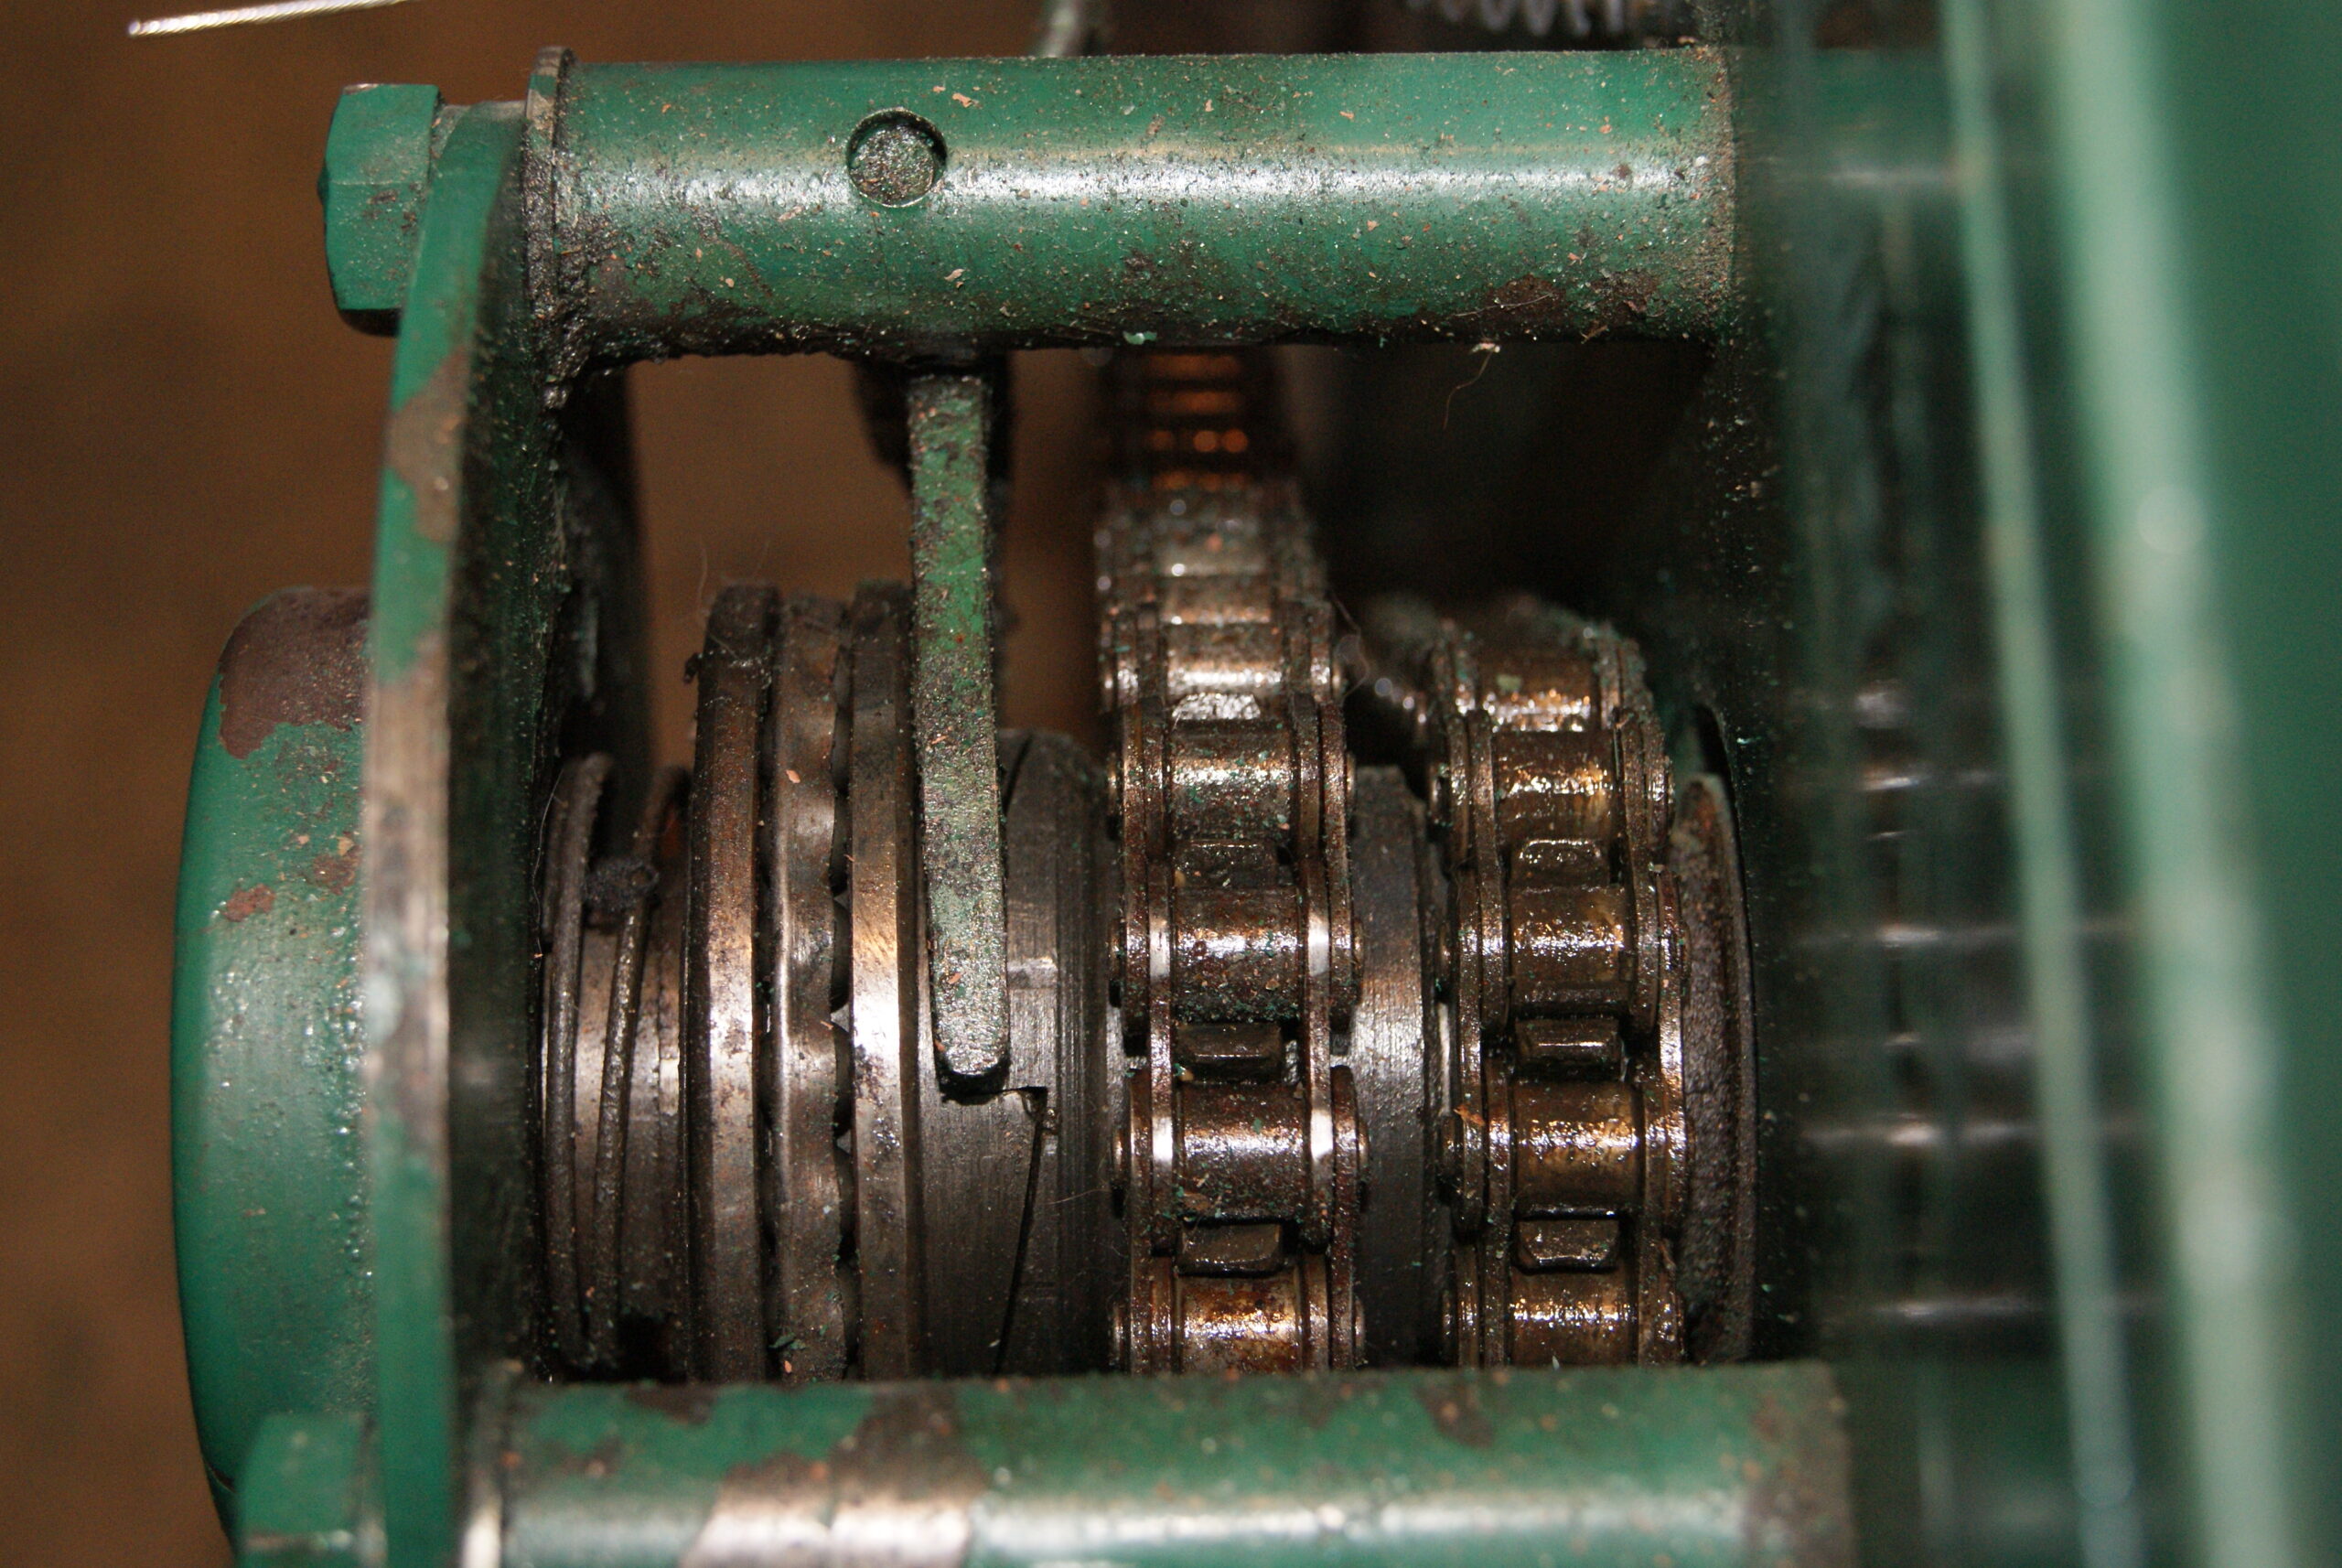
I started off with the chain guard; as I thought, an easy 5-minute job so I’ll tackle it before taking Mrs. Geoff down the shops. First problem was that I noticed the cutter clutch cable had stretched and was allowing the operating fork to rub on the roller drive chain, so a quick adjustment sorted that out but it is quite a fine adjustment.
Next was the rubber sealing strip (AKA the Mk1 GT6 overrider rubber). A sparing application of spray glue on the inside face was enough to secure it and it took just under 2 metres of rubber strip to go all around it. Once it dried I thought a quick trial fitting was in order and then the trouble started!
The guard is secured by three countersunk, socket head nuts which tighten onto a tube welded inside the guard. The tubes fitted over the three 5/16″ BSF studs which were fixed through the mower side frame and that’s when my luck ran out. Two of the nuts started on the threads nicely, then the third just would not catch; it had to be the lowest one that you couldn’t get to easily, didn’t it? Obviously the three nuts used to work but the mower came to me with no rubber seal, so it was the thickness of the seal that was throwing it out and making the lower stud too short for the nut to catch on.
Half an hour later, having re-arranged the garage so I could tip the mower backwards, I was lying on the floor cursing all things that came into view when finally the locking nut on the back of the stud started to move. Winding it backwards and forwards with plenty of WD40 applied I got it to the end of the threaded portion, so I turned my attention to the other end. The stud had been threaded through a tapped hole in the side frame and so two nuts locked against each other on the exposed thread on the chain side gave me something to put the spanner on; never be tempted to use Stilsons or grips on a thread or you’ll be replacing it in short order! The nuts did the trick, starting with a small amount of movement and working it backwards and forwards to get the muck and rust out and to let the oil in. I managed to get another 1/4″ on the length of the stud which was enough to start the nut on. Phew!
Mrs. Geoff was not happy by this time so I had to dip into my pocket to buy her a dinner. Why do we do this to ourselves?
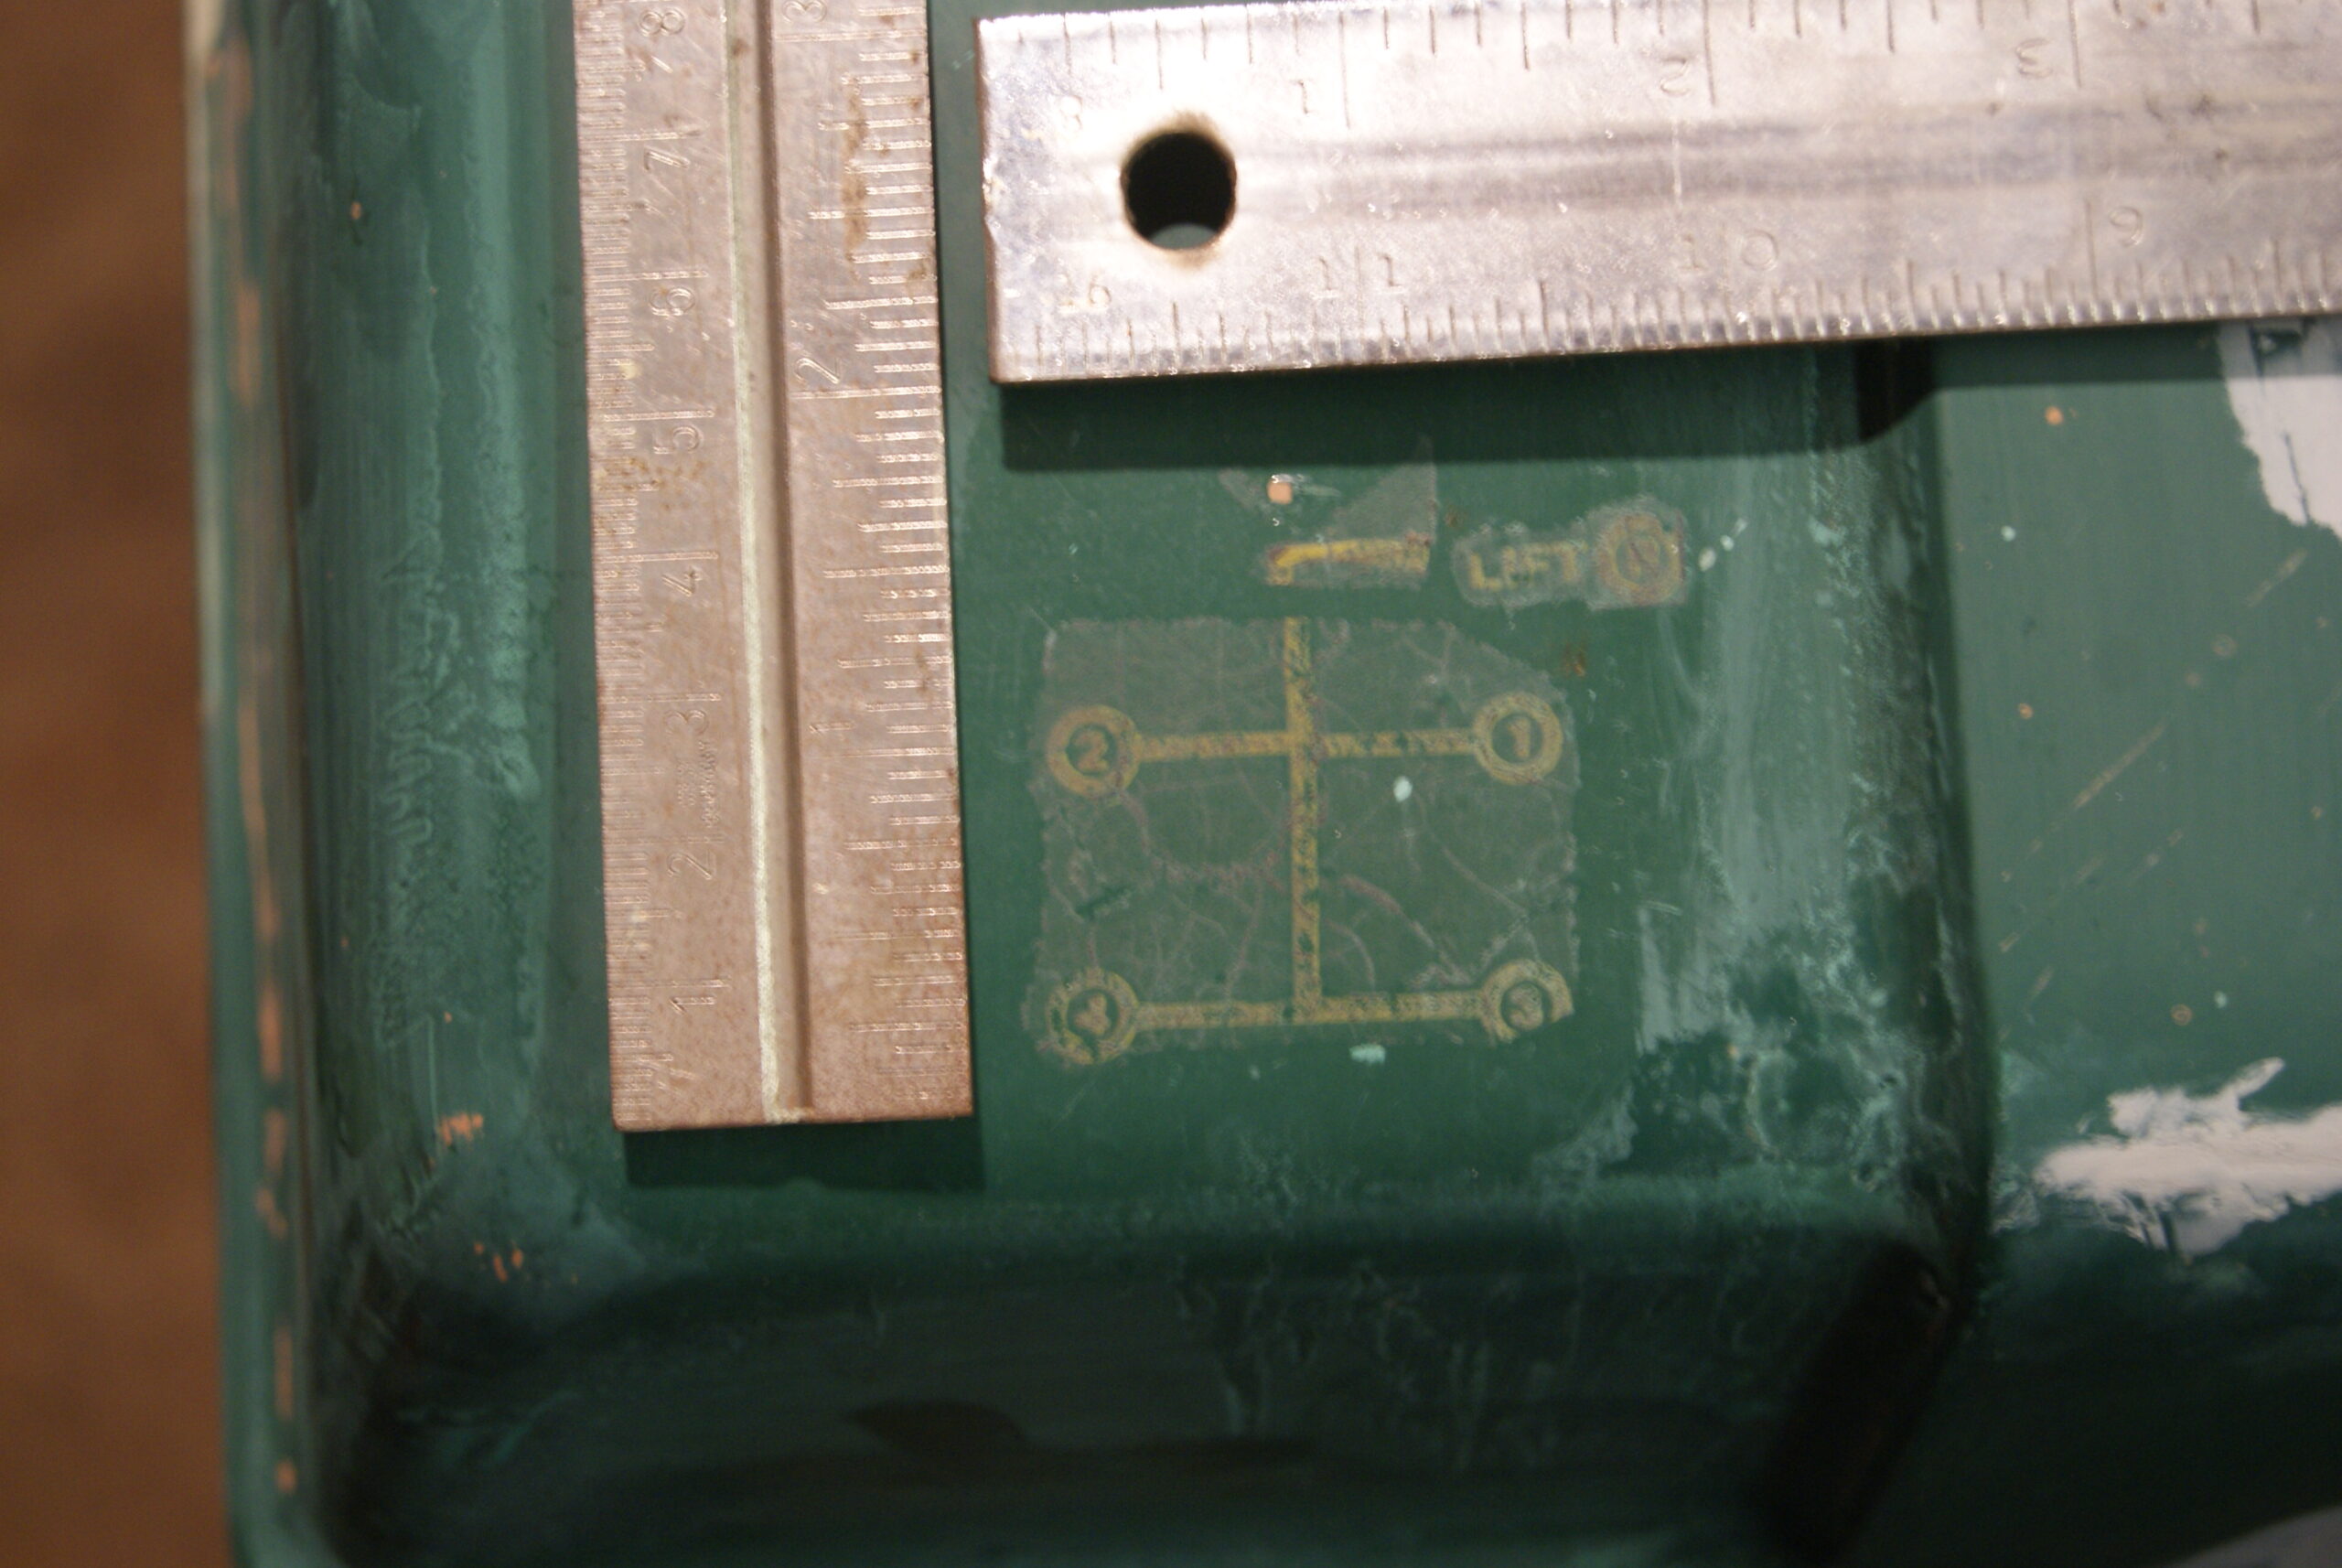
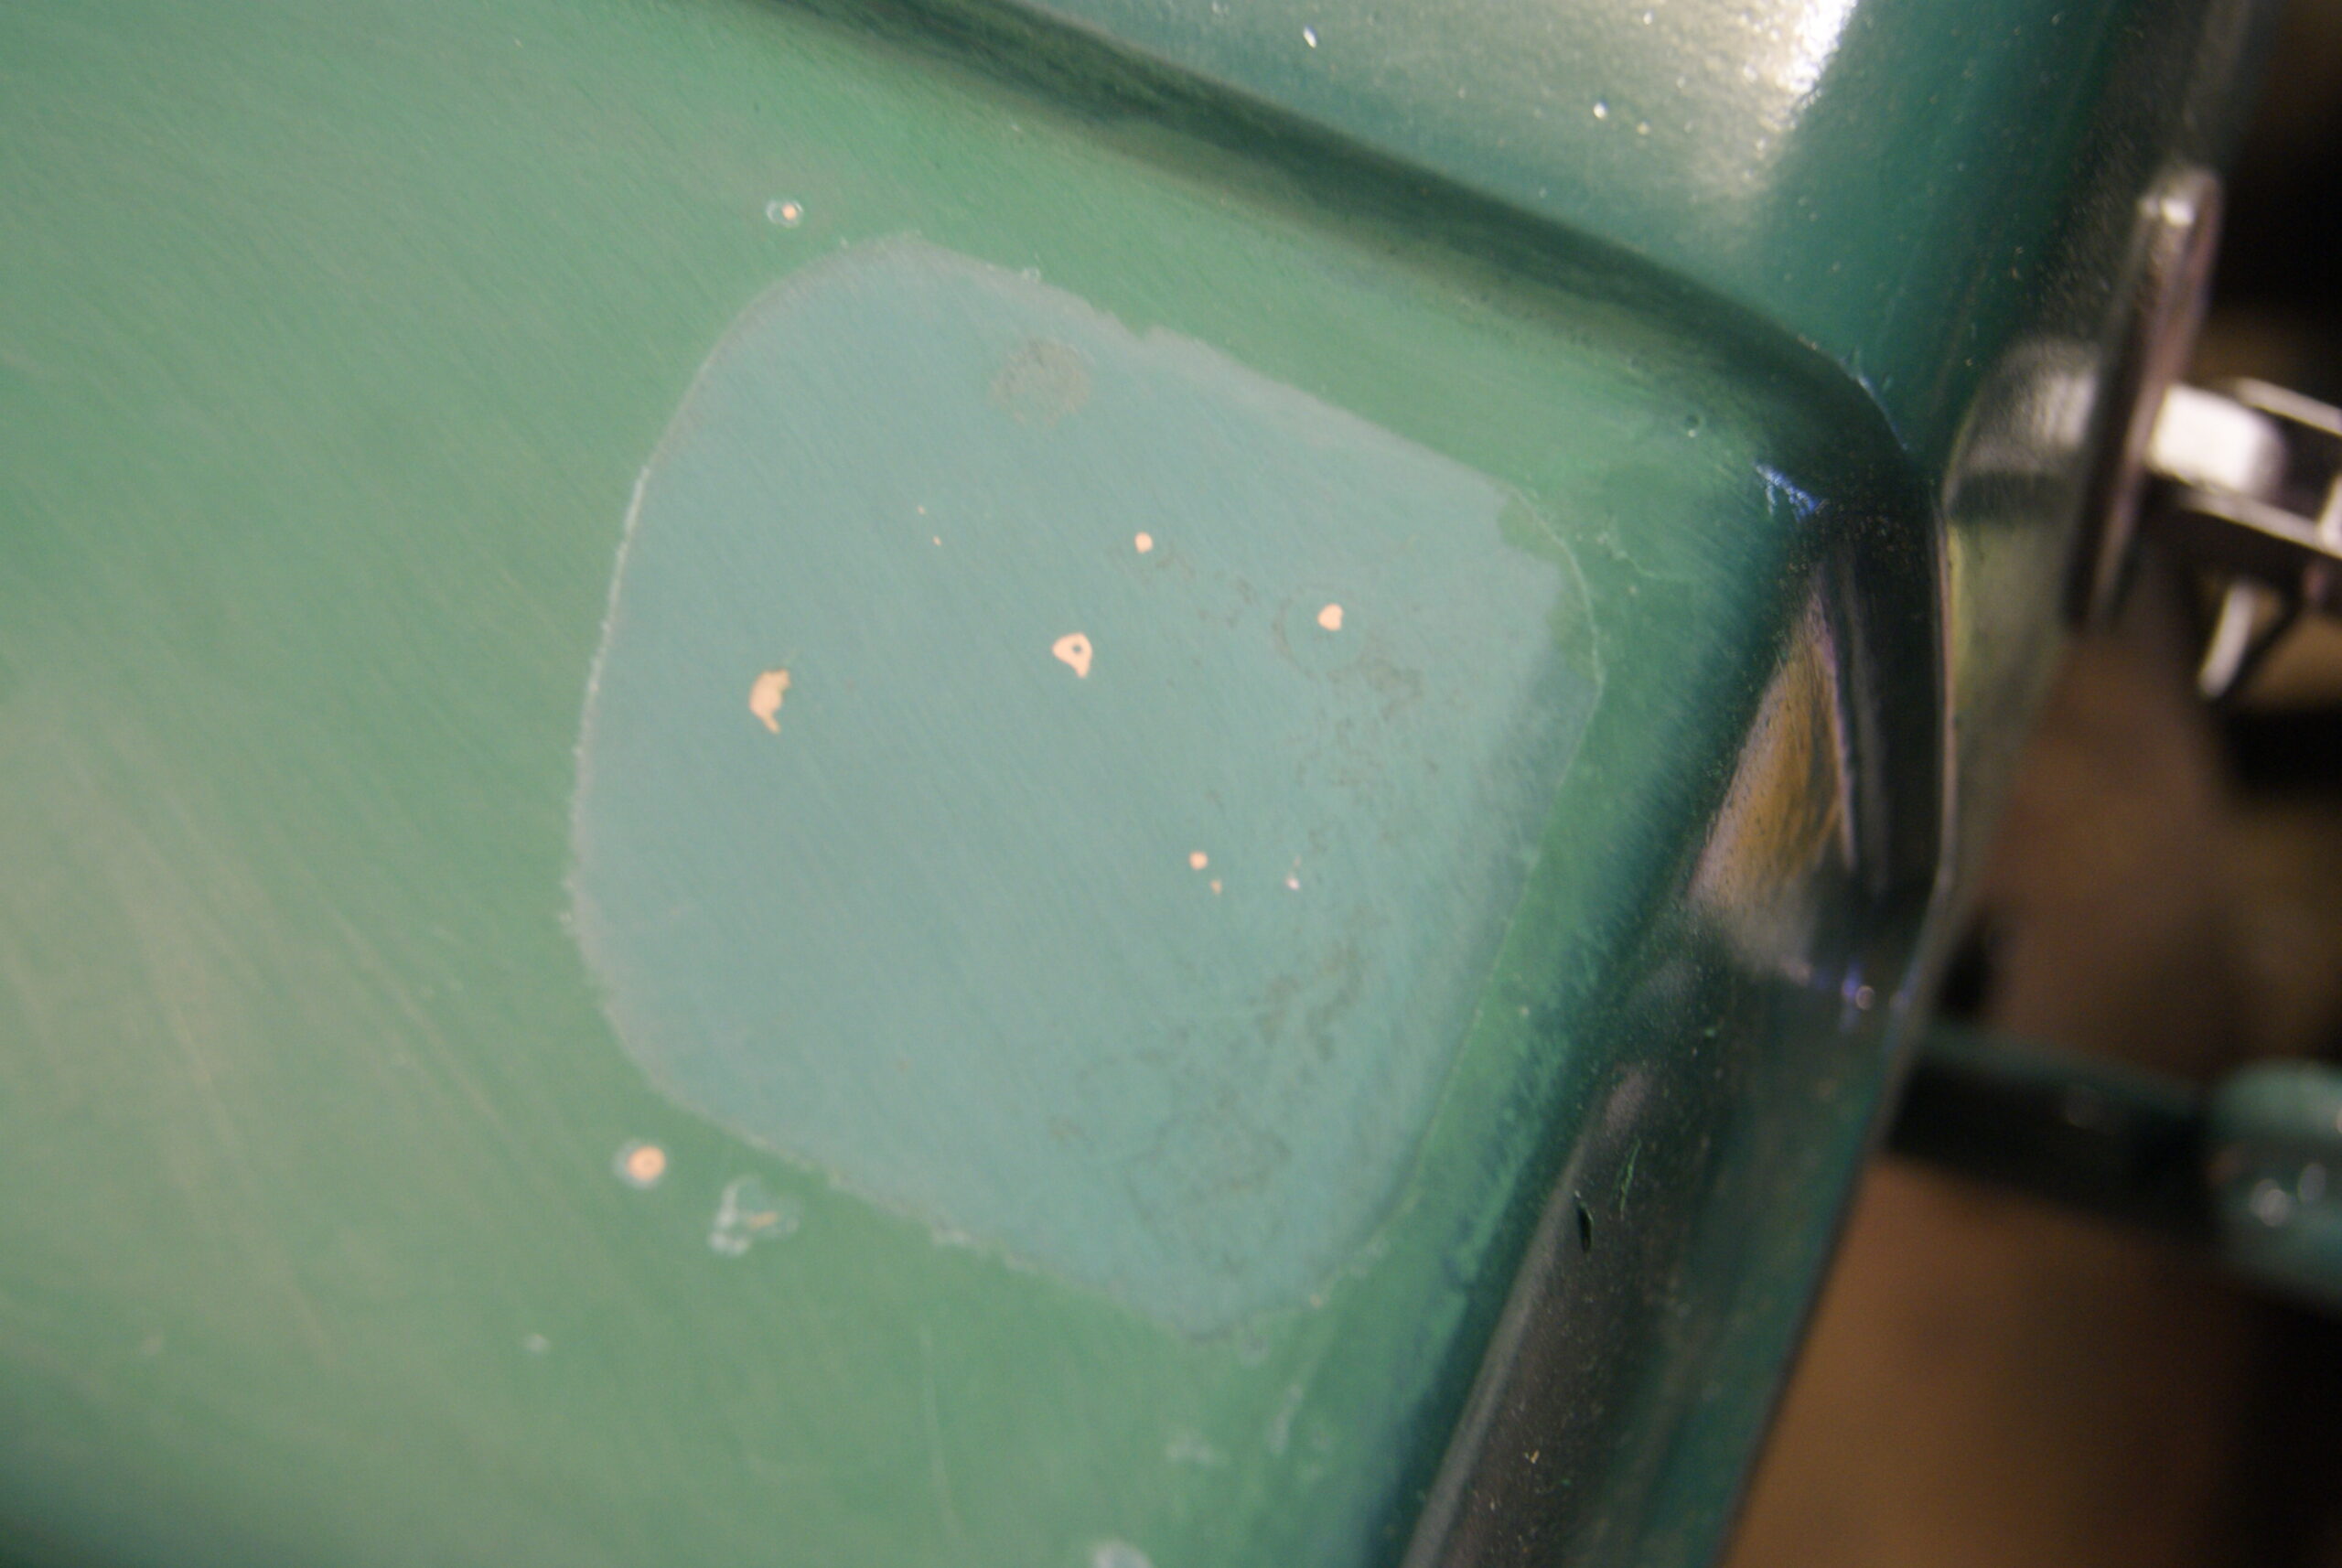
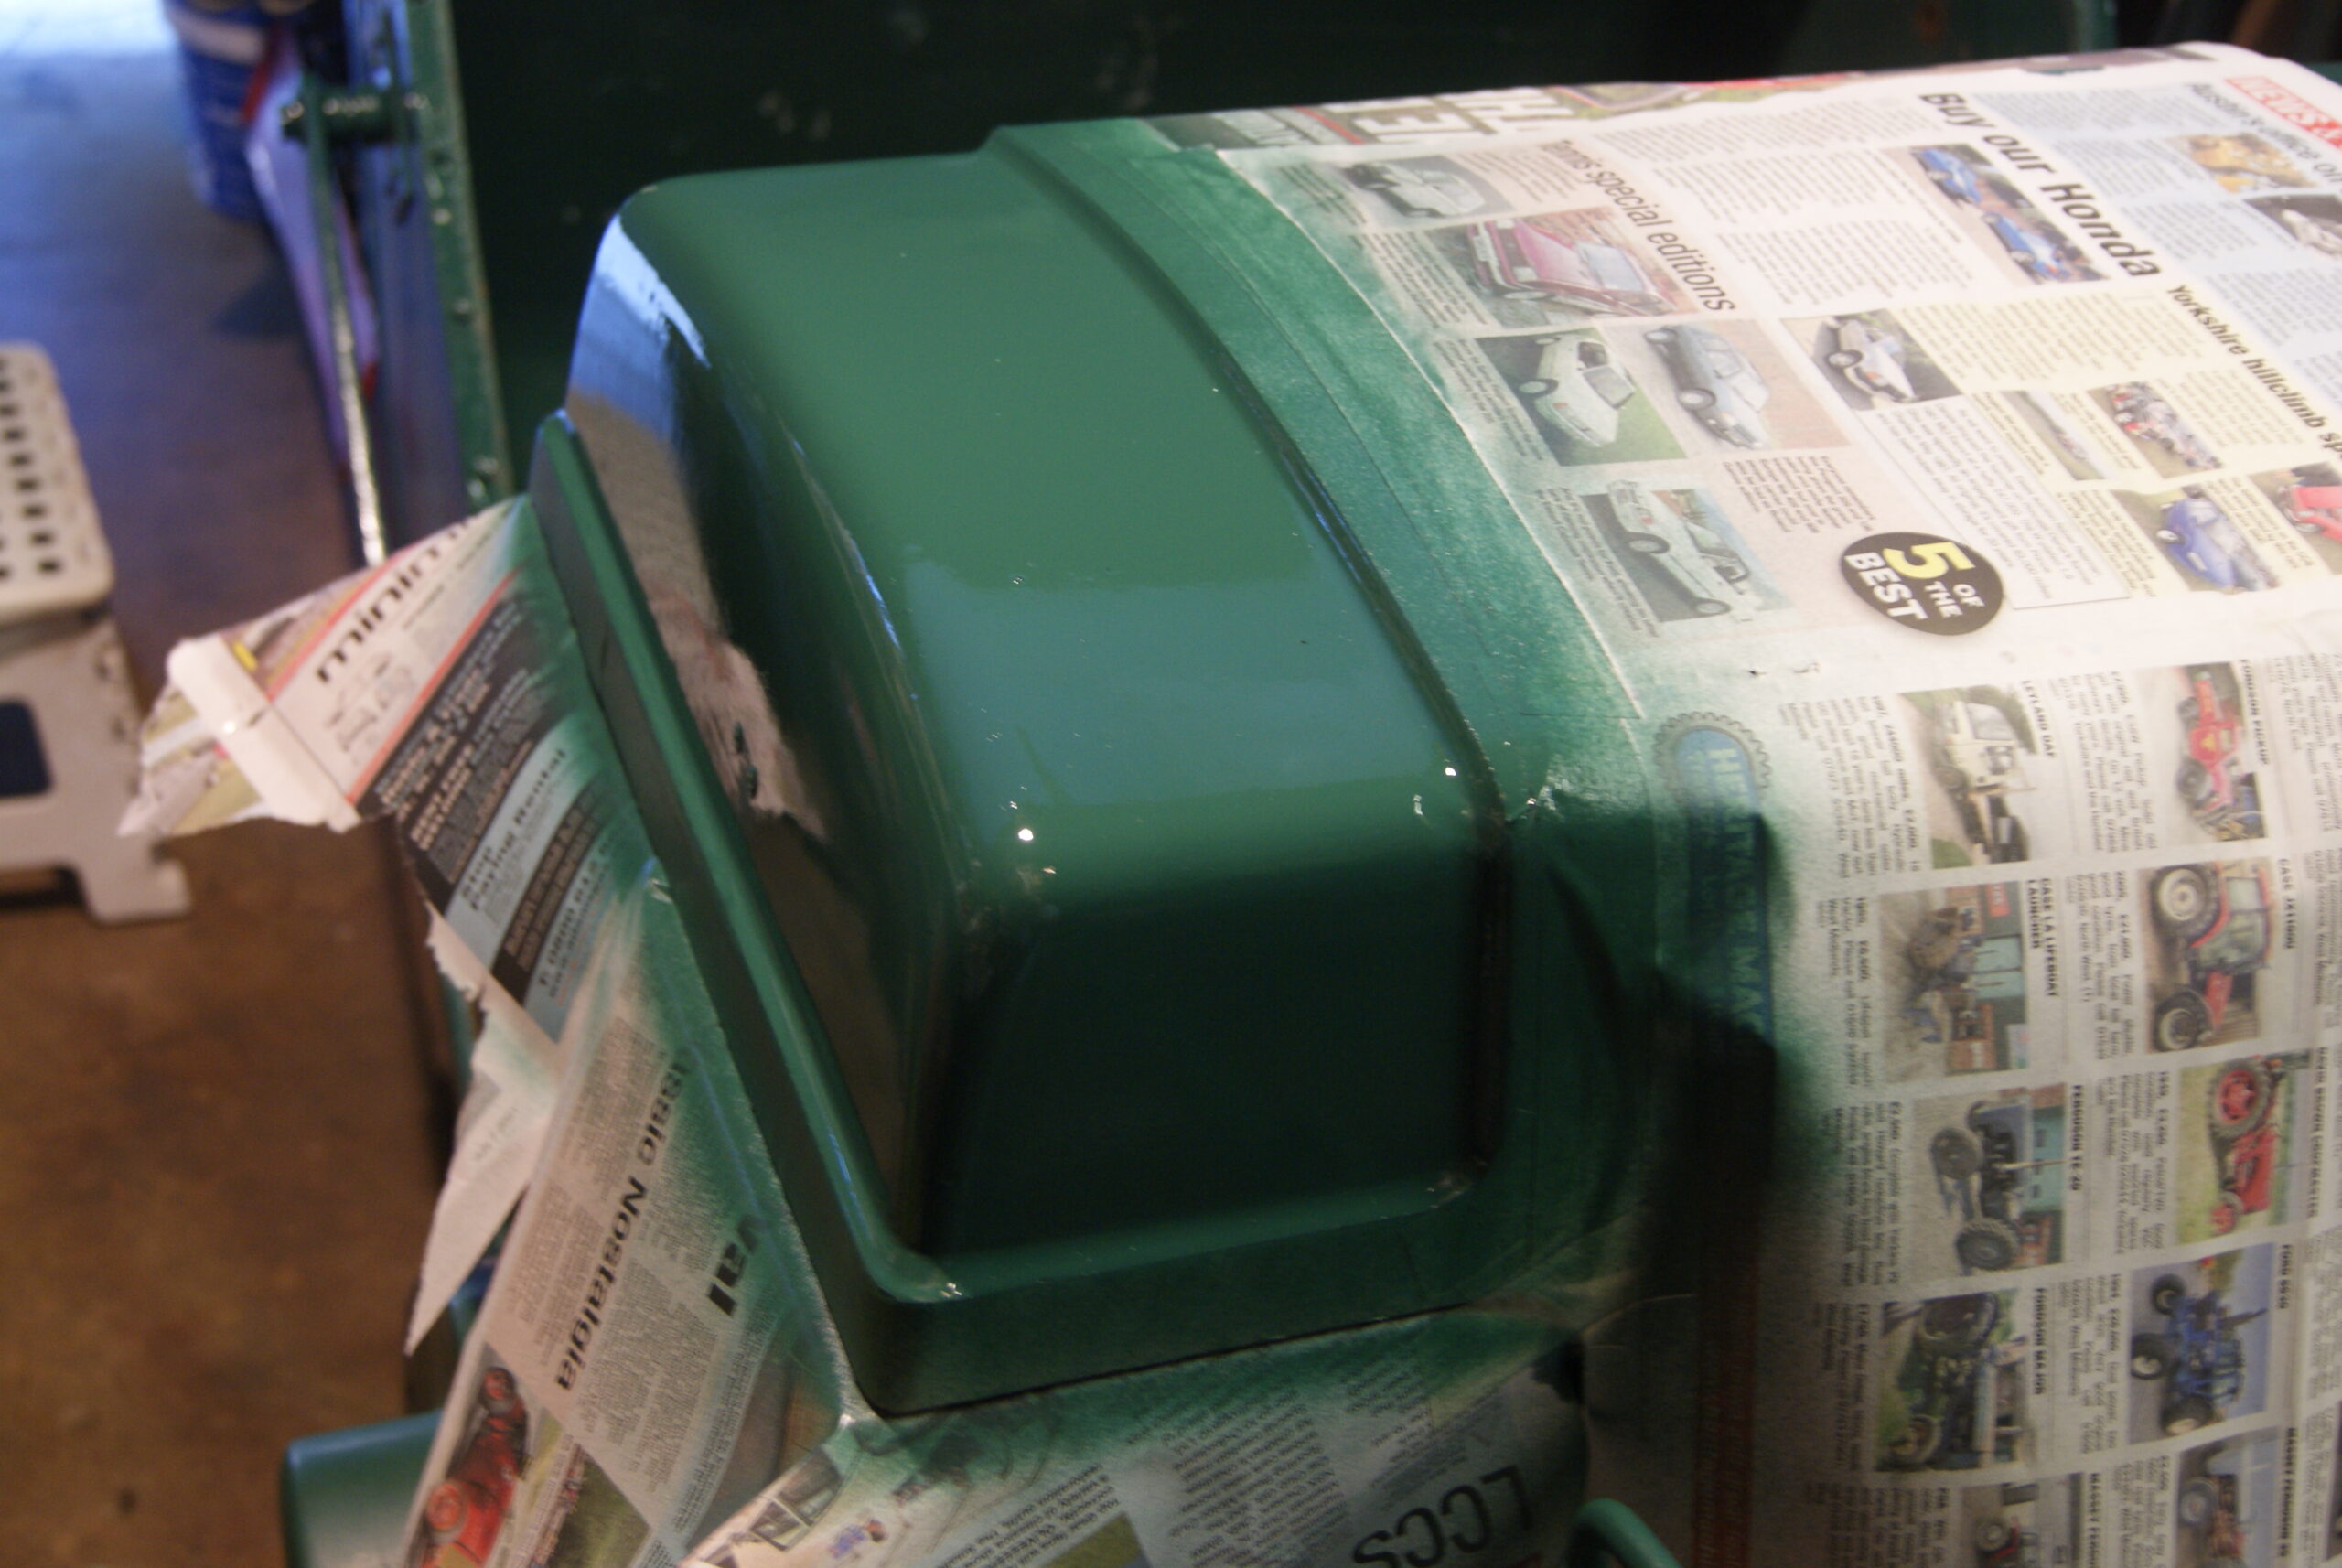
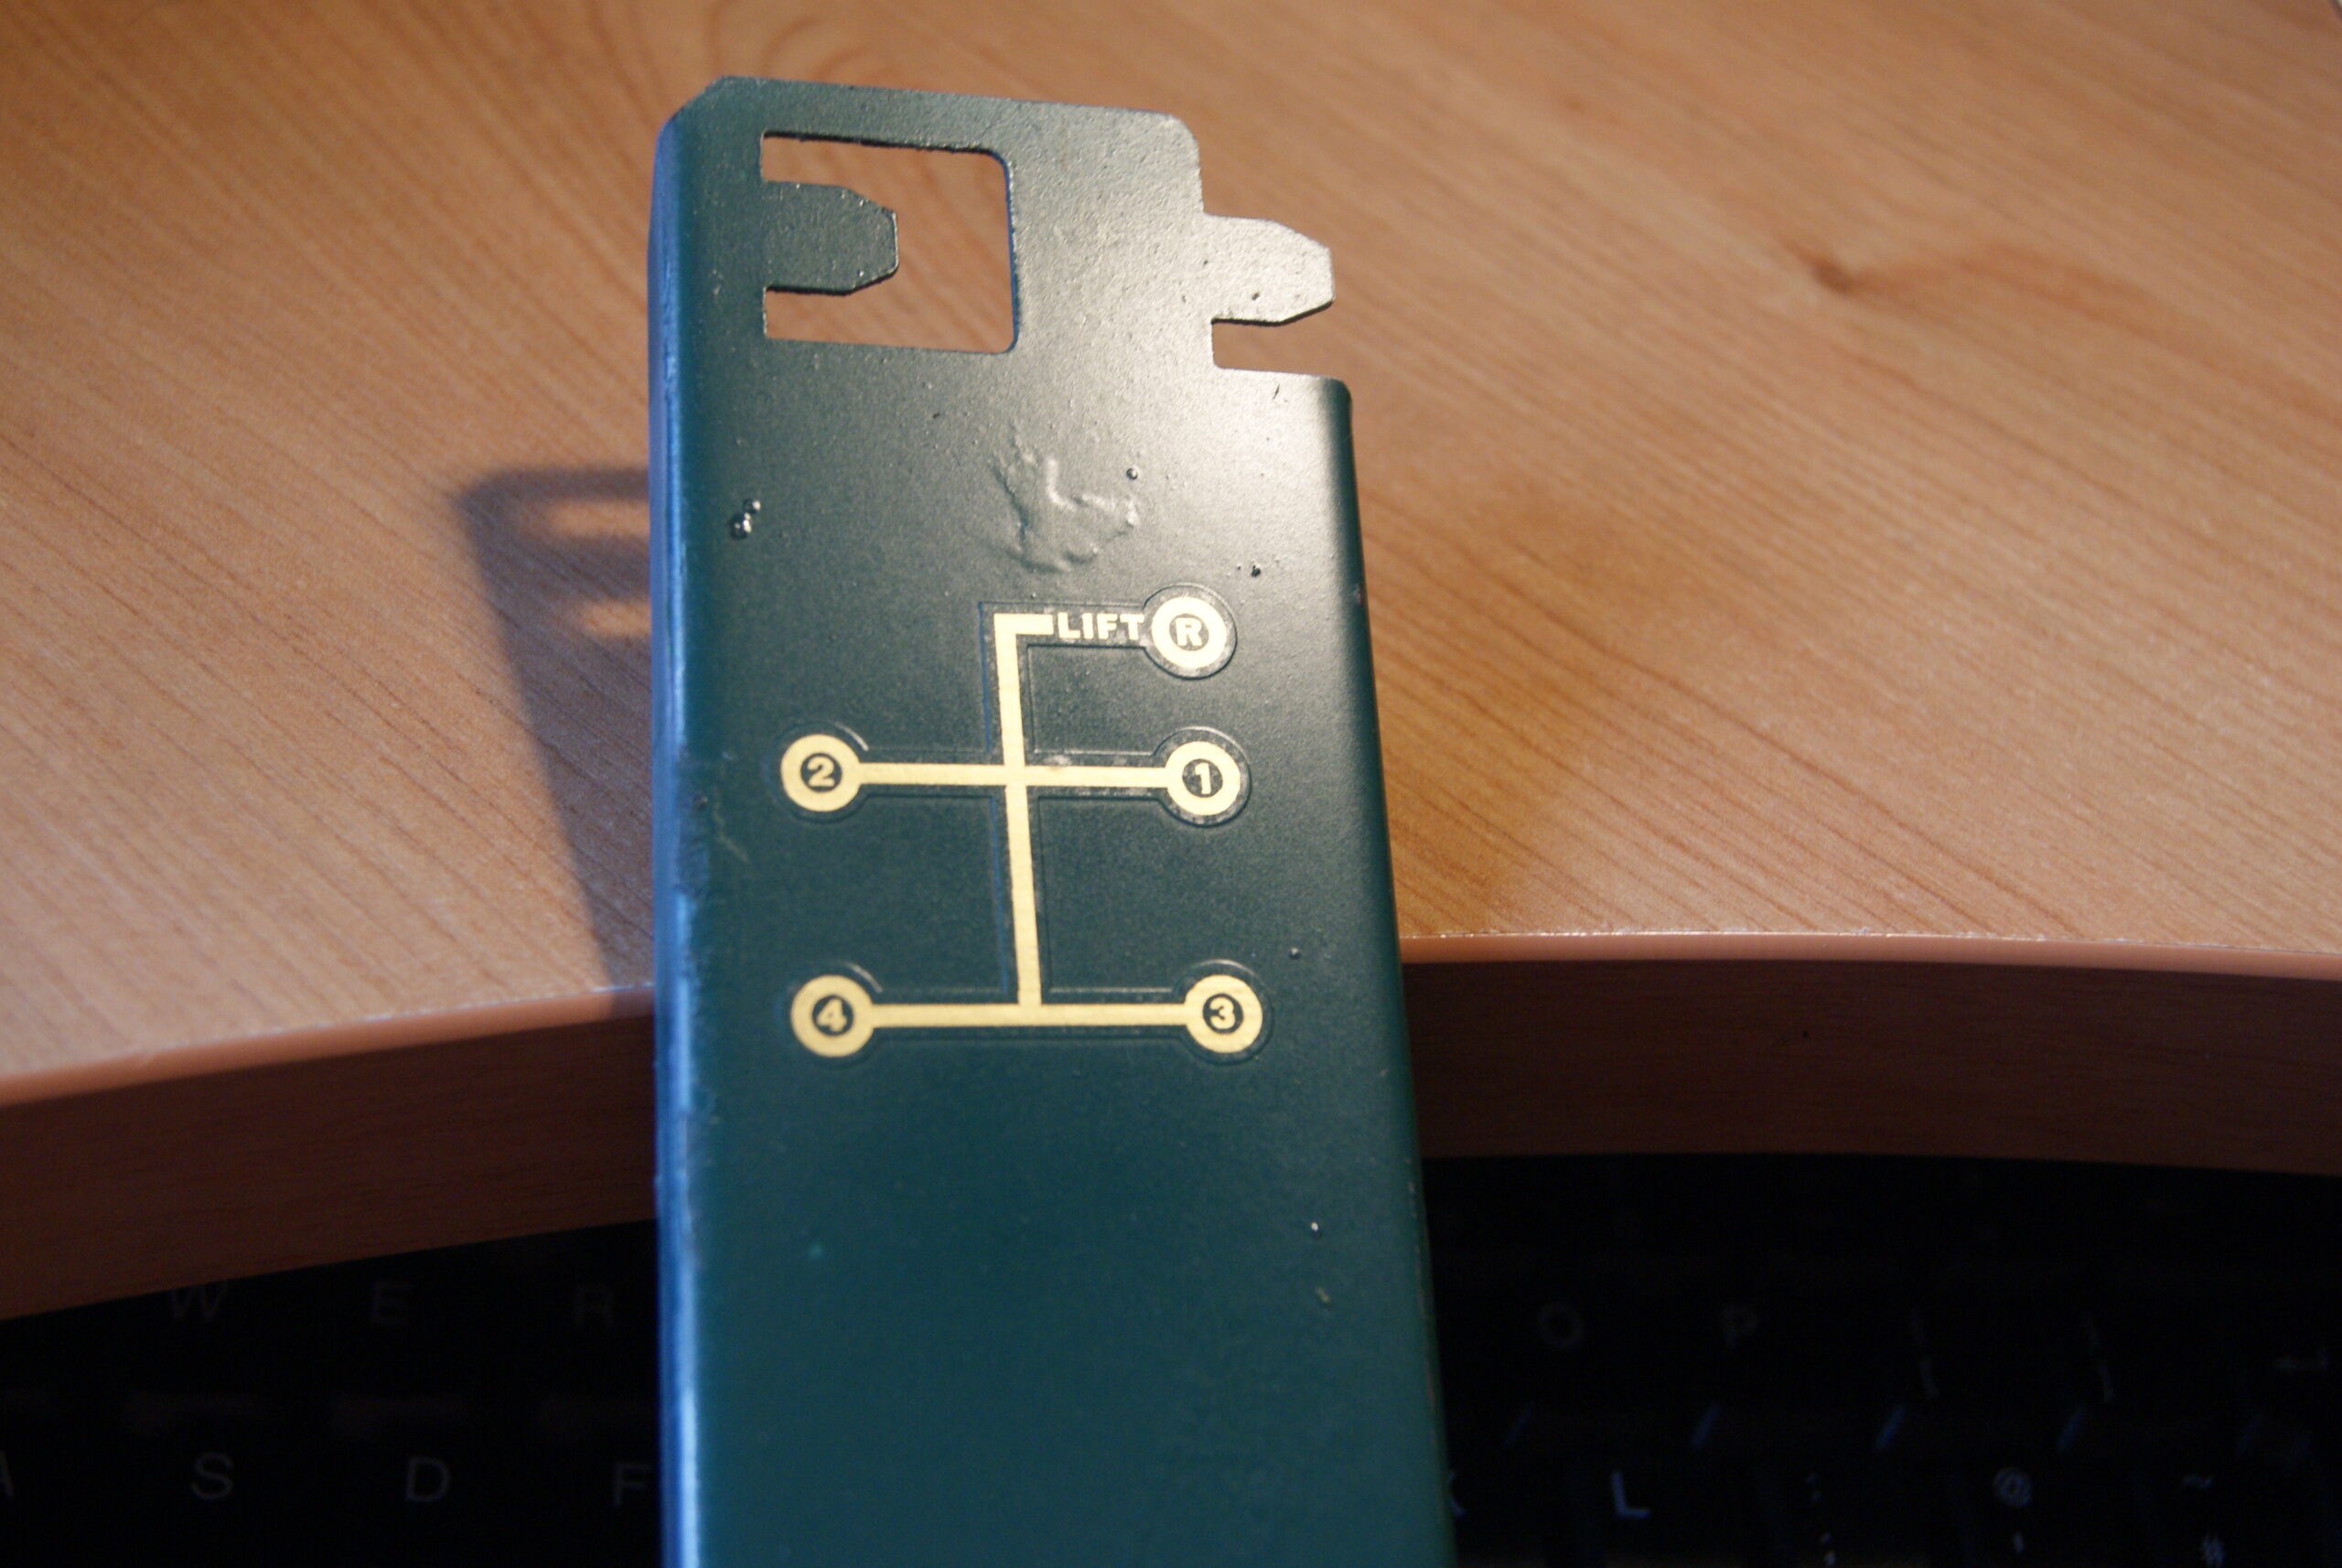
The other job I was putting off I tackled this week as well. The fibreglass lid has a small decal on the left hand side to show the operator the gear layout. The more I looked at it the more I convinced myself that it was a later addition, probably added after the re-paint with the thick paint. Talking to Roy Allett, he told me that Reliant used to change the position of reverse gear on a regular basis so they used to have to keep modifying the gear pattern decal to match the gearbox. The decal on this machine had evidently been chopped about a bit so it was most likely a later decal modified to match the earlier gearbox. When I painted the lid I masked it off to protect it; OK, I was delaying having to make the decision, but this week I persuaded myself that it had to go as it looked too worn and messy to keep. I masked off the surrounding panels so that I could concentrate on this one, rubbing it down to provide a good key for the new paint and removing the old decal. Whilst doing this I felt justified as four or five orange circles appeared as I rubbed through the transfer- it was that lumpy orange primer again, proving that the decal had been a later addition after the re-paint.
A few coats of Allett Green soon sorted out the last part of the lid so now I’ve just got to wait for it to harden. Ever tried watching paint dry?
Attachments:
August 17, 2022 at 8:33 pm #39753 will-haggleParticipant
I do recognise where thee’s got that ‘un! Down near Pilton”
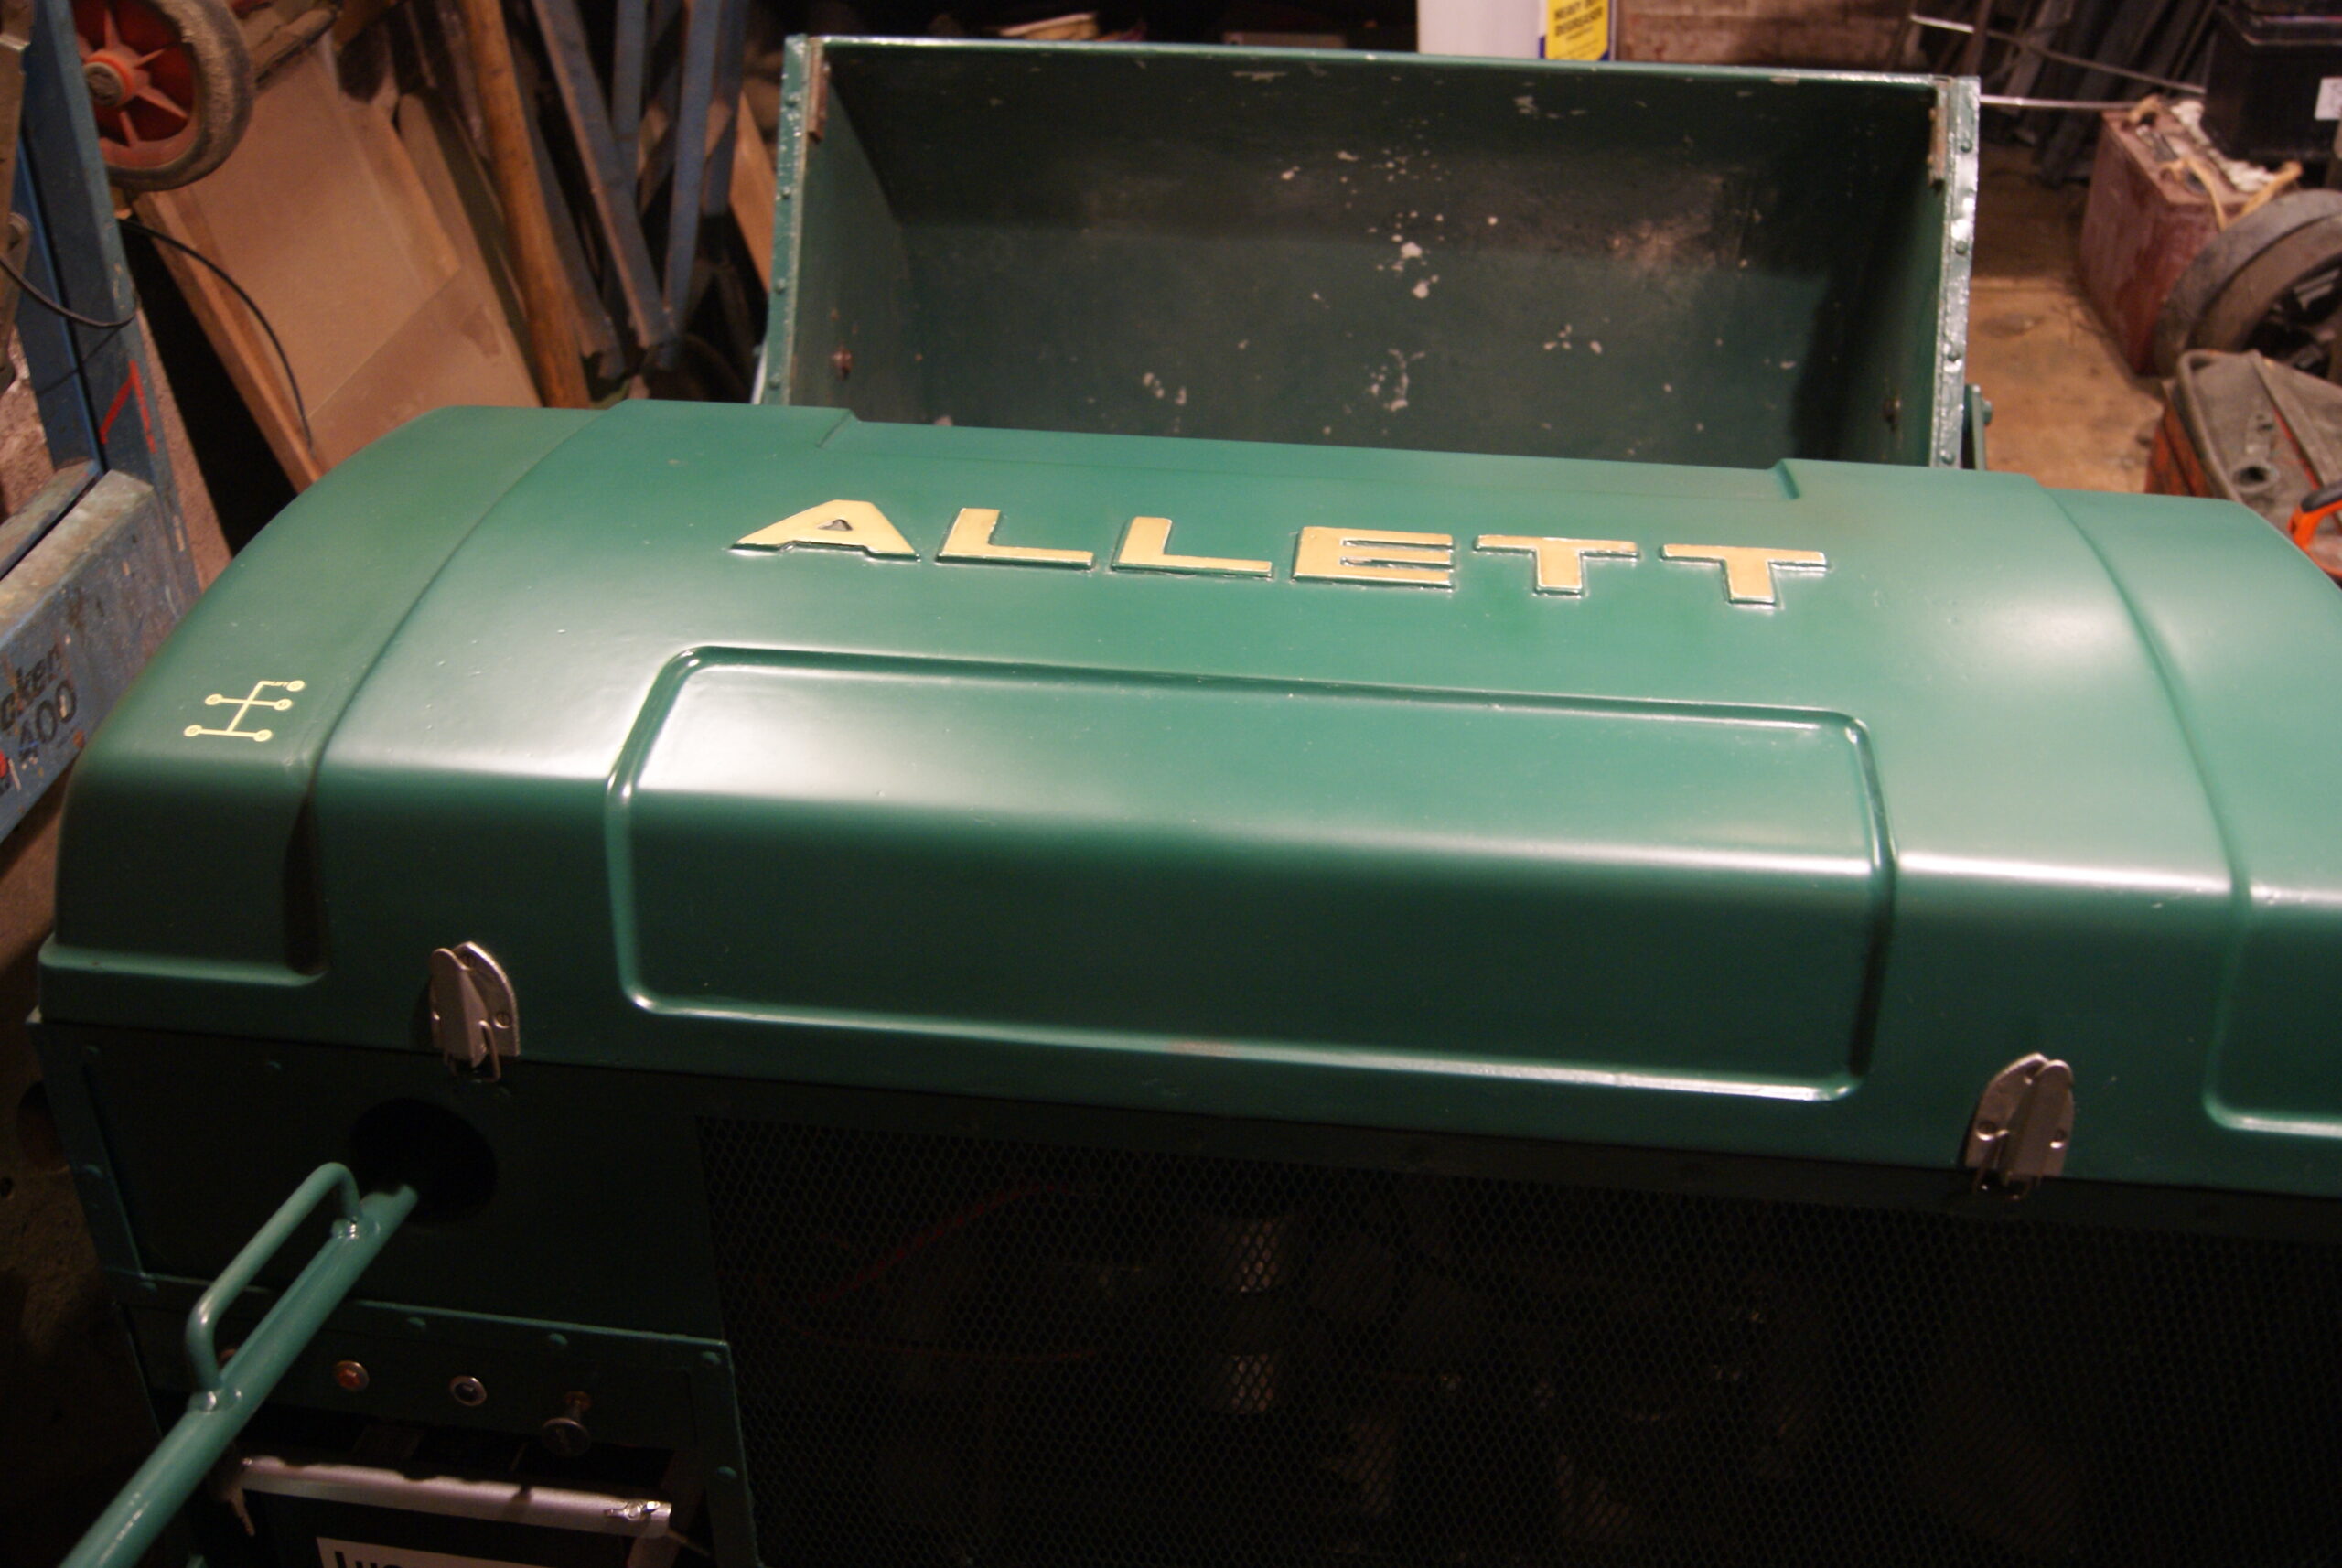
August 26, 2022 at 12:00 pm #39845trusty220KeymasterEven though I haven’t posted anything for a while I’ve been very busy in the background- so busy, in fact, that I will have to post quite a few pictures to get you up to speed.
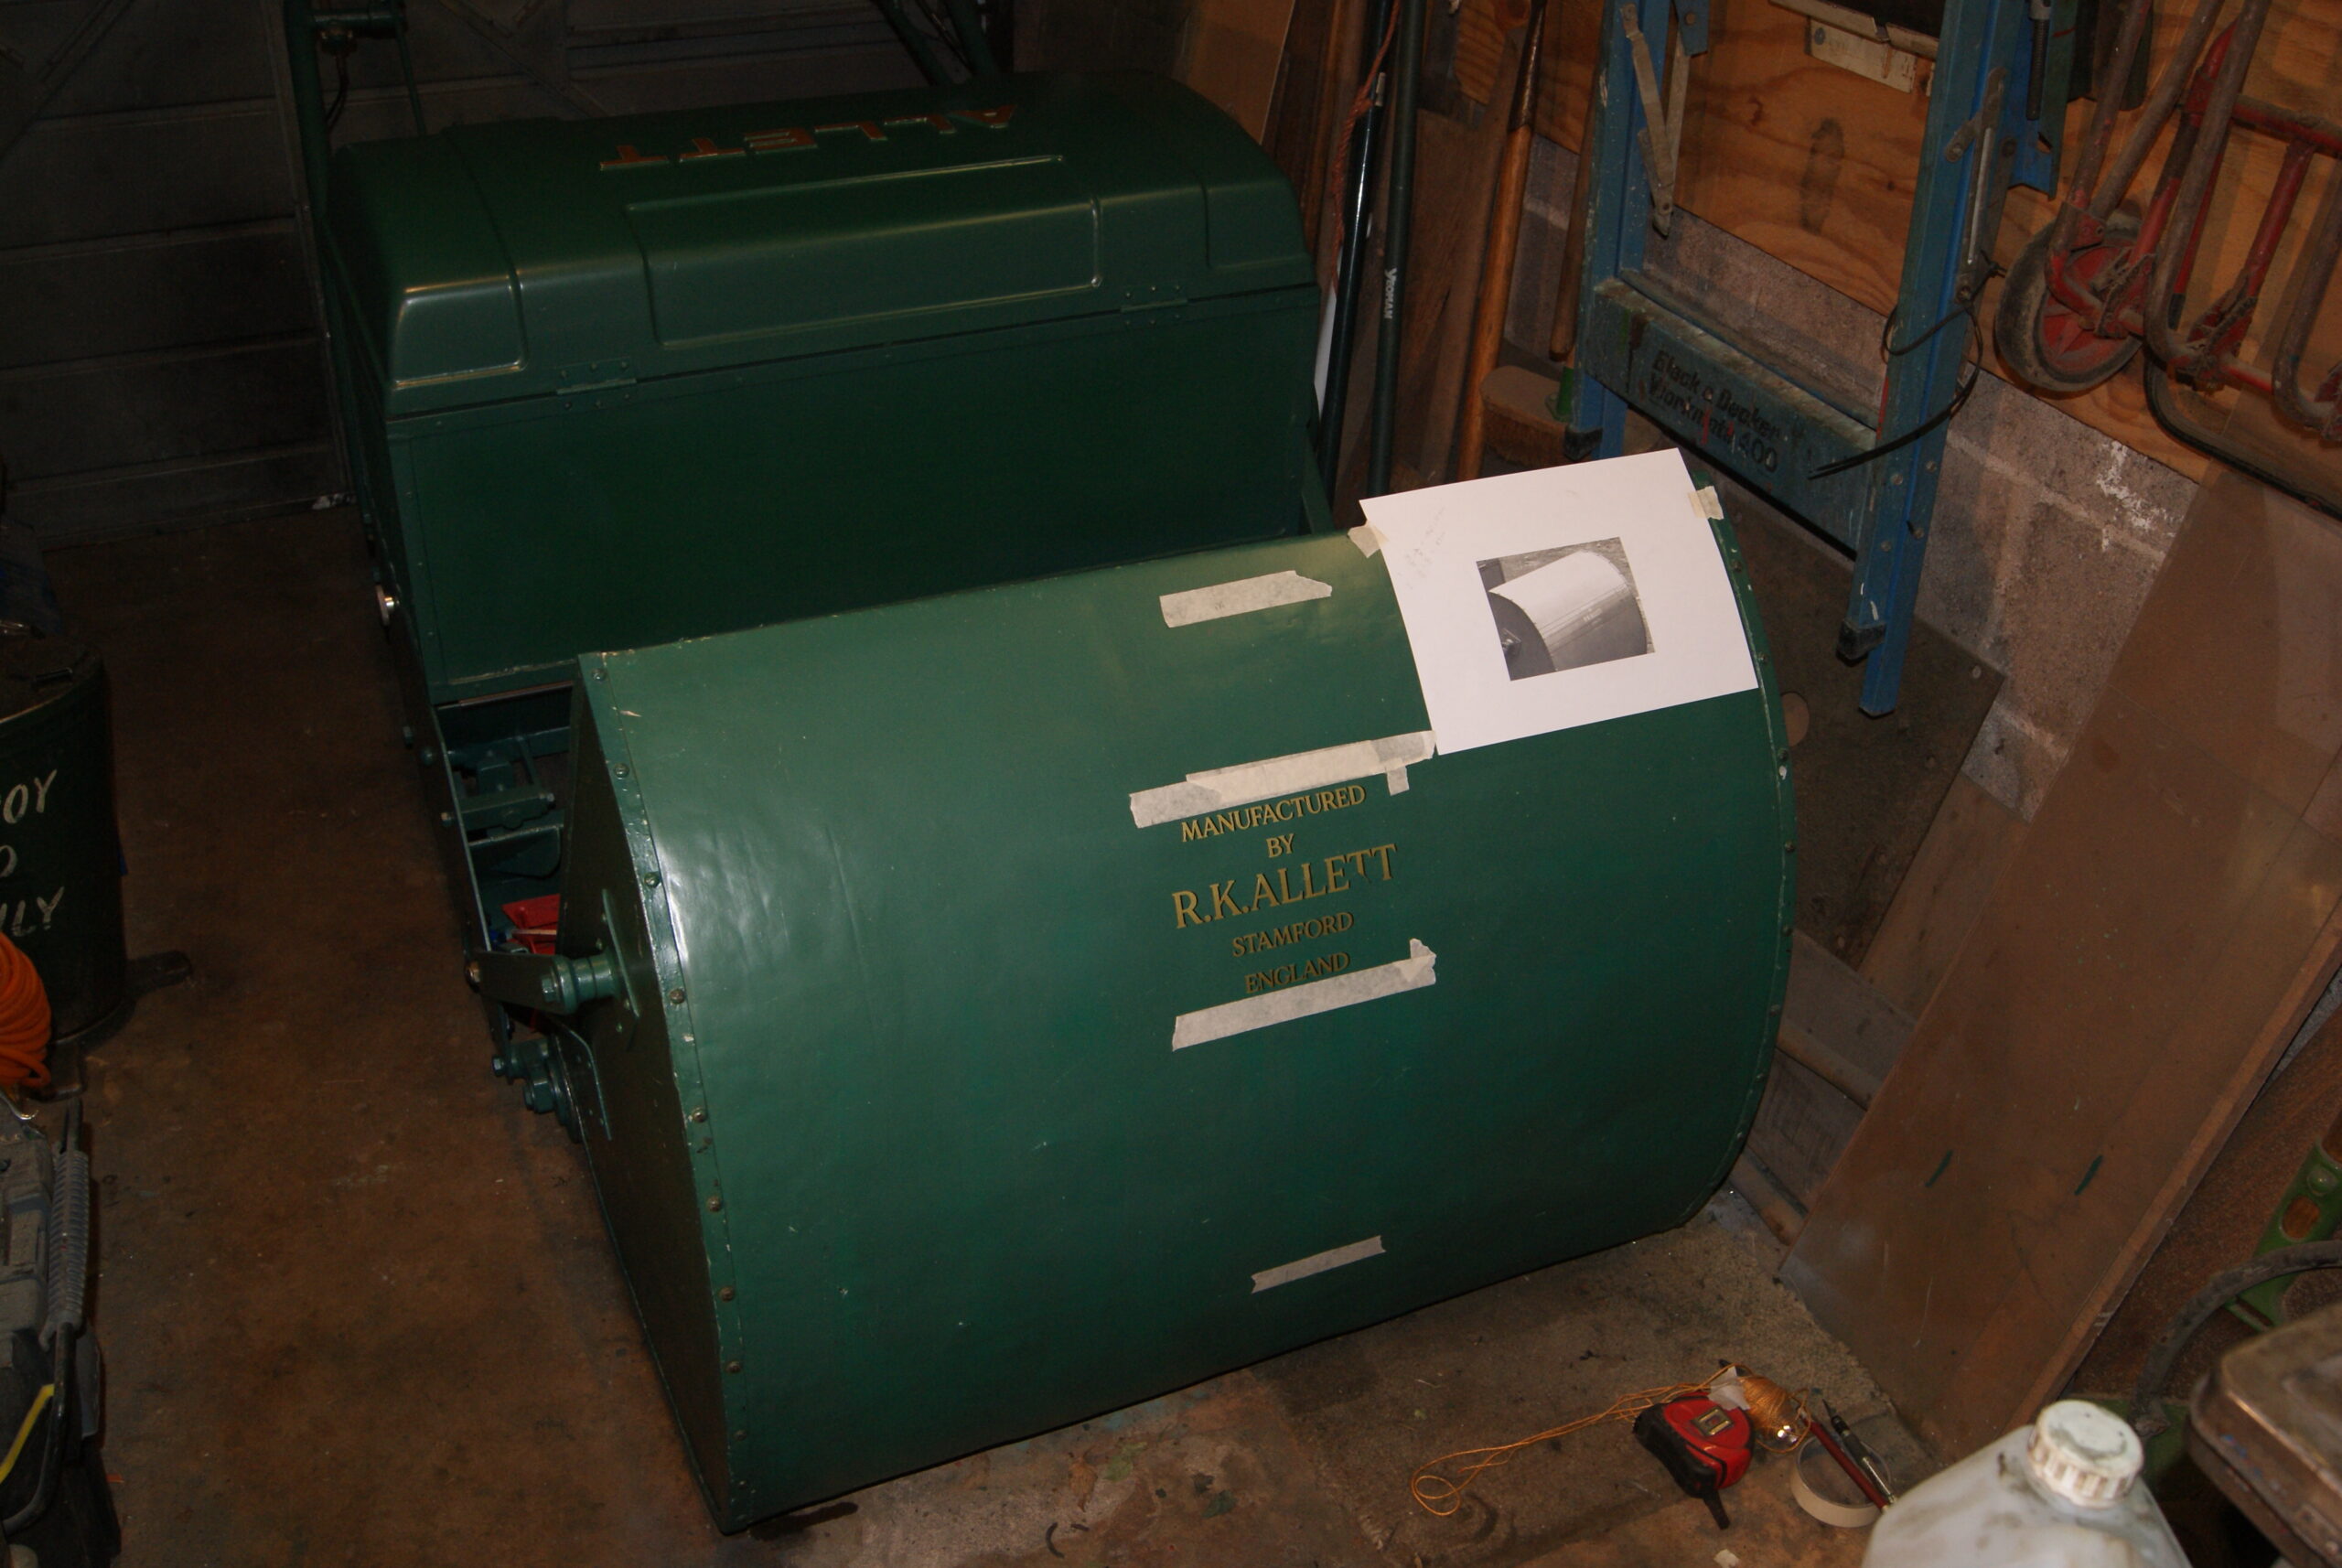
The last time you heard anything from me I had just re-painted the section of the engine cover. That is now finished with the addition of a new decal (courtesy of Classic Transfers) and it really does look better than if I’d left the original. I can sleep better at nights now that I know it was the right decision- sometimes these things can play on your mind when you’re trying to preserve as much of the original as you can.
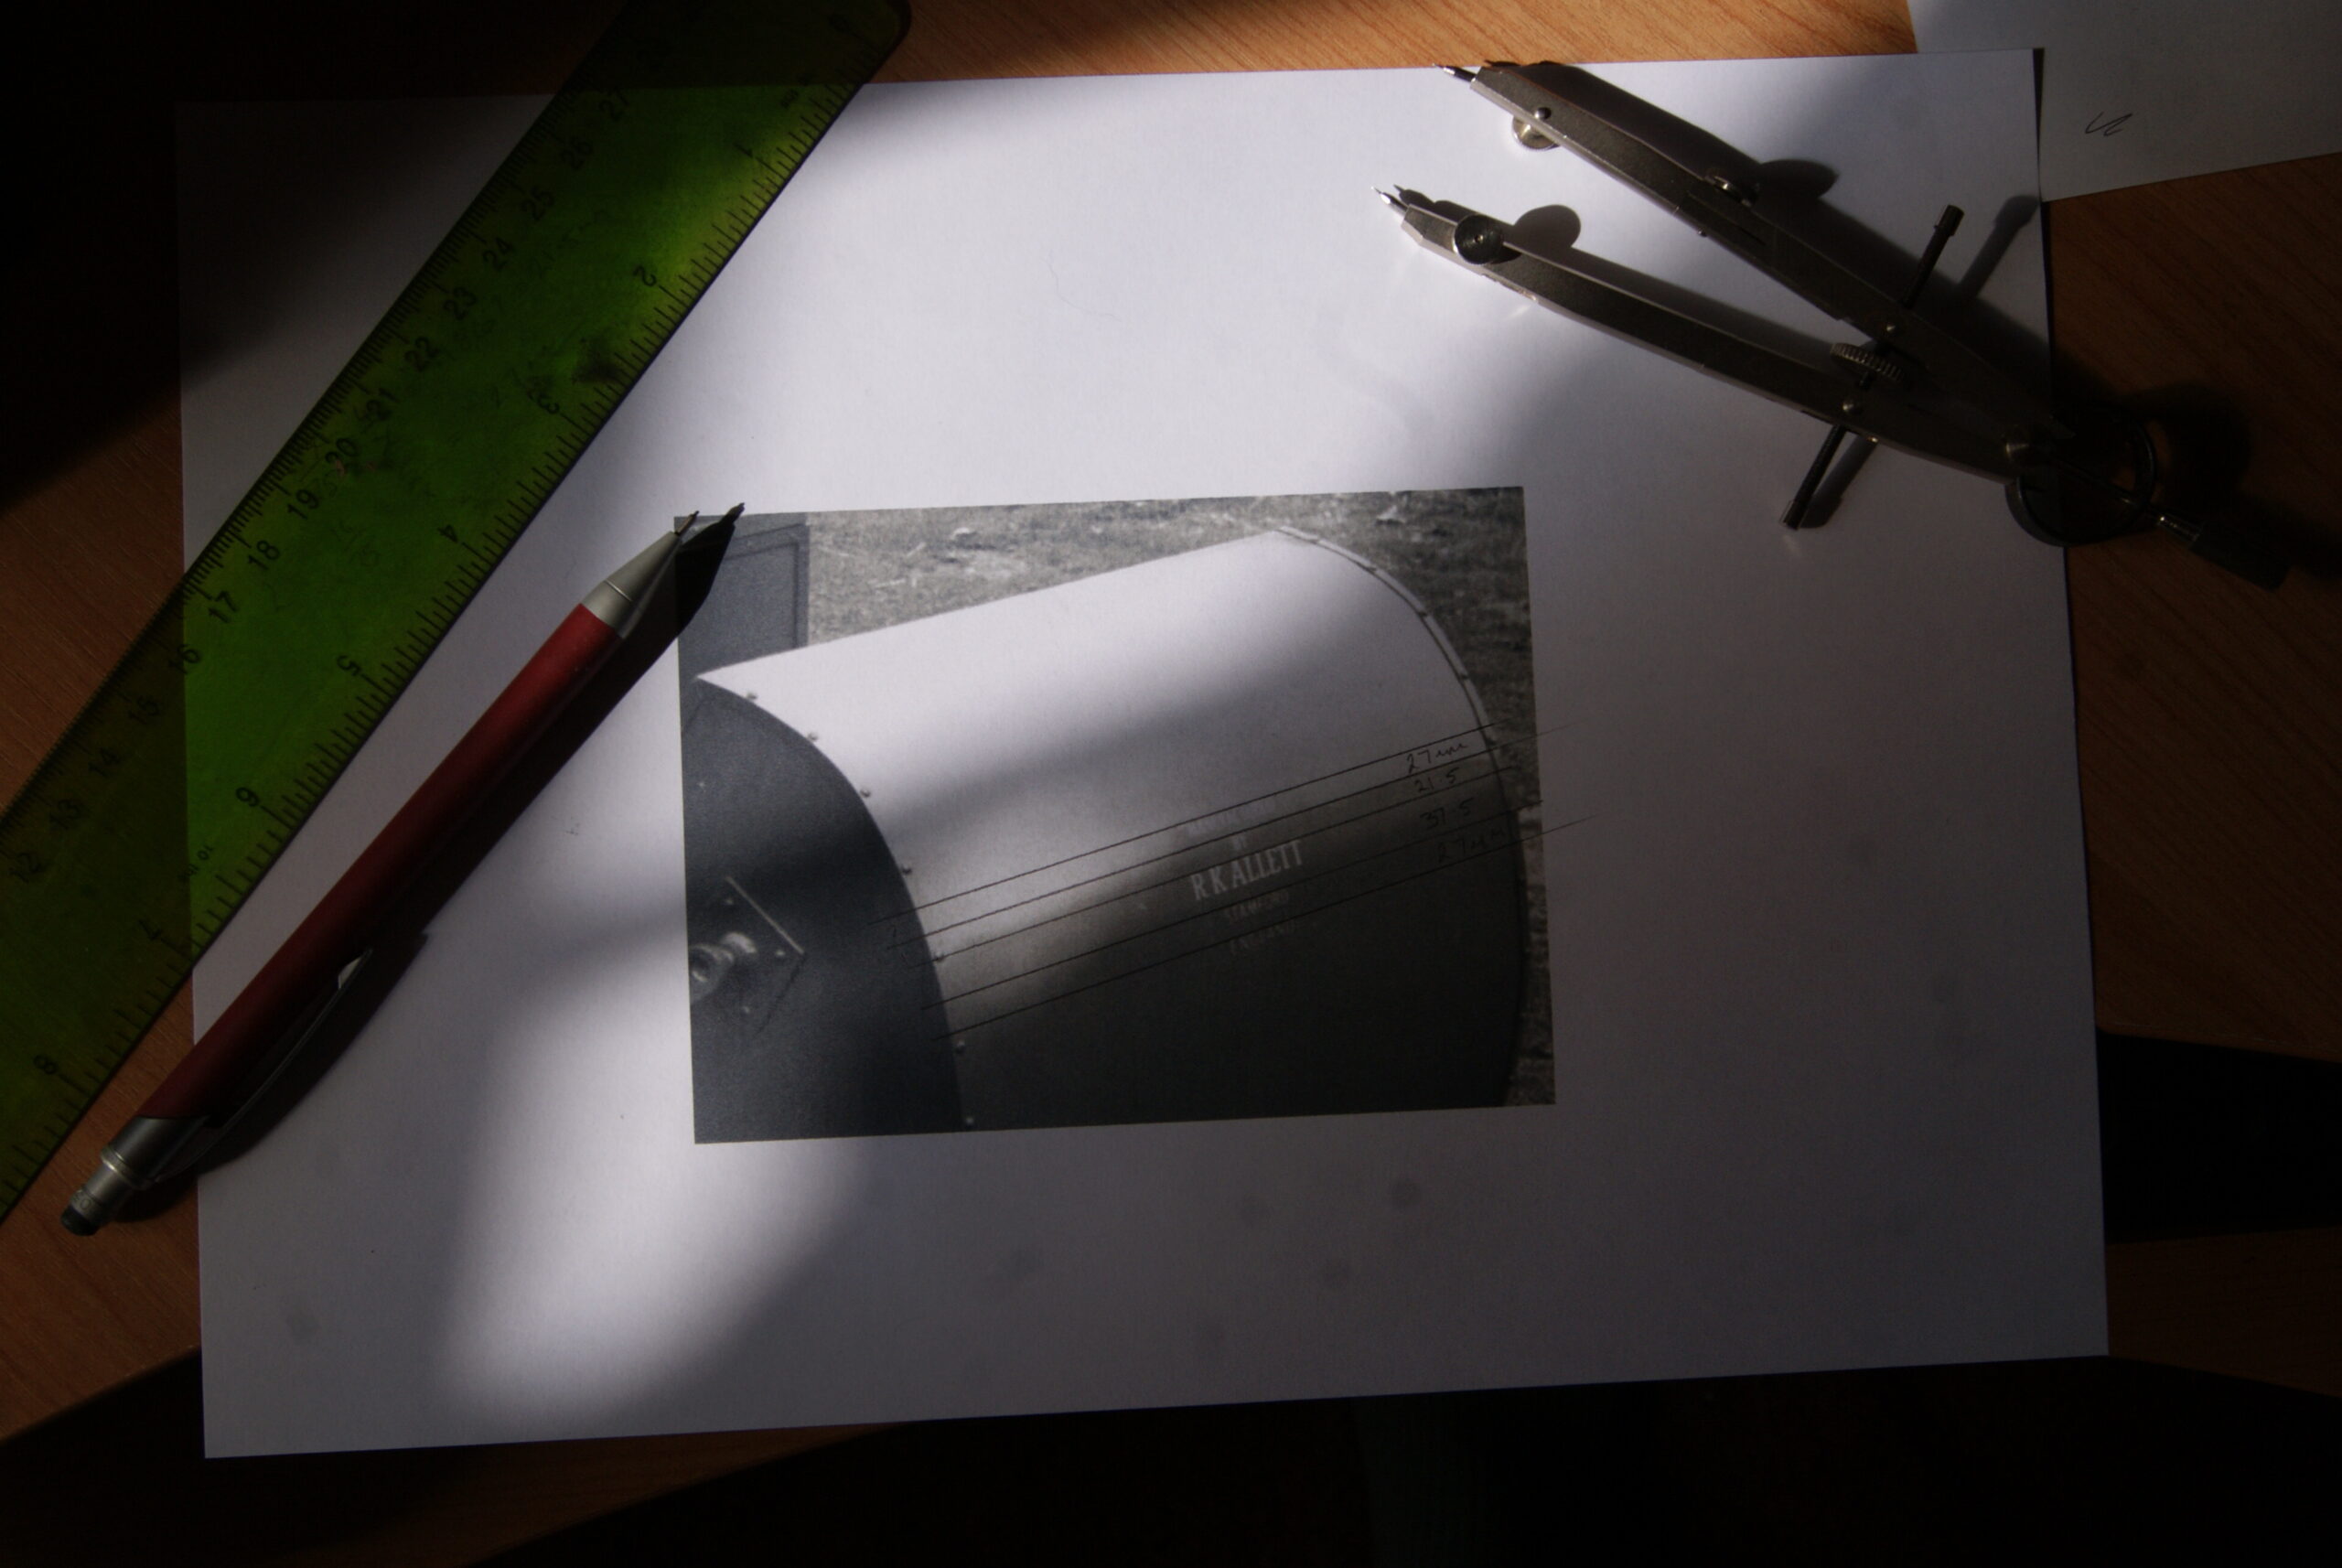
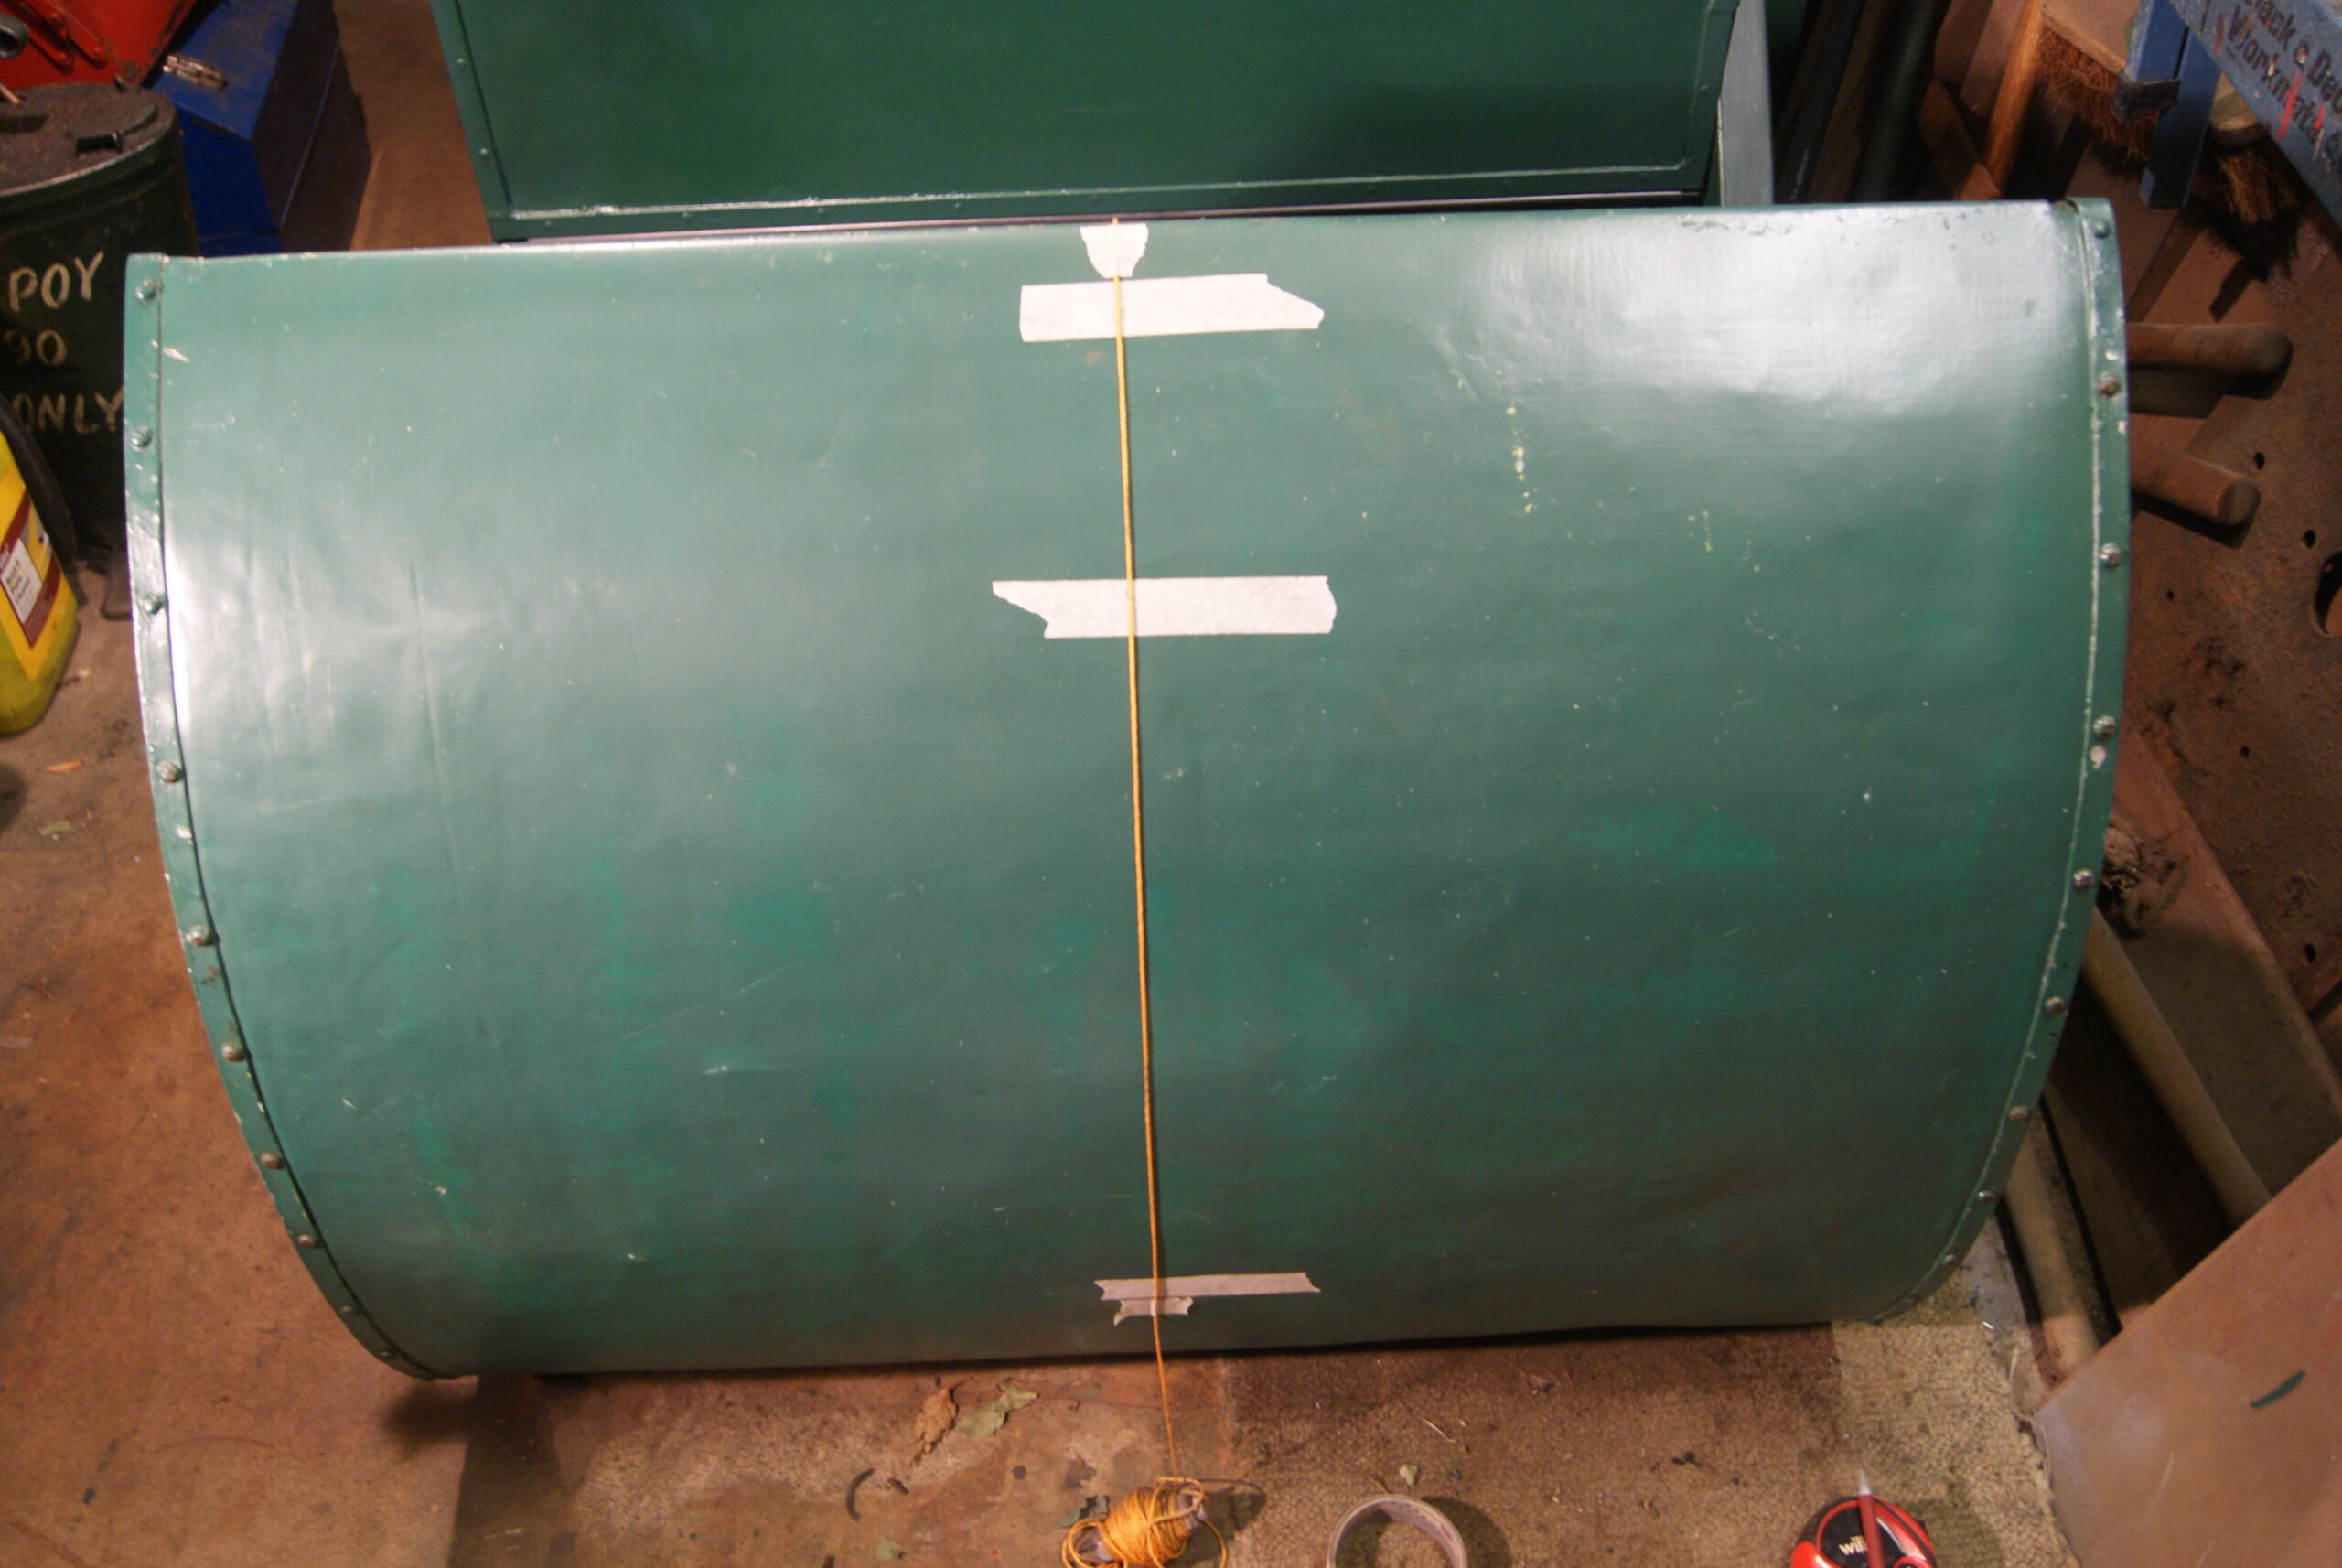
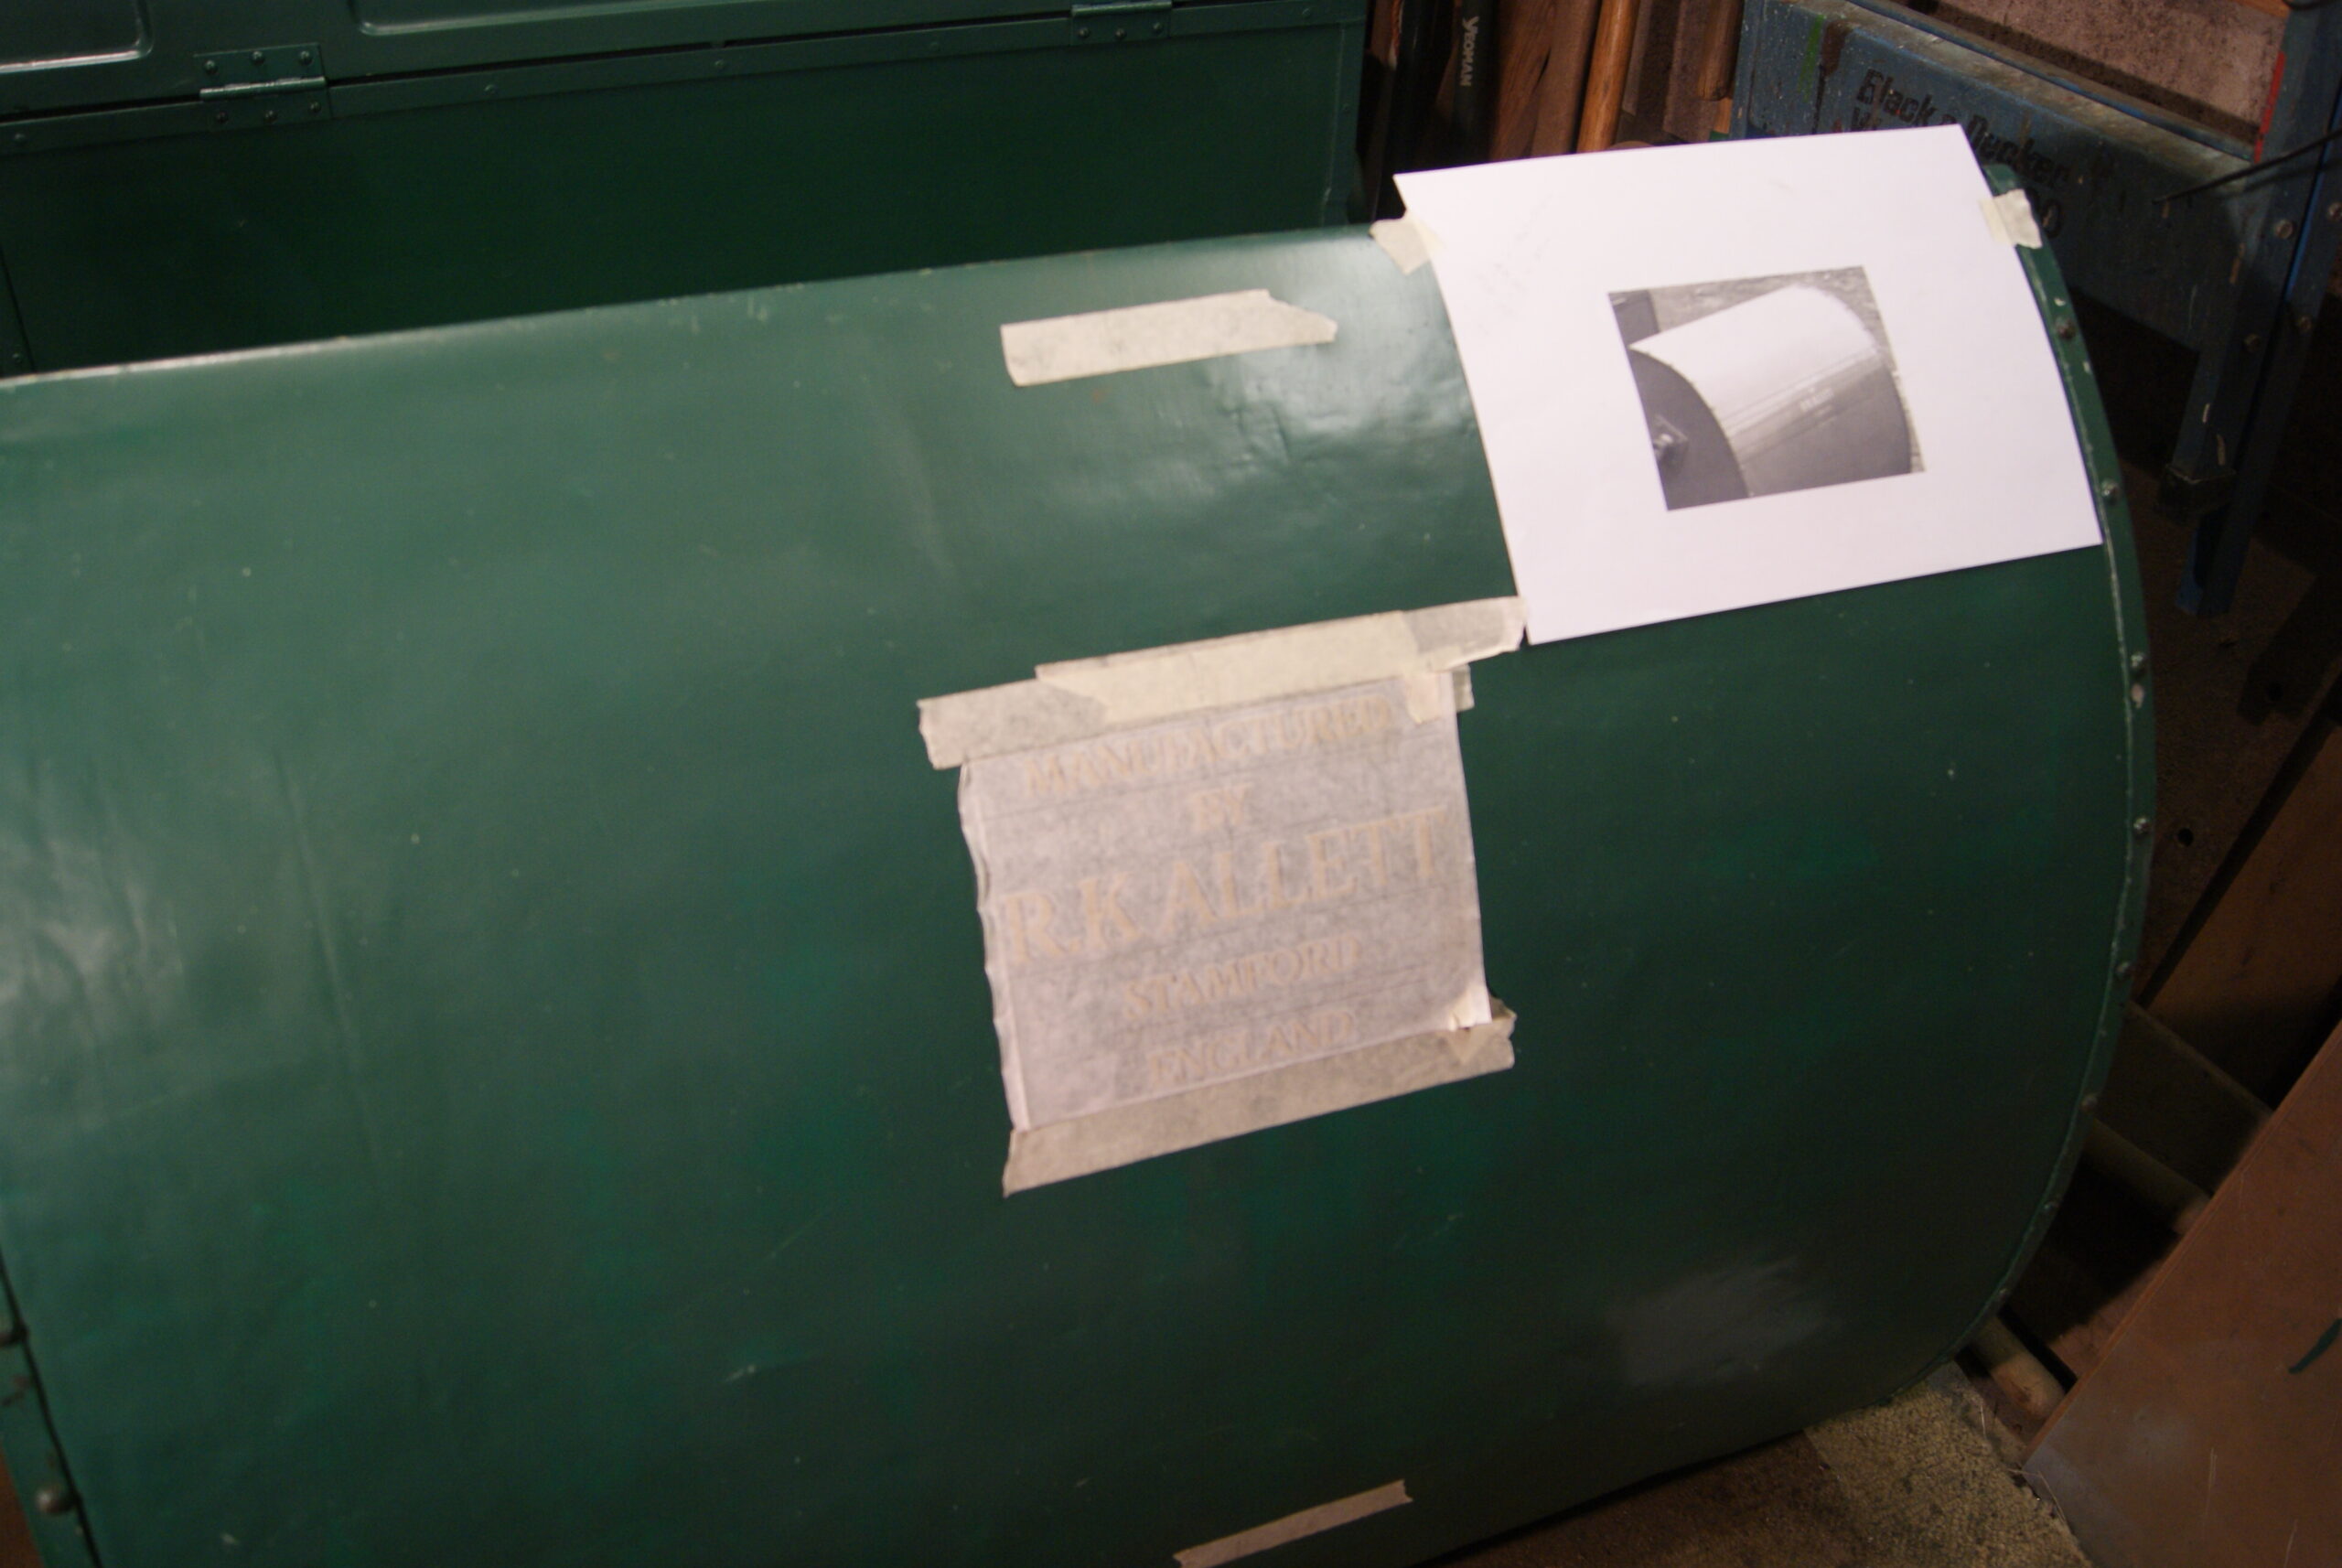
The large part of the background work was to thrash out the design of the grassbox decal; luckily Shaun Etherington at Allett Mowers did quite a lot of the preliminary work and Adam Wilson at Classic Transfers was absolutely brilliant, coming up with different ideas and schemes until we got the artwork as near to the original as we could work out from the grainy black-and-white photo. The decals arrived yesterday and I’ve been trying to work out the best way to apply them so that I keep them square to the top of the grassbox, square to the ground as well and plumb in the middle; it’s not as easy as you think especially when you’re looking at quite a bit of money if you get it wrong. Oh dear, back to the sleepless night again!
You will see from the photo’s that the first thing I decided to do was to lay down a datum line to find the middle of the grassbox; I did this with a builder’s plumb line which is basically a piece of string with a weight on the end, and I secured it to the grassbox top and bottom with masking tape. I did it this way because I didn’t want to mark the surface of the grassbox in case I couldn’t get the marks out again; next, a centre line was marked in pencil on the backing of the transfer so that I could centre the transfer under the string centre line- so far so good!
Now, how far down do we put the transfer? The original photo shows the top of the “R.K.Allett” name to be level with the fifth screw down on the right hand side, so that was where it all started to come together. One thing I did notice from the photo when I was trying to line everything up was that the grassbox is different in so many ways to the one I’m working on. The photo is of the prototype whereas the one I’m working on is the first production machine and so differences are to be expected- the top of the prototype grassbox is a lot flatter than on mine and when you look at the spacing of the woodscrews around the edge they are spaced at 3″ centres, but they don’t start in the same place at the top. This means that if you draw a straight line across the front of the grassbox between opposite screw heads the line is not parallel to the lettering so I had to take the screw heads on one side and use a square to project a line across. Once that was fixed I then used masking tape to mark the position of the decal, took a deep breath and started to apply it.
I don’t want to have to do that again! It came out perfectly lined up but my heart skipped quite a few beats before I was finished!
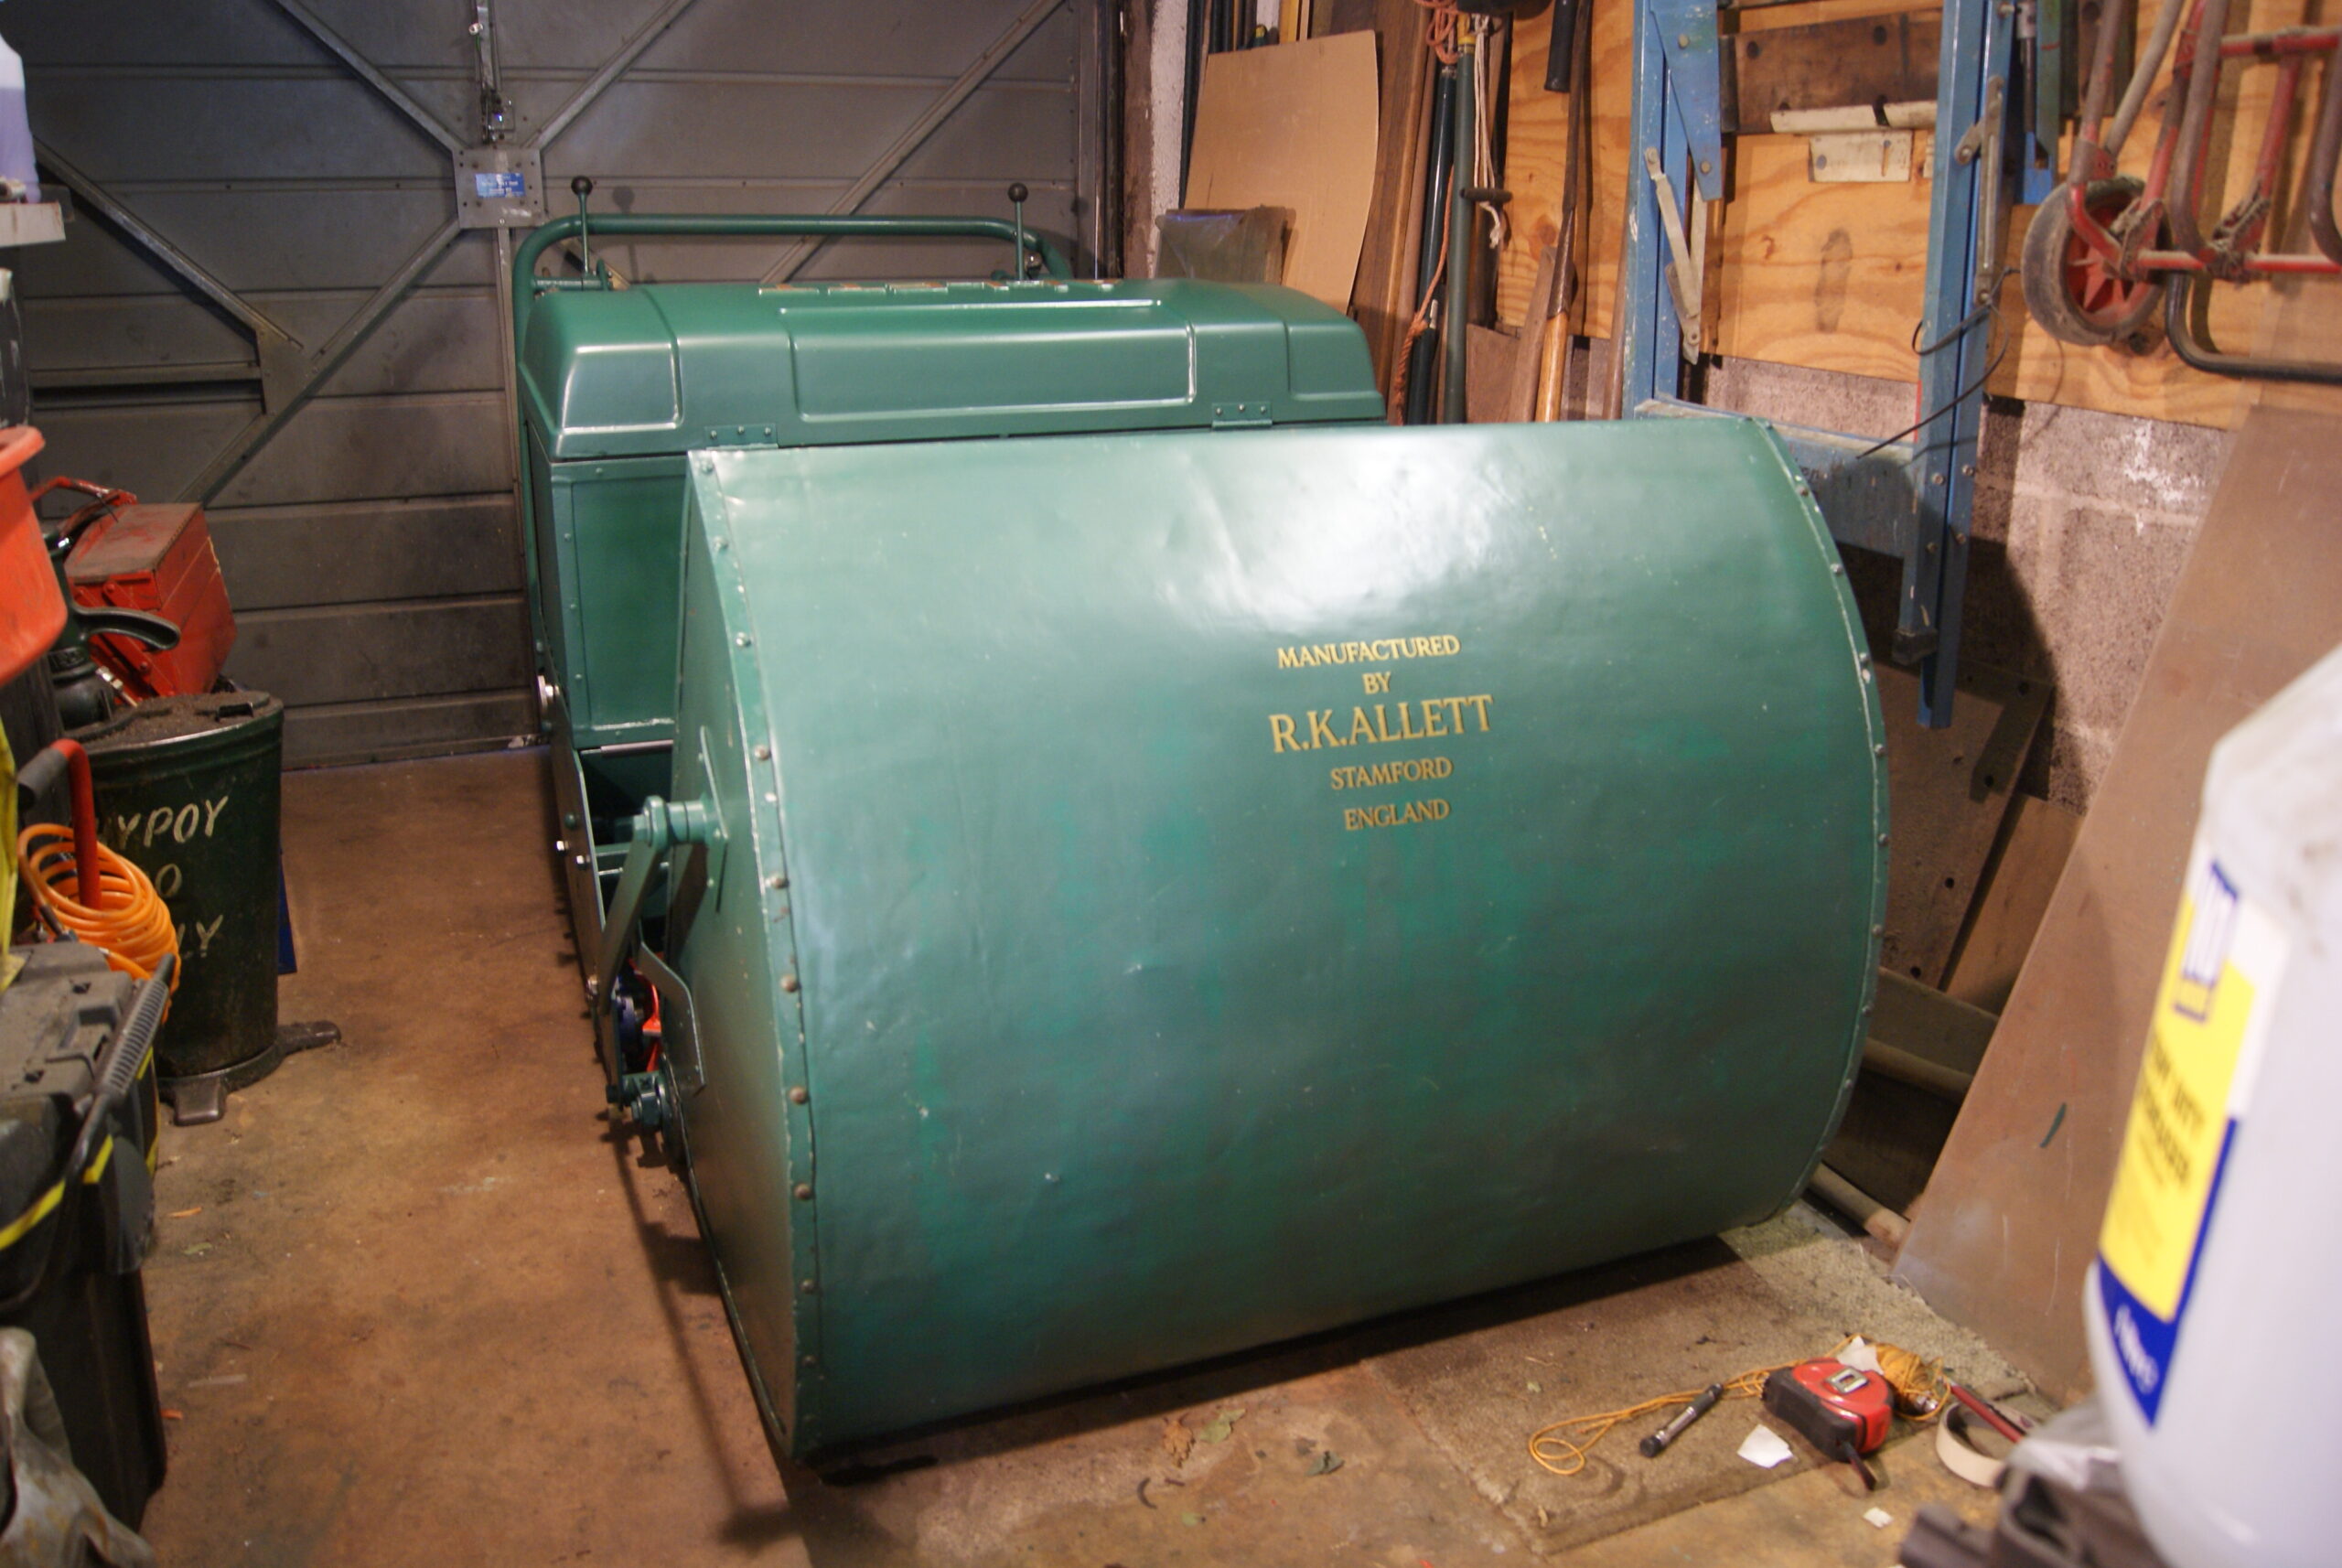
……..and on that note, I think the job’s finished! It’s been a happy distraction from restoring Trusty machinery and took me back to my mechanicking days working on Ransomes machinery. I can now see why so many clubs bought an Allett when I used to struggle to sell the Mastiff against it; it’s in a totally different league.
I would like to thank everyone on this forum- and at the factory- for the help given to me to bring this project to a conclusion. I hope they like it back at Hixon! If they don’t I can always find a place in my vintage collection for it!
Now, what am I going to do next?
Attachments:
August 30, 2022 at 6:48 pm #39876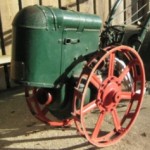 jtg1Participant
If your looking for projects, have an atco tractor, that needs a significant amount of TLC, but sure you have many more projects already lined up.
-
AuthorPosts


- You must be logged in to reply to this topic.