Home › Forums › Groundcare Machinery › Grass Cutting Machinery › Allett Regal No.1
Tagged: Allett Regal Mk1
- This topic has 96 replies, 10 voices, and was last updated 3 years, 8 months ago by
 trusty220.
-
AuthorPosts
-
May 22, 2022 at 4:56 pm #39071
 trusty220Keymaster
Thanks again for the leads on the oil filter. I’ve looked at the one on the auction site and decided to order it. If it doesn’t fit then I’ll have to think of something else but it sounded like the only sensible thing to do.
Progress hasn’t been that fast towards the end of the week as I have a part time job on Thursdays and Fridays; it keeps me in beer and diesel, the two main factors in life! Saturday was mainly spent tracking down more parts and I now have a new air filter, oil pressure switch and a few bits and pieces for the exhaust and the air filter housing.
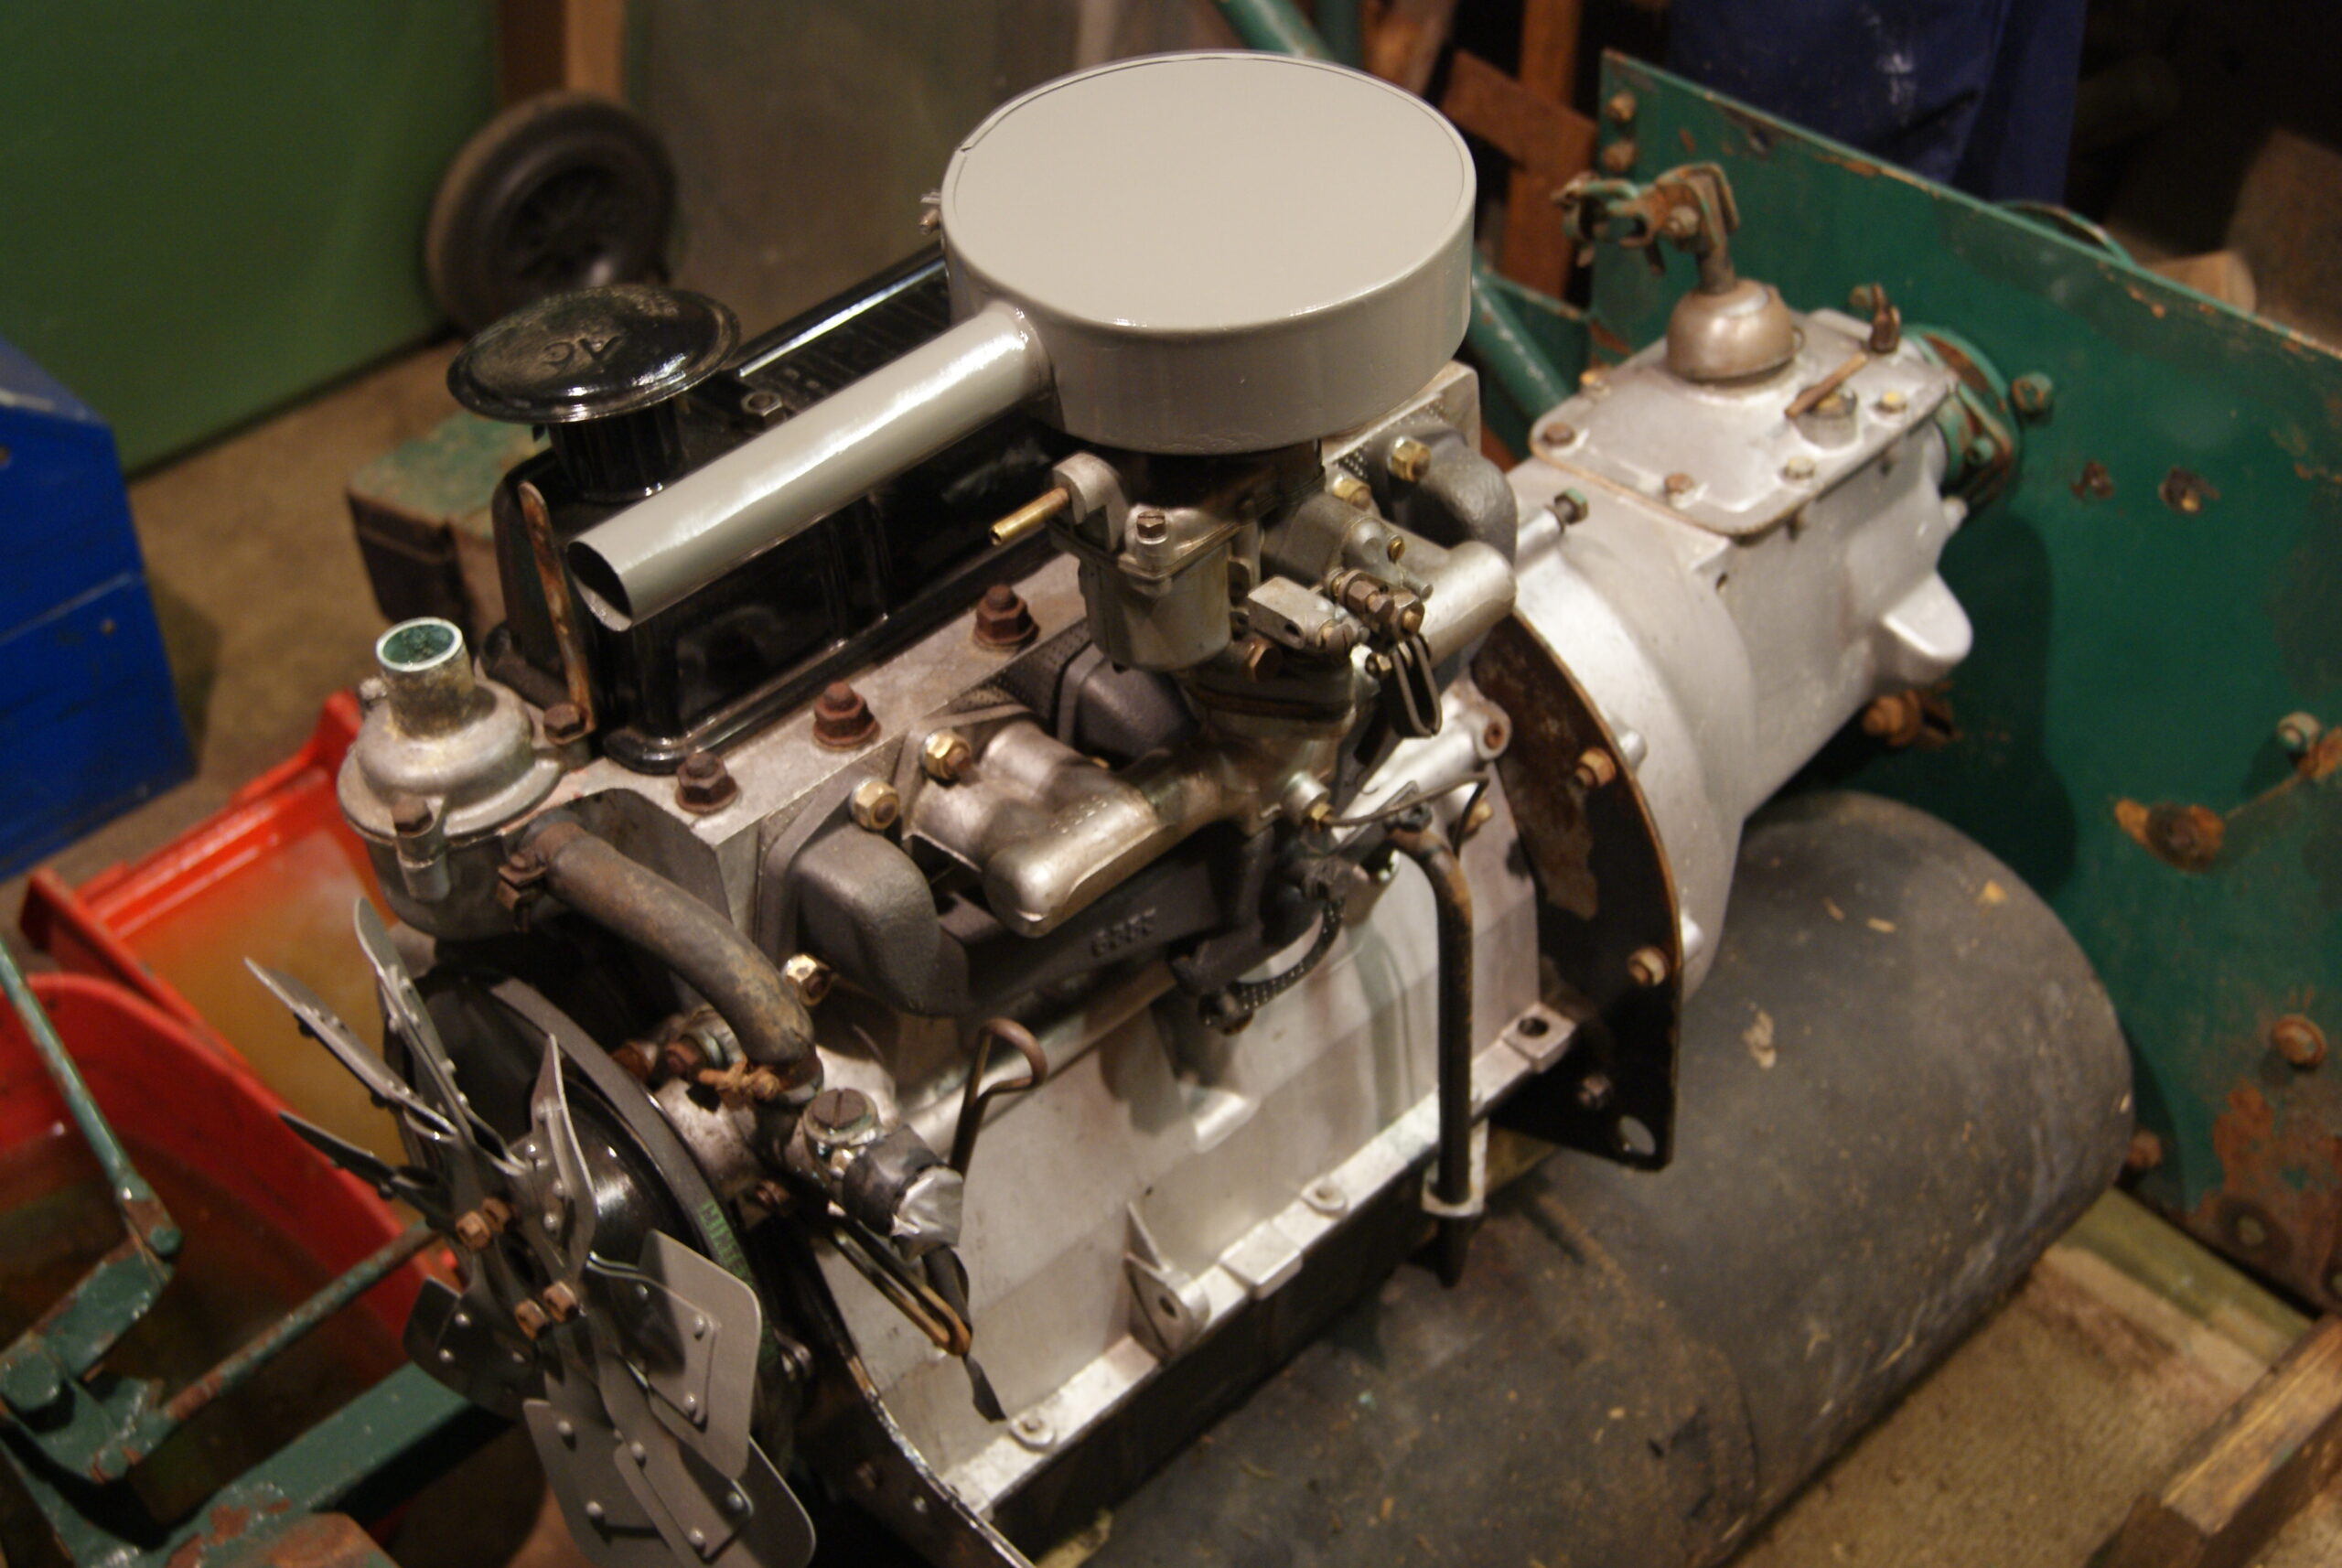
You will see from the pictures that the manifolds are now cleaned and re-fitted; the exhaust manifold came out clean as a whistle from the electrolysis so I treated it to a coat of high temperature paint to stop it rusting again. Both manifolds are attached with brass nuts to prevent corrosion which you may also pick up from the pictures.
The mower had a good clean today with some of Charlie’s degreaser from Screwfix. It is good stuff and at less than £10 for 5 litres it is good value but you do need to leave it to soak in, then rub it gently with a brush whilst washing it with water. I dowsed the whole mower with it and washed it off with a hosepipe, brushing it with a 2″ paintbrush and it really did get it clean. The only trouble is the dirt was hiding an awful lot of rust and paint loss so the machine looks a lot worse now for being clean.
The air filter housing needed to be cleaned gently so I’ve left it to soak for 24hrs in brick cleaning acid. It will have a further 24 hrs in a solution of bicarbonate of soda to neutralise the acid, then a thorough wire brushing should get rid of all the paint and surface rust.
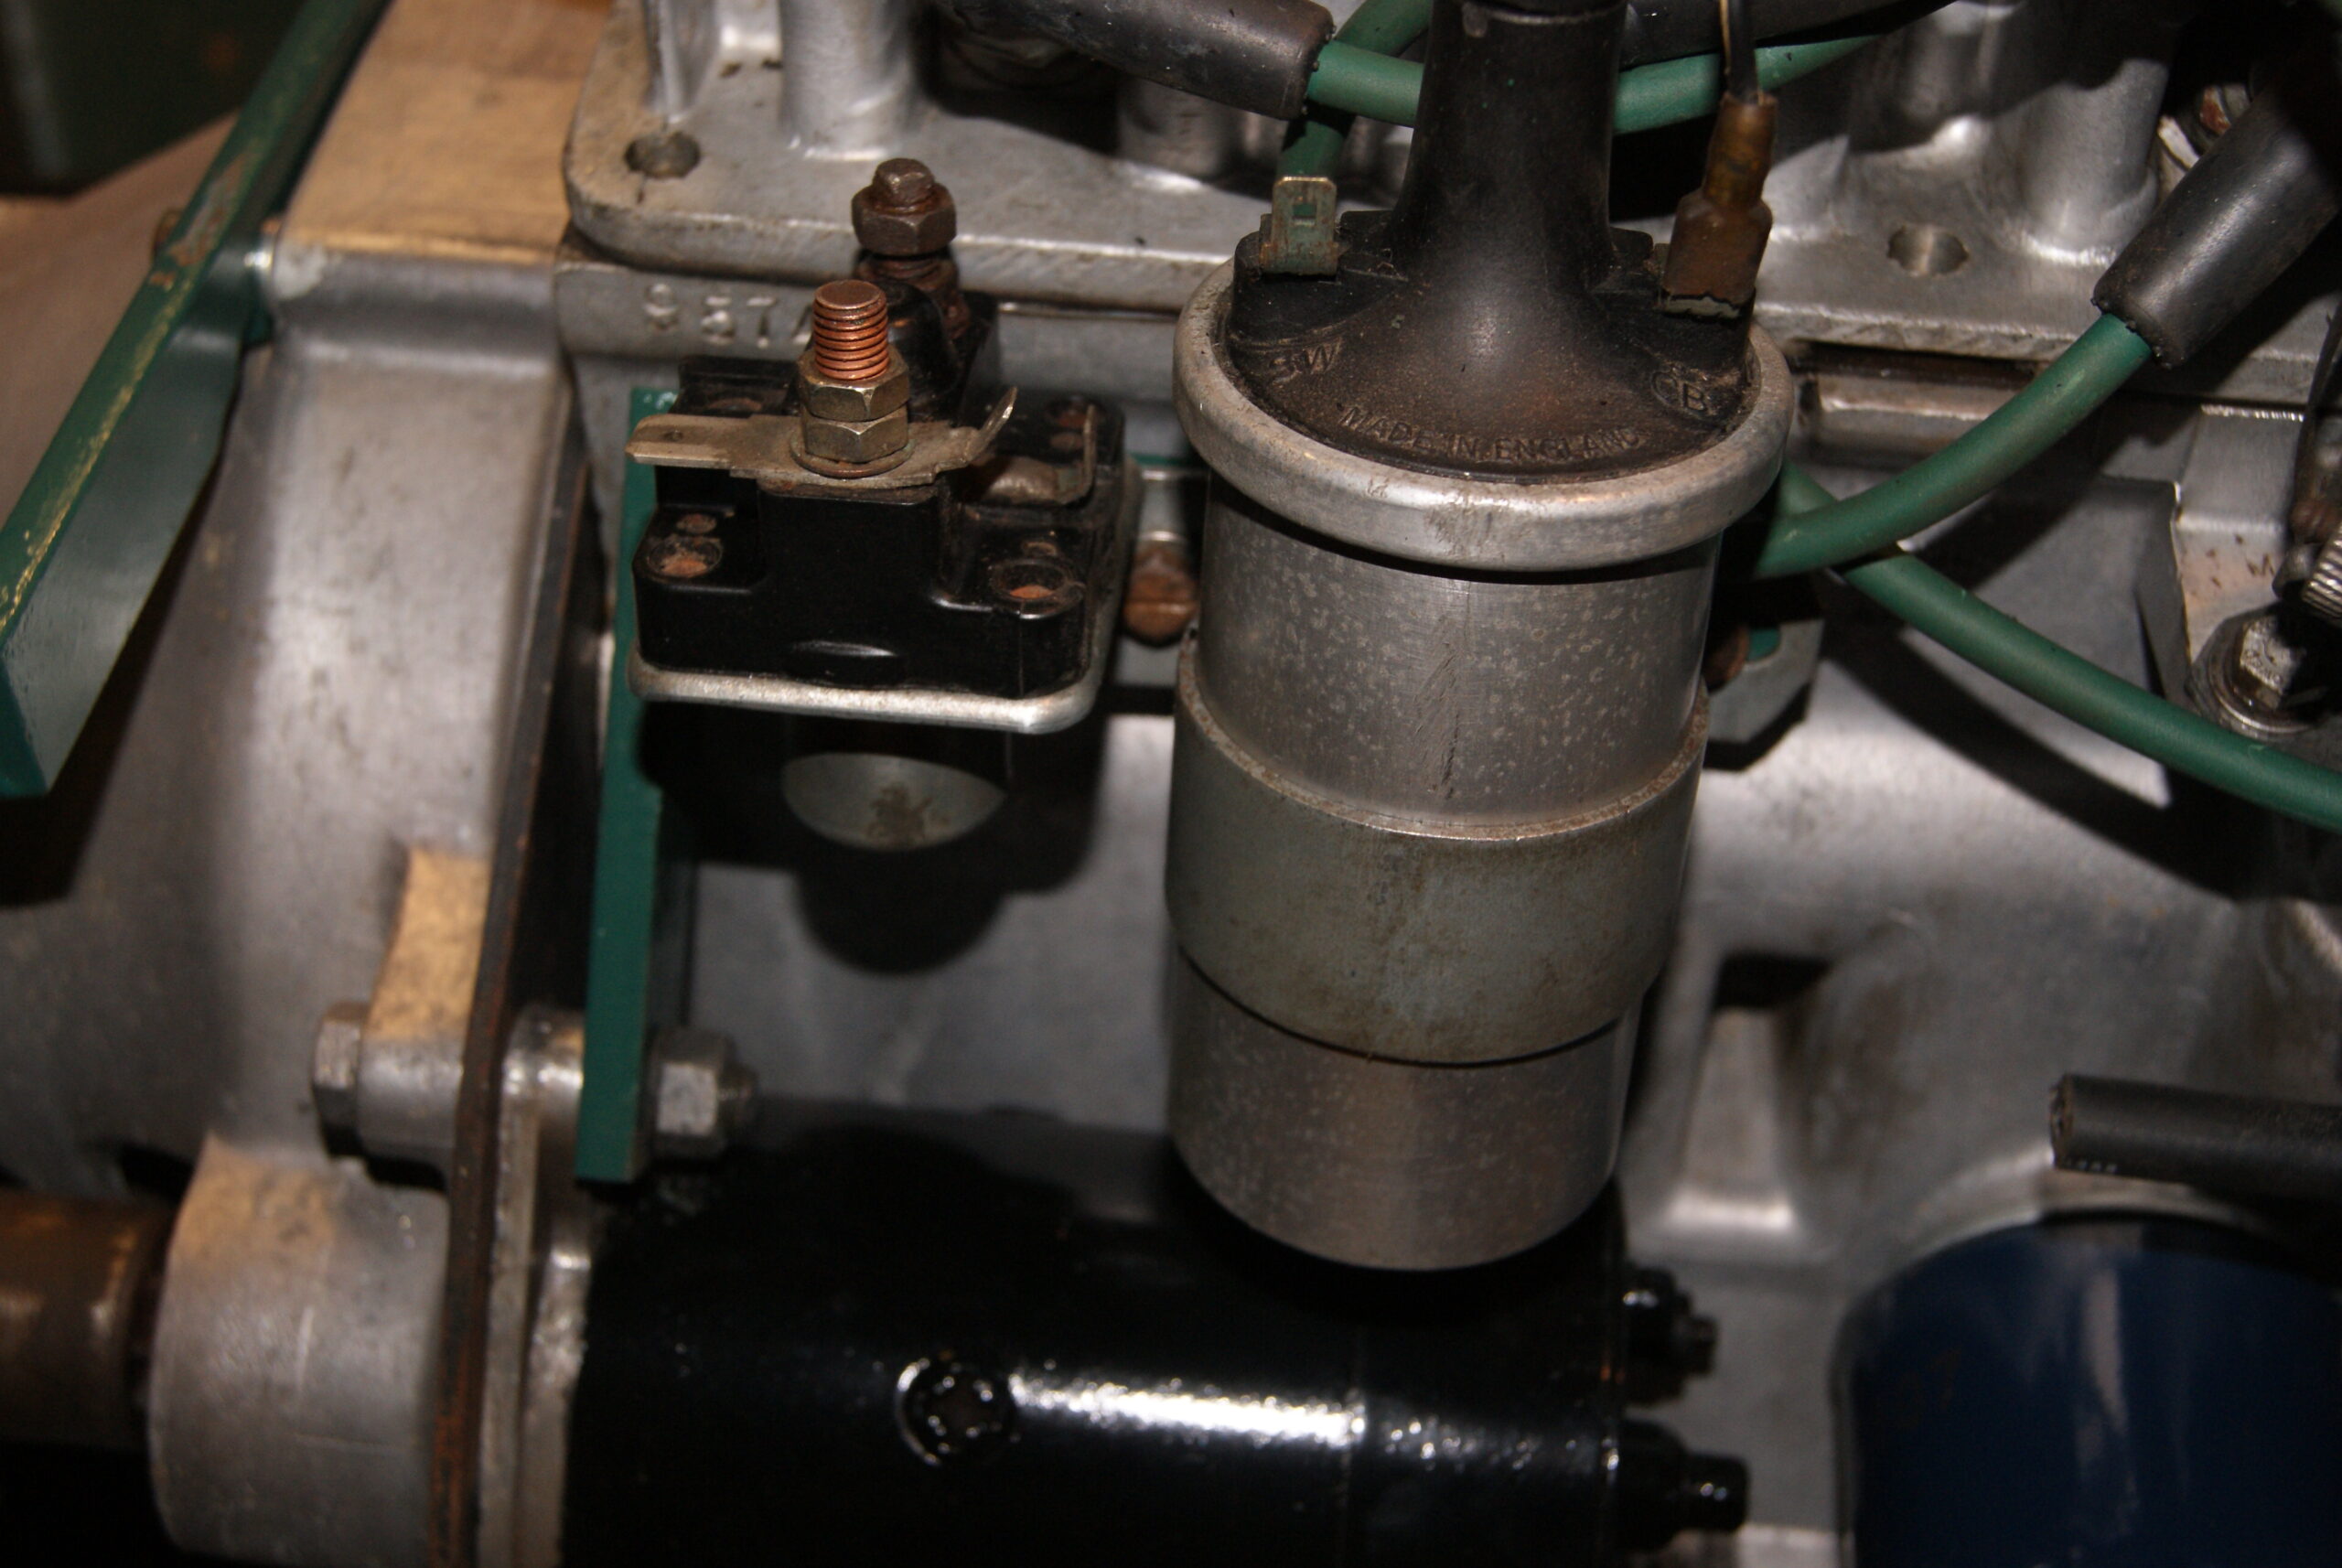
I normally like to finish the day on a good note, but today is going to be the exception! Waiting for the paint to dry on the radiator fan, I thought I’d have a look at the dynamo.
It doesn’t look like it’s been working for a long time and due to it’s position low down at the front of the engine it was packed solid with grass cuttings, glued together with what can only be described as oily gunge. The wires from the brushes were both broken, but the brushes looked like they were in good shape- probably because they’d stuck in the holders and hadn’t worn out by rubbing on the commutator. I think I’m going to let the local expert have a go at it as it’s a fiddly job and once it’s fitted I don’t want to have to take it out again.Still, tomorrow’s another day and the radiator should be ready for collection. I’m going to have to source some paint before fitting it as the mounting plate is completely rusty with no remains of paint on whatsoever. Looks like another day on the road again!
Attachments:
May 23, 2022 at 9:55 pm #39087 wristpinParticipant
Looking good. They certainly had their money’s worth from the air filter element! We used to have an excellent auto electrical firm but such as is the way of things, the partners were getting on in years and the property developers could see space on their site for several substantial houses.
May 24, 2022 at 10:18 am #39090trusty220KeymasterIsn’t that the way all things seem to go these days? If there’s money to be made then good sense and sentimentality go right out of the window; look how many of our core British companies have been sold off to overseas investors and competitors.
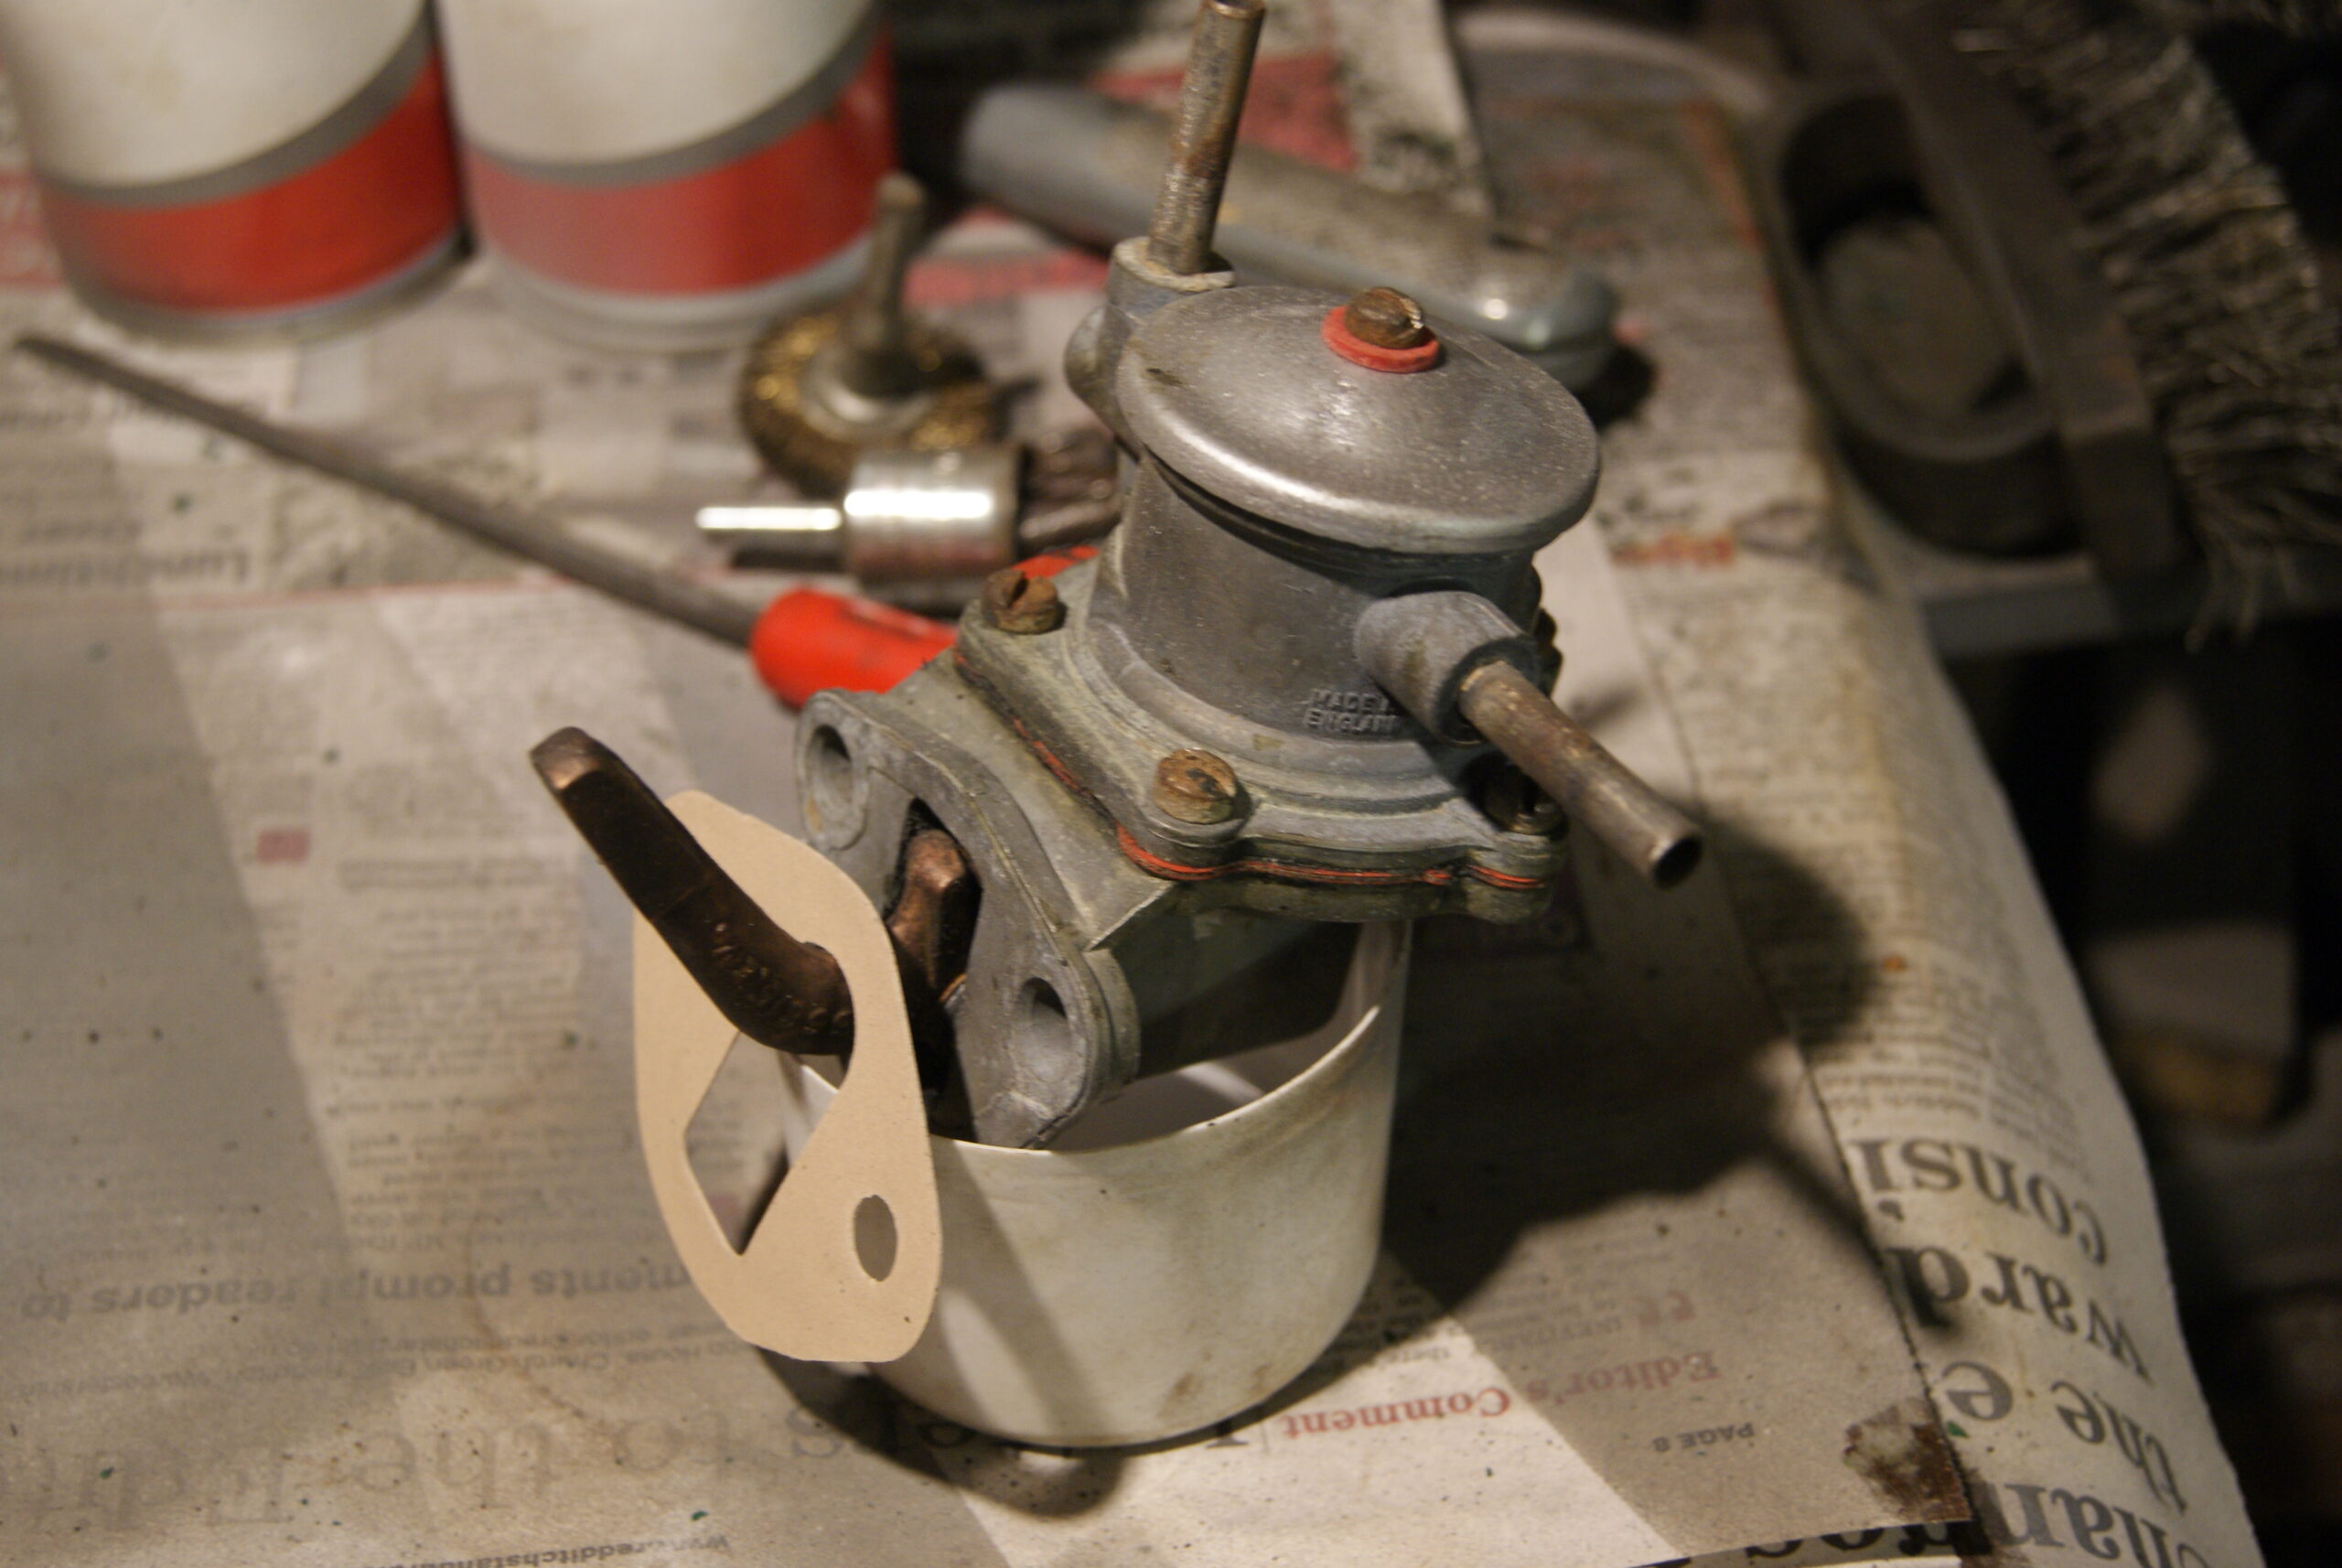
Work has come to a bit of a halt at the moment as I have to source the right shade of green paint. The starter motor has cleaned up nicely as has the fuel pump, but when I came to re-assemble the pump I found the diaphragm was split in two places which would probably account for the large oil leak below the pump. Funnily enough the pump is the same that was fitted to Triumph Heralds so the new diaphragm is on it’s way from the local Triumph specialist.
Plenty more to do yet, keep going!
May 26, 2022 at 8:12 am #39097 will-haggleParticipant
Your GT6 probably has more in common with that Reliant engine than just the Lucas Electrics. Reliant poached the Triumph designer when they were swapping from the Austin 7 derived side-valve 750cc engine to the 600 cc OHV unit for the first OHV Reliants. These engines were wet-linered all-aluminium units and developed 25bhp. Apart from the Allett mower they were also used in the Uni-horse 700 tractor.
May 26, 2022 at 8:32 am #39101will-haggleParticipantSee my reply above, not a mini unit.
-
This reply was modified 4 years, 2 months ago by
 will-haggle.
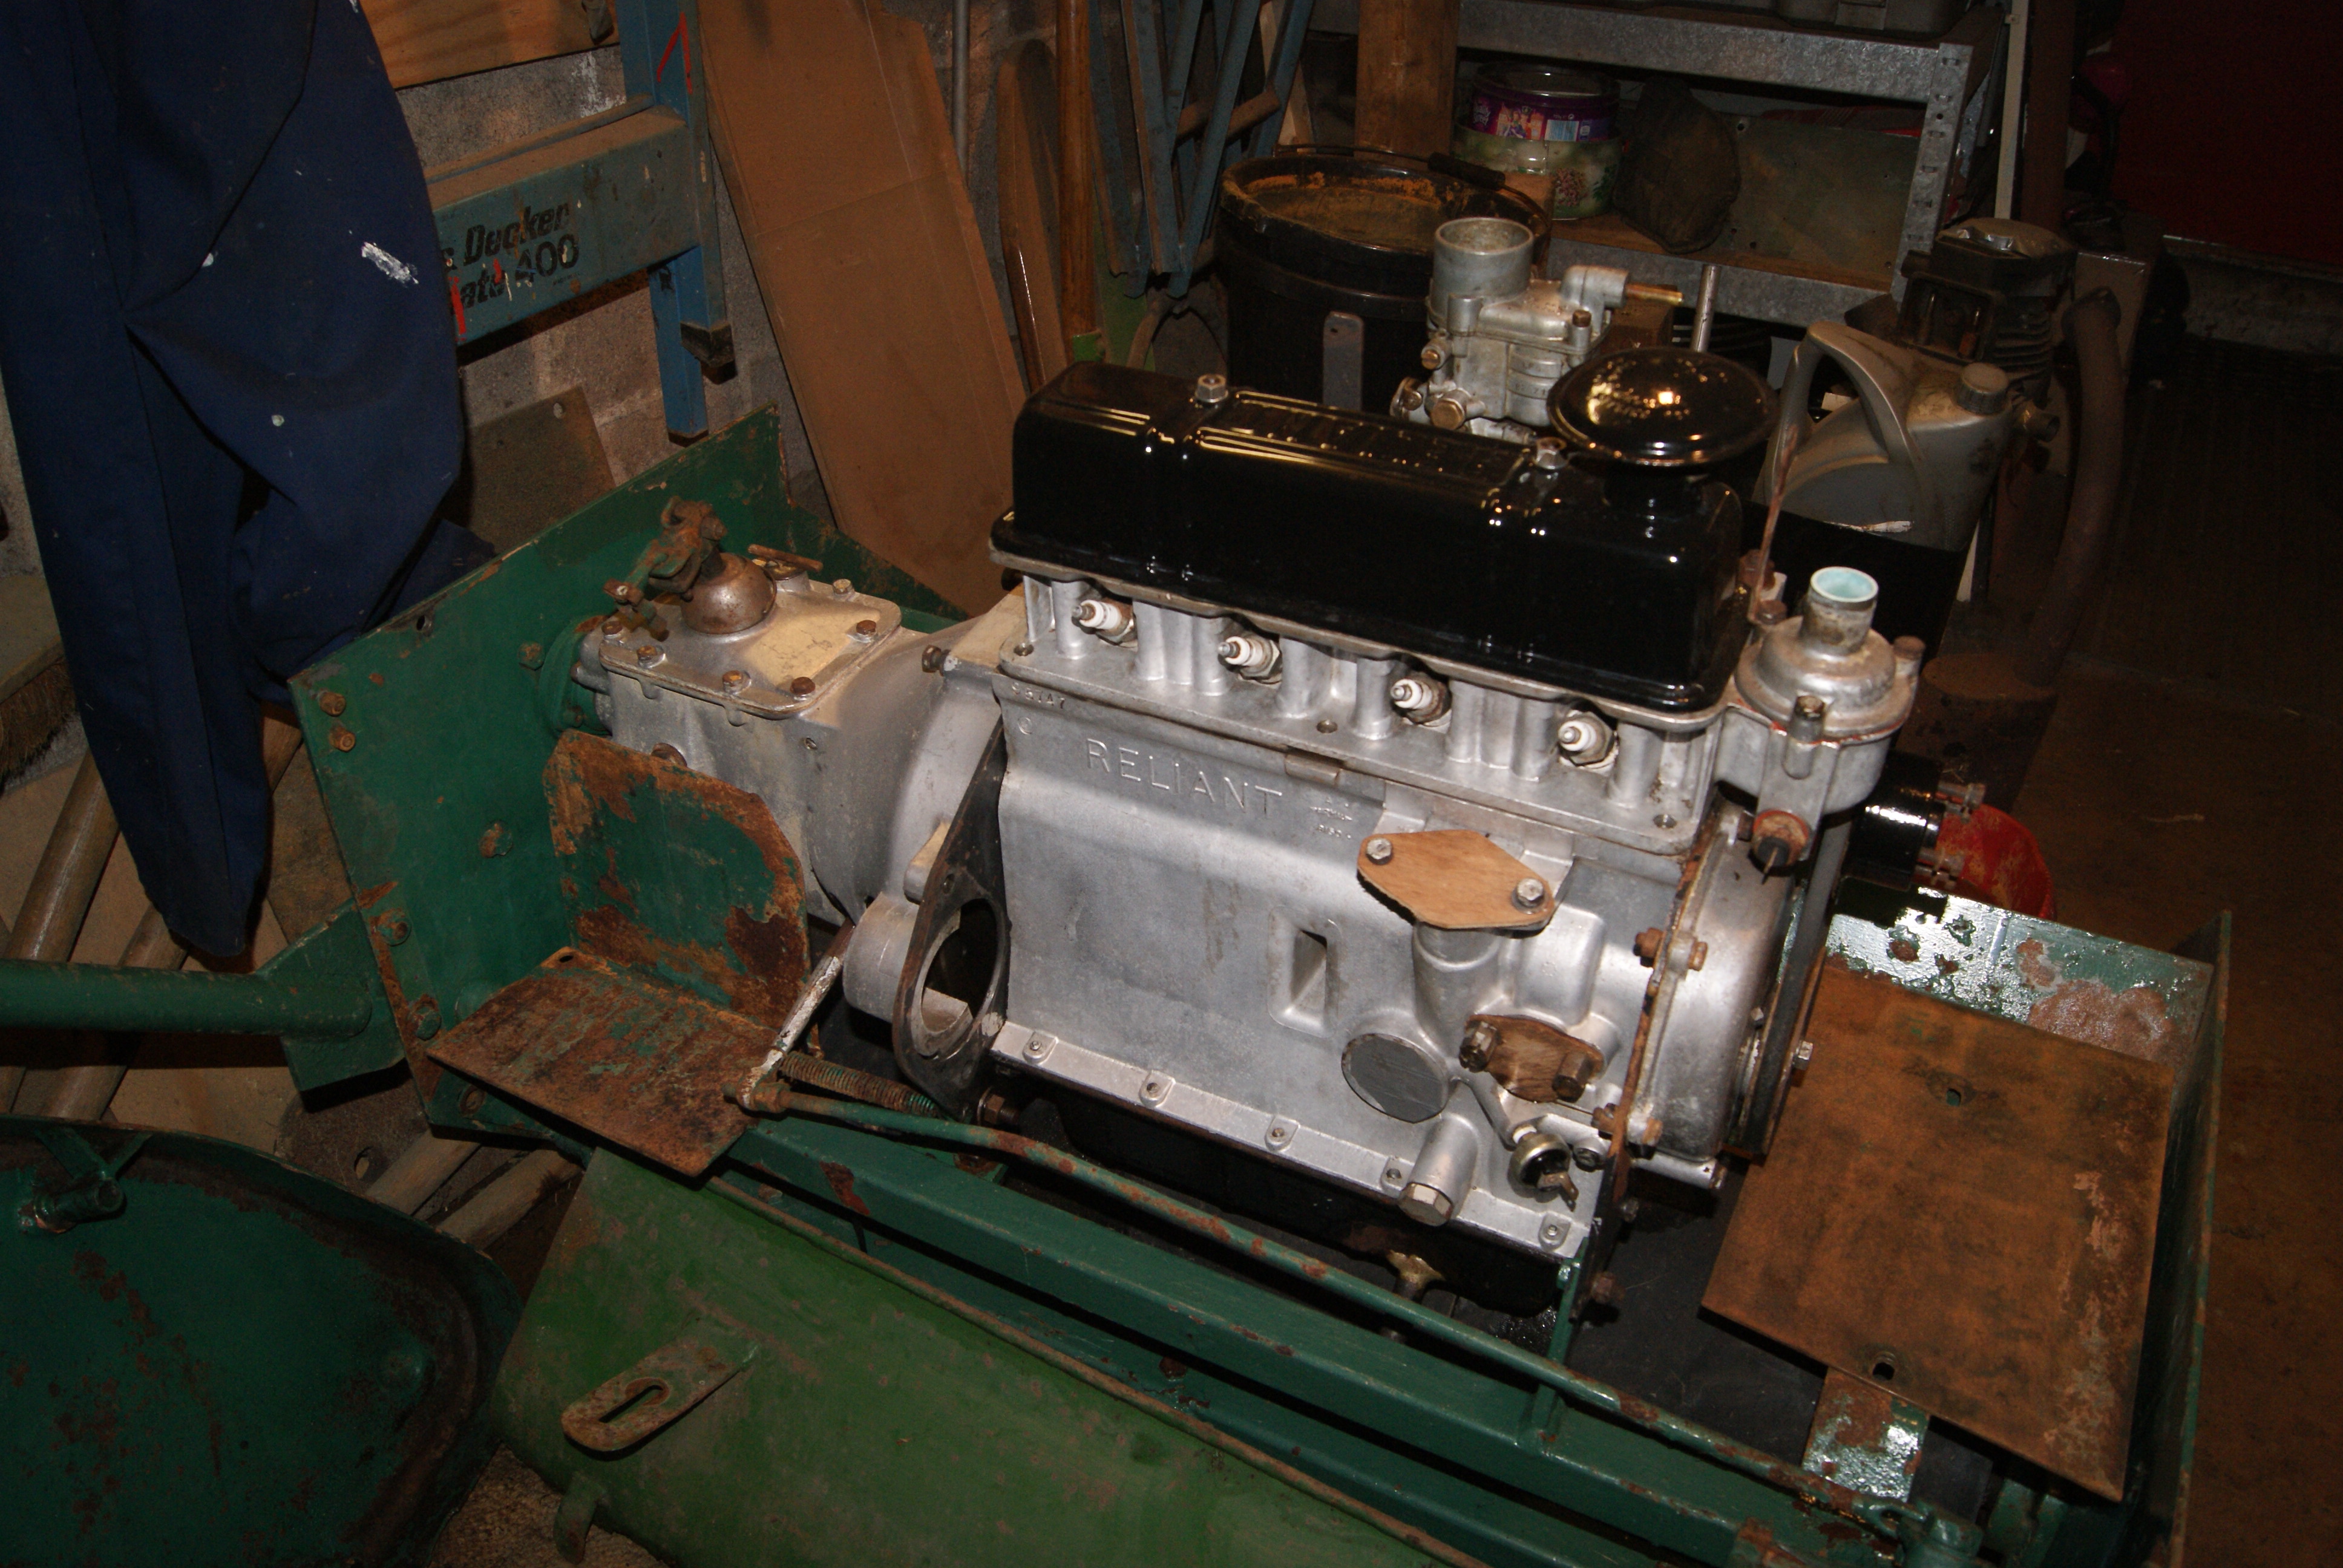
May 26, 2022 at 4:58 pm #39106trusty220KeymasterThat’s very interesting, Alan. The rocker cover on the Reliant engine looks very similar to the one on the GT6 except it’s only about 2/3rds the length (the GT6 is a six cylinder, 2 litre engine). Maybe it’s the same as a Herald or Spitfire rocker cover- maybe someone will know for sure. Things like fuel pumps and starter motors would have been “off the shelf” items and common to a lot of cars made in the Midlands at the time. The fuel pump is made by AC, the starter and dynamo are both Lucas items and the switches and warning lights are probably common items as well- we’ll see when I get that far.
At the moment I’m doing a lot of the cosmetic work on the radiator surround, mountings and air filter so not a lot to report, plus I’m doing two days at the auctions as a part time job. Funny how work gets in the way of a good hobby, isn’t it?
As soon as there is anything to see I’ll post some more pictures.
May 26, 2022 at 9:58 pm #39107 hdtrustParticipant
Hi Geoff now you have cut your teeth on the Allett perhaps you’d like to have a go on this one!
Attachments:
May 27, 2022 at 7:06 pm #39112trusty220KeymasterIt will make a change from Trusty stuff, but I think I’ll finish the Allett first! There’s some interesting stuff in the background as well, do you need a hand to collect it?
May 29, 2022 at 6:55 am #39116will-haggleParticipantOh Ahh, I do know where that be, down near Glass’nbr’y I’ll warrant!
May 29, 2022 at 7:03 am #39117will-haggleParticipantIf anyone’s interested in the Uni-horse 700, see the April 2018 issue, there’s a good description of it on the back page.
May 29, 2022 at 6:40 pm #39120trusty220KeymasterI’ve been a bit remiss of late but here’s an update on the Allett.
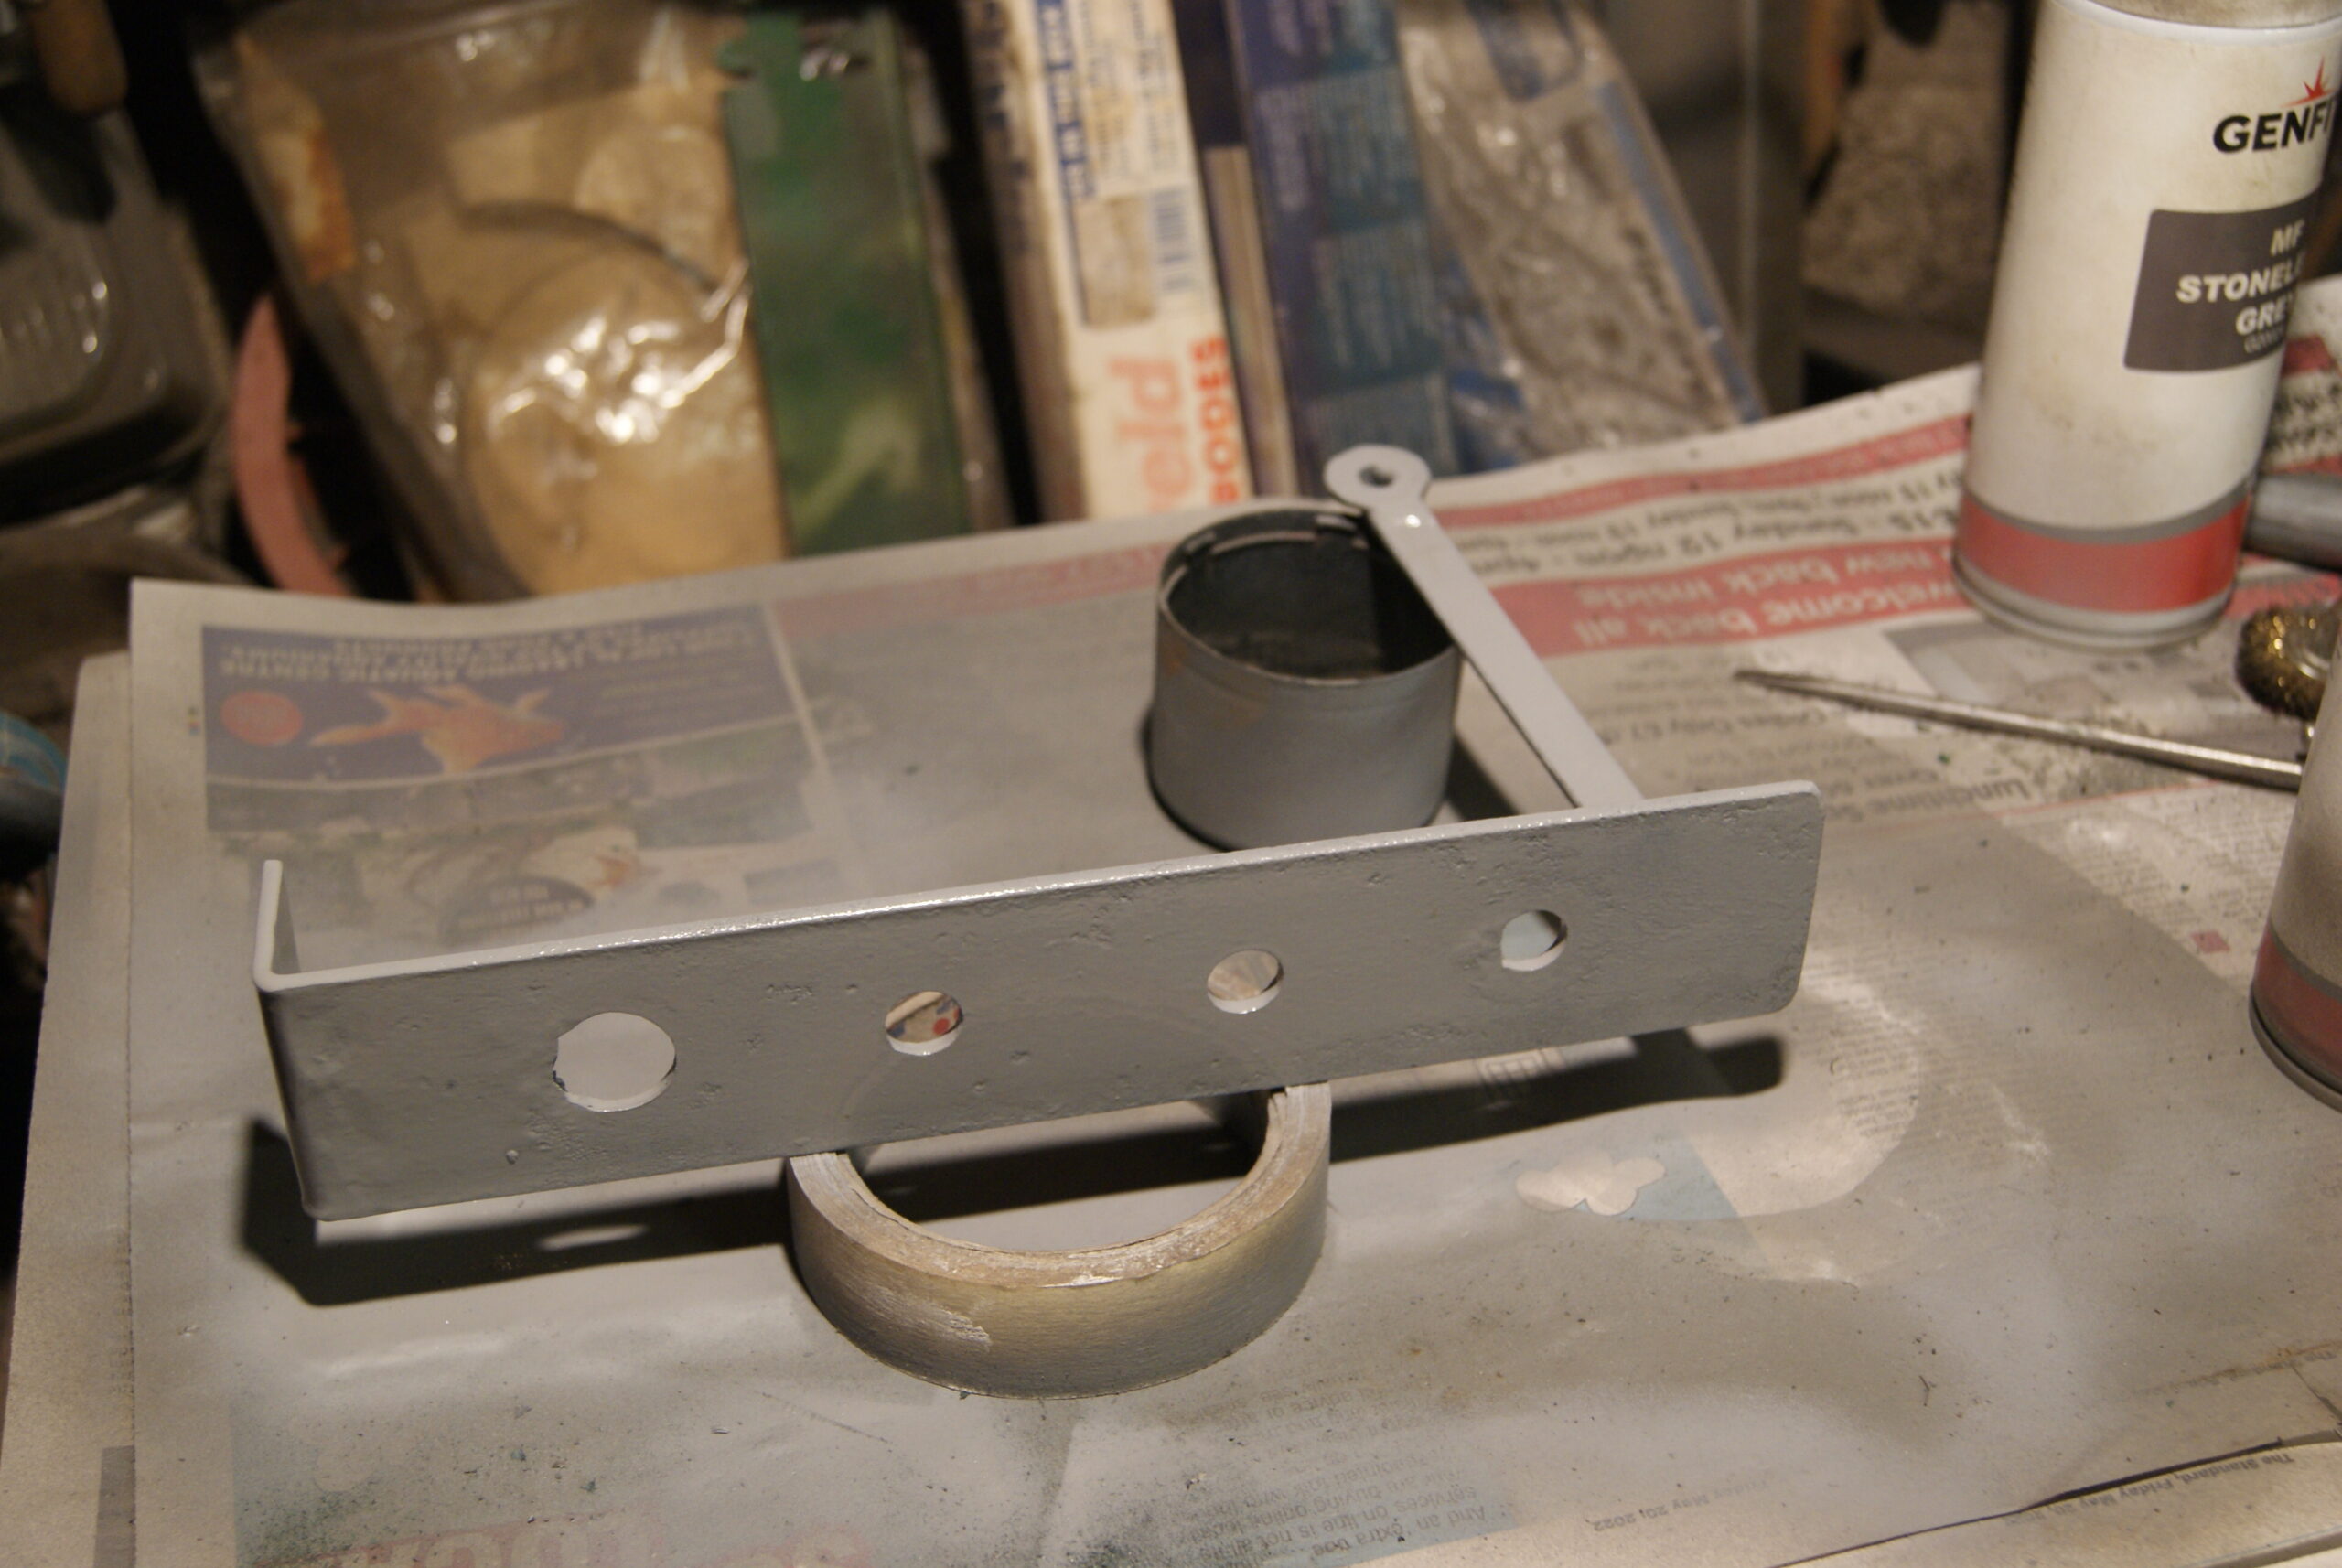
The air filter housing was in quite a state but at least it was complete. At first I thought it had come apart and would need re-soldering together, but on closer inspection it was supposed to be in three parts and all held together with one 2 BA screw. Top and bottom plates fitted into the lip rolled around the edge of the wrapper plate, then the whole assembly is squeezed together and the 2 BA screw and nut fitted to tighten it all up. The photo of the red washing up bowl is the process of stripping the rust and paint off gently using brick and patio cleaner; it works really well and is ideal for delicate parts such as this. Once the acid is neutralised with a solution of bicarbonate of soda the metal can be cleaned up with a light rub with wire wool and it really does come up as a silver colour. An application of filler, gentle flatting down and re-painting completed the job, then it was fitted to the carburettor with the correct rubber grommet with a liberal coating of Vaseline to help it slide into place.
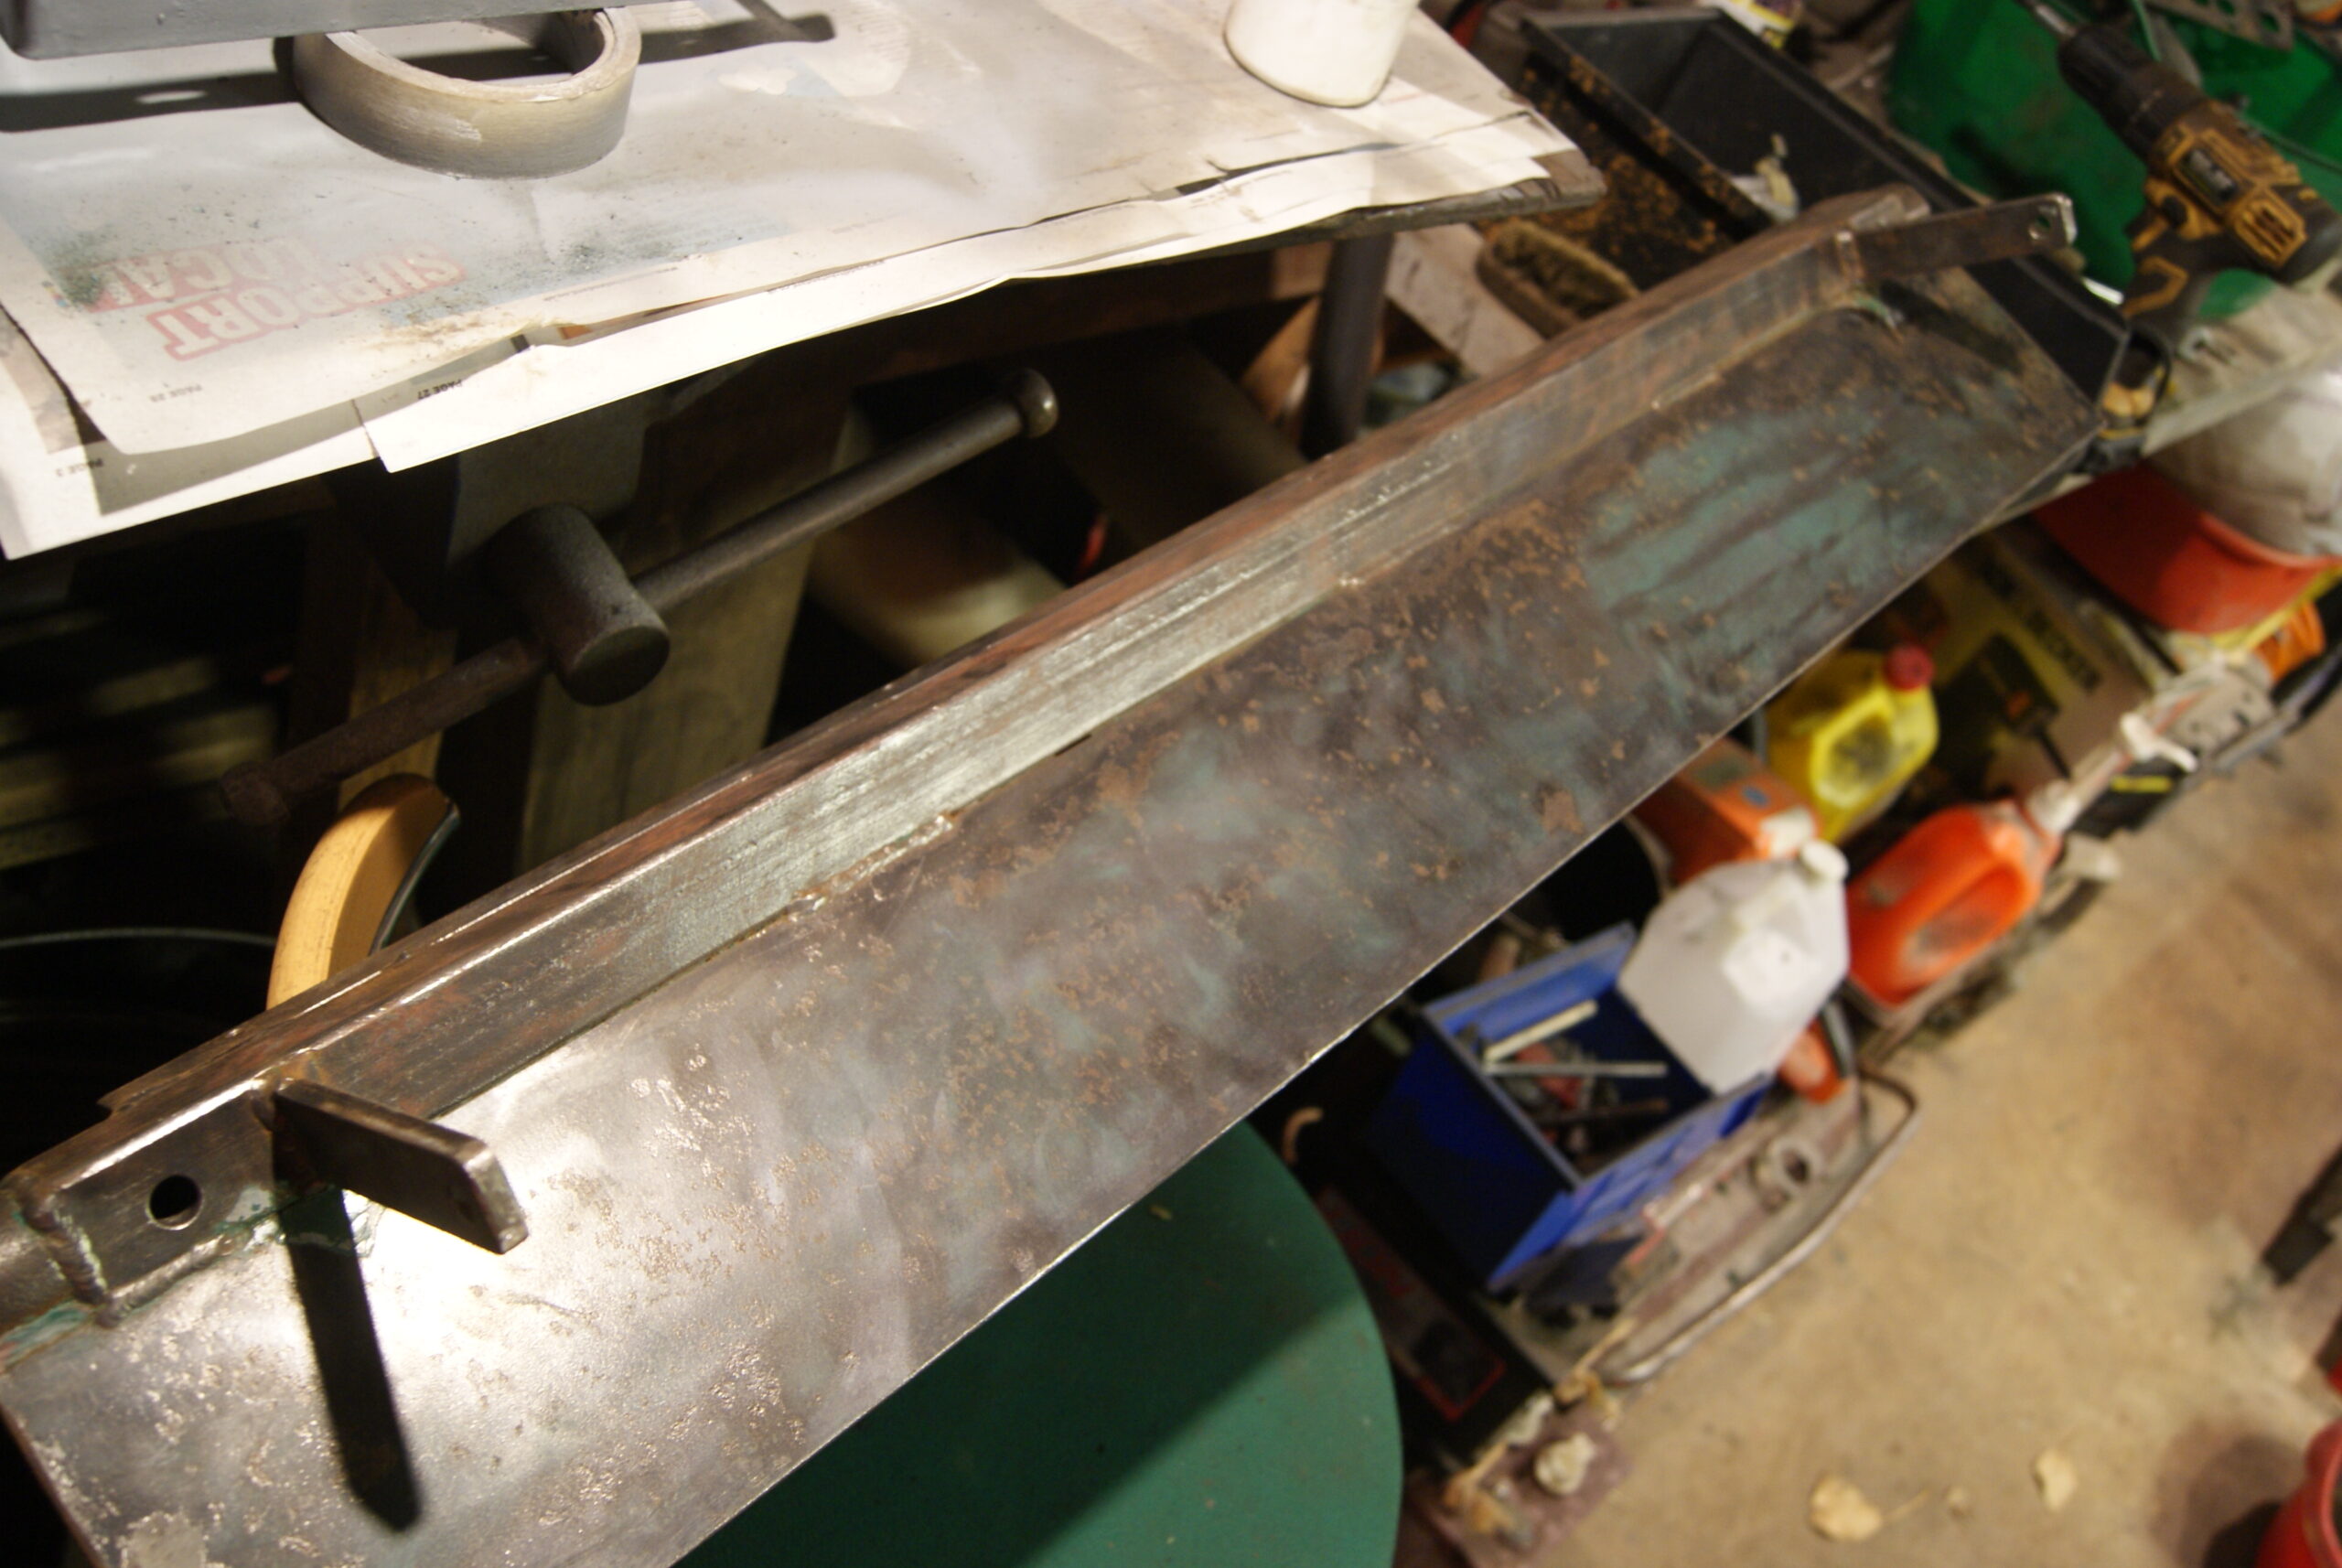
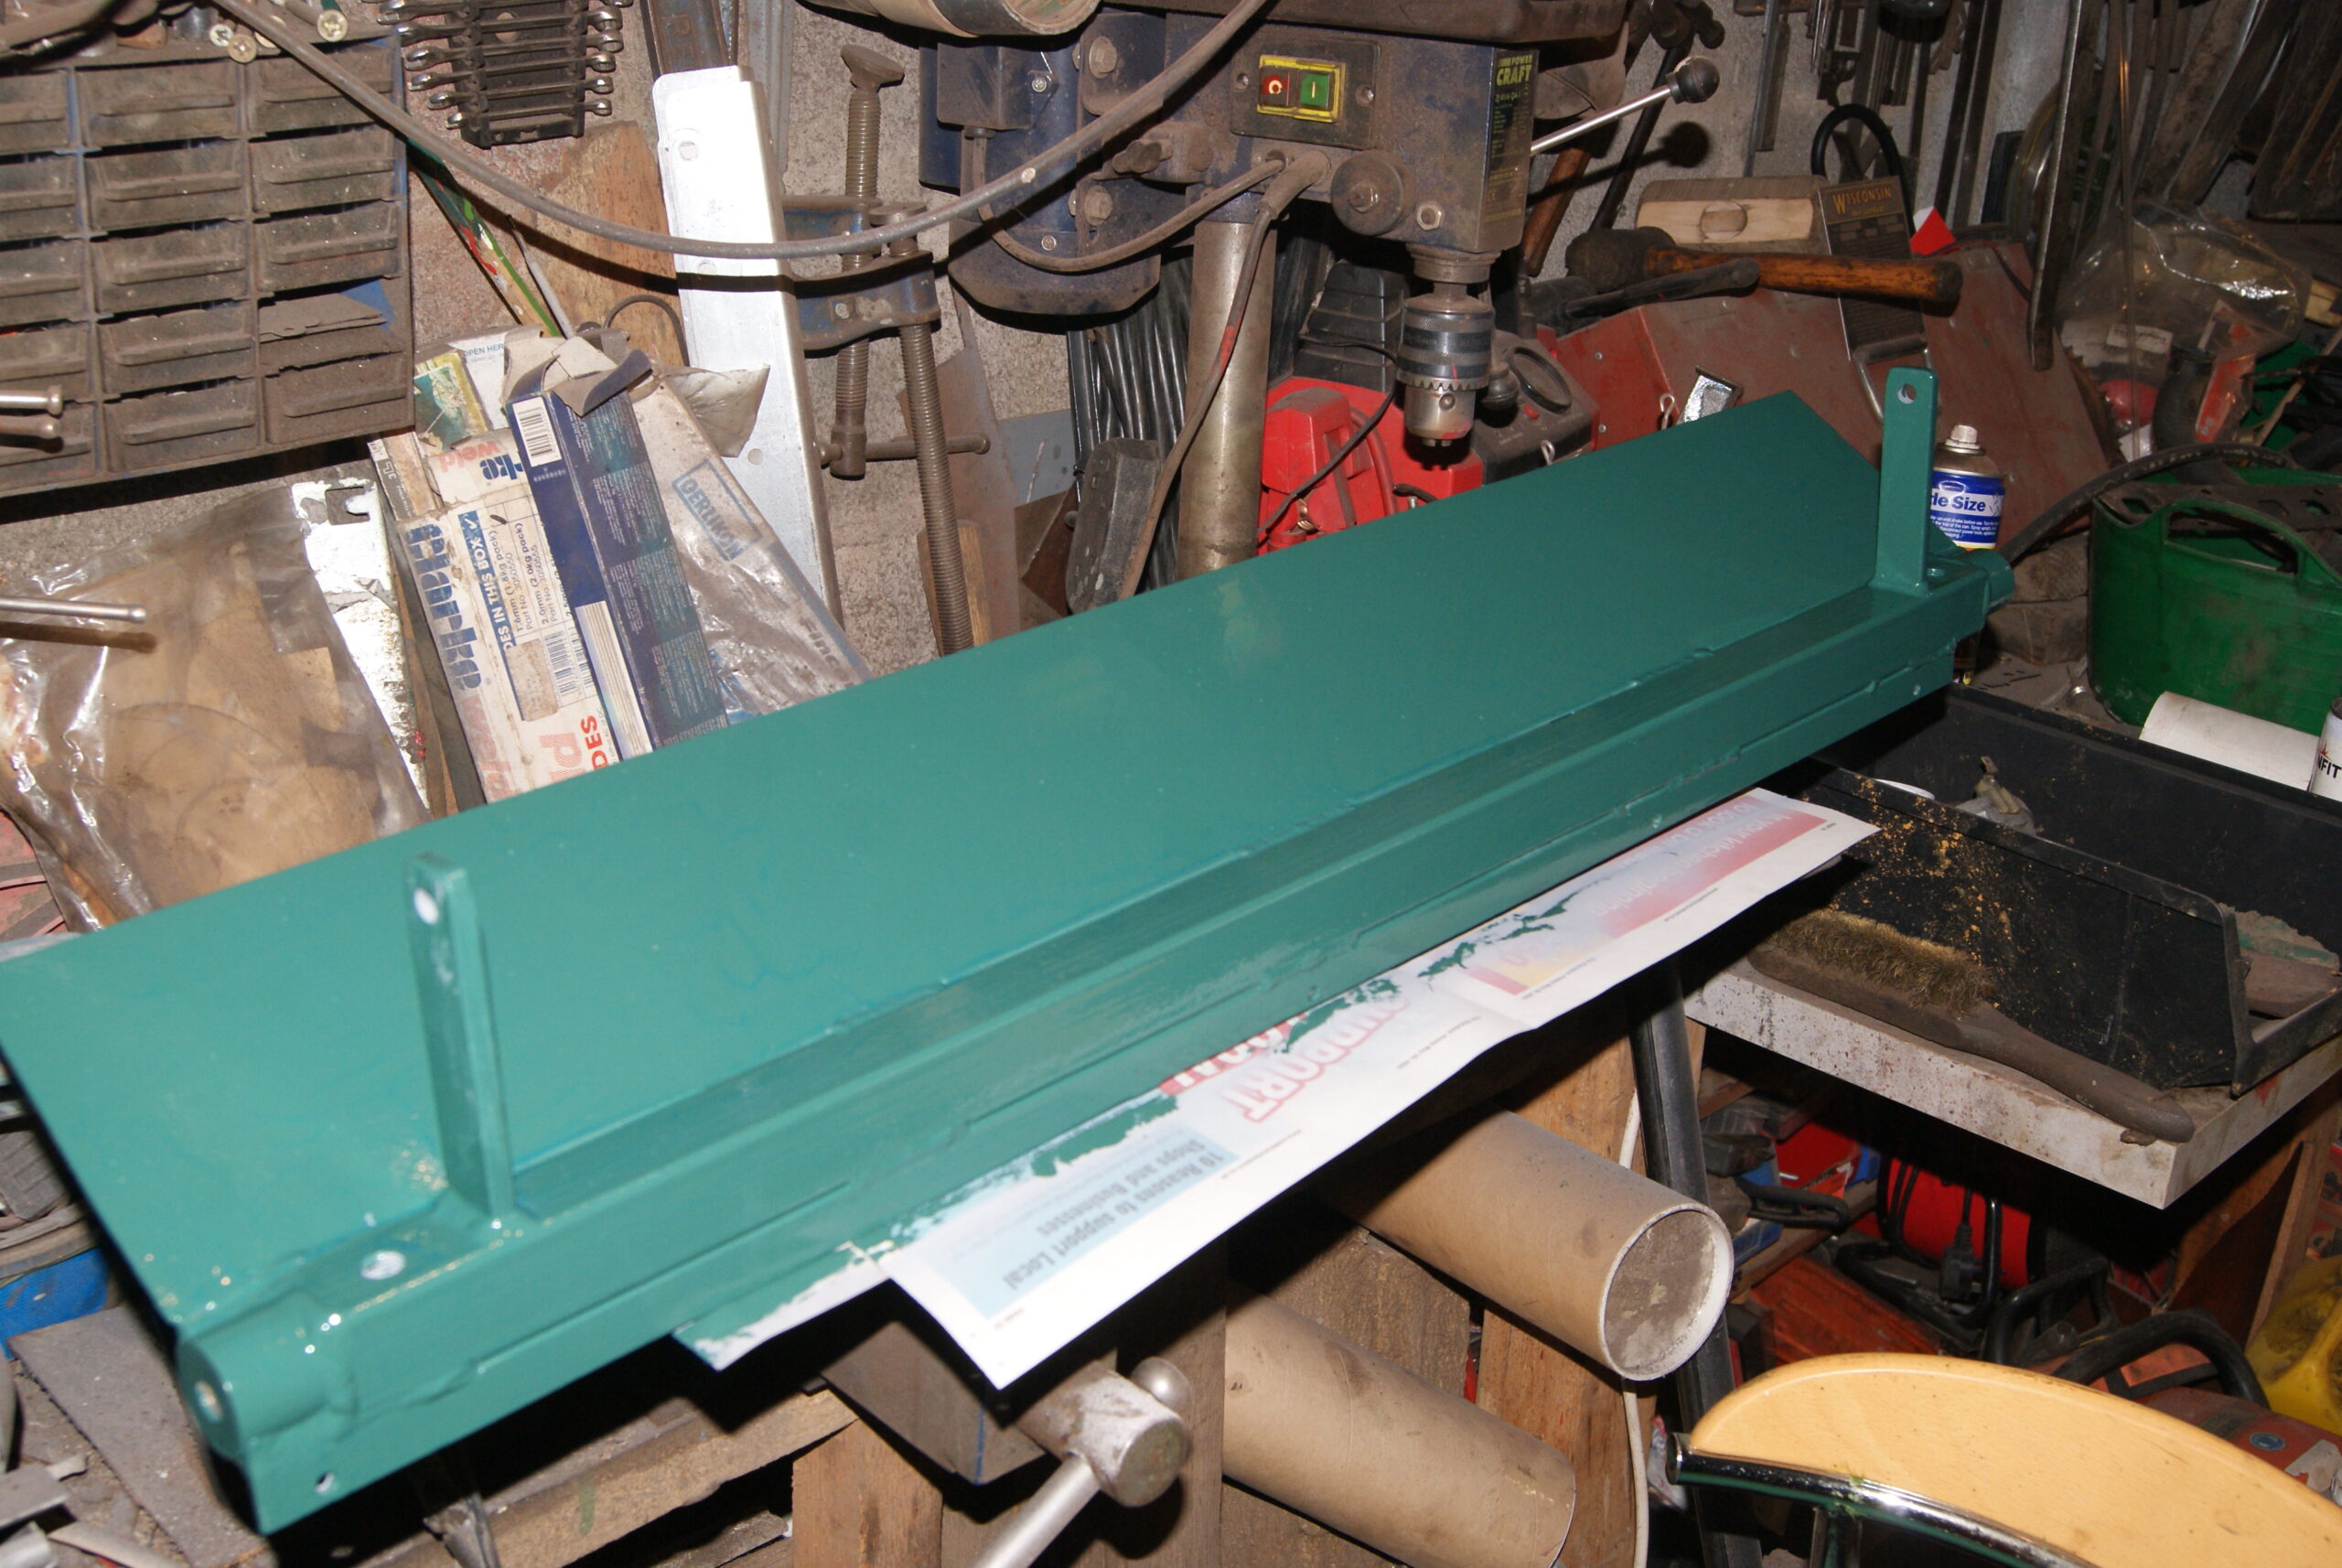
After the cleaning last weekend it was obvious that the rust had taken more of a hold than I had first thought. If I’d brushed up the rusty patches and painted them it would have looked awful so I decided to remove the large front crossmember which also incorporated two engine mountings. To keep the chassis in the correct shape I thought that if I put two wooden wedges under the engine to take the weight I could then undo the two end screws and remove it. There are two further crossmembers at the back of the engine so if I replace the front one before removing one of the rear ones it should always have two crossmembers attached at any one time.
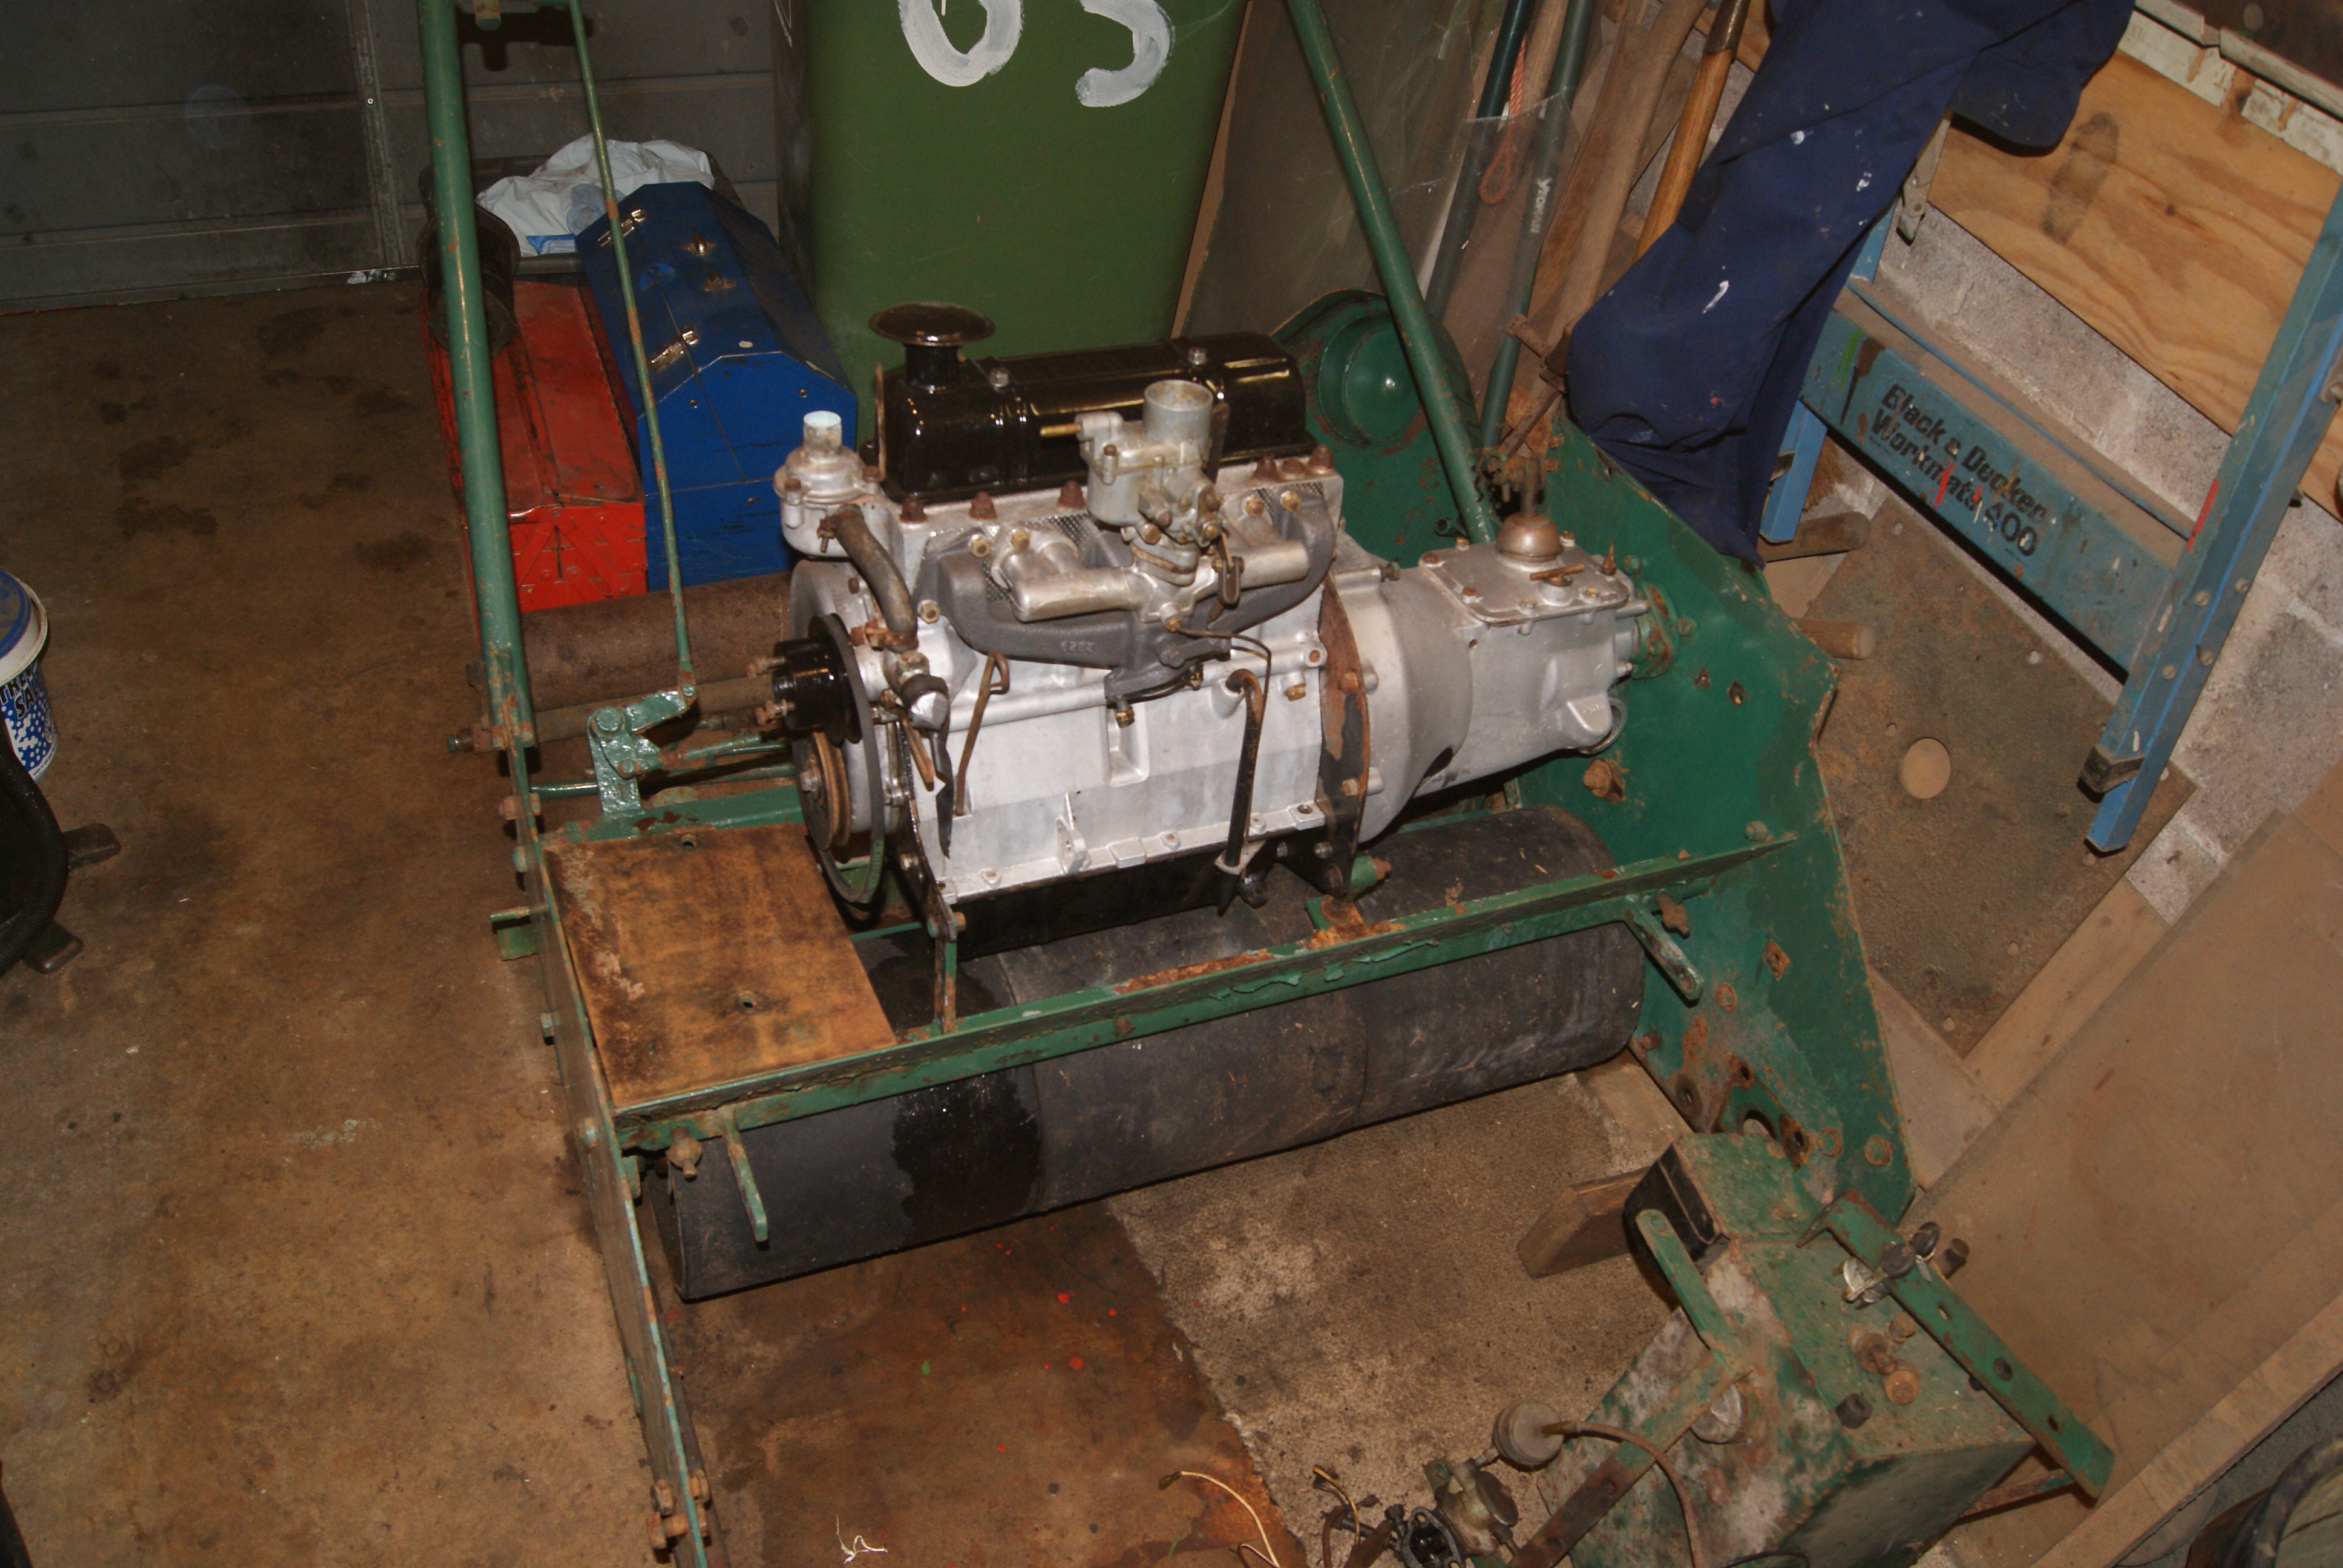
The front crossmember is now cleaned off with a wire wheel and primed with grey primer. There are some other brackets that are undergoing the same process with the acid and soda and will also be painted with primer before having a coat of Allett green. The starter motor, fuel pump, radiator, cowling and distributor are also ready to be re-fitted once the chassis work is completed; the dynamo is with the local auto electrics expert who thinks he can resurrect it with a bit of work.
That’s about all for this update. Cosmetic work always takes time but it can either break or make this kind of job so it’s worth taking the time to flat things down, fill any blemishes then flat and fill endlessly until you’re satisfied enough to put the paint on.
Attachments:
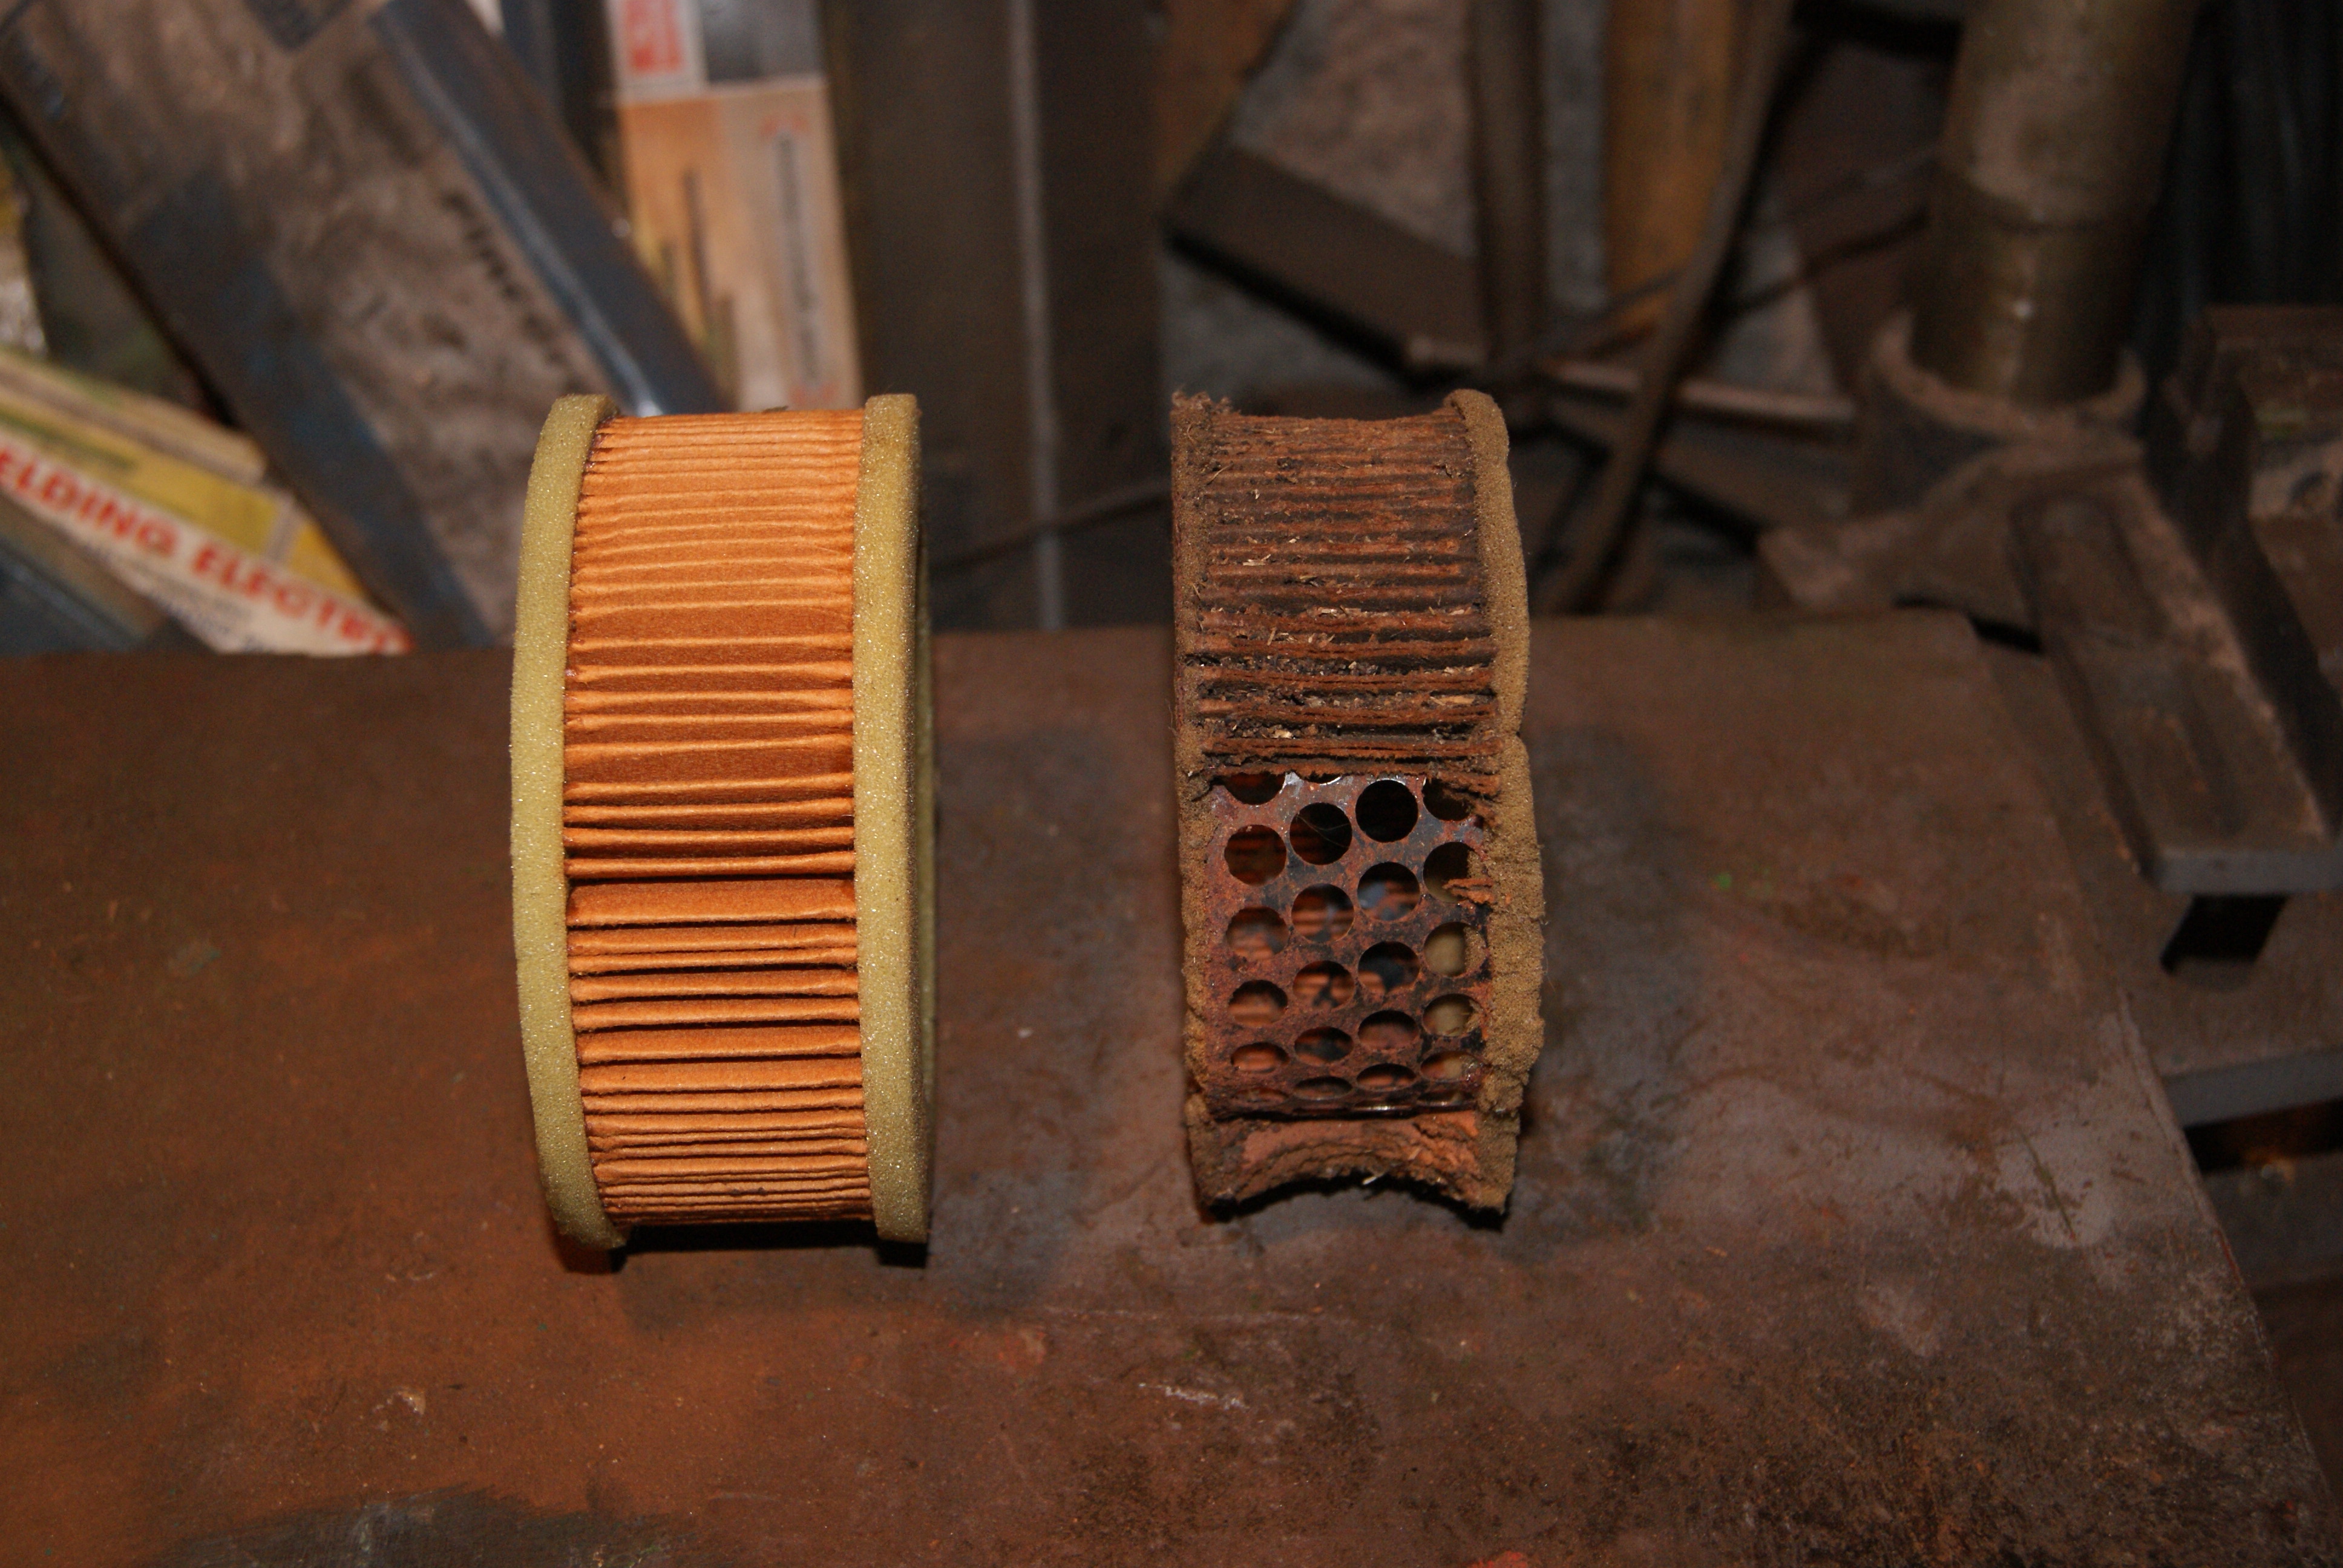
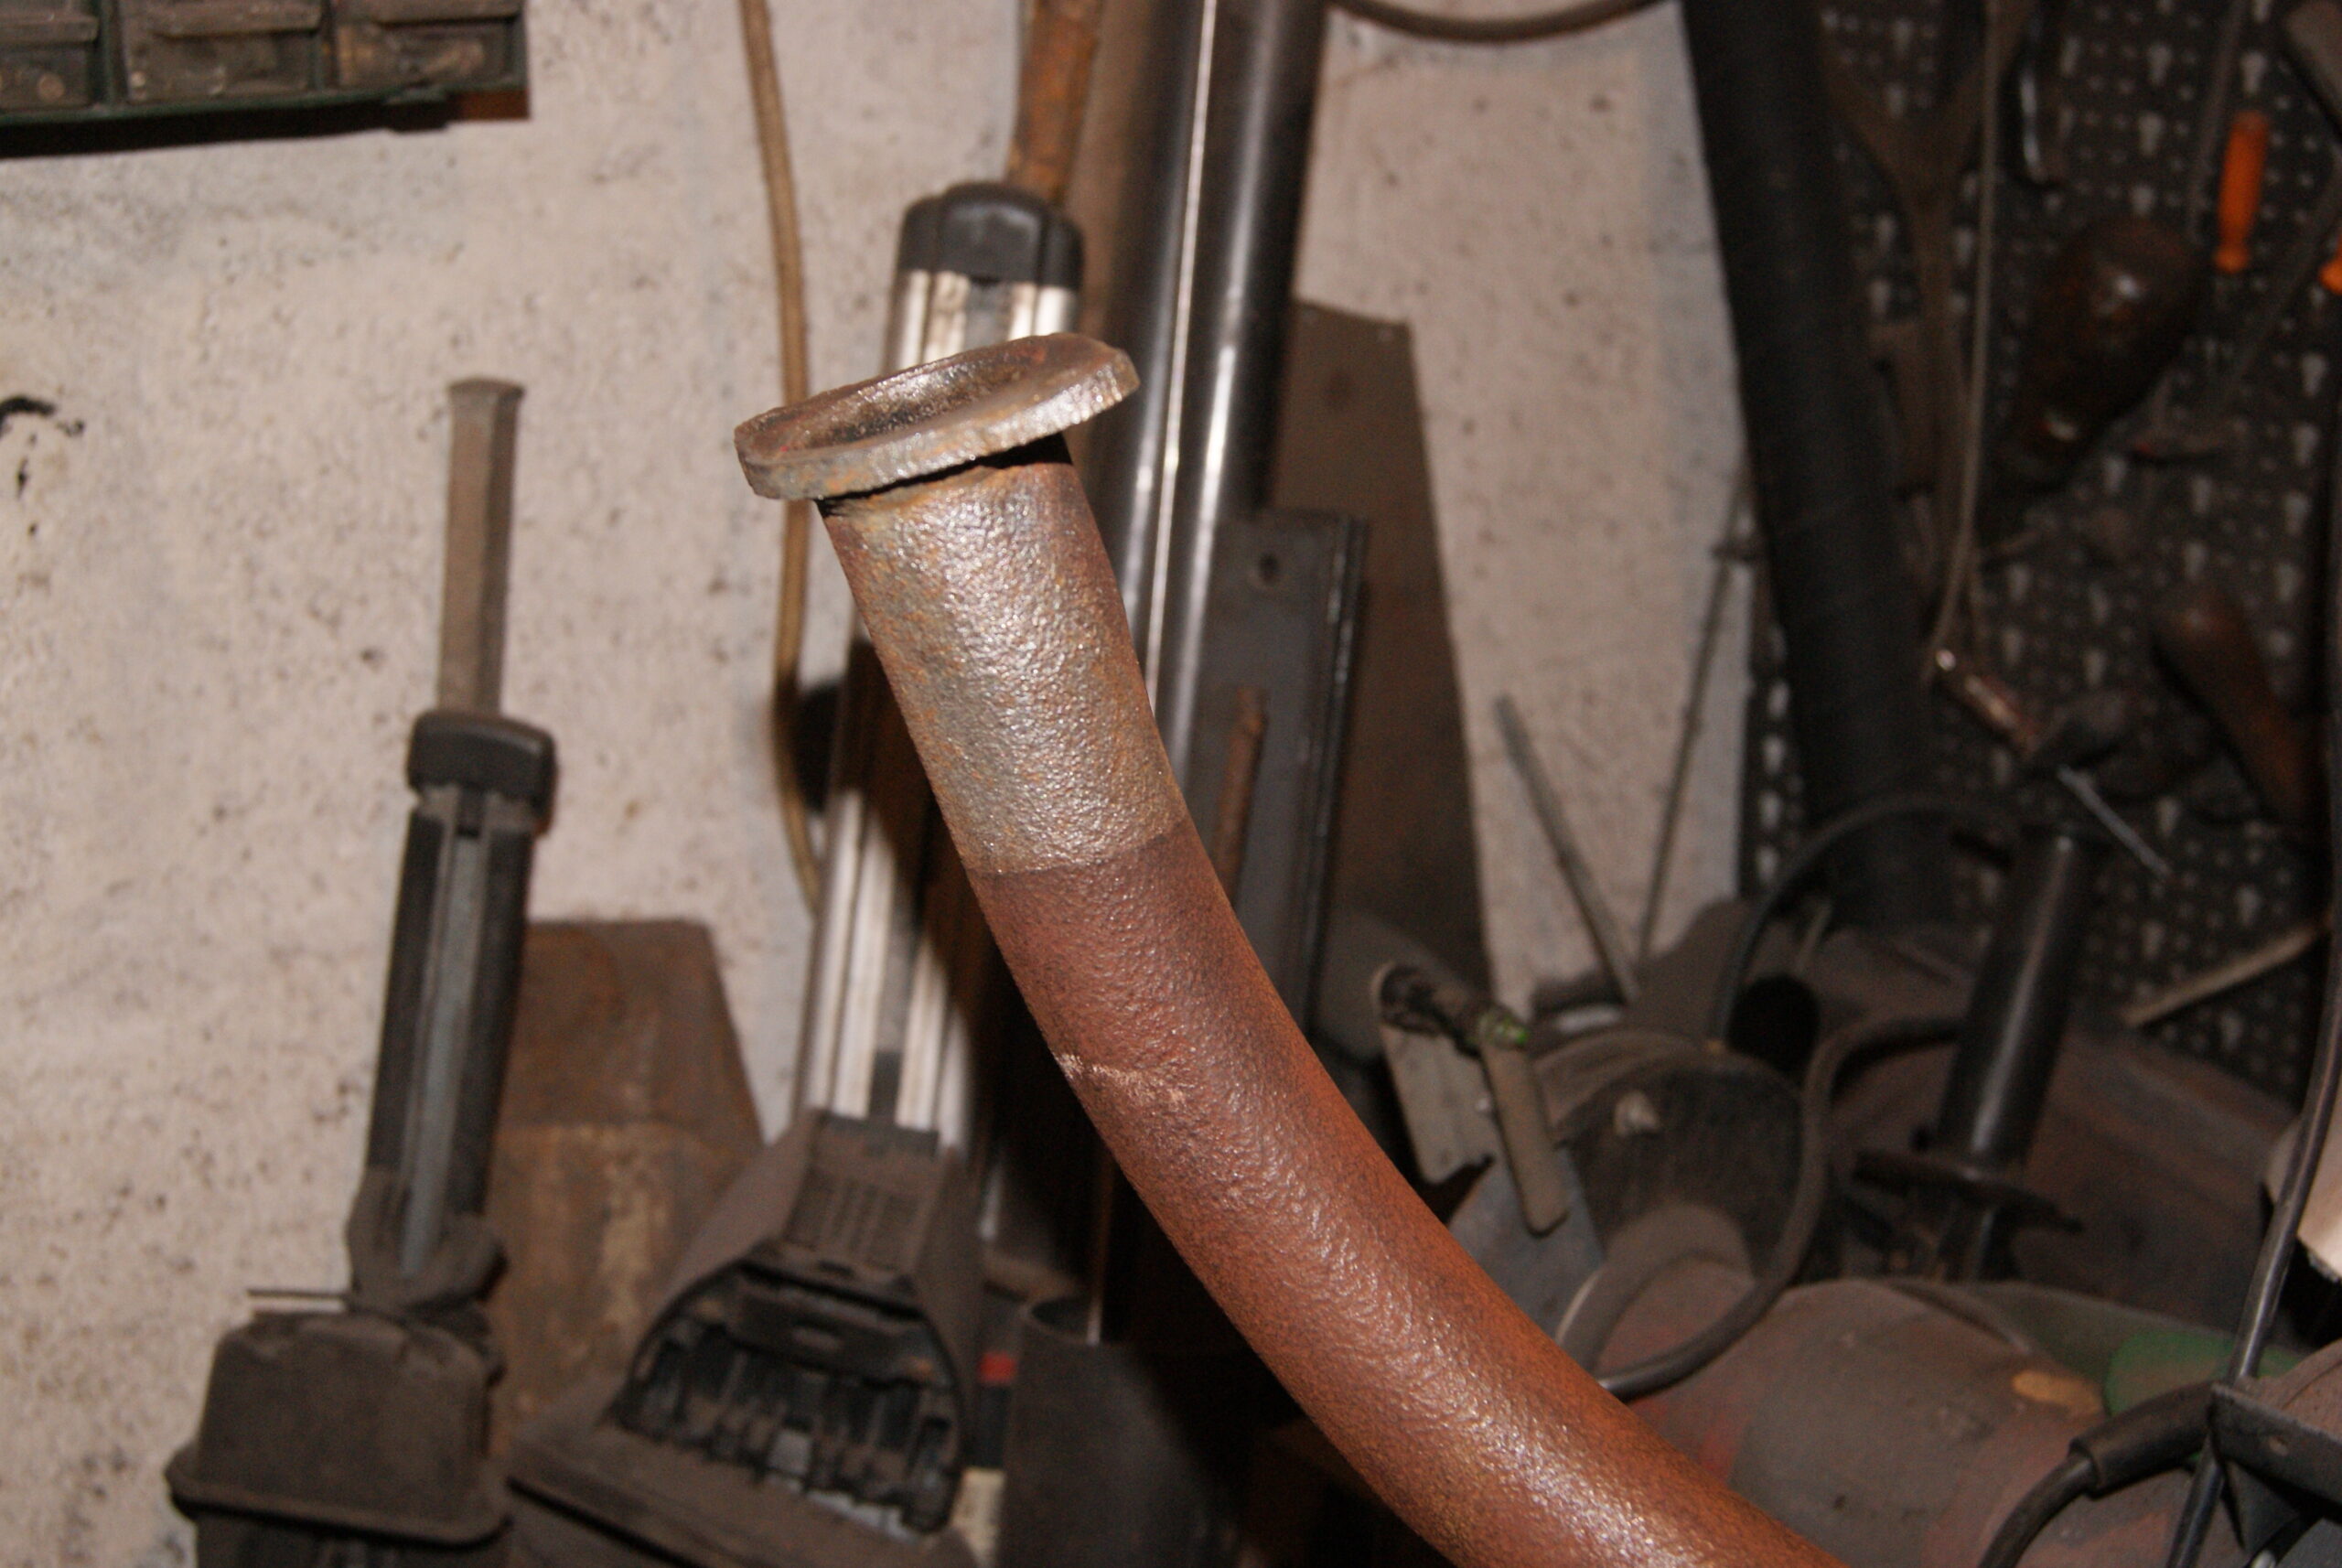
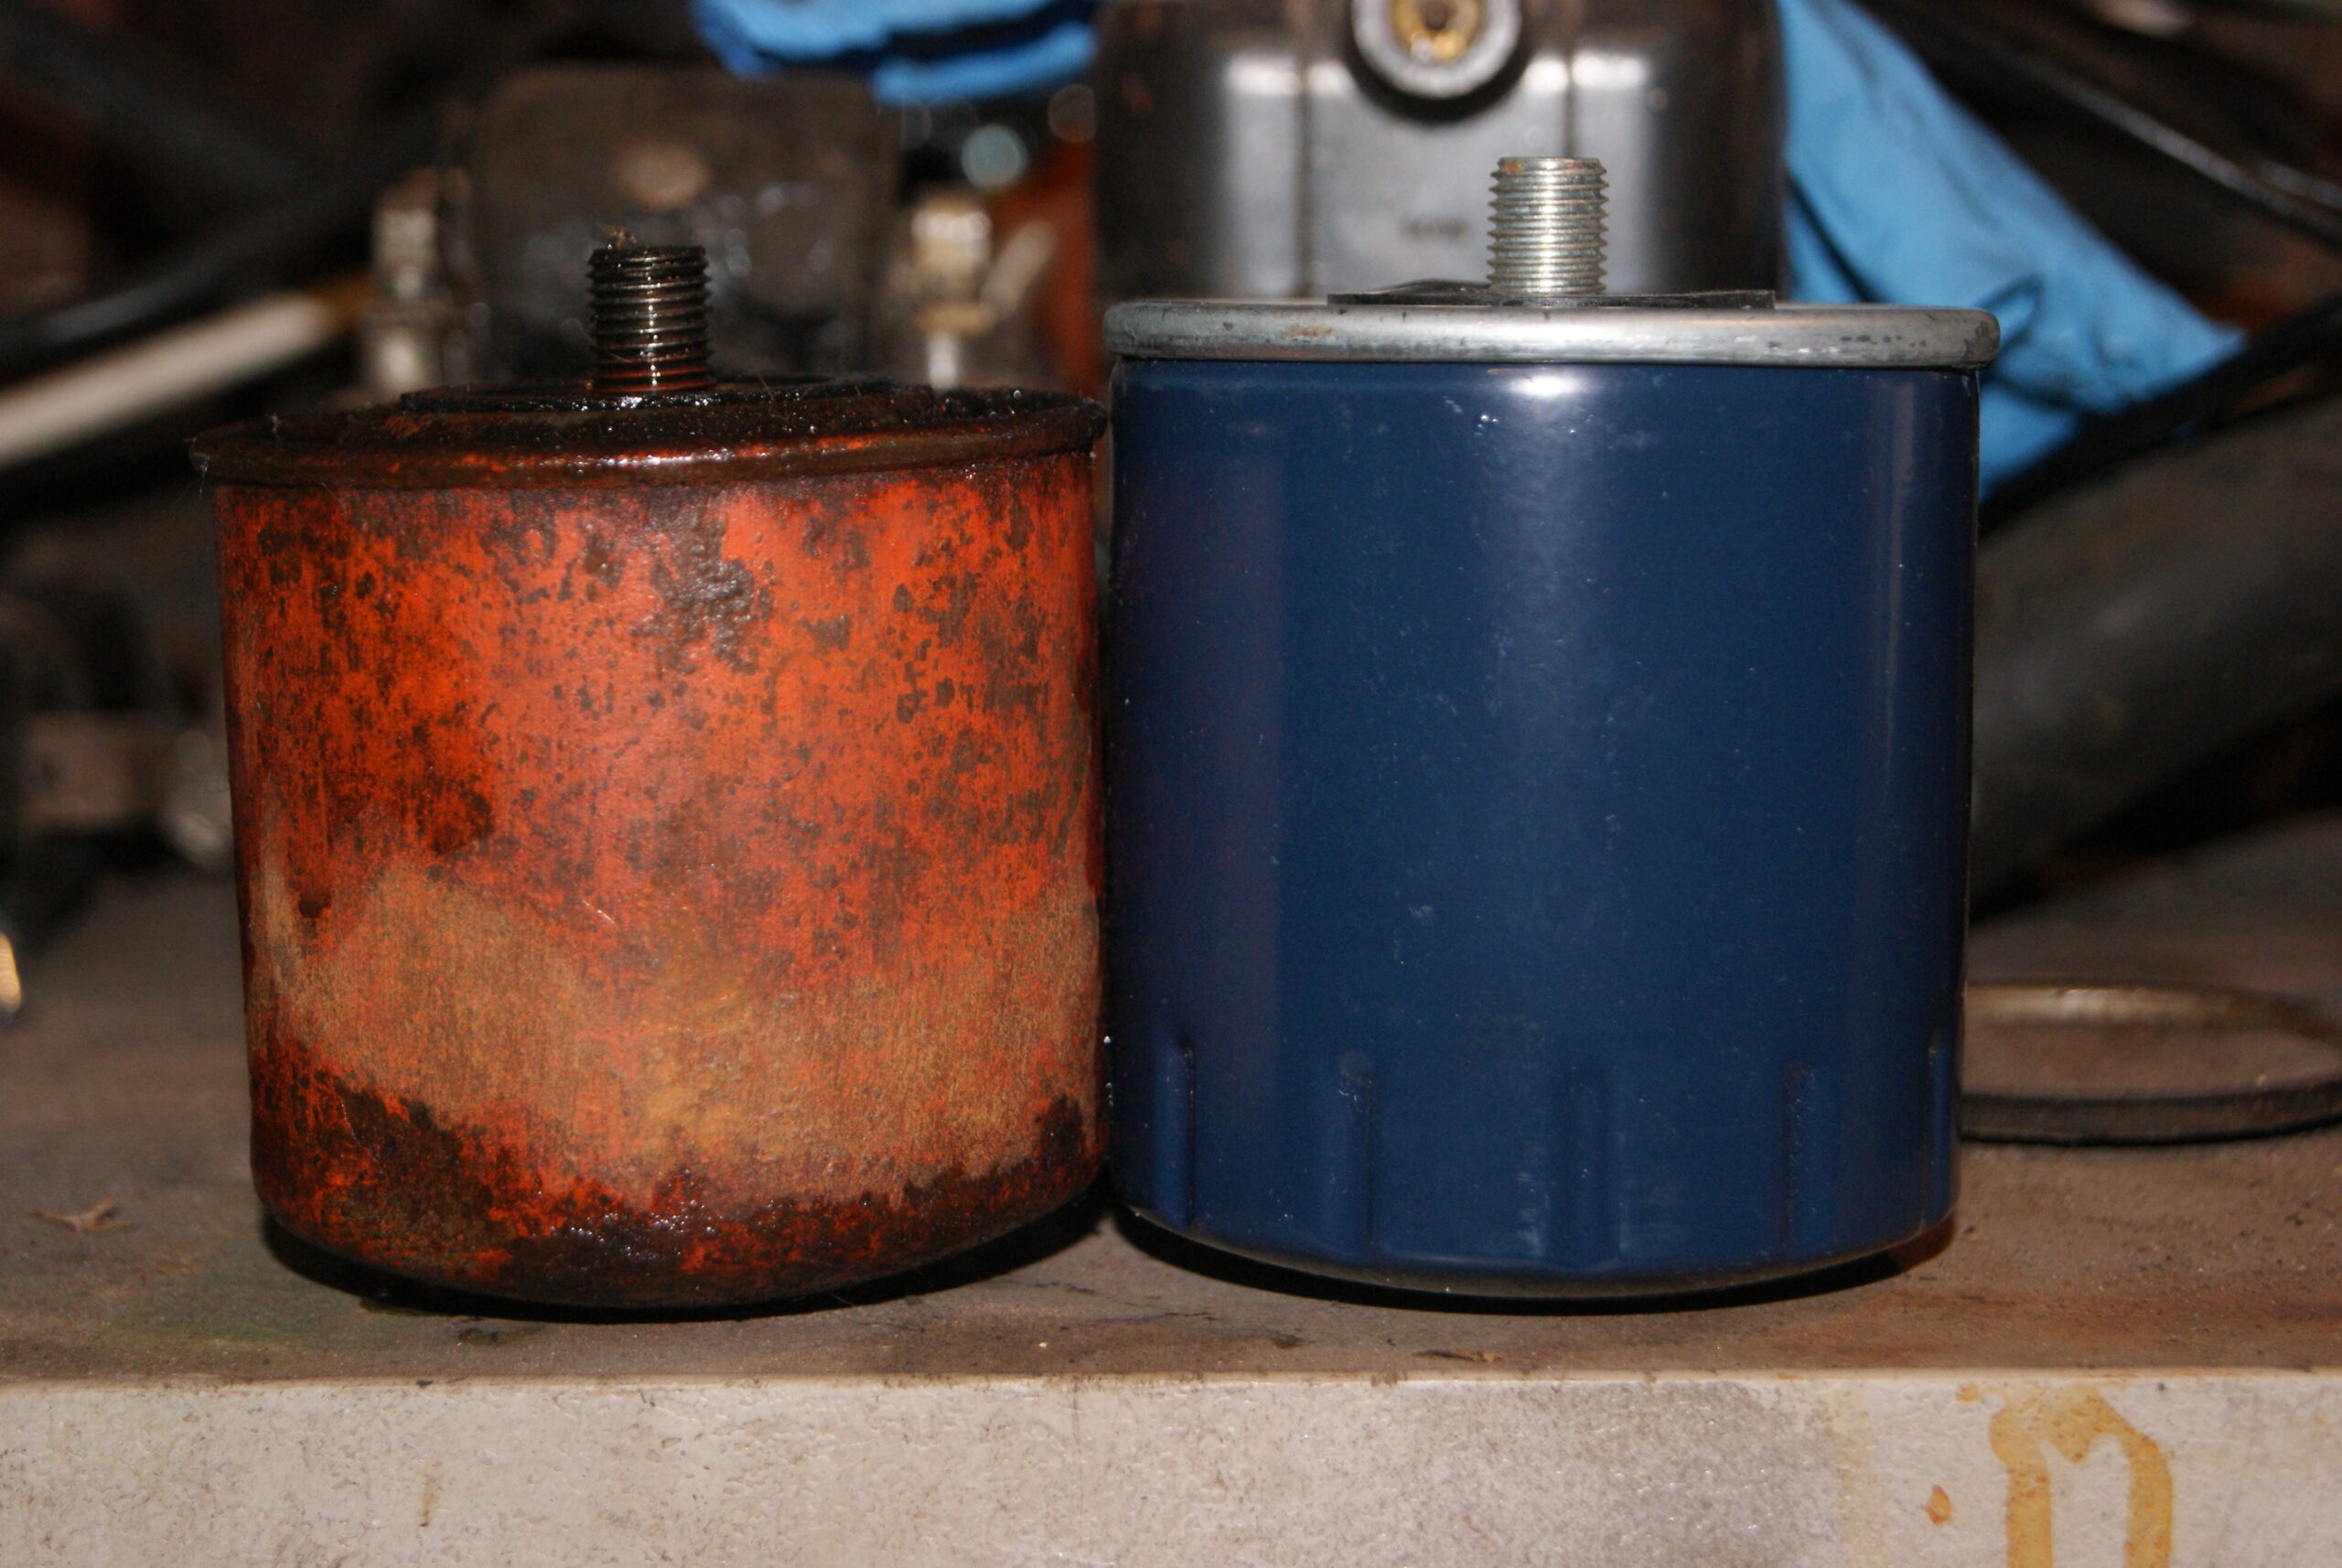
June 4, 2022 at 12:29 pm #39161trusty220KeymasterI thought for this update I would start with some comparison photo’s of old and new so you can see what’s available. I’ve also included a photo of the exhaust downpipe so you can see what kind of results that you can get from using the brick cleaner method of de-rusting; the dividing line is very clear cut and you can see for yourself why I do it. It’s ideal for more delicate items that won’t stand up to rotary wire brushing and it does leave the surface clean and rust free with no brown staining.
The oil filter is only 3/8″ longer than the original and so I’m hoping it will fit under the cover when I get around to it.
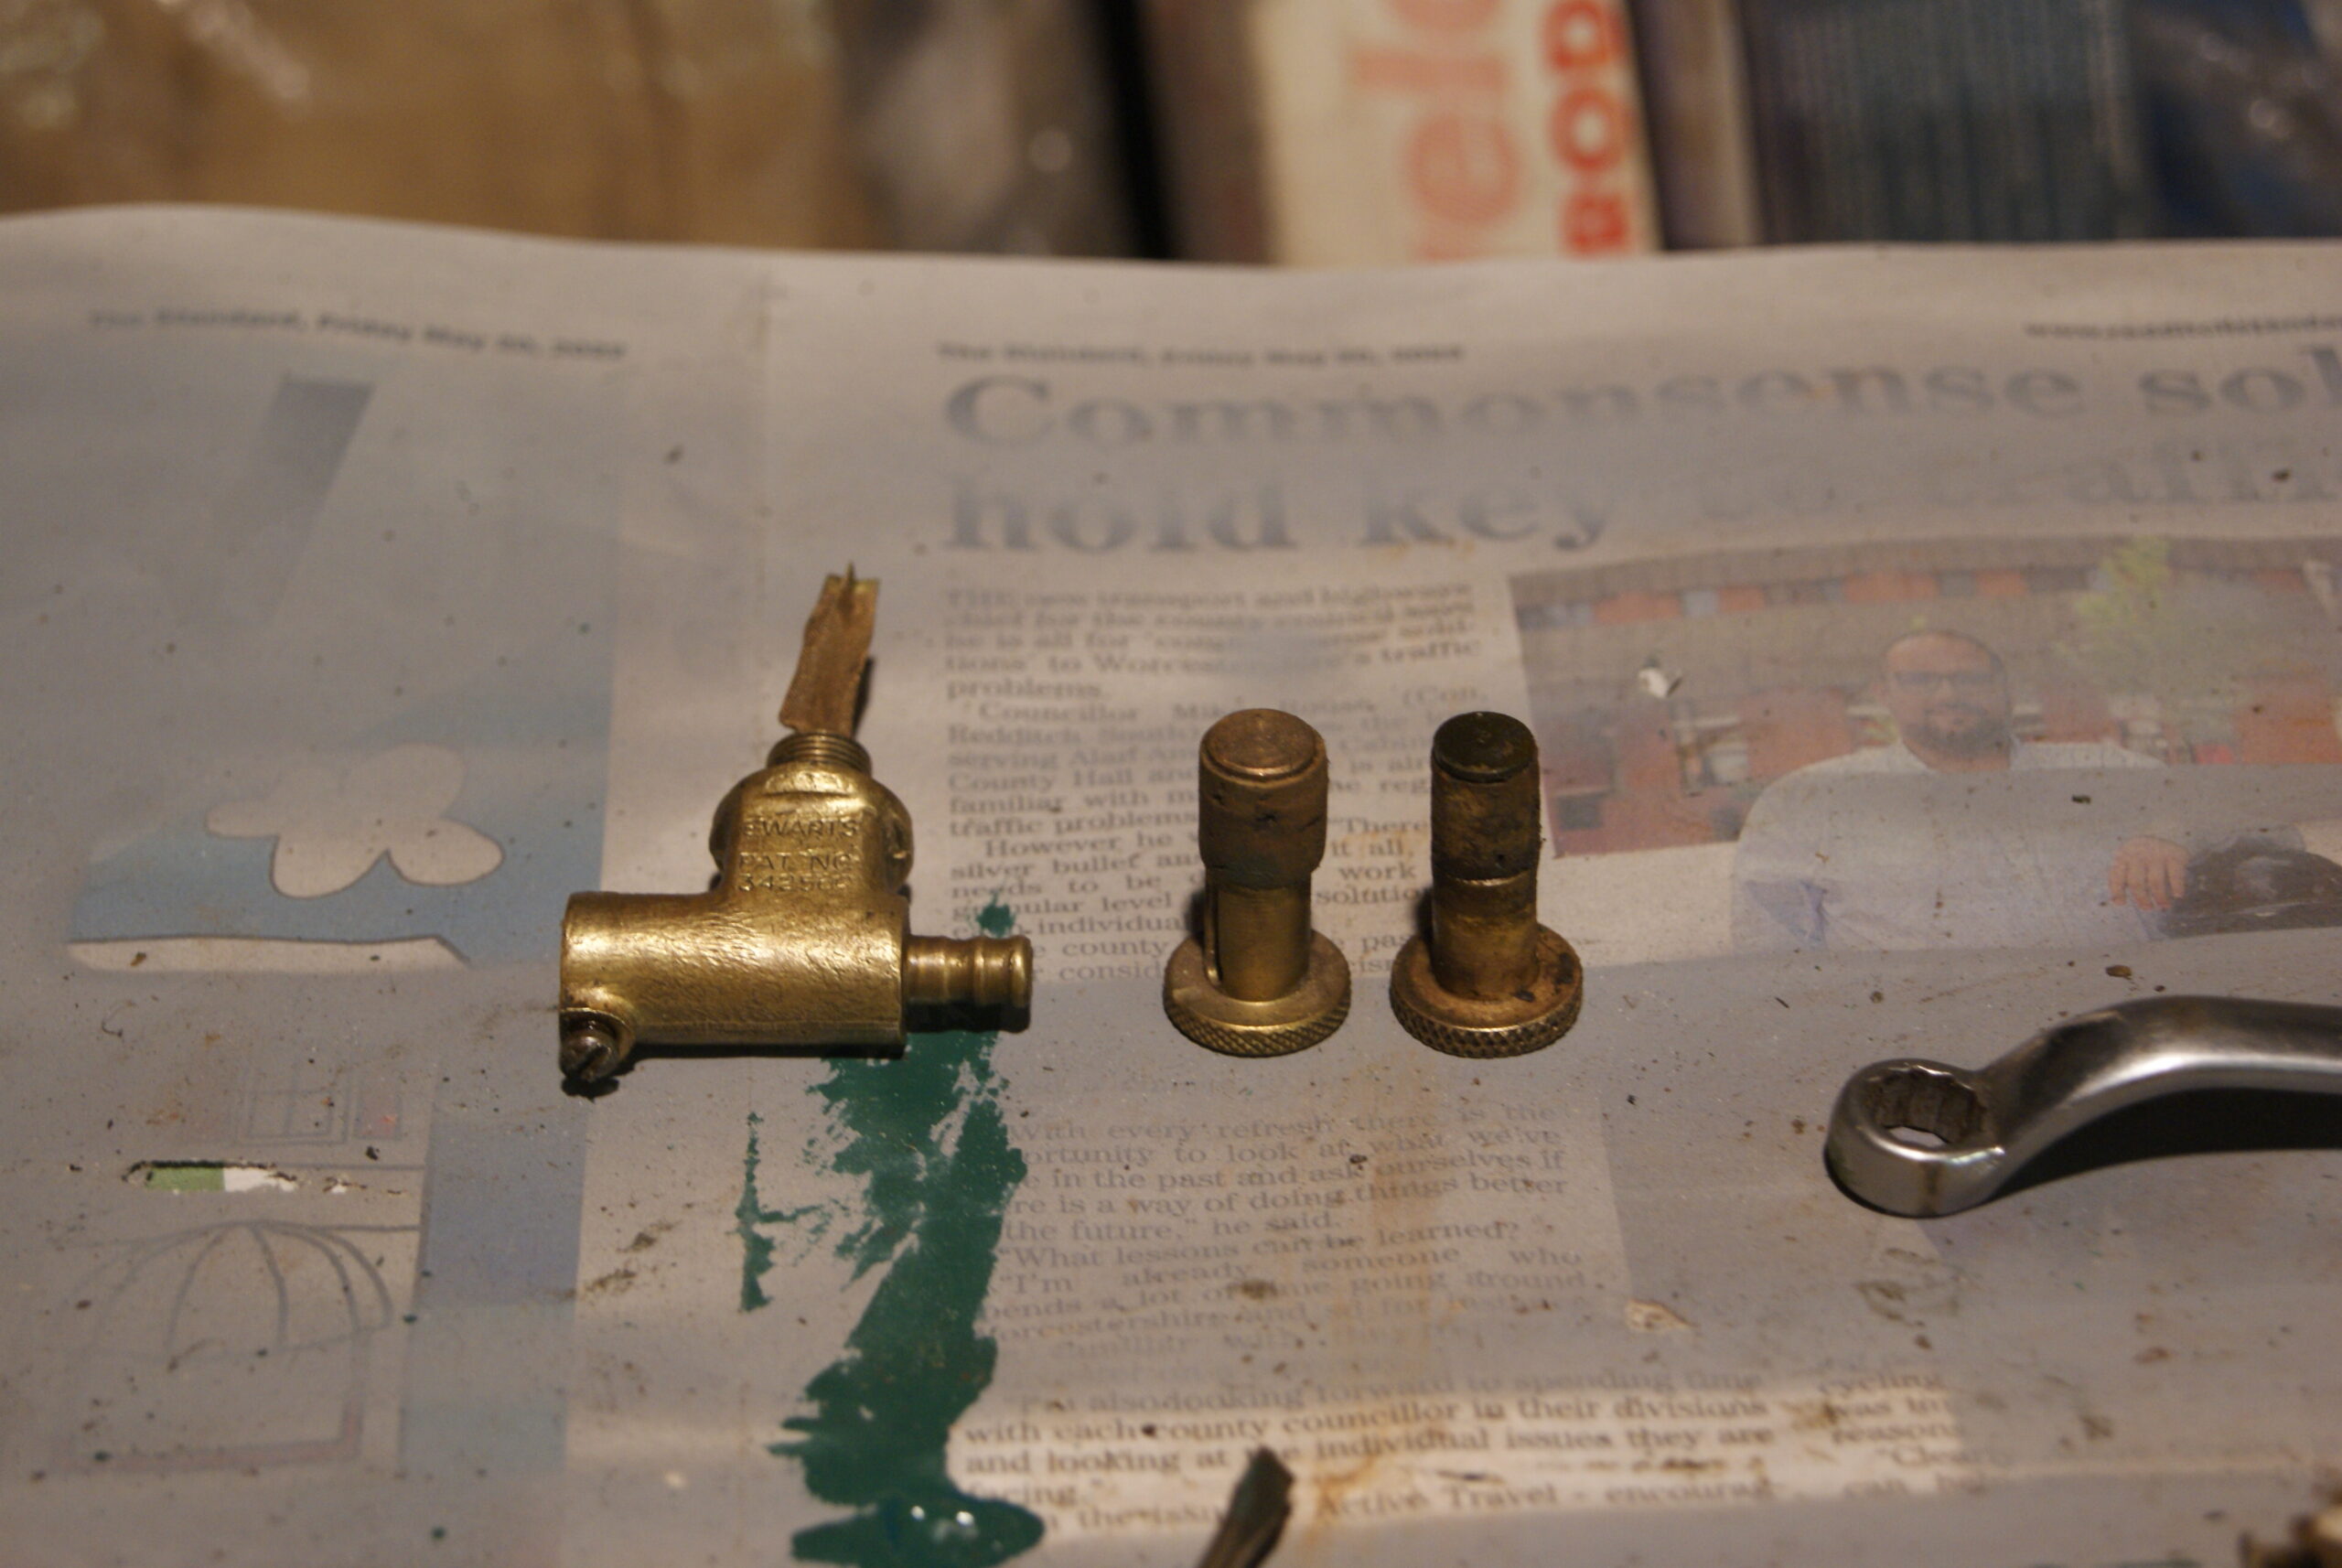
Surprisingly the fuel tank is fitted with a standard Ewarts brass tap with a cork plunger. Yes, the cork was no good as you can see from the photo but the new one next to it was obtained via that online auction site and it has made it as good as new again.
Paint has been the main topic this week with lots of parts getting cleaned off and re-painted using the matched synthetic enamel paint. Well worth it and the only way to get good results is to take your time; never be afraid to reject something if it doesn’t come up to standard, just flat it down again and try again until you get an acceptable result.
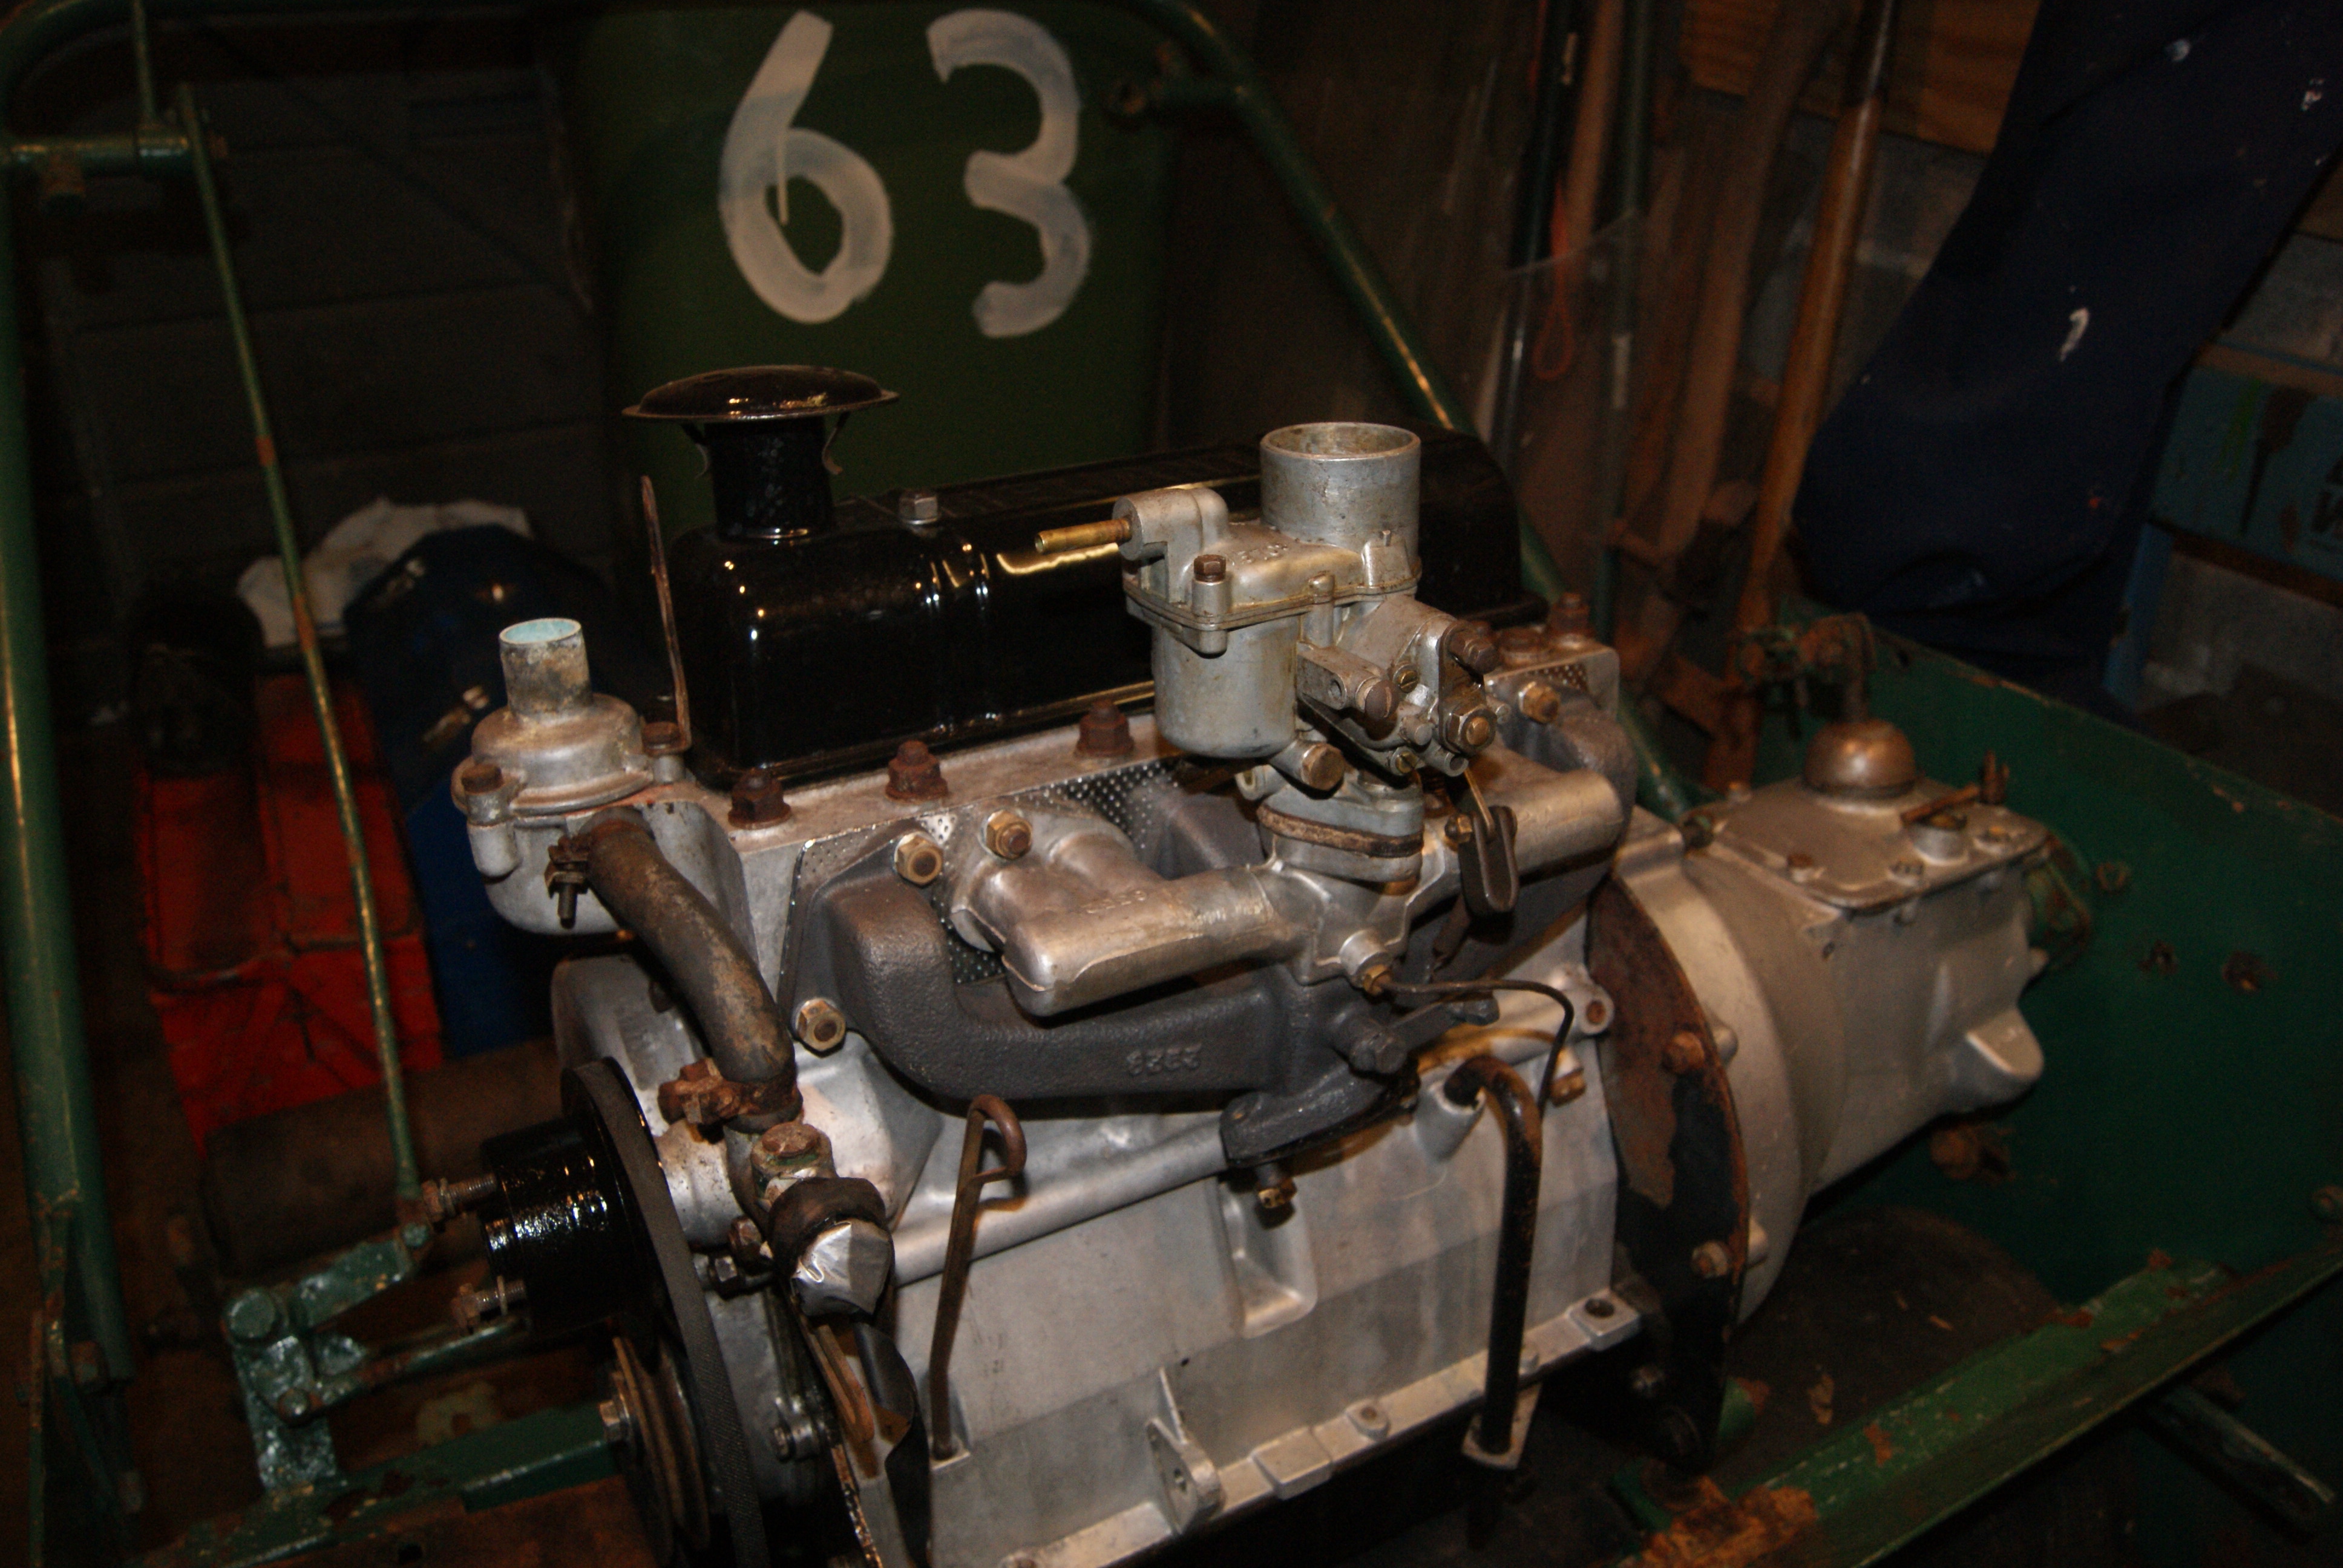
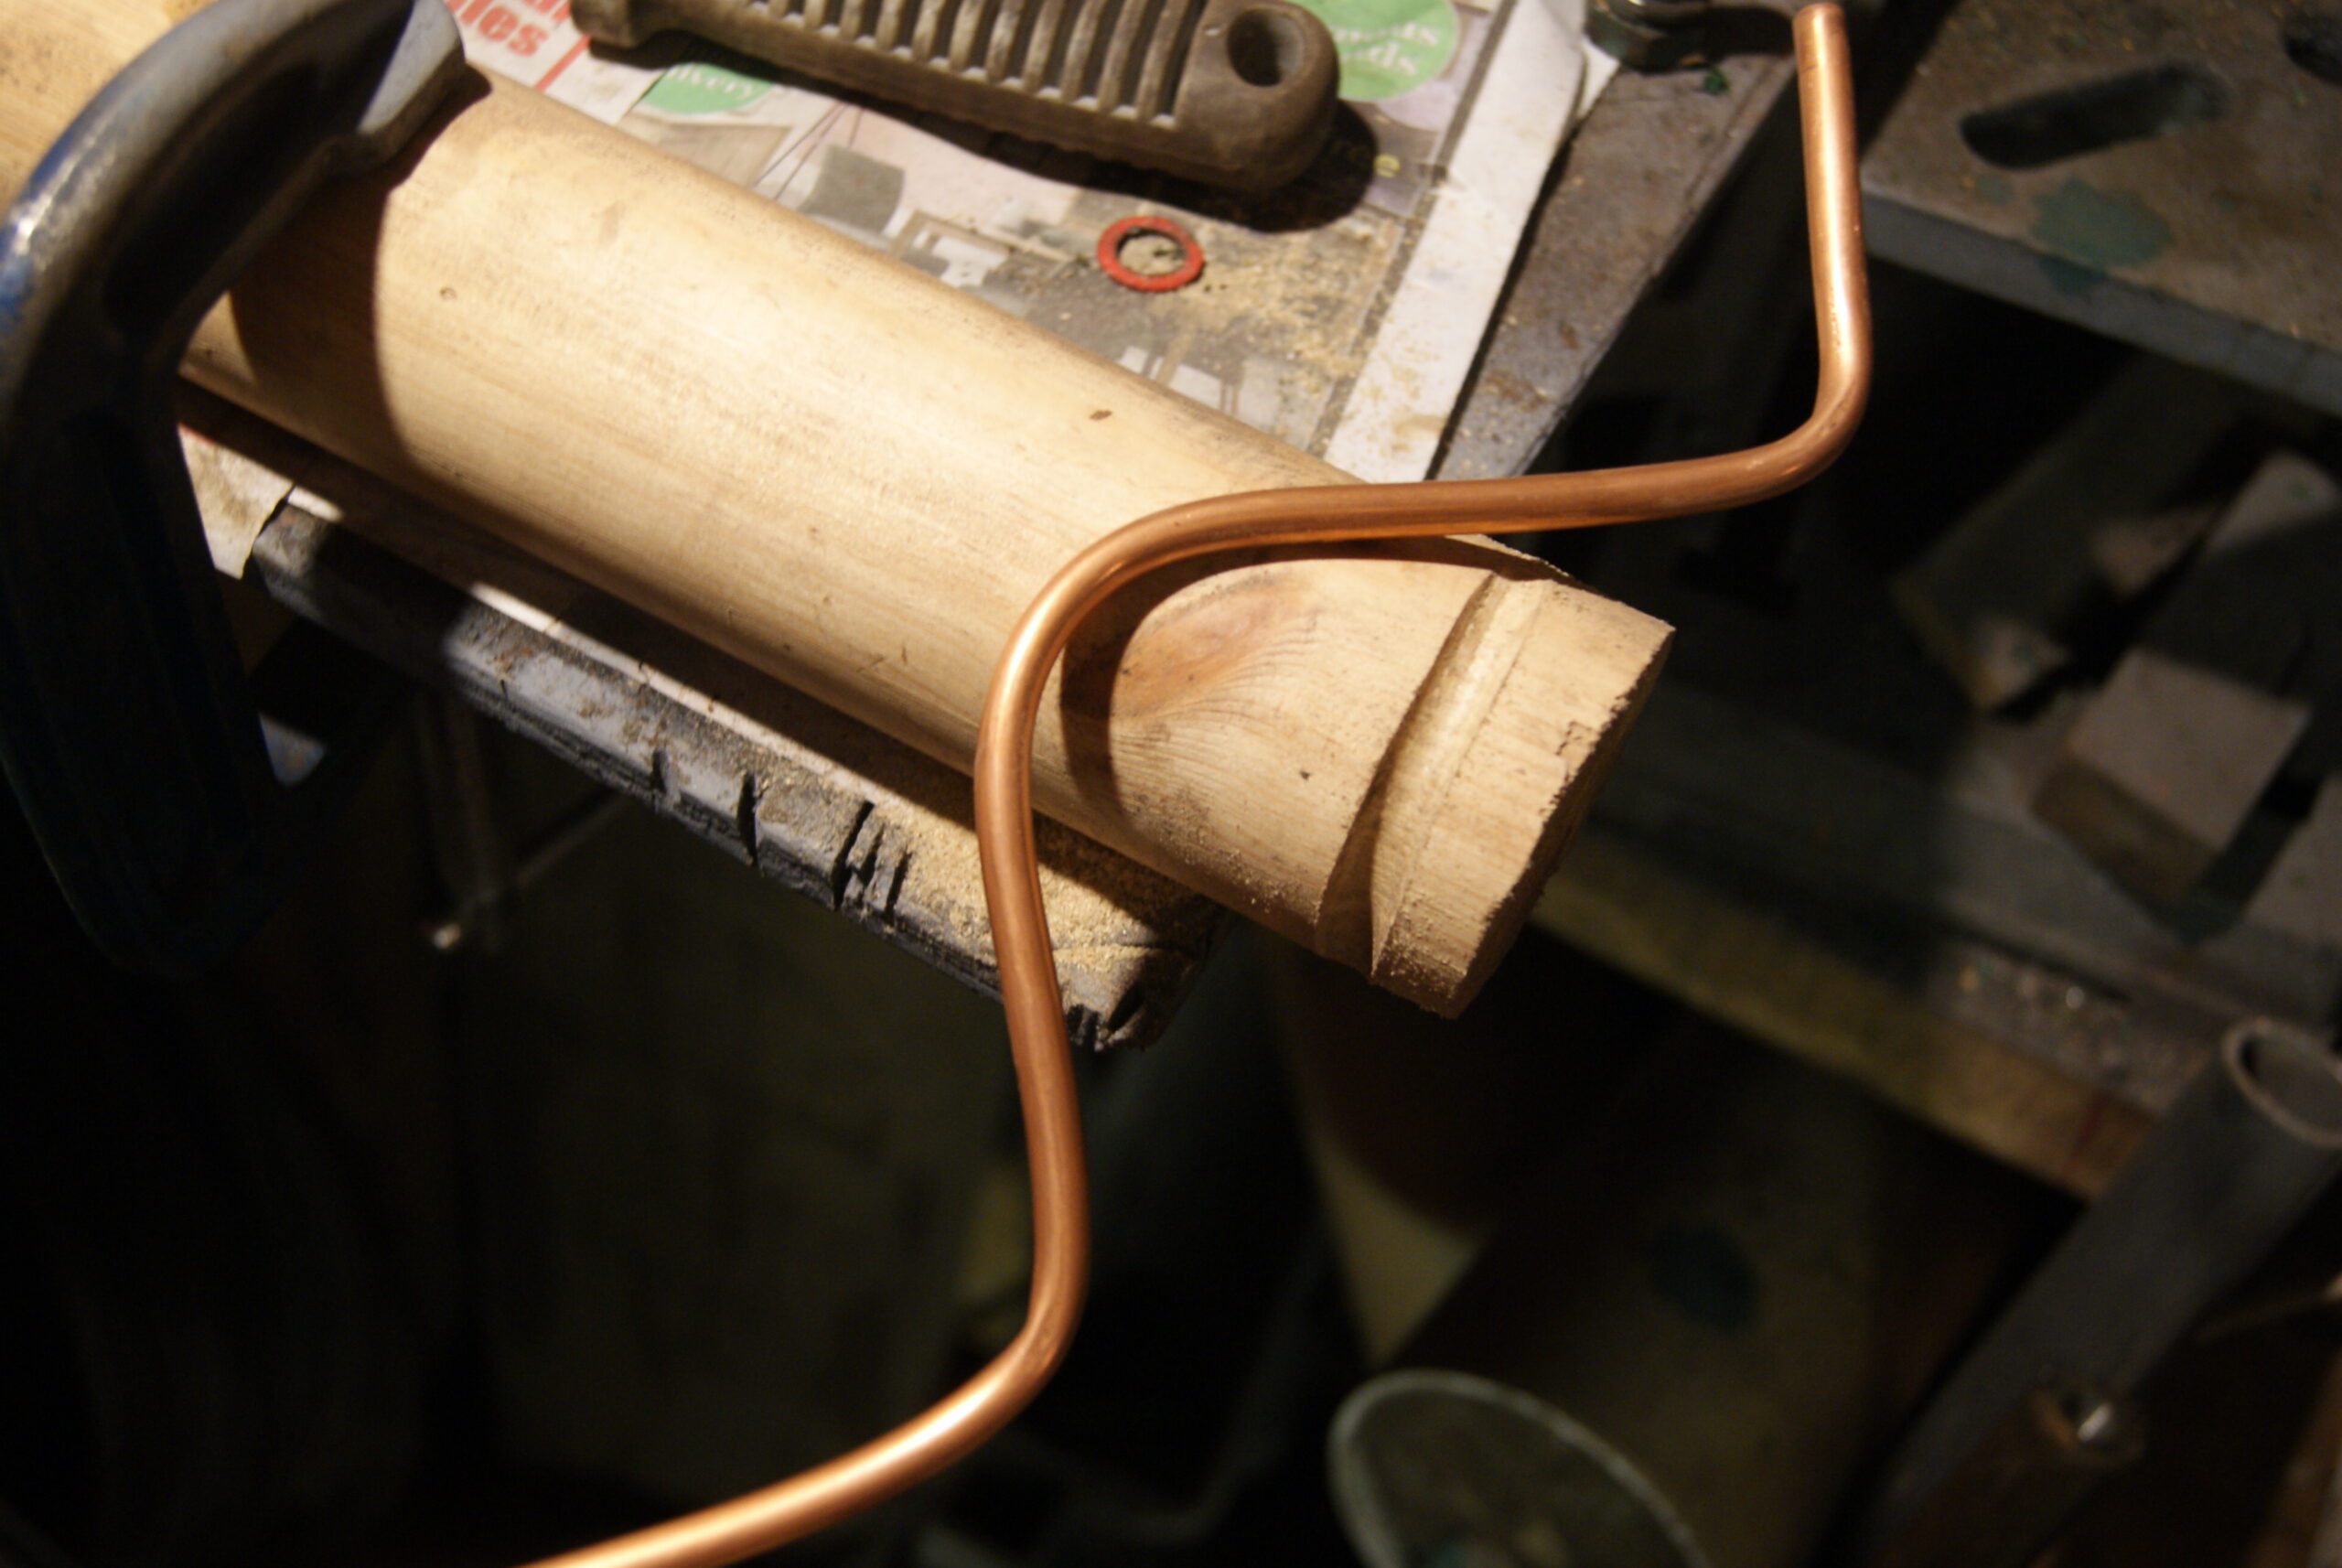
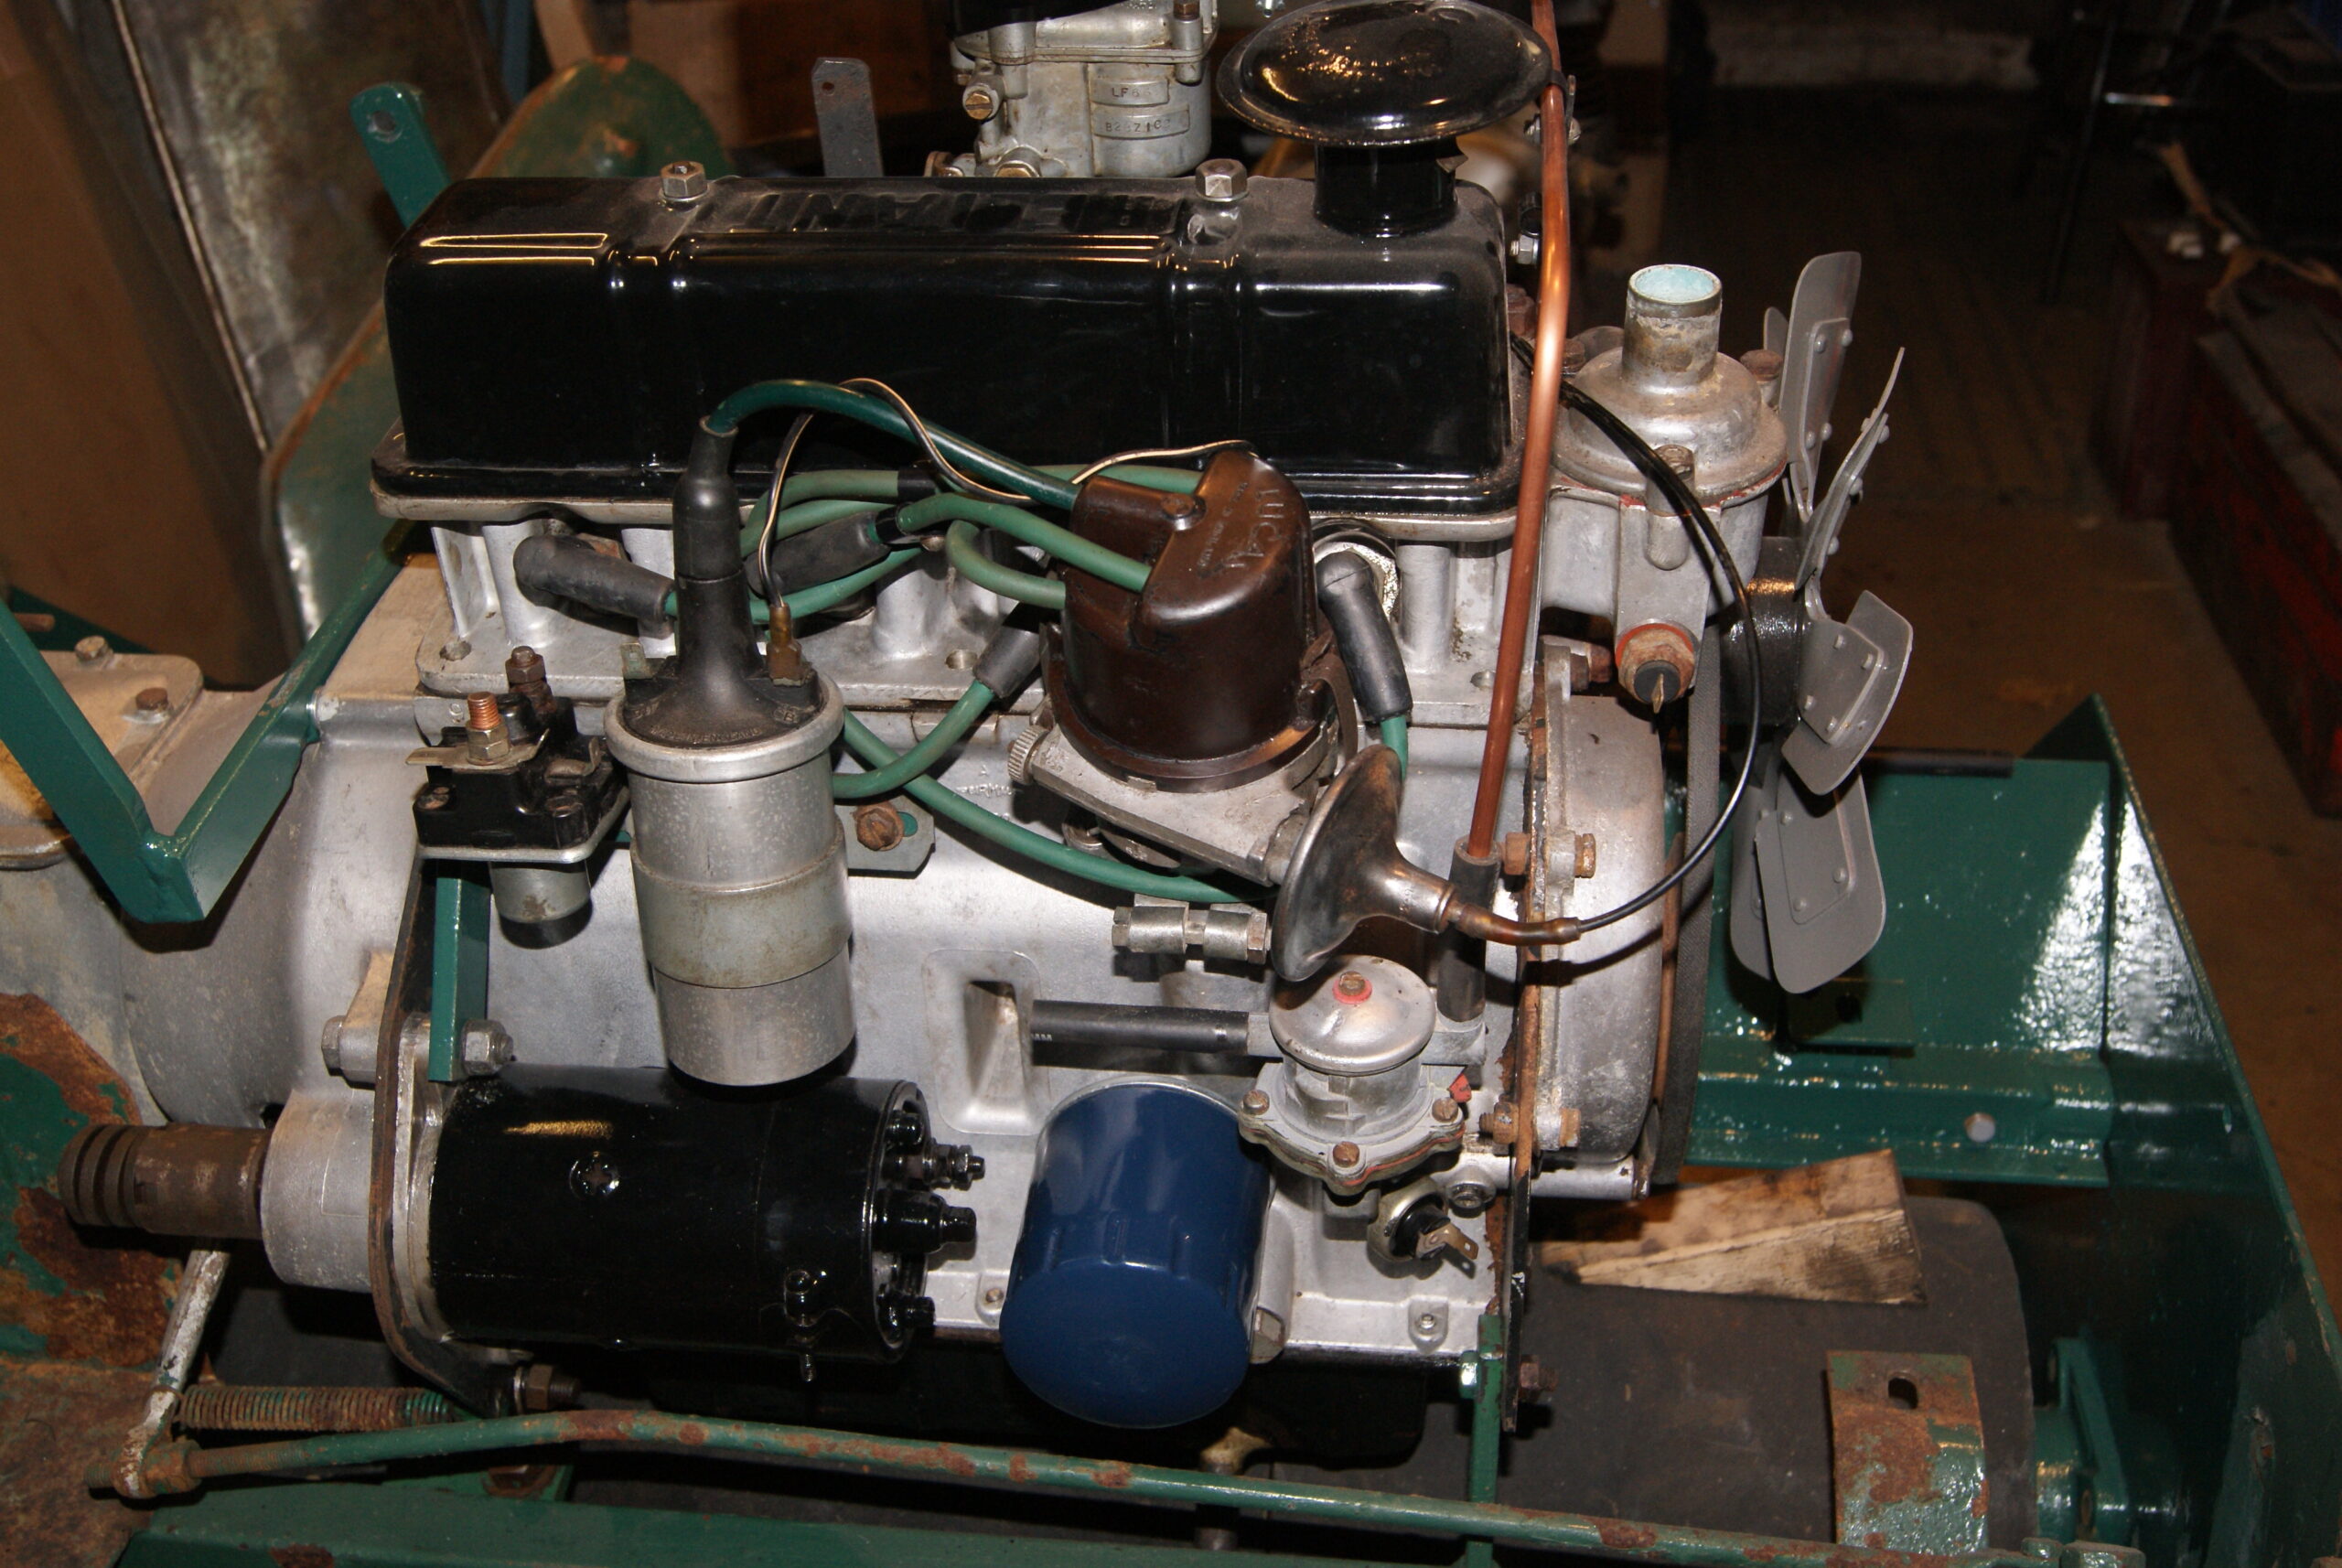
One thing that I have started to do whilst waiting for paint to dry is to start to reassemble the ancillaries on the engine. Fuel pump, oil pressure switch, distributor and starter motor have all been put back on. It has been treated to a new set of HT leads and the fuel line- which was neoprene tubing when it came in- is now in the process of being replaced with copper pipe. I tried to free-form the bends using just hand pressure but the pipe started to deform and squash, so I made up a wooden jig using a piece of old stair rail with a groove filed in it with a round file; it sounds a bit Heath Robinson but it worked really well and formed accurate bends without the pipe squashing itself into an oval shape.
One thing I was kicking myself for was for wasting time matching up a pair of bolts to hold the starter motor on with. One thing that I really do hate is having odd bolts in something like this when it would have come out of the factory with a pair of matched bolts in 3/8″ UNF. Having put it back on with the new bolts I then came to re-mount the starter solenoid and ignition coil which are fitted to a common bracket- you guessed it, the bracket fitted to the top mounting bolt of the starter motor! The bolt I took off was a 3/8″ BSF which would have been used by the Allett production people, so I had to go ferreting for it again; the starter motor is now attached with one UNF bolt and one BSF bolt which I reckon is the original way it was done. Oh well, you certainly learn things doing this kind of job!
Attachments:
June 5, 2022 at 6:39 am #39178 charlieKeymaster
Time and patience is the only way, it pays off in the end.
June 6, 2022 at 9:58 am #39179trusty220KeymasterIs that a New Year’s Resolution, Charlie? What happened to, “Don’t force it, get a bigger hammer!”? Only joking!
I didn’t know whether to call this piece Trials and Tribulations but I thought it would sound too much like something off Blackadder; anyway, I’ll let you judge for yourselves.
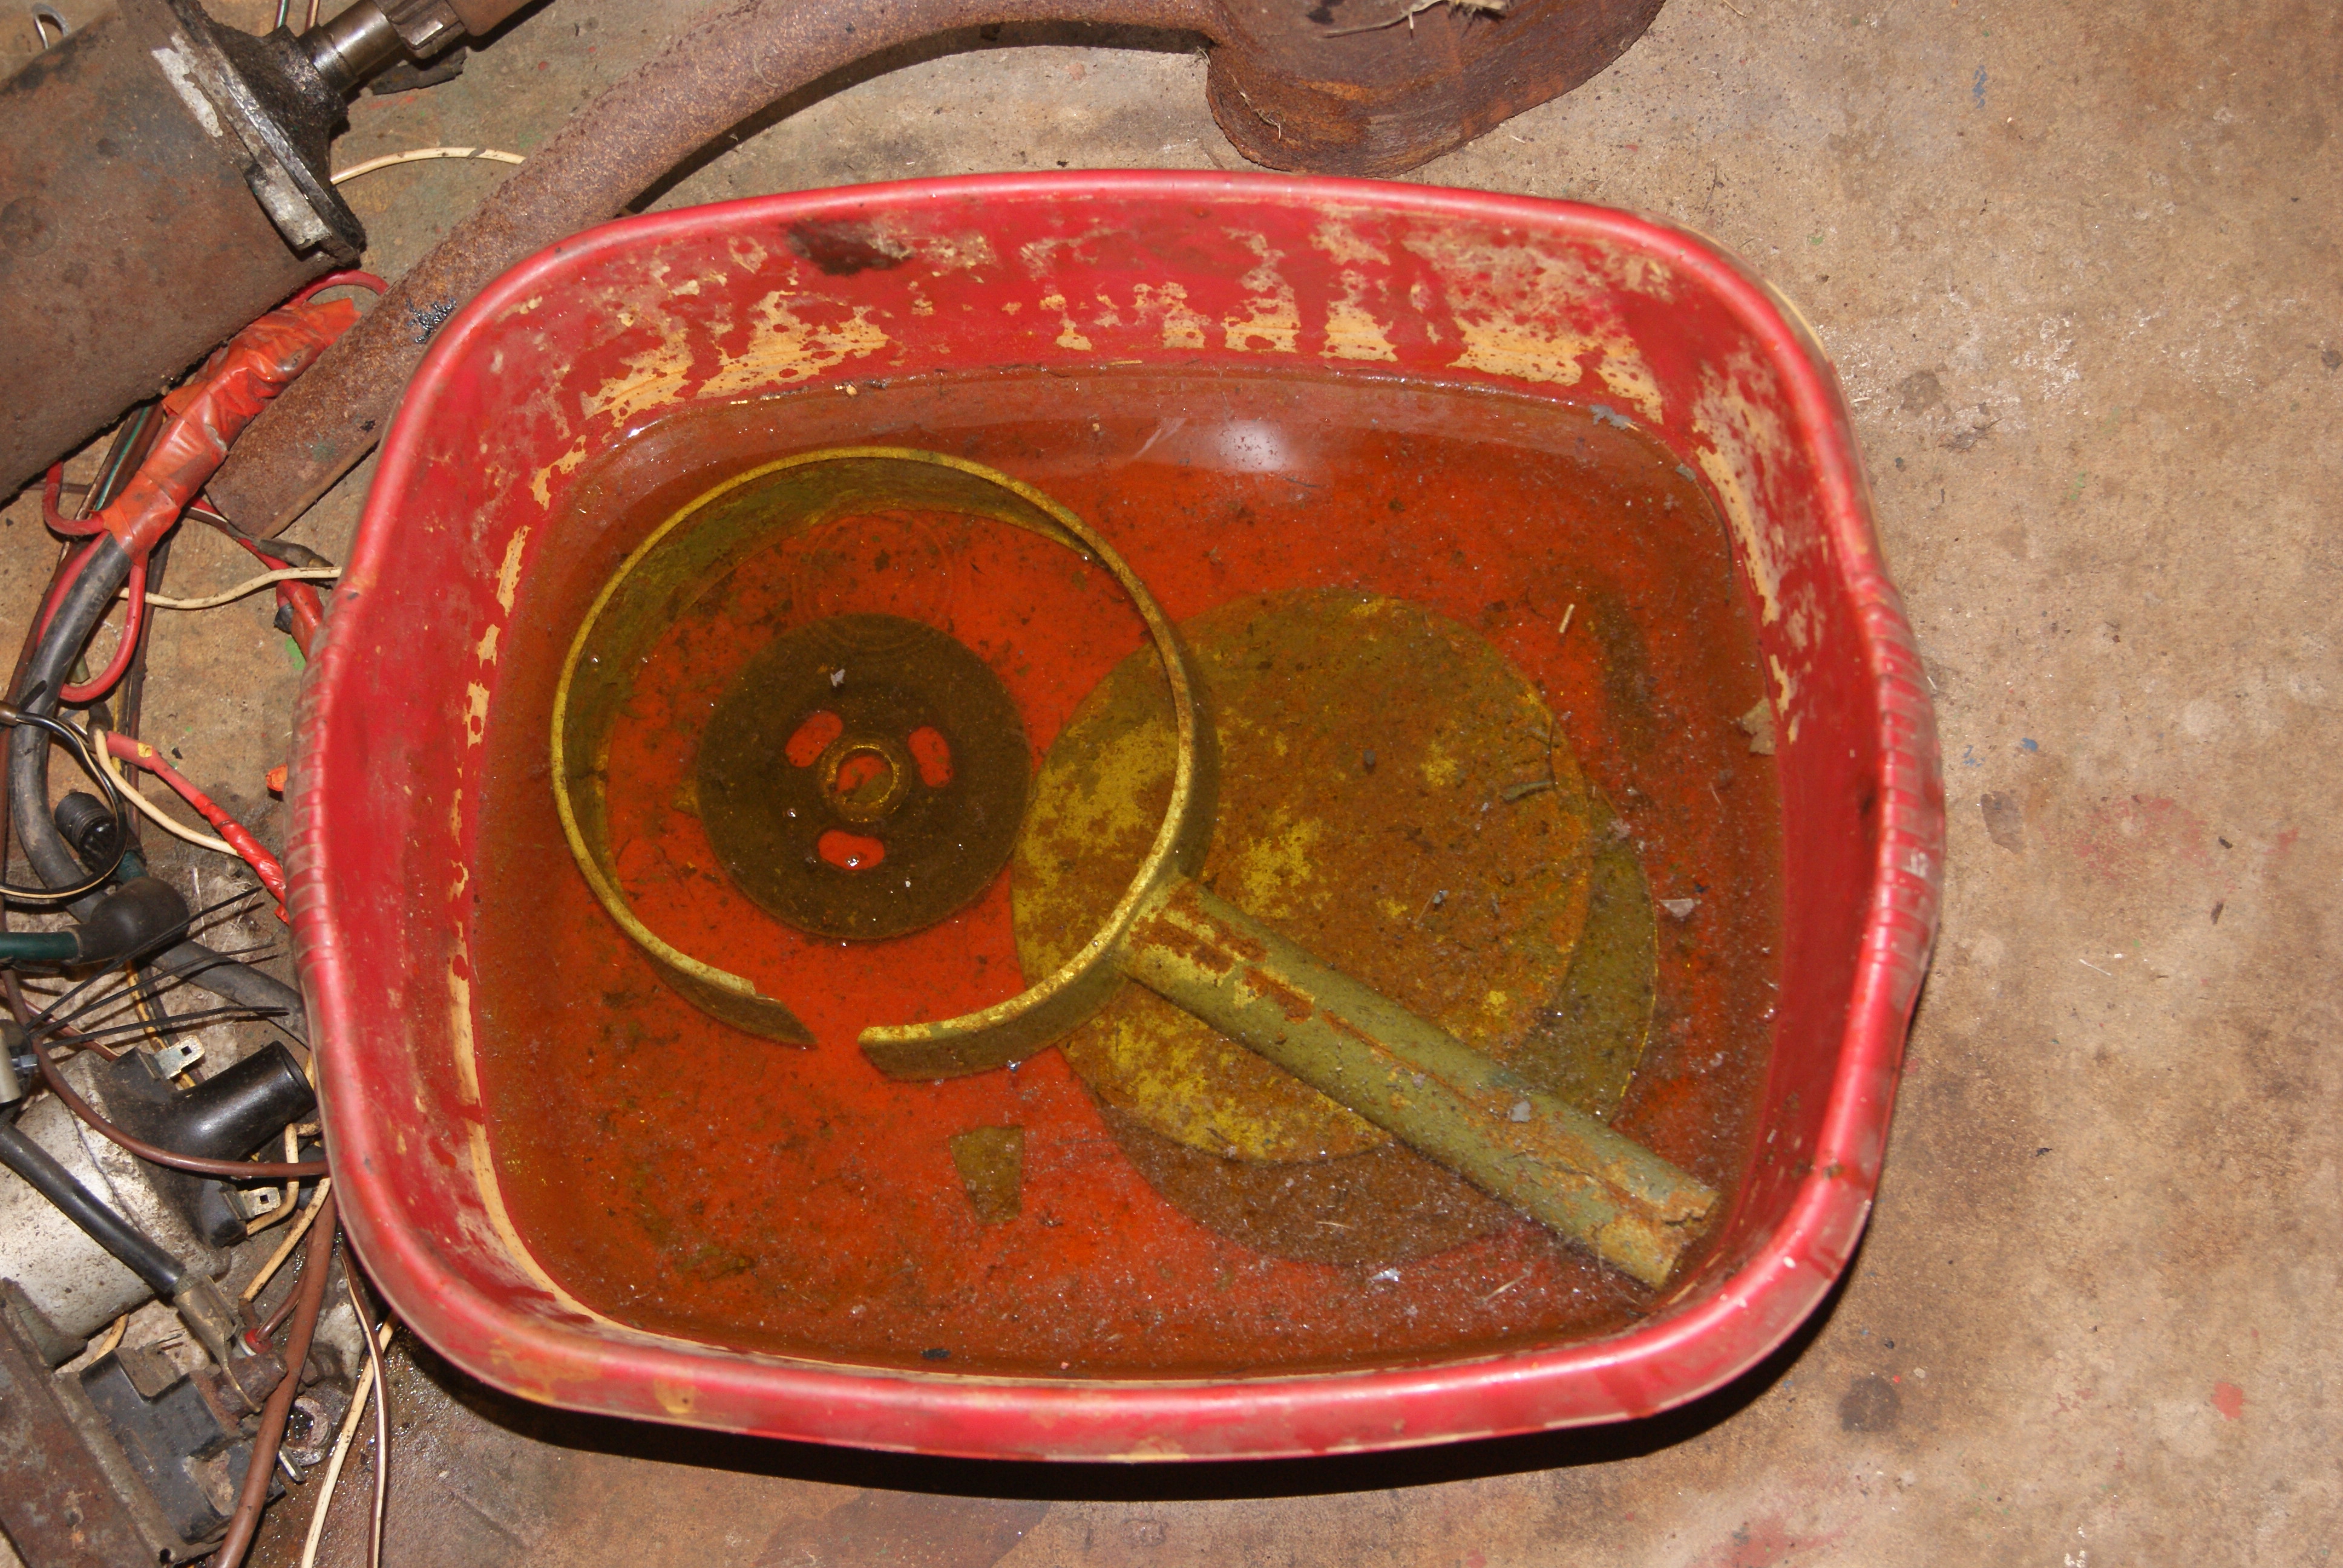
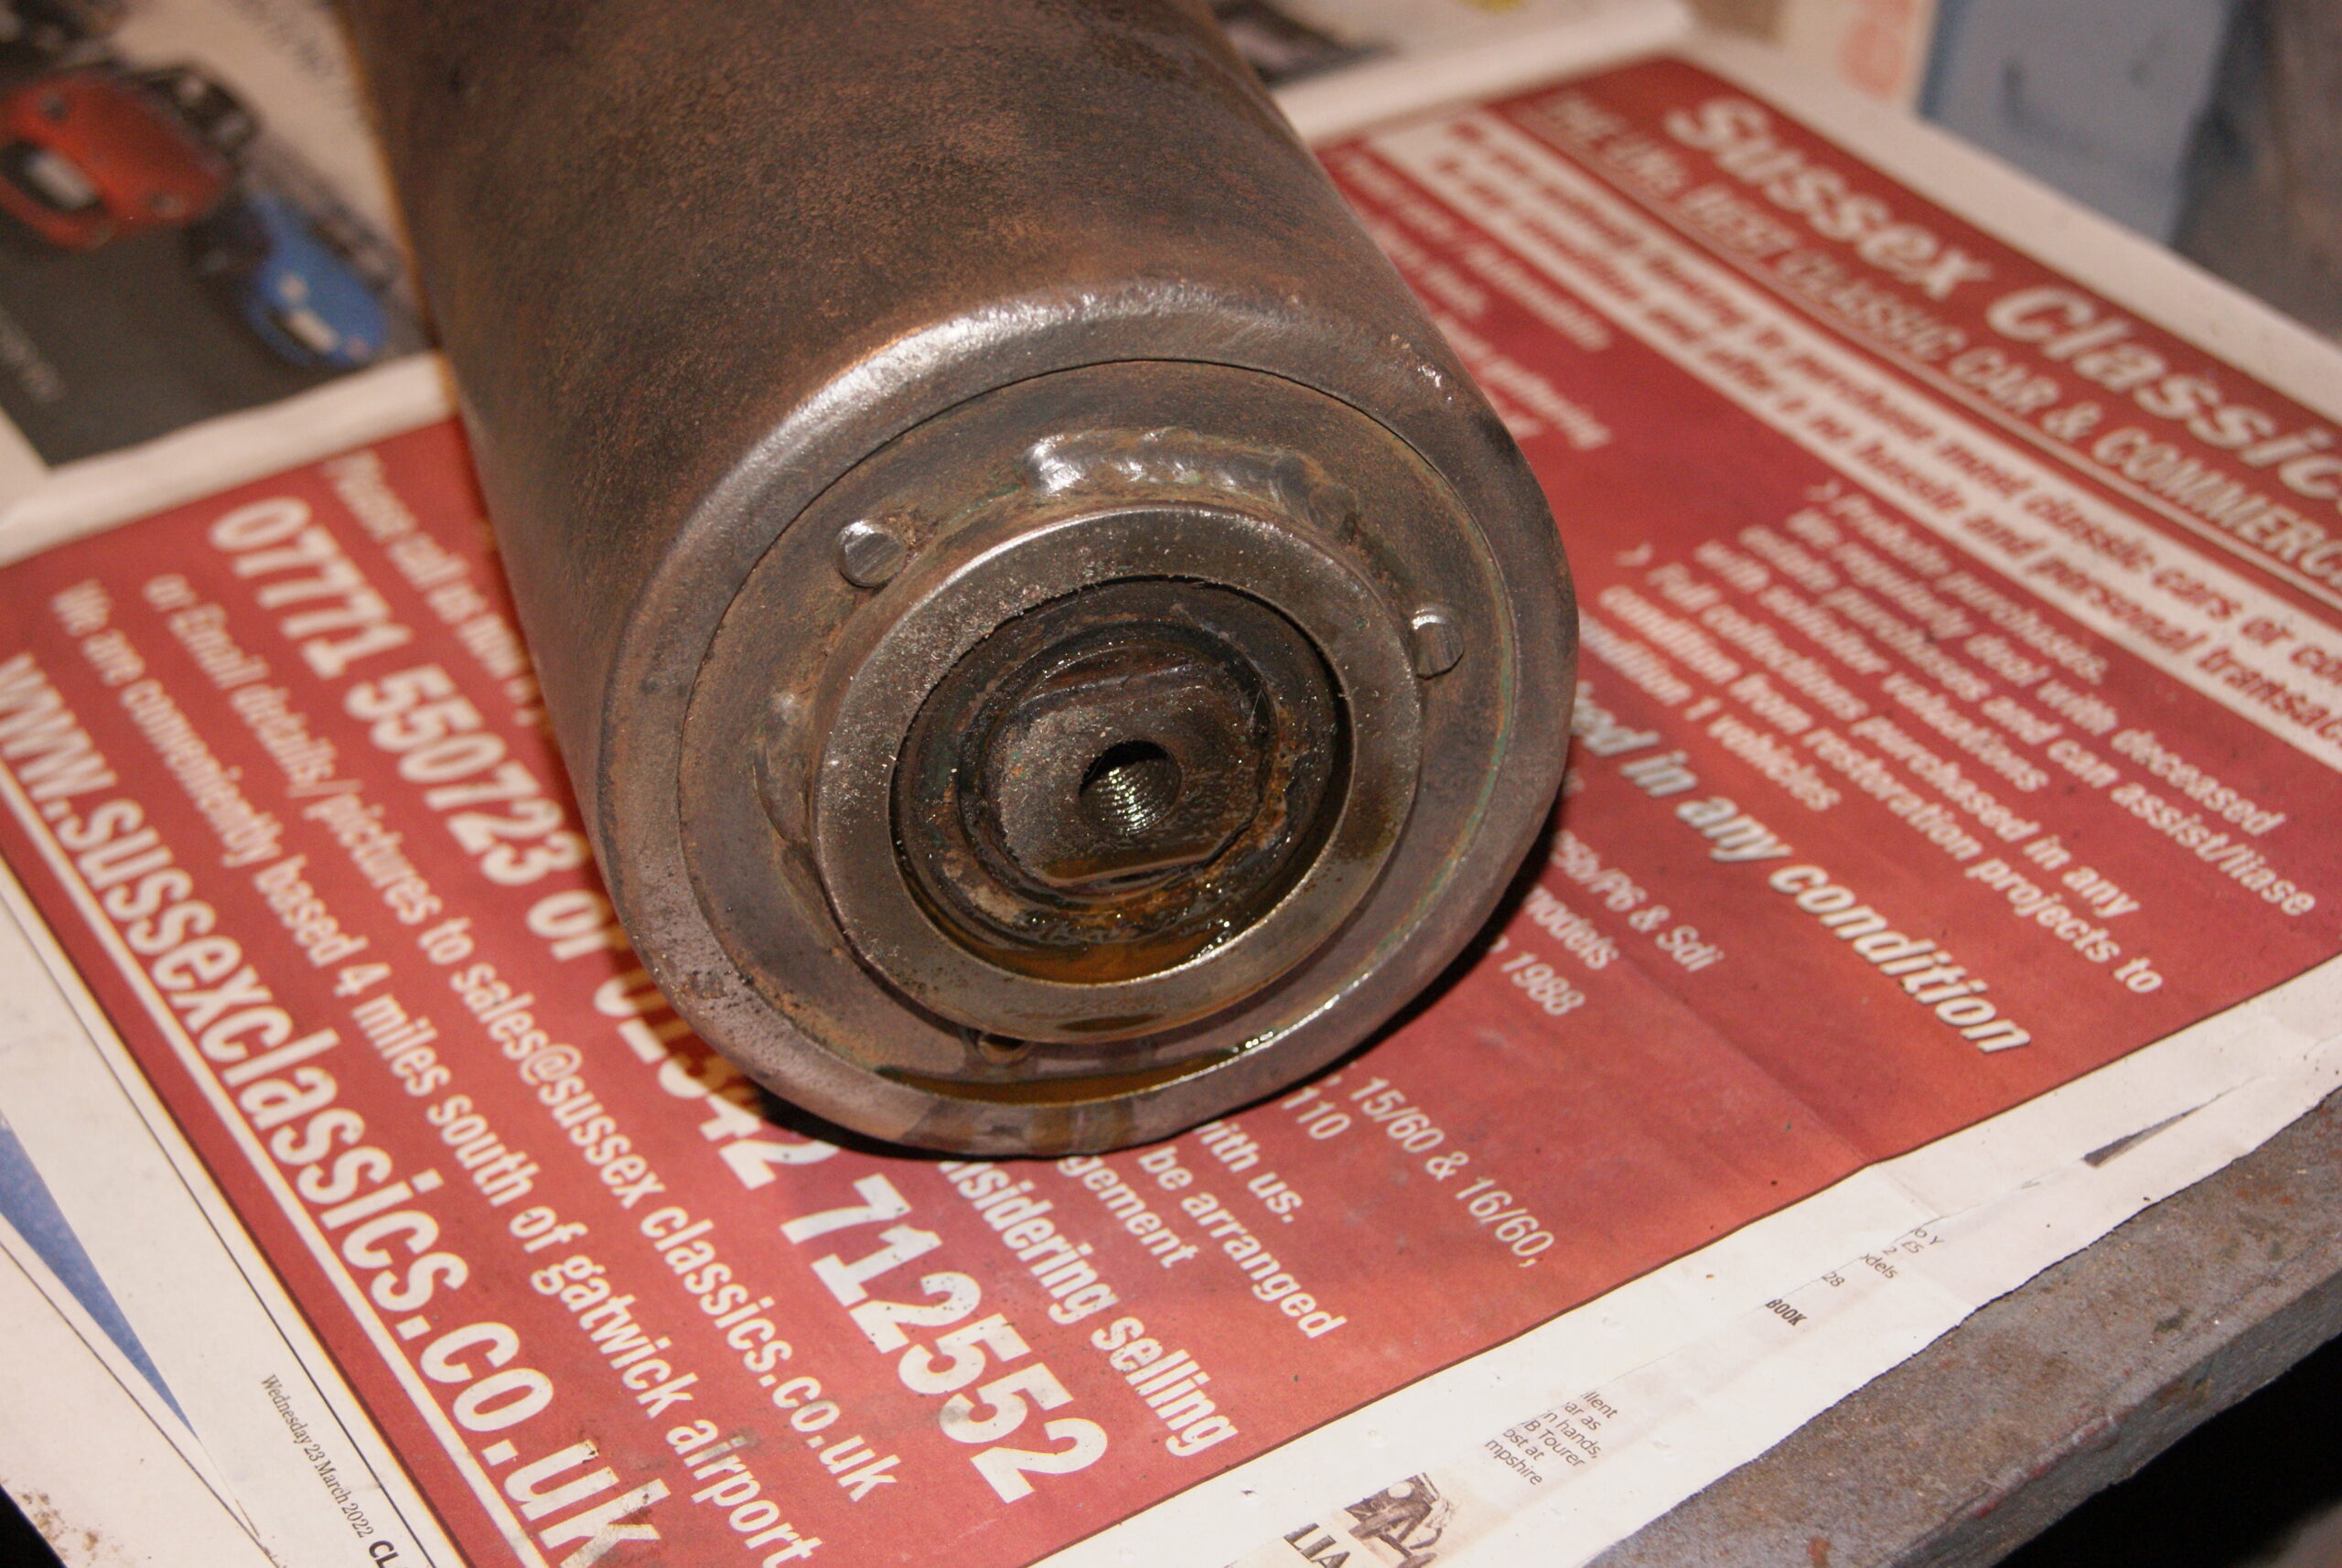
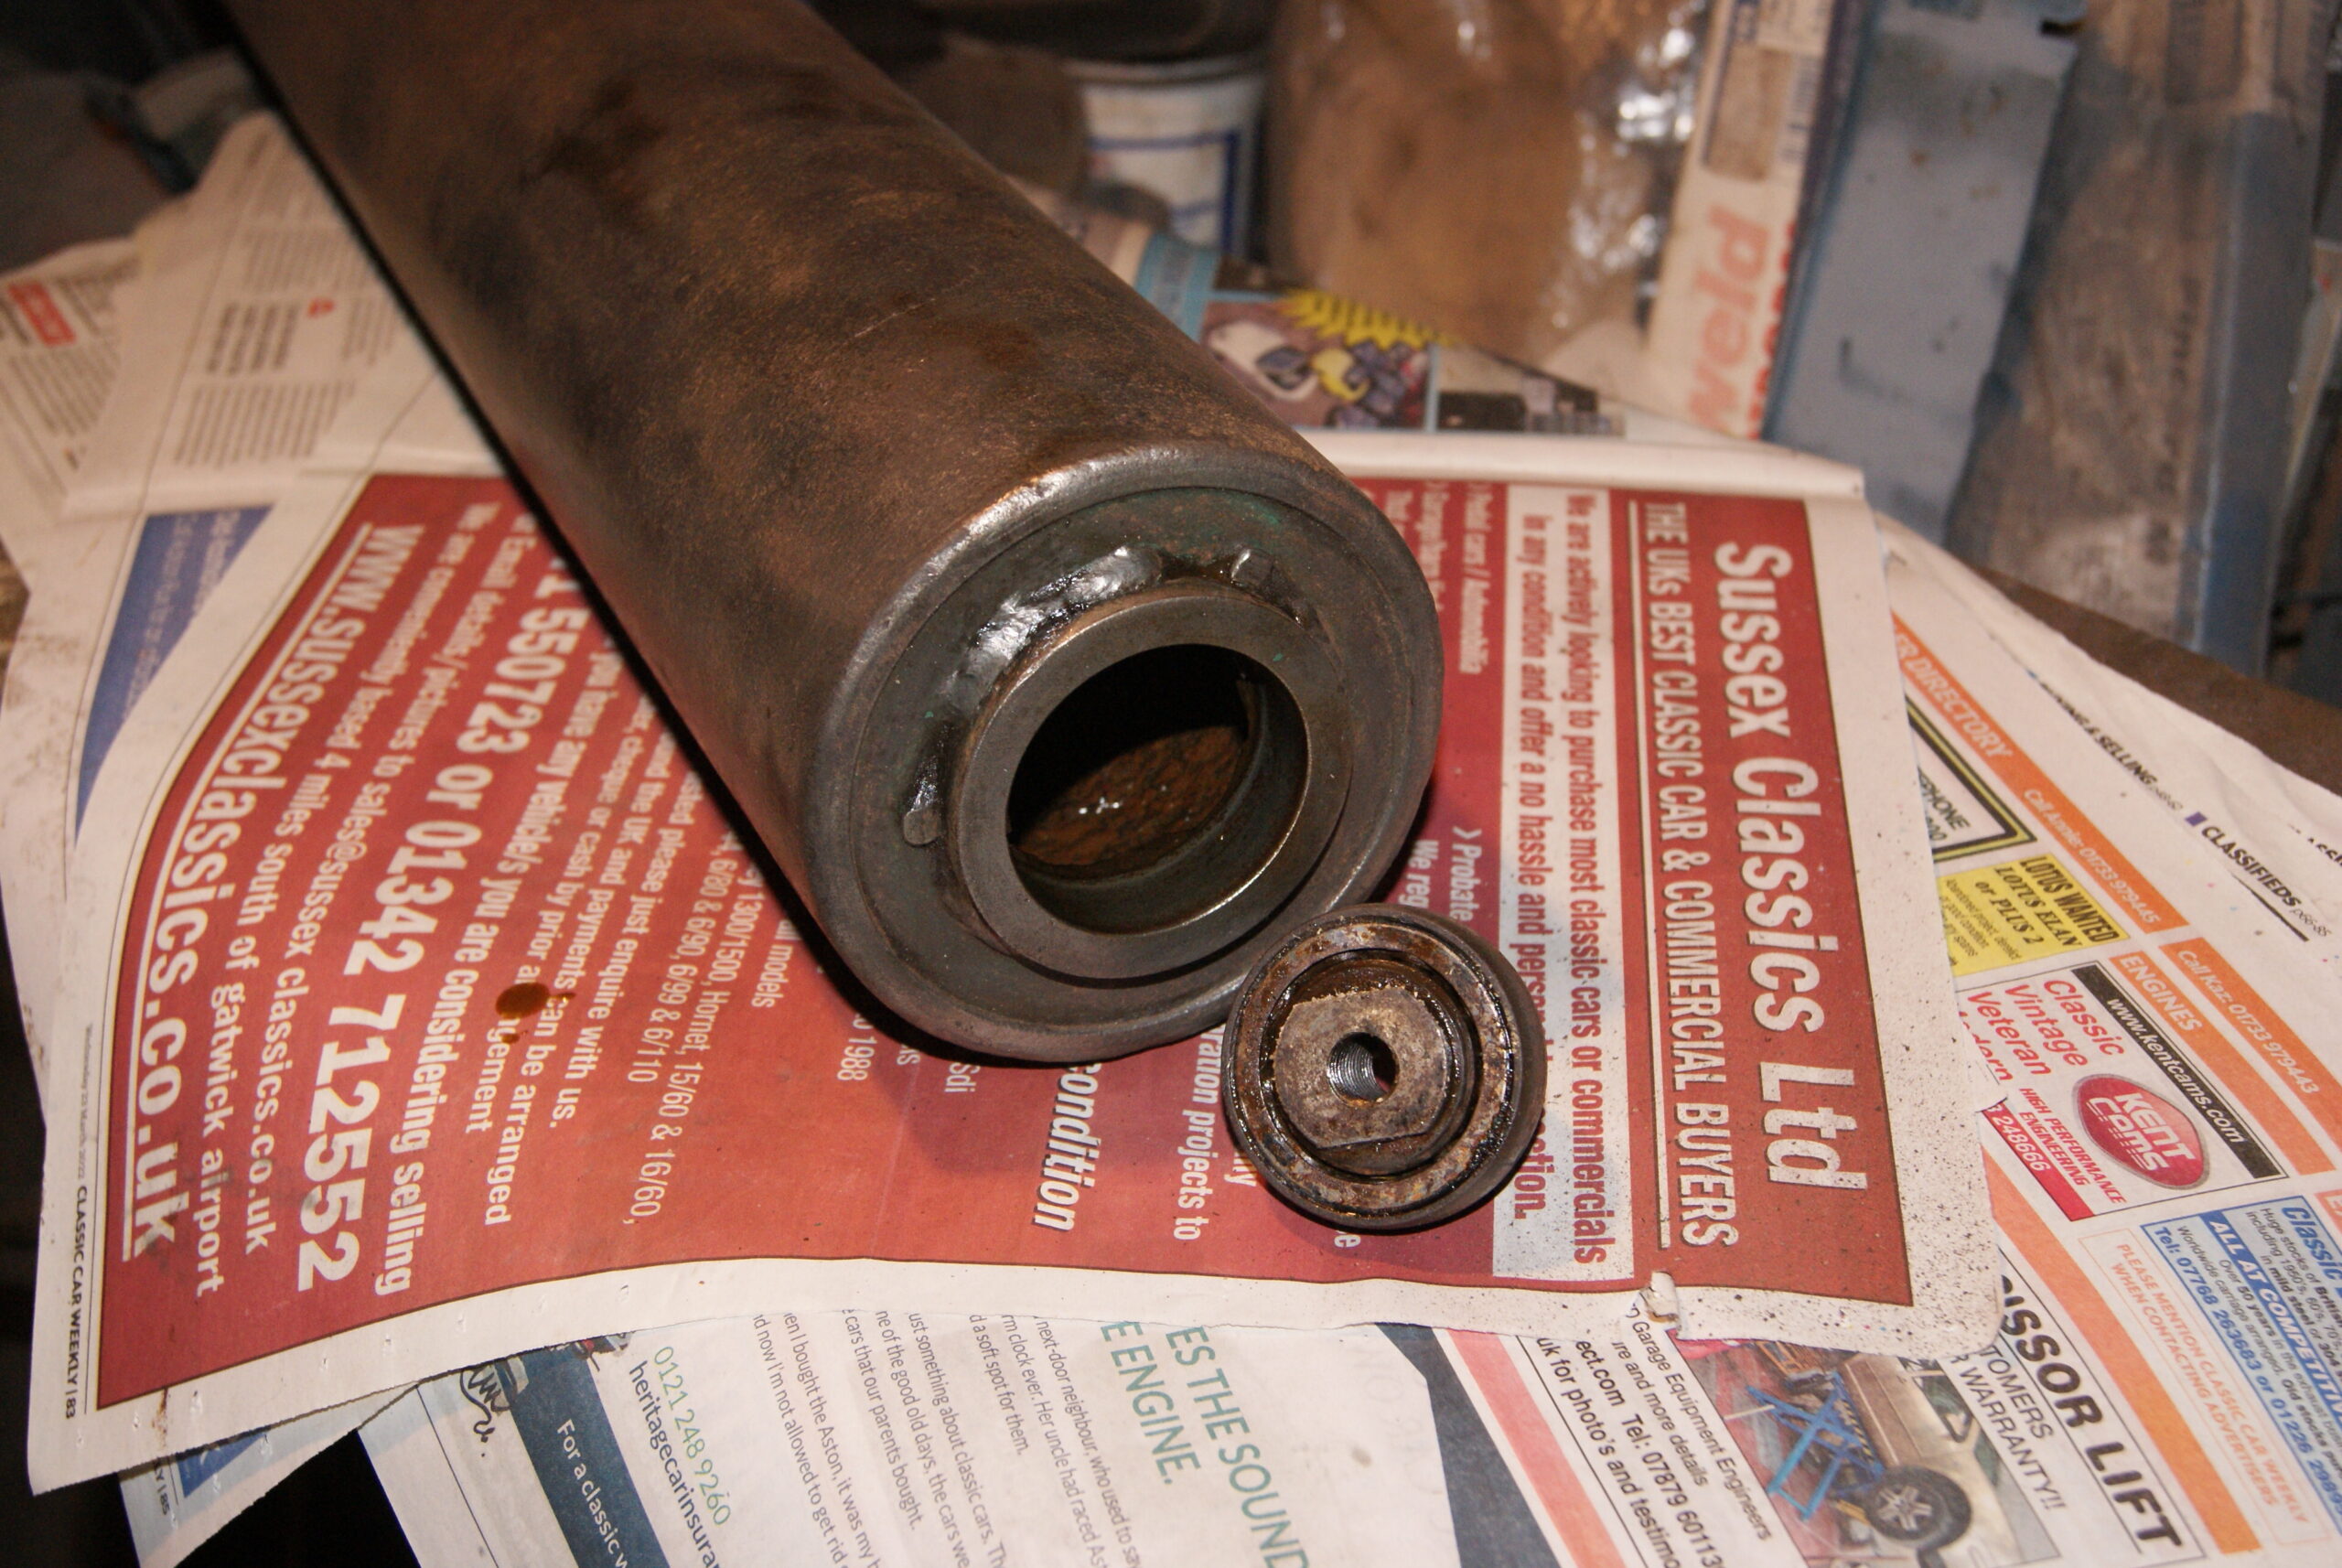
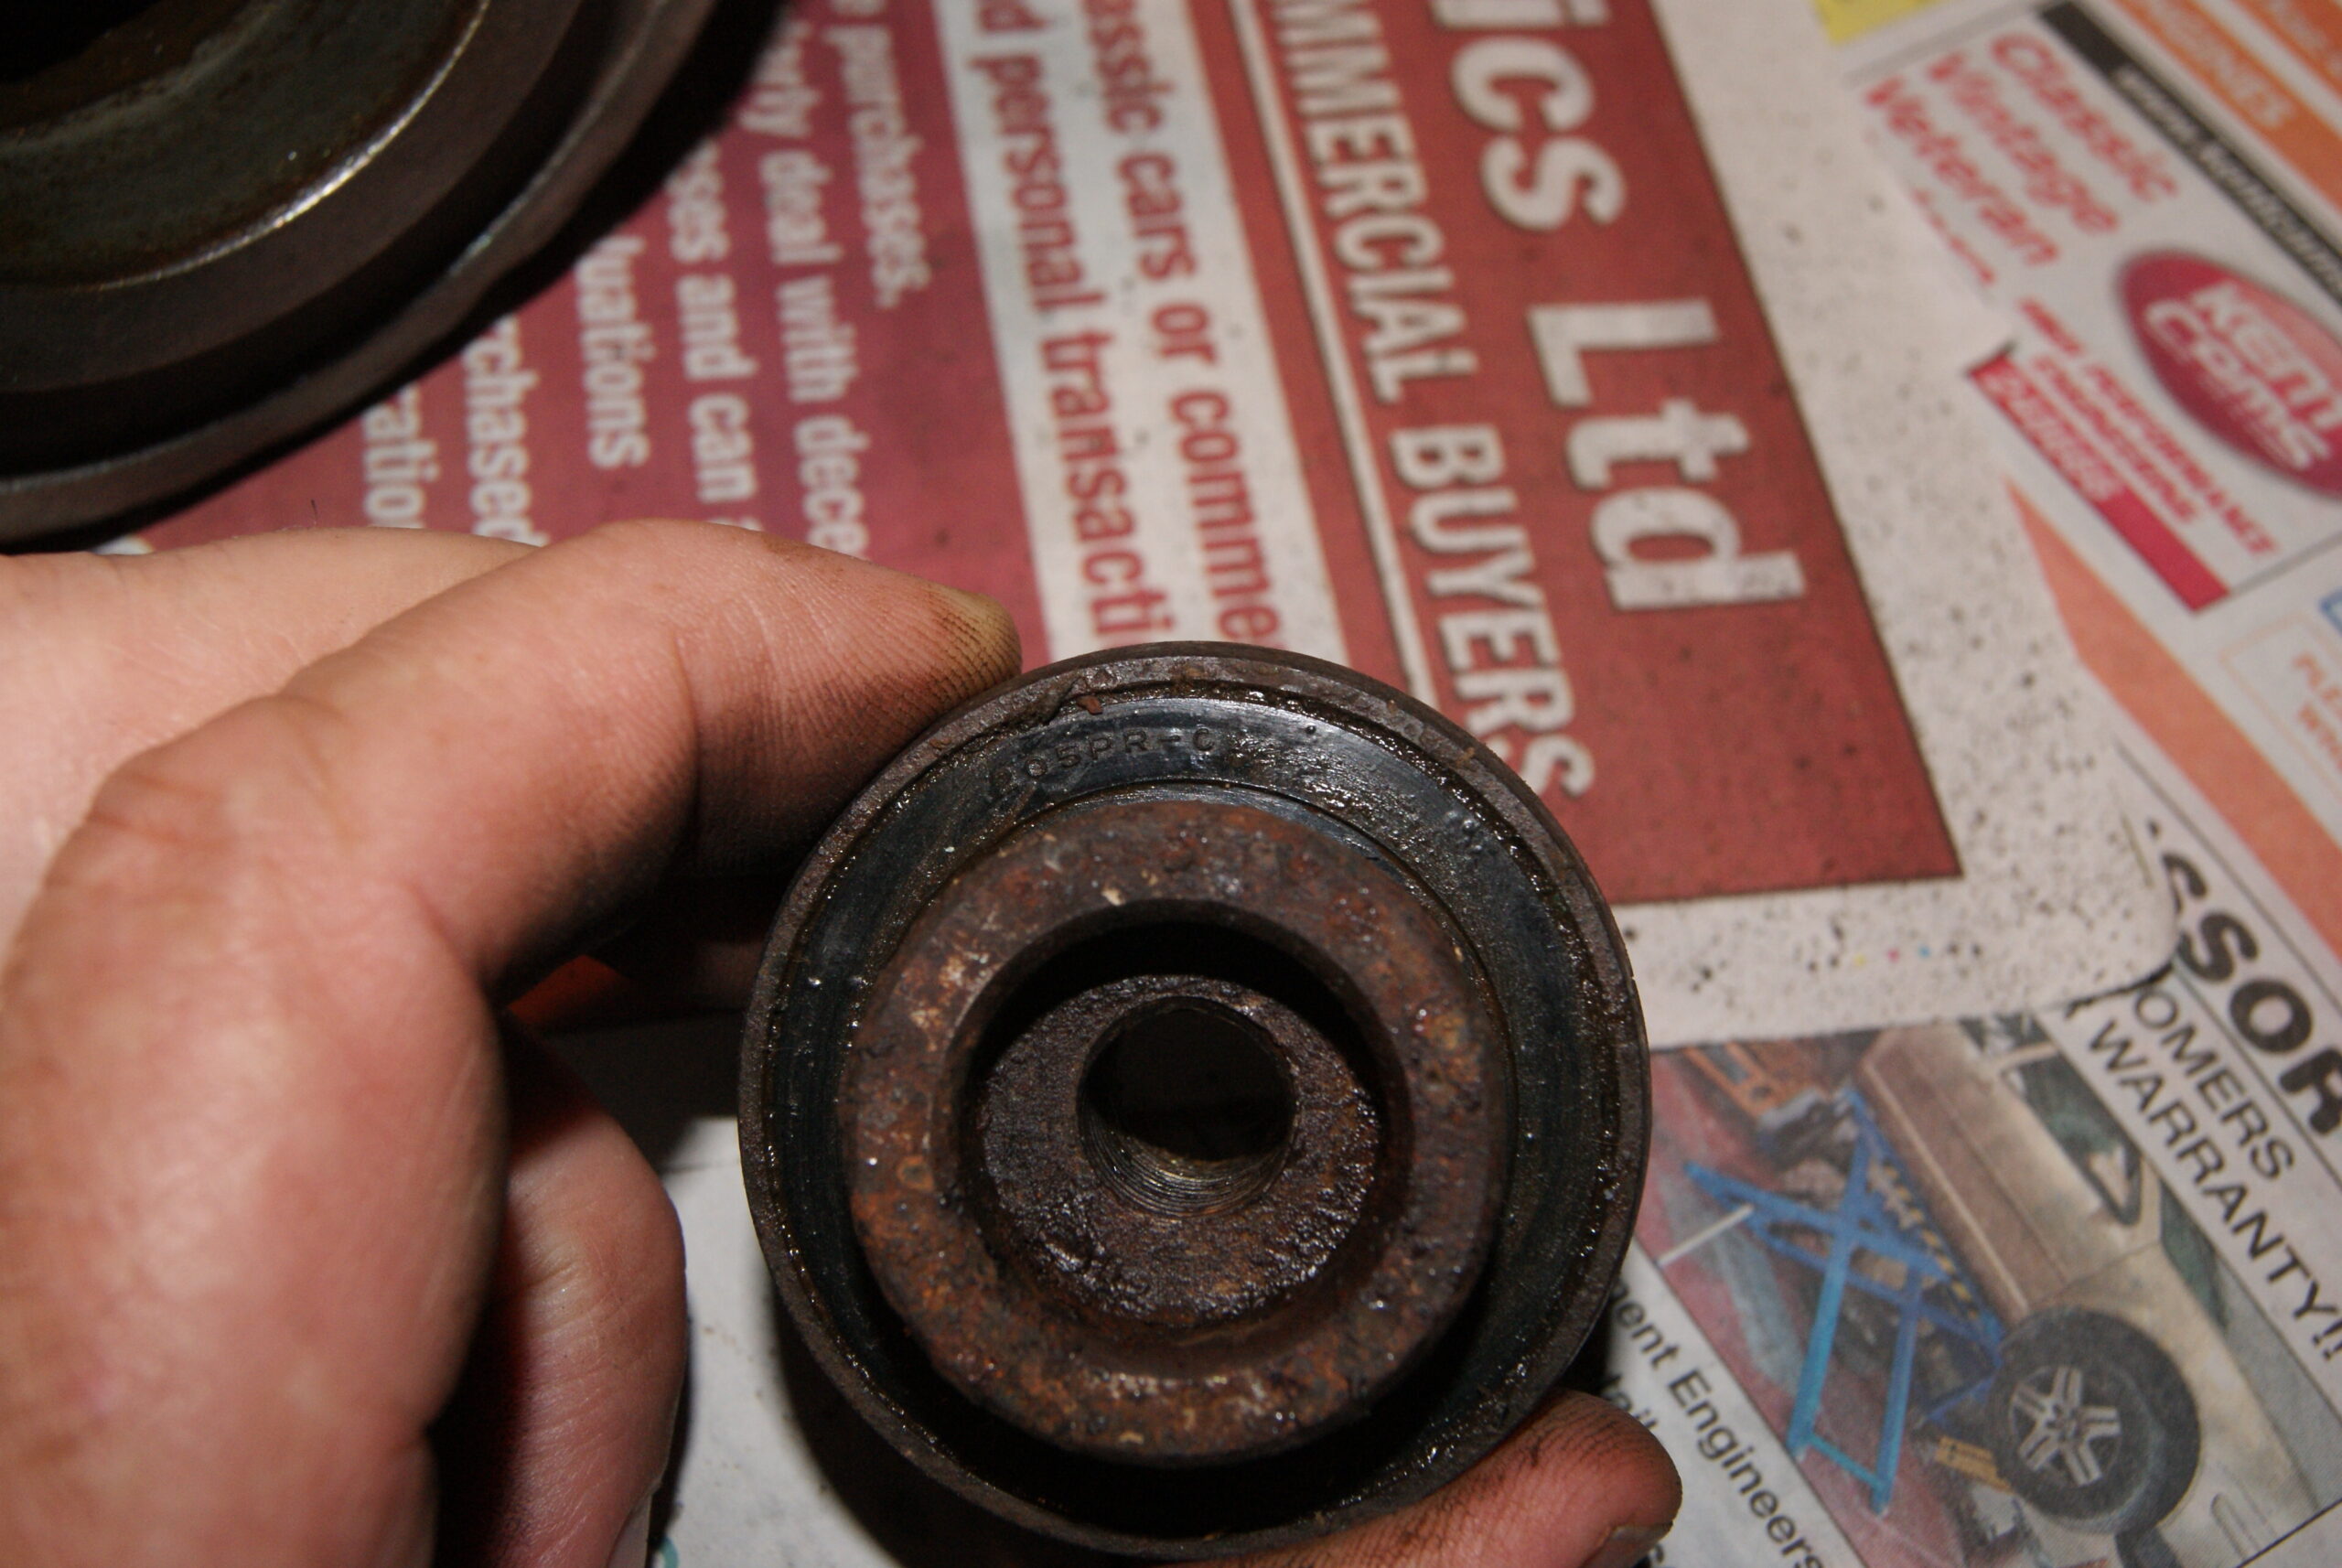
The front roller on any mower is always going to take a bit of a pounding and this one is no exception. Bearings are normally the first things to show signs of fatigue and I’d love to know how many sets this one’s had in it’s lifetime. The last person in there was quite inventive, however, which has made my job more of a challenge.
When I removed the roller originally I did spot that there was an excessive amount of play in the one end. This turned out to be not only wear in the bearing itself but also a vast amount of wear in it’s circular mounting. The bearings used were of the self-aligning type which had a spherical profile on the outer bearing. Somebody had obviously removed the outer carrier and pressed them into the circular tracks on each end of the roller. To help with lubrication- we all know that sealed bearings don’t come with much grease inside- the previous person had removed their inner seals and filled the inside of the roller with oil.
Now that both bearings are showing wear, their outer seals have worn and the oil inside the roller is now in a pool on the floor of my workshop. The local bearing supplier, Central Bearings, have found a direct equivalent with a flat profiled outer race which they are ordering, so we’ll see what they’re like when they come.
I do have a cunning plan in mind to take up the wear in the fitting when they arrive, so Baldrick isn’t the only one to have ideas; I swear that mine doesn’t include turnips though!
Attachments:
June 6, 2022 at 5:24 pm #39183wristpinParticipantwe all know that sealed bearings don’t come with much grease inside
There is a reason for that, and perhaps not the obvious! Same as for wheel bearings, if they are over packed with grease the balls skid round en masse rather than rolling round the track, and end up with flats on them.
Not sure that I quite follow what may have been done by a previous repair but bearings with a spherical outer race are readily available, from the likes of Simply Bearings. -
AuthorPosts

- You must be logged in to reply to this topic.