Forum Replies Created
-
AuthorPosts
-
April 18, 2020 at 9:04 am #33884
 vhgmcbuddyMember
Thanks this is a real help.
I take it that a bullfinch is the same as a 200 so the seals are the ones that cost £ 16.50 each.
Brilliant website and forum
Thanks againApril 16, 2020 at 12:11 pm #33837vhgmcbuddyMemberI’m looking for the air bleed tube. I tried them but they don’t do parts for my carb anymore. I think I’m going to have a go at repairing what I have.
April 14, 2020 at 9:55 am #33824vhgmcbuddyMemberLove it !!
Attachments:
April 14, 2020 at 9:54 am #33821vhgmcbuddyMemberAll I can say is listen to the wise man Andy Frost !
Thank you soooo much for all your help , teaching and expertise .
It’s made my day and I will look at all sorts of things with a villiers engine from now on 😁It runs and stops like a beauty and ticks over really nicely .
Does seem to leak fuel when idle from the bottom of air filter ?
I’ll check the float . Or just it off !!
Thanks again ….
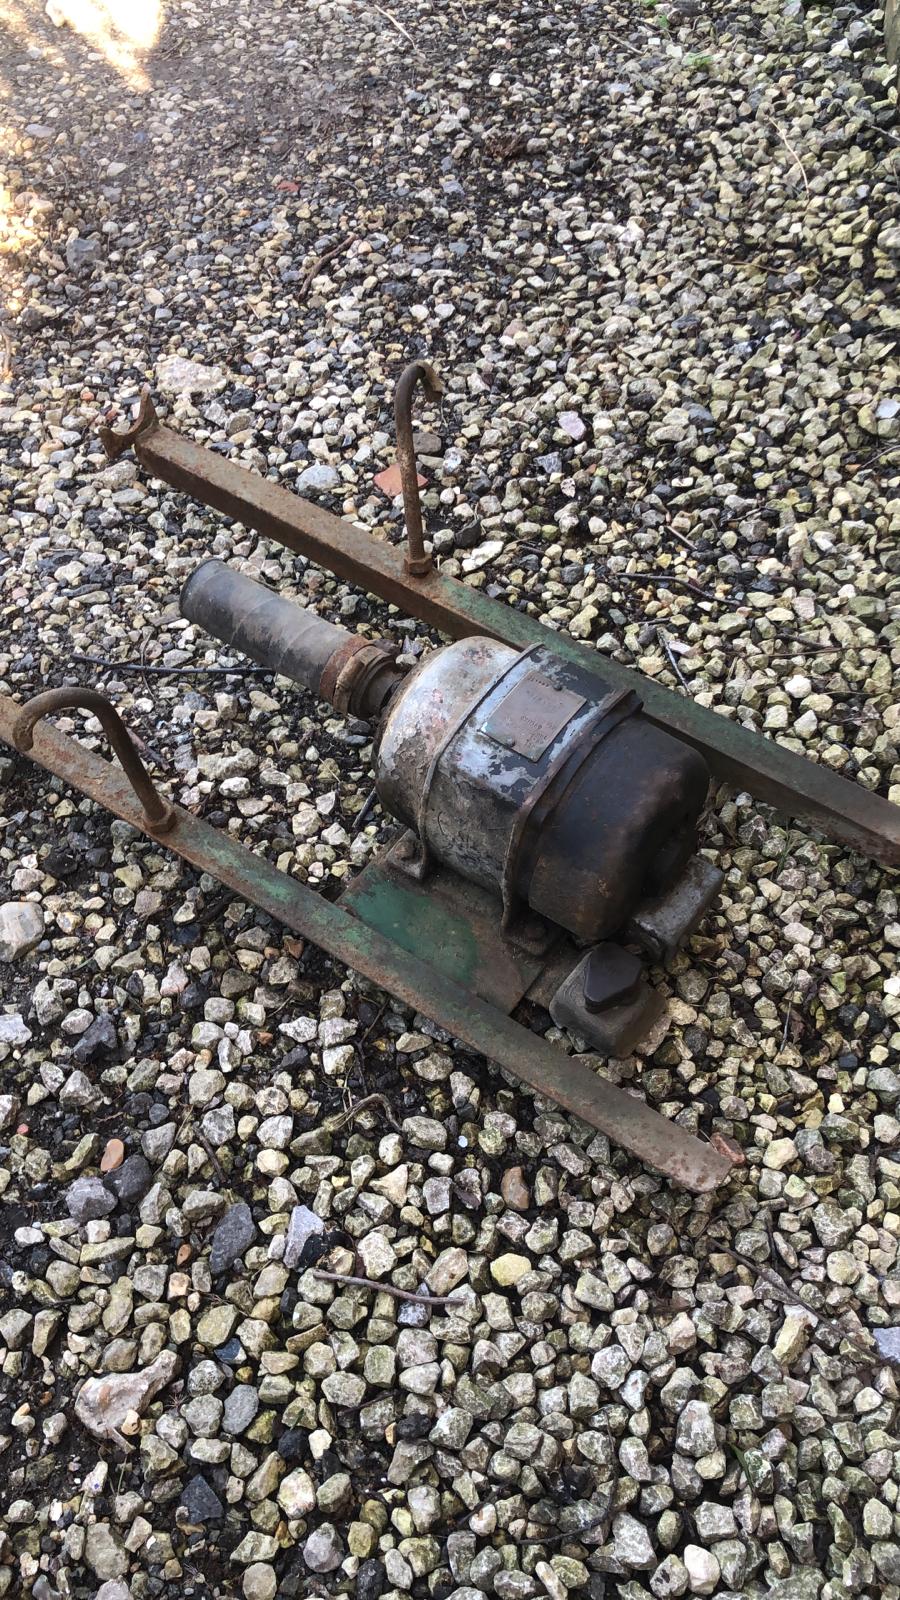
Next to test the 110v generator that goes on the back 😊
April 14, 2020 at 9:54 am #33818vhgmcbuddyMemberAll I can say is listen to the wise man Andy Frost !
Thank you soooo much for all your help , teaching and expertise .
It’s made my day and I will look at all sorts of things with a villiers engine from now on 😁It runs and stops like a beauty and ticks over really nicely .
Does seem to leak fuel when idle from the bottom of air filter ?
I’ll check the float . Or just it off !!
Thanks again ….
Next to test the 110v generator that goes on the back 😊
April 13, 2020 at 11:45 am #33811vhgmcbuddyMemberAs I know have a spark…..I haven’t checked the insulator bush under the points ? not sure if I should take it apart to check….
I’ve put the piston at TDC as is when the notch on the shaft is at 12pm
I then screwed gently the cover on which has what looks like a factory arrow marking on and I have lined that up with the mark on the backplate which is at 10 0’Clock.
There is another homemade marking at 11 0′ Clock ?? I’ve left that for now…
Once I’ve got it to finger tight without moving the shaft Ive held the cover marking tight with the 10 0’Clock makings together and tightened up the main bolt…
now as per some online instructions for starting Mk24/25c ….
Ive done as follows…..
taken out of gear by un-engaging the lever on right hand handle .
I’ve turned ON the fuel tap
Primed the carburettor until fuel spills out at the base of the bleed nipple
Closed the air filter slider ( which I previously cleaned in fuel)
Given it 1/3rd throttleAnd when I pulled it on a few occasions I get a backfire and nothing else…
At least that’s something I guess !!
Sorry to be a continuous pain !! but Any thoughts …..
Kind Regards,
Mark
April 13, 2020 at 10:50 am #33809vhgmcbuddyMemberHi Agaim !!
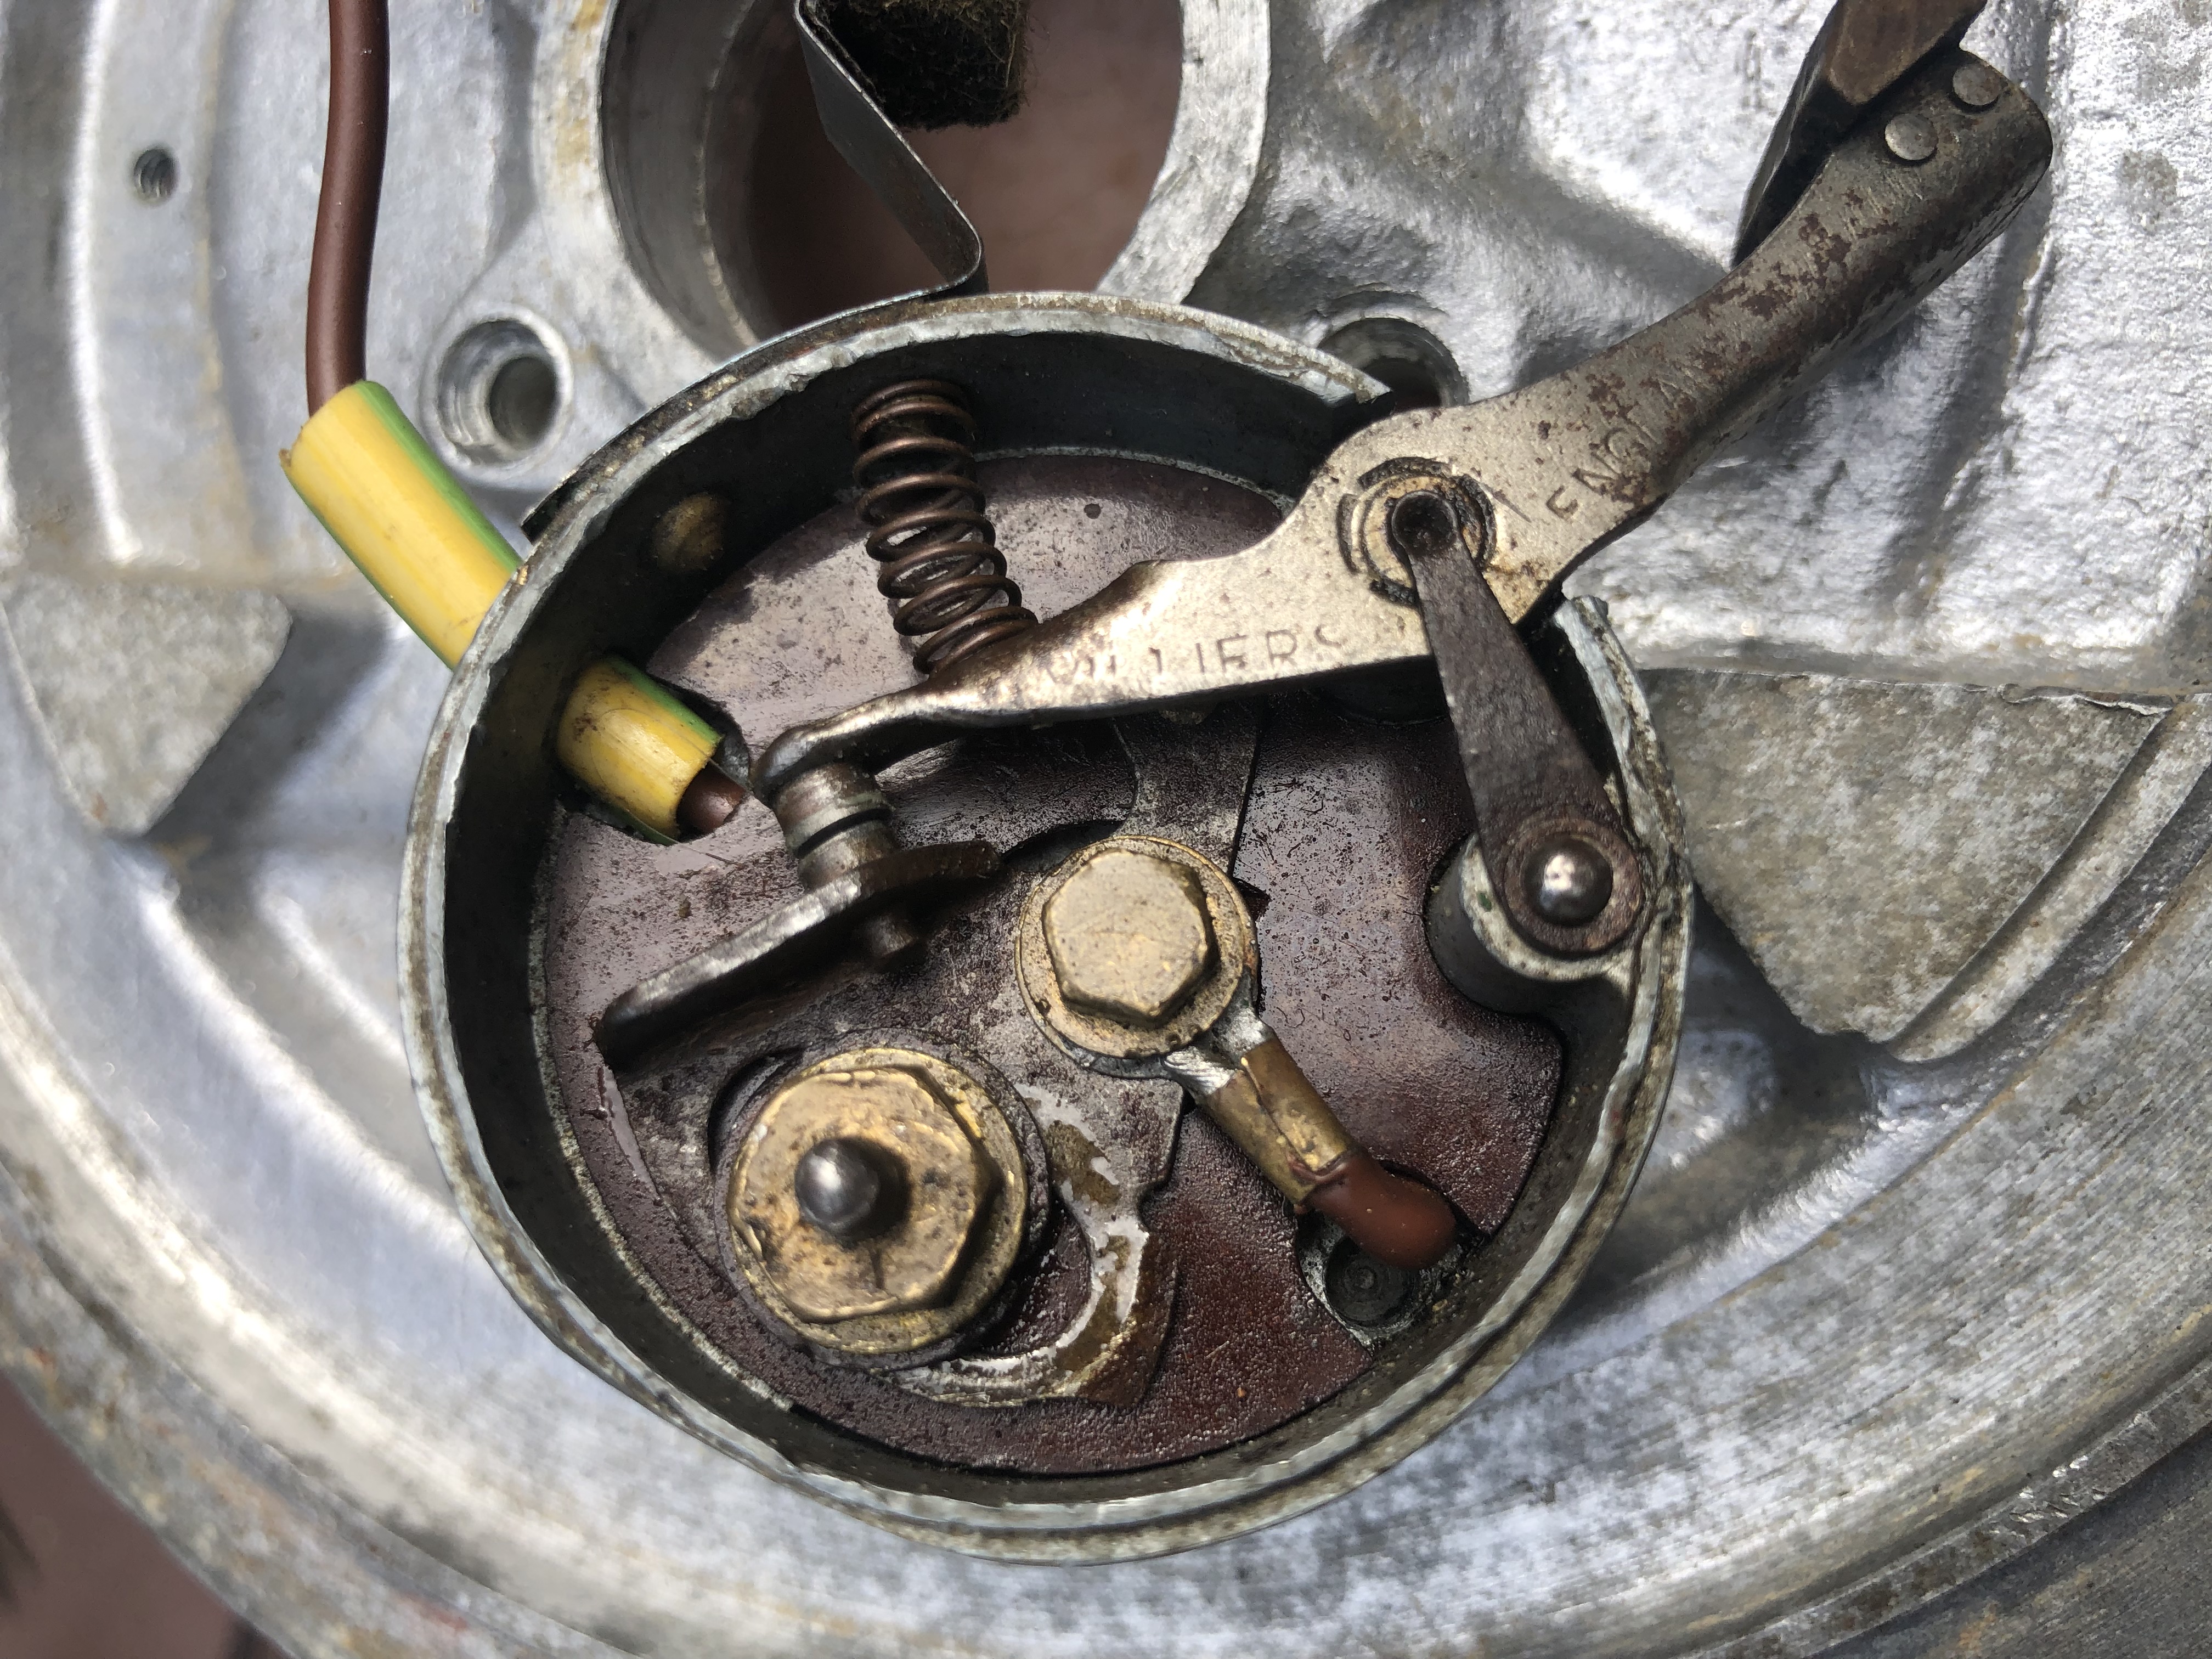
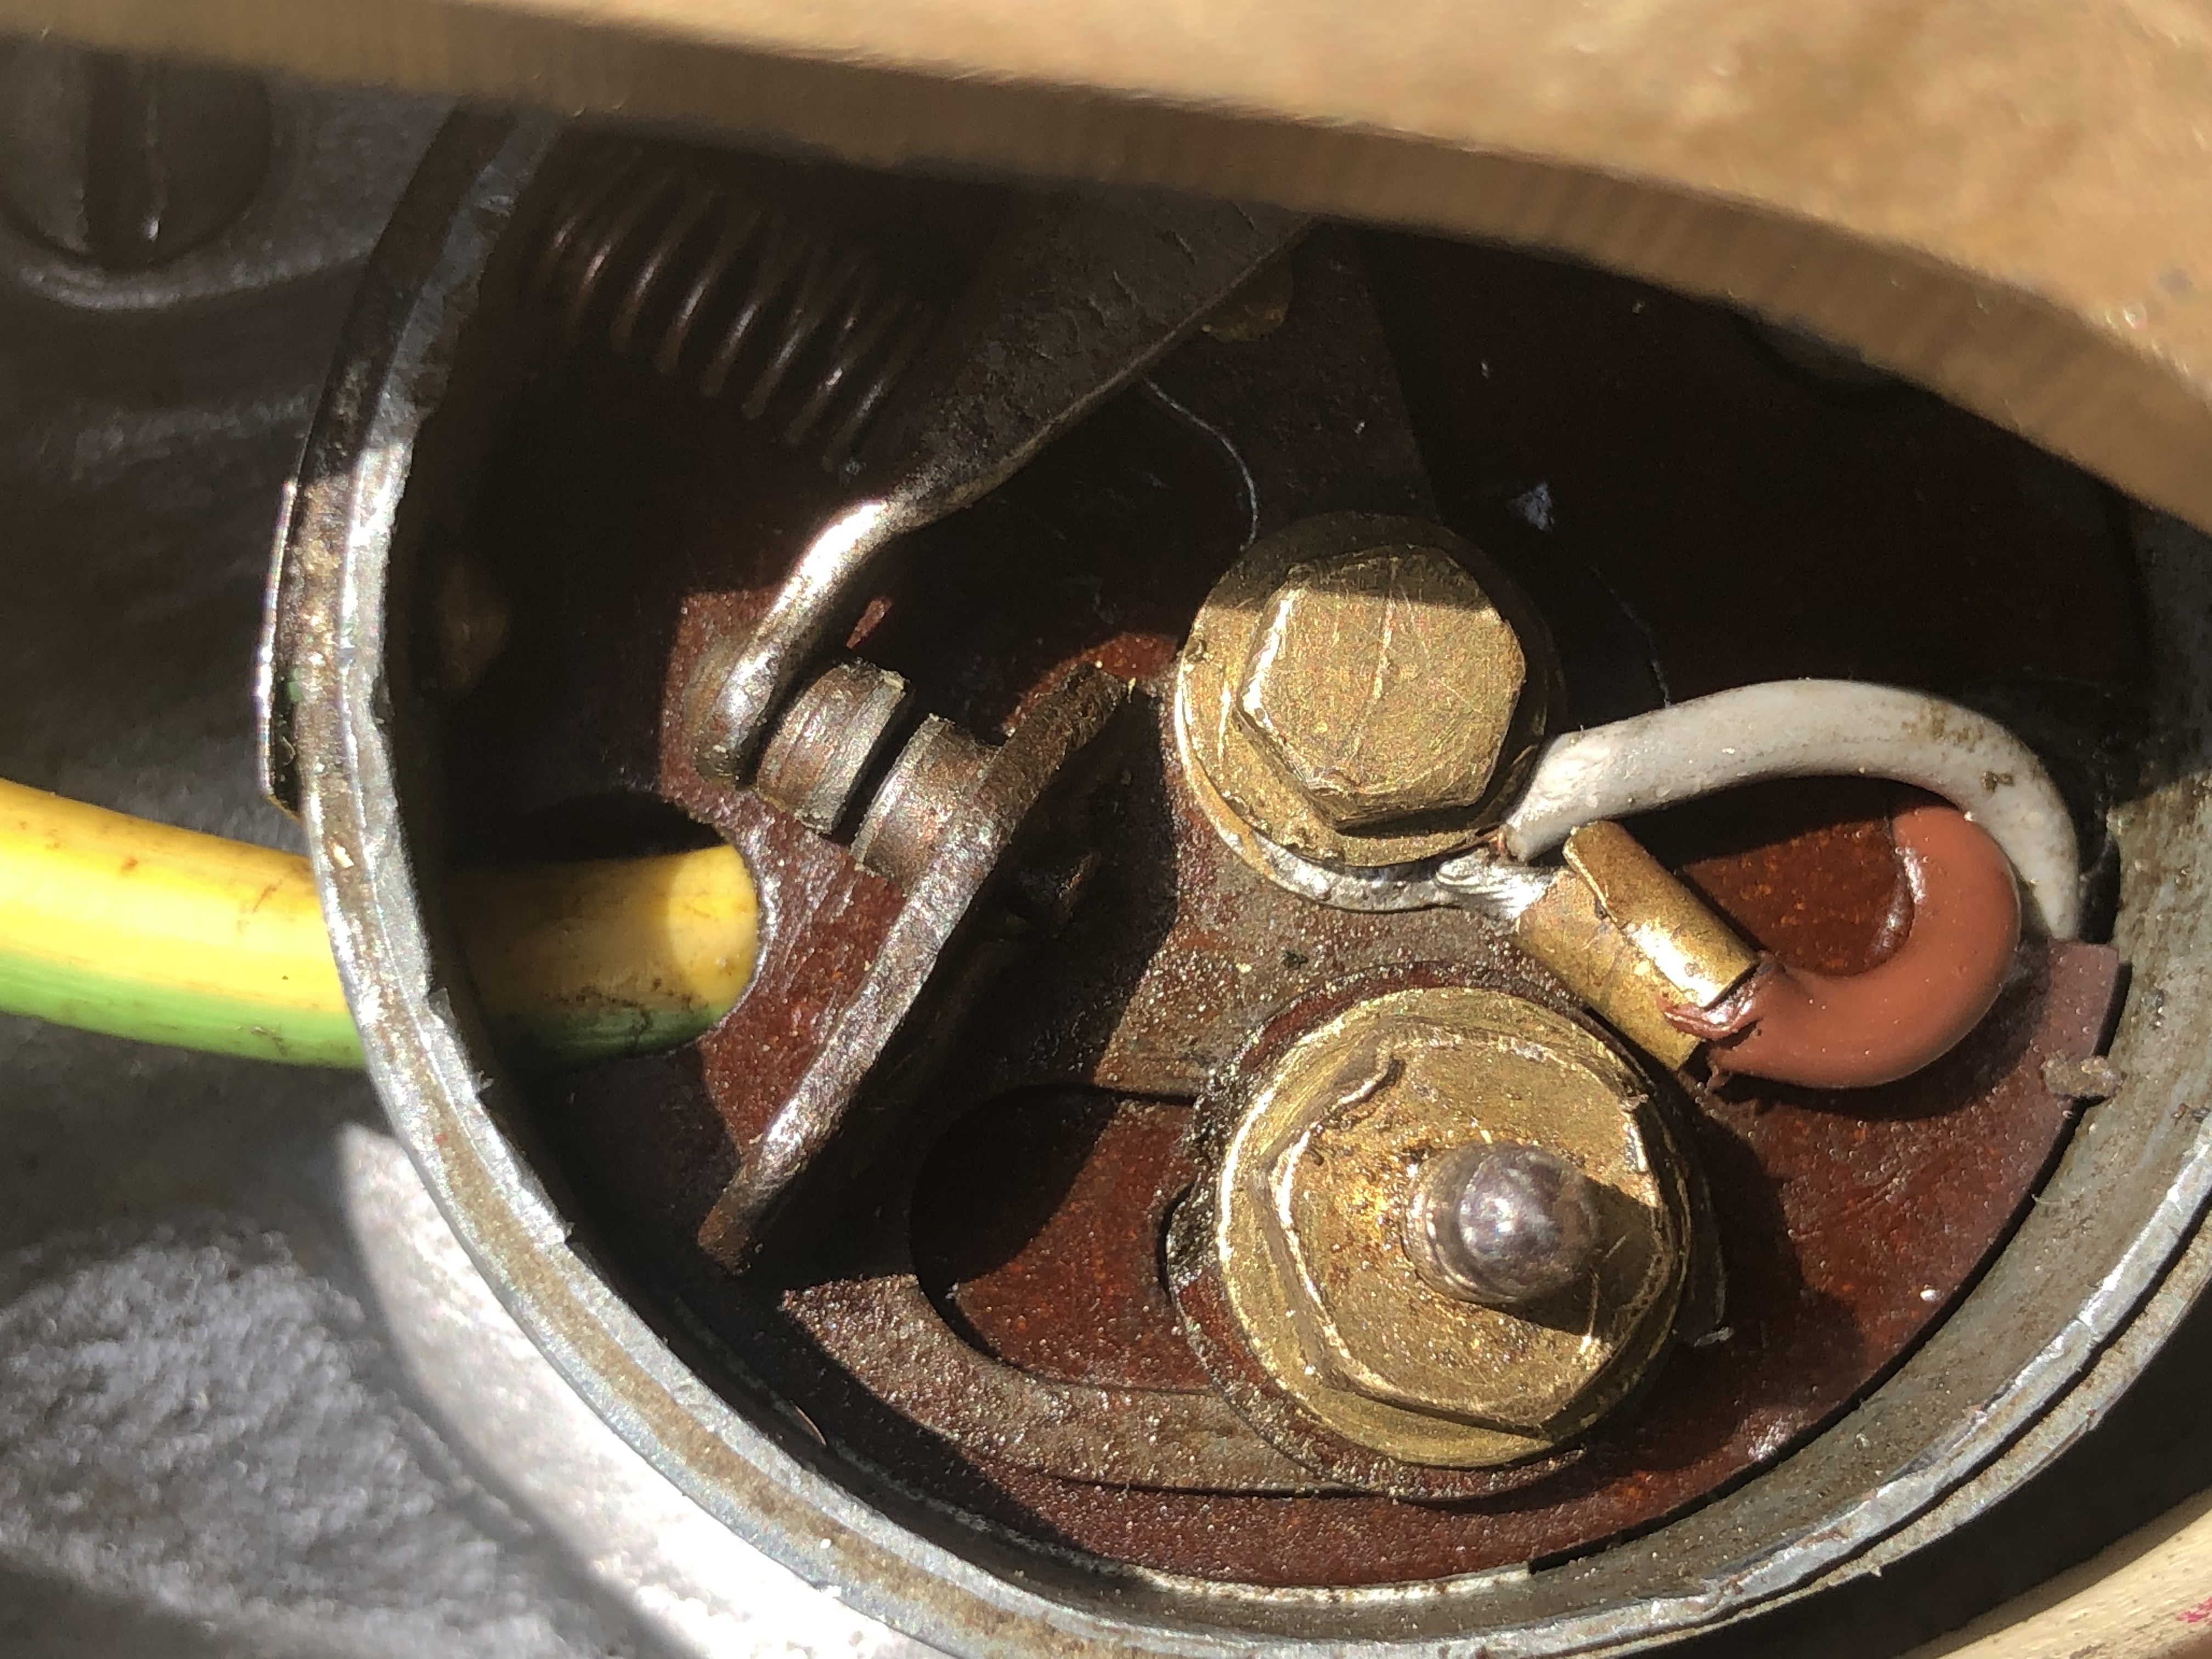
Well … looking properly at the two sets of points I’m giessimg the insulated washed is the one missing under the adjustment crew on picture 13
I do have it under the nut (usually screw) in photo 12Made out of the same brown material as the large circular section !!
And then a huge thank you for the obvious gap !!
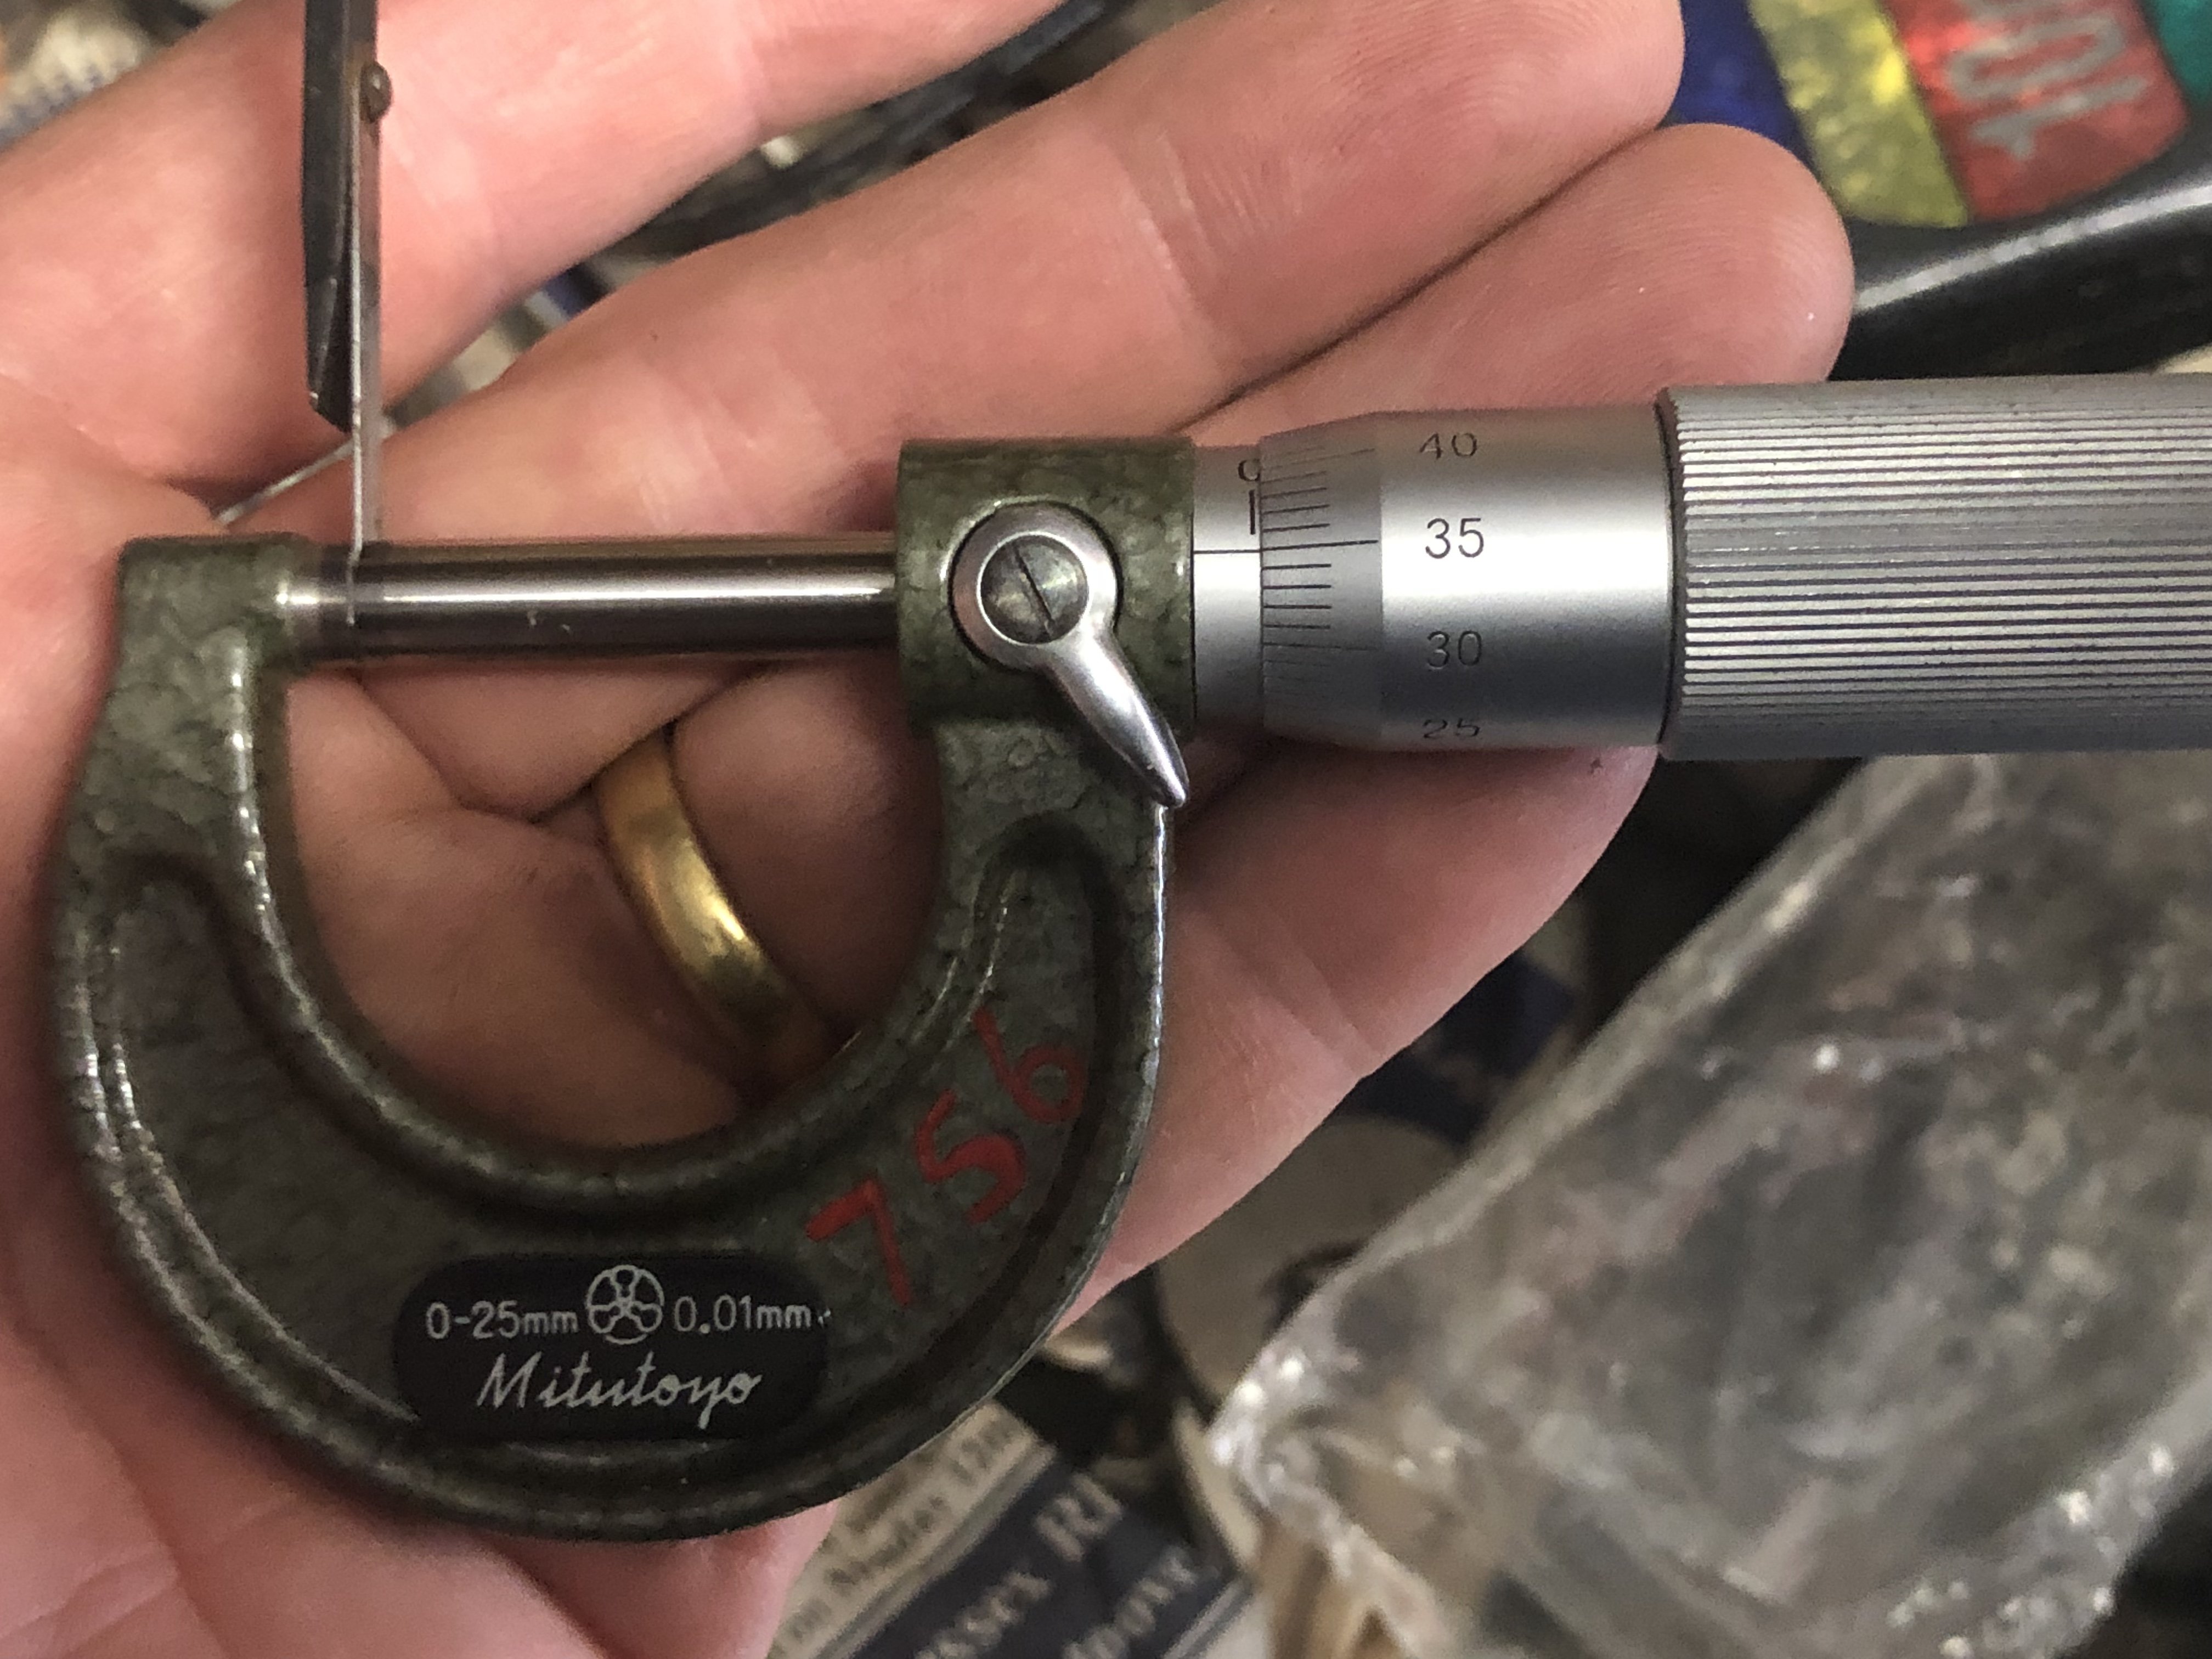
My father gave me a feeler Guate from another mower which he said should be about right ! This maybe the thing they was throwing me off.Picture of feeler Gauge attached.
I’ve now haves that gap and I HAVE A SPARK 😊😋
I’ll now go and see if it’ll start !!
Half way there 😊
Thanks again
Attachments:
April 13, 2020 at 10:30 am #33807vhgmcbuddyMemberI’ll go and check the points gap again…
April 13, 2020 at 10:29 am #33806vhgmcbuddyMemberThanks Andy for your assistance I really appreciate it.
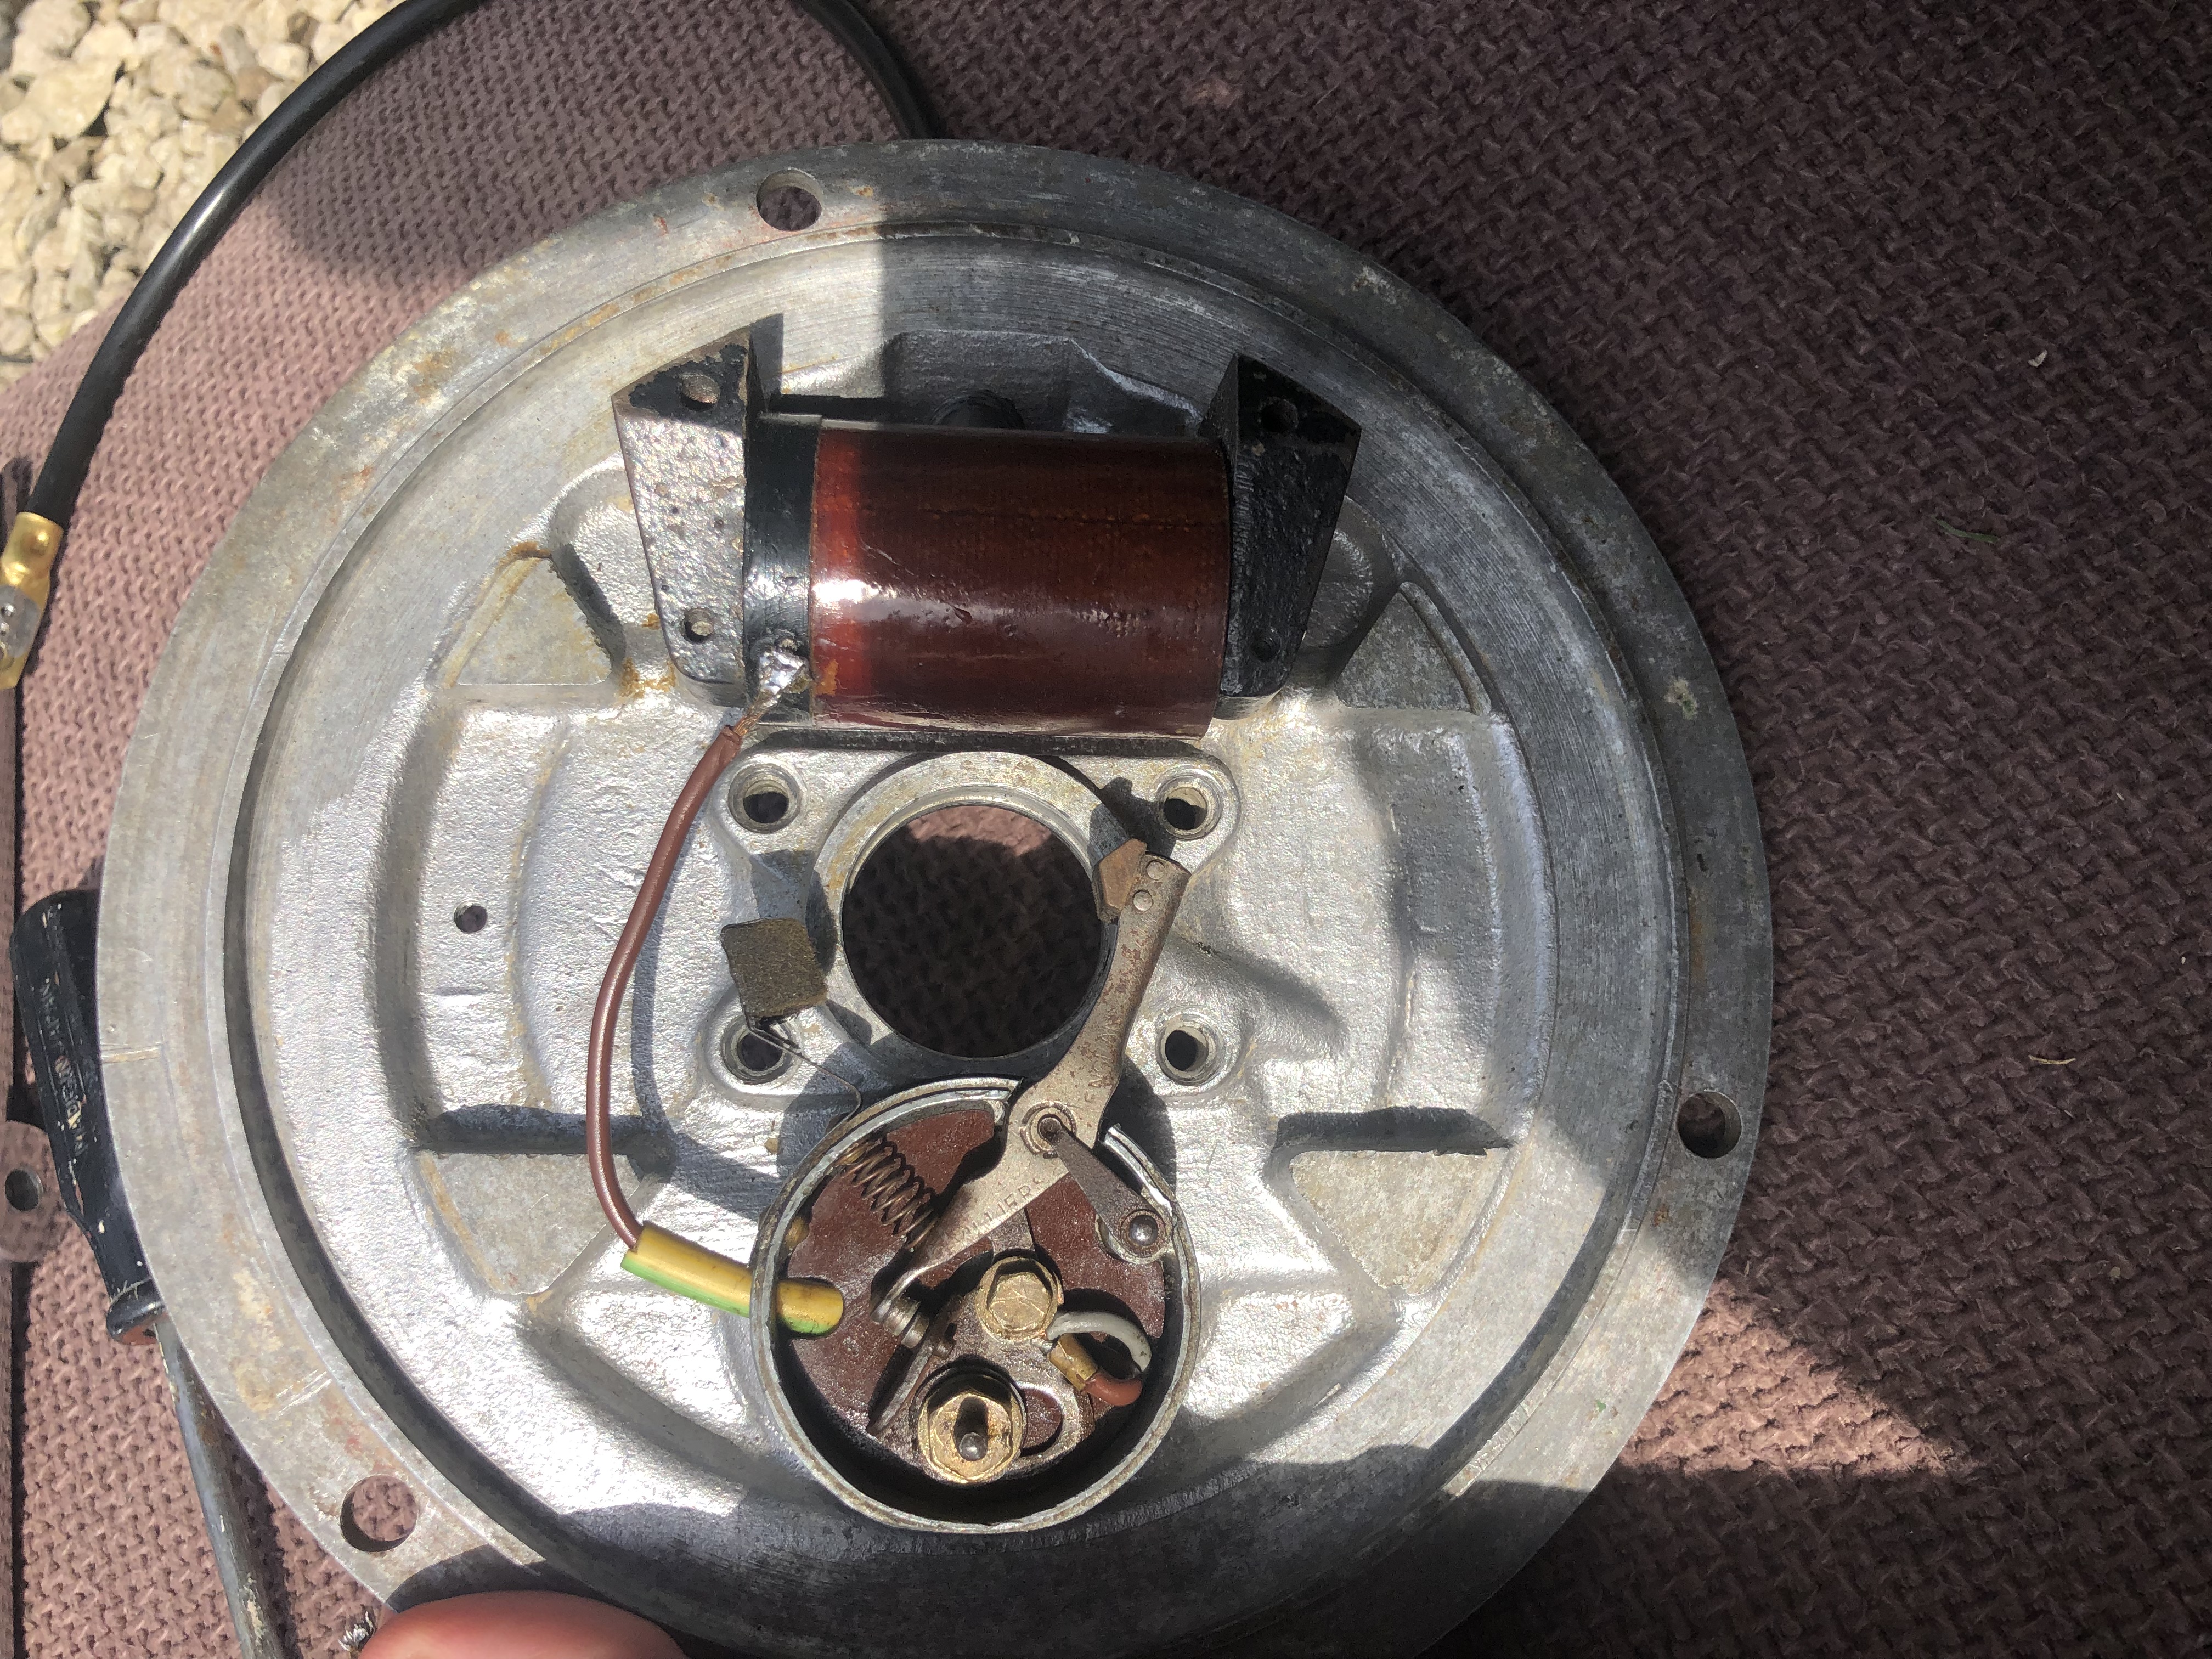
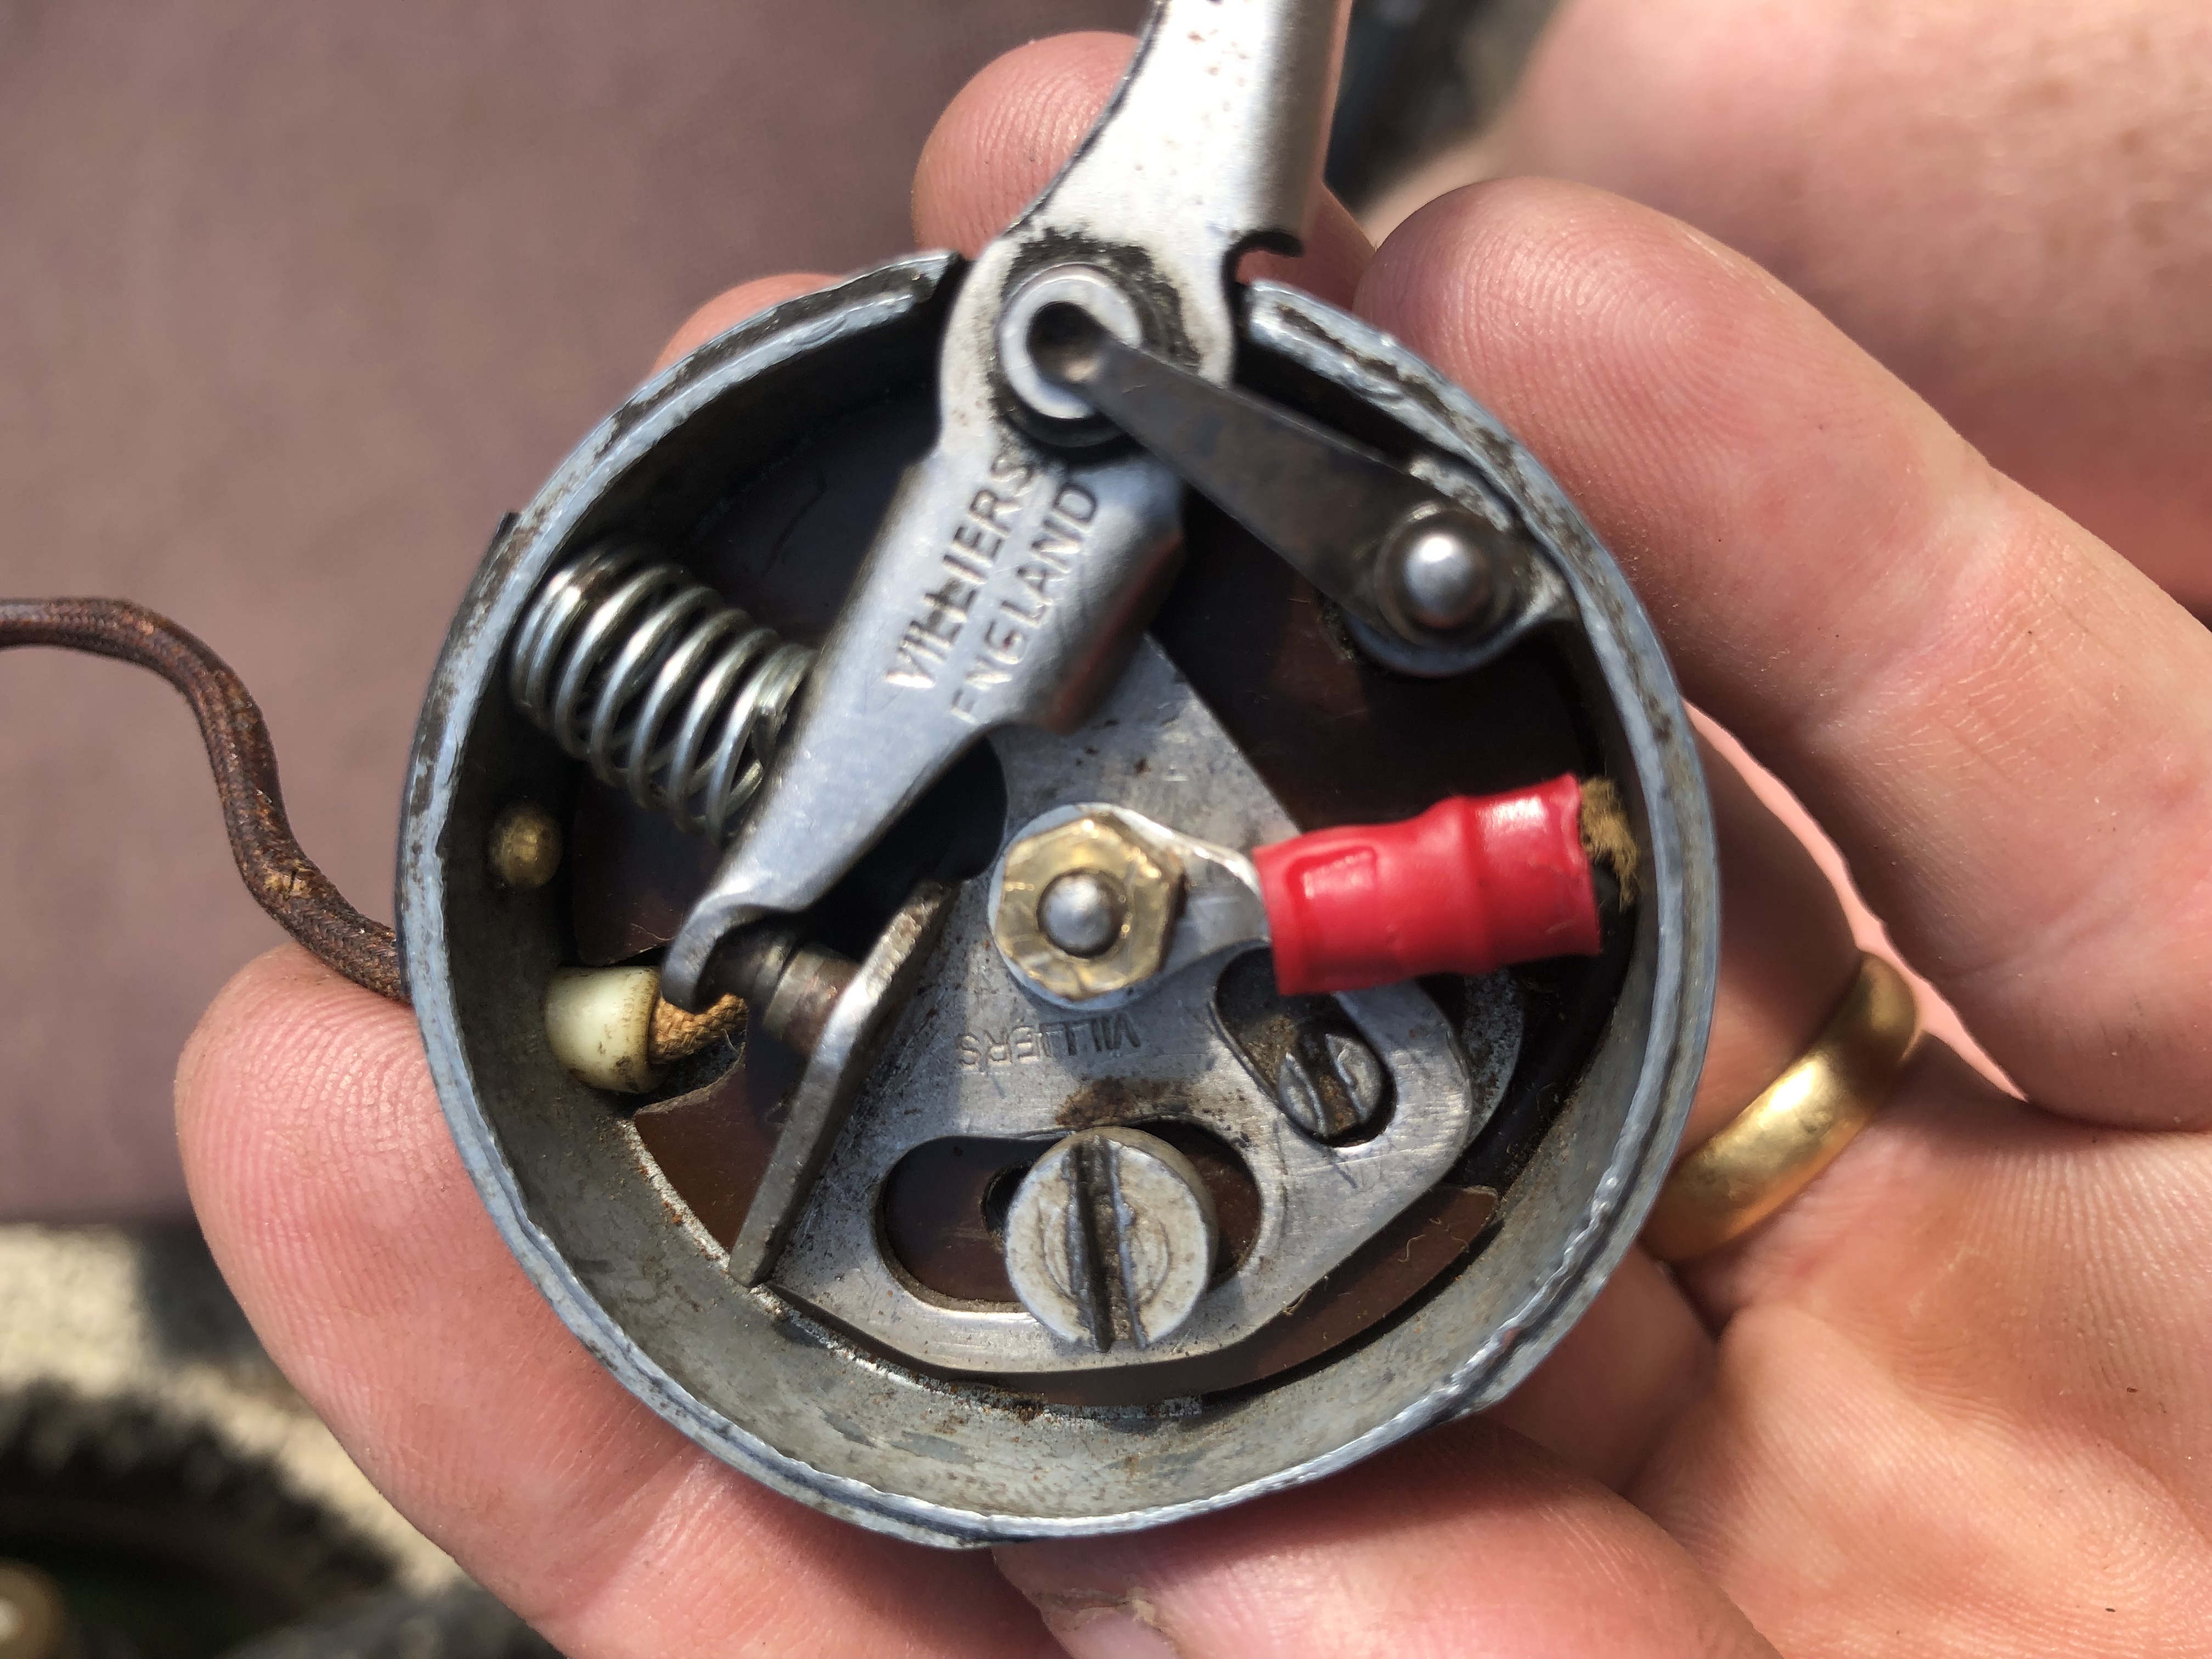
image 11 probably wasn’t the most helpful as I hadn’t fitted the new condenser and wire at that point.
Image 12 is what I’m now using ……
Image 13 is my spare one .( is the insulating washer just a brass washer ??) or is that being daft as I’m guessing brass no isolating ?
If brass washer is the case is it the one under the condenser/coil nut ? or under the screw for altering the points ? or both??
or am I missing the obvious which is quite likely !
lastly I have put it back together with the points as per image 12 and still no spark at all…..
Maybe a chance that I have a faulty new coil ??? or have damaged it using the uninsulated points ??
Otherwise I’m at my wits ends ! but still trying to be positive rather than reverting to taking it to someone to fix !
I guess I need to find someone to potentially do a test on the coil ?? or unlikely ?
If all else fails ….
Don’t suppose there are any enthusiasts in in mid Sussex that you know of that are into historic machines if all else fails….April 13, 2020 at 8:56 am #33799vhgmcbuddyMemberI’ve also now taken the coil back off and cleaned the magnets and piles of any grease or oil just to make sure .
I have two sets of points ? One with a new condenser.
They are slightly different ? One has a bit to tighten point settings the other the usual screw .
I’m using the one with the nut which isn’t so convenient but has the new condenser on it and an arm that is less worn in the end.Picture of the two points below , can’t see anything obvious that’s wrong here .
Question ??
If the timing is not set up correctly initially prior to putting fan and pull cord pulley back on ?? Would this prevent a spark ??
I can test it with a drill ??
Do you always see an obvious spark ?
Thanks
Mark
Attachments:
April 12, 2020 at 7:23 am #33793vhgmcbuddyMemberThank you very much ….
Well it’s definitely not the sprung dimple on the back of the coil , however I don’t remember seeing the little insulator bush behind the points so I will take it apart again and check .
Many thanks again.
Mark
April 10, 2020 at 9:05 pm #33791vhgmcbuddyMemberThank you and apologies for my lack of response . Correct condenser as above just arrived and a coil from villiers uk.
Well I’ve put the condenser in, fitted / soldered the new coil .I’ve now got new everything from plug to leads etc….
I put it partially back together and with the plug on the engine I got a spark ! By spinning it up on my drill.
Having got really excited I put everything back together . Primed the fuel , closed the cover in the air filter gave it 1/3 throttle ..
I then had a large back fire ???Turned it over a few more times and nothing .
Checked spark again ? And Now no spark again ??
Any thoughts …. I’ve had it apart so many times , checked points first and got the correct gap
With a new coil and condenser surely there isn’t much else to give a spark ??
Any assistance would be appreciated …
I’ve got a spare set of points and I’ve tried them too !
Almost as if the coil isn’t working again but it’s brand new ??
Cheers
Mark
April 10, 2020 at 5:10 pm #33790vhgmcbuddyMemberearliest references I have for the Howard Inline Twin engine is 1951,
first in ‘The Engineer’
“This engine has been built by Rotary Hoes, Ltd.”
[The Engineer. (England) Dec 14, 1951 p763]next it is reported in the Howard mag:
“The new Series IV Model ‘Gem’, shown by Rotary Hoes for the first time at the 1951 Smithfield Show, offers
growers greater power and wider cultivation.
Although new to the home market, limited supplies of this model were sent during 1951 to Greece and
South Africa. … … The ‘Gem’ IV is powered by an engine of Rotary Hoes’ own design which develops
9.8 b.h.p. at 2,000 r.p.m. the maximum governed speed. The engine is an air-cooled twin-cylinder 4-stroke
with 3in. bore and 3 1⁄2 in. stroke and a capacity of 810 c.c.”
[Rotavator Pictorial, March 1952]sorry i cant find this issue in my scanned docs, (another gunna-do job) it is the first one, i also have the second, then a big gap up to 1956. anybody have any more they can share?
my first reference to the 360 version is 1960, as per Brian Bells book, does anybody have Howard docs for earlier date? so yes your 1951 Gem has a later replacement engine, anybodies guess what motor it had originally, the Gem was available as both Series III and Series IV for several years. as well as the standard JAP 600 single, in the USA they also had Wisconsin singles and twins.
it is hard to imagine these machines being made by the thousands, it makes it more real to see those truckloads, thanks for great article Charlie. cheers Rod.
April 10, 2020 at 1:57 pm #33788vhgmcbuddyMemberUsually here in the US we can date them by a triangle shaped safety decal that is applied to all power equipment in the 70s-80s. The decal has info that includes the date, however that decal is missing from mine. Mine does have the Tecumseh two-cycle engine and I believe needs only a spring for the carb/governor to run. I plan to restore it eventually.
I have looked for years for a blue Flymo, without success. I have been told that blue ones were never imported to the USA, possibly Canada. I’m not sure if that info is correct though.
I talked to a local small engine dealer, now deceased, who told me that he once sold Flymos and after a year of no sales he saved only the Tecumseh parts that might fit other applications and hauled a large truckload of new Flymo parts to the landfill. Wish I had been there. I would have been glad to save him the trouble!April 6, 2020 at 4:35 pm #33751vhgmcbuddyMemberHi Andy
Thank’s for reply. I will put it back together tonight and give it a try.Phill
-
AuthorPosts