
Forum Replies Created
-
AuthorPosts
-
January 28, 2021 at 8:50 am #36520vhgmcbuddyKeymaster
that looked a painful way to stop it, sounds nice
January 27, 2021 at 10:15 pm #36518vhgmcbuddyKeymasterApologies for dredging up an old thread, but, nearly nine months after purchase…
…it runs!
Now the engine is known to be sound I can begin working through the rest of the issues!
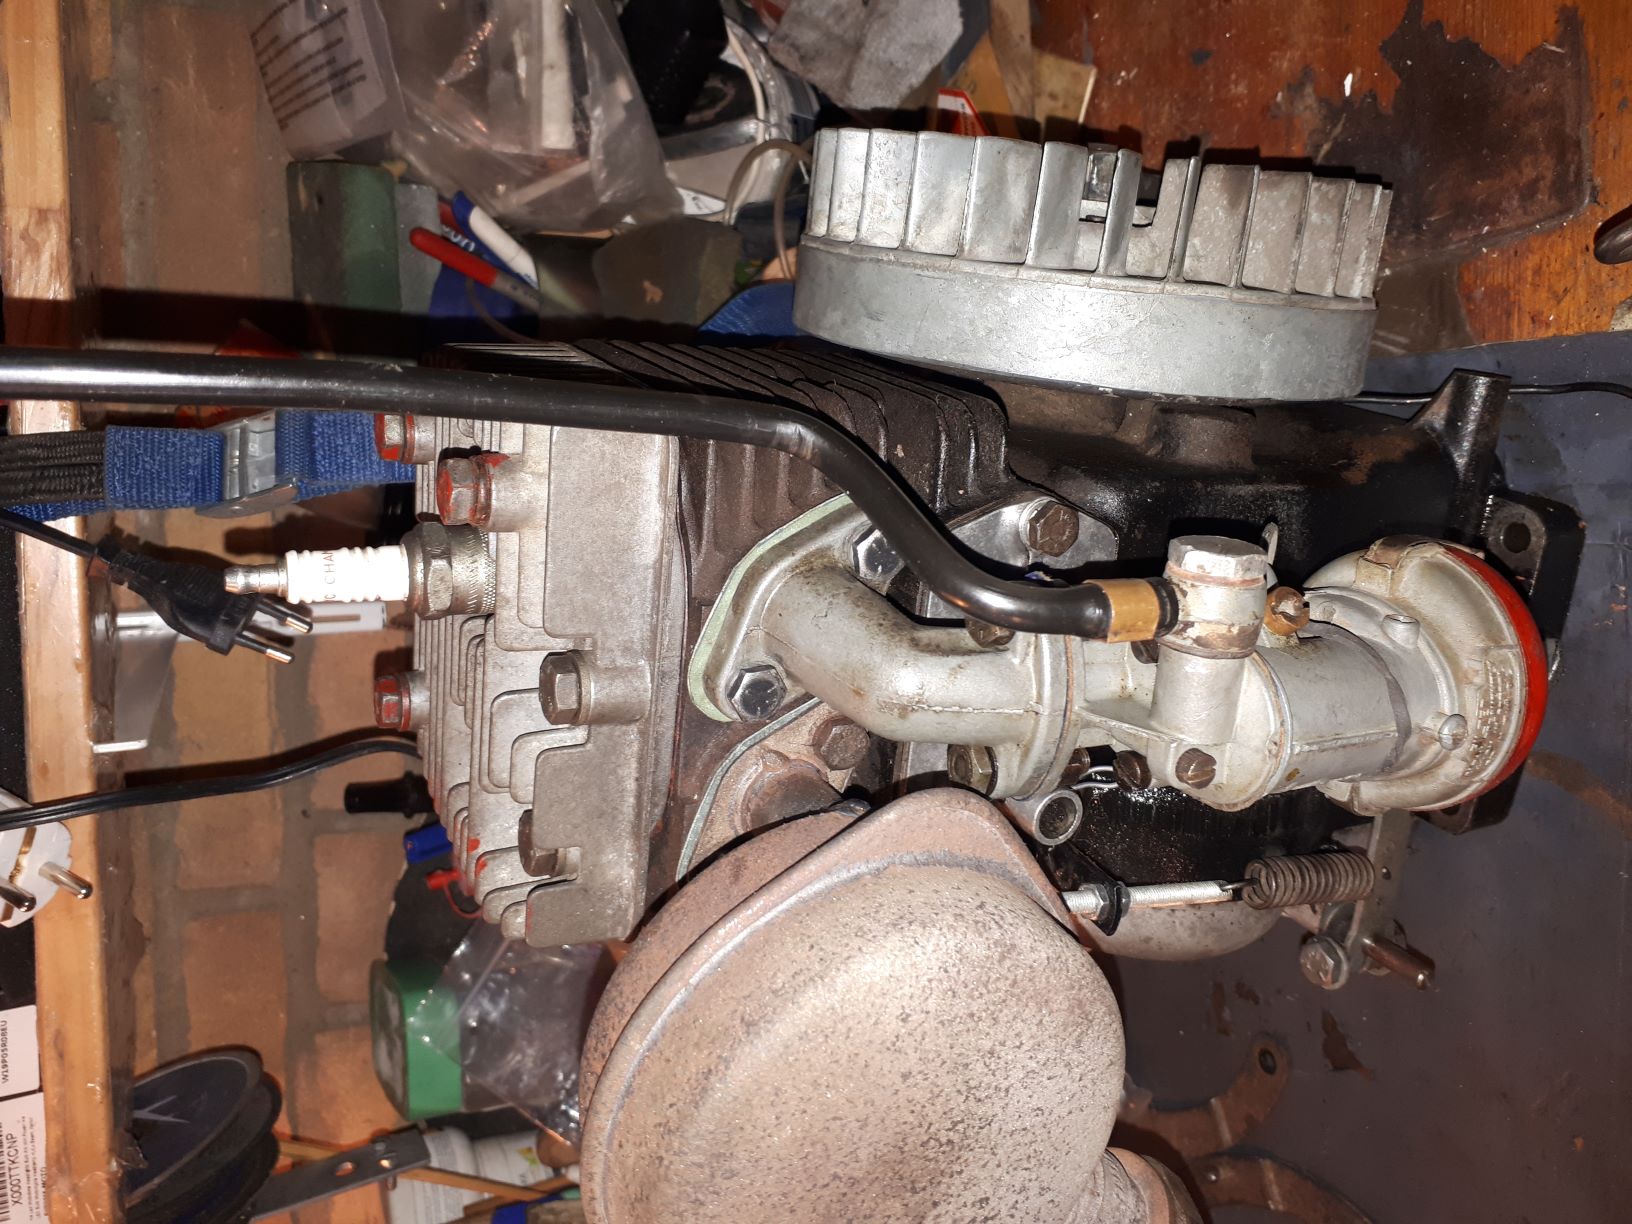
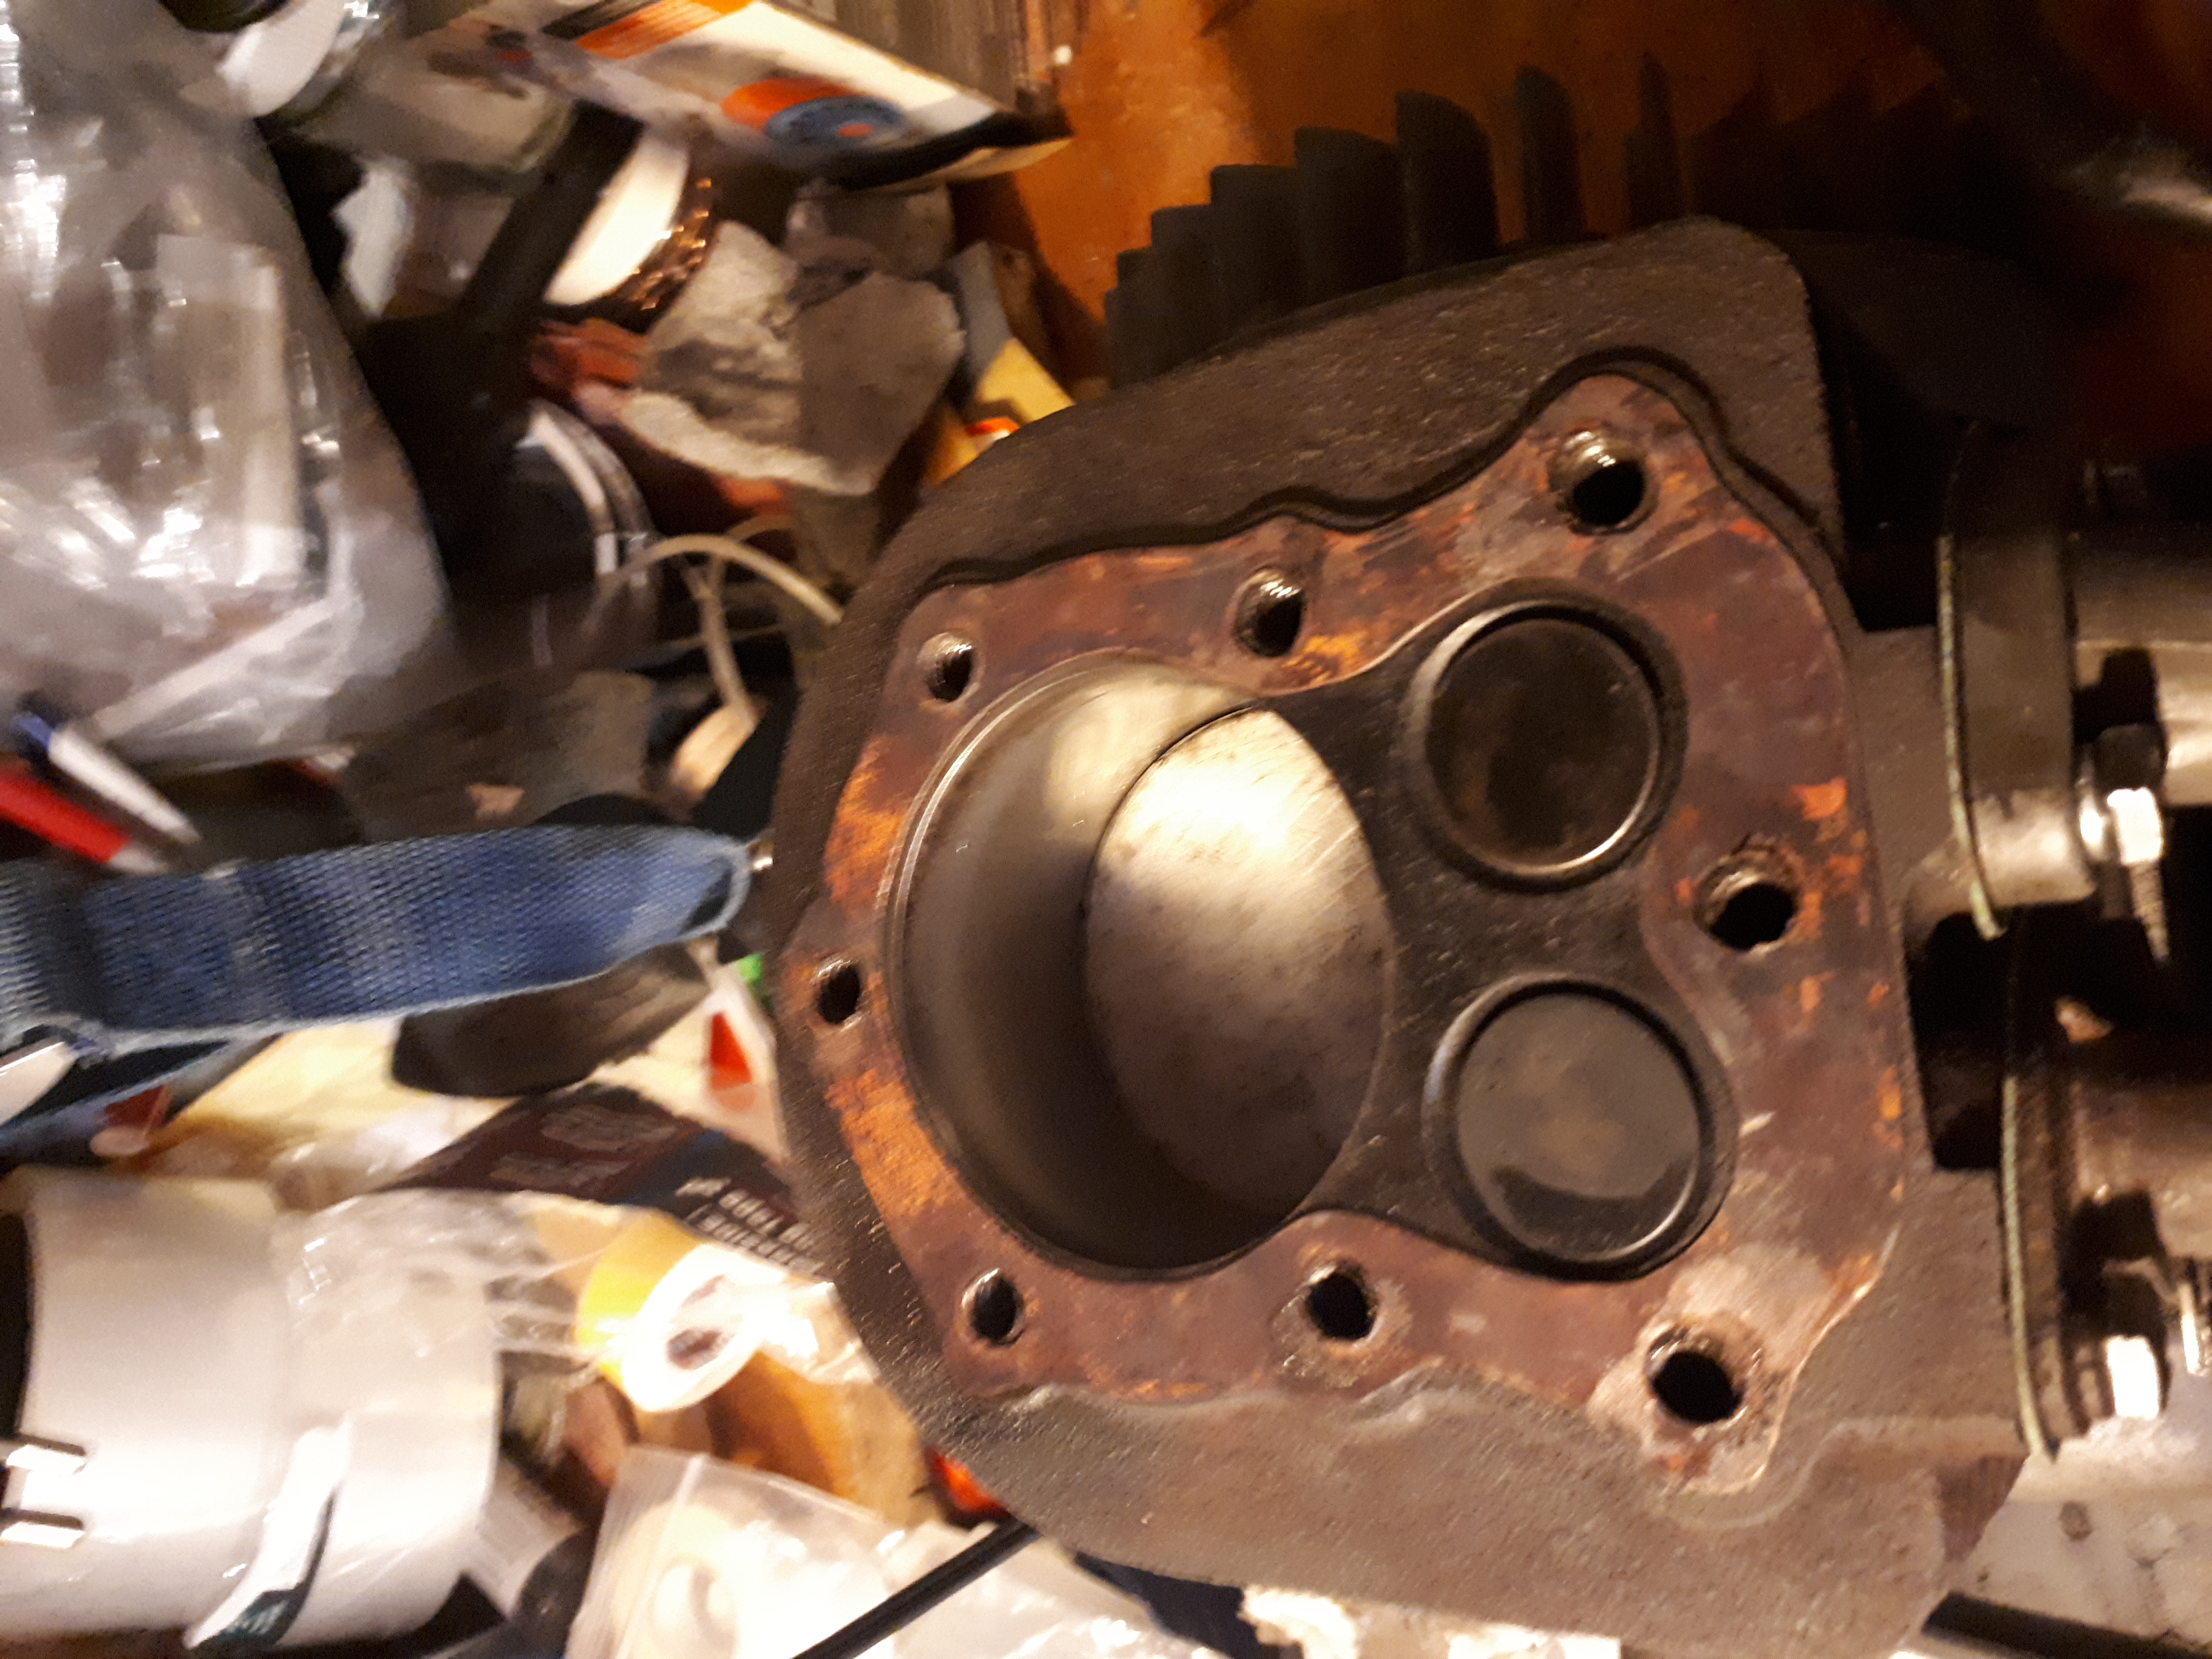
January 27, 2021 at 1:30 pm #36514vhgmcbuddyKeymasterHello all the way from Western Australia I’m working on a Villiers 2 stroke engine which I think it’s a 3g from what I have been told. Can anyone tell me what engine I have. I also have the cylinder head off and there’s quite a bit of physical resistance in the stroke around the TDC Mark, is this normal? caused by the magnets brushing pass the coil ends? I have to use quite a bit of force to rotate the fly wheel thru TDC. thank you.
Attachments:
January 24, 2021 at 8:33 am #36501vhgmcbuddyKeymasterYes Mike, that’s a 35.
Good luck with your search for an engine. Pity the original is lost, the rest of the machine looks pretty decent.January 23, 2021 at 9:59 pm #36492vhgmcbuddyKeymasterSome more pictures
Attachments:
January 21, 2021 at 10:58 pm #36472vhgmcbuddyKeymasterThis is for all those Saturday mornings I worked, booking in and working on a Tesco carrier bag full of parts of a recoil starter that someone had taken apart and couldn’t get back together.
To the lady instructed to get a belt or cable for hubby’s mower.
“ yes Madam, a lot of them are green”January 19, 2021 at 9:46 pm #36462vhgmcbuddyKeymasterSorry not been able to get into the garage for a few days.
https://drive.google.com/file/d/1nu6K8rBkcNTVUKV1HJkWfL5zX_huHMTJ/view?usp=drivesdk
https://drive.google.com/file/d/1o1AeYumRAyON4EGqCe-IqUmFDYYIeUBy/view?usp=drivesdk
https://drive.google.com/file/d/1nrJJS66VlP2hIMLWJyem5d7iv8Wyy3Av/view?usp=drivesdk
https://drive.google.com/file/d/1o0_VMub4-XfN1T73IPgPTIQ6ngimQWs6/view?usp=drivesdk
Must find a way to make photos compress on my phone as struggling with getting my laptop to receive files from my phone.
Take care and stay safe, Mike
Photos downloaded and added to post by admin to save need to follow links.Attachments:
January 19, 2021 at 5:40 pm #36455vhgmcbuddyKeymasterEasy-start – the ruin of many an engine !!
January 17, 2021 at 3:27 pm #36440vhgmcbuddyKeymasterFinally the engine re-assembled with all the new gaskets. Was a good exercise and a first for me.
Attachments:
January 17, 2021 at 3:23 pm #36438vhgmcbuddyKeymasterThe head gasket prior to fitting the head back and torque the bolts.
Attachments:
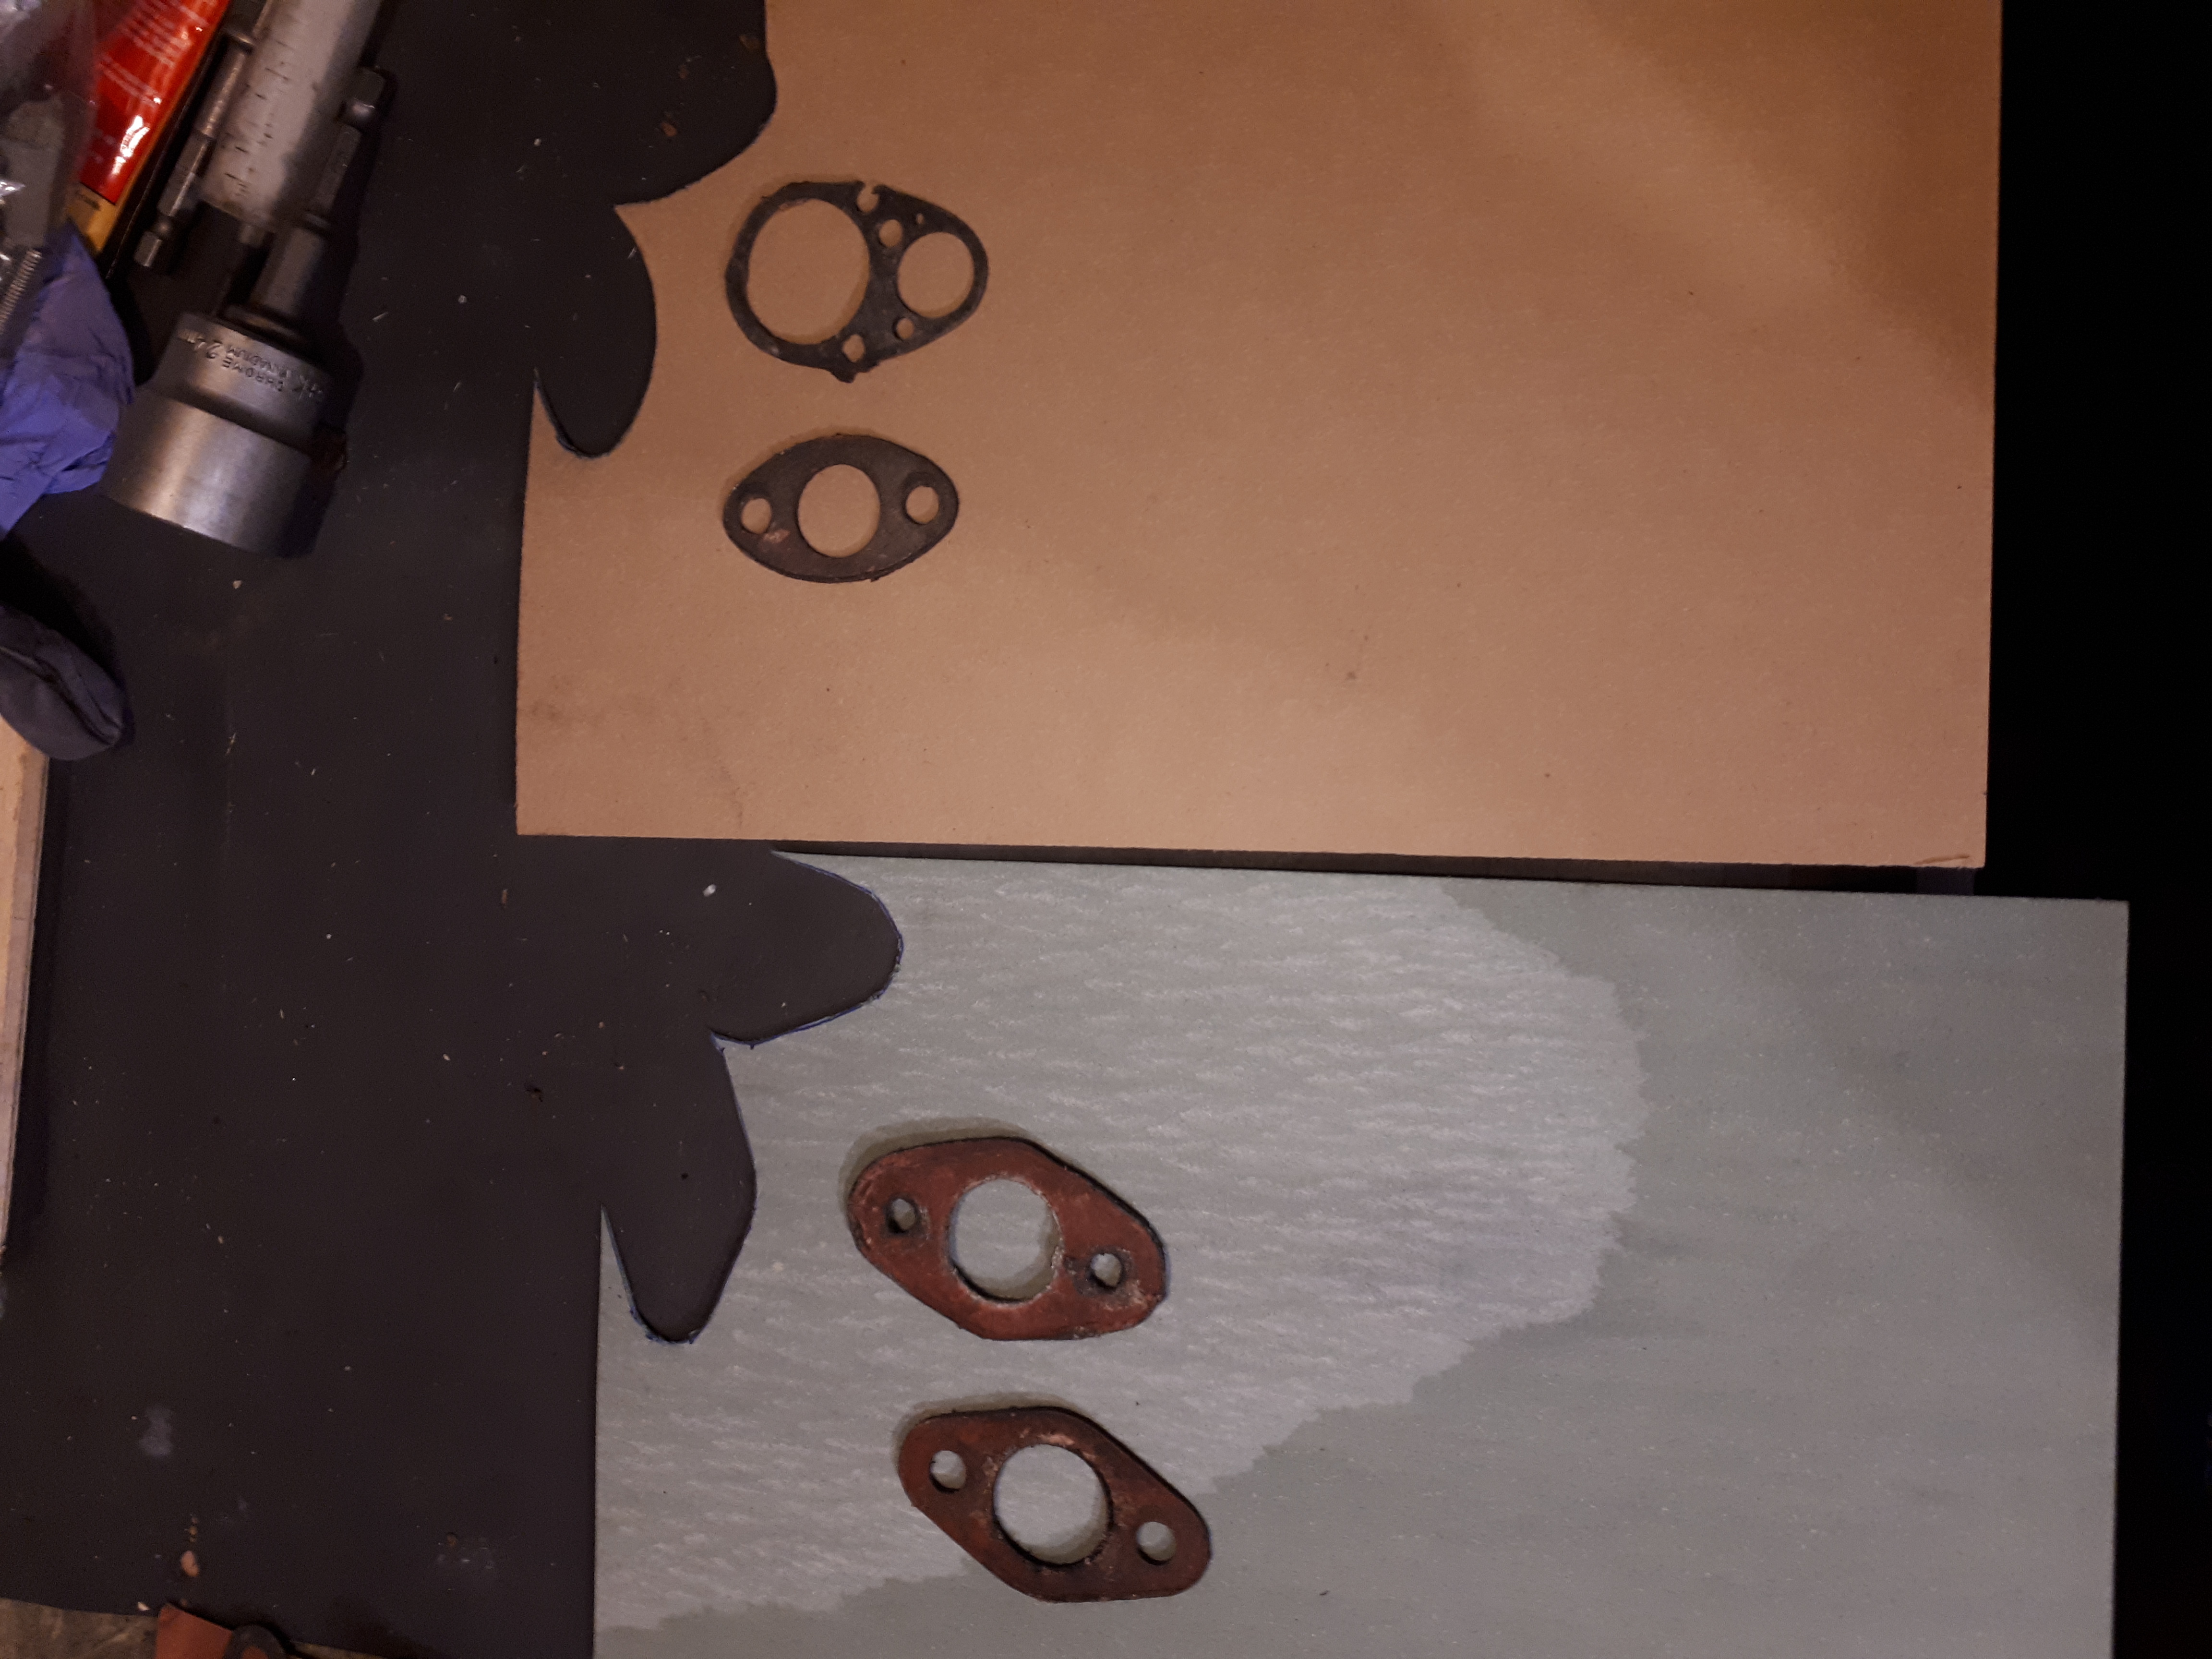
January 17, 2021 at 3:22 pm #36436vhgmcbuddyKeymasterNow the other gaskets.
Attachments:
January 17, 2021 at 3:21 pm #36434vhgmcbuddyKeymasterDear Charlie, Andy and Angus.
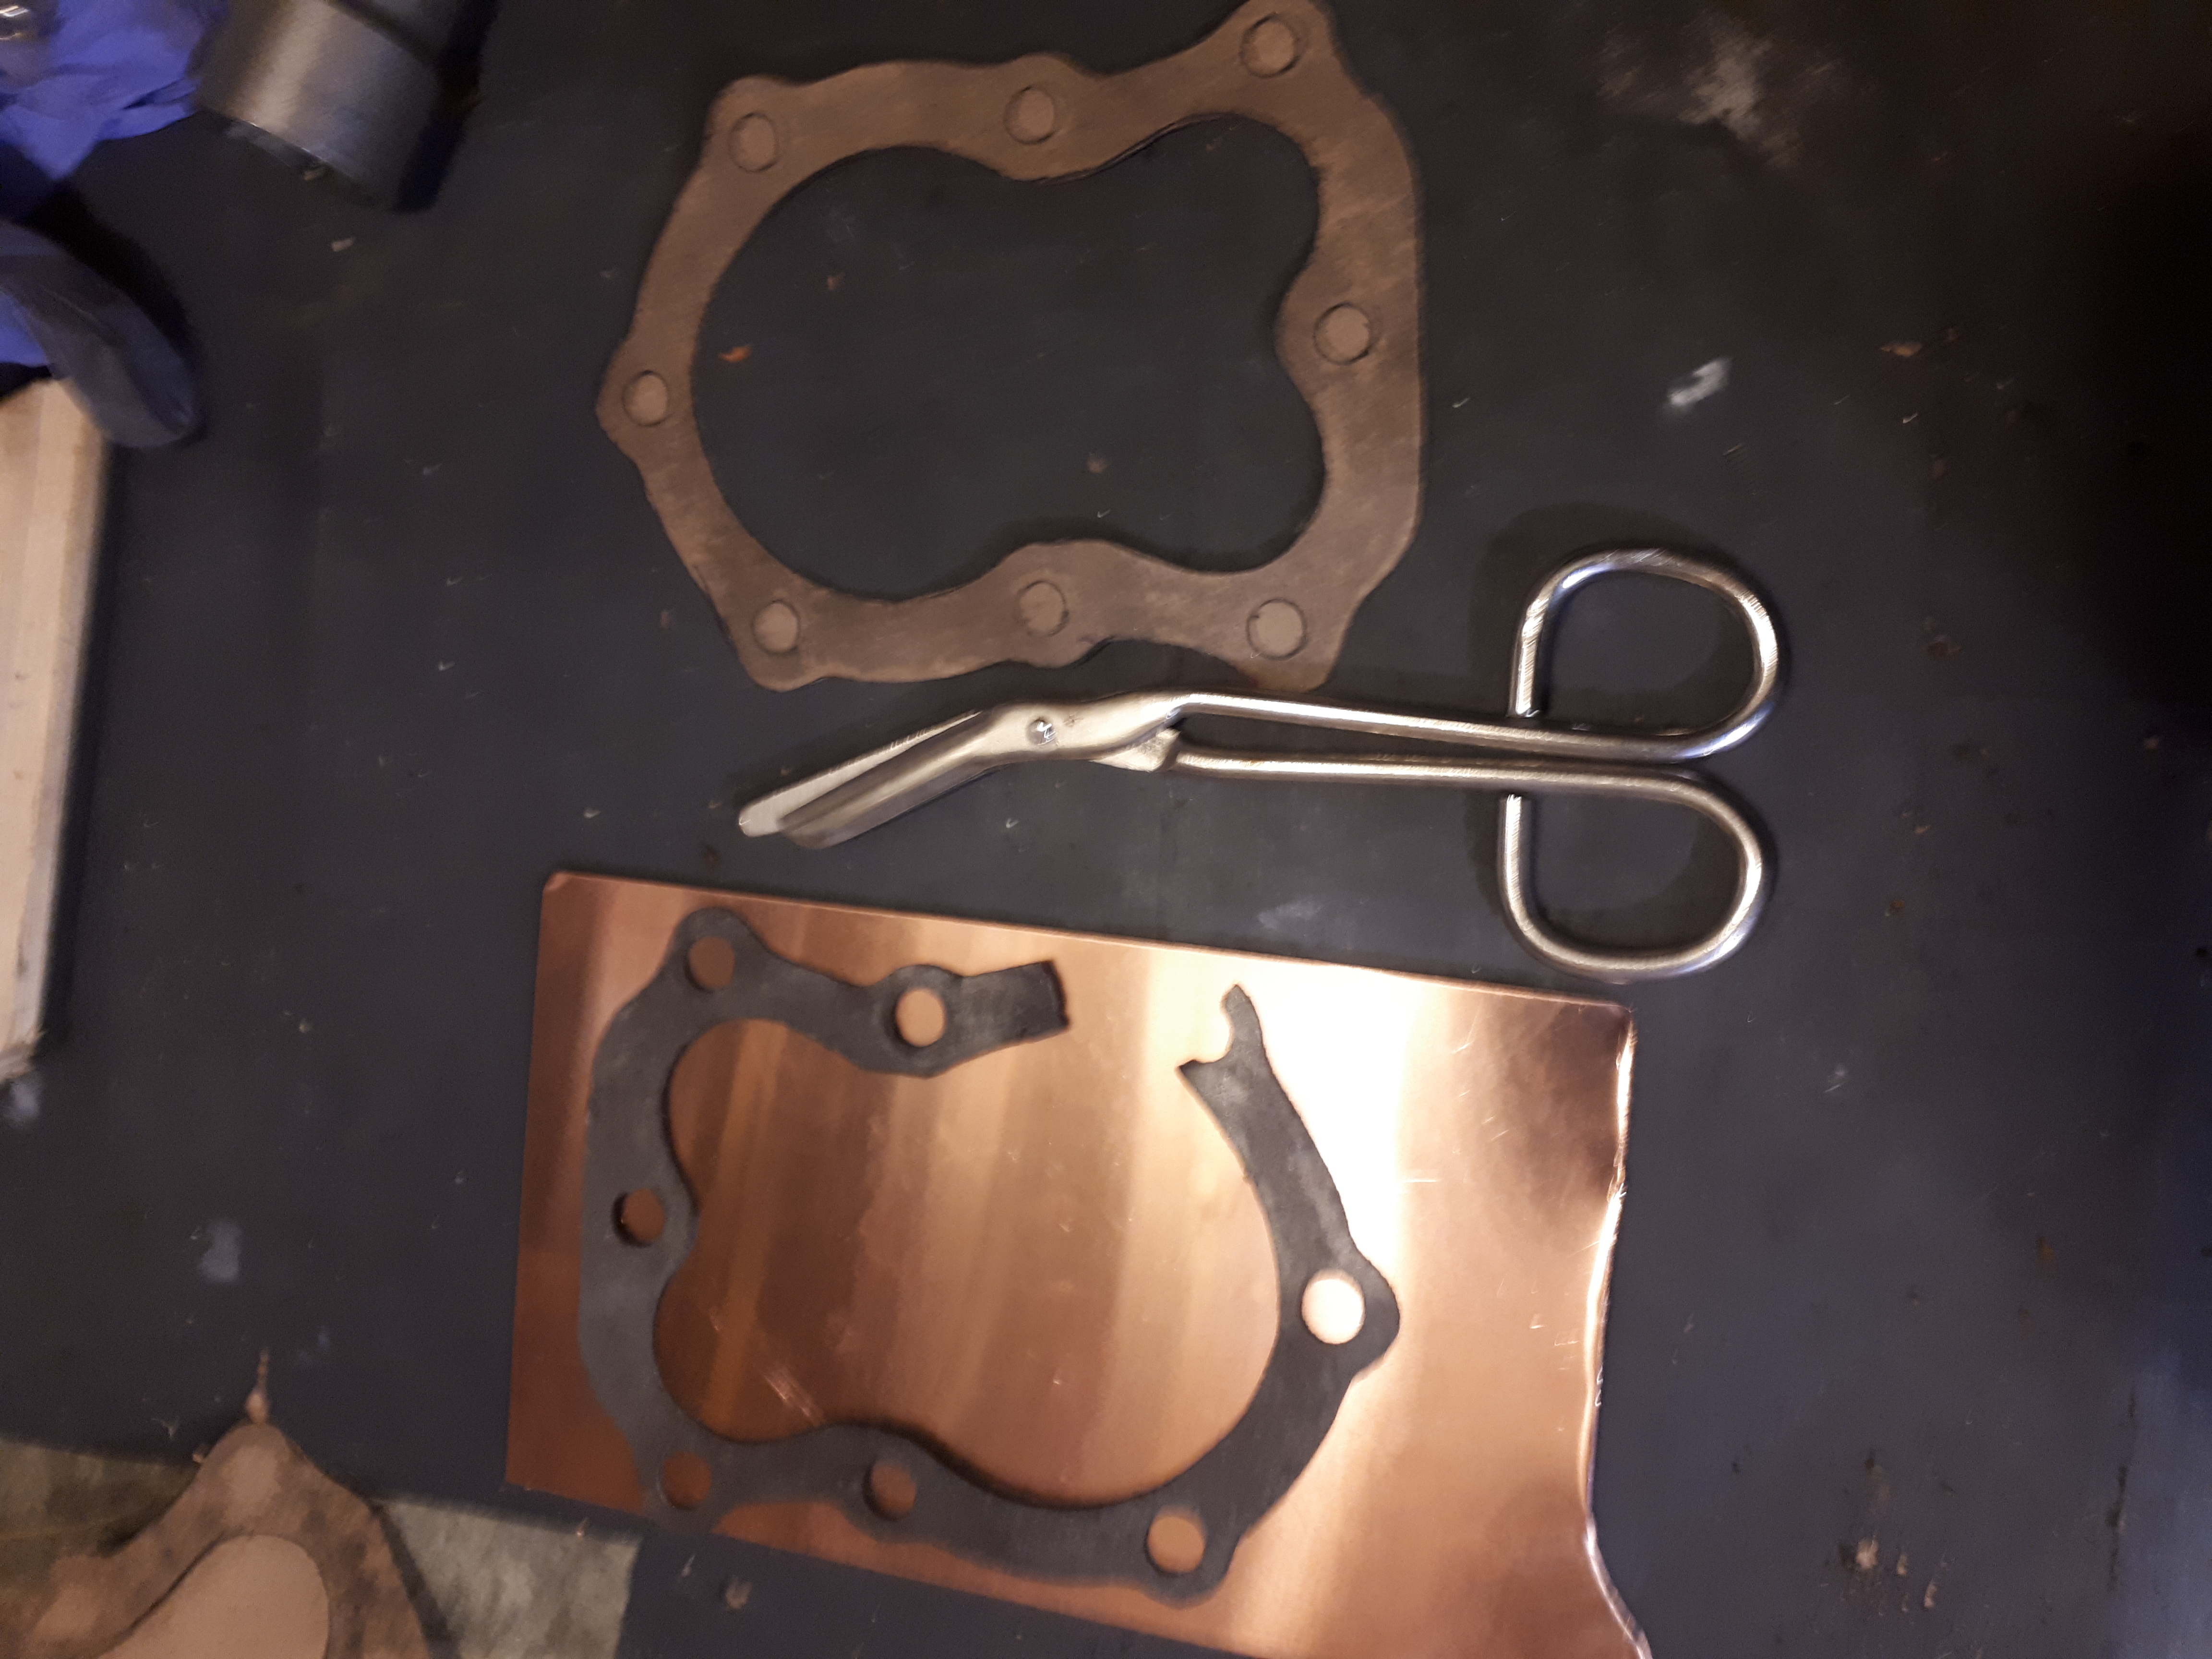
Went ahead with fabricating my own head gasket.
Did take me several hours (evening hours, after work) spread over a week to cut, adjust, make the holes, quench and finally put it back onto the engine.
I started and tested the engine yesterday. I had it run for 10 minutes in at least 2 stints.
As I re-installed the governor linkage to the carb, it now stabilizes nicely (had to adjust the carb). As I had ordered a gasket kit, I had several types + thicknesses of gaskets so used the opportunity to fabricate all the gaskets for the carb + intake and for the exhaust.
A few photos to illustrate.
Of note that for the copper plate, I mainly used the “special scissors” I had from an old medical kit and a “Dremel” to refine/adjust the cuts/holes.Attachments:
January 16, 2021 at 8:51 pm #36422vhgmcbuddyKeymasterCheers for all the advise
January 16, 2021 at 11:29 am #36421vhgmcbuddyKeymasterExhaust removal – my method. I’ve found that using this method from the outset rather than getting everything chewed up with Stillsons etc, usually to no avail.
Cut the old muffler off leaving about 1/2” of the stub proud of the block.
Take a 4” length of hacksaw blade in a handle or wrapped in masking tape, with the teeth pointing back to cut on the pull stroke.
Insert right into the stub and make a longitudinal cut through the wall of the stub down to the point where it’s just touching the threads in the block.
Take a set of Mole / Vice grips and grasp the stub at right angles / parallel to the block face and position one jaw along, but not overlapping the cut.
Squeeze the grips to collapse that section into the bore of the pipe.
Continue the squeeze and collapse until a good proportion of the pipe has pulled away from the internal wall of the block.
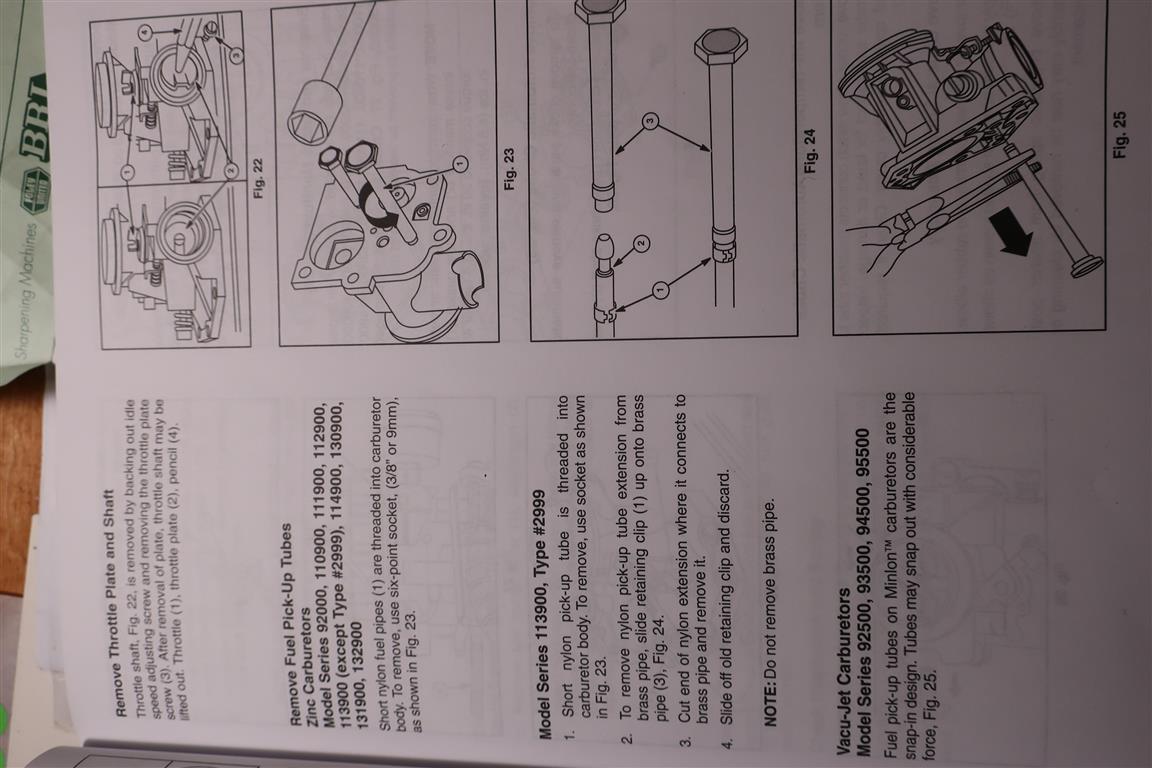
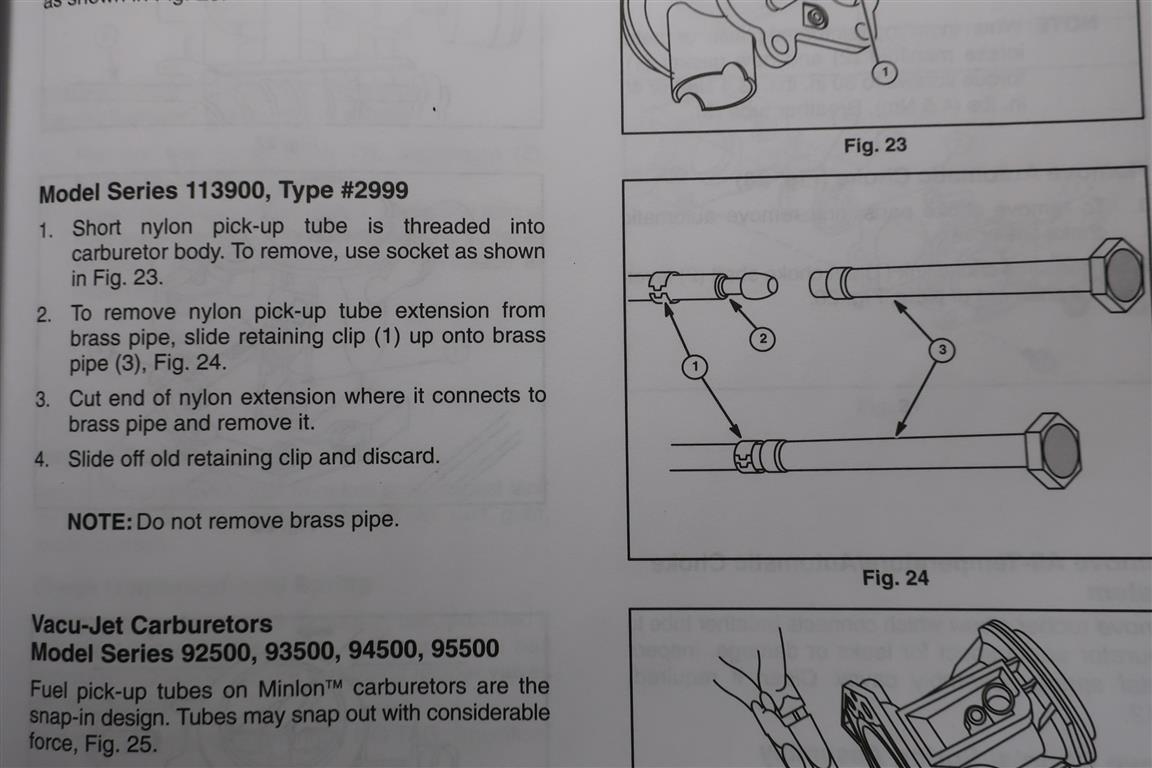
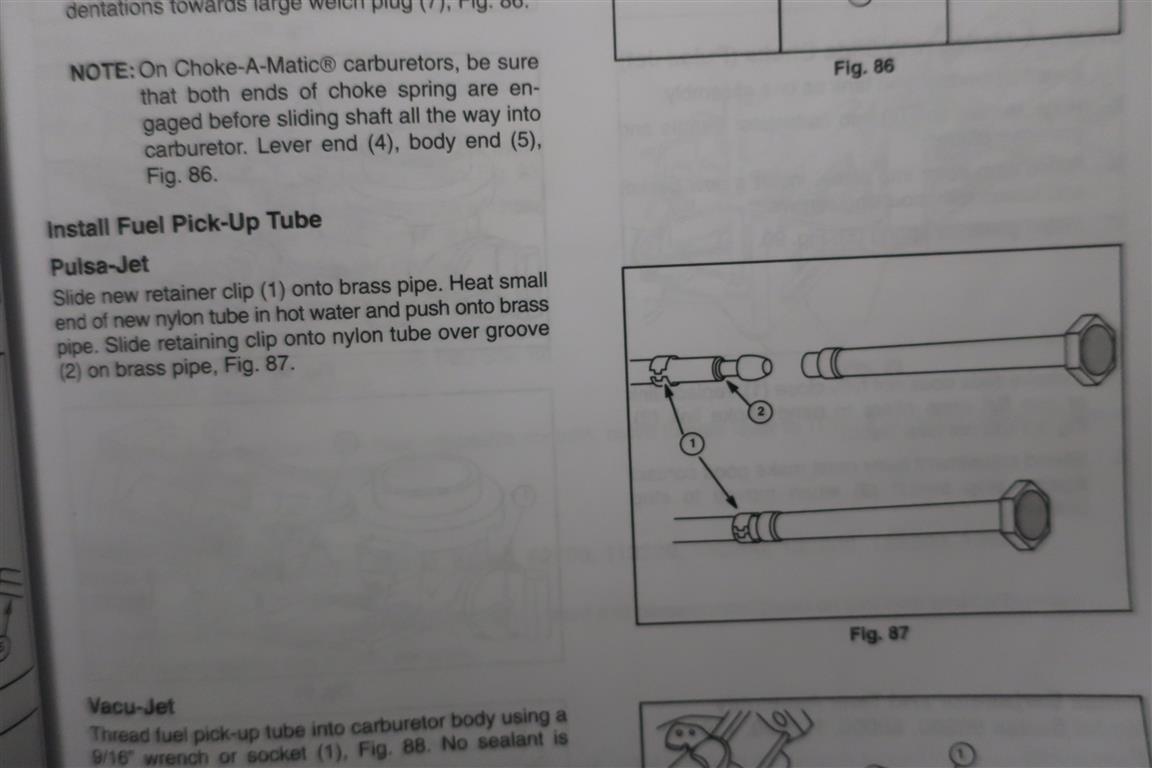
At this stage the grips can usually be repositioned to wrangle the collapsed stub out of the block.January 15, 2021 at 11:32 pm #36417vhgmcbuddyKeymasterThis may help with the fuel pipe. You will see that BS say cut off the nylon pipe, but to warm the new nylon pipe in hot water when installing.
Attachments:
-
AuthorPosts