Forum Replies Created
-
AuthorPosts
-
March 27, 2021 at 2:18 pm #36844
 trusty220Keymaster
Quite right! There used to be a lever on the left hand handlebar that controlled the hydrostat. It sounds like your lever has been left in the reverse position so that when you engage drive to the gearbox it starts to move backwards. If you move the hydrostat lever to the middle position you will find it will stop the wheels rotating, and if you move it to the forward position it will move the wheels progressively faster in the forwards direction. The further forward you push the lever the faster forward it will go and if you bring it backwards it will get slower, then stop, then start to move in reverse.
Don’t run yourself over!
March 24, 2021 at 11:20 am #36831trusty220KeymasterWe had a few through the workshop back in the eighties. From memory they used to be fitted with a special 12 Volt battery that had three terminals- one negative and two positive. This allowed for two speeds on the motor as the voltage could be altered from 12V to 6V to suit conditions.
As far as I remember the rest of the mower was quite straightforward and followed normal practice. Enjoy it and good luck!
March 14, 2021 at 10:16 am #36783trusty220KeymasterA shame but I fully agree with the decision. I doubt that everyone will have had their second vaccination by September and so it’s the only decision the lads can make.
Looking forward to 2022 already!
March 11, 2021 at 10:46 am #36757trusty220KeymasterThe artwork is now finished and the next stage will be production. Nearly there!
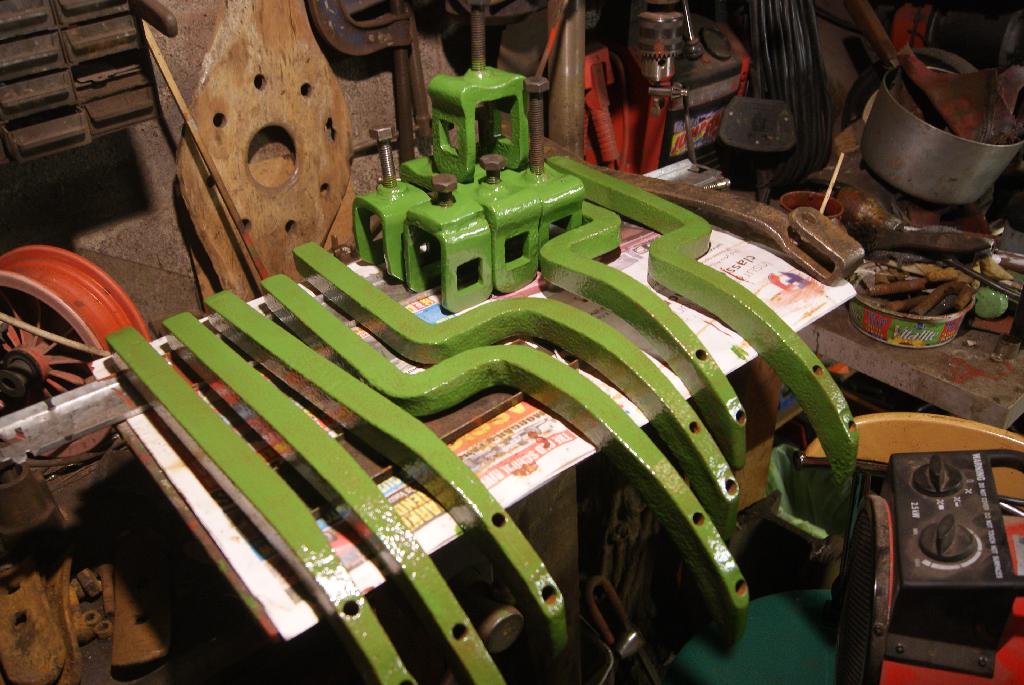
As an update I thought that it would look better with a plough underneath it as well, so off to the farm again and dug out a plough. Everything was seized solid with rust so into the fire it went and after a five minute cooling off in the stream the bolts came undone with no trouble at all. I am now embarking on a marathon wire-wheel process because the parts are too big to put into the bucket to use electrolysis.
Pictures in due course.
February 23, 2021 at 4:50 pm #36694trusty220KeymasterThese things need to be heavy to penetrate the ground so I’m not surprised that it weighs 30lbs.
I’m sure that if you advertised it in The Cultivator (our club’s magazine) somebody would love to give it a new home and a new lease of life. Once thrown away it’s gone forever.
February 22, 2021 at 3:41 pm #36684trusty220KeymasterIt could be an early Patisson product. Are there any makers’ marks on it at all?
February 17, 2021 at 12:50 pm #36649trusty220KeymasterI’m told that the artwork for these stickers is nearly finished so I’ve taken a little time out to fettle up a headstock to put the first one onto. I had the idea that I would make up a display of all of the Trusty tools that fit to the headstock, so this is the first stage.
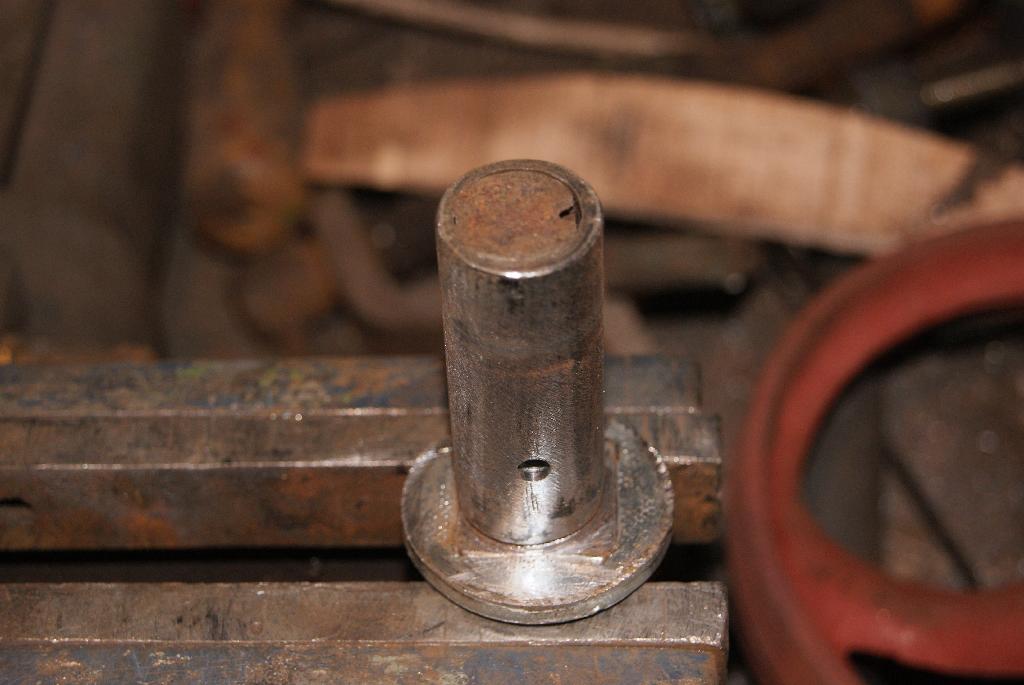
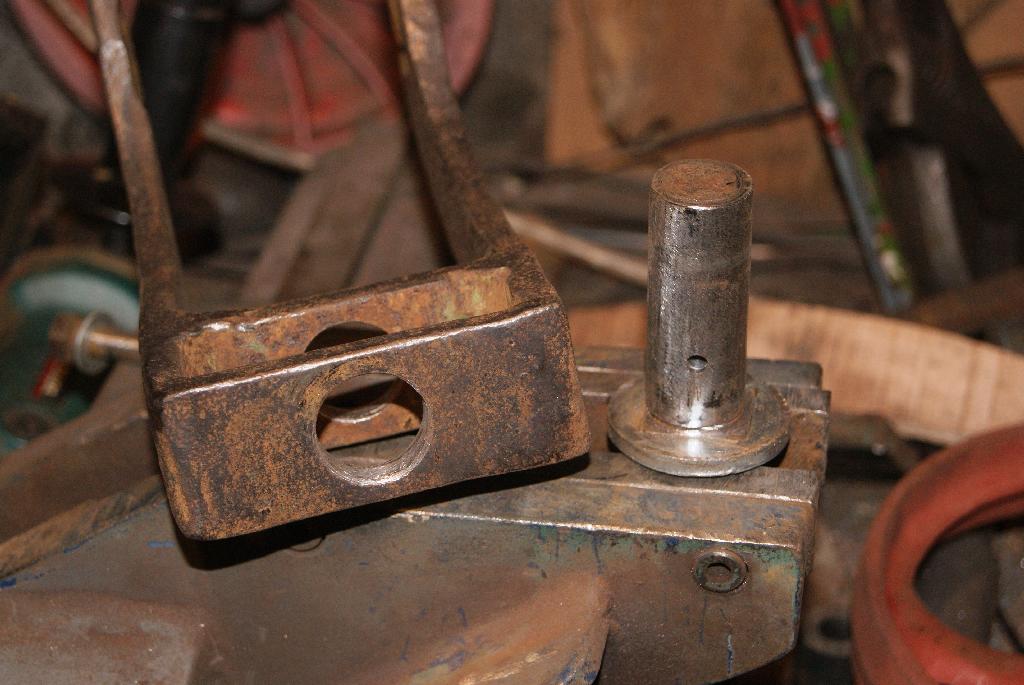
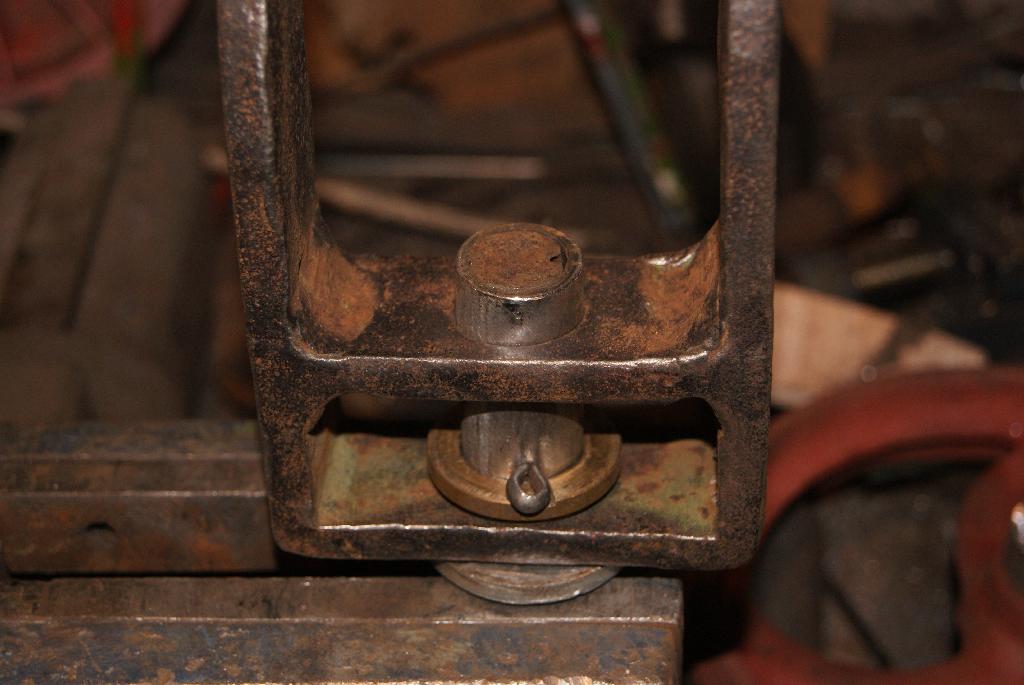
I don’t know about you, but it’s ages since I’ve tried to get one of these apart and it certainly brought back many unhappy memories struggling with this one. All of the bolt-on parts came off easily but where I always struggle is getting the pin out of the front casting to separate the front from the back. The pin normally rusts itself to the casting and you just cannot get enough heat into it to get the pin to move- until now, that is! Back to the farm with a few wooden pallets I went, filled up the oil drum with them, chucked a bit of old hay in to get it started then go for a cup of tea. By the time I came back it had settled down to a lovely red glow all around the drum with a thick covering of hot embers across the bottom. I put the headstock in (minus the aluminium cast pieces) and filled it up again with more pallet wood. After a short while the whole assembly was glowing red so I left it to burn out and cool down. That night the pin came out with a bit of persuasion from the lump hammer but it wasn’t easy- the technique is to knock it backwards and forwards, dosing it with oil and WD40 every time. Eventually it moves more and more until it comes out completely.
I have now got it to the paint stage, so not long now!
PS Normally using this technique I pull the red hot metal out of the fire and plunge it into the stream to crack the rust seal by using differential expansion/contraction. This works well if you have a steel fabrication but I didn’t trust it with cast iron; you only break it once!
Attachments:
February 13, 2021 at 5:04 pm #36625trusty220KeymasterMr. Haggle, thanks for the praise but I fear that if I put what really happens down in writing I may be summonsed!
But maybe if I write “allegedly” after every sentence there may be some scope…..
I would like to add my thanks as well to the team that put it together. It is the only magazine wholly dedicated to “our” machinery and is a good flag waver for the club. Keep up the good work, guys, and for the rest of you- keep sending in articles for Mr. Haggle to publish; without your articles we don’t have a magazine.
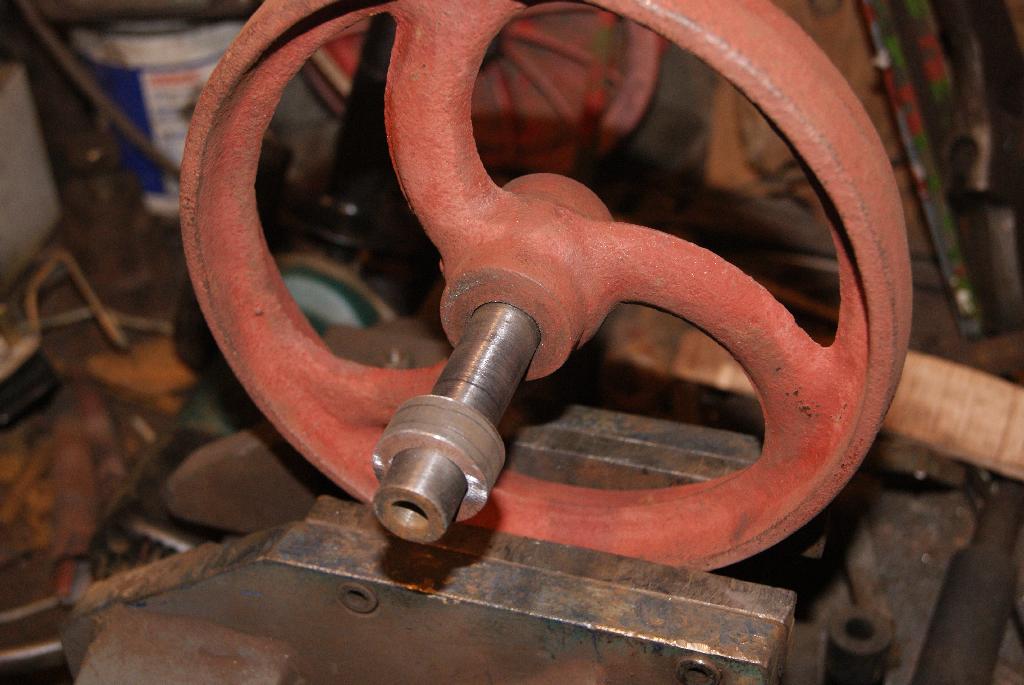
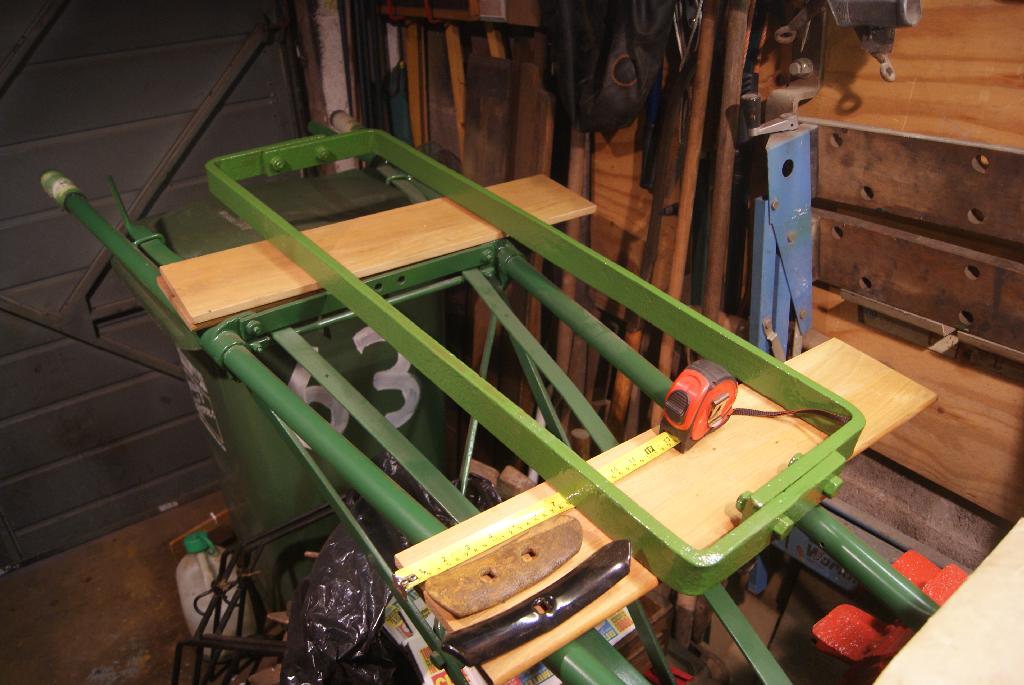
February 12, 2021 at 4:57 pm #36615trusty220KeymasterThis is turning into a marathon rebuild! The castor wheel is now done and awaiting a coat of paint.
If you look on one of the previous pictures you will see all of the parts laid out and the one troublesome bit- the leg- which had originally had a circular end turned on it for the castor wheel fork to rotate on. In it’s long working life the circular end had worn to a barrel shape and the holes in the fork had worn oversize. To remedy this I firstly filed four flats on the circular end of the leg to reduce it down to good metal, then filed it circular using the centre of each flat as a datum. That took a day of drudgery with a hand file but I simply couldn’t see any other way of doing it. Normally half an hour with the lathe would have had it sorted but that wasn’t an option.
In a similar way I filed the oversize holes in the fork so they were circular then measured the two sizes- the leg I finished down to 3/4″ diameter with a hand file again and the fork was opened up very slightly to 1″ with a blacksmith drill bit in the pillar drill. I then managed to buy a steel tube with outside diameter 1″ and bored the centre hole out to 3/4″ using the pillar drill. I left the leg a couple of thou oversize so I could heat up the tube, knock it over the leg and when it cooled it is now fixed firmly with no fastenings needed. I did file the outside down a little so that it slid nicely over the fork, then drilled a hole for the split pin so that the fork doesn’t fall off the end every time I pick up the handlebars.
That sorted that problem out, now for the wheel! Another trip to the steelholders got me a length of thick-walled steel tube which I opened out to 3/8″ internal diameter to take the centre bolt. The outside diameter was 3/4″ so I opened up the centre hole of the wheel (I couldn’t face doing any more hand filing) and the wheel fitted over the new axle. All I had to do then was to make up some new spacers to put either side of the wheel and the job was done; I could have used a stack of washers instead but I wanted it to look more like it would when it was new.
Next job is to make some new hook bolts to attach the frame to the tractor. That is going to be next week to give me time over this weekend to fettle an old headstock ready for the new Greyhound stickers when I get them; not long now!
Attachments:
February 10, 2021 at 5:20 pm #36602trusty220KeymasterIt’s a shame that all of those dealers have now disappeared around here. At one time Midland Shires Farmers would have been the place to go but they have long since gone and the only place that even approaches what they used to do is Telford Farm Machinery (TFM). All of the other main dealers are relatively new and staffed by youngsters that know how to look things up on a computer if you give them the machine make and serial number.
I think my best course of action will be to change all of the points for the narrower ones that I can get locally. At least that way they will all match and look correct.
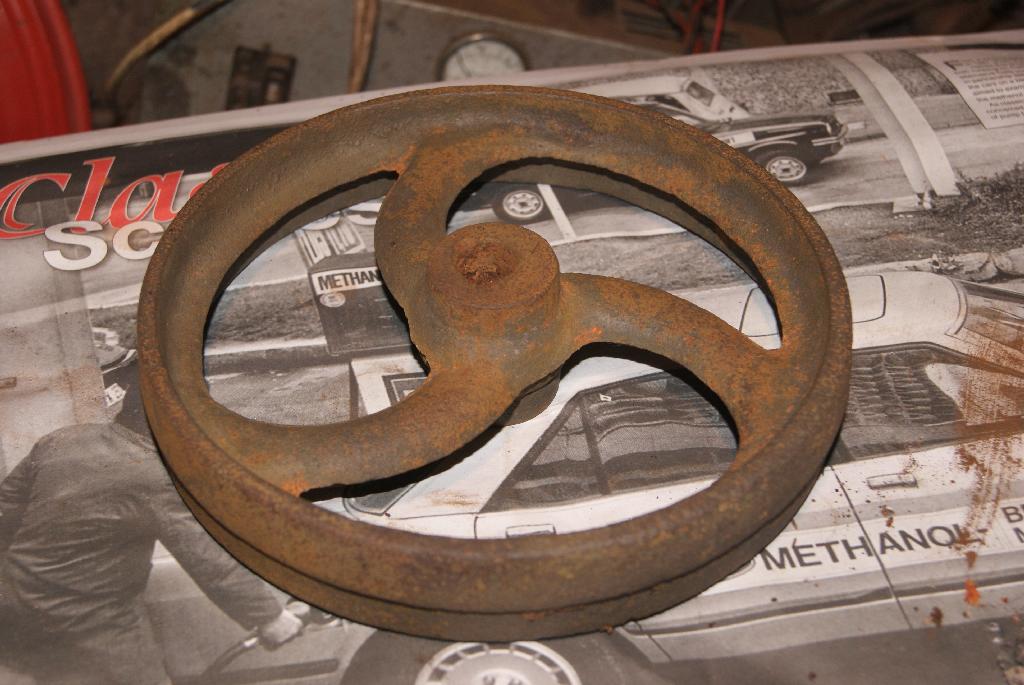
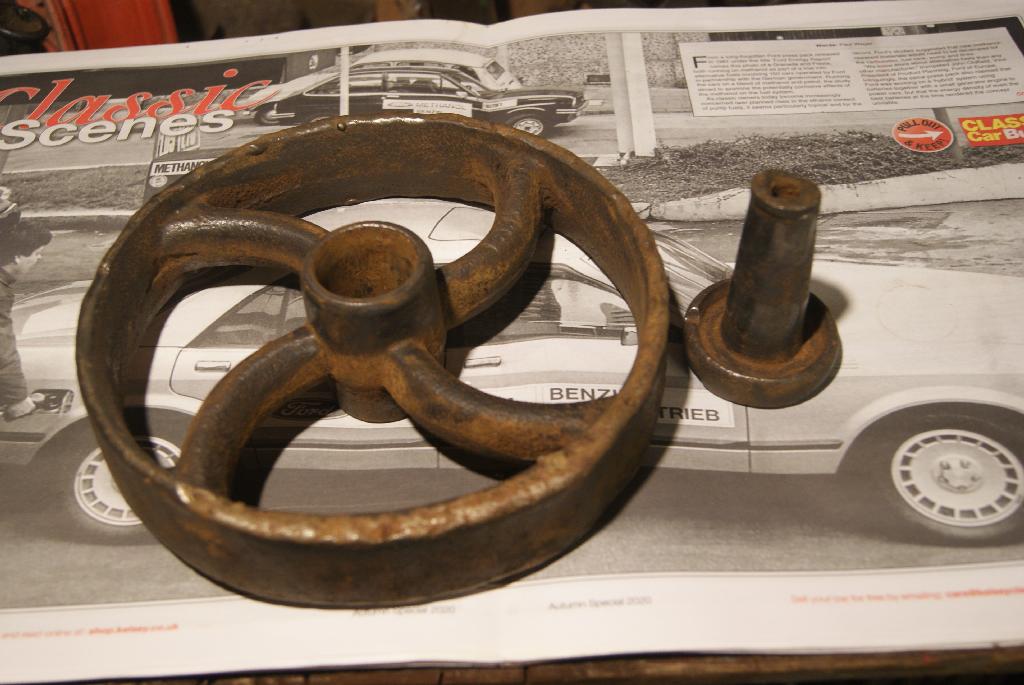
February 7, 2021 at 2:33 pm #36575trusty220KeymasterTo say that I’m surprised would be an understatement. After 24hrs most of the rust and orange paint had come off and was floating on the surface with the bubbles of hydrogen above the positive electrode. There was a large-ish patch of orange paint at the bottom of the wheel so I changed the hanger around so that the hanger (which is conducting the electricity) was right next to the patch that I wanted to sort. After another 24hrs it was gone, lifted off and swimming about in the bubbles. All I had to do was to wash thoroughly in the sink (waiting until Mrs. Geoff had gone out) with hot water and washing up liquid, then rinse off with water and scrubbing with a nail brush. Excellent results and I would thoroughly recommend it, especially with the larger parts that would otherwise have cost a fortune to soak in acid.
The only thing to be cautious about is the hydrogen that it gives off; we all know how flammable hydrogen is (if you don’t, watch the video of The Hindenberg zeppelin) so you really need to do it in a well ventilated place. My garage is ideal because it’s so draughty it never gets a lethal build up.
The wheel is now painted in red oxide to stop it rusting. I will attend to the axle and centre hole once the paint is dry but I didn’t want to undo all the work that I’d done getting rid of the rust.
Attachments:
February 5, 2021 at 11:24 am #36566trusty220KeymasterMore problems to solve this time.
I was lying in bed about a week ago dreaming (as you do) and something occurred to me about the cultivator. As it is pulled through the ground it will keep getting deeper and deeper unless it is fitted with a depth wheel to oppose the downward force. Also, because it is bolted rigidly to the rear of the chassis of the tractor it will tilt as the tractor wheels encounter bumps and hollows; two depth wheels at each end of the frame will not work and the only practical solution is to have one wheel right in the middle with a tine behind it to take out the wheel marks.
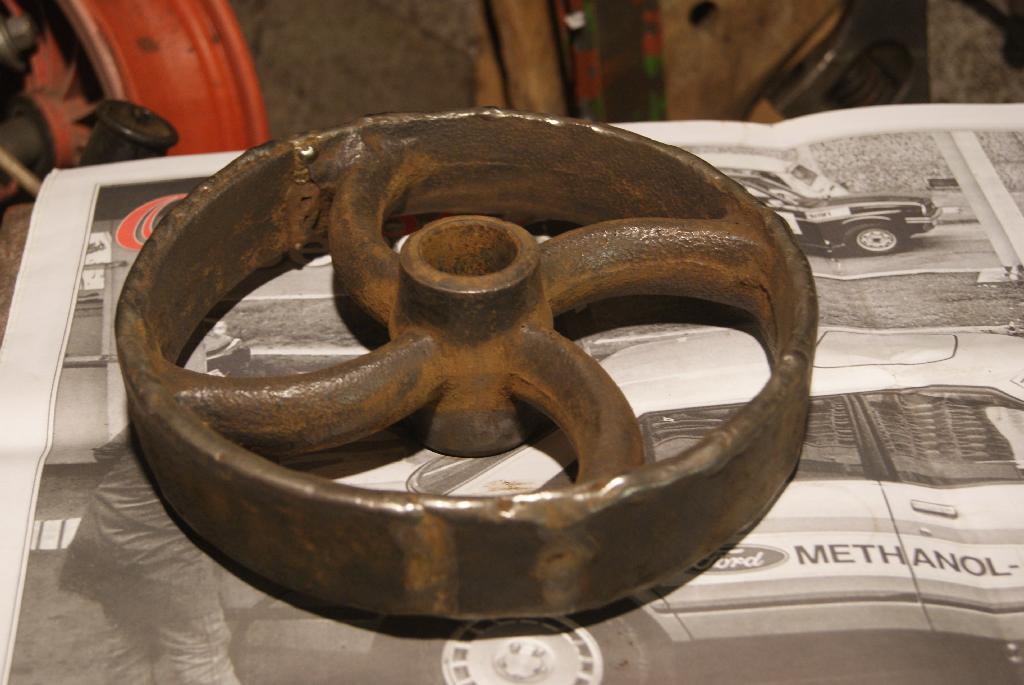
Luckily I have a few spare legs off implements that I’ve bought over the years so I found a nice one with a square shaft that would match the rest of the tines. It had a castor at the bottom and a four spoked cast iron wheel- great!
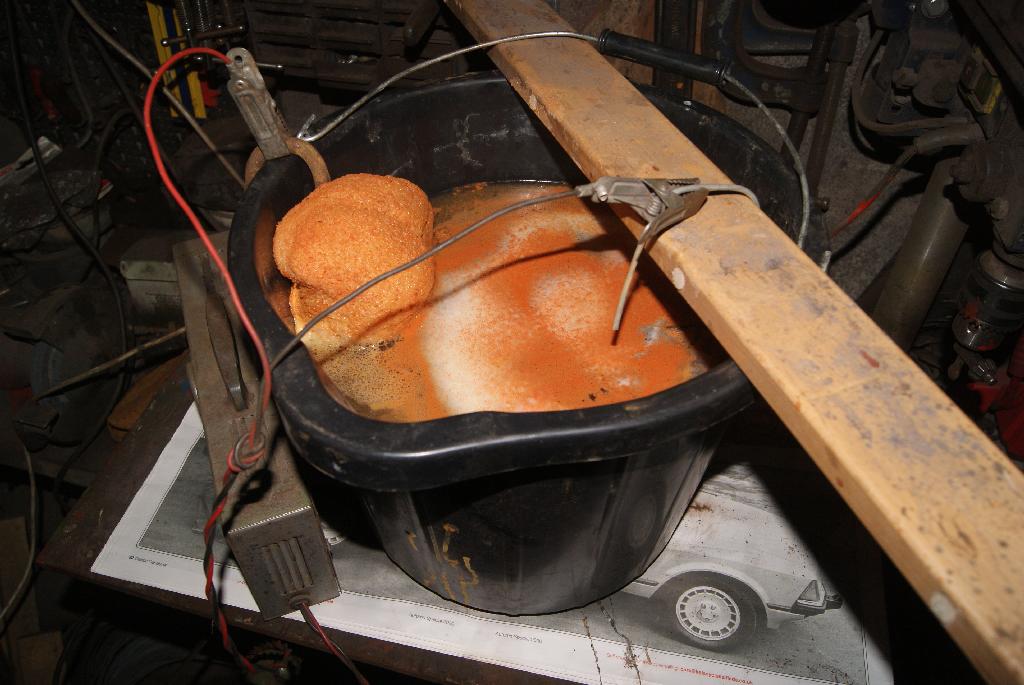
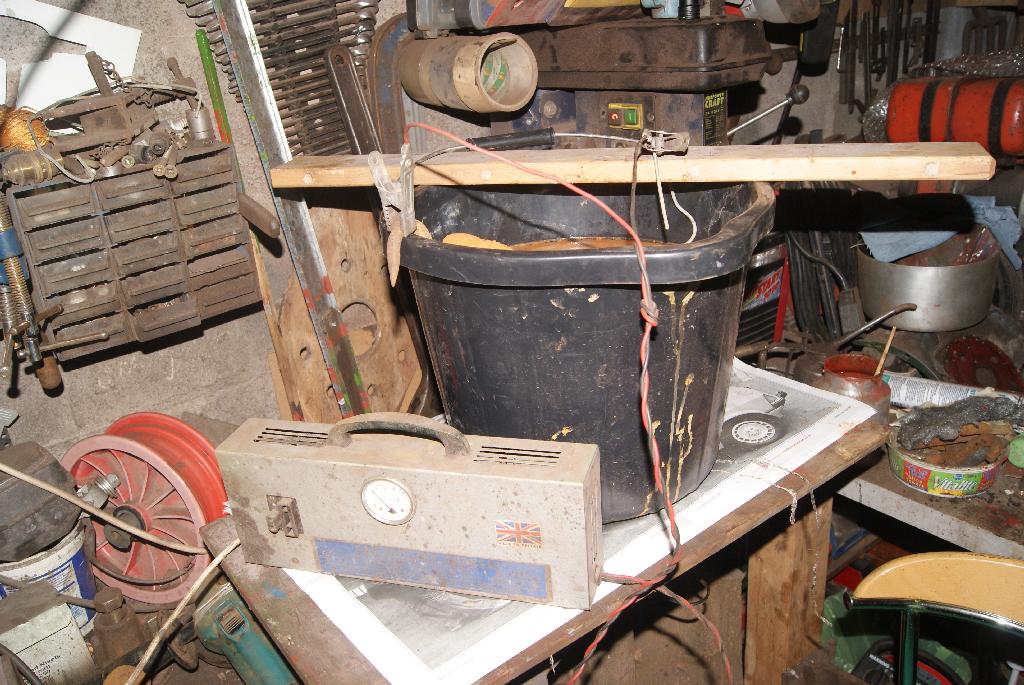
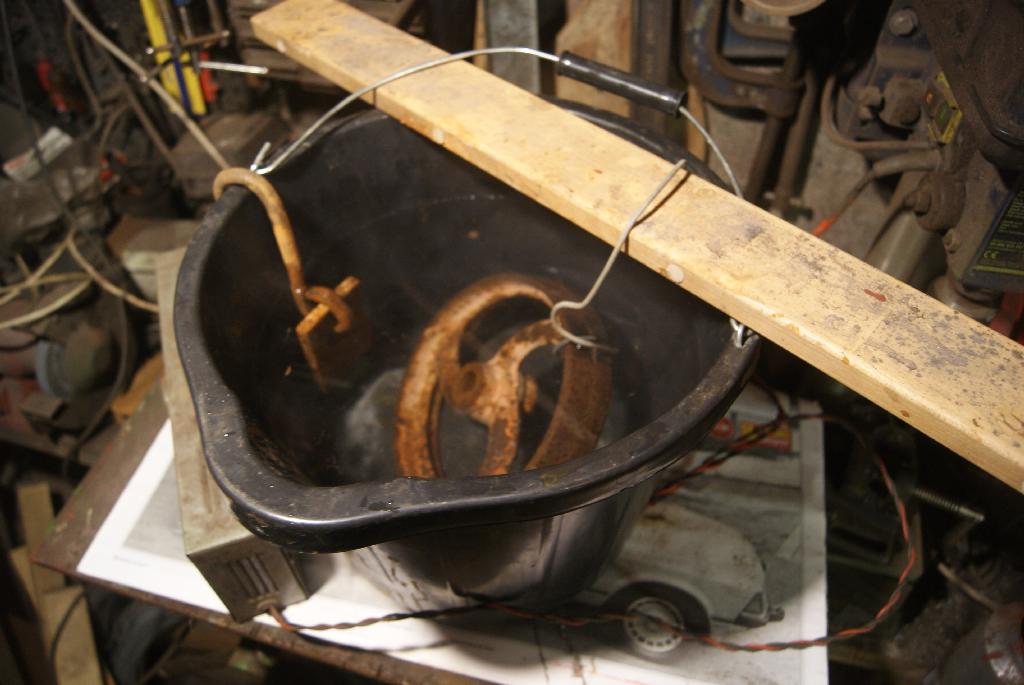
After the last batch of brick cleaner was disposed of- it had got to the stage where it didn’t really work any more- I thought I’d try a different approach. Watching Combat Dealers one afternoon they used electrolysis on some very rusty pieces of military equipment, so I thought I’d give it a try.
A 2-gallon bucket of water, pour in some bicarbonate of soda, put an electrode down one side of the bucket and suspend the workpiece in the solution (preferably from something that doesn’t conduct electricity like a piece of wood).
A battery charger is the only technical thing needed as you need to pass about 2 amps through the solution; the positive lead attaches to the electrode down the side of the bucket and the negative to the workpiece. The only thing you have to watch for is to make sure the area is well ventilated because the solution gives off hydrogen which is highly inflammable.
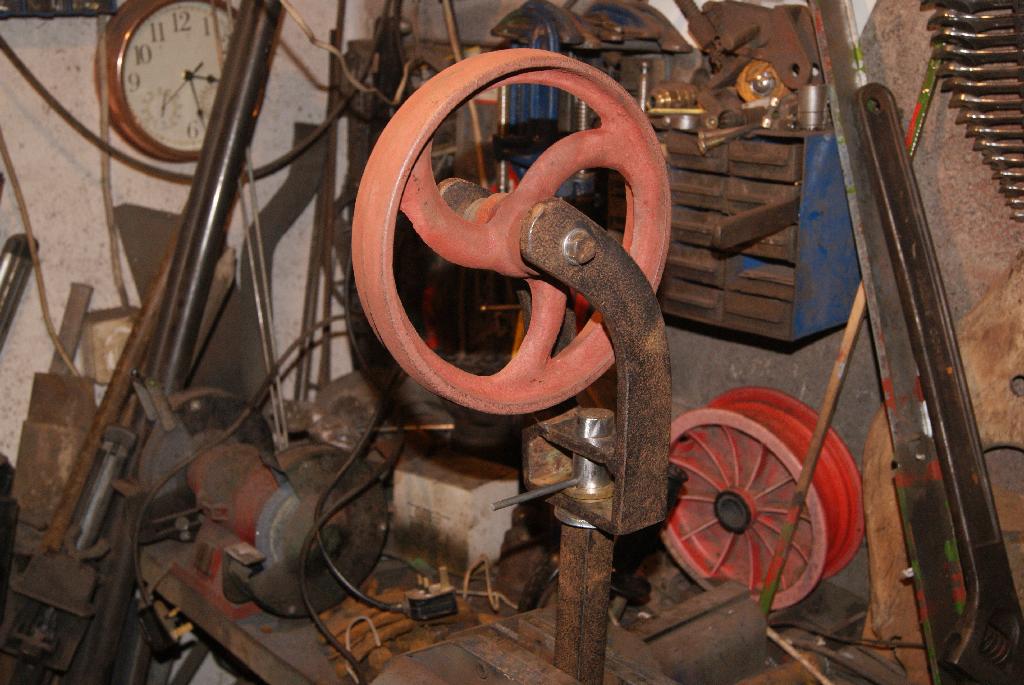
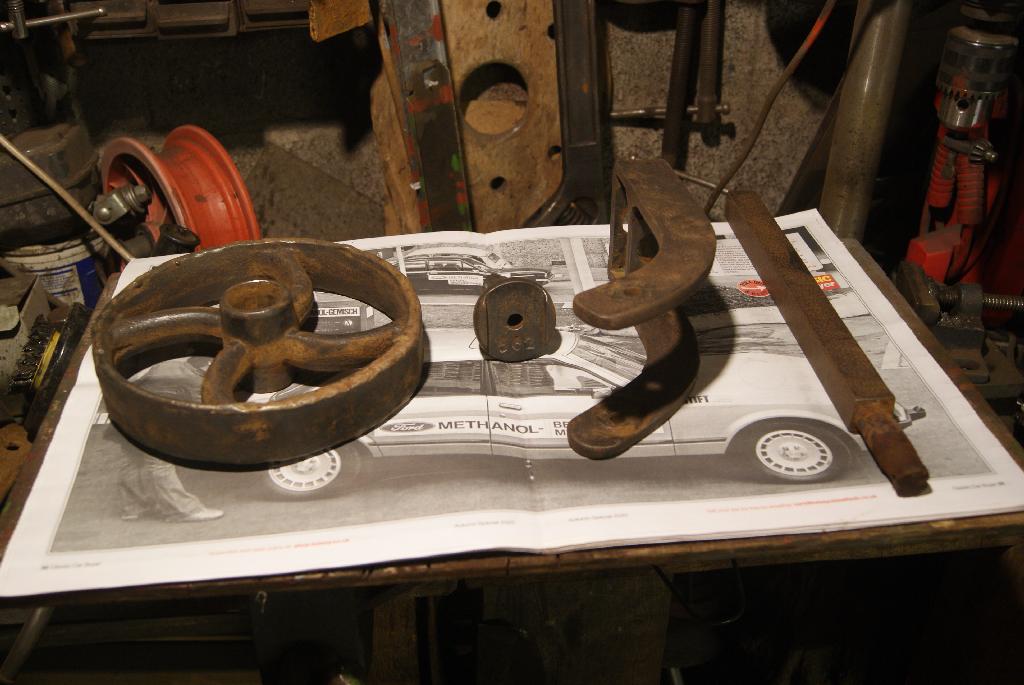
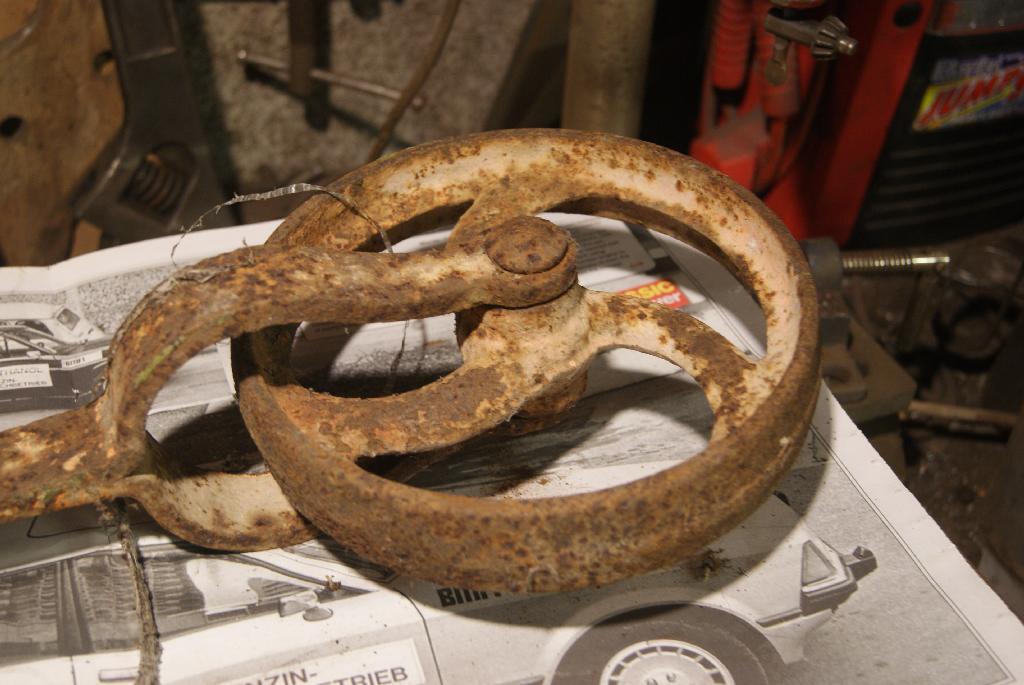
I must say that it worked very well and the whole lot cleaned up nicely after an overnight bath in the solution. It was then that I found a lot more problems that had been hidden under the rust. Somebody had repaired the wheel and there was a lot of welding around the rim but the worst was the cast iron carrier which incorporated a bearing surface. It had worn down to a taper and the hole in the centre of the wheel was tapered to the extent that it measured 1 1/2″ diameter one side but only 1″ diameter at the other. I can repair it but I need my lathe to do it, so I’ve put the two to one side to attend to once I’ve got my workshop set up. I’ve got a similar wheel off something that I’ve acquired at some point so I’m using that as a replacement. It’s only just gone into the bucket so you’ll have to wait for the results, hopefully not too long.
Attachments:
February 2, 2021 at 6:41 pm #36557trusty220KeymasterThere was only one fitted to the right hand side of the headstock. The left hand side had a maker’s plate rivetted in the place it would go.
I can combine the postage if you want a set of Trusty transfers as well as a Greyhound one; I still have a few Trusty waterslide transfers left. For prices see the Classified Adverts in the back of The Cultivator.
January 29, 2021 at 3:52 pm #36527trusty220KeymasterThe one thing about this time of year is that it’s so B****y cold! I’ve tried painting all the parts that I’ve de-rusted but the paint just won’t dry. It reminds me of the story that one of my mates told me about a farmer who bought a very large quantity of paint at a post-war disposal sale of ministry stuff. He painted the whole farm with it, spruced it up a treat it did, then wondered why it wouldn’t dry. It was wet for weeks before he decided to investigate, then found that he’d bought a job lot of gas-sensitive paint that was designed not to dry- it was supposed to change colour when gas was detected!
You can see everything has a nice coat of green paint all ready to re-assemble, but I can’t get it to dry in the cold. I’ve already been warned off the airing cupboard and the industrial fan heater just takes the chill off without getting really hot. I’ll just have to wait.
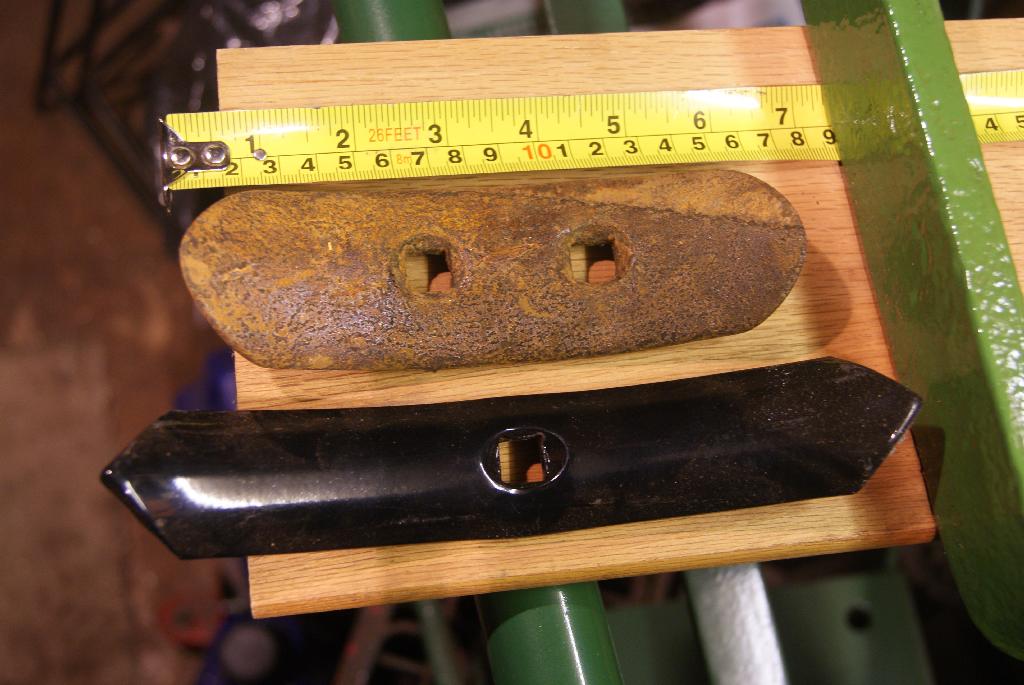
Something that you may be able to help with though- the cultivator points are about 7″ long with two holes in as per the photo. I’ve found a single hole version in my local agricultural merchants which will fit and I could change the whole set, but does anyone know where I can find something that looks like the original?
Attachments:
January 29, 2021 at 2:03 pm #36526trusty220KeymasterAs far as I know they were a standard fitment on the headstock, Robert. When you consider most headstocks were sold with a plough underneath then added to at a later date with other attachments, that would probably mean that the majority had the sticker on.
-
AuthorPosts