Home › Forums › The Main Forum Area › Projects › Early Trusty Rebuild
- This topic has 101 replies, 14 voices, and was last updated 4 years, 2 months ago by
 trusty220.
-
AuthorPosts
-
January 15, 2021 at 3:05 pm #36409
 trusty220Keymaster
Just in case you’d thought I was slacking here is the next thrilling instalment! Well, not really thrilling, but you know what I mean.
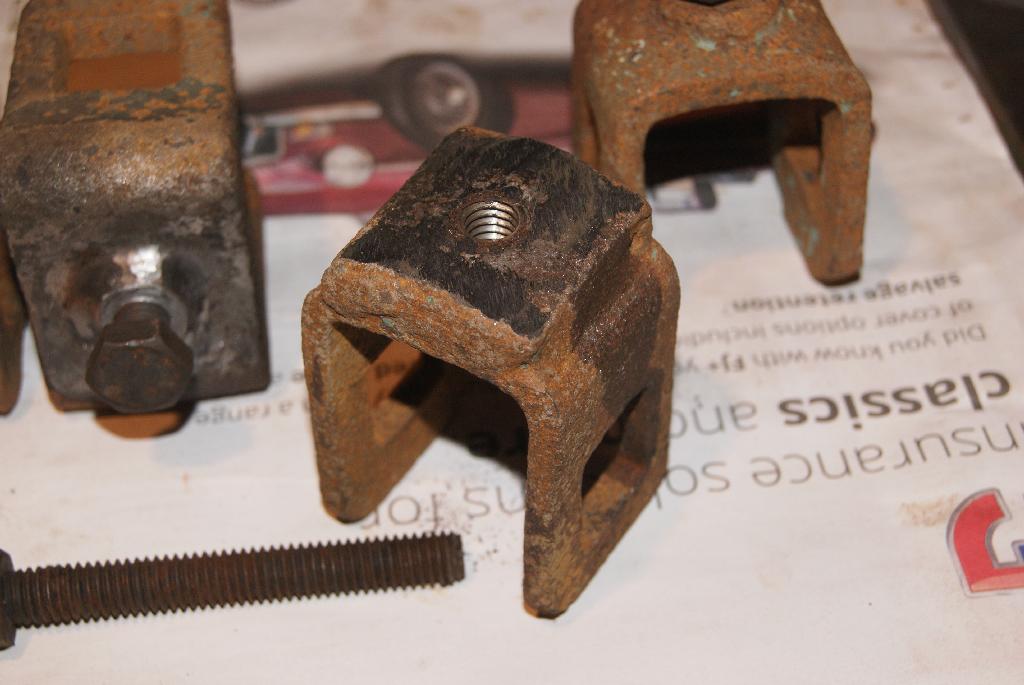
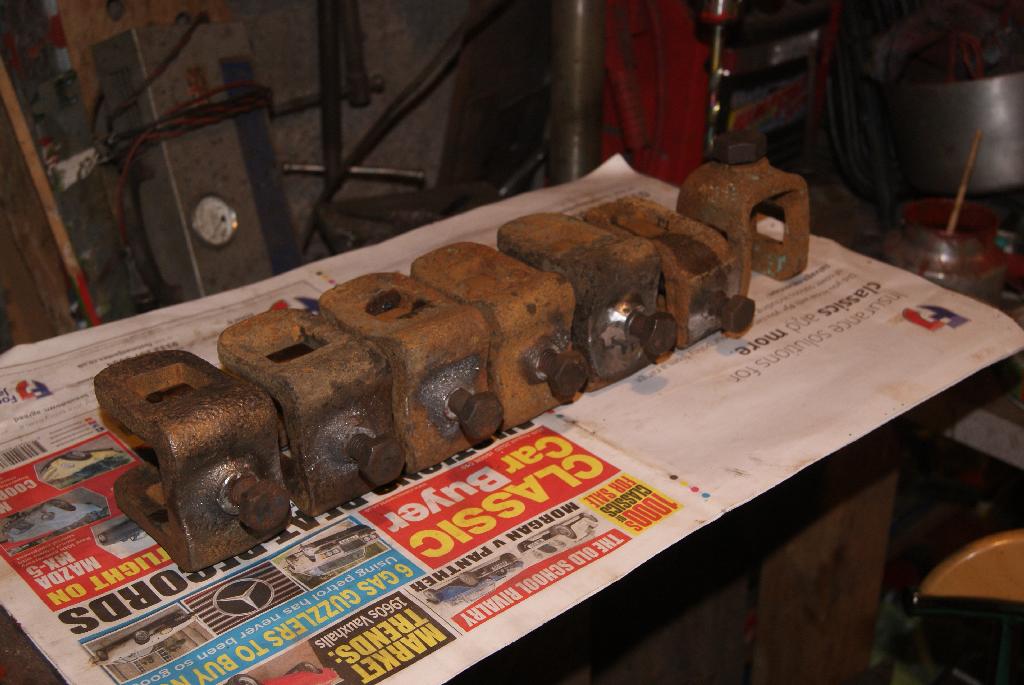
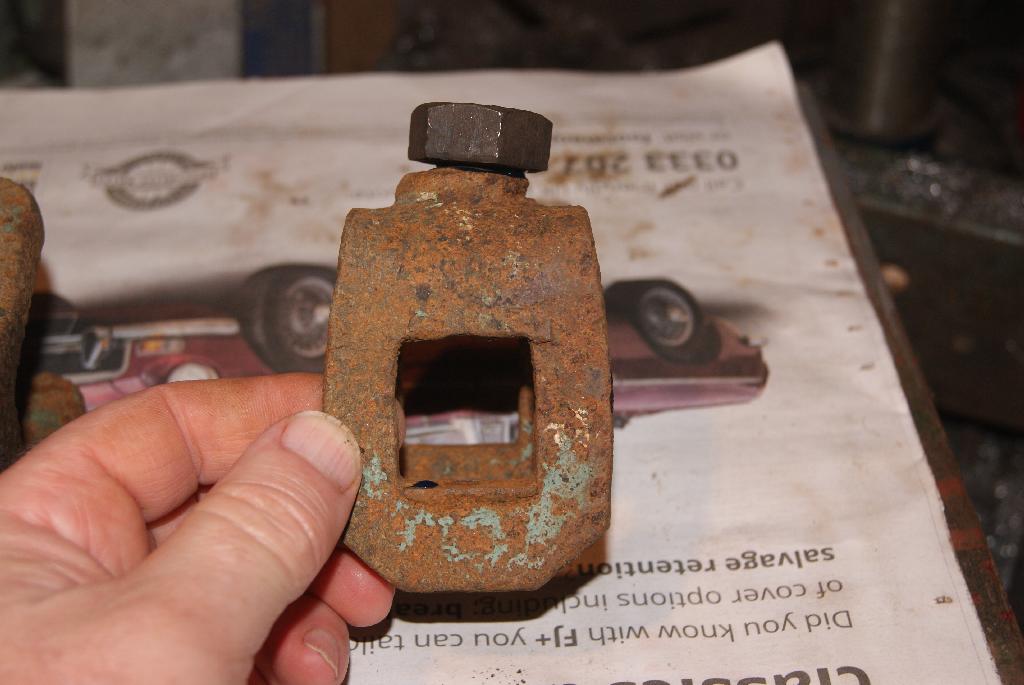
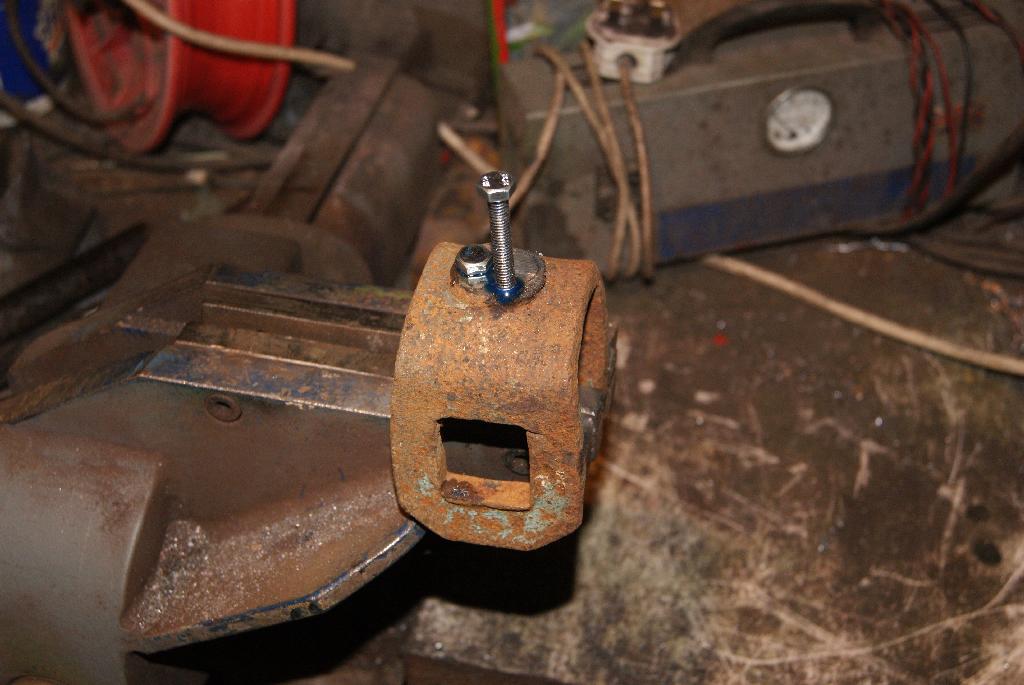
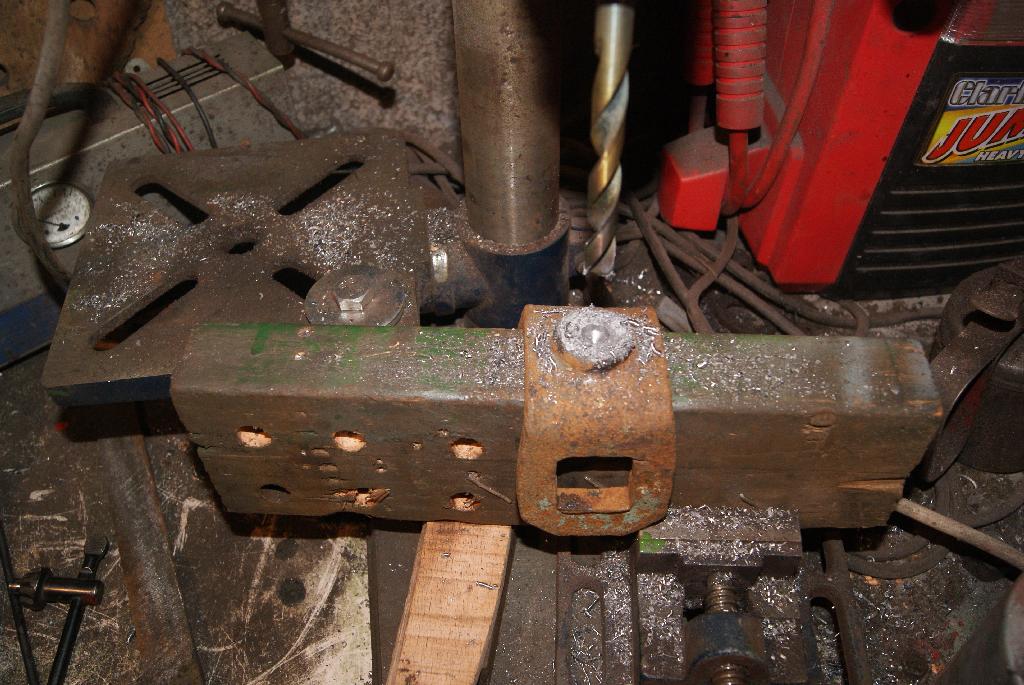
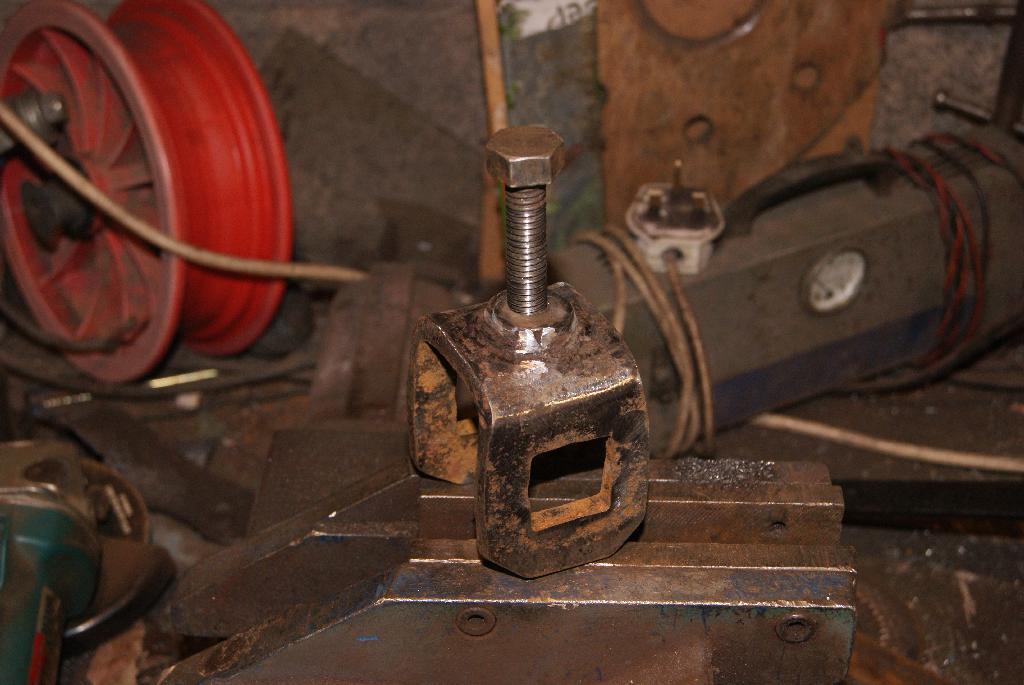
I managed to set up a production line to plug the holes in the cast clamps; it was quite easy once I’d found a different sized bolt for every clamp. In fact it was quite useful in that I used up some of my “stash” of old bolts and in particular the ones that had good threads but the heads had wasted away. Isn’t it funny how you can have a pristine bolt thread on a bolt with a knackered head? All done now apart from two clamps which were obviously replacements at some time and made from mild steel. I’m treating them the same way because my welder is packed away still, otherwise I would weld the holes up and re-drill in the centres.
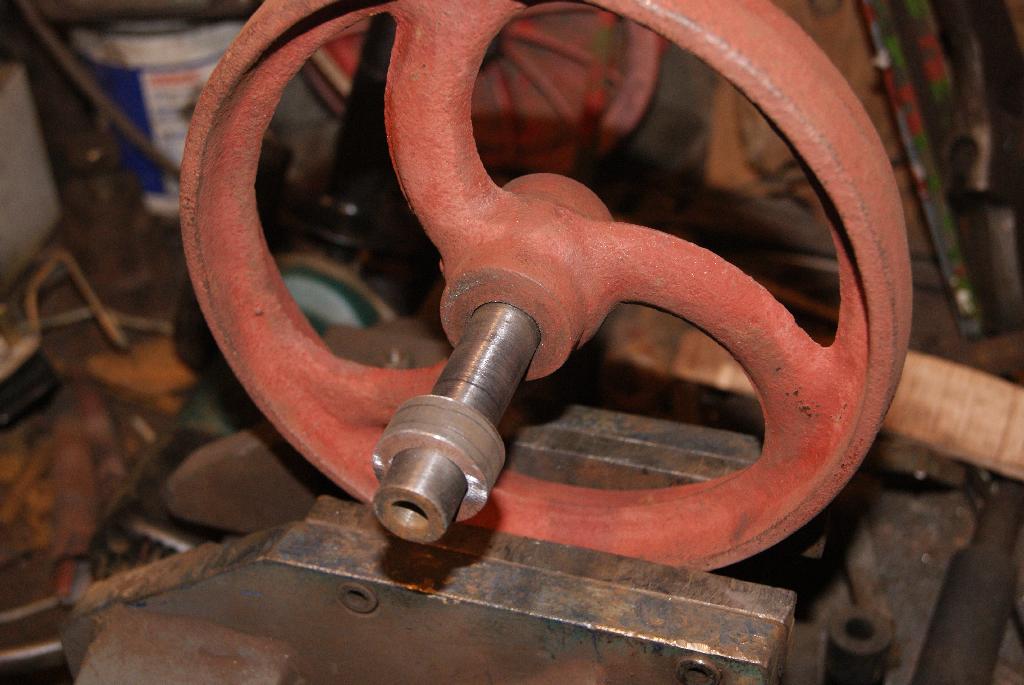
I have taken a picture of the last clamp to show you how much out of true some of the holes were and why I’m having to do this. Someone had opened the thread out to 3/4″ Whitworth and drilled it on the angle. In the picture I’ve managed to find a 3/4″ bolt and I’ve screwed it home with Loctite on the threads. I’ll wait until it’s dry and then carry on the same.
Attachments:
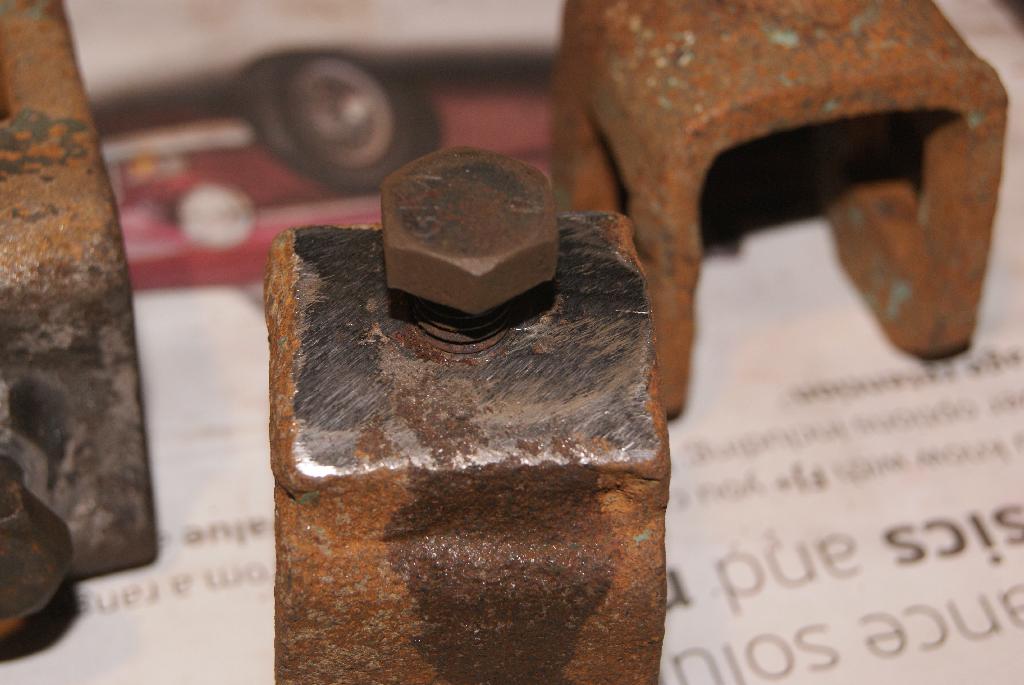
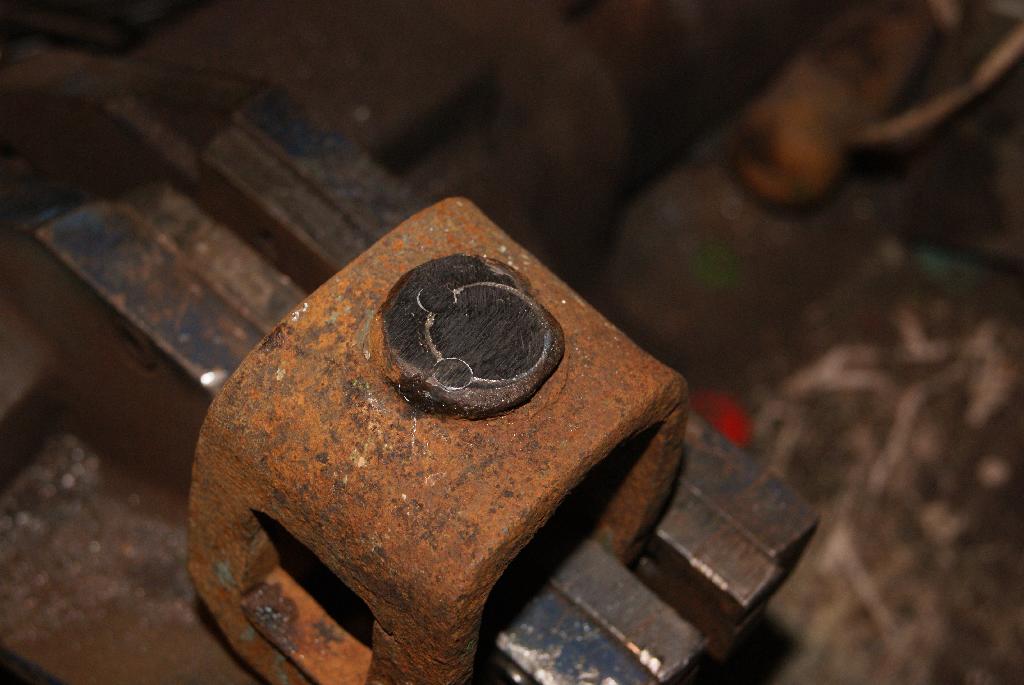
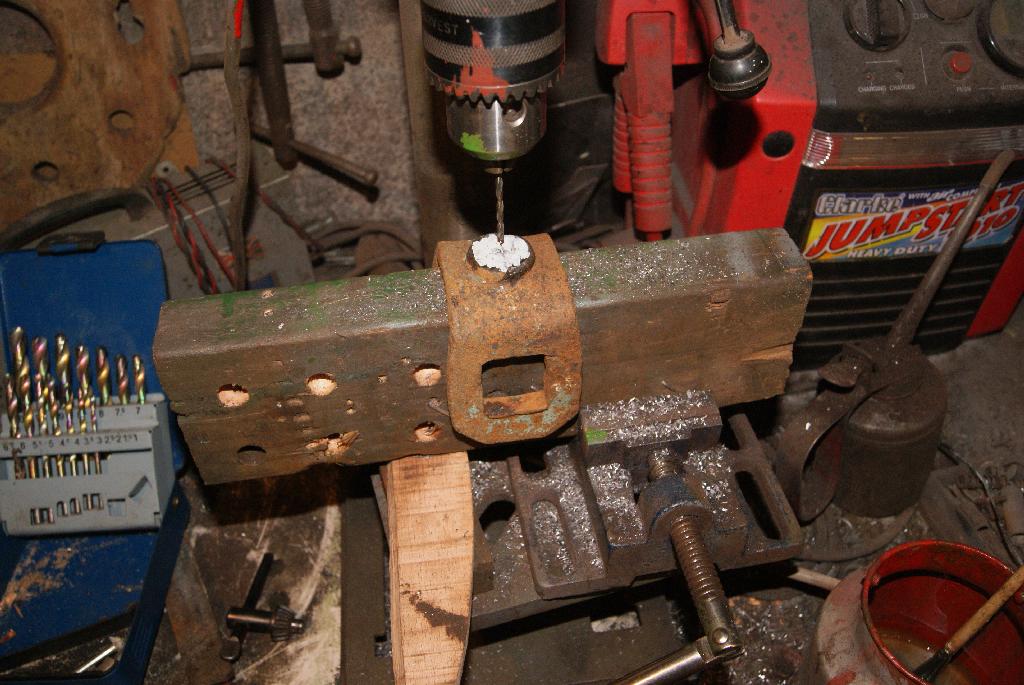
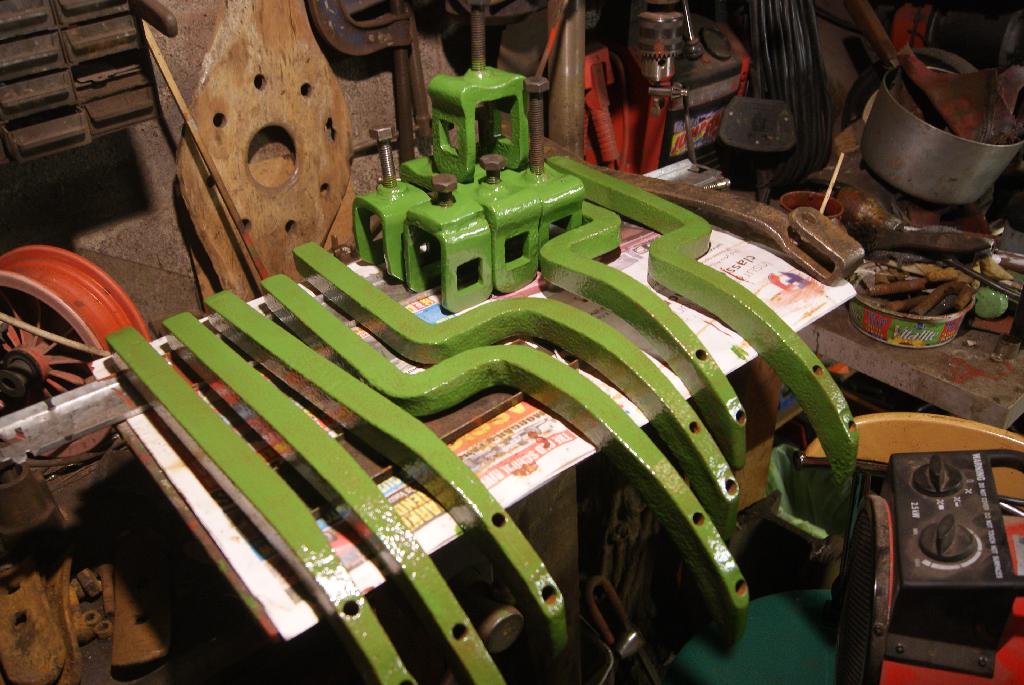
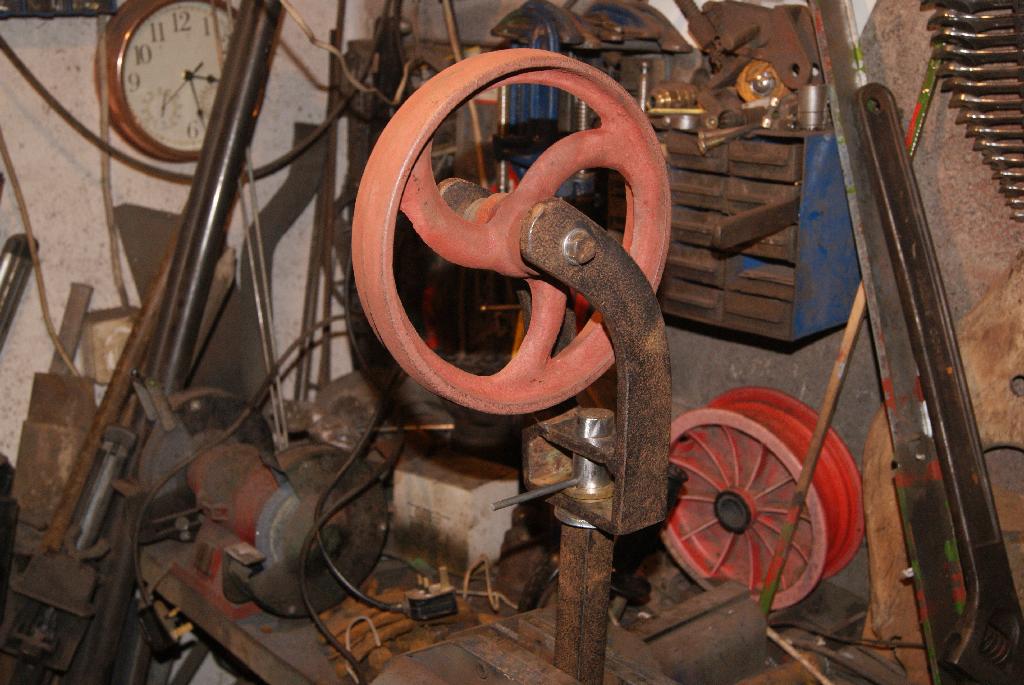
January 17, 2021 at 1:16 pm #36423trusty220KeymasterCarrying on from the last posting I thought I’d do a stage-by-stage set of pictures for anyone facing the same problem.
Firstly, saw off the protruding threads either side of the clamp and file smooth. Next I drilled two 5mm holes down the side of the 3/4 bolt thread, then tapped them to M6 and wound two M6 bolts in with Loctite on the threads. Leave overnight to dry then saw off the protruding threads again and finish to a smooth finish with a file both sides.
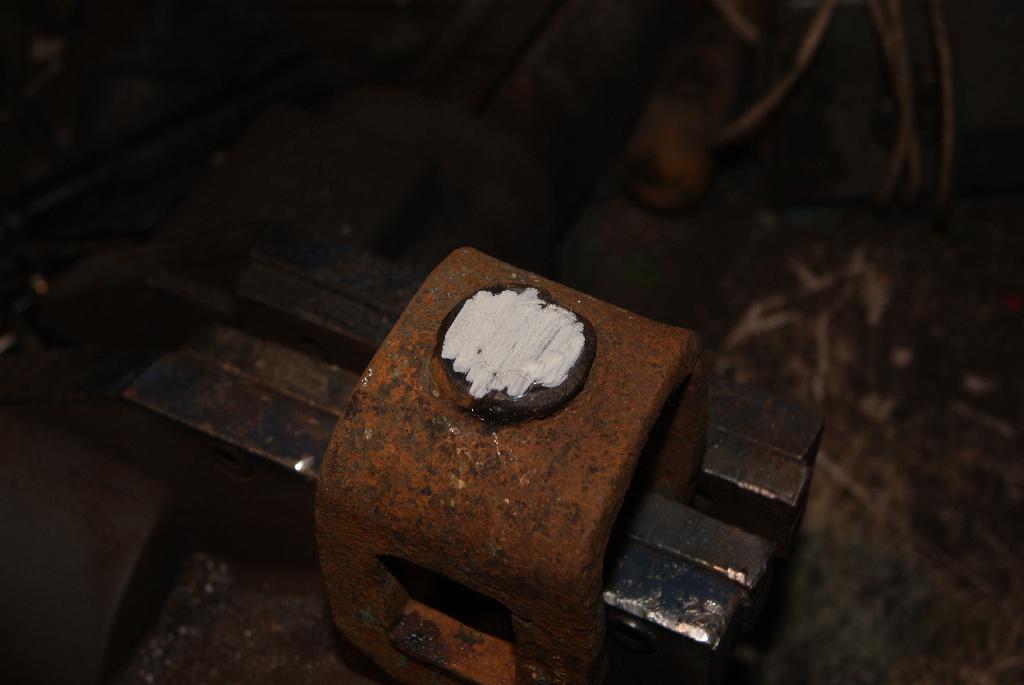
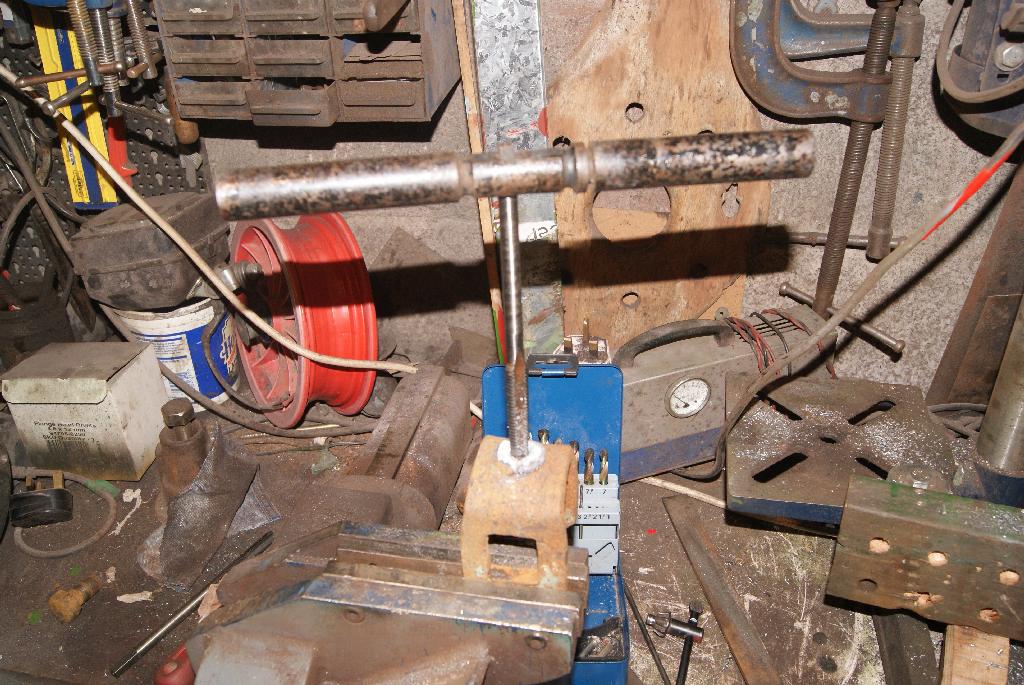
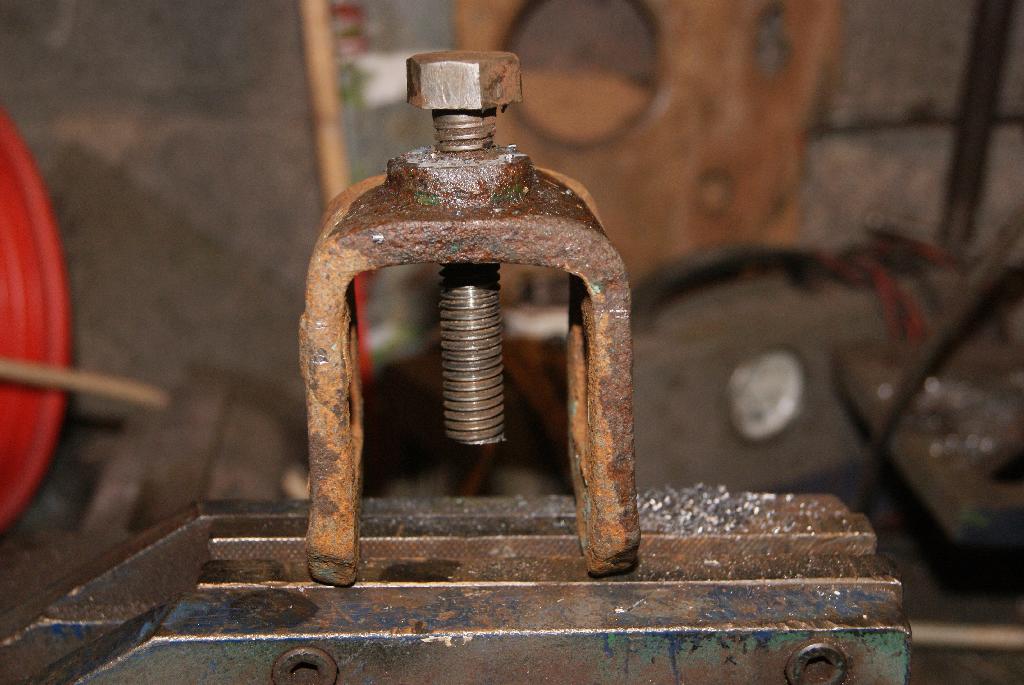
The smooth finish allows you to coat the area with paint or Engineer’s Blue so that you can mark it out and find the centre where you want the new bolt hole to be. Measure it from both sides, find the centre of the clamp (not necessarily the centre of the boss), mark it with a centre punch and drill down perpendicular. To do this I use a pillar drill and mount the clamp on a wooden jig so that it sits squarely below the drill bit; it is always worth spending time making a jig to hold the workpiece because the job takes less time and will have a much better appearance than if you’ve done it freehand.
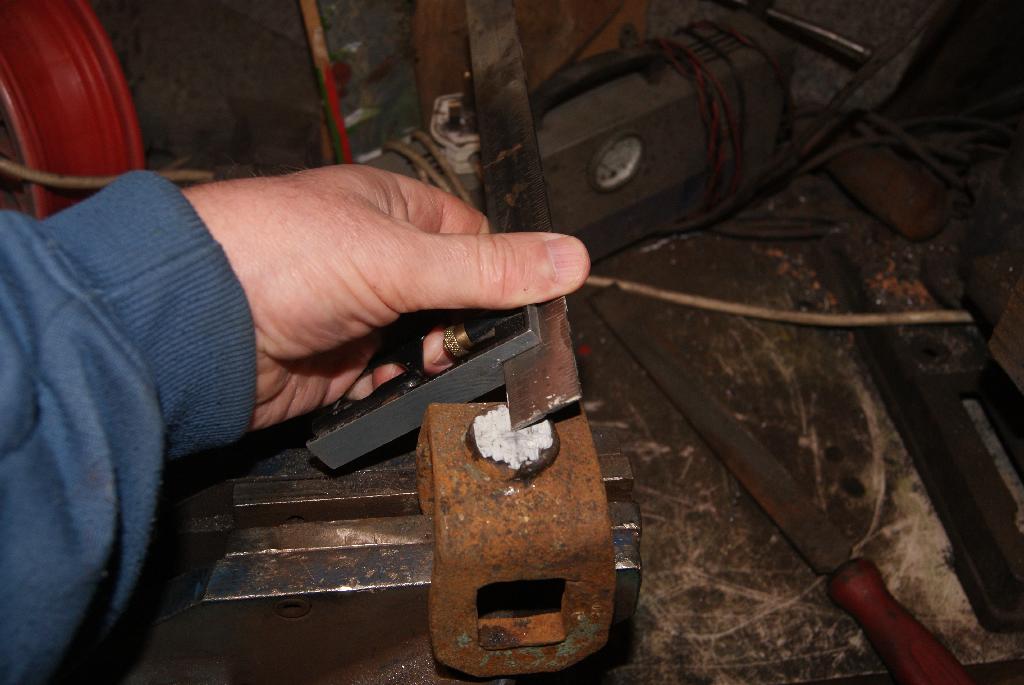
I started with a 3mm drill to drop a pilot hole down to see where it emerged at the bottom. Satisfied with the result I carried on with progressively larger drills until I took the hole out to 10mm, then mounted the clamp in the vice and tapped the hole to 1/2″ Whitworth. A quick once-over with the wire brush in the angle grinder and we’re ready for paint. Simples!
Attachments:
January 18, 2021 at 8:32 am #36445 charlieKeymaster
A useful how to guide. There is something very satisfying about making repairs like this.
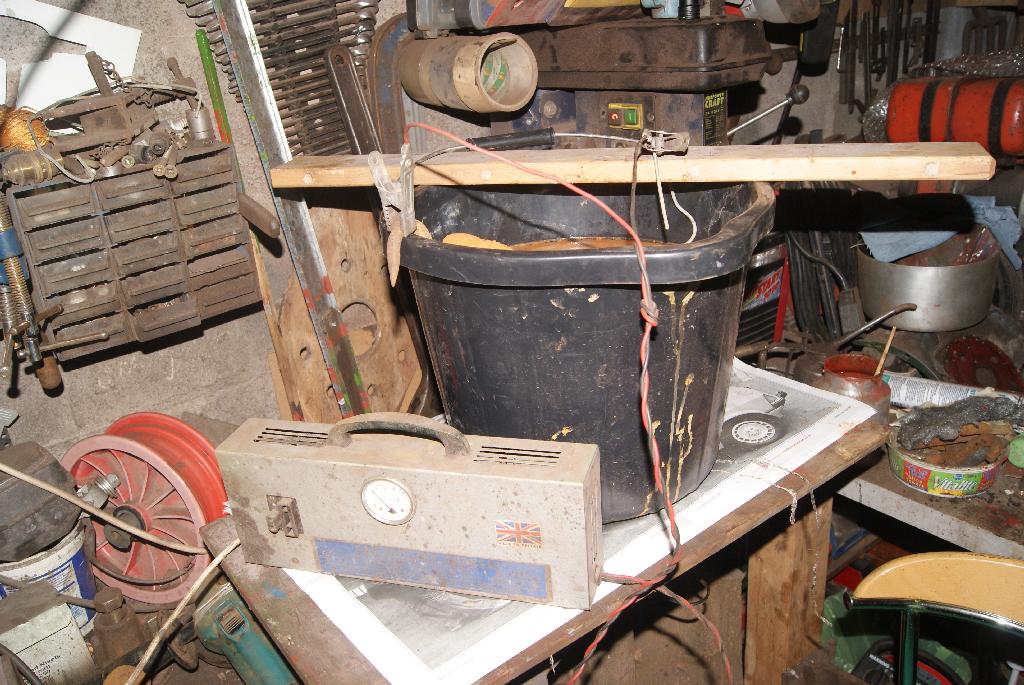
January 29, 2021 at 3:52 pm #36527trusty220KeymasterThe one thing about this time of year is that it’s so B****y cold! I’ve tried painting all the parts that I’ve de-rusted but the paint just won’t dry. It reminds me of the story that one of my mates told me about a farmer who bought a very large quantity of paint at a post-war disposal sale of ministry stuff. He painted the whole farm with it, spruced it up a treat it did, then wondered why it wouldn’t dry. It was wet for weeks before he decided to investigate, then found that he’d bought a job lot of gas-sensitive paint that was designed not to dry- it was supposed to change colour when gas was detected!
You can see everything has a nice coat of green paint all ready to re-assemble, but I can’t get it to dry in the cold. I’ve already been warned off the airing cupboard and the industrial fan heater just takes the chill off without getting really hot. I’ll just have to wait.
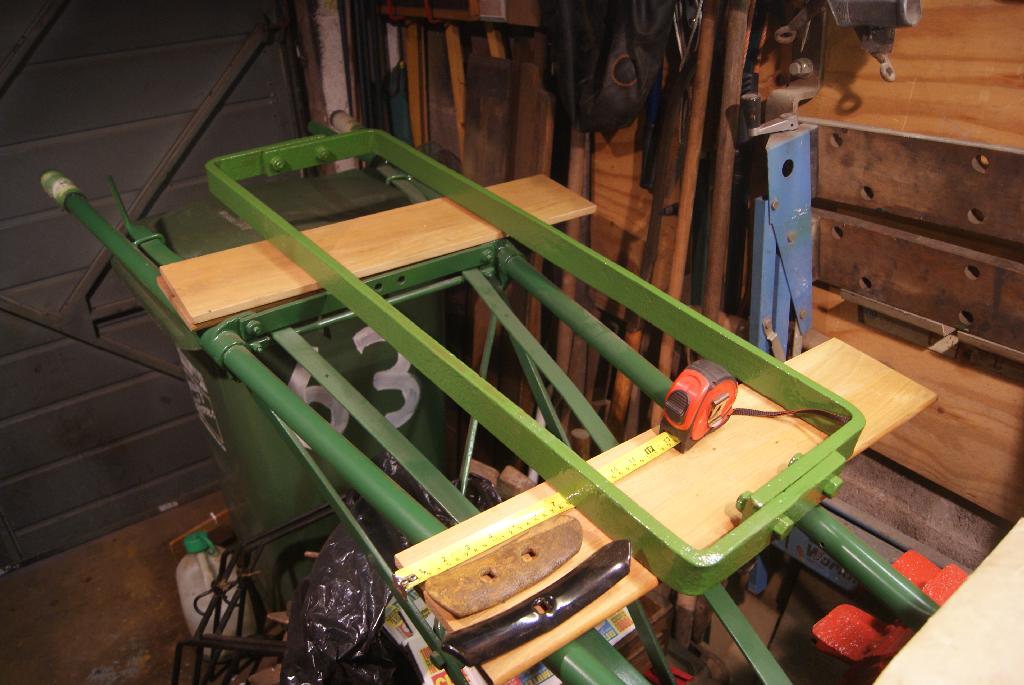
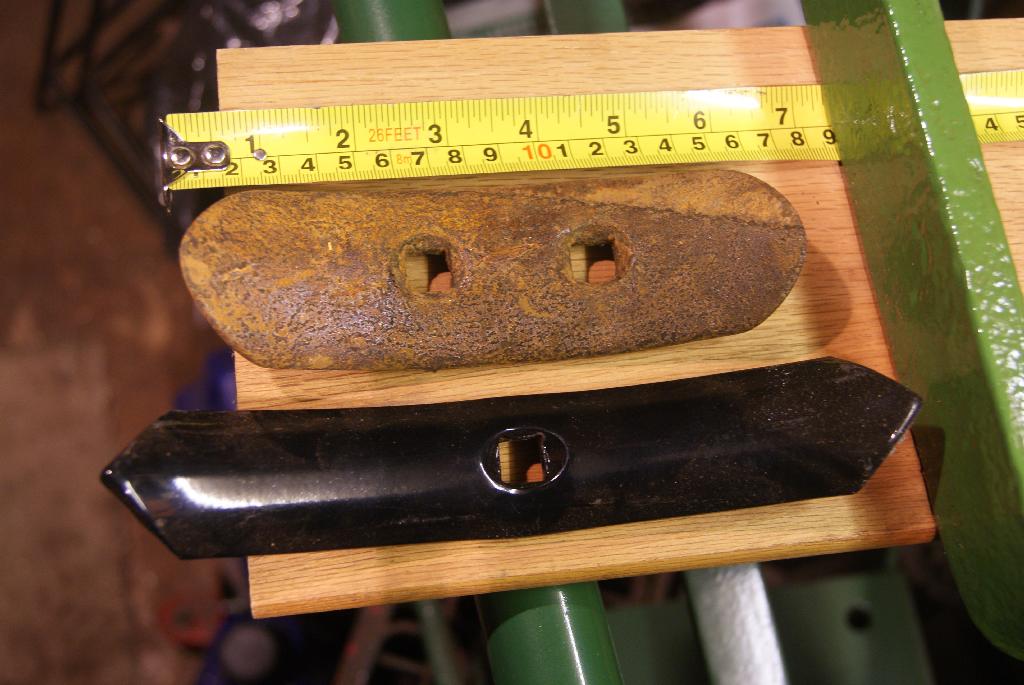
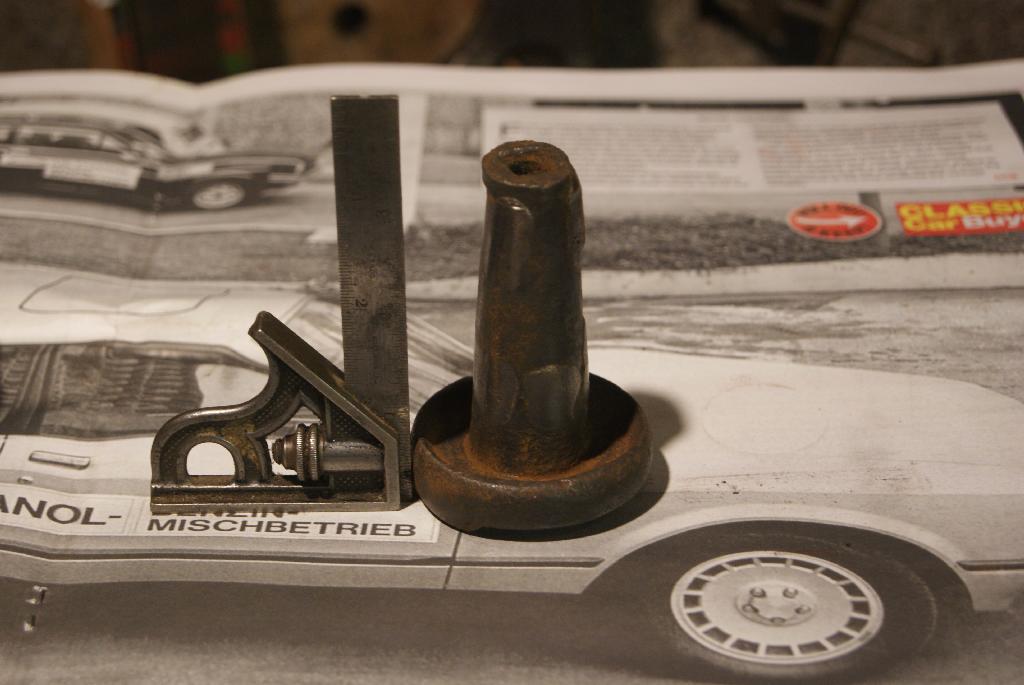
Something that you may be able to help with though- the cultivator points are about 7″ long with two holes in as per the photo. I’ve found a single hole version in my local agricultural merchants which will fit and I could change the whole set, but does anyone know where I can find something that looks like the original?
Attachments:
February 5, 2021 at 11:24 am #36566trusty220KeymasterMore problems to solve this time.
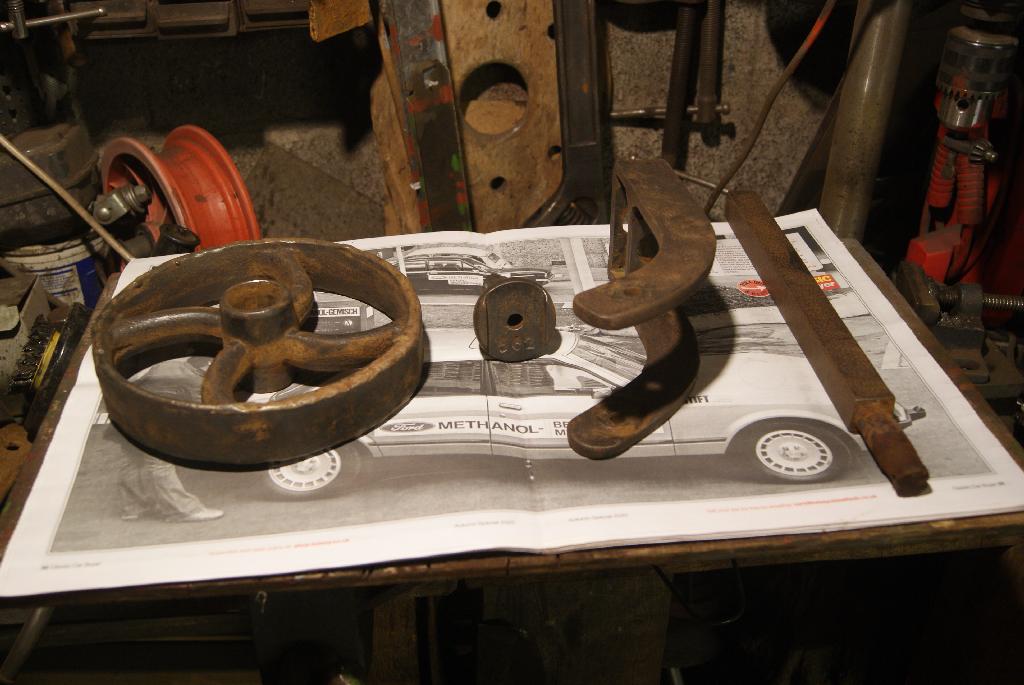
I was lying in bed about a week ago dreaming (as you do) and something occurred to me about the cultivator. As it is pulled through the ground it will keep getting deeper and deeper unless it is fitted with a depth wheel to oppose the downward force. Also, because it is bolted rigidly to the rear of the chassis of the tractor it will tilt as the tractor wheels encounter bumps and hollows; two depth wheels at each end of the frame will not work and the only practical solution is to have one wheel right in the middle with a tine behind it to take out the wheel marks.
Luckily I have a few spare legs off implements that I’ve bought over the years so I found a nice one with a square shaft that would match the rest of the tines. It had a castor at the bottom and a four spoked cast iron wheel- great!
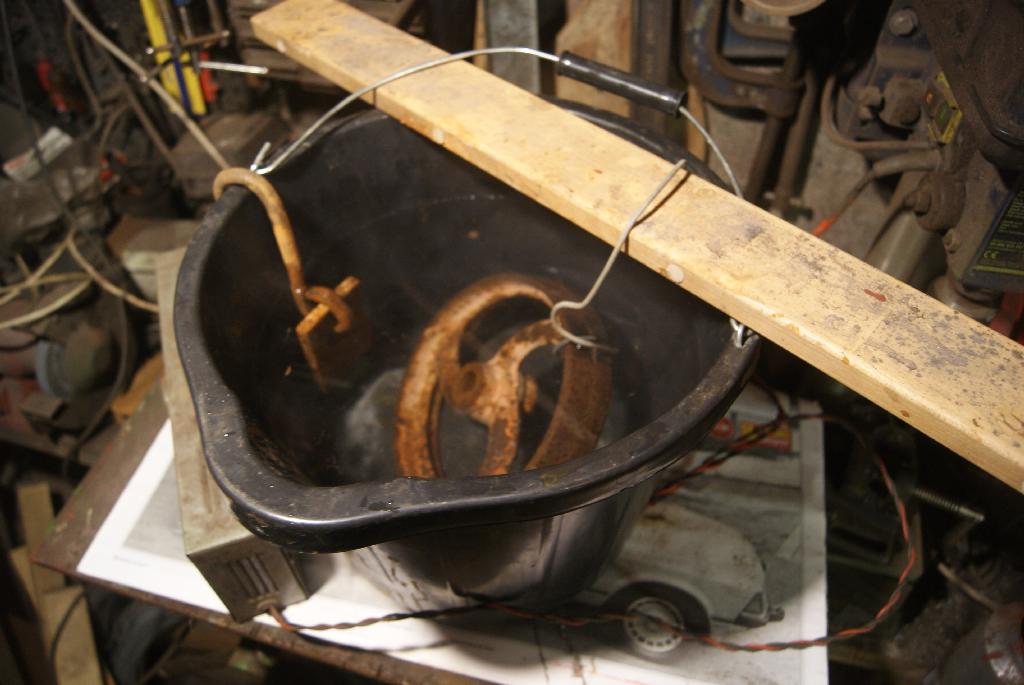
After the last batch of brick cleaner was disposed of- it had got to the stage where it didn’t really work any more- I thought I’d try a different approach. Watching Combat Dealers one afternoon they used electrolysis on some very rusty pieces of military equipment, so I thought I’d give it a try.
A 2-gallon bucket of water, pour in some bicarbonate of soda, put an electrode down one side of the bucket and suspend the workpiece in the solution (preferably from something that doesn’t conduct electricity like a piece of wood).
A battery charger is the only technical thing needed as you need to pass about 2 amps through the solution; the positive lead attaches to the electrode down the side of the bucket and the negative to the workpiece. The only thing you have to watch for is to make sure the area is well ventilated because the solution gives off hydrogen which is highly inflammable.
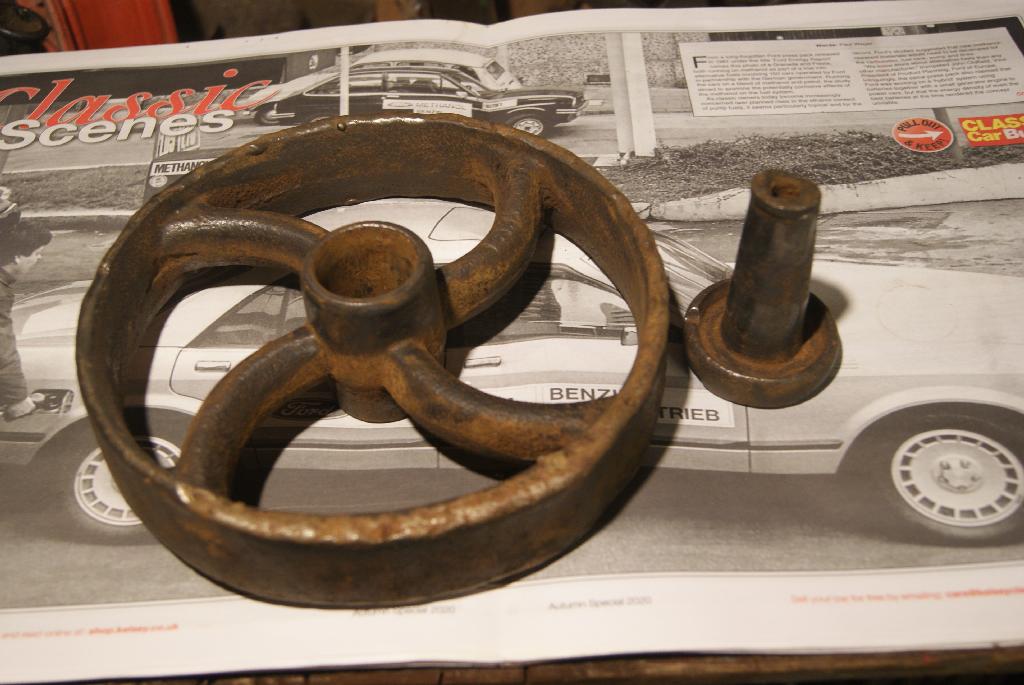
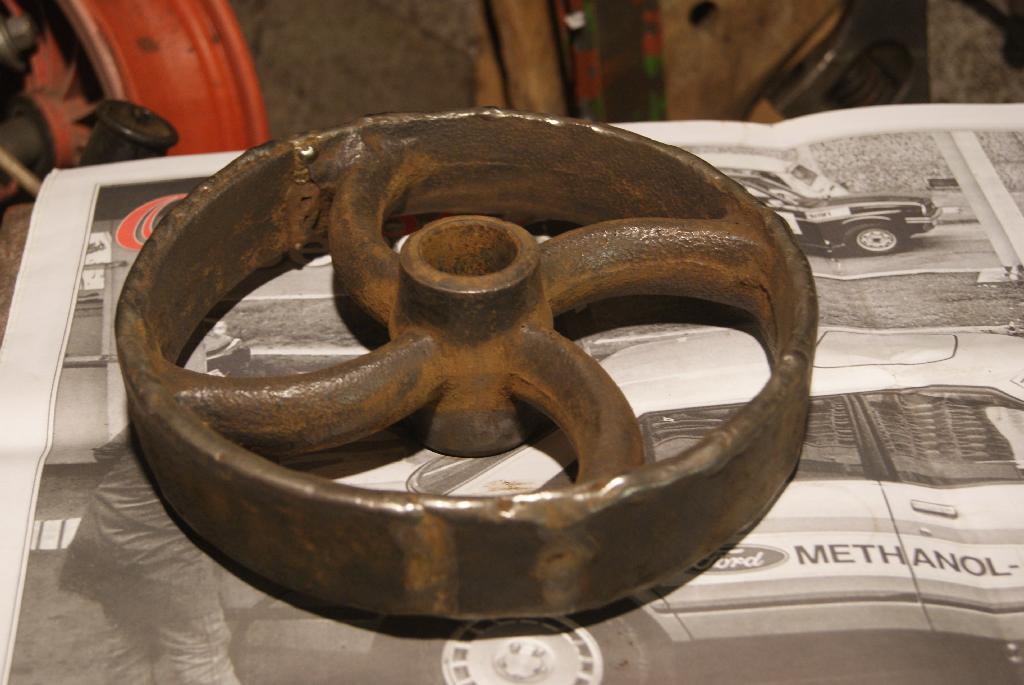
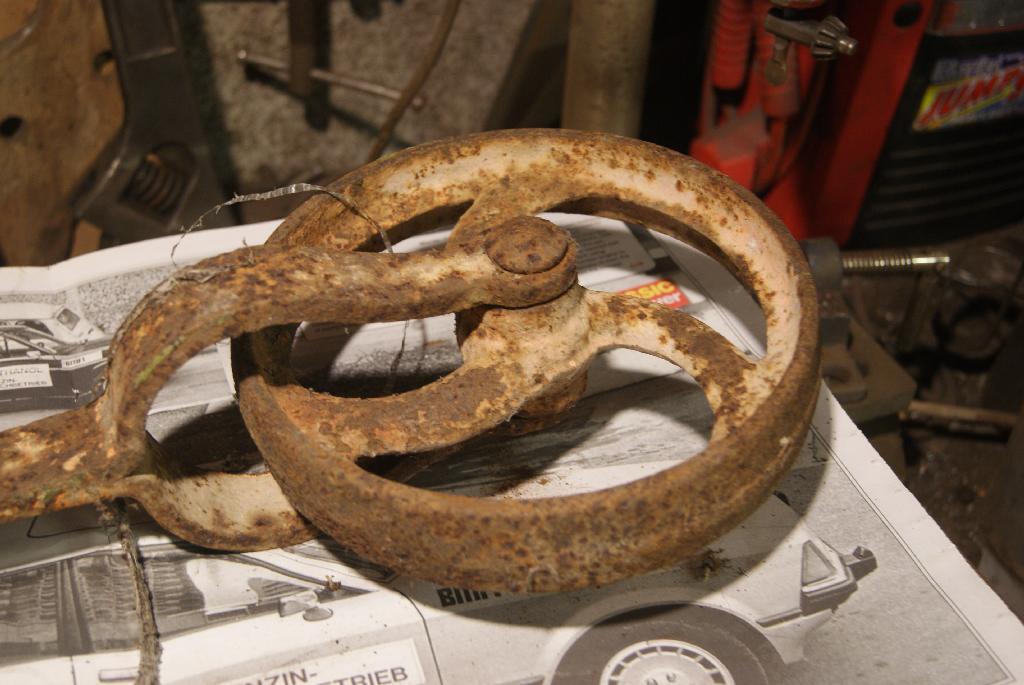
I must say that it worked very well and the whole lot cleaned up nicely after an overnight bath in the solution. It was then that I found a lot more problems that had been hidden under the rust. Somebody had repaired the wheel and there was a lot of welding around the rim but the worst was the cast iron carrier which incorporated a bearing surface. It had worn down to a taper and the hole in the centre of the wheel was tapered to the extent that it measured 1 1/2″ diameter one side but only 1″ diameter at the other. I can repair it but I need my lathe to do it, so I’ve put the two to one side to attend to once I’ve got my workshop set up. I’ve got a similar wheel off something that I’ve acquired at some point so I’m using that as a replacement. It’s only just gone into the bucket so you’ll have to wait for the results, hopefully not too long.
Attachments:
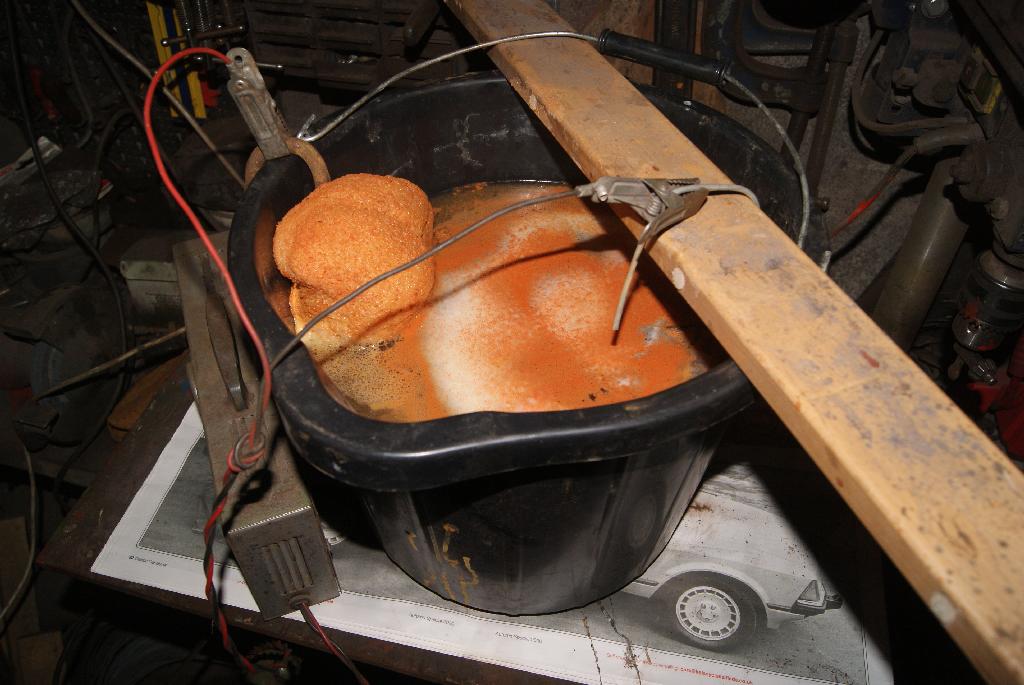
February 7, 2021 at 2:33 pm #36575trusty220KeymasterTo say that I’m surprised would be an understatement. After 24hrs most of the rust and orange paint had come off and was floating on the surface with the bubbles of hydrogen above the positive electrode. There was a large-ish patch of orange paint at the bottom of the wheel so I changed the hanger around so that the hanger (which is conducting the electricity) was right next to the patch that I wanted to sort. After another 24hrs it was gone, lifted off and swimming about in the bubbles. All I had to do was to wash thoroughly in the sink (waiting until Mrs. Geoff had gone out) with hot water and washing up liquid, then rinse off with water and scrubbing with a nail brush. Excellent results and I would thoroughly recommend it, especially with the larger parts that would otherwise have cost a fortune to soak in acid.
The only thing to be cautious about is the hydrogen that it gives off; we all know how flammable hydrogen is (if you don’t, watch the video of The Hindenberg zeppelin) so you really need to do it in a well ventilated place. My garage is ideal because it’s so draughty it never gets a lethal build up.
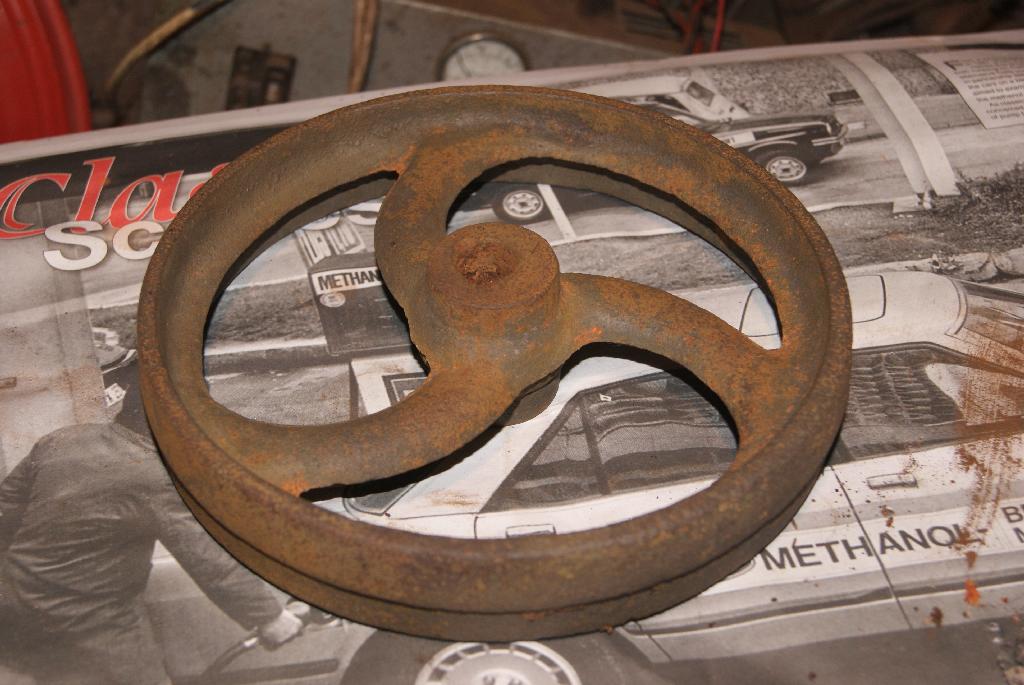
The wheel is now painted in red oxide to stop it rusting. I will attend to the axle and centre hole once the paint is dry but I didn’t want to undo all the work that I’d done getting rid of the rust.
Attachments:
February 8, 2021 at 11:07 am #36582chris
ParticipantOn the subject of replacement tines, try a different agricultural supplier, the dealers are often tied to the manufacturers they are agents for and tend to stock what they have sold.
An independent general stockist will have all sorts of tine points, I used (when I was working ) Hargreaves agriculture of Holbeach, they could get all sorts of points and being an oldish company they had great knowledge.
We also had a machinery dealer/ scrap man chap that had bought old dealer stock over the years, he had some amazing stuff, usually if he could remember which tin shed or part of the yard he kept them in, again his knowledge was amazing.
If you can find similar in your area you might be lucky!February 10, 2021 at 5:20 pm #36602trusty220KeymasterIt’s a shame that all of those dealers have now disappeared around here. At one time Midland Shires Farmers would have been the place to go but they have long since gone and the only place that even approaches what they used to do is Telford Farm Machinery (TFM). All of the other main dealers are relatively new and staffed by youngsters that know how to look things up on a computer if you give them the machine make and serial number.
I think my best course of action will be to change all of the points for the narrower ones that I can get locally. At least that way they will all match and look correct.
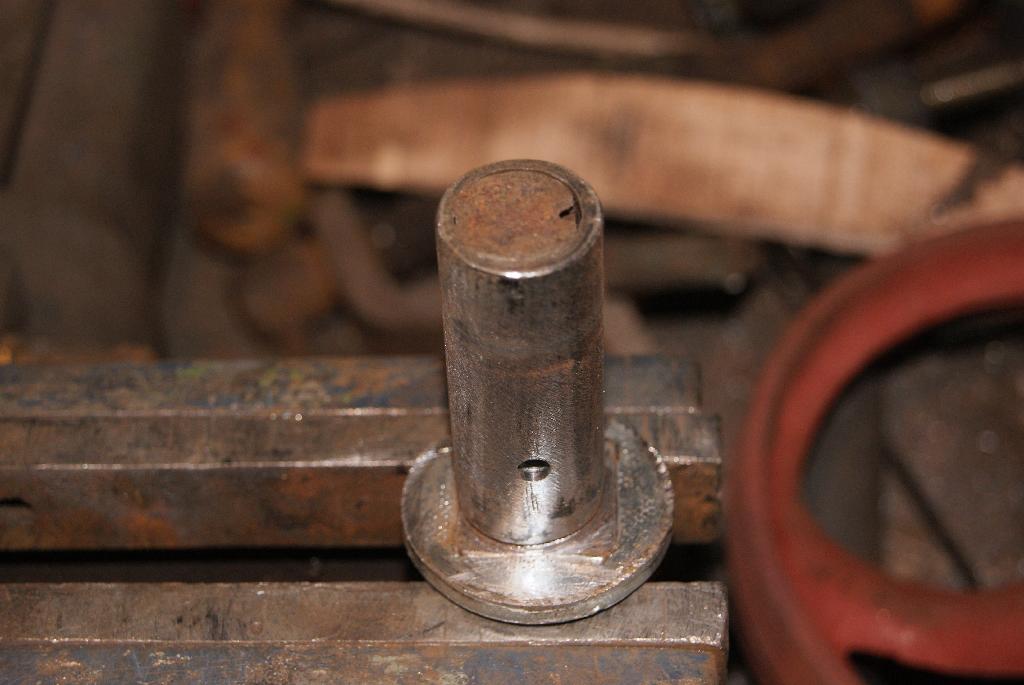
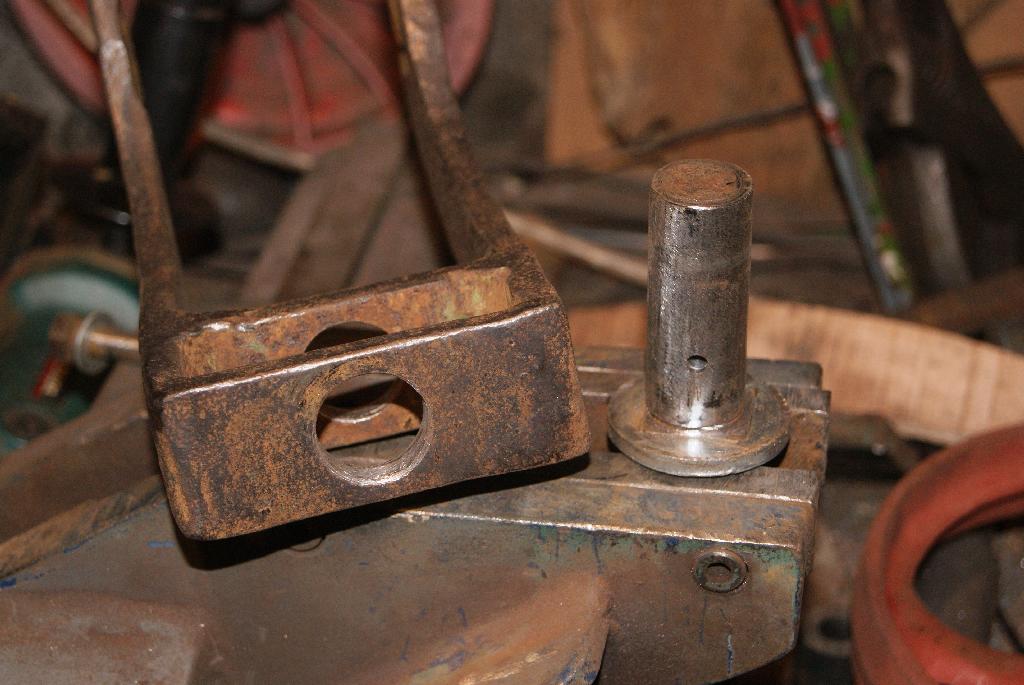
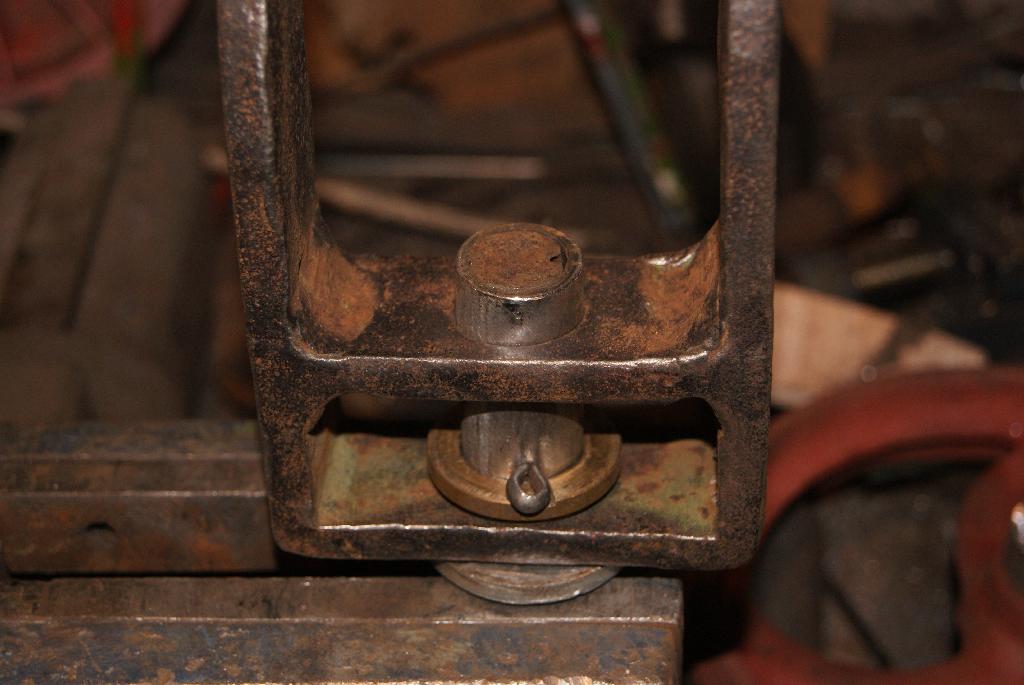
February 12, 2021 at 4:57 pm #36615trusty220KeymasterThis is turning into a marathon rebuild! The castor wheel is now done and awaiting a coat of paint.
If you look on one of the previous pictures you will see all of the parts laid out and the one troublesome bit- the leg- which had originally had a circular end turned on it for the castor wheel fork to rotate on. In it’s long working life the circular end had worn to a barrel shape and the holes in the fork had worn oversize. To remedy this I firstly filed four flats on the circular end of the leg to reduce it down to good metal, then filed it circular using the centre of each flat as a datum. That took a day of drudgery with a hand file but I simply couldn’t see any other way of doing it. Normally half an hour with the lathe would have had it sorted but that wasn’t an option.
In a similar way I filed the oversize holes in the fork so they were circular then measured the two sizes- the leg I finished down to 3/4″ diameter with a hand file again and the fork was opened up very slightly to 1″ with a blacksmith drill bit in the pillar drill. I then managed to buy a steel tube with outside diameter 1″ and bored the centre hole out to 3/4″ using the pillar drill. I left the leg a couple of thou oversize so I could heat up the tube, knock it over the leg and when it cooled it is now fixed firmly with no fastenings needed. I did file the outside down a little so that it slid nicely over the fork, then drilled a hole for the split pin so that the fork doesn’t fall off the end every time I pick up the handlebars.
That sorted that problem out, now for the wheel! Another trip to the steelholders got me a length of thick-walled steel tube which I opened out to 3/8″ internal diameter to take the centre bolt. The outside diameter was 3/4″ so I opened up the centre hole of the wheel (I couldn’t face doing any more hand filing) and the wheel fitted over the new axle. All I had to do then was to make up some new spacers to put either side of the wheel and the job was done; I could have used a stack of washers instead but I wanted it to look more like it would when it was new.
Next job is to make some new hook bolts to attach the frame to the tractor. That is going to be next week to give me time over this weekend to fettle an old headstock ready for the new Greyhound stickers when I get them; not long now!
Attachments:
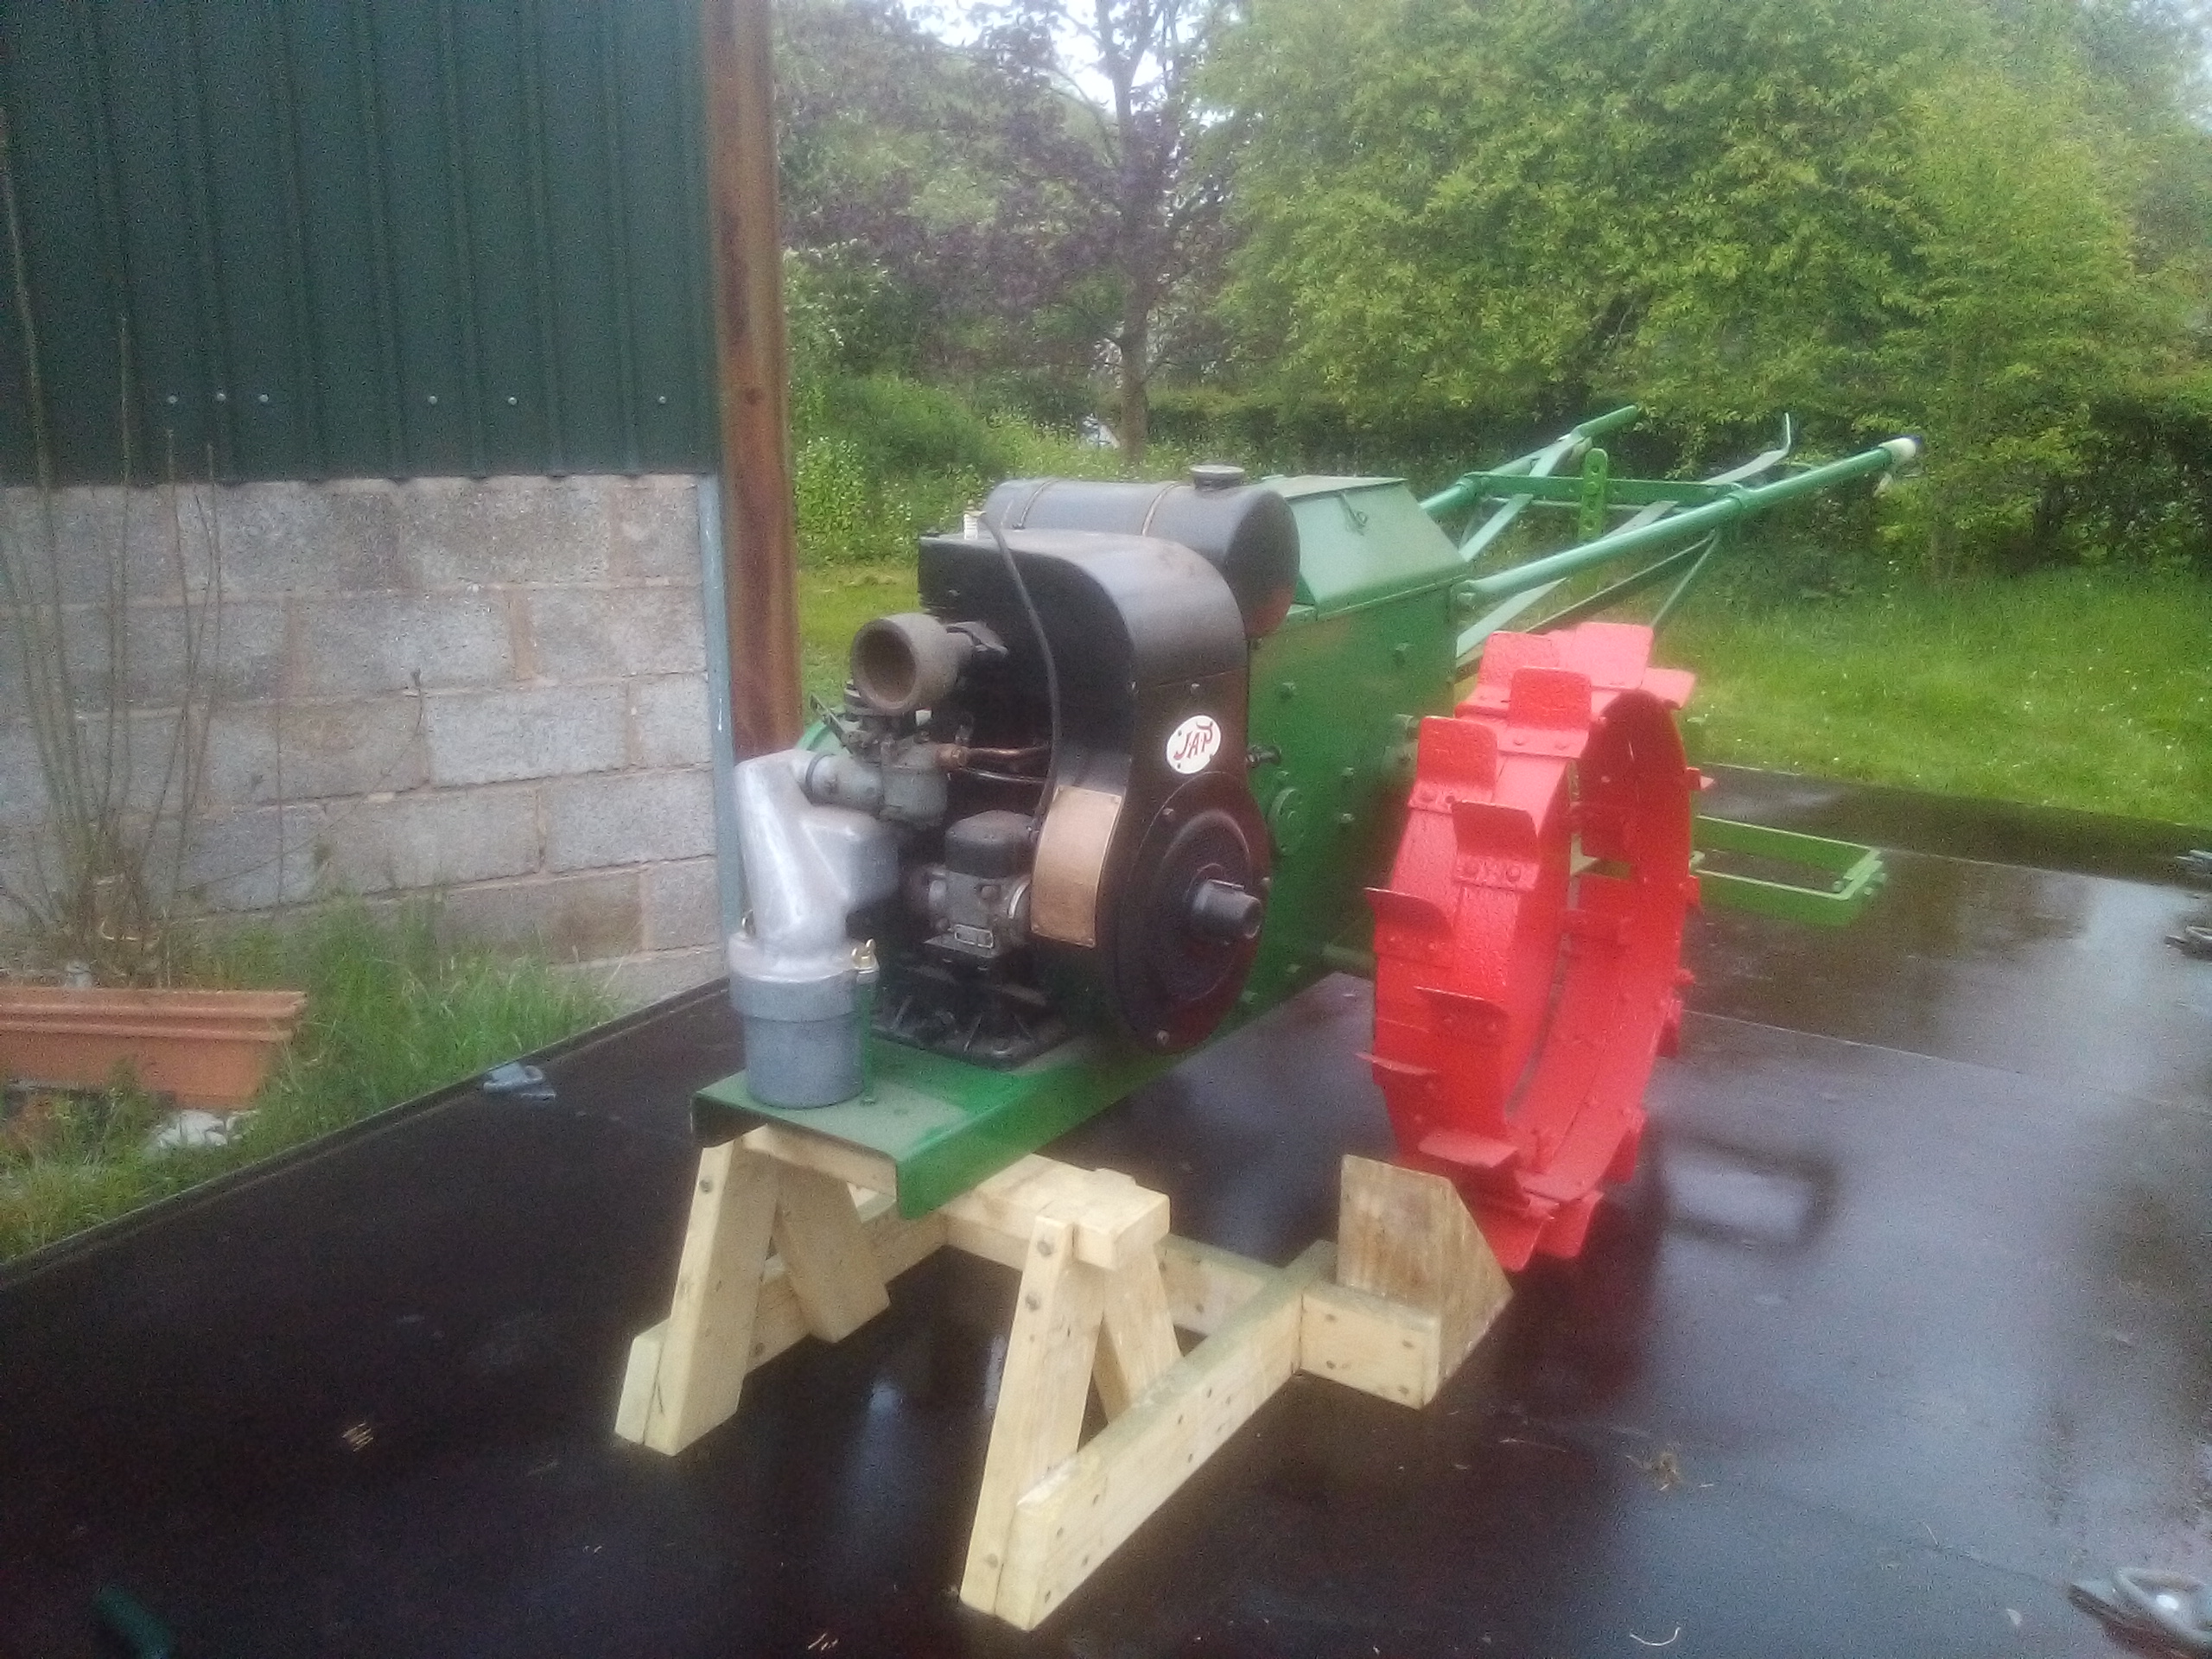
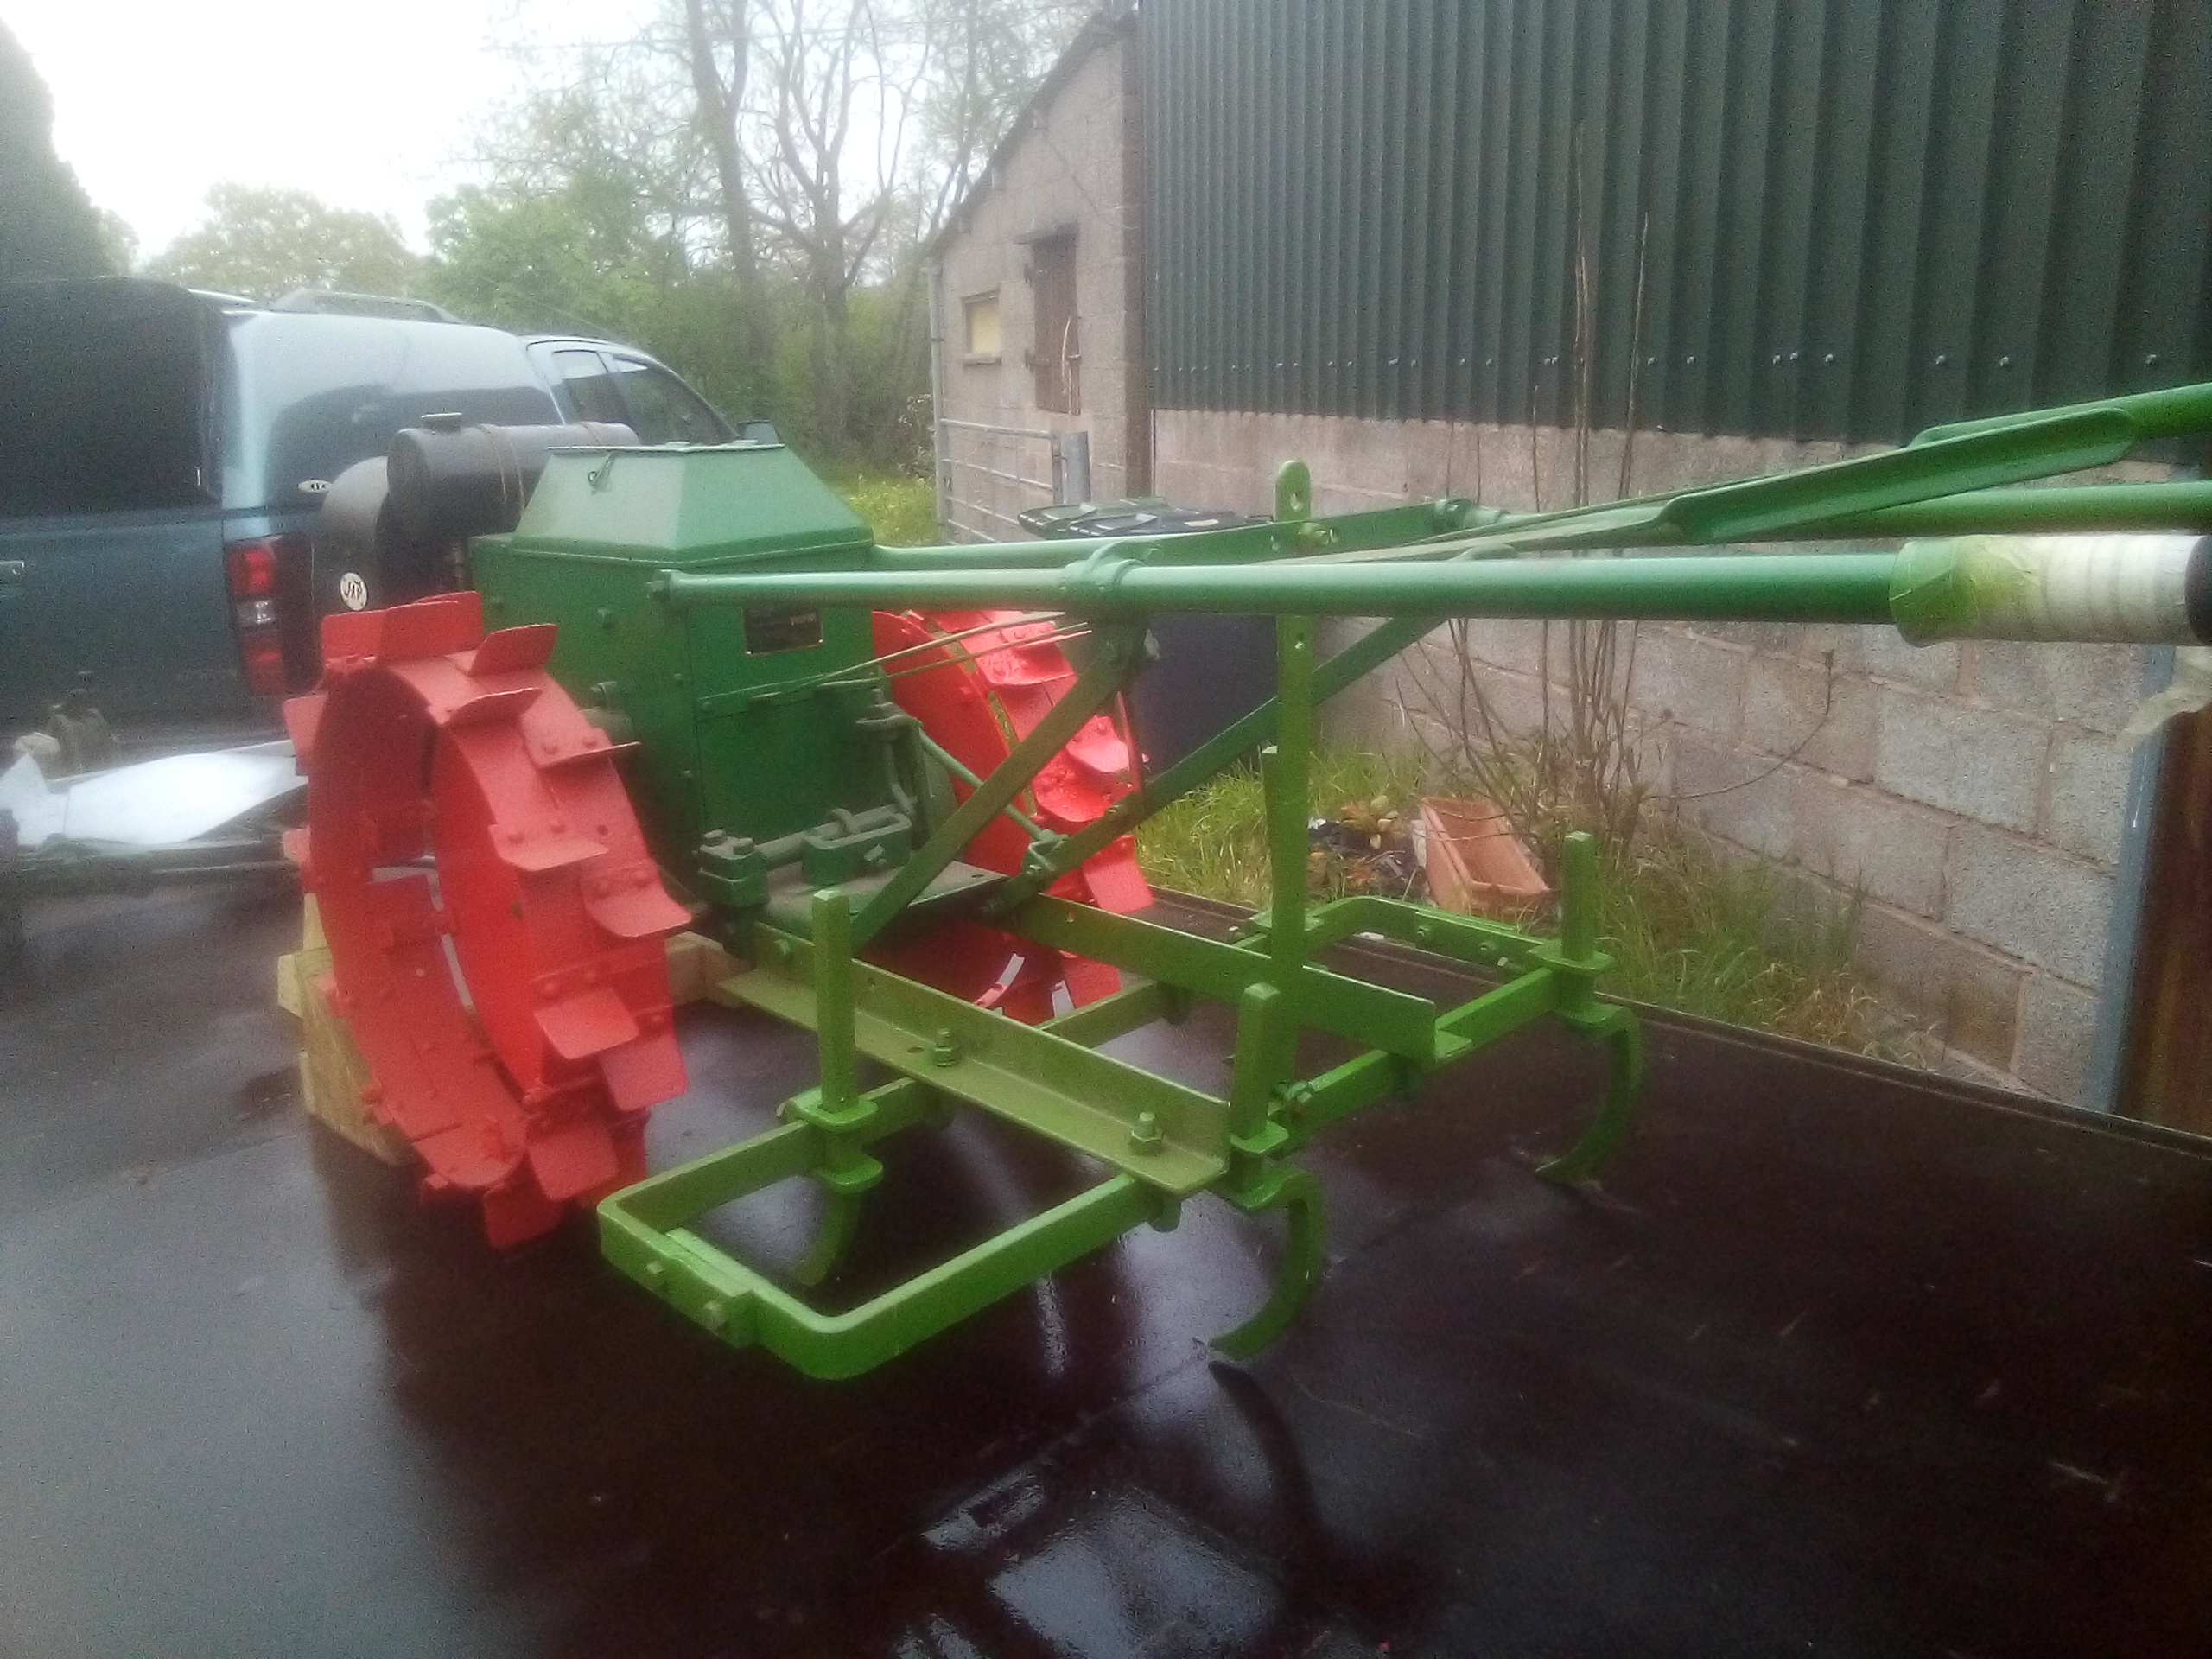
May 1, 2022 at 4:02 pm #38918trusty220KeymasterI’ve just been clearing out the workshop ready for the next project which is due to arrive on Wednesday. In case you were wondering what had happened to the Trusty rebuild, here are some photo’s I took earlier today before I unloaded it at the farm. The depth wheel isn’t fitted as it won’t go high enough to allow the wooden trestle to fit under the front of the chassis so off it came for now.
The next project is NOT a Trusty so you can breathe freely again. I’ll give you a clue- what did I do for a living for thirty five years before I retired early? As an extra bonus this project is historically important as well and it needs to be preserved rather than restored, so an even bigger challenge. As Charlie has said before, it’s only original once and if you paint strip it all the history has gone forever.
Curious? You’re going to have to wait and see.
Attachments:
May 8, 2022 at 7:06 am #38968halfa
ParticipantBrilliant job! She looks like she’s just rolled out of the factory. What green is the toolframe ? Cheers
May 8, 2022 at 6:14 pm #38974trusty220KeymasterOur local farm supplies, TFM Machinery, sells Tractol enamel. The green that I used on the toolframe was labelled as Ransomes Green but it is the old shade that they used up to the mid-eighties. It’s a little lighter than the current shade of green that Ransomes use but I thought I’d use it to show up the toolframe better.
Thanks for the kind comments.
-
AuthorPosts


- You must be logged in to reply to this topic.