Home › Forums › The Main Forum Area › Projects › Early Trusty Rebuild
- This topic has 101 replies, 14 voices, and was last updated 4 years, 2 months ago by
 trusty220.
-
AuthorPosts
-
December 17, 2020 at 11:24 pm #36192
 kmacaoidhParticipant
The cultivator looks interesting, is it of a type with the ones you have shown in your Trusty vol.2 book on pp15 or pp55-56. And will it be the wire brush and elbow grease to clean back the surface rust, or have you any other methods up your sleeve
December 18, 2020 at 9:19 am #36193 trusty220Keymaster
Hello, Kevin, glad to see that you made it onto the forum.
The cultivator that I have for this tractor is a genuine one, not the dealer made ones that I have included in the book. Where it is similar is that it bolts to the back of the chassis- most of the later Trusty implements fit on the swinging drawbar but this tractor was made before the swinging drawbar system came into production.
Most of the smaller parts I am now soaking in Brick and Mortar Cleaner from Jewsons. This is a dilute Sulphuric Acid which lifts the rust out of the steel but it must be done in a well ventilated area because it gives off toxic fumes (Hydrogen Sulphide). By the time Mrs. Geoff starts complaining about the smell- after a few days- they are normally ready for a soak in water and bicarbonate of soda to neutralise the acid. My biggest problem with this method is the size of the tub that I use and the cost of the acid; if I have to de-rust large parts I don’t have a tub big enough and the cost of filling it with acid would be prohibitive. I may experiment with the electrolysis method, but then again I’m going to have to buy a bigger tub, find somewhere to put it then find a convenient point to plug the battery charger into the mains.
I think for this job I’ll just use a wire brush on the angle grinder to clean up the bigger bits. At least then I can move on and get the interesting stuff done, which is the repair of the threads on the cast iron clamps.
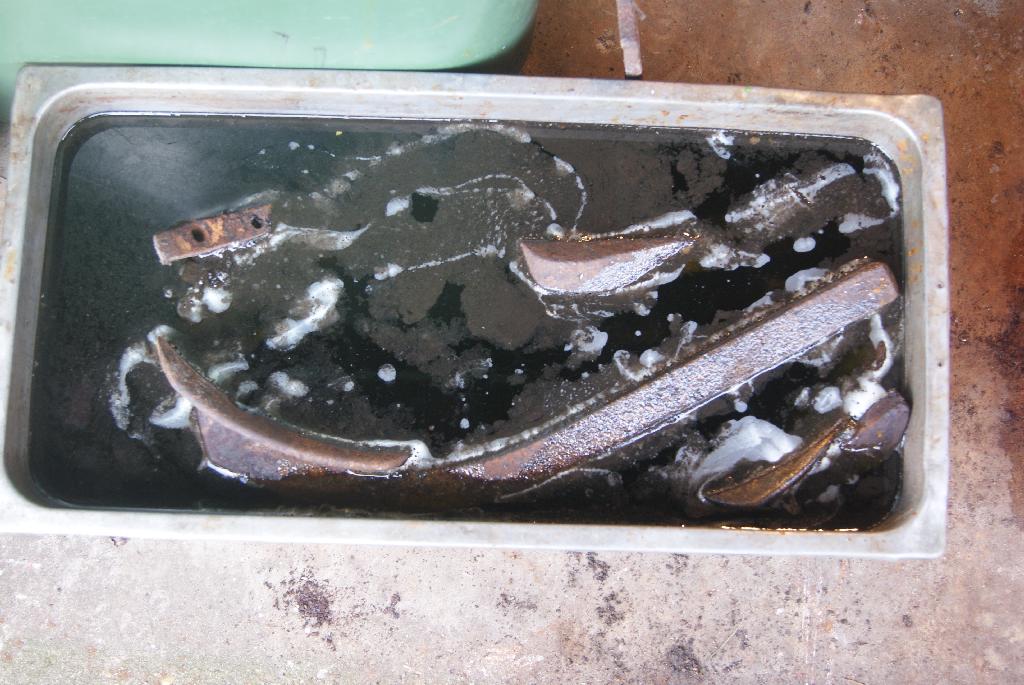
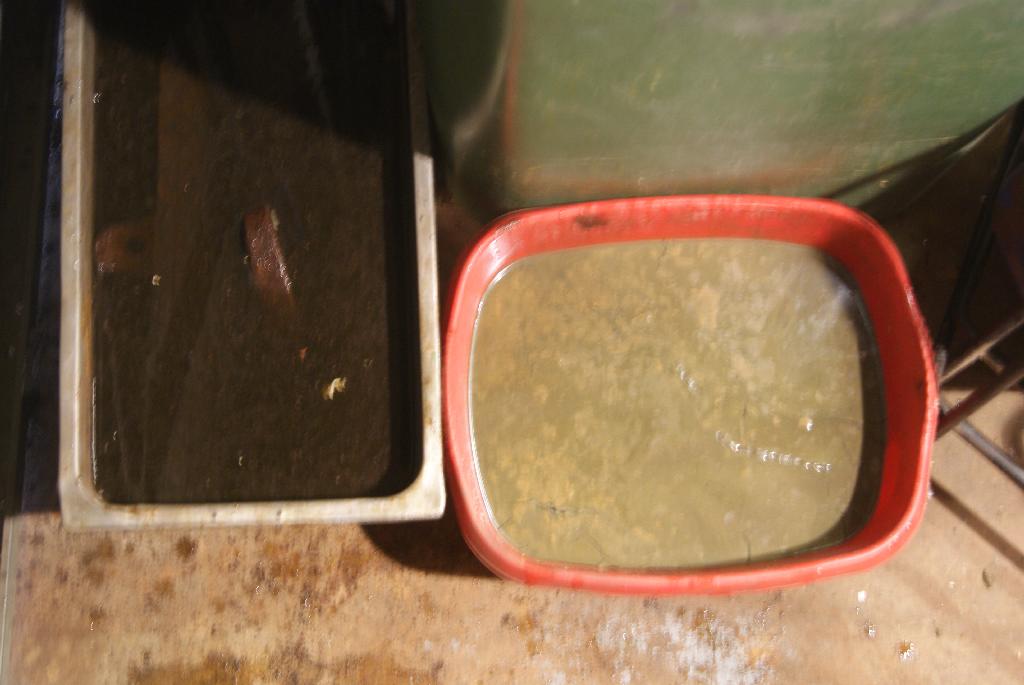
December 19, 2020 at 6:18 pm #36201trusty220KeymasterA few people have asked about my method for cleaning rust off using the dilute acid. Here are some pictures to show the results during the process; you can see the rust floating on the top of the acid bath (the stainless steel tub) in the one picture and even more rust in suspension in the Bicarbonate bath (the red washing up bowl- don’t tell Mrs. Geoff!).
Because the acid has been used quite a few times now I’ll leave the parts in there soaking for about a week; new acid should only need a day or two at the most, but it loses it’s potency after a few times. When I soaked the parts of the Trusty Sawbench they buffed up silver like new steel, not old and brown like you would expect old steel to look like.
I’ve now moved the clamps to the bicarbonate solution to neutralise the acid, so in a few days I will start to refurbish them. The aim is to make all of them identical with matching threads so I will have to reduce the holes in some of them- it could be interesting!
Attachments:
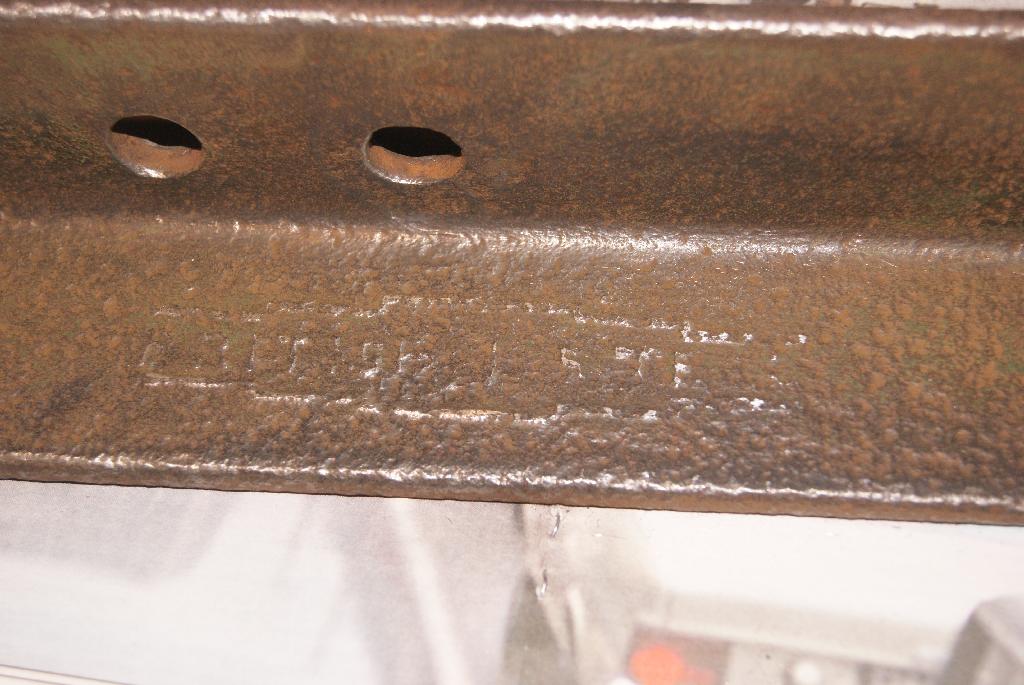
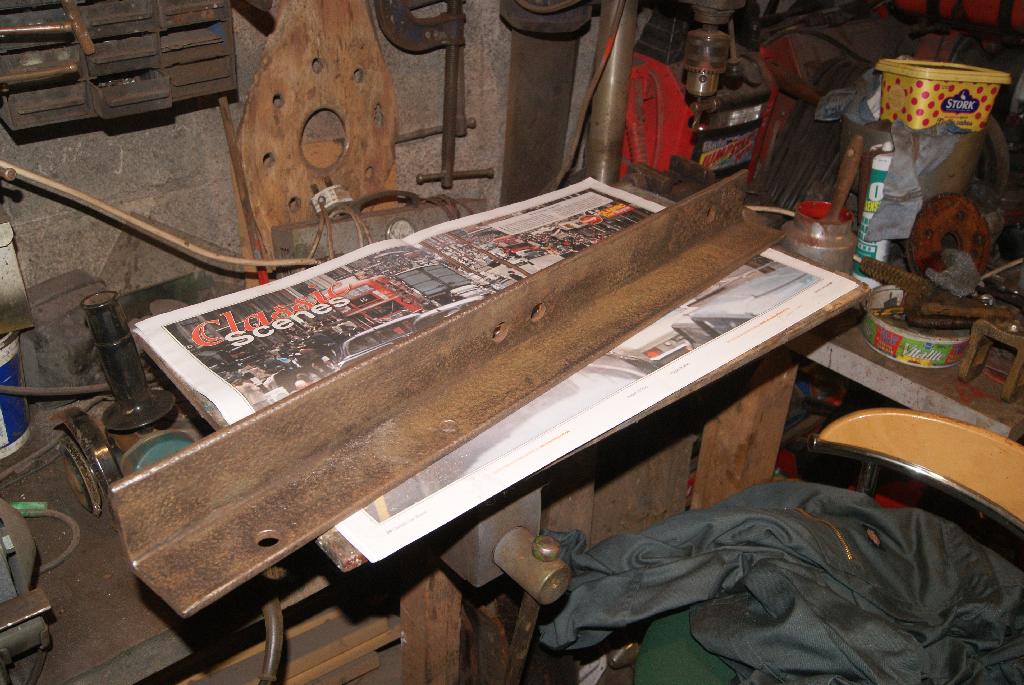
December 21, 2020 at 4:44 pm #36213trusty220KeymasterRain again today, so I thought I’d have a go at some of the larger pieces that won’t fit in the tank. No problems encountered and I used a small angle grinder with a wire wheel attachment which really made the rust fly! At one point the neighbour rushed in thinking the place was on fire because there were literally clouds of dust blowing out of the garage door and they thought it was smoke!
One nice surprise was that the cleaning process uncovered stamps in the metal; on closer inspection they both proudly read “British Steel” framed within a stepped outer surround. A nice find, I wonder if we will ever get those businesses back in the future? Somehow “Tata Steel” doesn’t have the same ring to it, does it? I will try to make these stamps more visible when the restoration is finished as they do add something to the whole job.
I took the opportunity to fish around in the bicarbonate tub and found a clamp that had been rusted solid with a bolt stuck in it. The bolt came out with no trouble at all so I continued with the wire wheel and it came up bright metal. You can see the difference by comparing the two pieces- the clamp is silvery whereas the angle iron is still a brown-ish colour with rust still colouring the steel. Once it’s painted and sealed from the atmosphere it should be fine, so that’s what I’ll do with the larger pieces.
Not so good was the hook bolt that held the cultivator frame to the angle pieces. I only took one out of the tub and gave it a quick clean with the wire brush and straightaway I could see that it had been heavily eaten away with rust. I will have to make a jig and pay another visit to my mate to make some more.
Anyway, here are the results of the acid versus non-acid de-rusting techniques.
Attachments:
December 21, 2020 at 11:20 pm #36221kmacaoidhParticipantThank you Geoff, it nice to be able to take some small part in the forums. Your own Trusty Refurb to begin with, then we may branch out. There’s plenty to discover. But having recently bought a Trusty, as a consequence of looking for ploughs, ridgers and other cultivation equipment for my other two wheel tractor, I will now have to get my head around this new commitment. And it is just that, one gets the feeling that you have a burden of responsibility to look after these vintage pieces of equipment. Suddenly we’re taking an in-depth interest in something we had only a passing interest, up until a week or so ago. There’s history there, and even to an untrained eye we can see how well made these machines were, the quality and weight of the steel, built to last, even through possible neglect. Or seventy plus years of hard agricultural work.
With no mechanical know-how to speak of, I’m taking a firm interest in the methods of removing historic rust. I’m thinking I can work my way backwards from the none working, engine, etc, parts, taking on the cleaning up of the ploughs and attachments first. Removing the ten year old dried putty like mud from round the tractors wheels and extensions, and dusting off a similar time spans worth of dust, dry hay and cobwebs. At least it was in dry.
The engine I fear will need more expert hands, no spark to speak off as bits and pieces seem seized up, flimsy connections, strands of fine hair-like wires. And a timber bung screwed into the petrol tank. To mention but a few.
Good times ahead. We will be reading through that entire Trusty Rebuild Forum and all attached comments with great interest. And dreaming of applying the final coat of Trusty green paint
December 22, 2020 at 9:38 am #36223trusty220KeymasterWhy not start a new posting in the Projects section, Kevin? It would be interesting to see the problems you have and how we can help to get you out of trouble.
Don’t forget, whatever problems you are going to encounter with your tractors somebody on this forum will have had the same and, more importantly, will have a solution.
December 23, 2020 at 11:23 pm #36247kmacaoidhParticipantWe will see how things go in the new year with that posting Geoff, enjoying your Rebuild for now, more than enough to read back over and catch up on. Keep up the good work
December 23, 2020 at 11:40 pm #36248kmacaoidhParticipantActually, the suggestion, by Charlie I think, that Vól.3 could be The Trusty Rebuild? I know, I know, a lot of work. But I think a lot of us would like to see it. But back to the Forum for now, more than enough to be going on with
December 23, 2020 at 11:48 pm #36249kmacaoidhParticipantInformation I have tried to find is, the progression in engine Hp from the first JAP5, JAP6 and so on to the Norton that were 14hp or stronger? The Trusty is a heavy machine, compared to modern copies, it needed power to pull itself around let along the heavy and strongly build equipment it carried and pulled behind it?
(ps: think I posted this question previously on Trusty Register Forum, but it was awaiting ‘moderation’)
December 24, 2020 at 11:00 am #36252trusty220KeymasterOver the years I have found that the Trusty was first offered with both Villiers and Blackburne engines. Neither of these was possessed of huge amounts of horsepower but was adequate for most jobs around the smallholding. Don’t forget that most of these were originally used for rowcrop work with cultivators behind them; this work doesn’t require a lot of power and the fuel economy would have been used as a selling point.
Most smallholdings would have had soil very much like a large vegetable garden which would be easily dug- or in this case, ploughed- and so a large horsepower would not be needed. As time went on the single cylinder petrol engines became more specialised instead of being converted motorcycle engines, and the JAP 5 engine from J.A. Prestwick of Tottenham gave more power than any other to date that the factory used.
As with all machinery most people want just that little bit more power; look at cars, they’re always increasing the power outputs due to “customer demands” and things that the Trusty was never designed to do suddenly became possible, like ploughing stubble which was definitely not on the original design criteria. Then customers would have wanted to use them on heavier soils which would be more compacted, also wanting more horsepower, so you can see how it progressed over the years.
Even in the later days of the factory you could still buy a single speed Trusty with a JAP 5 engine if you wanted, and some were sold in this form. If you had light soil why spend more than you have to by buying something with a huge engine that guzzles lots of expensive fuel that was rationed?
That’s the main reason why you see such a large diversity in the engine fitments on the Trusty. My own experience tells me that my 3-speed Trusty will only plough our Midland clay soils in second gear, dropping down to first gear for the tricky bits, yet I have ploughed in third gear on full throttle when I used to go to Holbeach (which is on The Fens). The soil over there is light loam and the JAP 6 engine on my tractor doesn’t even notice the load!
I hope that goes some way to explaining why you see so much variation- obviously, if you want to plough heavy soil you need lots of horsepower, but if you don’t need to plough then it’s just wasted having a large engine.
Have a good Christmas, everybody. I hope we’re going to!
GeoffJanuary 4, 2021 at 9:59 pm #36349kmacaoidhParticipantFollowing on with the question of Trusty hp over it’s life span, I’ve just picked up on your comment that the tractors would have first been used for ‘rowcrop’ cultivation? This would be light work, straight lines, level ground, minimum soil disturbance? What we’re the documented cultivation equipment, if known? Something like the cultivator you are repairing with your Trusty? And what is the history of crops being cultivated? This would mainly have been in the South of England? The London food belt of that time even? Its a very interesting social history factor, all these added layers of history that go with these many old farm machines!
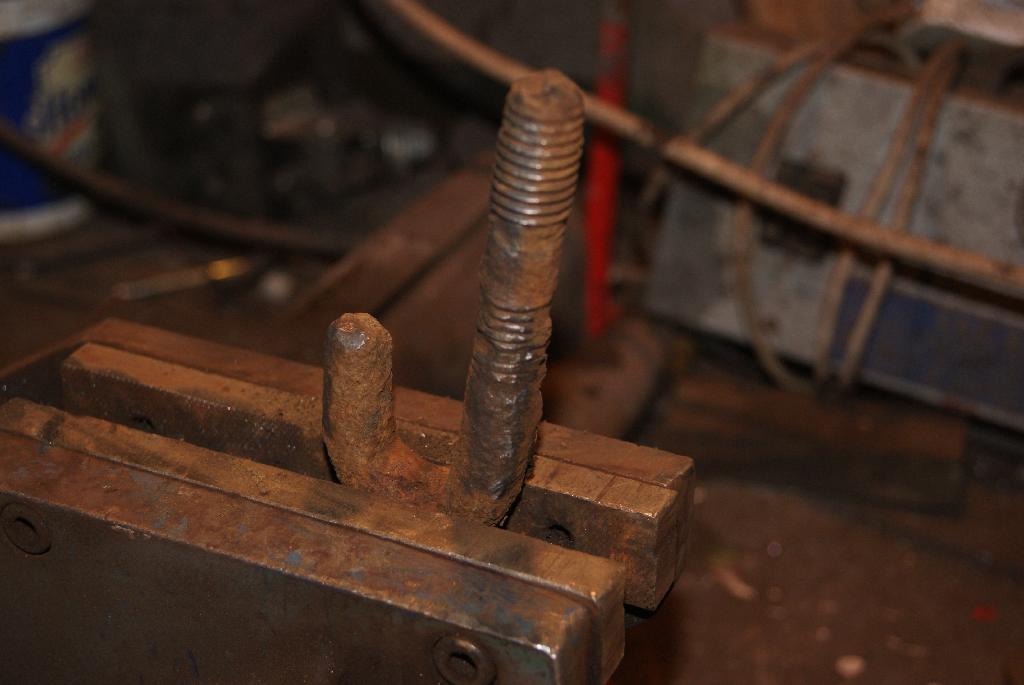
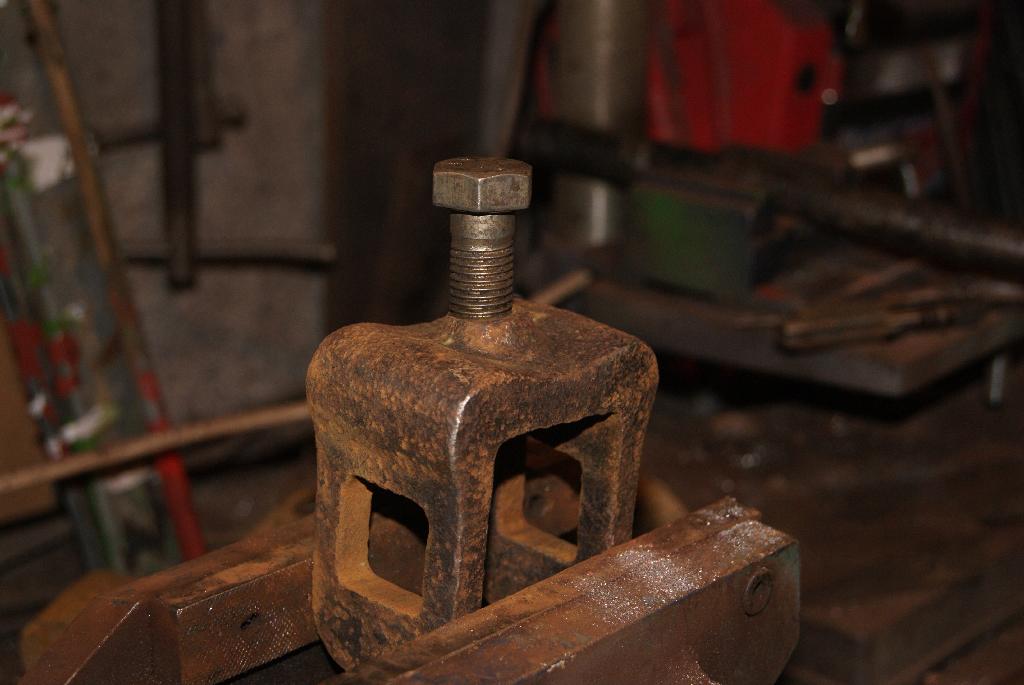
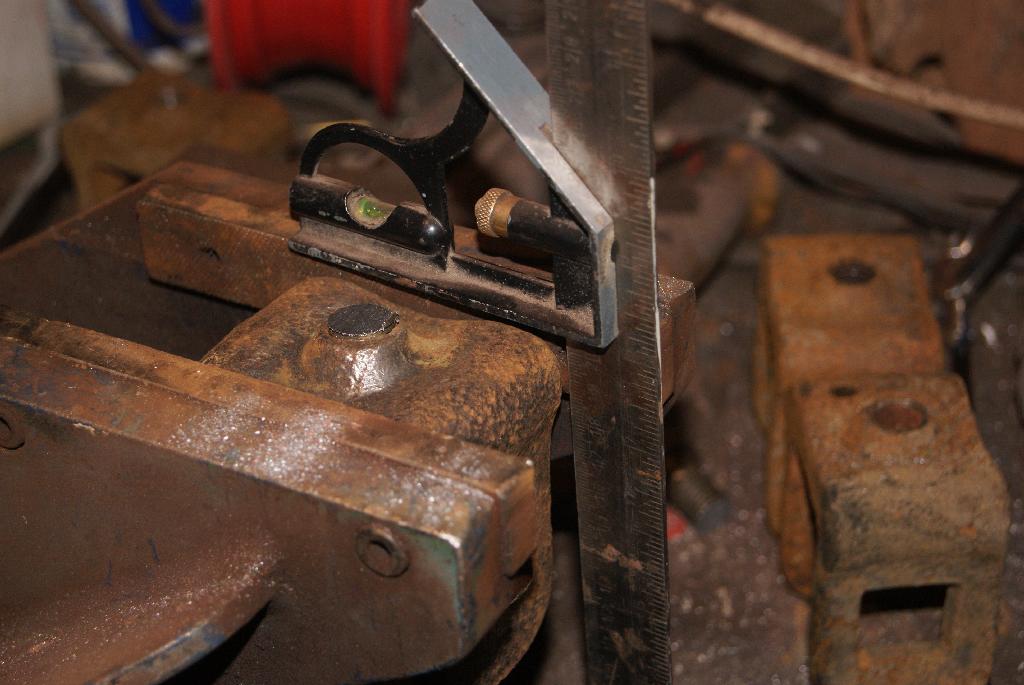
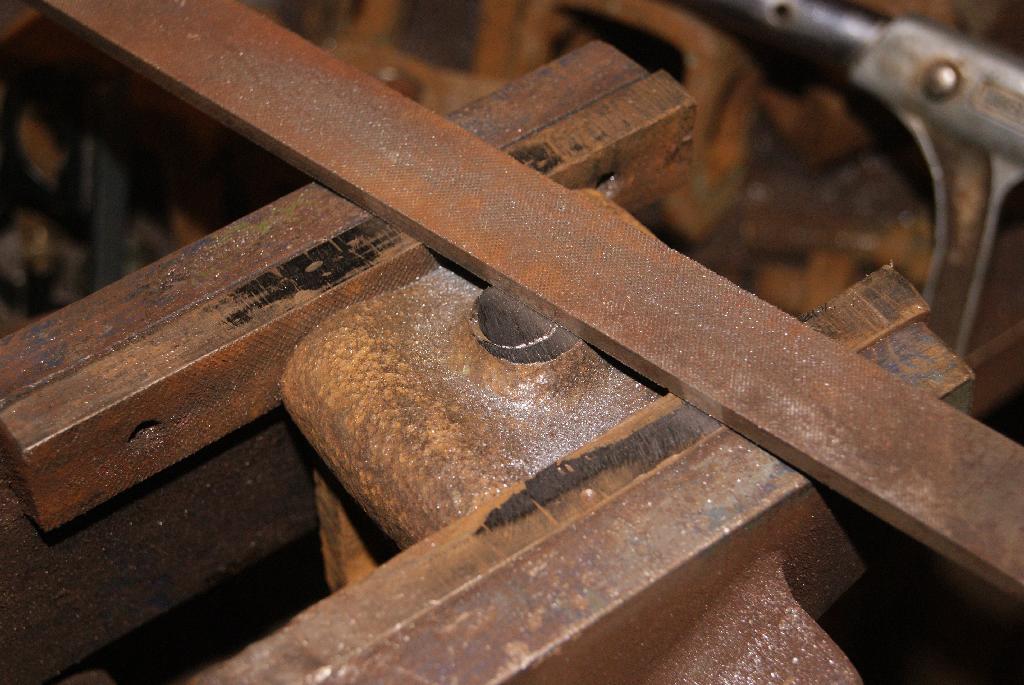
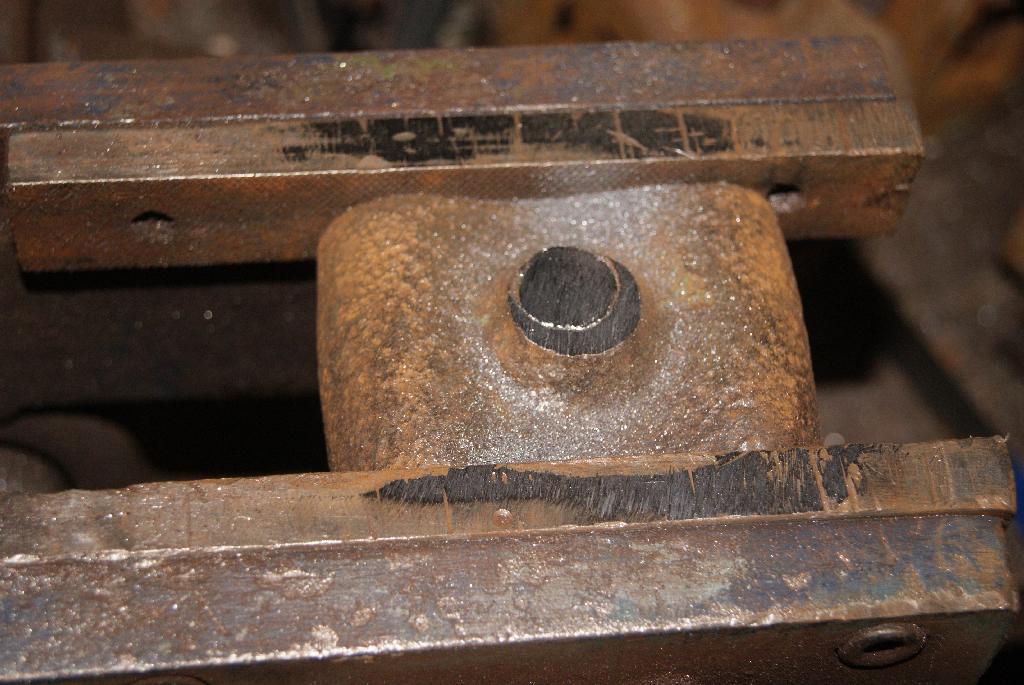
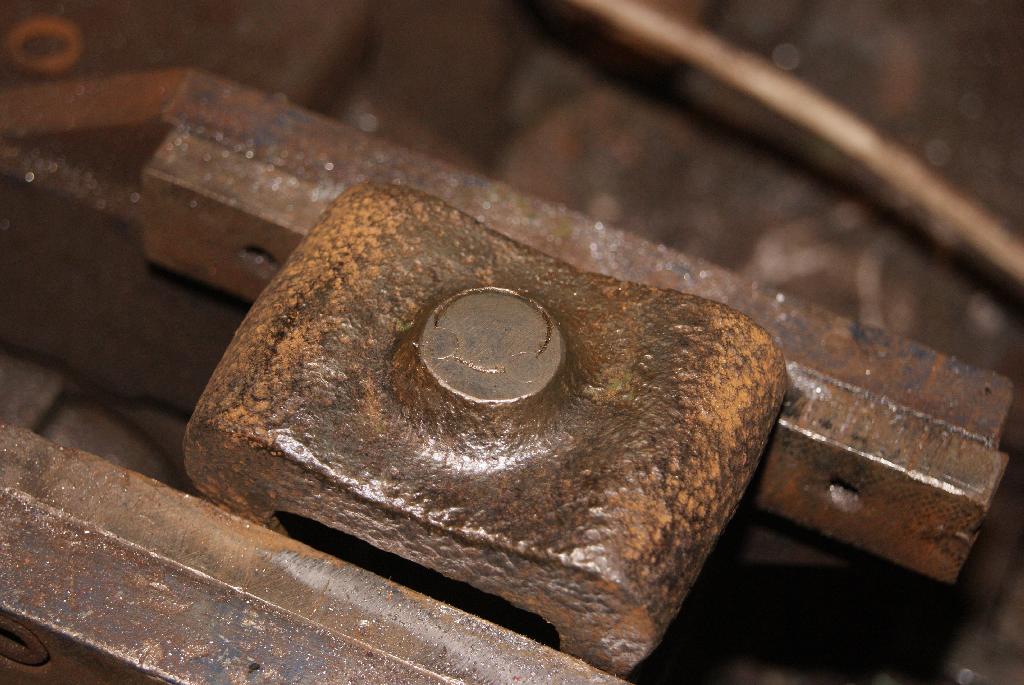
January 5, 2021 at 3:59 pm #36354trusty220KeymasterI plucked up courage today to attempt the repair of one of the tine clamps on the cultivator. If you remember the clamps are cast iron, and so very brittle, and somebody had “repaired” most of them by drilling out the bolt hole and re-tapping in a larger size. OK, a working repair that probably got the owner over the immediate problem, but why drill the hole off-centre and at an angle? I’m not OCD (or I don’t think I am) but things like that just can’t go unaltered- besides, the way it had been left would have been difficult to use with every clamp needing a different spanner size.
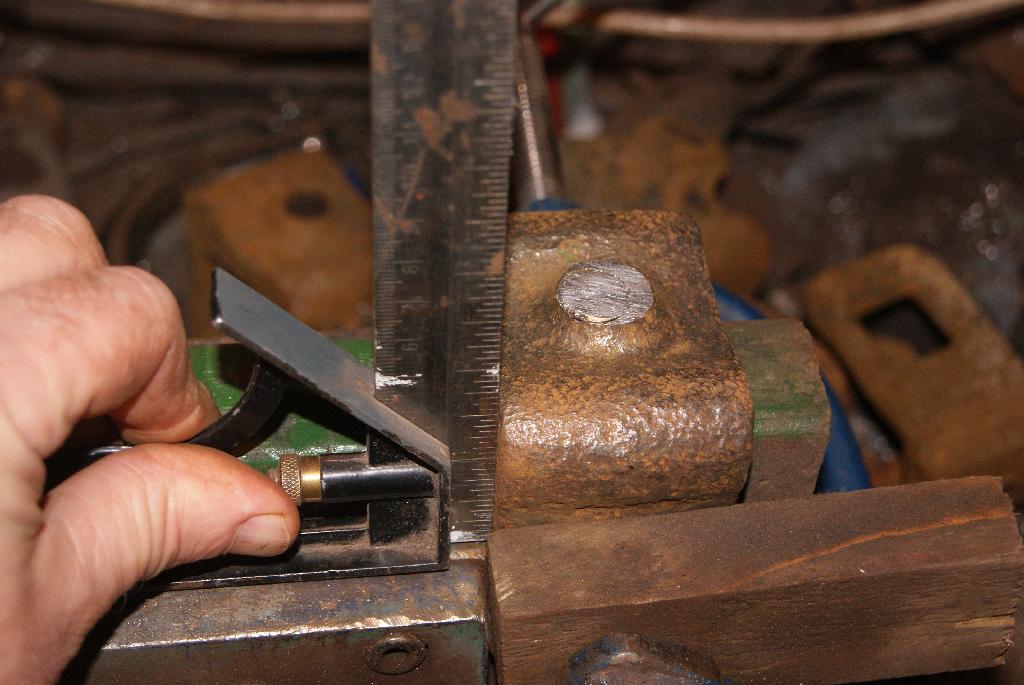
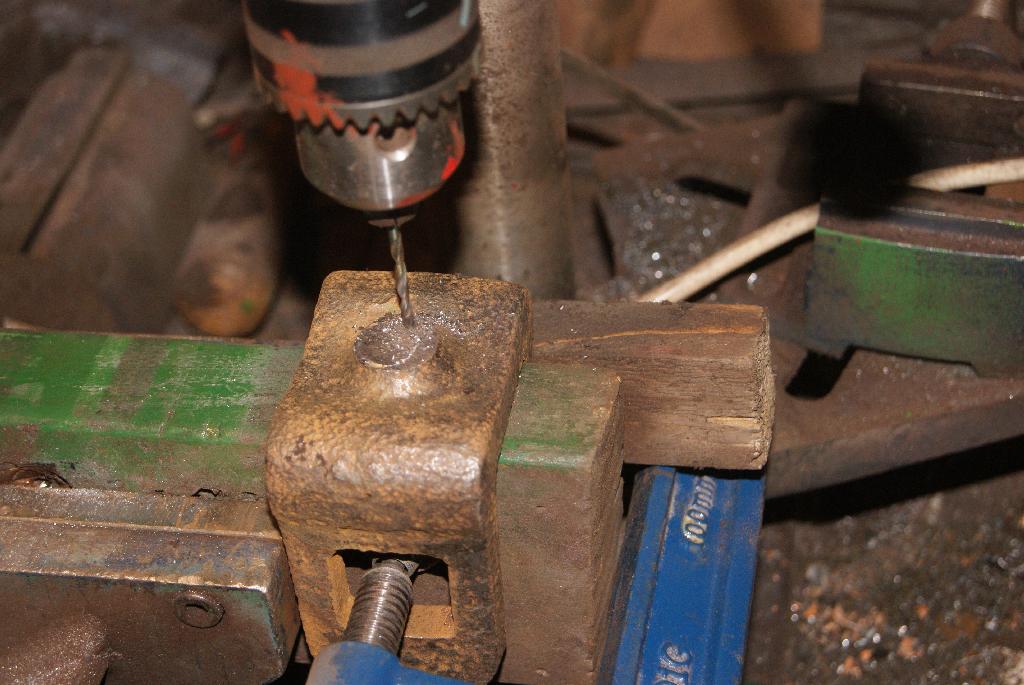
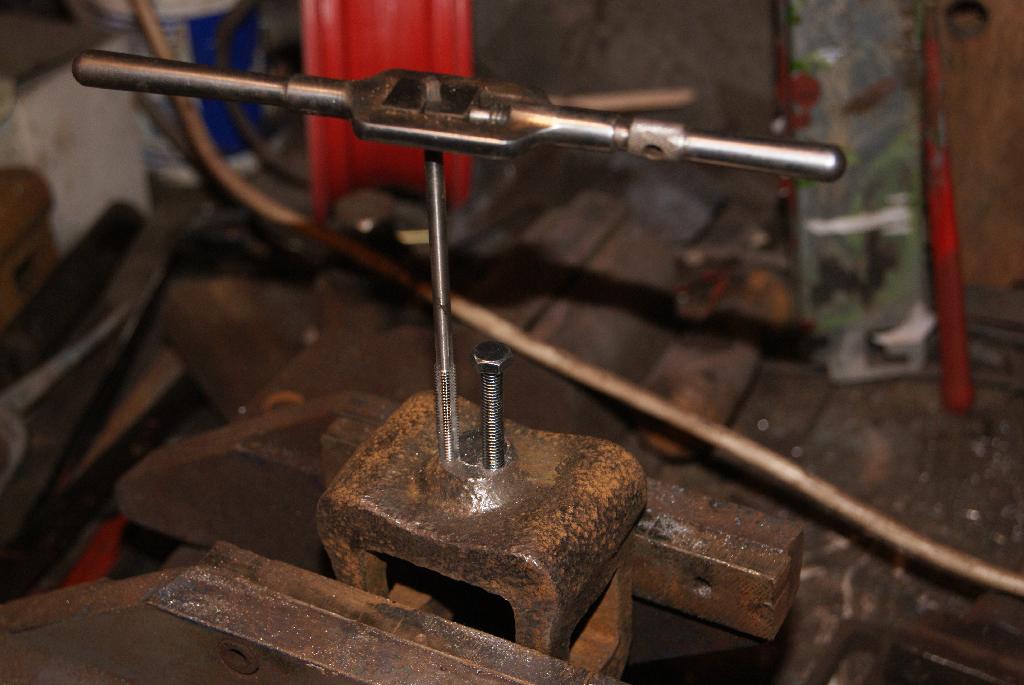
Normally I would just fill the hole with weld, trim it all back and drill and tap but you can’t do that with cast iron, at least not with any success. I had to do it the long way round which involved plugging the hole with a mild steel bolt, drilling two dowel holes down the threads and tapping them to accept small bolts which will prevent the larger insert from rotating when I drill and tap it later. The pictures explain it better, but the large insert was a 5/8 Whitworth bolt that I cut off and dressed back with a hand file to give a flat surface on the original boss. To prevent it rotating I clamped it in the vice and positioned the pillar drill to drop a hole straight down the edge of the larger bolt. I tapped these holes to M6 and wound in a couple of metric bolts covered with loc-tite so the hole thing is now rigid.
My local bolt supplier is closed under the lockdown rules so I can’t see if he’s got any 1/2″ Whitworth bolts, otherwise I would have drilled and tapped it as well. I’ll leave that until I know what size bolt I can lay my hands on just in case.
Only another six clamps to go- wish me luck!
Attachments:
January 5, 2021 at 4:50 pm #36364 wristpinParticipant
Love it; shades of metal stitching a cracked cylinder block.
January 5, 2021 at 5:51 pm #36365trusty220KeymasterThat’s where I got the idea from! Thanks for the comment, Angus; I hope all’s well in your corner of the world.
January 5, 2021 at 8:29 pm #36368wristpinParticipantAll well here thanks, just trying to make all the available work, take up all the available time.
-
AuthorPosts

- You must be logged in to reply to this topic.