Forum Replies Created
-
AuthorPosts
-
May 26, 2022 at 4:58 pm #39106
 trusty220Keymaster
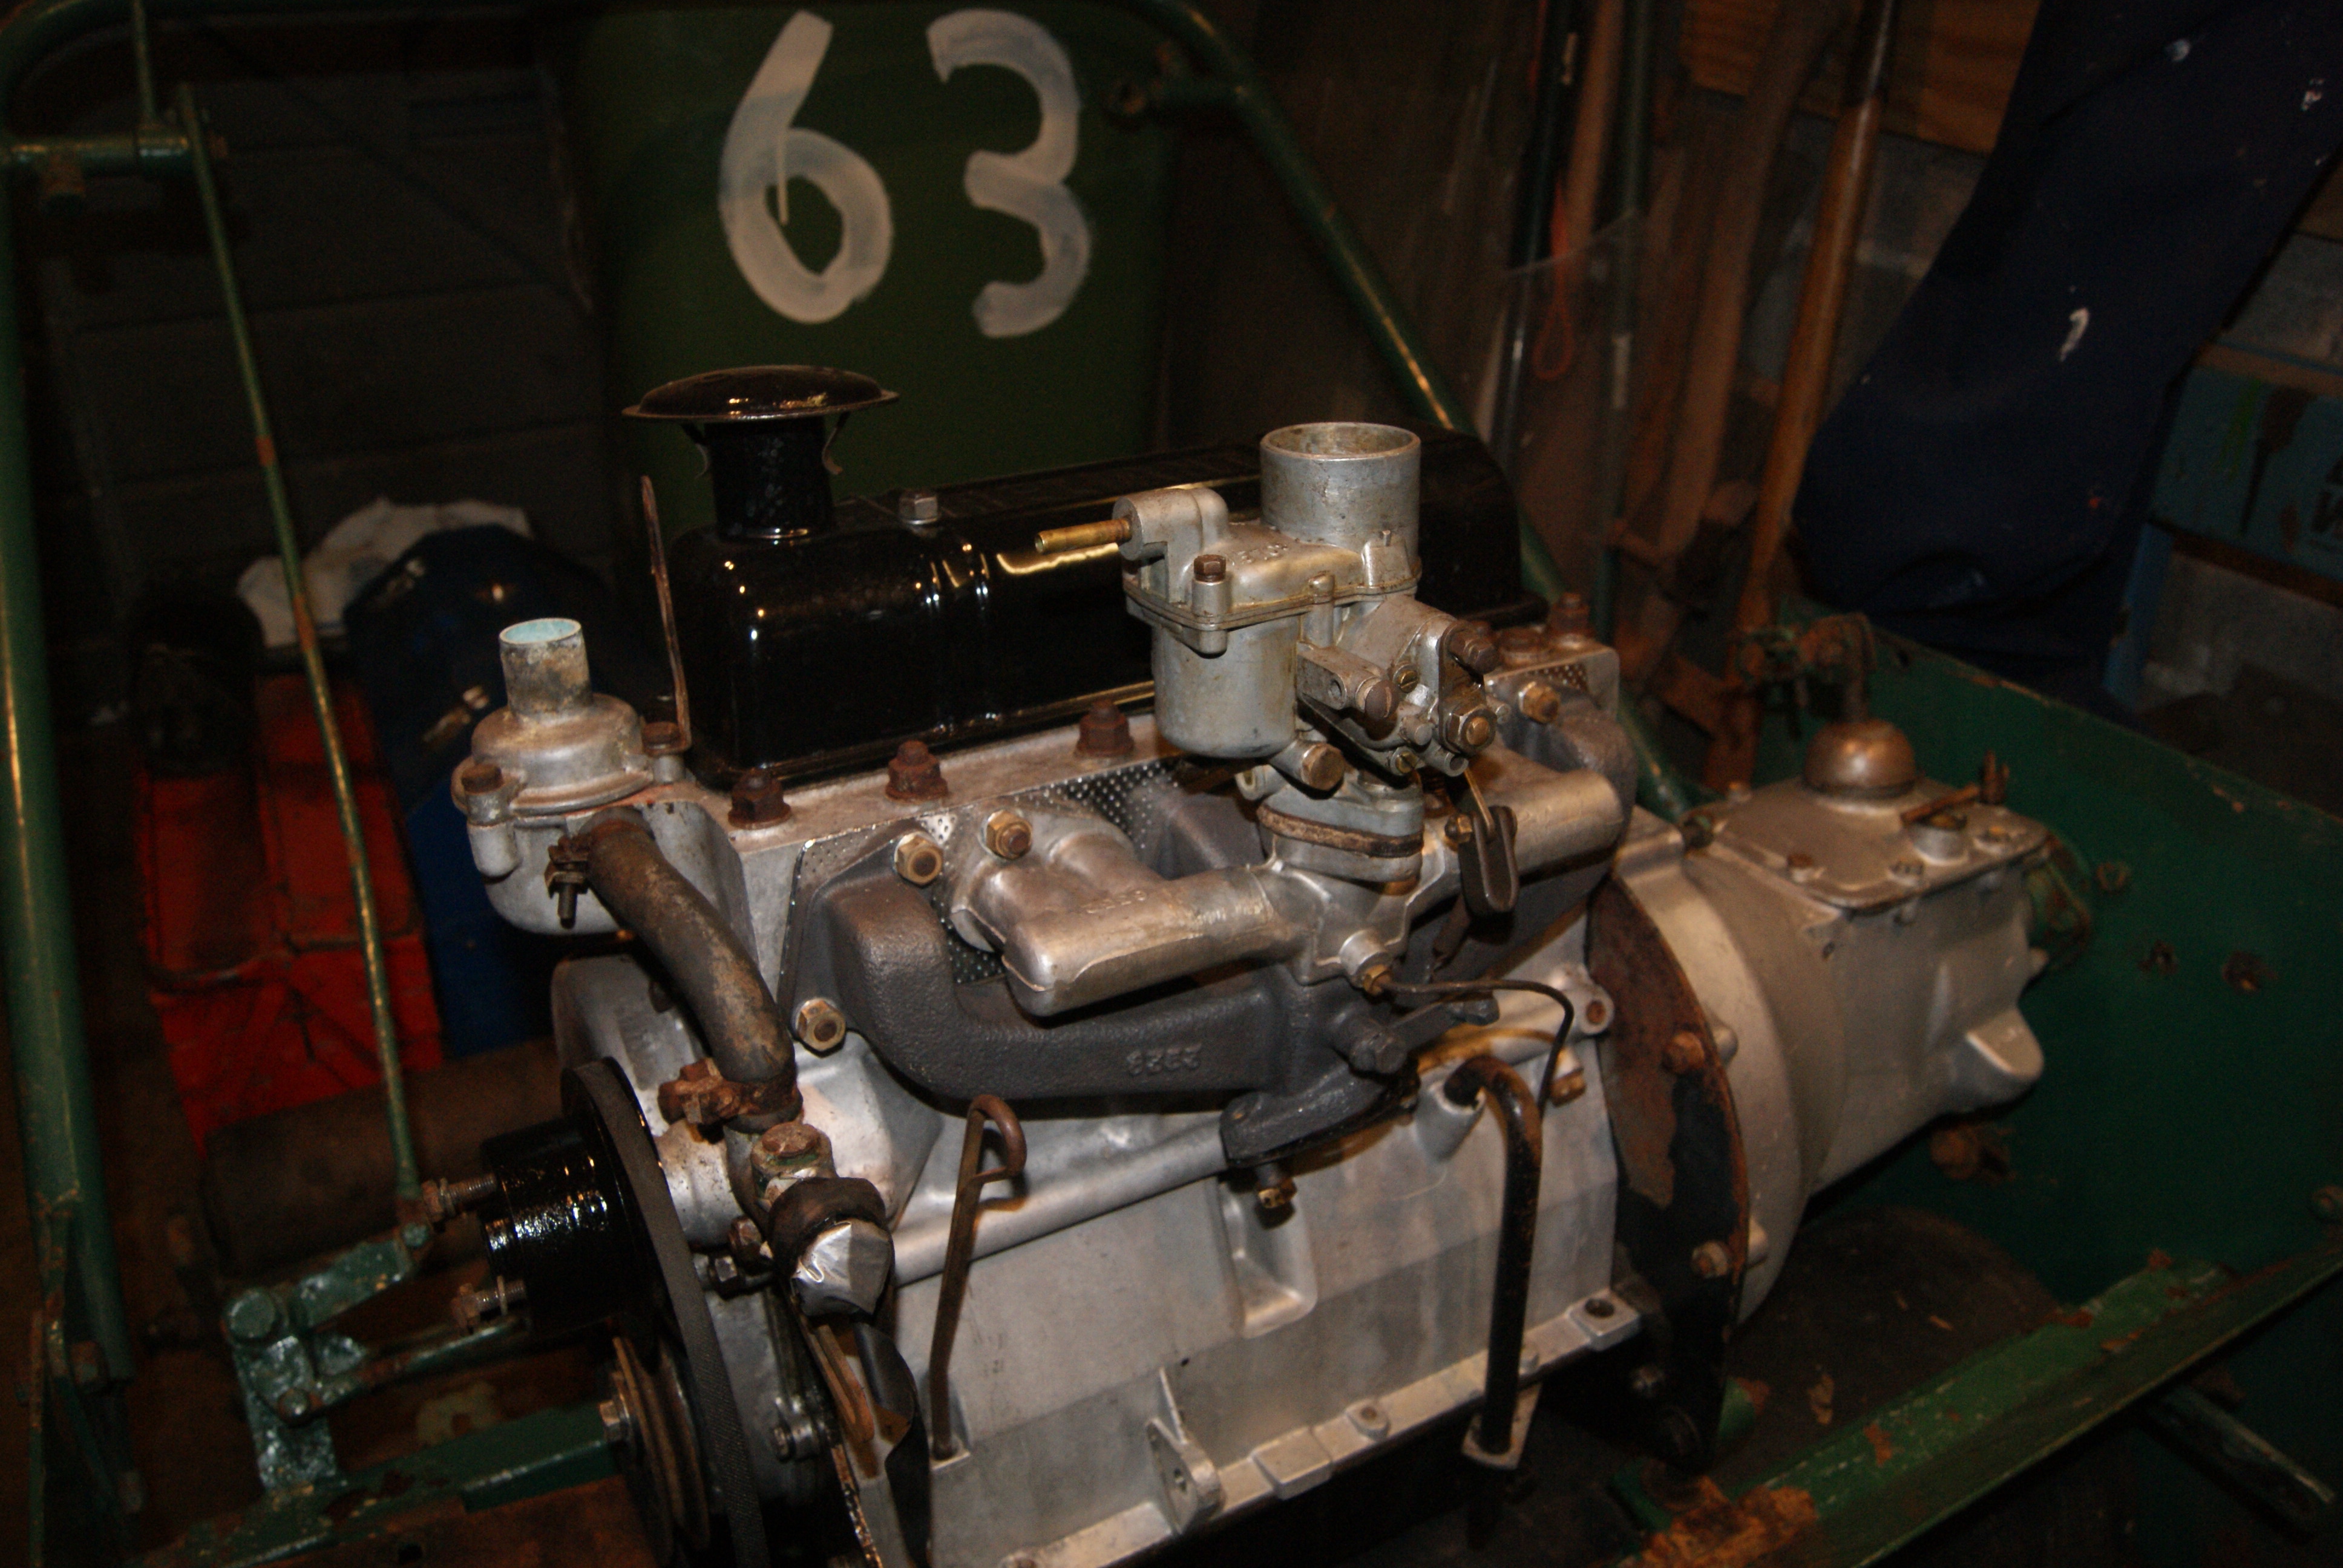
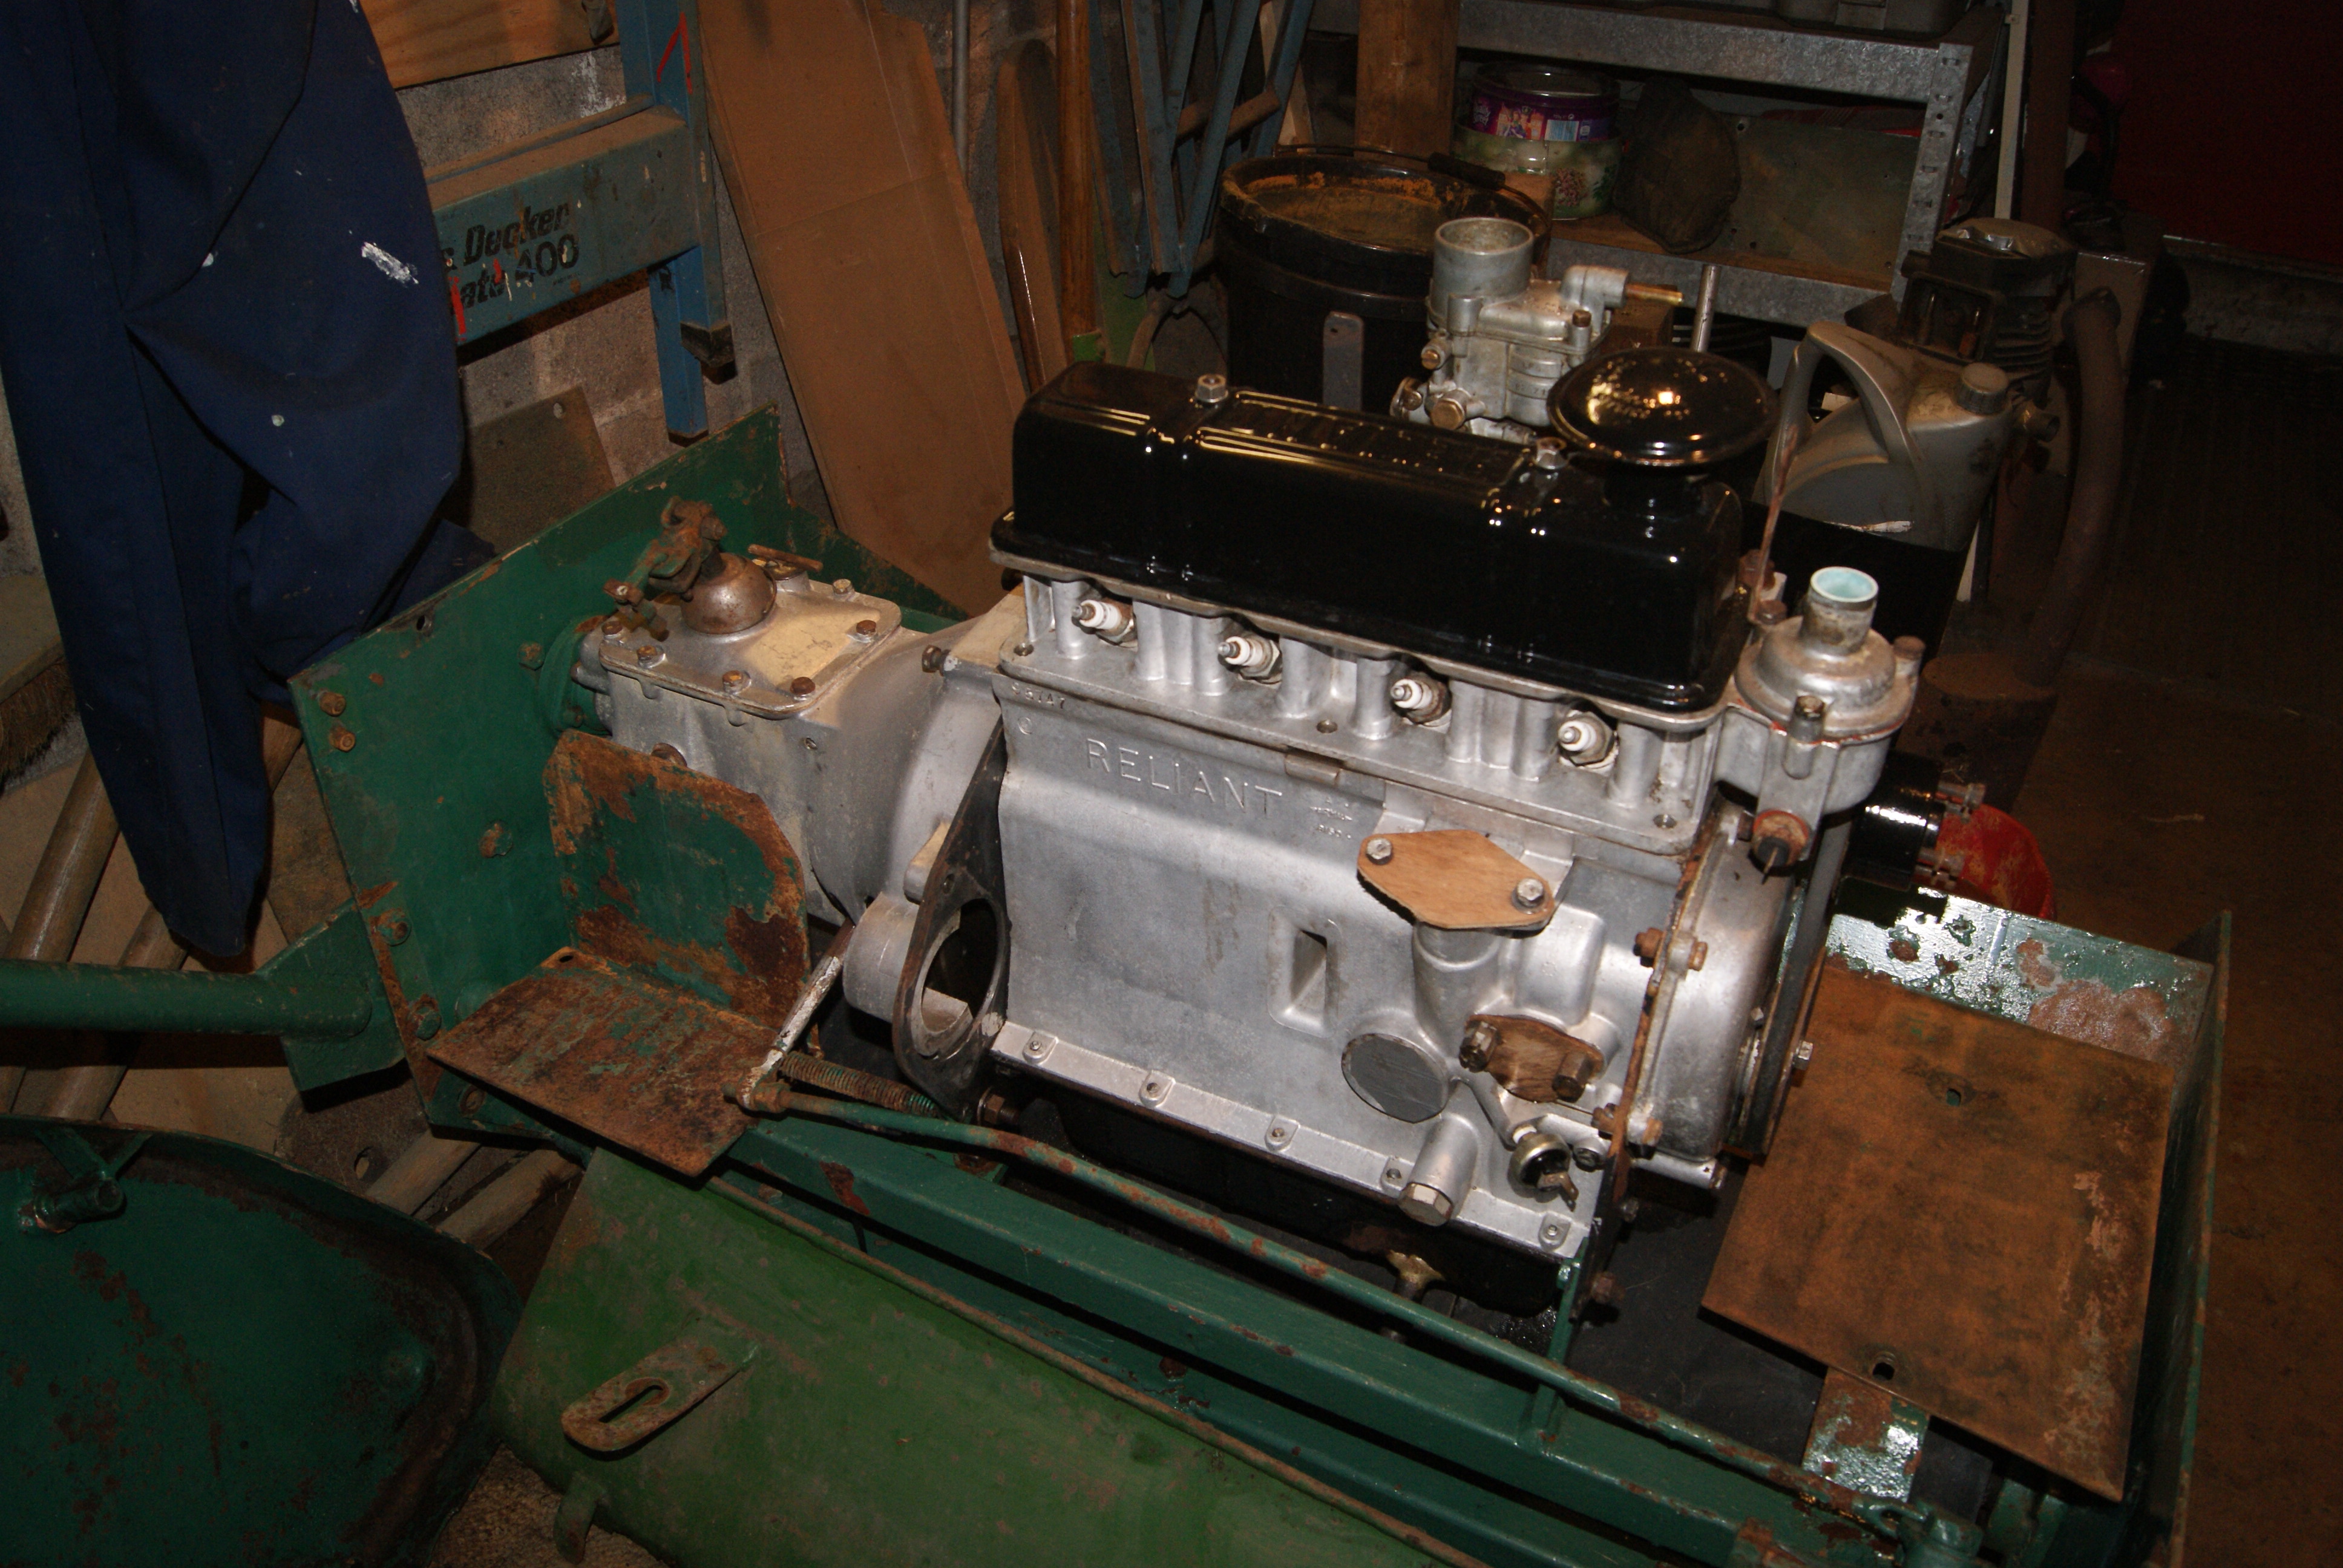
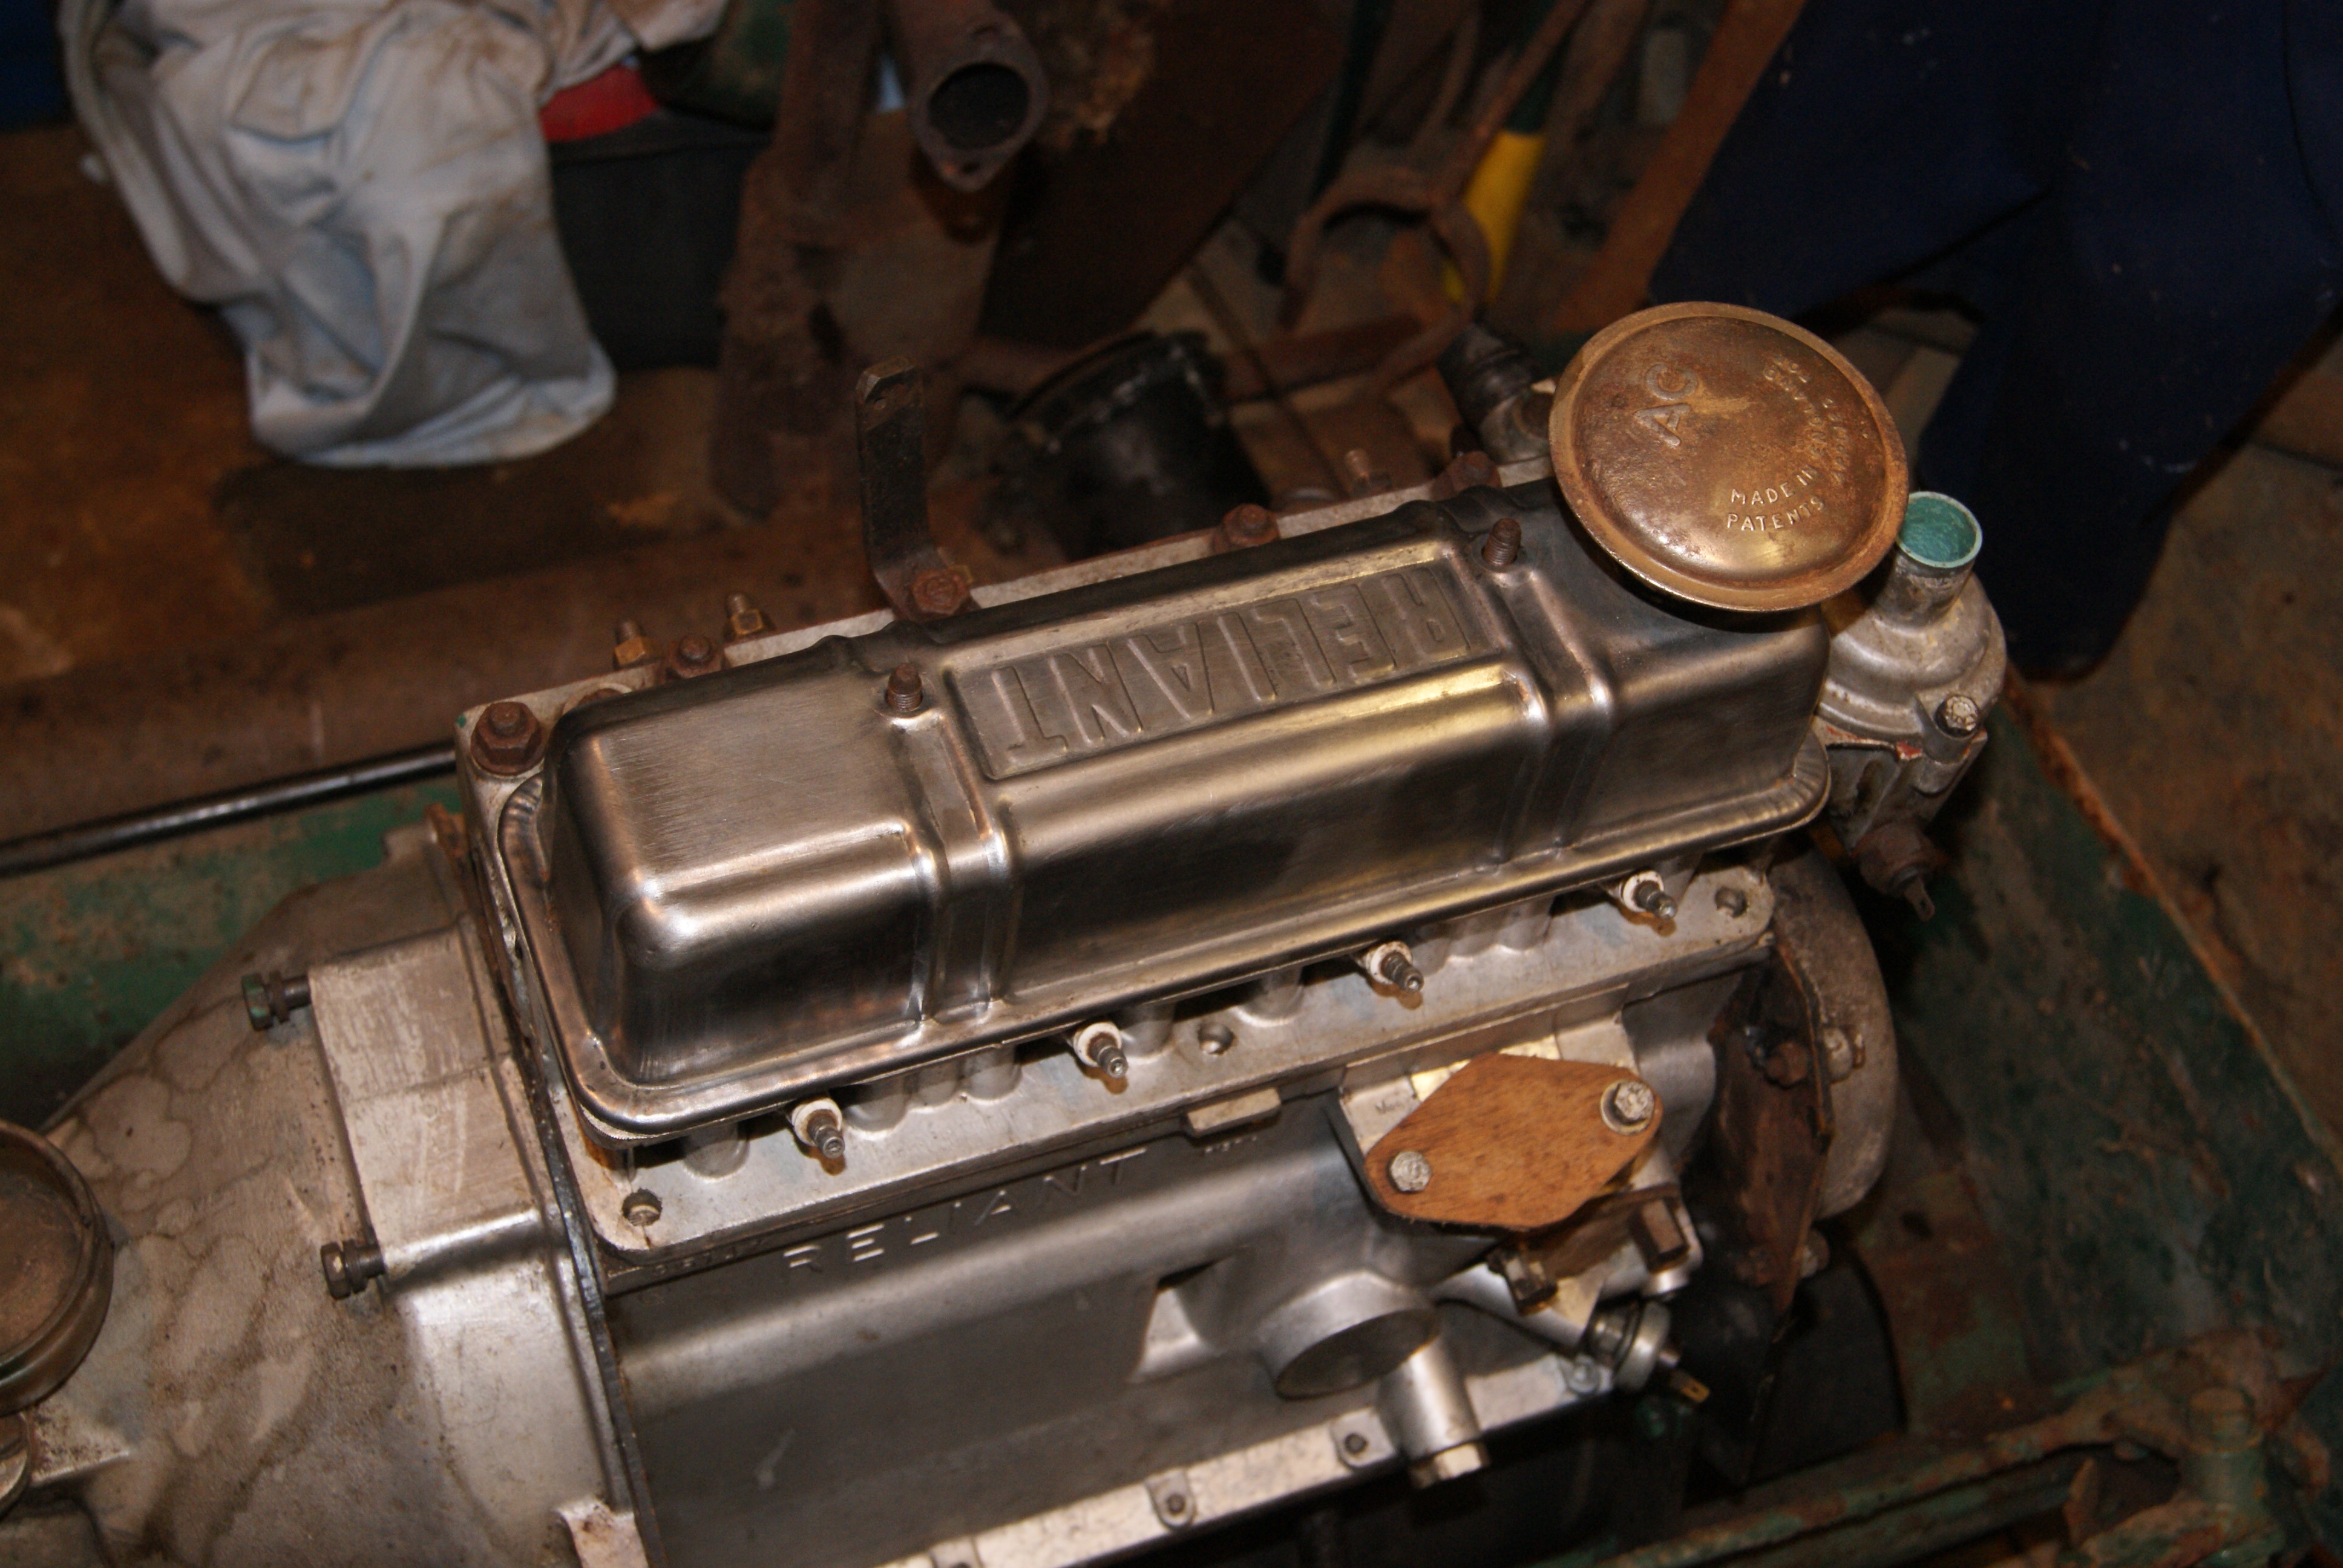
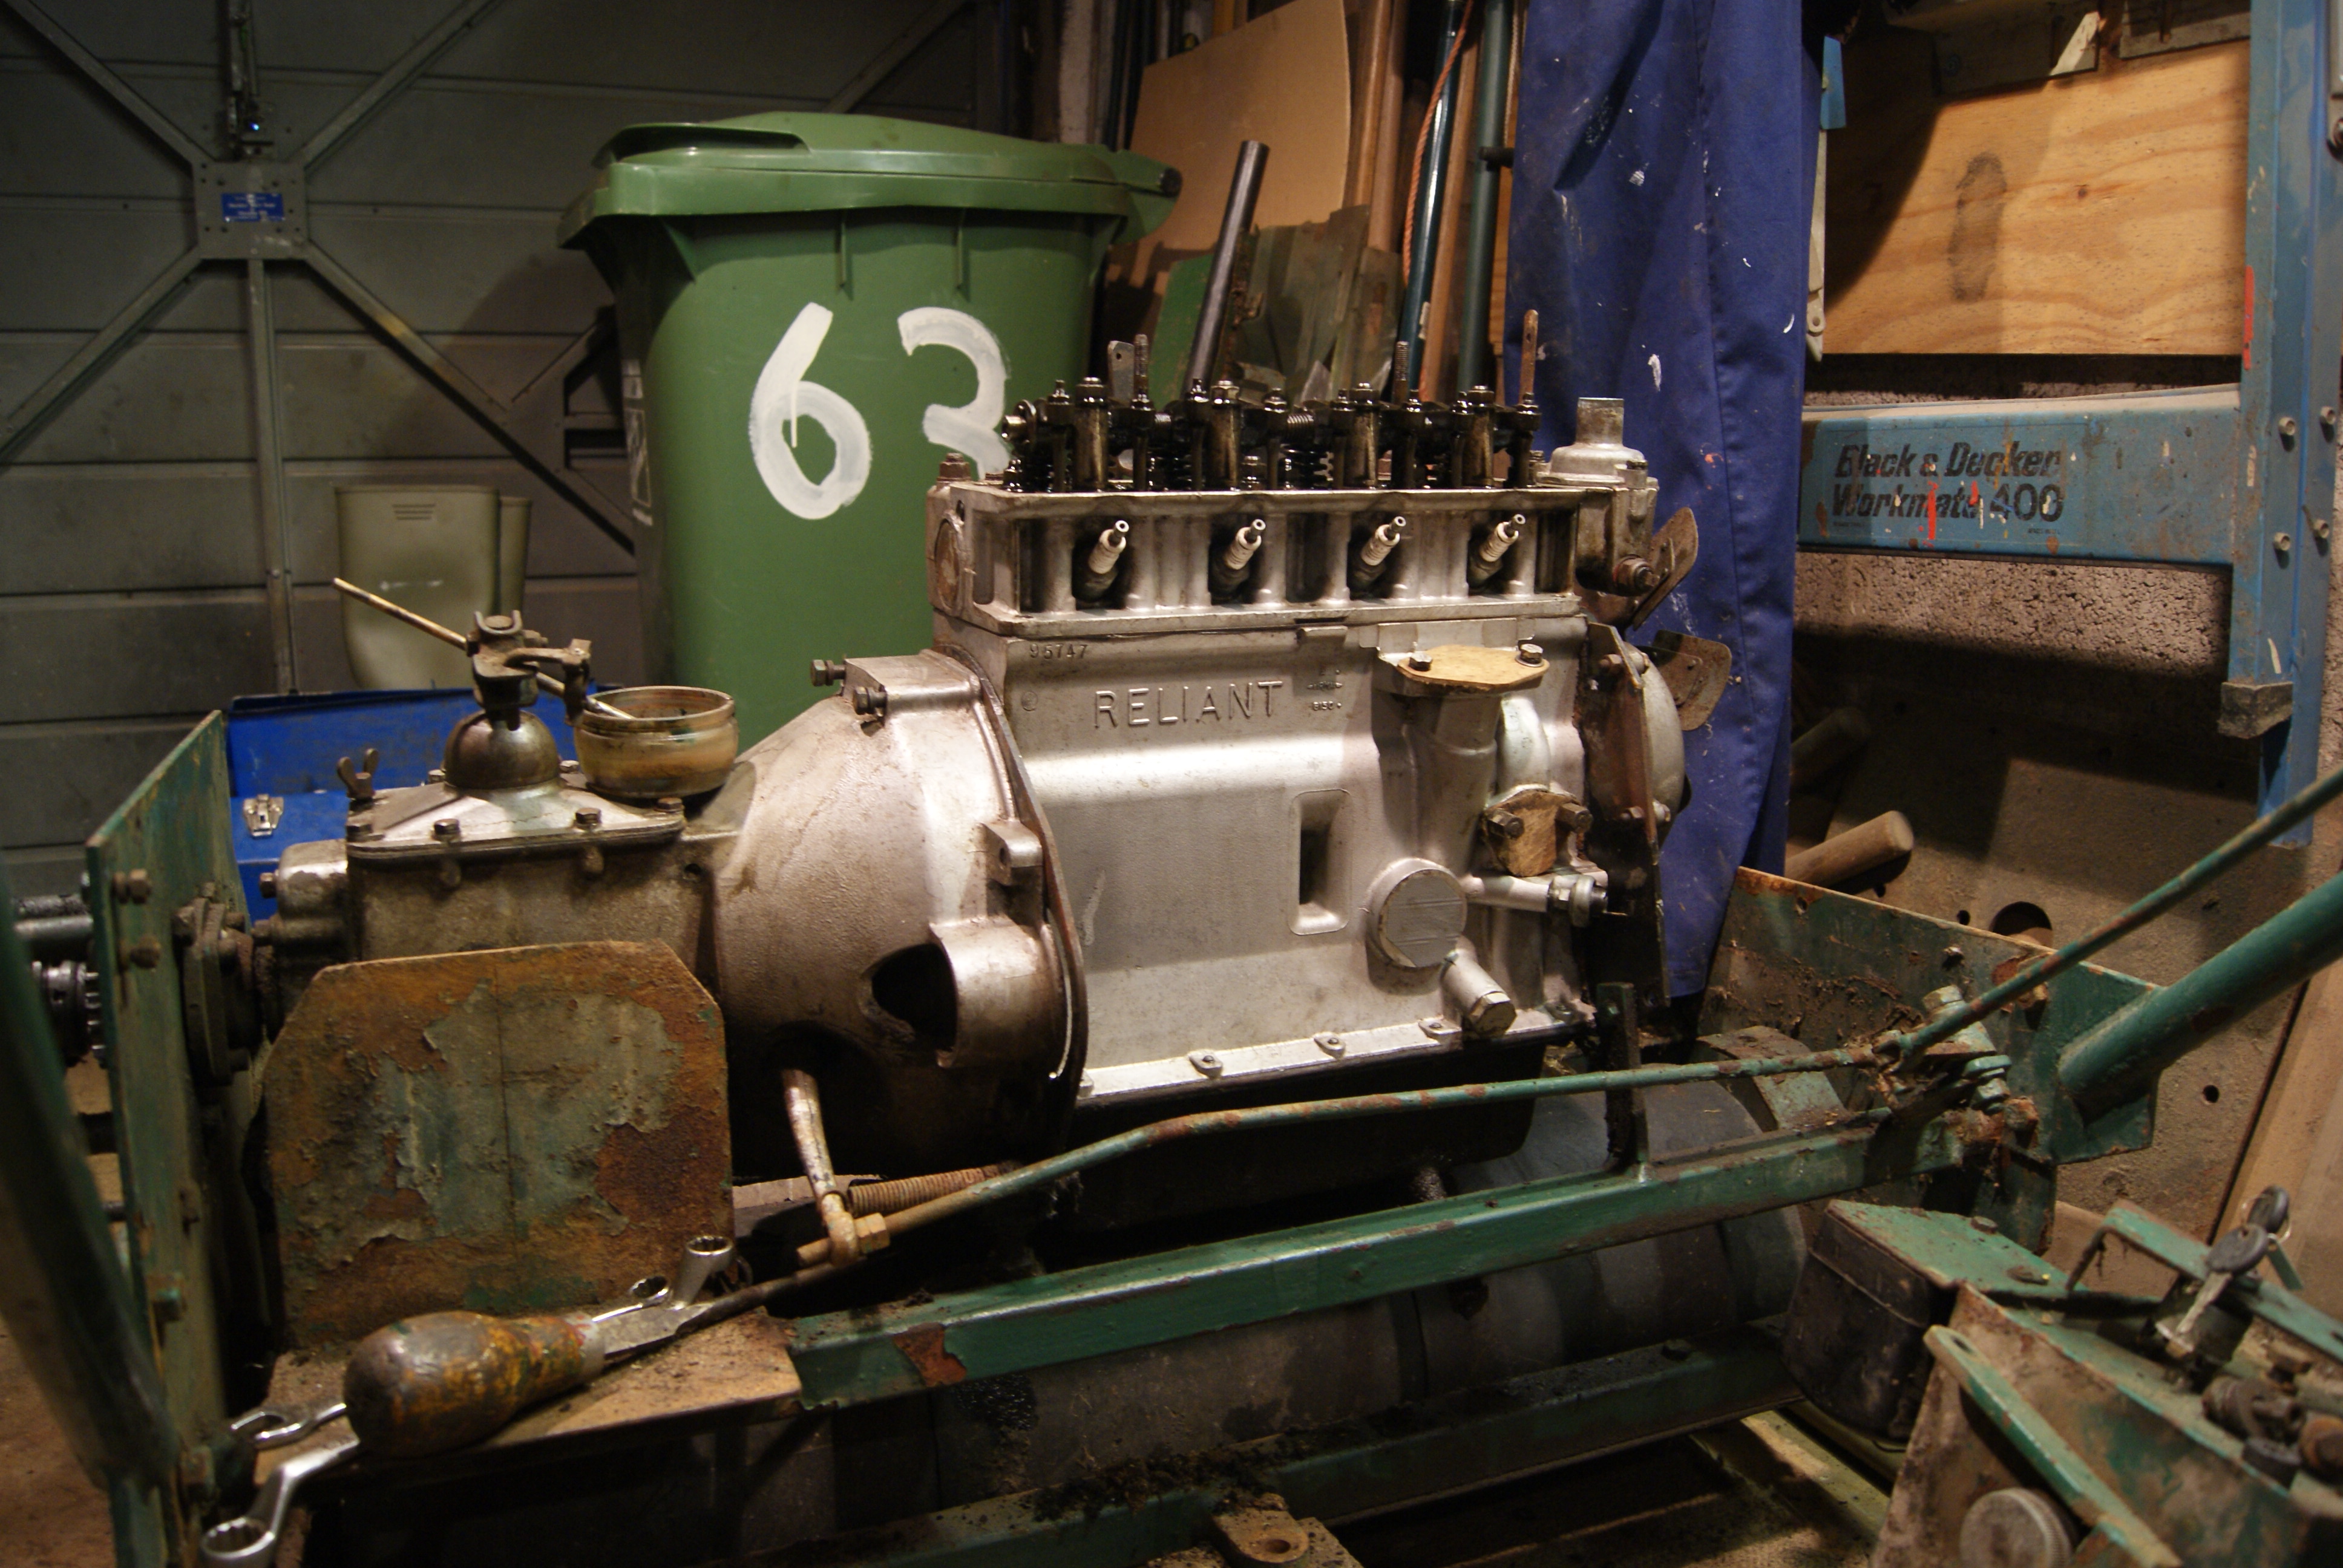
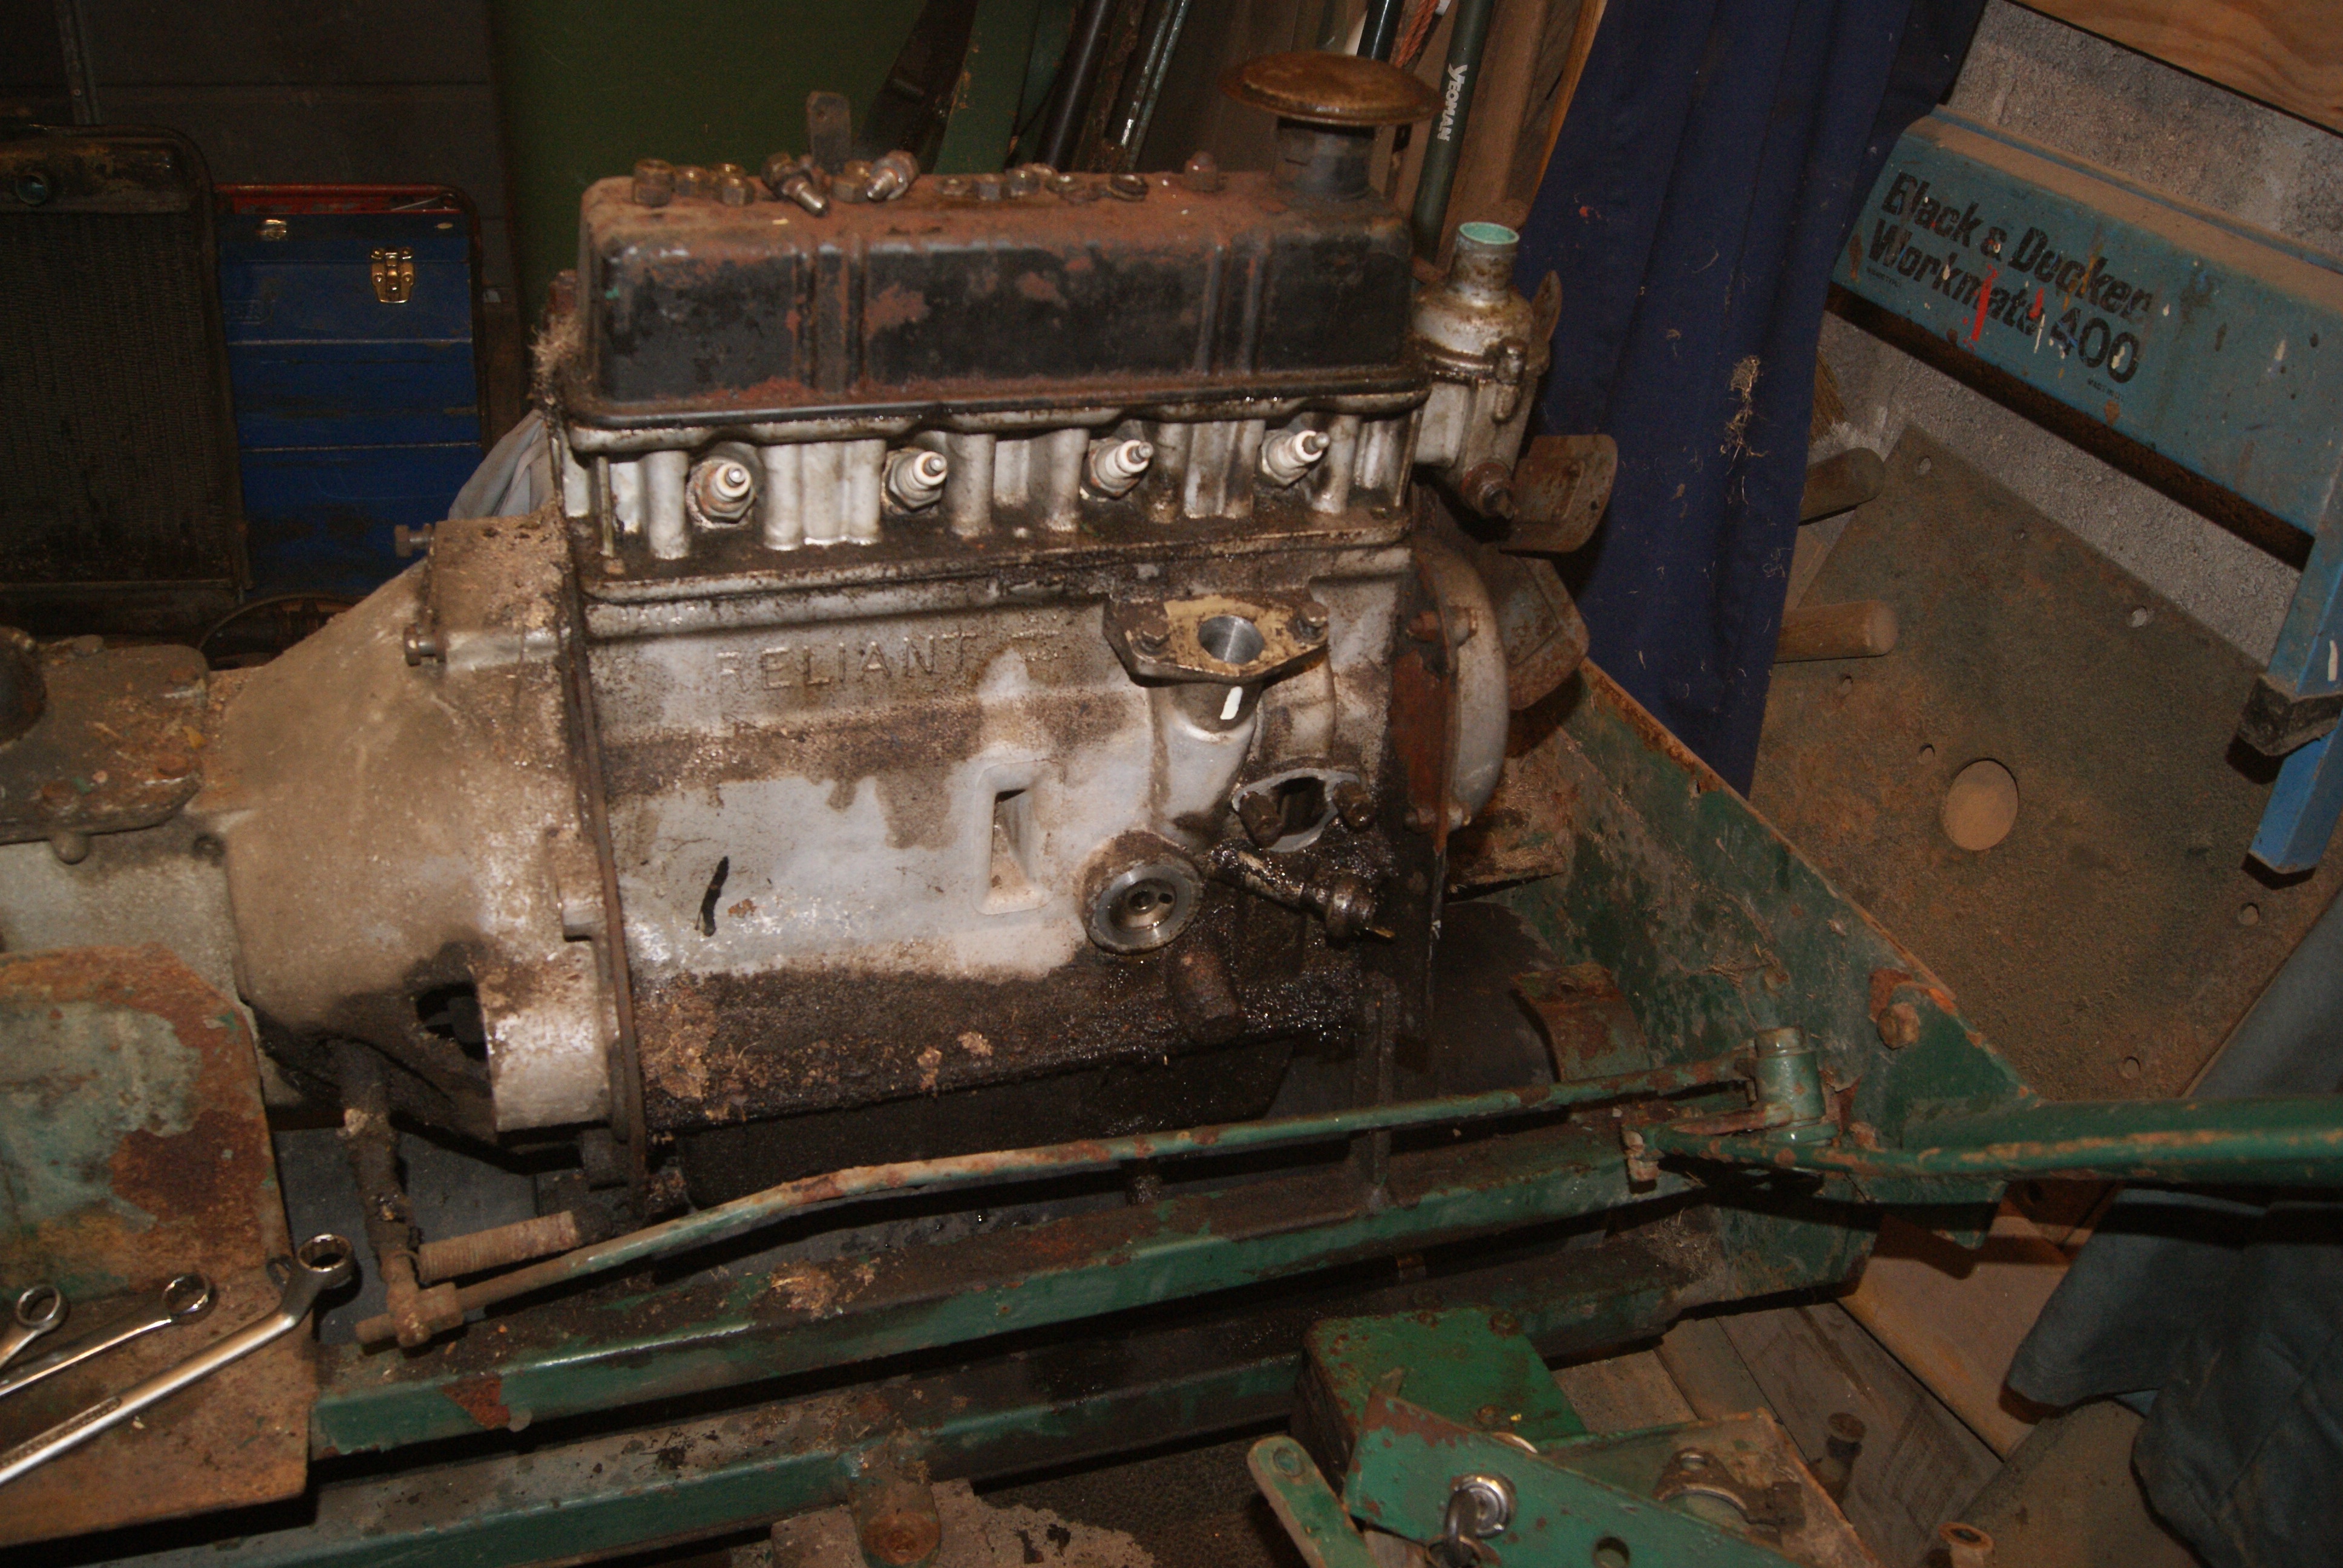
That’s very interesting, Alan. The rocker cover on the Reliant engine looks very similar to the one on the GT6 except it’s only about 2/3rds the length (the GT6 is a six cylinder, 2 litre engine). Maybe it’s the same as a Herald or Spitfire rocker cover- maybe someone will know for sure. Things like fuel pumps and starter motors would have been “off the shelf” items and common to a lot of cars made in the Midlands at the time. The fuel pump is made by AC, the starter and dynamo are both Lucas items and the switches and warning lights are probably common items as well- we’ll see when I get that far.
At the moment I’m doing a lot of the cosmetic work on the radiator surround, mountings and air filter so not a lot to report, plus I’m doing two days at the auctions as a part time job. Funny how work gets in the way of a good hobby, isn’t it?
As soon as there is anything to see I’ll post some more pictures.
May 24, 2022 at 10:18 am #39090trusty220KeymasterIsn’t that the way all things seem to go these days? If there’s money to be made then good sense and sentimentality go right out of the window; look how many of our core British companies have been sold off to overseas investors and competitors.
Work has come to a bit of a halt at the moment as I have to source the right shade of green paint. The starter motor has cleaned up nicely as has the fuel pump, but when I came to re-assemble the pump I found the diaphragm was split in two places which would probably account for the large oil leak below the pump. Funnily enough the pump is the same that was fitted to Triumph Heralds so the new diaphragm is on it’s way from the local Triumph specialist.
Plenty more to do yet, keep going!
May 22, 2022 at 4:56 pm #39071trusty220KeymasterThanks again for the leads on the oil filter. I’ve looked at the one on the auction site and decided to order it. If it doesn’t fit then I’ll have to think of something else but it sounded like the only sensible thing to do.
Progress hasn’t been that fast towards the end of the week as I have a part time job on Thursdays and Fridays; it keeps me in beer and diesel, the two main factors in life! Saturday was mainly spent tracking down more parts and I now have a new air filter, oil pressure switch and a few bits and pieces for the exhaust and the air filter housing.
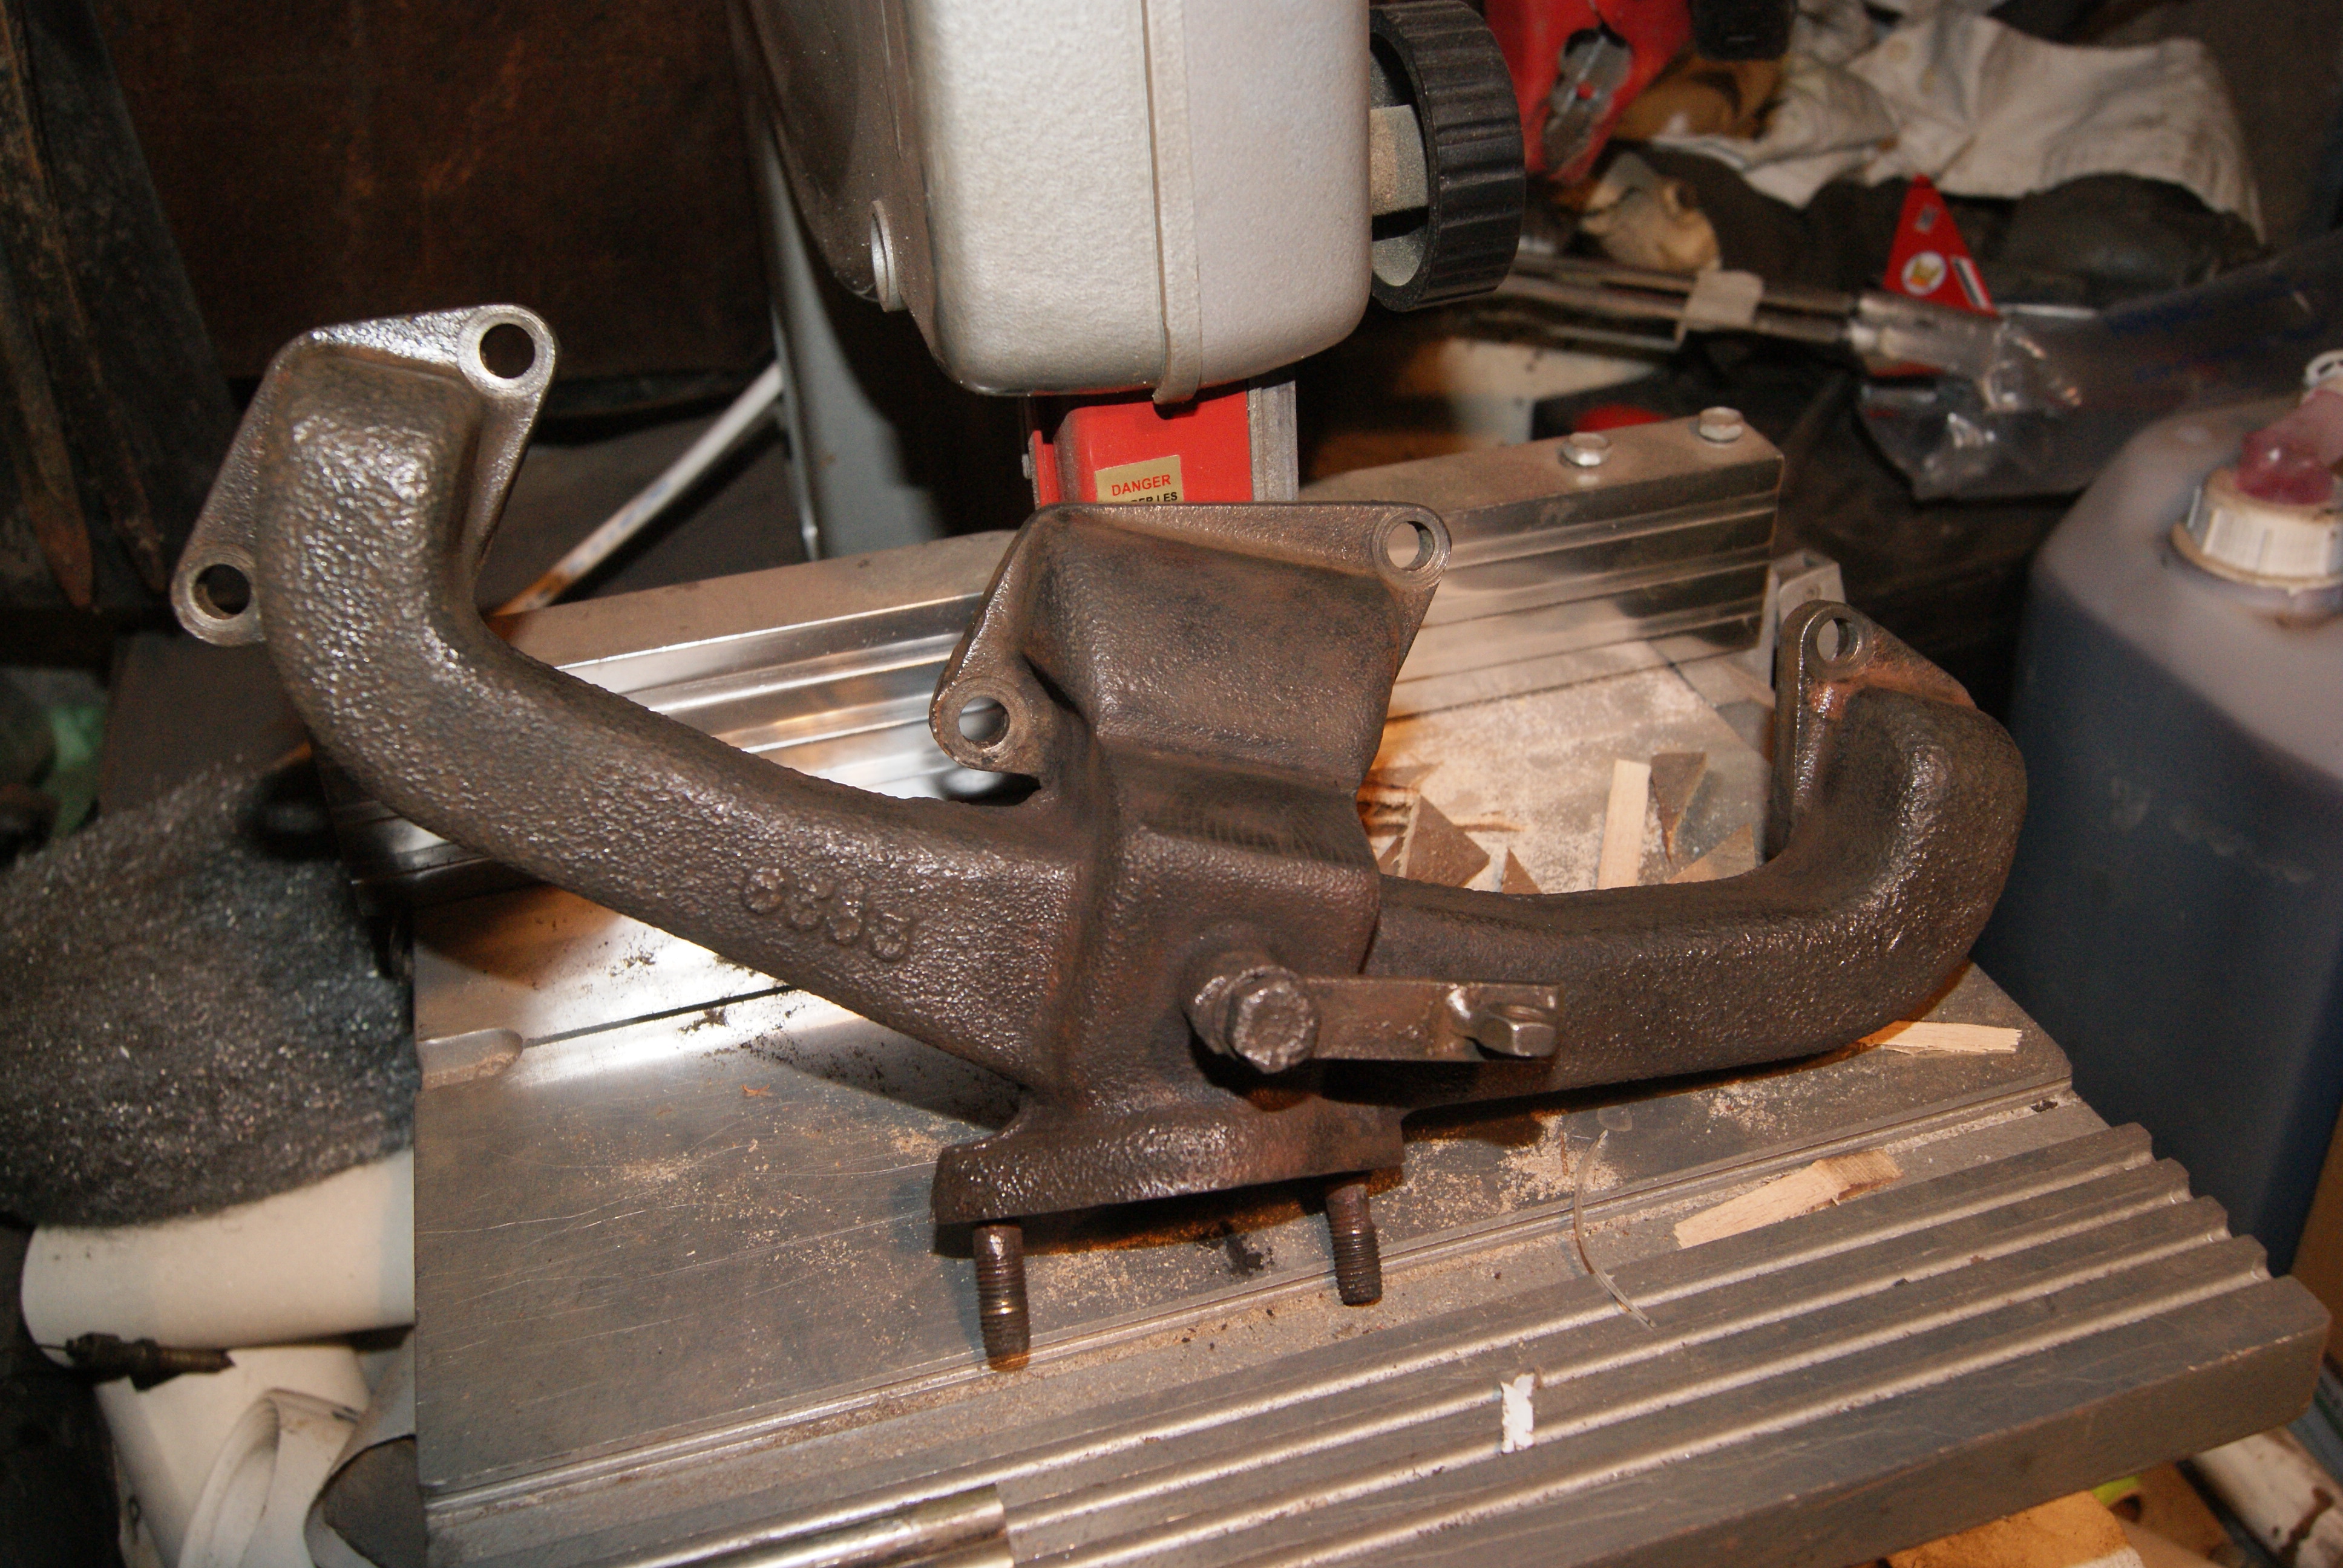
You will see from the pictures that the manifolds are now cleaned and re-fitted; the exhaust manifold came out clean as a whistle from the electrolysis so I treated it to a coat of high temperature paint to stop it rusting again. Both manifolds are attached with brass nuts to prevent corrosion which you may also pick up from the pictures.
The mower had a good clean today with some of Charlie’s degreaser from Screwfix. It is good stuff and at less than £10 for 5 litres it is good value but you do need to leave it to soak in, then rub it gently with a brush whilst washing it with water. I dowsed the whole mower with it and washed it off with a hosepipe, brushing it with a 2″ paintbrush and it really did get it clean. The only trouble is the dirt was hiding an awful lot of rust and paint loss so the machine looks a lot worse now for being clean.
The air filter housing needed to be cleaned gently so I’ve left it to soak for 24hrs in brick cleaning acid. It will have a further 24 hrs in a solution of bicarbonate of soda to neutralise the acid, then a thorough wire brushing should get rid of all the paint and surface rust.
I normally like to finish the day on a good note, but today is going to be the exception! Waiting for the paint to dry on the radiator fan, I thought I’d have a look at the dynamo.
It doesn’t look like it’s been working for a long time and due to it’s position low down at the front of the engine it was packed solid with grass cuttings, glued together with what can only be described as oily gunge. The wires from the brushes were both broken, but the brushes looked like they were in good shape- probably because they’d stuck in the holders and hadn’t worn out by rubbing on the commutator. I think I’m going to let the local expert have a go at it as it’s a fiddly job and once it’s fitted I don’t want to have to take it out again.Still, tomorrow’s another day and the radiator should be ready for collection. I’m going to have to source some paint before fitting it as the mounting plate is completely rusty with no remains of paint on whatsoever. Looks like another day on the road again!
Attachments:
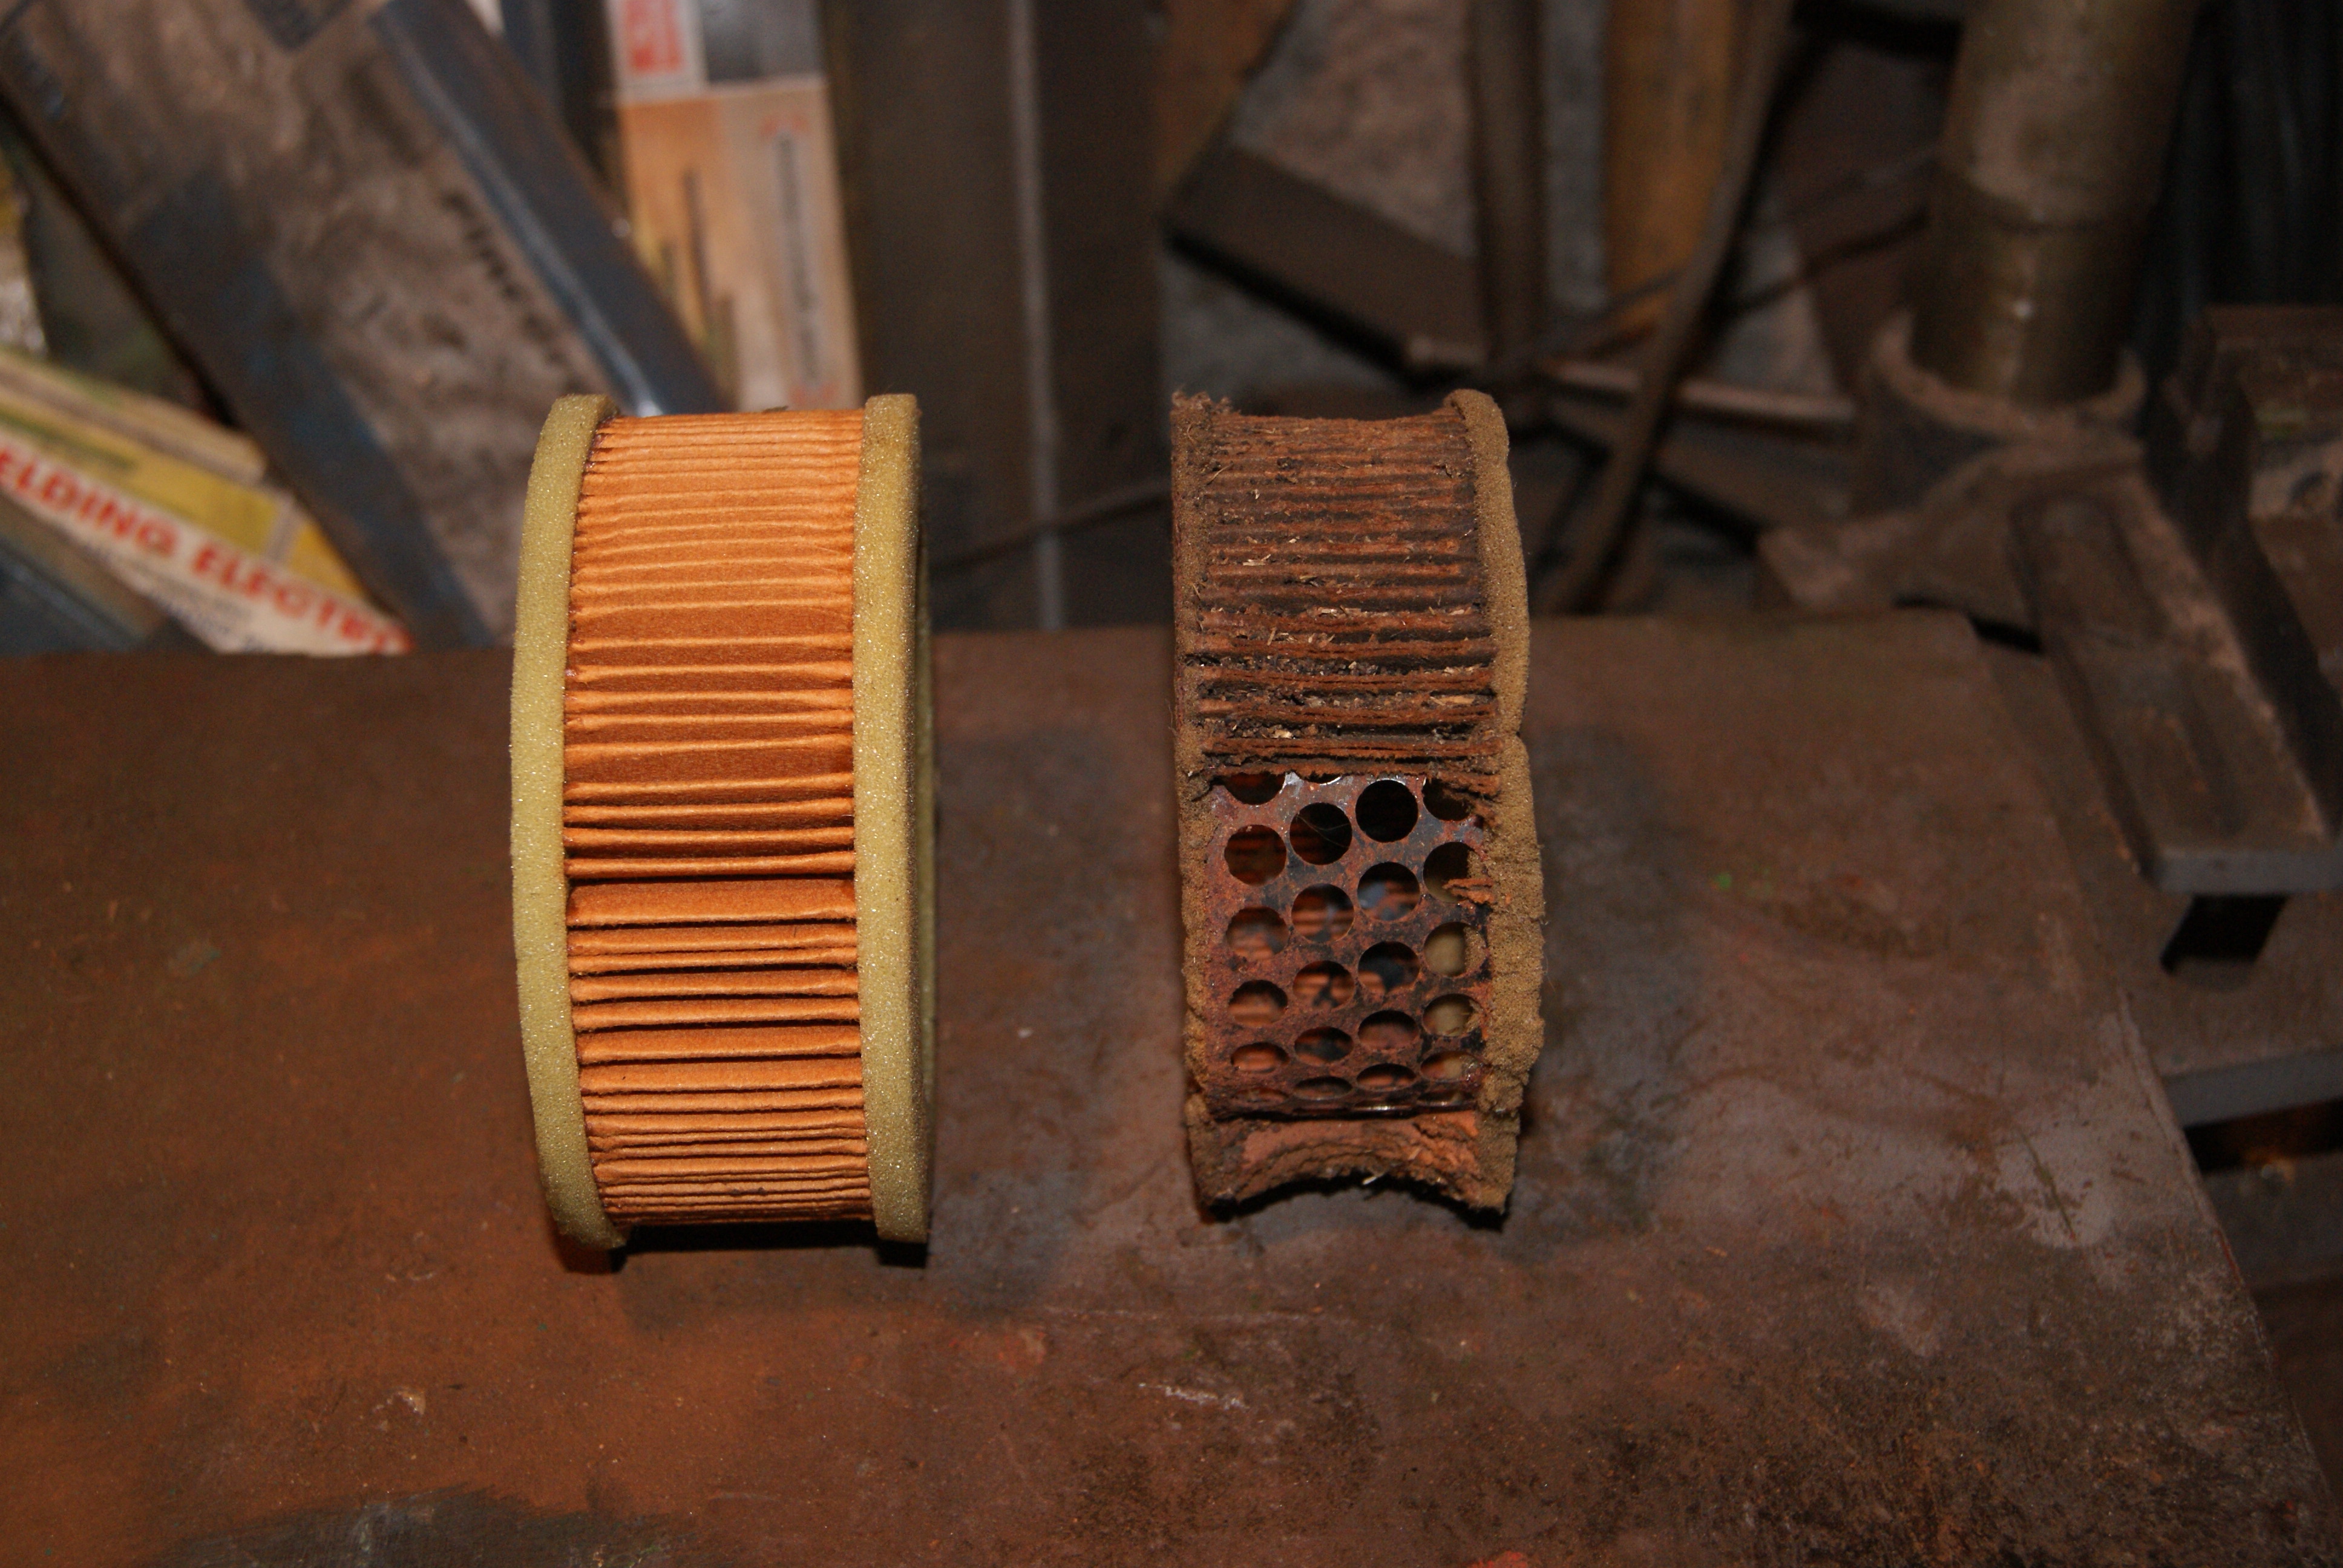
May 20, 2022 at 6:01 pm #39064trusty220KeymasterThanks for the tip, Andy. The fitting does look the same and the description fits the build year as well- they are for a Reliant 600cc built between 1964-68. The only trouble is that it looks too long on the photo so I’ll have to send them an email to ask for dimensions. It seems a little pedantic but the cover fits very close to the end of the filter so that if it’s too long the cover won’t fit. And no, I don’t want to cut a hole in the cover, I think Allett Mowers may get a bit annoyed!
I had thought of making a male/male adapter Angus; I could possibly use a Kubota oil filter on it to get the short length. I may still have to do that but my lathes and miller are still packed away in the mother-in-law’s garage, so I may have to borrow a mate’s workshop to do it.
As I say, nothing is impossible, it just takes a little longer! Thanks for your help both of you, I now have a definite course to steer.
-
This reply was modified 4 years, 2 months ago by
 trusty220.
May 20, 2022 at 7:41 am #39061trusty220KeymasterHi, Andy, I’ve looked but can’t find them- if you’ve found some on there could you send me a PM with a link or some other way to find them? That would really get me out of a hole.
I think I’ve found an air filter but everyone I ask so far has told me to re-use the old engine oil filter as they are no longer available. Help!!
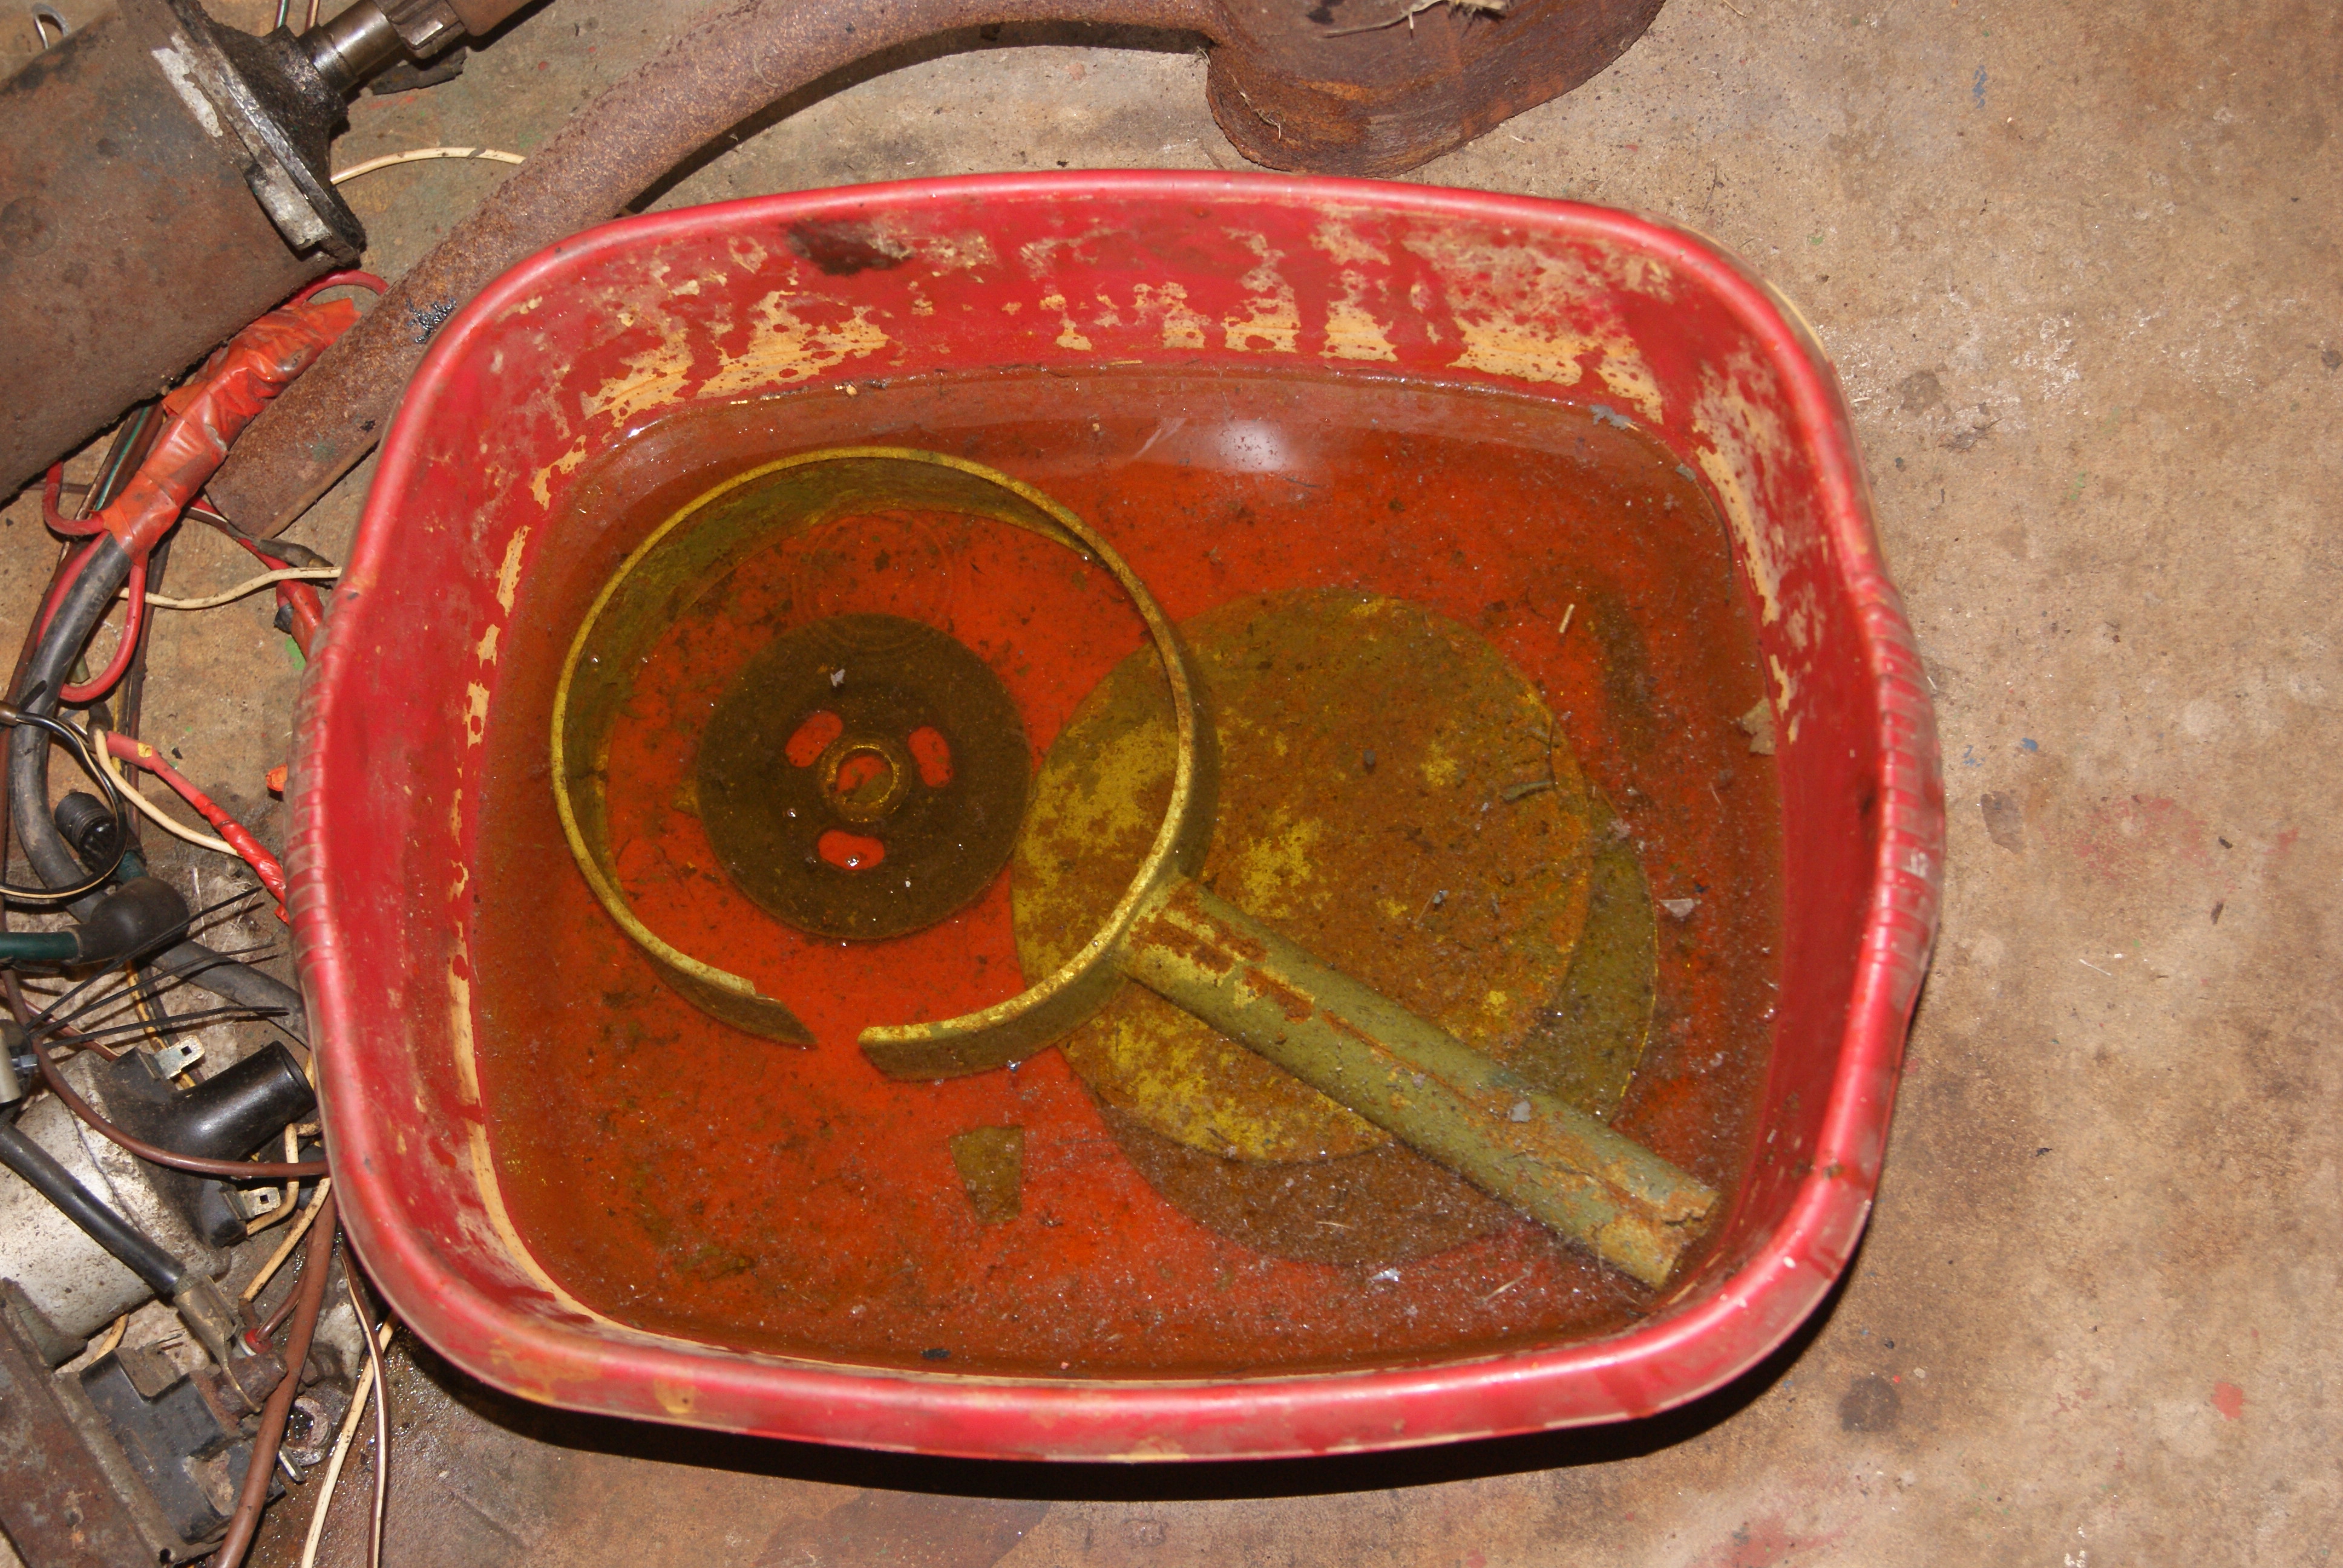
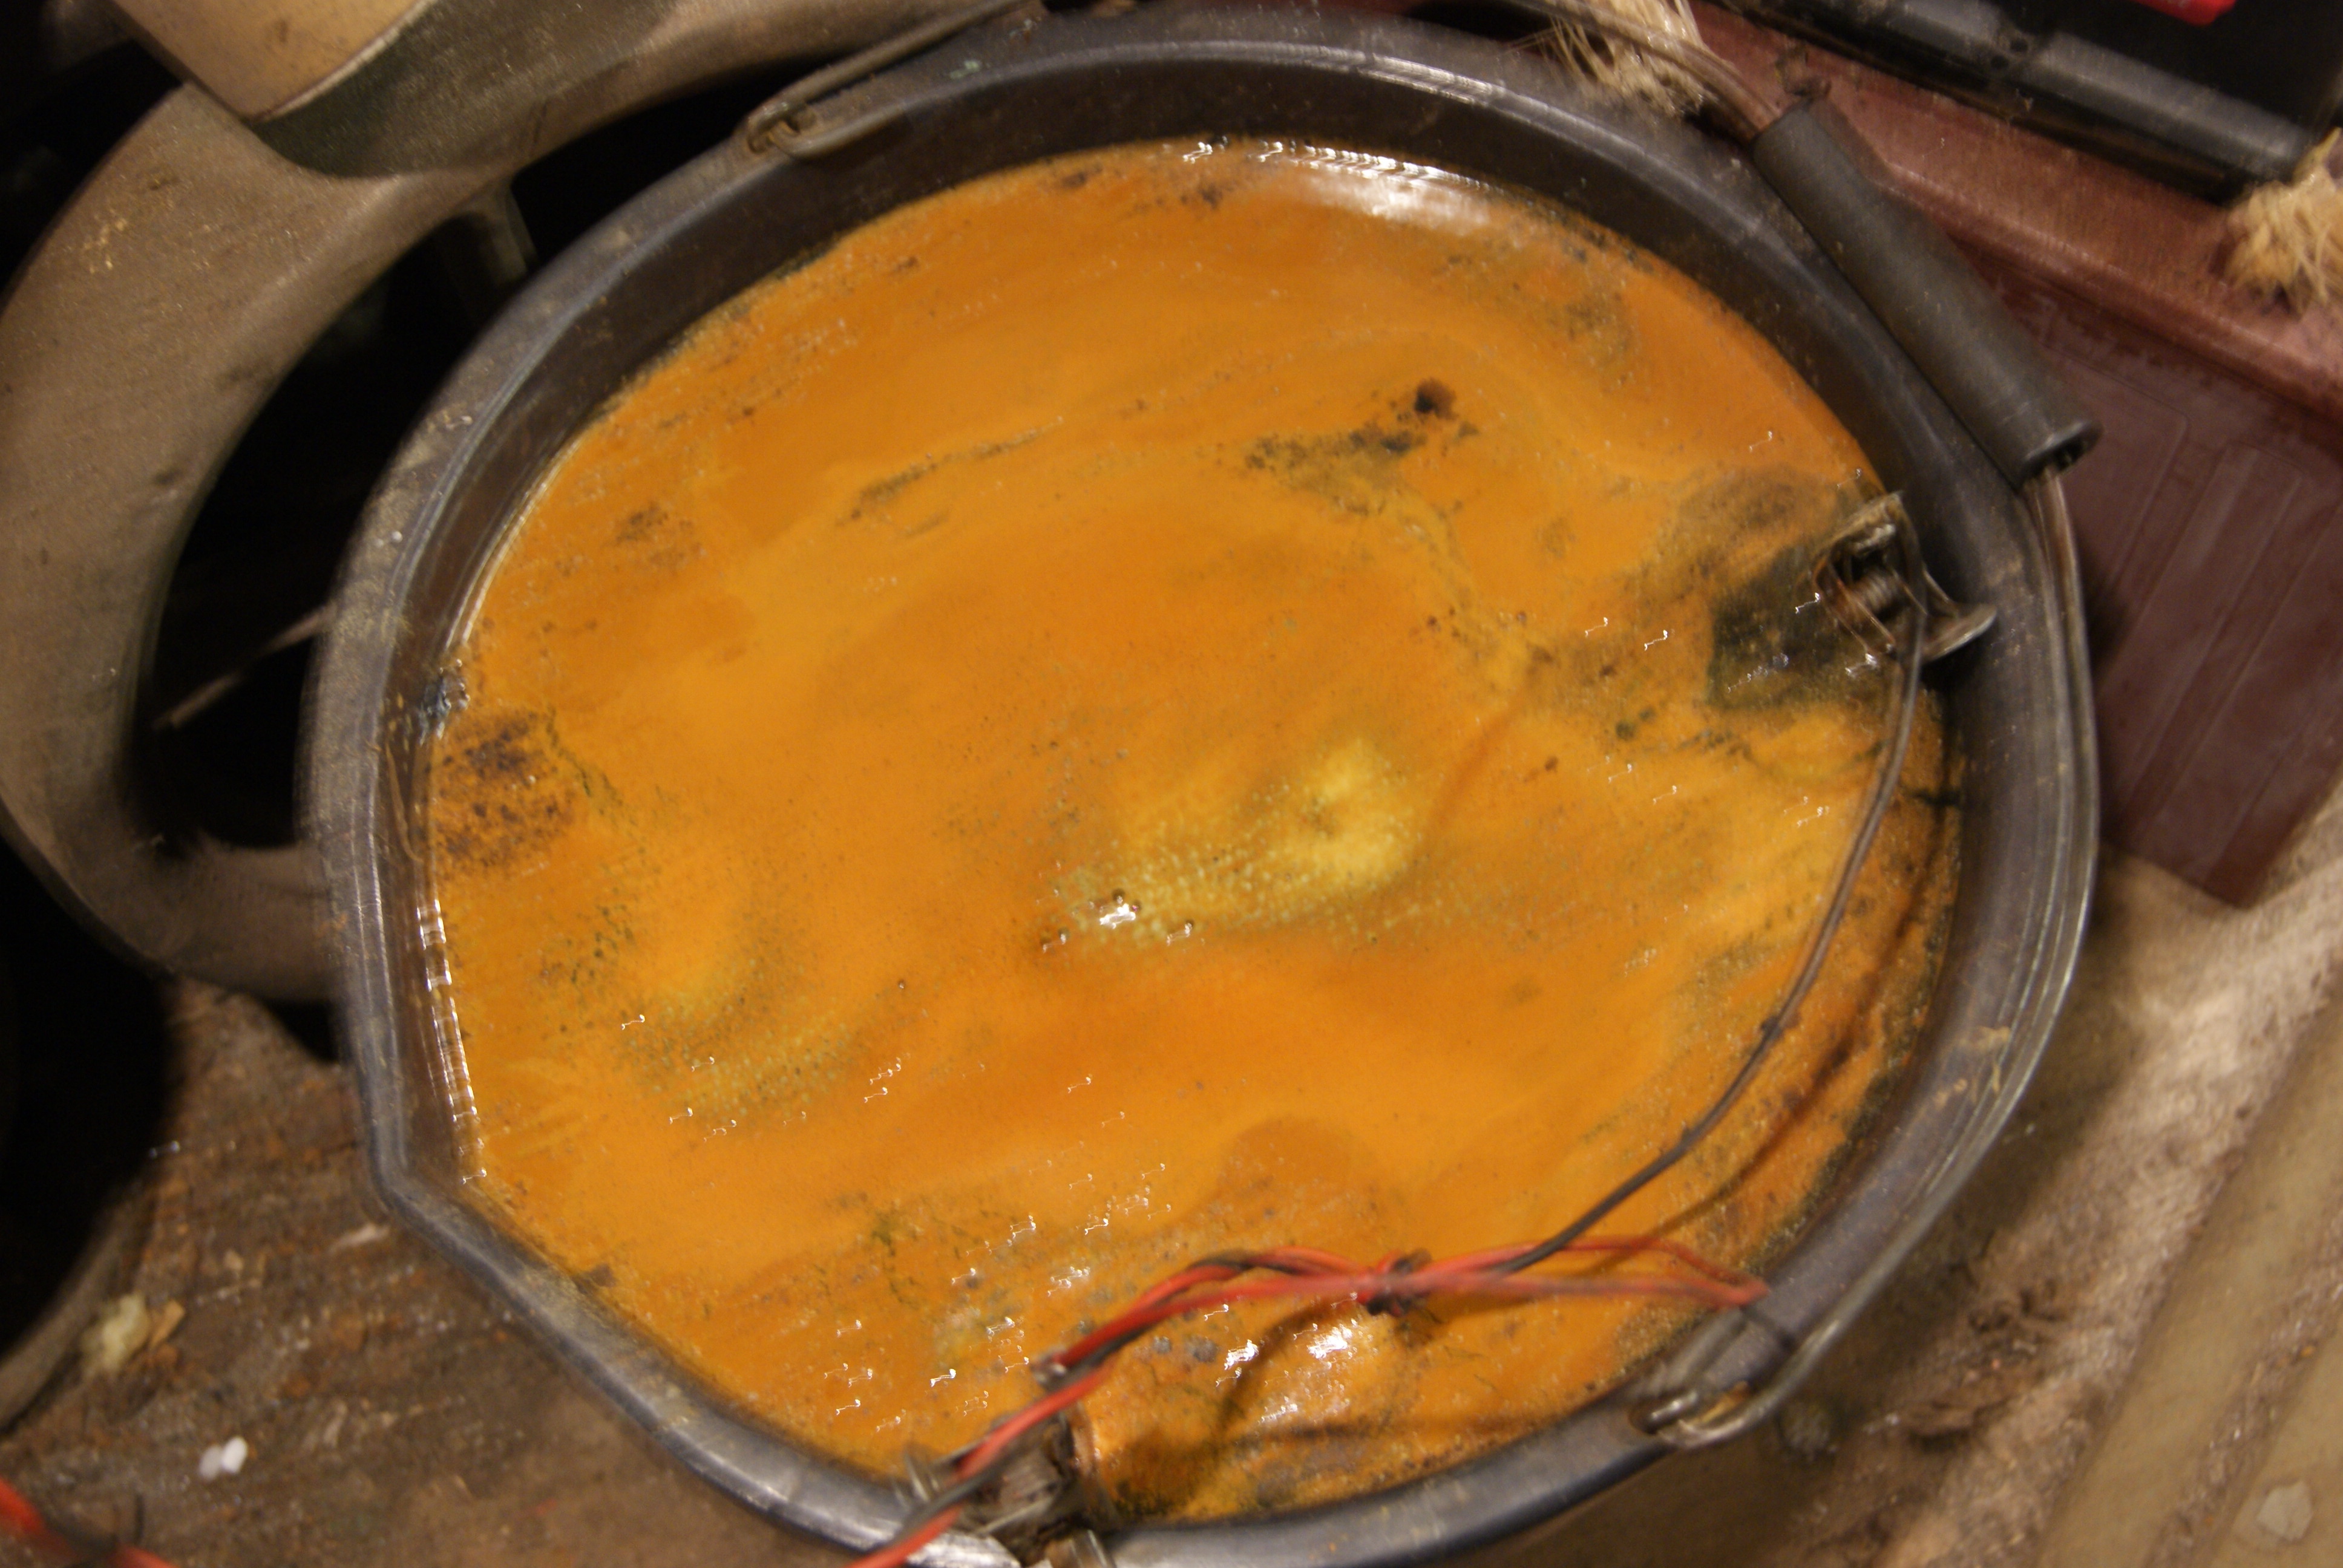
May 18, 2022 at 4:36 pm #39053trusty220KeymasterIf you had any doubts about the efficiency of electrolysis for de-rusting delicate items, here’s the proof. The photo below was taken this morning, barely sixteen hours since I started the process, and you can see a thick layer of rust on top of the liquid in the bucket. It has removed all of the rust and all that’s required now is a wire brush and a coat of heat resistant paint.
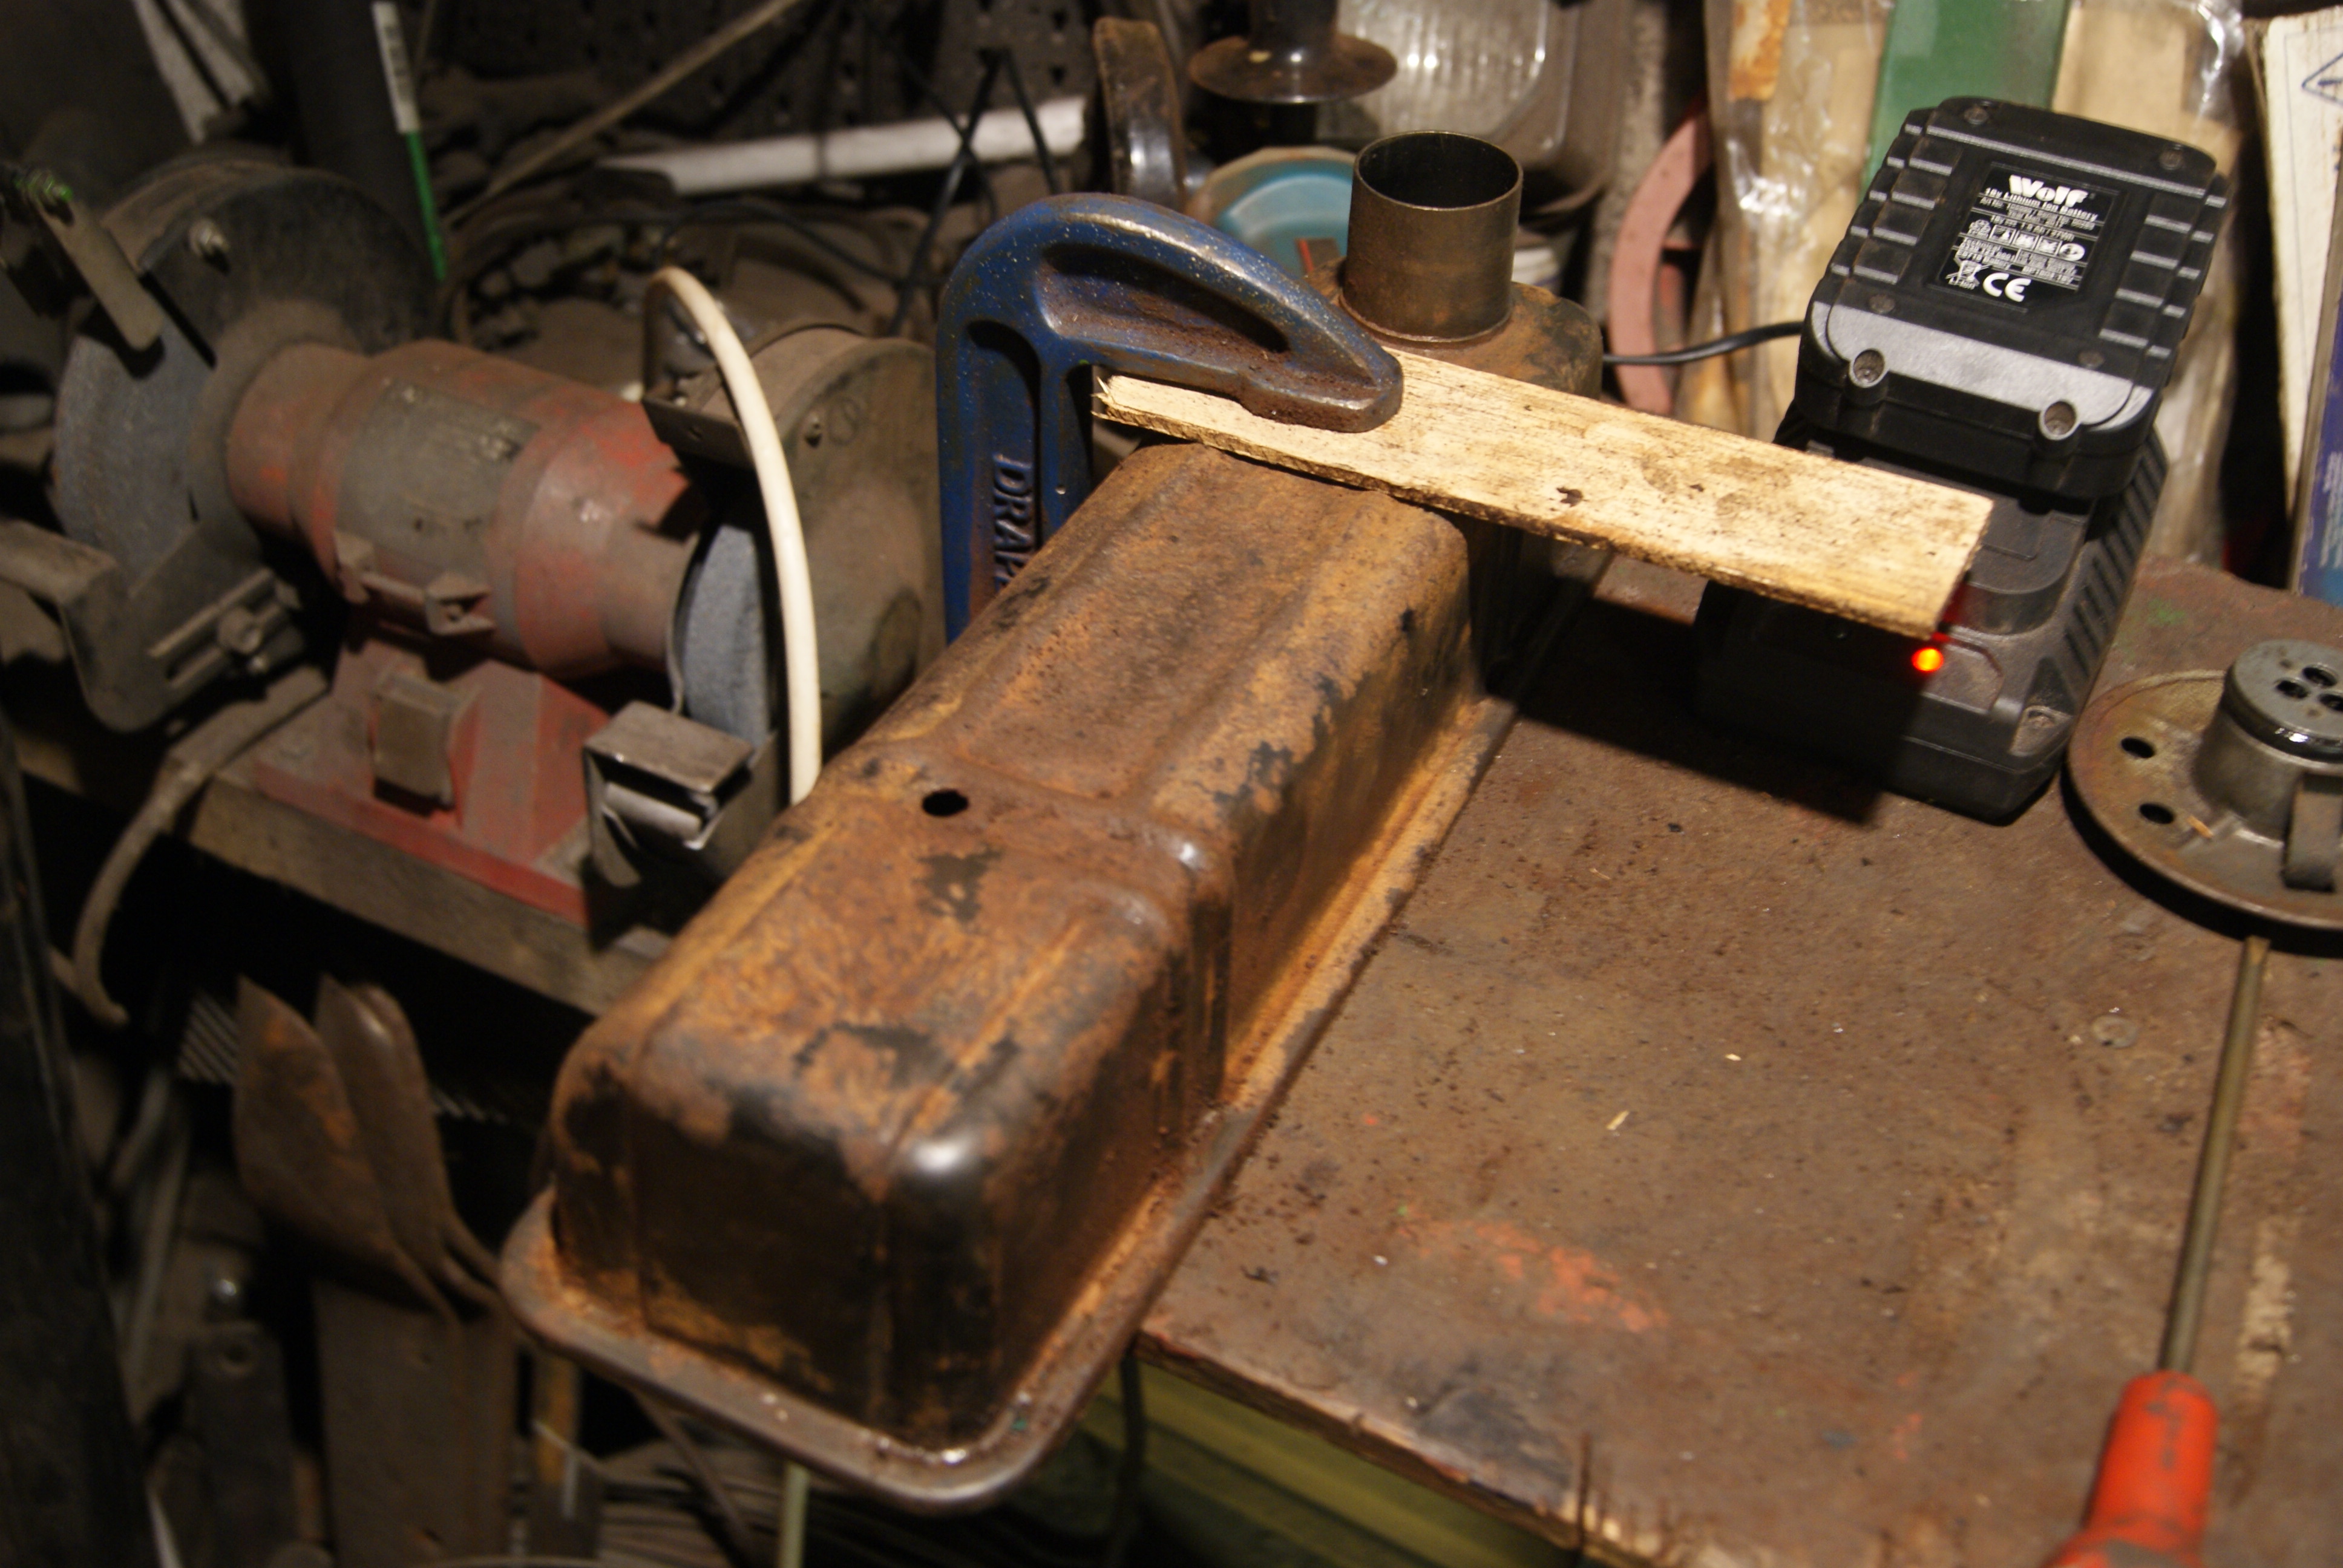
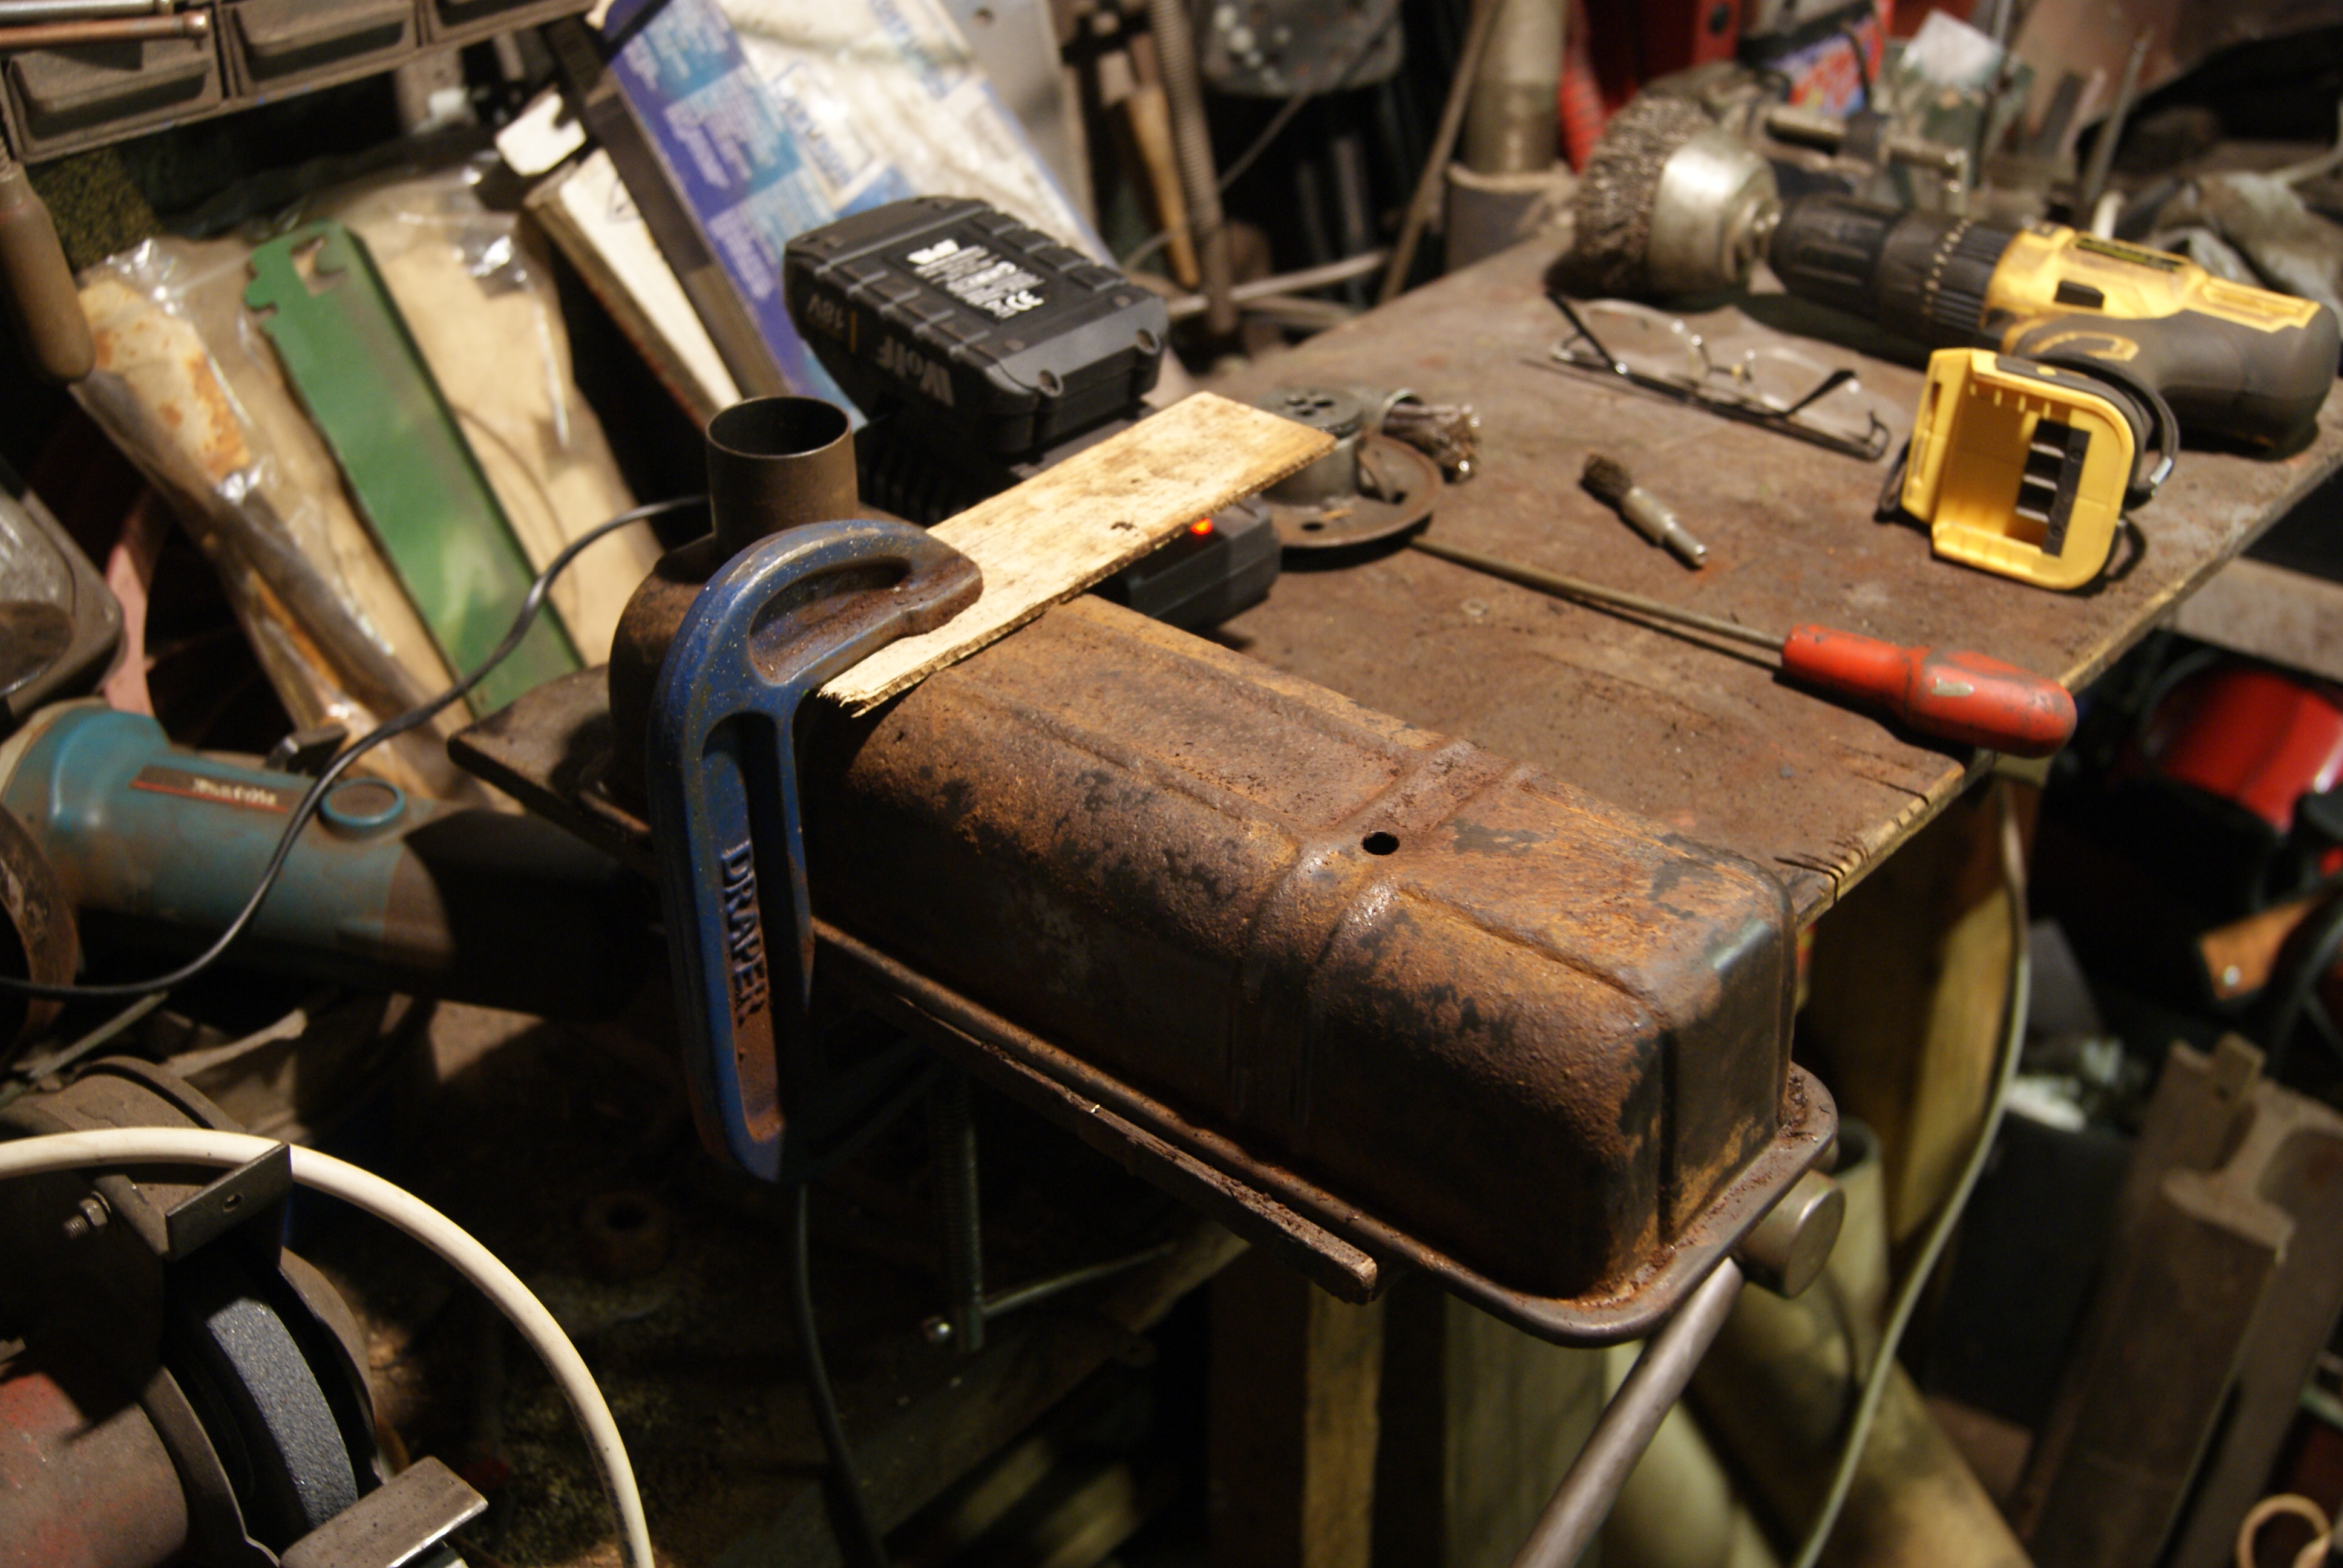
The rocker cover is another story, however, and it has taken me simply ages to get it to a reasonable standard. Not forgetting that it will be the first thing people see when they open up the cover it needs to be in good order, and so it has had a thorough clean inside and out to remove all traces of rust. Now it’s nice and shiny I don’t have the heart to paint it black, but painted it must be!
Other problems encountered today are the non-availability of engine oil filters and air filters; later versions of both are available, but the early type bypass oil filter with a male thread sticking out seems to have been superseded back in the sixties with a similar filter incorporating a female thread. Likewise, a similar tale concerning the air filter- later ones are three inches thick, earlier ones are one and a half inches thick- so the search goes on. Hopefully I’ll get there in the end, but then that’s what we all enjoy about the hobby, the tracking down of those elusive parts!
Attachments:
May 17, 2022 at 4:36 pm #39042trusty220KeymasterThanks for that, Charlie, I’ll give it a go if it stops raining. It needs to be a gentle action so that the paint survives intact, so a garden hose will probably be the answer.
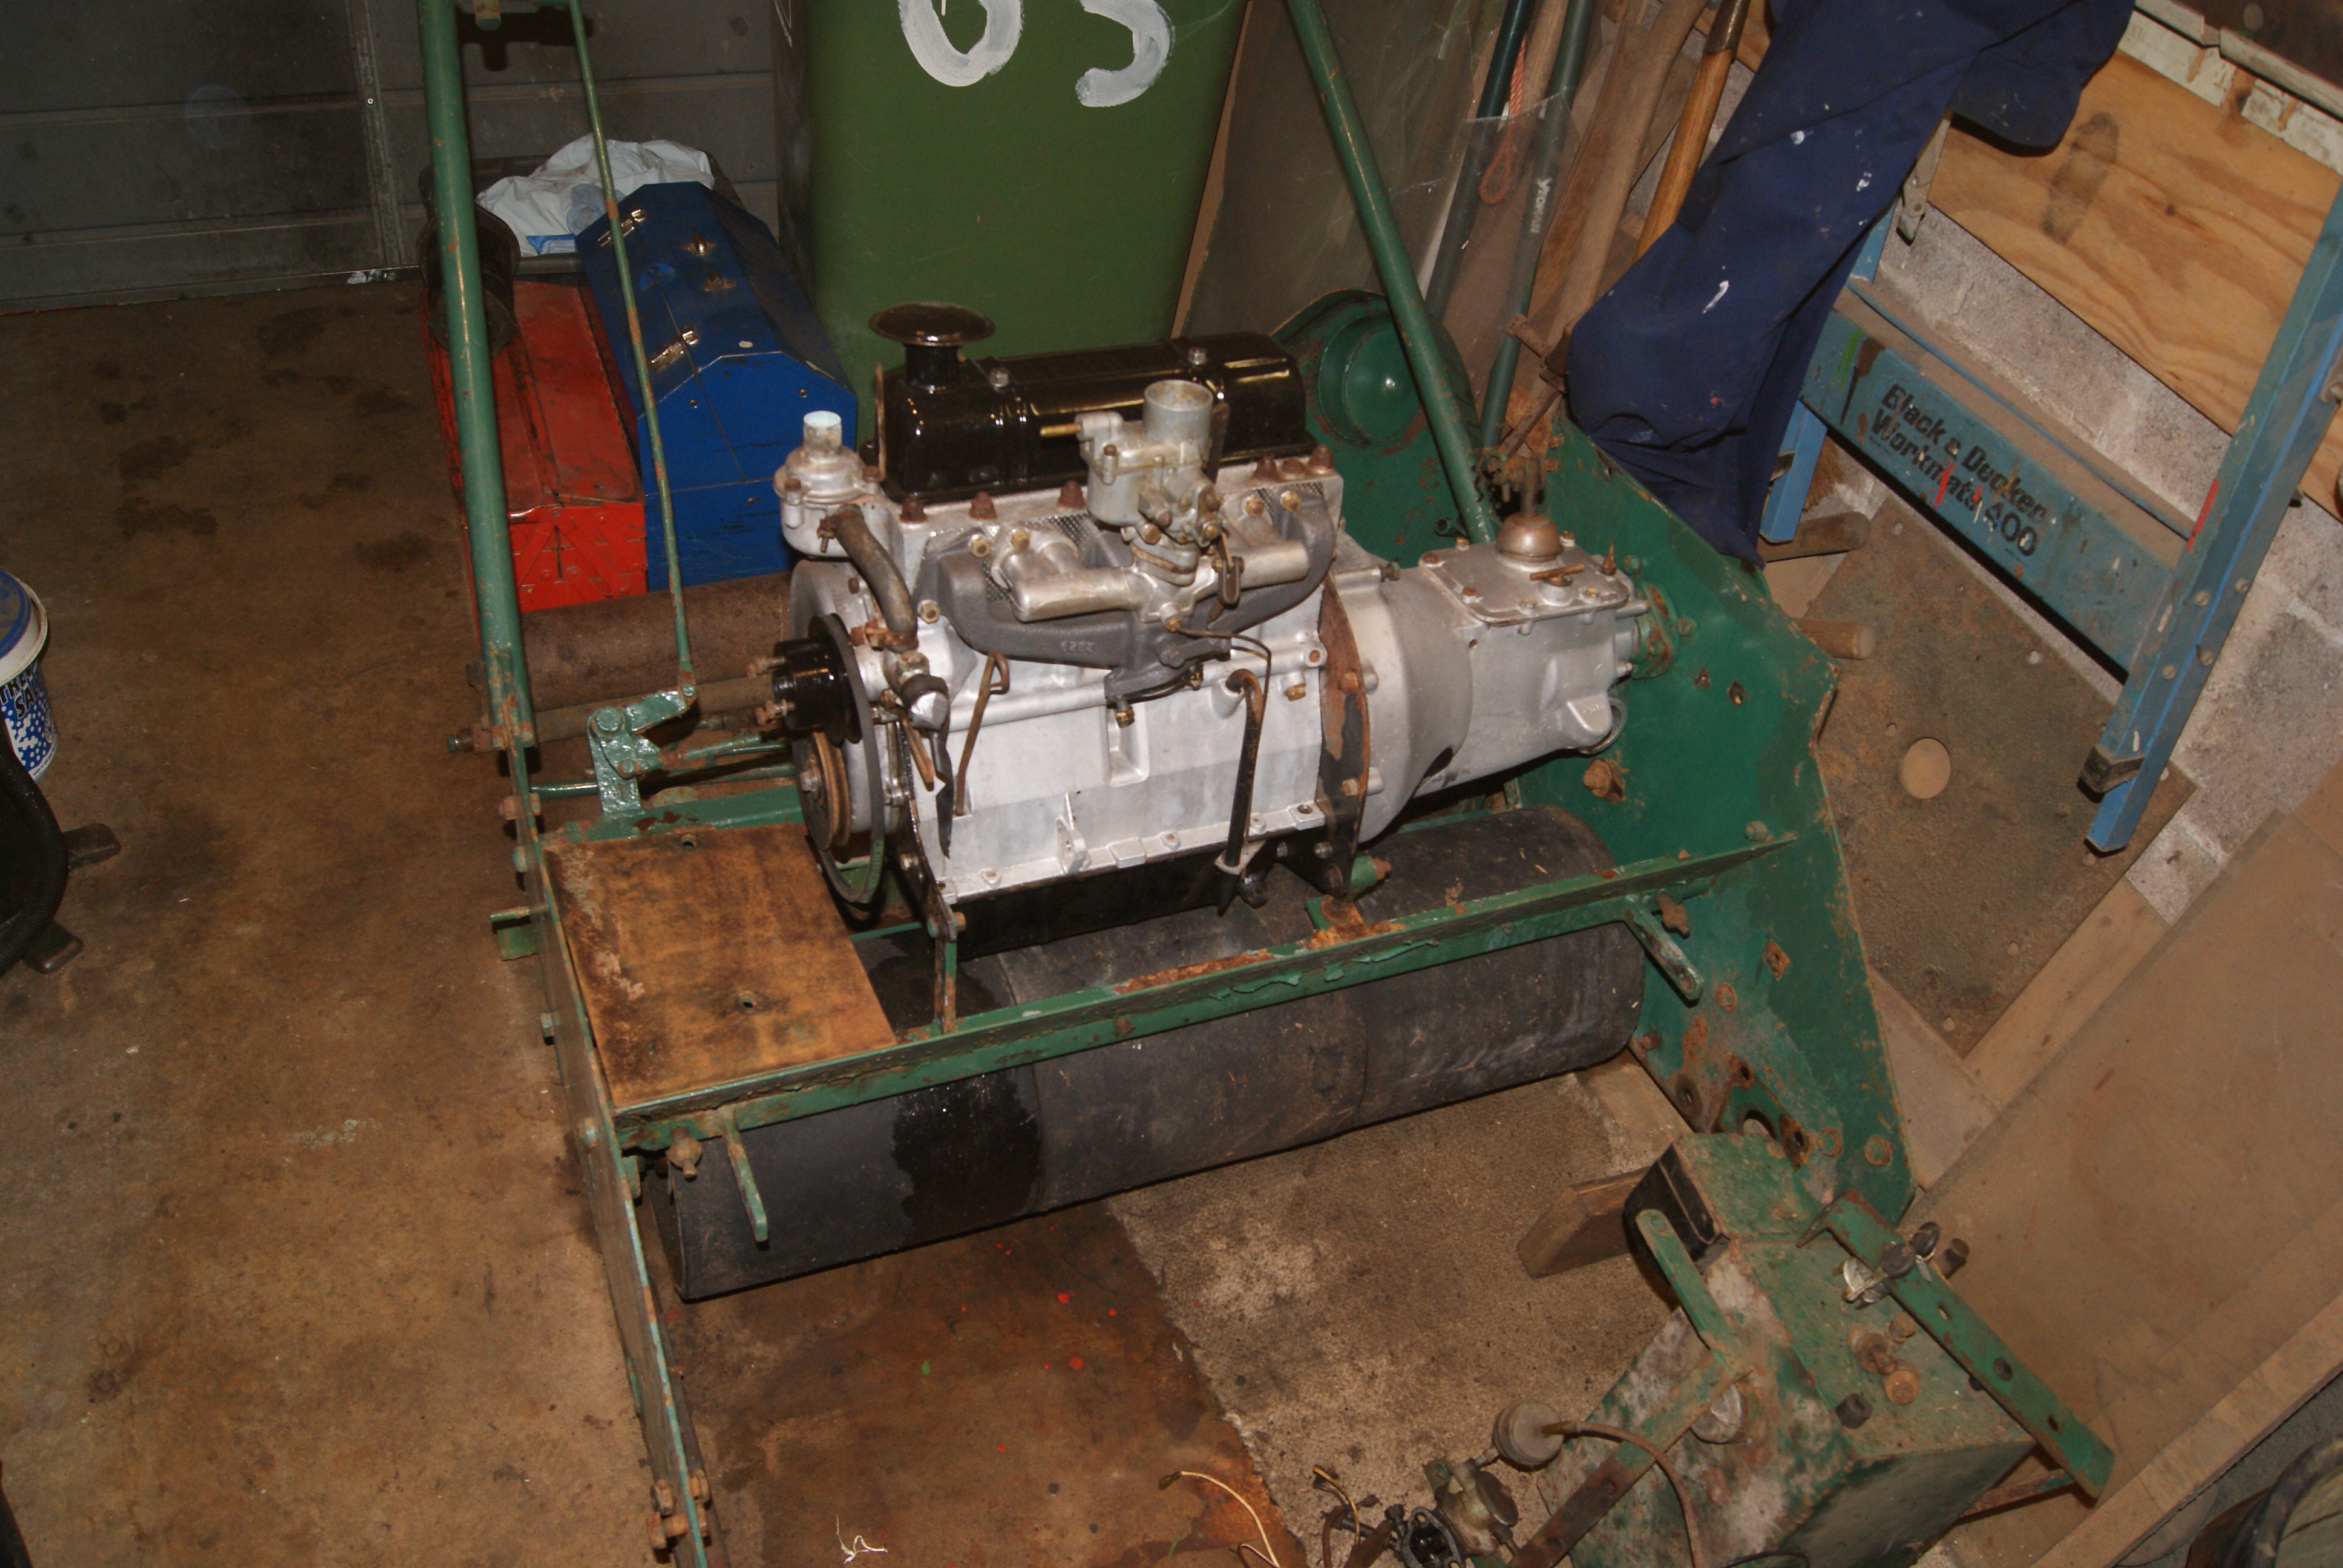
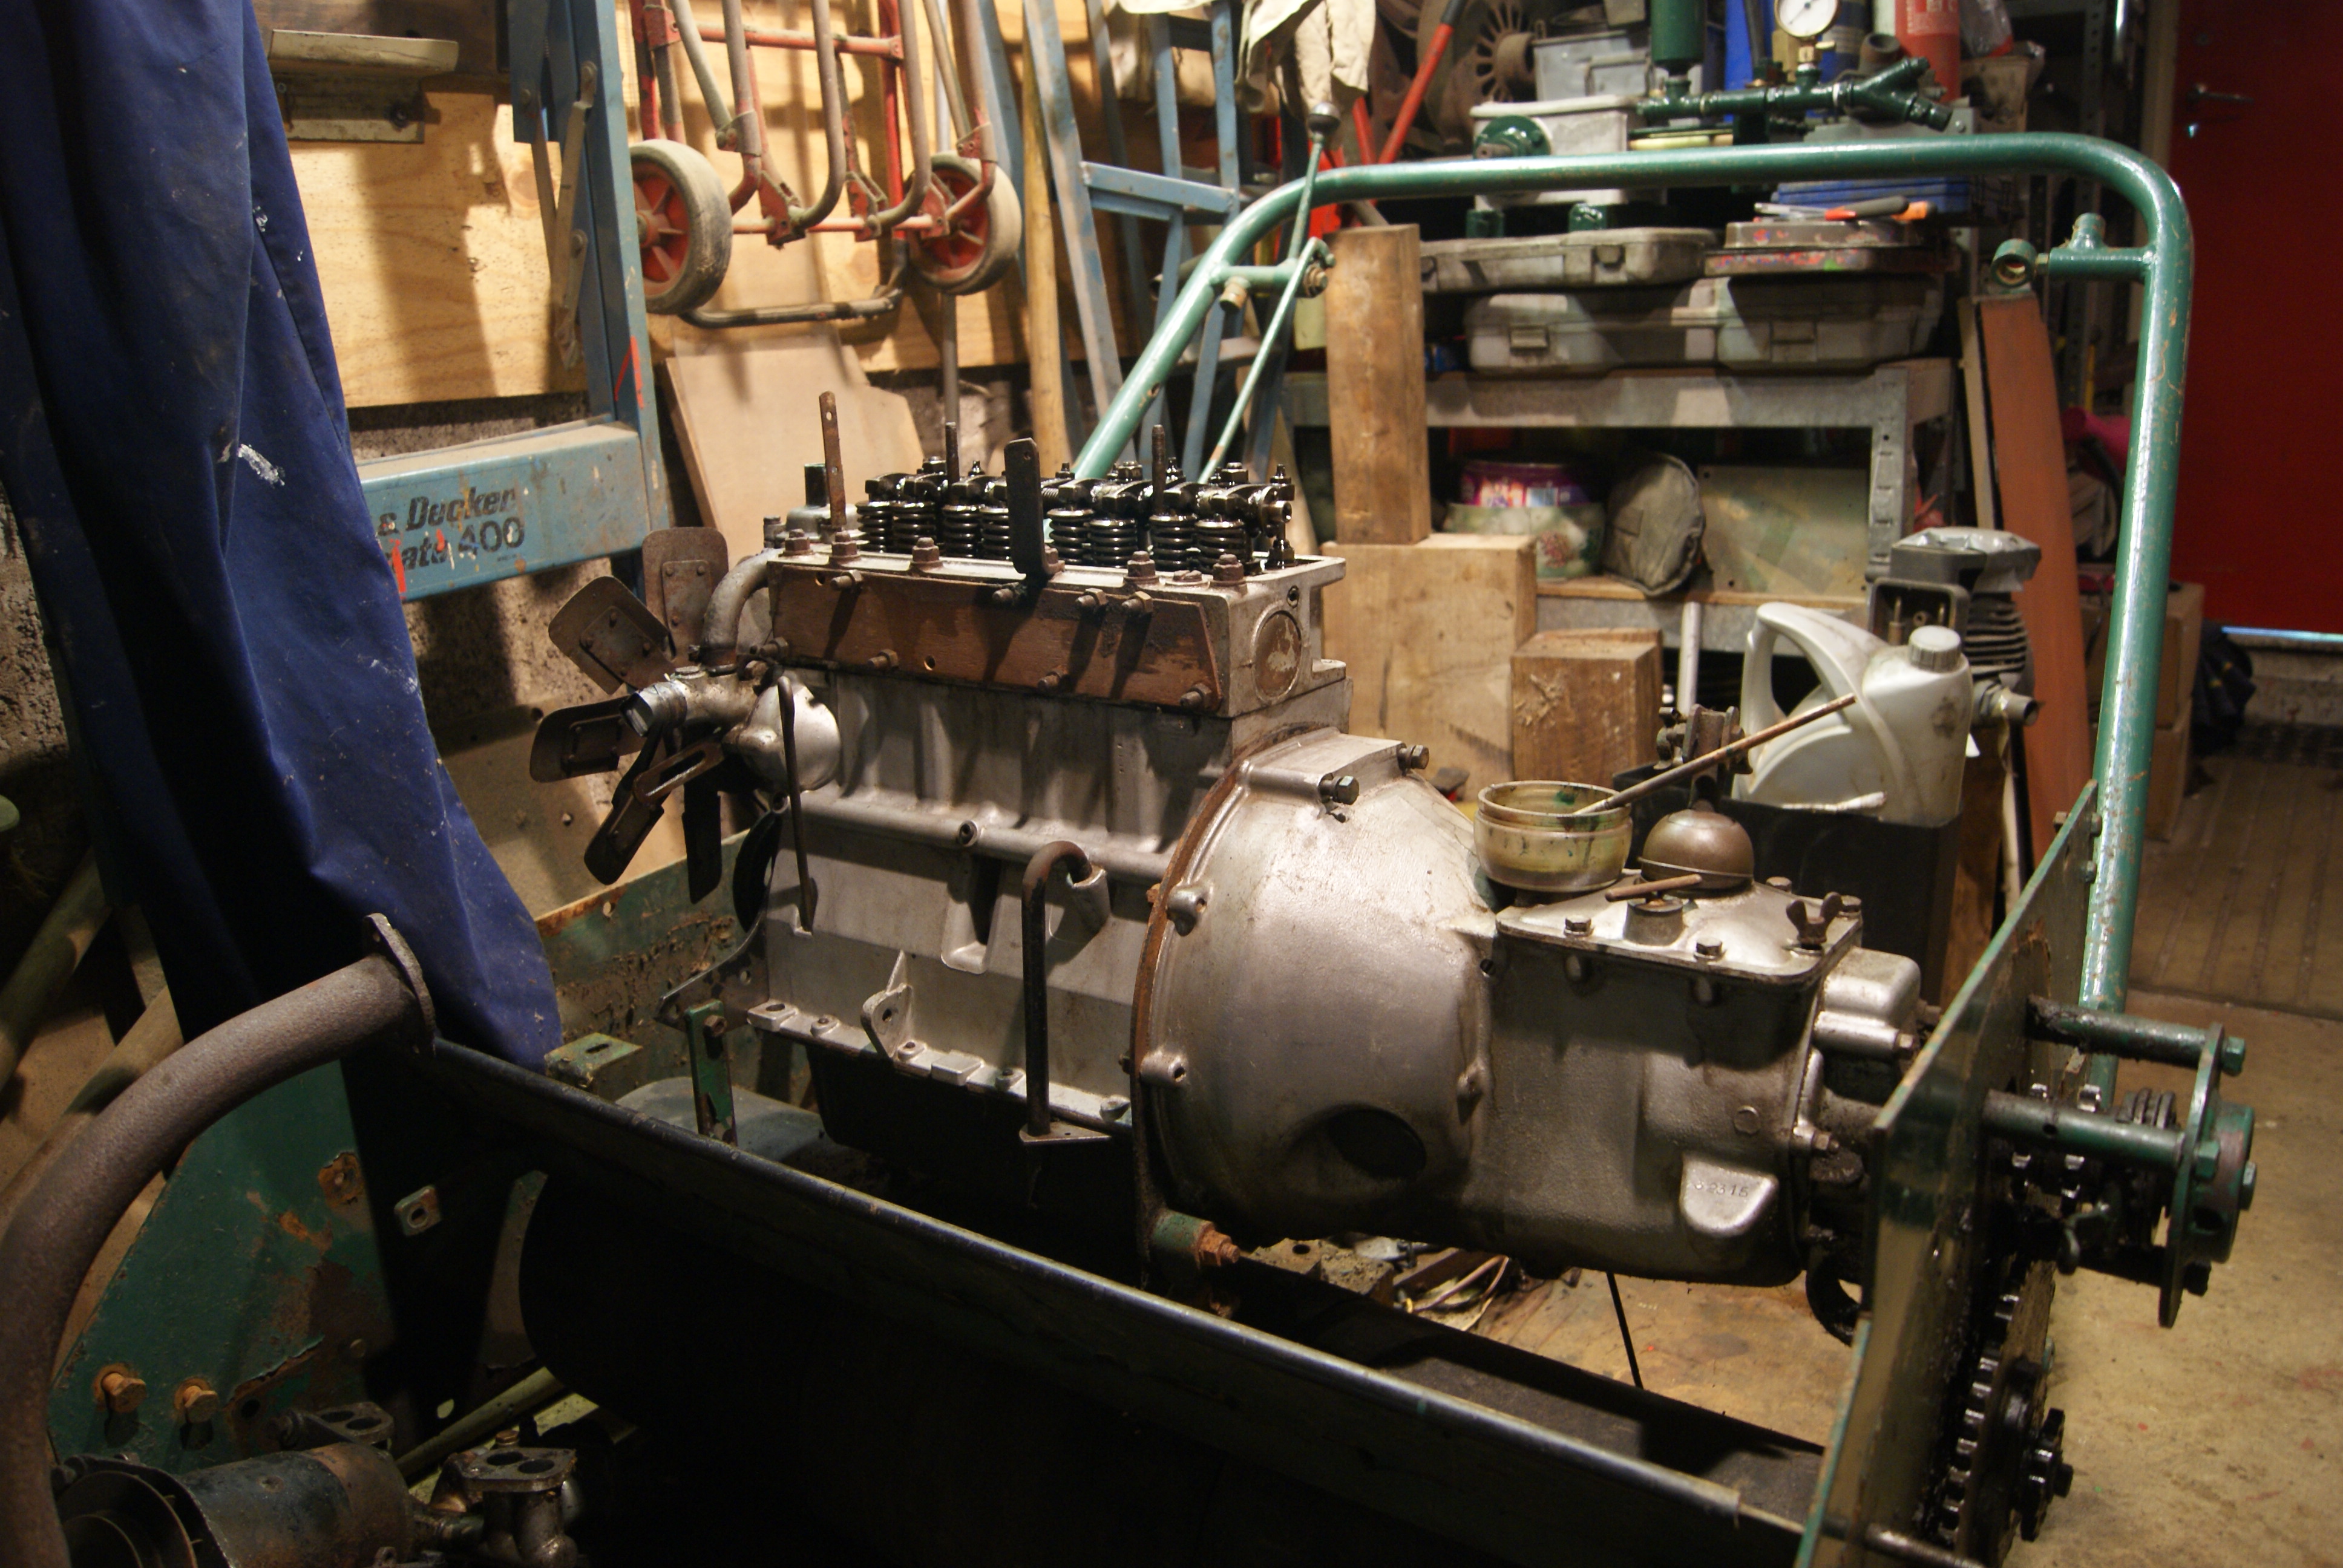
May 17, 2022 at 10:56 am #39032trusty220KeymasterThe engine and gearbox have now been thoroughly cleaned on the outside and what a difference it makes! Before everything just looked dull and worn out, but now the bright aluminium of the block and gearbox really do lift it. I would be lying if I said it was easy- I spent the whole day painting on brake cleaner then scrubbing it off, then repeating until all of the staining was removed. I could have achieved the same thing by blasting it with a steam cleaner but I didn’t want any water inside the workings and it would have taken some of the green paint off the chassis, something I want to avoid as it needs to be preserved rather than restored. The result speaks for itself and the brake cleaner was odourless, evaporating quickly after a quick wipe with a cloth; when I did the same with petrol to clean the carburettor I had to buy Mrs. Geoff a meal out to apologise for stinking the house out! Definitely brake cleaner from now on!
The next challenge will be to sort out the heavily pitted rocker cover. It needs to look good as it’s the first thing you see when you open up the covers, so a bit of panel beating to push it back out to the correct profile and lots and lots of wire brushing and sanding down to remove the years of rust.
Whilst I’m doing this I’ve put the exhaust manifold into a bucket to de-rust it using electrolysis. Another odourless method but it takes a bit of time to do and must be done in a well ventilated space- my draughty garage is fine, but if you do it somewhere at home please be aware that the gas bubbles given off contain hydrogen, so if it builds up in a poorly ventilated room it can explode!
More results soon.
Attachments:
May 16, 2022 at 12:02 pm #39027trusty220KeymasterWhat do you do if you want to know something? You ask an expert, which is what I did with the radiator today. Not only was the core blocked between the fins with grass cuttings but the vertical tubes were also blocked internally making for a very poor flow rate. I’d noticed that the engine warmed up very quickly but assumed it was because somebody had removed the thermostat; partially correct, but no banana!
The radiator is now in the hands of the local expert who I have trusted with the GT6 radiator and many more from work as well, so I know his work is top notch.
All of the orifices are now blanked off with plywood plates bolted down tight so no muck can get in, so here we go with the first stage of the clean!
May 16, 2022 at 8:22 am #39022trusty220KeymasterThe cylinder and bottom blade are now with Allett Mowers at Stafford for sharpening. I hope they can face up the bottom blade as the screws look as if they’ve been in for some time; from experience I’m guessing that the countersunk heads will shear off if I try to move them leaving me with no alternative but to drill and tap each hole, quite a daunting prospect but not outside the realms of what’s possible.
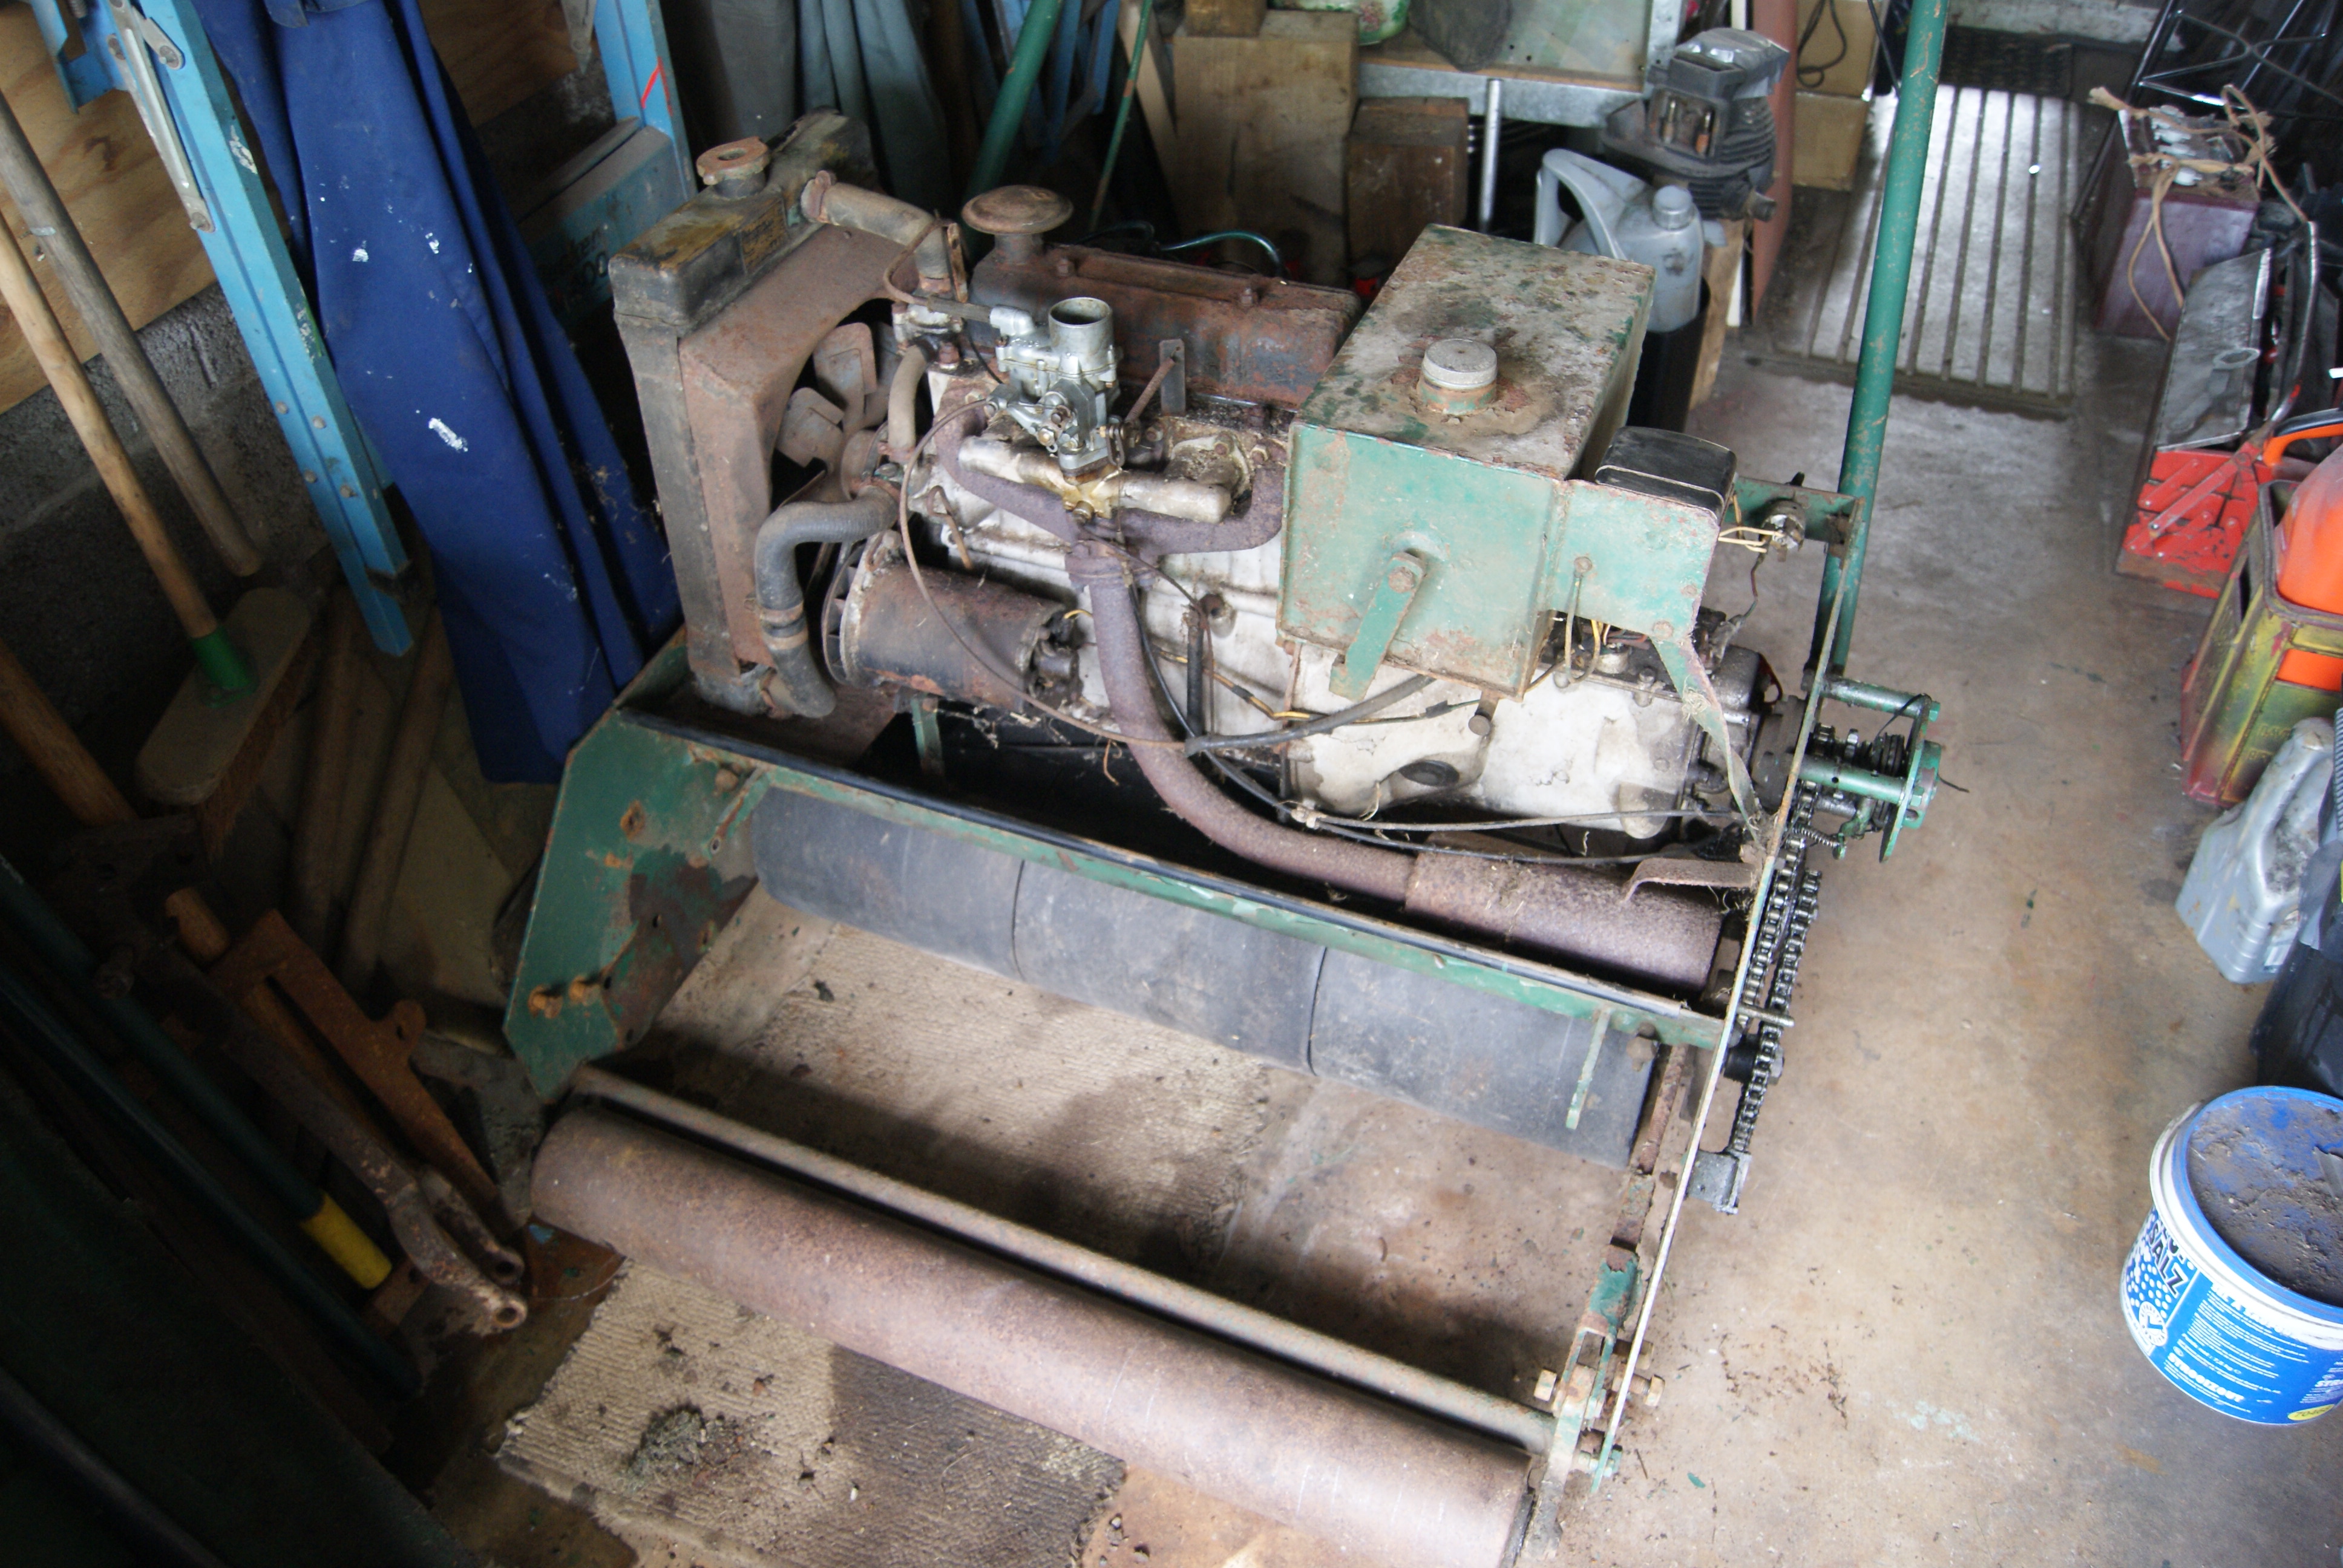
In the meantime I’ve been busy with the strip down. I simply could not put it off any longer now that I’ve got the engine running properly, so I took the whole weekend to carefully remove and catalogue with photographs all of the necessary details. One of the alarming finds was that the two wires coming from the dynamo to the regulator box passed behind the exhaust downpipe without any tie-downs and it was a miracle that the hot exhaust hadn’t melted the plastic and shorted out the battery. This will need to be addressed on build-up and the best way around it will be to pass the wires around the end of the block and along the side with the distributor and ignition coil. After all, it will keep the electrics all in one place and make it more practical.
As we speak the mower is now completely bare of all of it’s ancillaries and the manifolds, exhaust, dynamo, starter motor, fuel pump, petrol tank, etc. are now lying in the corner waiting their turn on the bench. I took Roy Allett’s advice on the engine block and re-filled it with coolant once I’d removed the radiator. It was encouraging to see that the previous owner had kept up with the anti-freeze and there was no sign of furring or corrosion inside the waterways that are visible. I did have to make up a plug for the bottom hose so the block can sit there with coolant in whilst the hoses are off.
Tomorrow’s job will be to box up all of the hoses, gaskets and other consumables and set off to the Reliant specialist to see what parts he can sell me. It’s going to be a long struggle if he can’t help!
In the meantime I will be busy today making up blanking plates to cover the inlet and exhaust ports as well as the distributor drive and fuel pump access points. I do not want to get any dirt down inside the engine now that I know it runs so well. One of the dilemmas I had over the weekend was whether to have the radiator re-cored; the core is blocked with grass debris which I could blow out with the airline, but then what state are the solder joints in? At the moment they are watertight, but with a little vibration- who knows? For safety (and my reputation!) I think it wise to get it re-made and then the uncertainty is done away with.
If there is any more time in the day I’ll start on the clean down and then we can start on the build-up. I can’t wait!
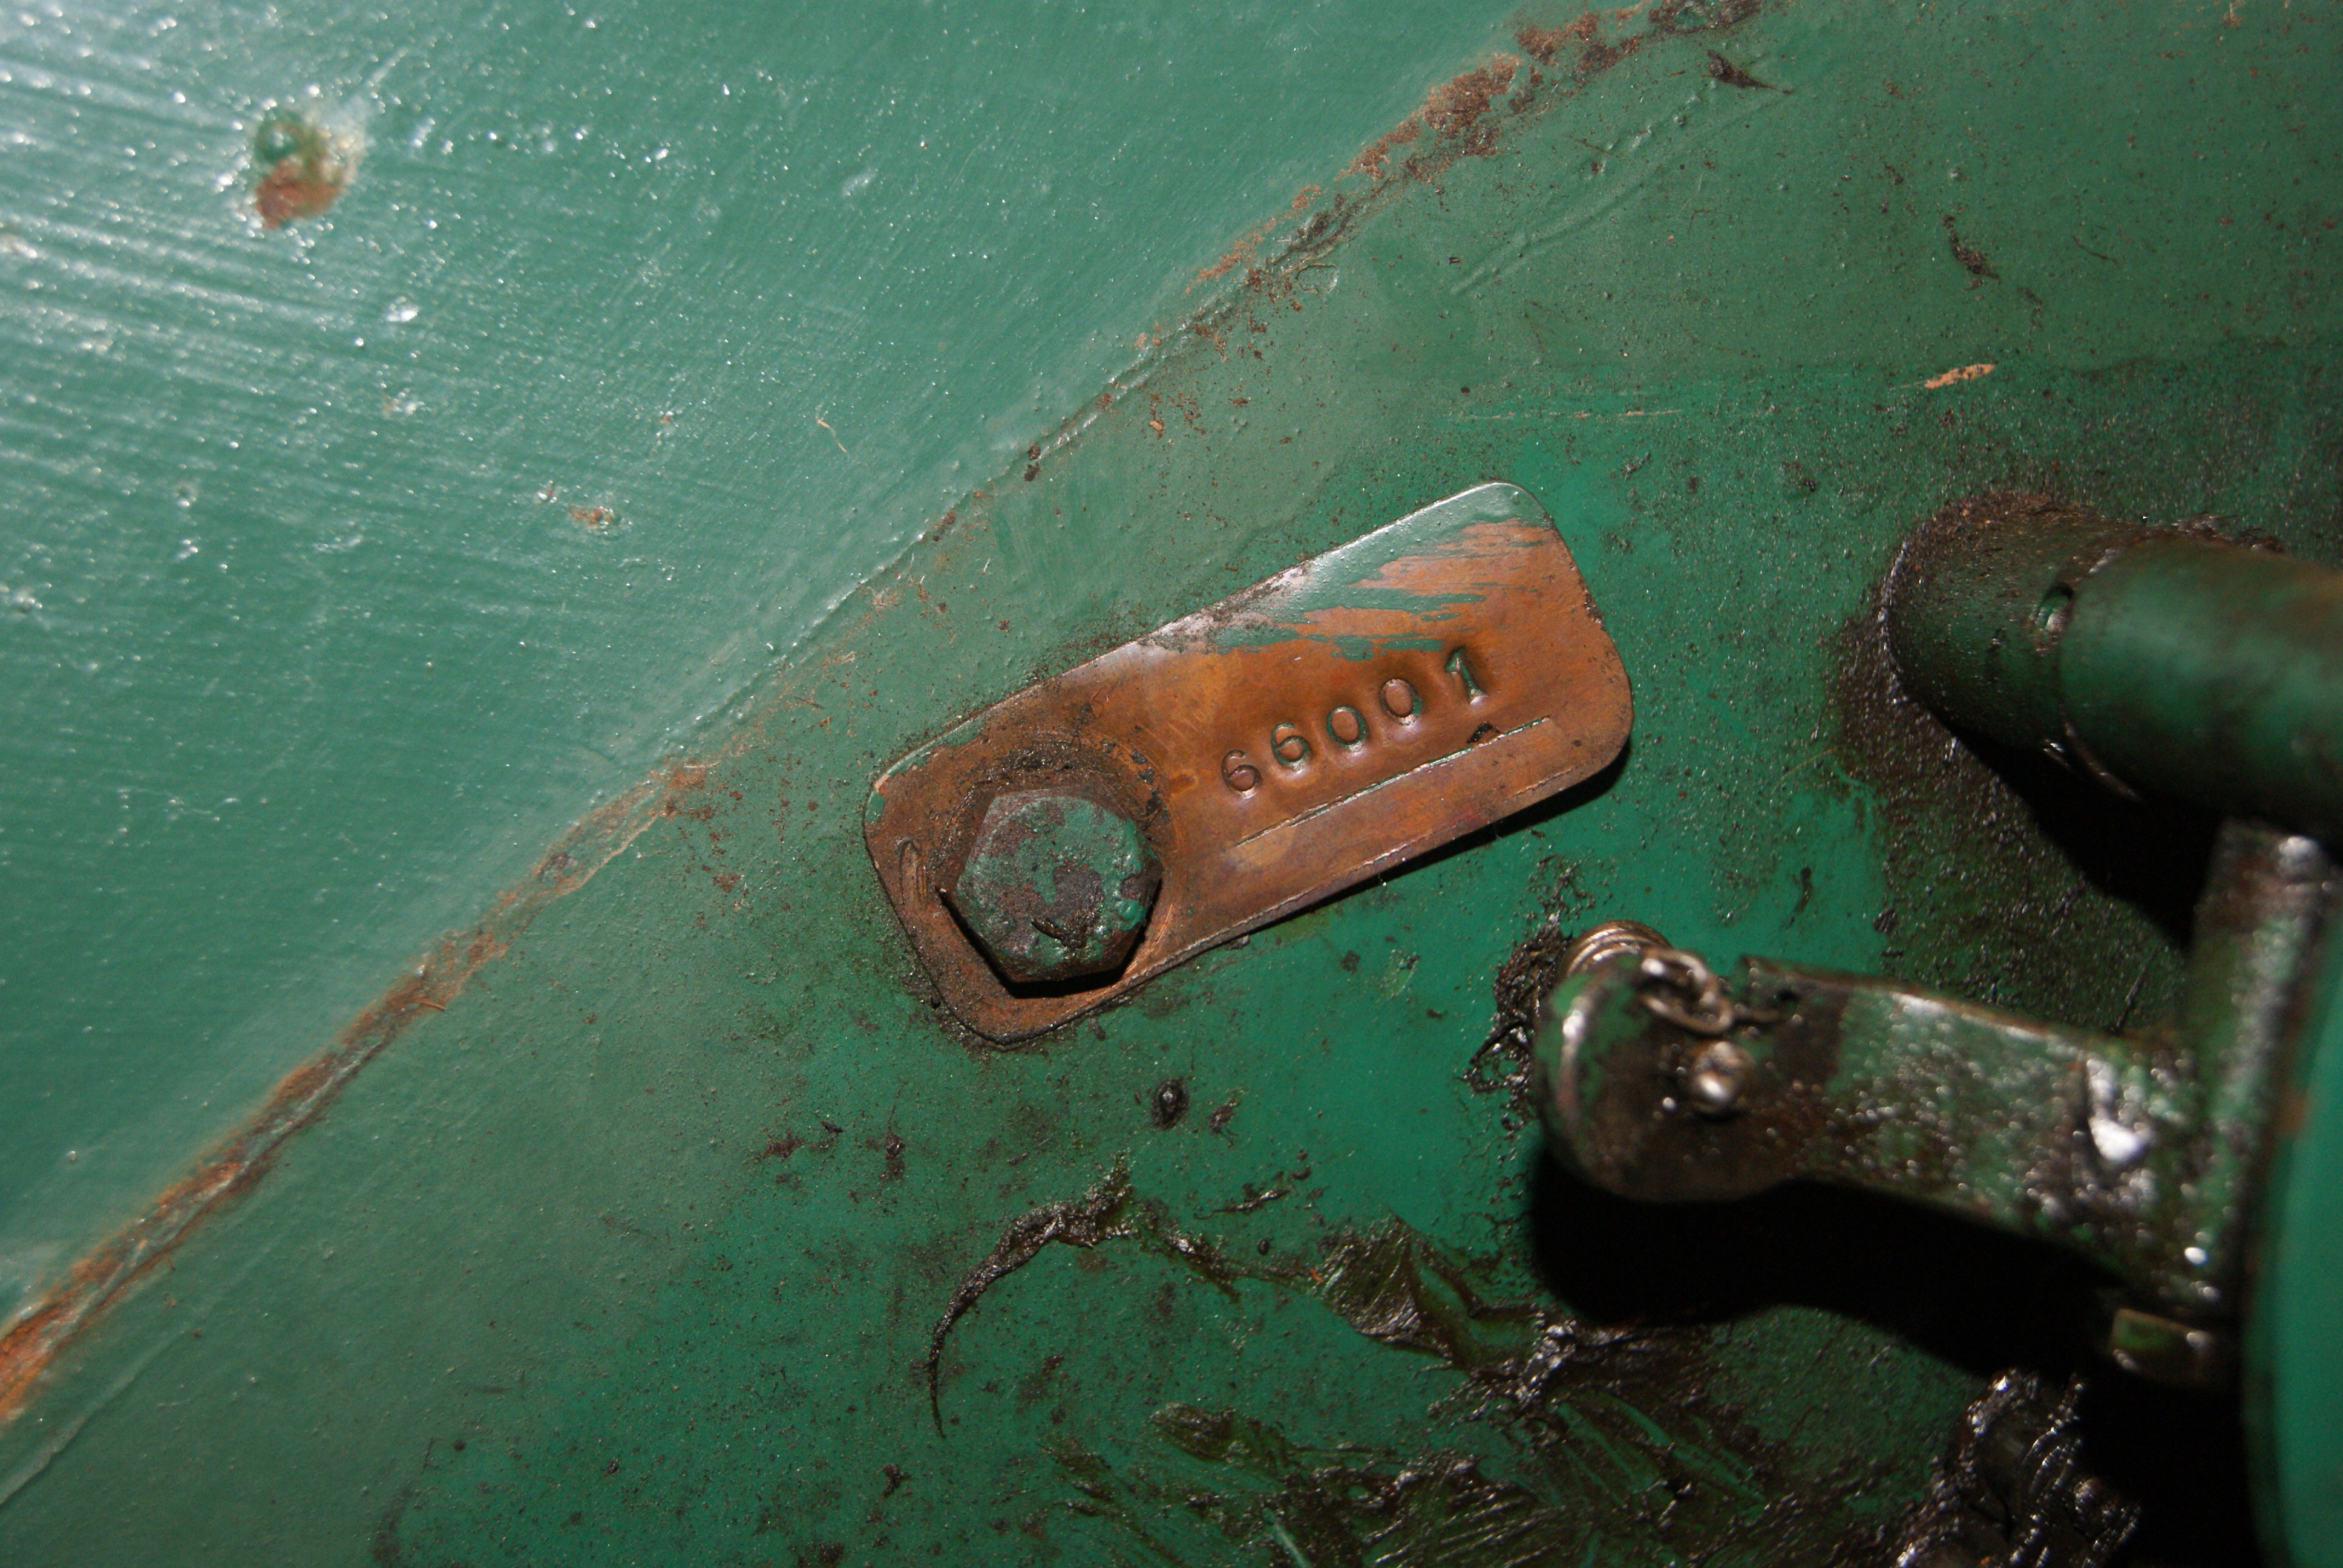
Before I forget, the one photo below shows the build number (or serial number) which confirms that this is the first production machine. The number is 66001 which points to it being made in 1966.
Attachments:
May 9, 2022 at 8:18 pm #39009trusty220KeymasterIt looks a lot like an ATCO from the backbone chassis, but then that was air cooled with a Villiers engine.
May 9, 2022 at 12:25 pm #38996trusty220KeymasterNext on the agenda was the removal of the cutting cylinder and bottom blade carrier. The cylinder looked simple enough with four countersunk screws at each end holding the cylinder bearings to the frame, so I parted the chain, unbolted the sprocket off the drive end and removed it then attacked the screws. Luckily they all came out without too much trouble but the assembly would not pass through the gap, so the bottom blade carrier had to come off as well as the front roller.
It was a struggle- and I’ve found the first UNF threads which were on the front roller shaft- but after a while all of the screws and bolts gave in and I had the two pieces on the floor. Now came the trouble; the bottom blade doesn’t look too bad and could probably be saved with a light grind but the fillet piece on the carrier is rotten as a pear. On Ransomes machines it is usually made of wood (normally oak) but on this one it is a mild steel strip welded to the inside of the angle iron carrier, presumably to make it more rigid. The water and grass have got under it and broken some of the welds, pushing it upwards into the cylinder. As it is going to be for display only I think I would be justified in cutting it off and discarding it; it can’t be saved as it is too far gone, so I’ll make the decision once I’ve cut it off.
Attachments:
May 9, 2022 at 12:11 pm #38995trusty220KeymasterThanks for the tip, Dave. I was using petrol because I had a jerry can full in the corner! I suppose you could say that I’ve actually found a use for E10 petrol- it cleans oil and dirt off chains and sprockets really well. I was working on the basis that it must be good for something because it’s awful to use as a fuel.
May 9, 2022 at 12:07 pm #38994trusty220KeymasterAny of our members can show under the VHGMC banner at any of their local (or otherwise) agricultural shows. For this reason we provide Public Liability cover up to a maximum indemnity of £5 million.
One thing that show organisers tend to ask for these days is insurance cover for road risks; some time back a law was passed which raised the profile of all show and rally fields to that of Public Highway. This means that if you have a ride-on machine they insist that it also has an insurance policy to cover road risks whether it is registered for the road or not. Our club cannot provide this cover due to the vast assortment of machinery that our members collect but I understand that the NFU will issue policies to cover this.
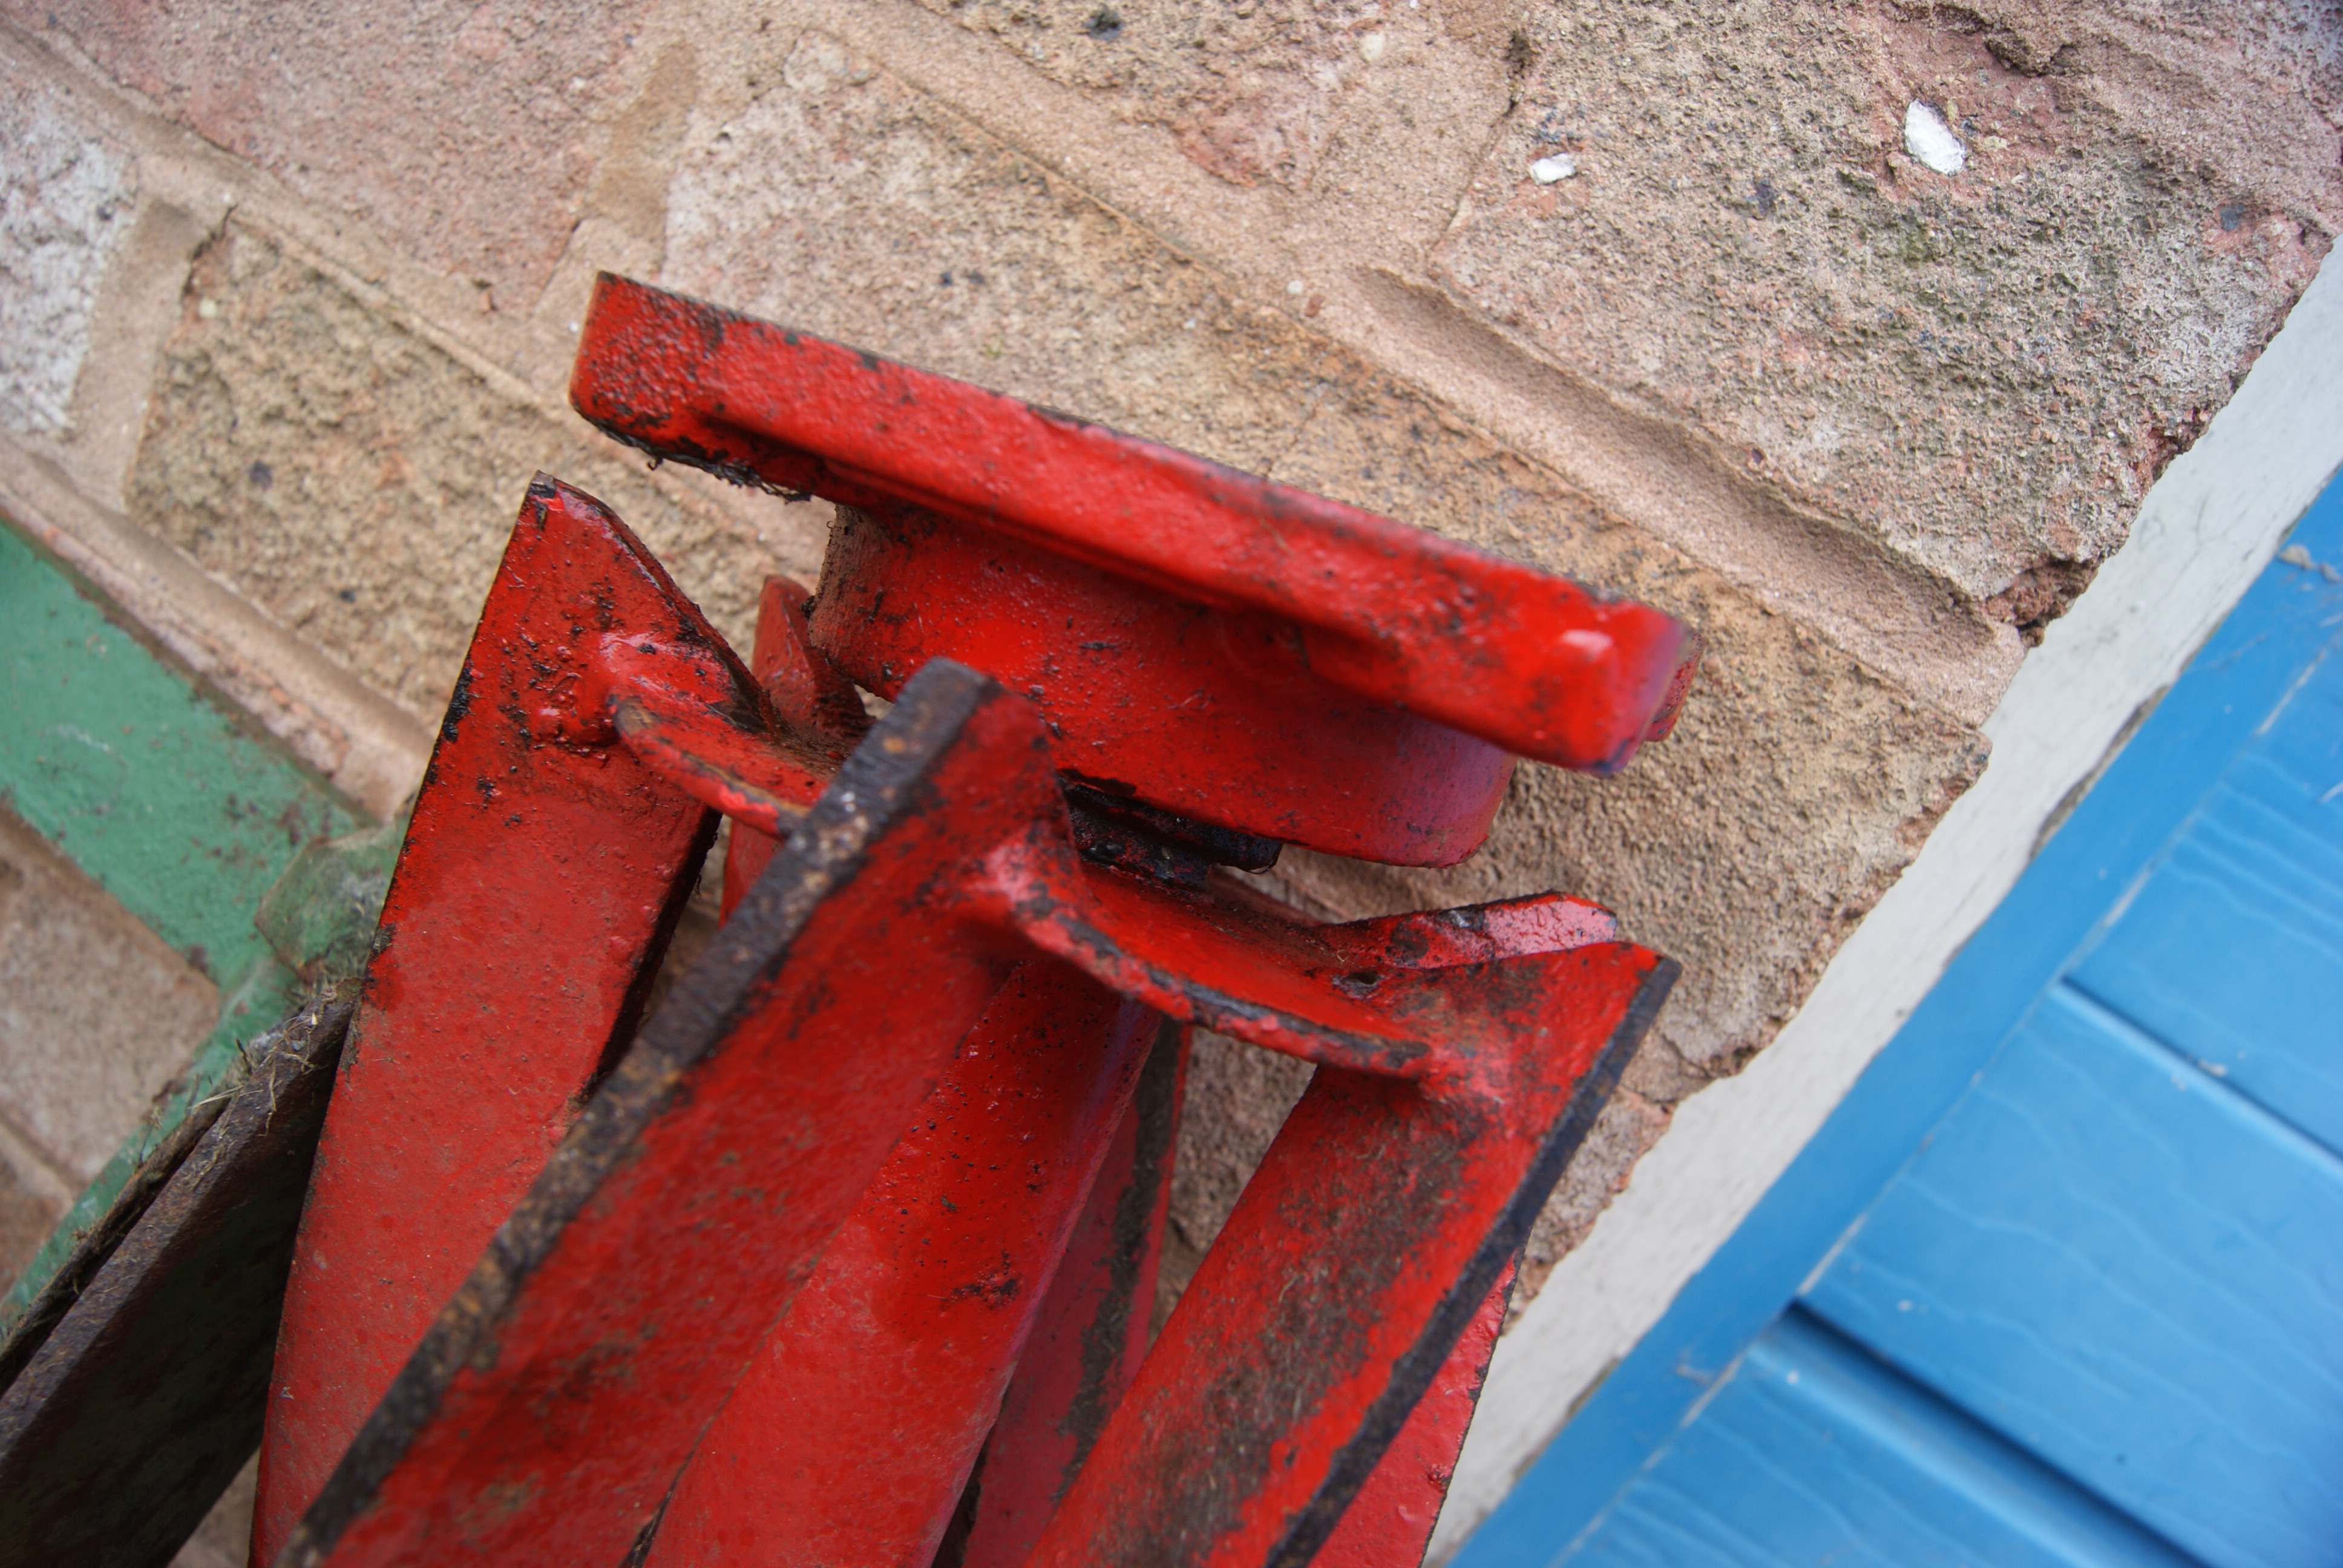
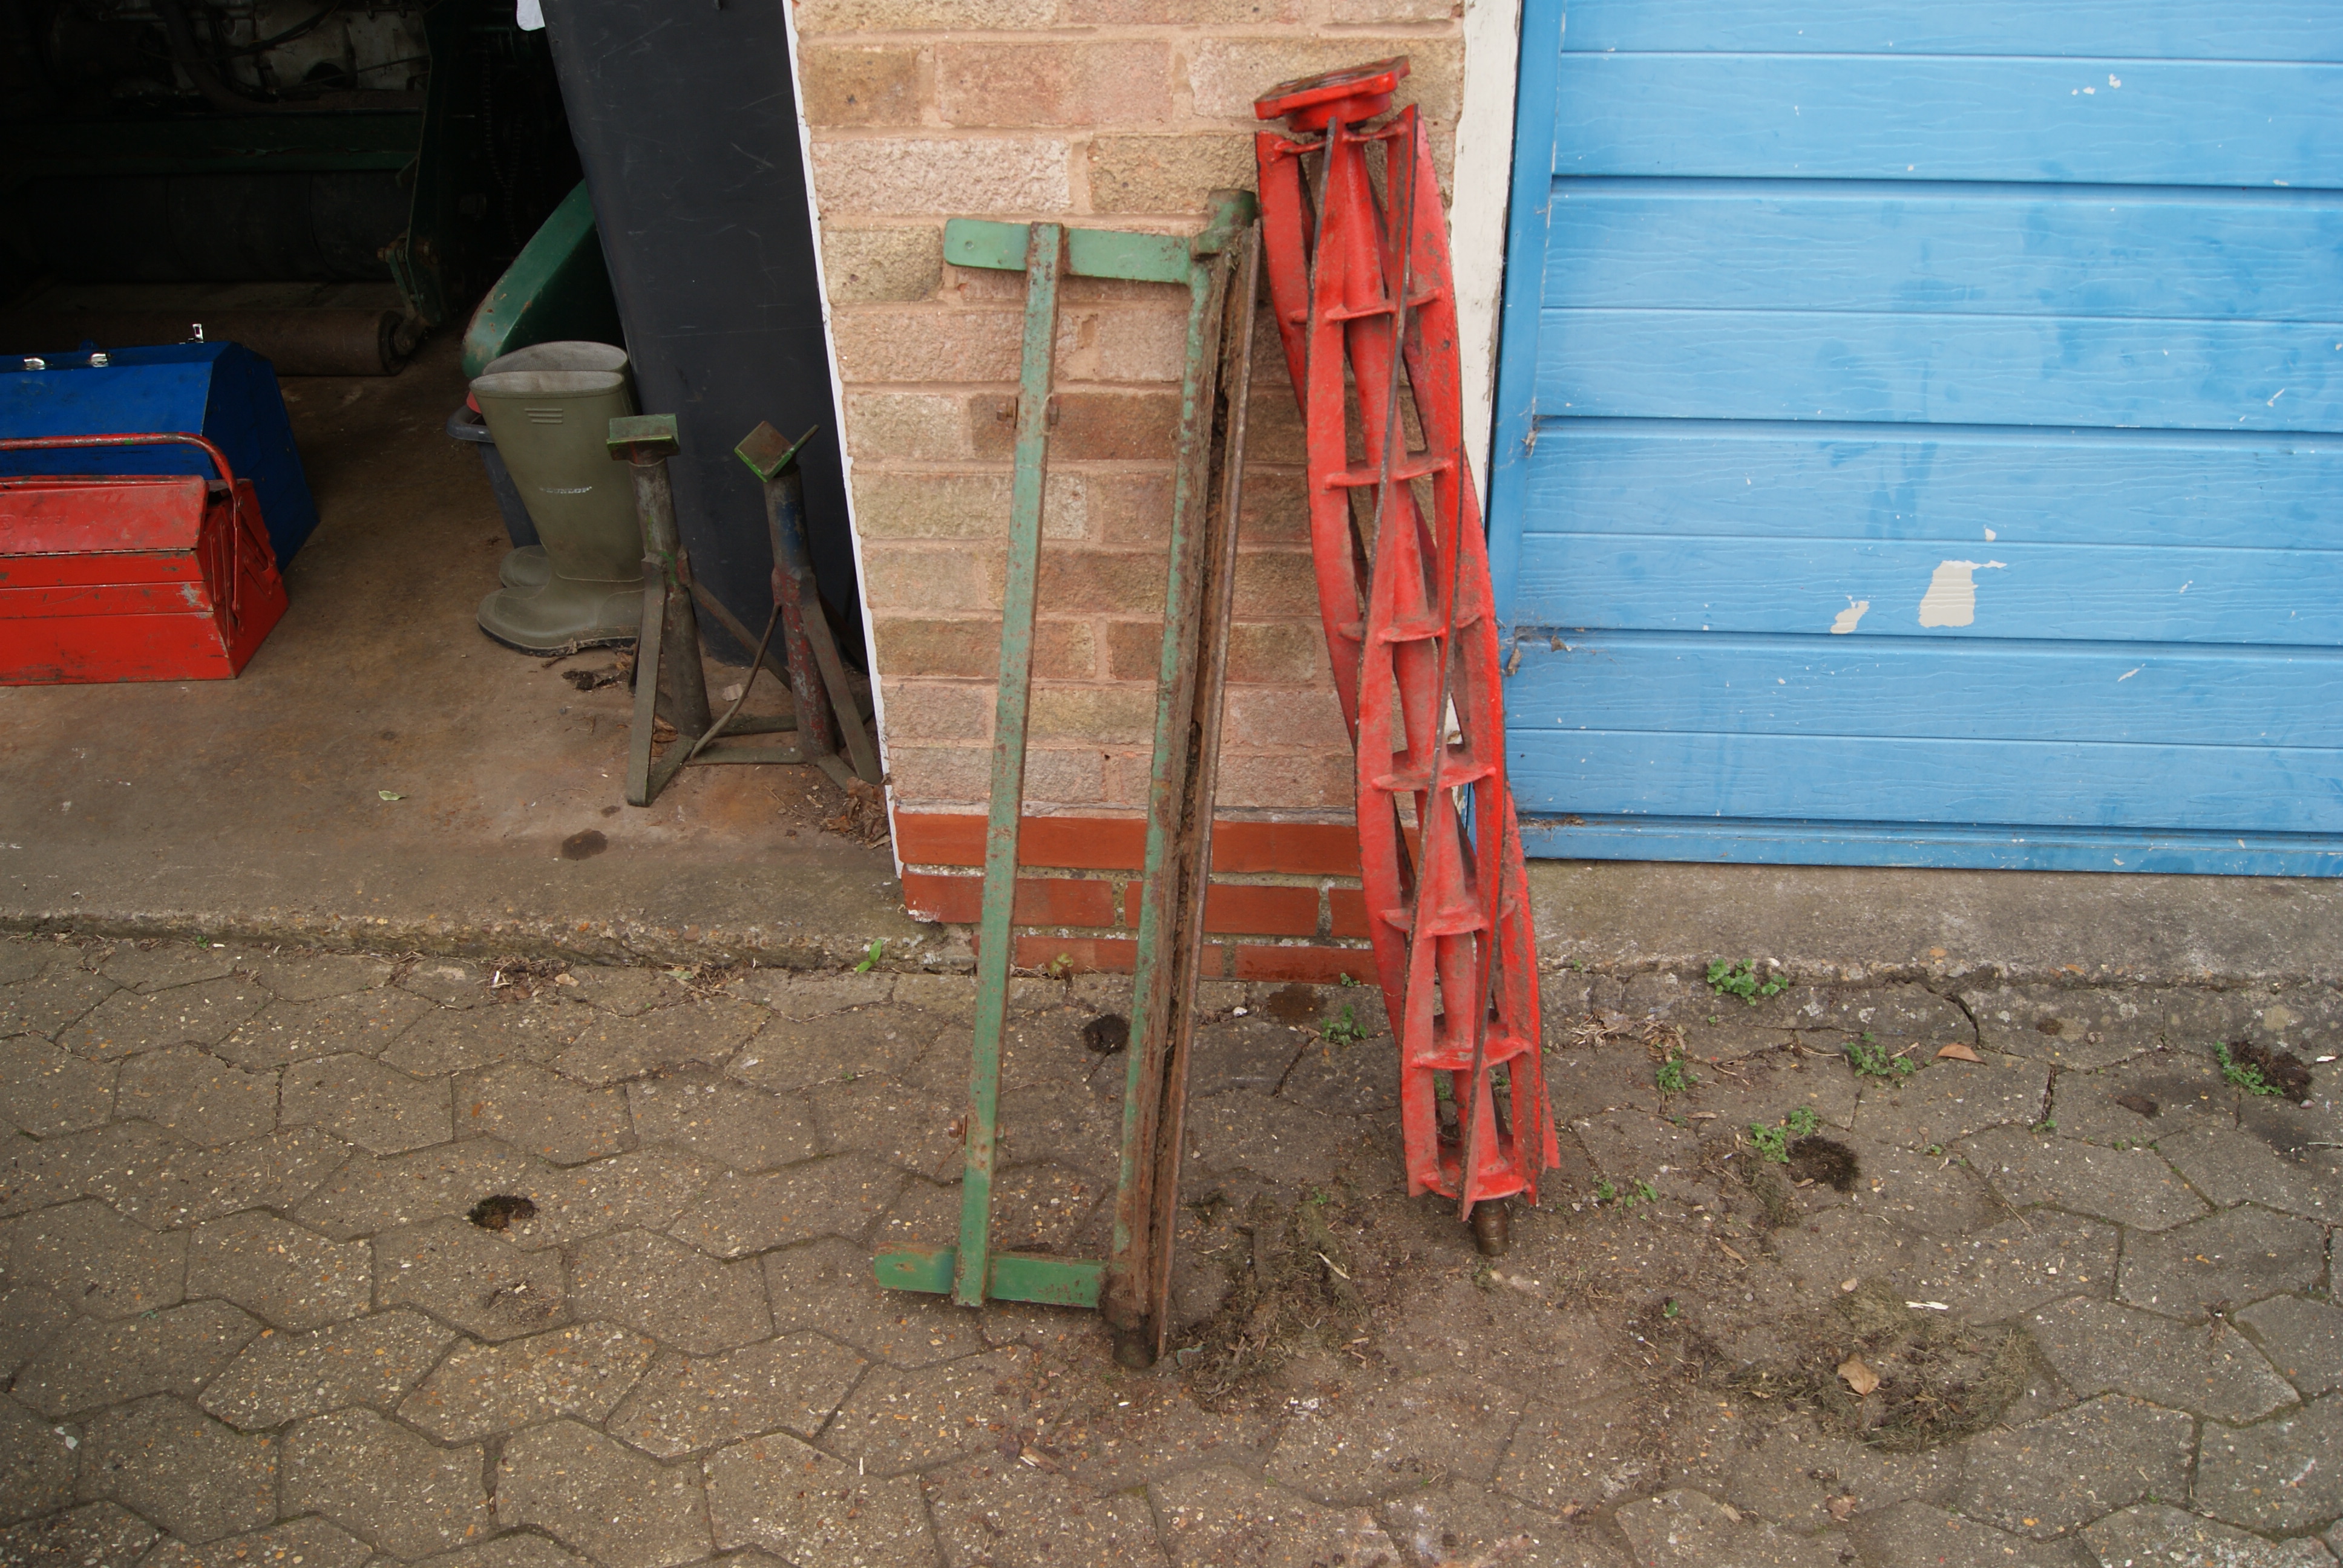
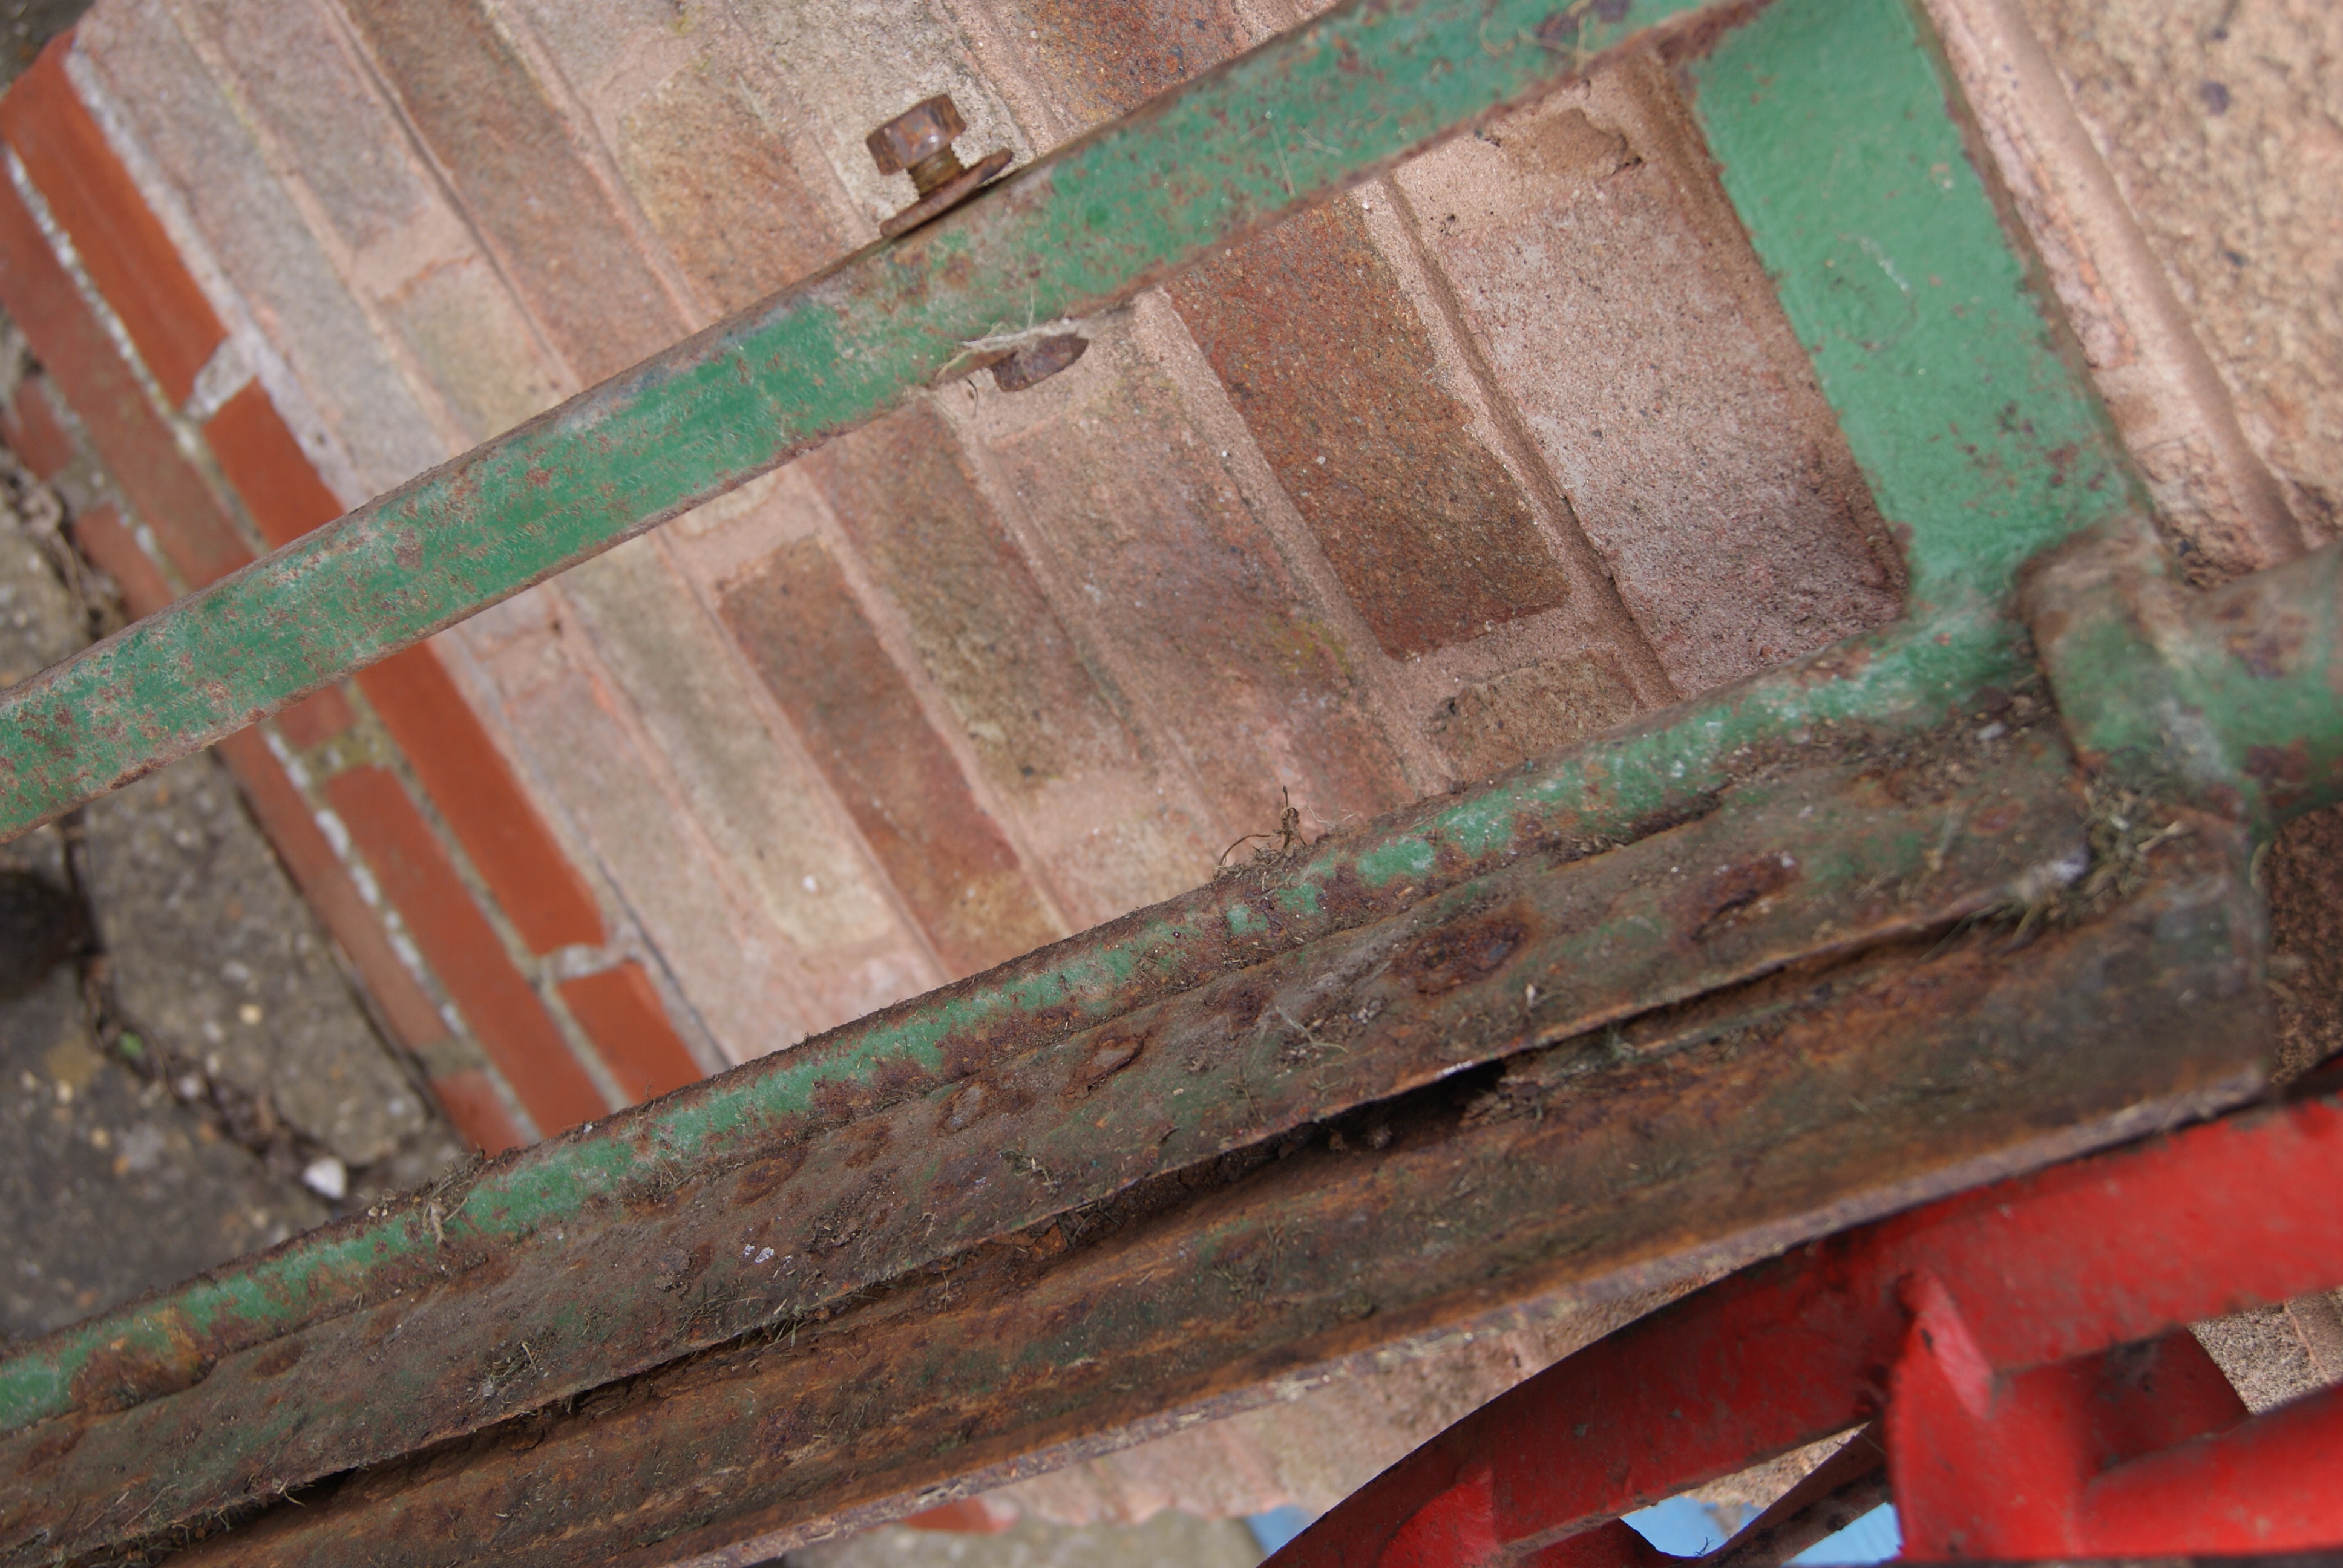
May 9, 2022 at 8:05 am #38990trusty220KeymasterI think the prize would go to the front A-frames on the Ransomes Motor Triple. How many people have been knocked senseless by taking the pin out and forgetting that the frame is sprung loaded? I haven’t, but know of one or two in the day.
-
AuthorPosts