Forum Replies Created
-
AuthorPosts
-
November 5, 2022 at 12:10 pm #40168
 trusty220Keymaster
We wish you all the luck in the world with it Roger! How about starting a new story in the Projects section so we can see how you’re getting on?
You know we’re here if you need any help, don’t be frightened to ask.
November 5, 2022 at 12:05 pm #40167trusty220KeymasterHello, Roger,
It will be interesting to hear how you compare the Trusty to the Anzani once you’ve got used to it, but that’s something for next year!
Assuming the Douglas engine is the original it would be easier to date it from the tractor’s serial number. If you let me know I will add it to the Trusty Register and look it up next time I do the research.
My preference is for the JAP 6 as it has the same power and torque but weighs a lot less, but then you don’t have to listen to me!
November 1, 2022 at 10:16 am #40154trusty220KeymasterCarburettor adjustments are the first step in the process and nine out of ten times you will find that they cure the problem.
Don’t start fiddling with governor settings or anything else until you’ve adjusted the fuel/air mixtures, you will only make the matter worse.
Start by setting the main jet- run the engine at working speed and screw the main jet in slowly until it runs rough; note the position of the screw head. Then unscrew it back out again slowly- it will run smoothly then rough again the more you screw it out- again, note the position of the screw head when it starts to run rough again.Screw the main jet in halfway between these two positions and you will find that it will run smoothly at it’s working speed.
Next, turn your attention to the idle mixture screw. Run the engine at a slow idle and perform the same process with the idle mixture screw. Once it’s running smoothly at idle you can then reduce the revs using the external screw on the throttle lever.
You haven’t finished yet!
When you increase revs from idle, does the engine hesitate before it picks up? If it does you will need to richen up the idle mixture slightly. The reason is that when idling the butterfly is nearly closed with only a small gap between it and the venturi wall. If you look closely inside the venturi you will see some small holes drilled just where the butterfly meets the wall- this is where the fuel/air mixture from the idle jet comes out and it not only allows the engine to run evenly at idle but also helps with the acceleration from idle to working speed. If it hesitates you either have one of the holes blocked or the mixture is too weak to bridge the gap between idle and working speeds.
It sounds complicated but it takes less time to do it than to read this piece!
Good luck!October 27, 2022 at 4:34 pm #40147trusty220KeymasterMine today! Must be the postal strike.
October 15, 2022 at 1:49 pm #40061trusty220KeymasterI did five years in the workshops of a Ransomes dealer in the Midlands back in the 80’s; we used to hire six Motor Triples to the local council and I did 12 months looking after the small fleet at one point before progressing onto the first of their hydraulic and electro-hydraulic machinery. I even PDI-ed the very last Motor Triple- a Kubota diesel engined version- which I think was sold to Solihull Council in about 1987-8.
I’ve now done thirty-plus years working in the industry as a mechanic progressing through to commercial sales and ending up as a hire manager with a Ransomes main dealer. Once a mechanic always a mechanic, and I always travelled about with my tools in the back of the truck so that if I came across a customer’s machine that wasn’t quite right I could show them how to set it up properly.
Unfortunately for you I’m still in The Midlands so we’ll have to keep going with the help on this forum. At least it may be a help to somebody else in the future.
October 13, 2022 at 8:44 pm #40058trusty220KeymasterIt’s a pleasure, Will, but it is making me remember things I thought I’d forgotten! What part of the world are you in, just in case you’re local and I can help out?
October 13, 2022 at 5:33 pm #40056trusty220KeymasterSo sorry for the delay, Will, but I was in Matlock yesterday and didn’t get back ’til late; high point of the day was a dinner of steak pie and chips with lashings of thick gravy all over it- a plateful and for only six quid! I think I may move to Matlock, I’m still dribbling thinking about it!
Anyway, your problem- part number of the lower sprocket is MBA6772 and it is secured to the end of the splined cylinder shaft with two setscrews that have square heads. If it’s missing teeth then I would suspect the alignment of the chain and top sprocket; the top sprocket is a one-piece assembly with a universal joint yoke on one end and a shaft that runs in roller bearings at the other end. End float of this shaft is handled by two bronze washers fitted at each side of the top casting- try reversing them if they have worn so that the unused back face is rubbing on the casting where the bearings fit.
The chain tensioner is a nylon slipper that is held against the chain by a spring which was never strong enough. As a back-up there was a bolt with a radiused head that could be adjusted to a position just behind the slipper, and I think it had a slot for a screwdriver on the end opposite the hexagon head so you could tell where the radius was in relation to the slipper. It shouldn’t be adjusted hard against the slipper, it’s really only there to take the oscillations out of the movement and it should also be slackened off as the cylinder to bottom blade adjustment is made, otherwise you end up stretching the chain, breaking the slipper and getting very messy with grease.
Talking about the cylinder adjusters, the genuine ones used to be a hollow tube with an internal thread (I think it was 3/8″ UNF), and the hole in the top used to have a plastic cap pushed into it. A good practice used to be to put a few squirts of engine oil down the tube every now and again to stop the threads rusting, but without the plastic caps the oil used to run out when you lift the cutters up to transport position so keep the caps on if you’ve still got them.
The walking stick levers always used to be quite a hefty pull to lift the front units and you may even need two hands to lift one. The front springs on the A-frames do take some of the weight and yours will undoubtedly have lost some of their strength but have a look at them to make sure that the ends of one or two haven’t snapped off- they used to break quite frequently and they were a pain to change- part numbers for these are MBB0248A for the right hand one, MBB0249A for the left hand.
I hope that helps- if you need anything else just ask. If I don’t reply very quickly I may be in Matlock again!
September 30, 2022 at 5:16 pm #40037trusty220KeymasterMy local motorfactors don’t sell gasket paper any longer; I’ve tried everywhere and they all say that there’s no call for it any more!
I now have two rolls of it under the bench courtesy of Agriline Ltd who stock two different thicknesses of gasket paper and also cork gasket sheet as well. A useful company if all else fails locally.
September 28, 2022 at 8:43 am #40026trusty220KeymasterAre you sure that the springs aren’t compressed and stuck in the bottom of the tubes?
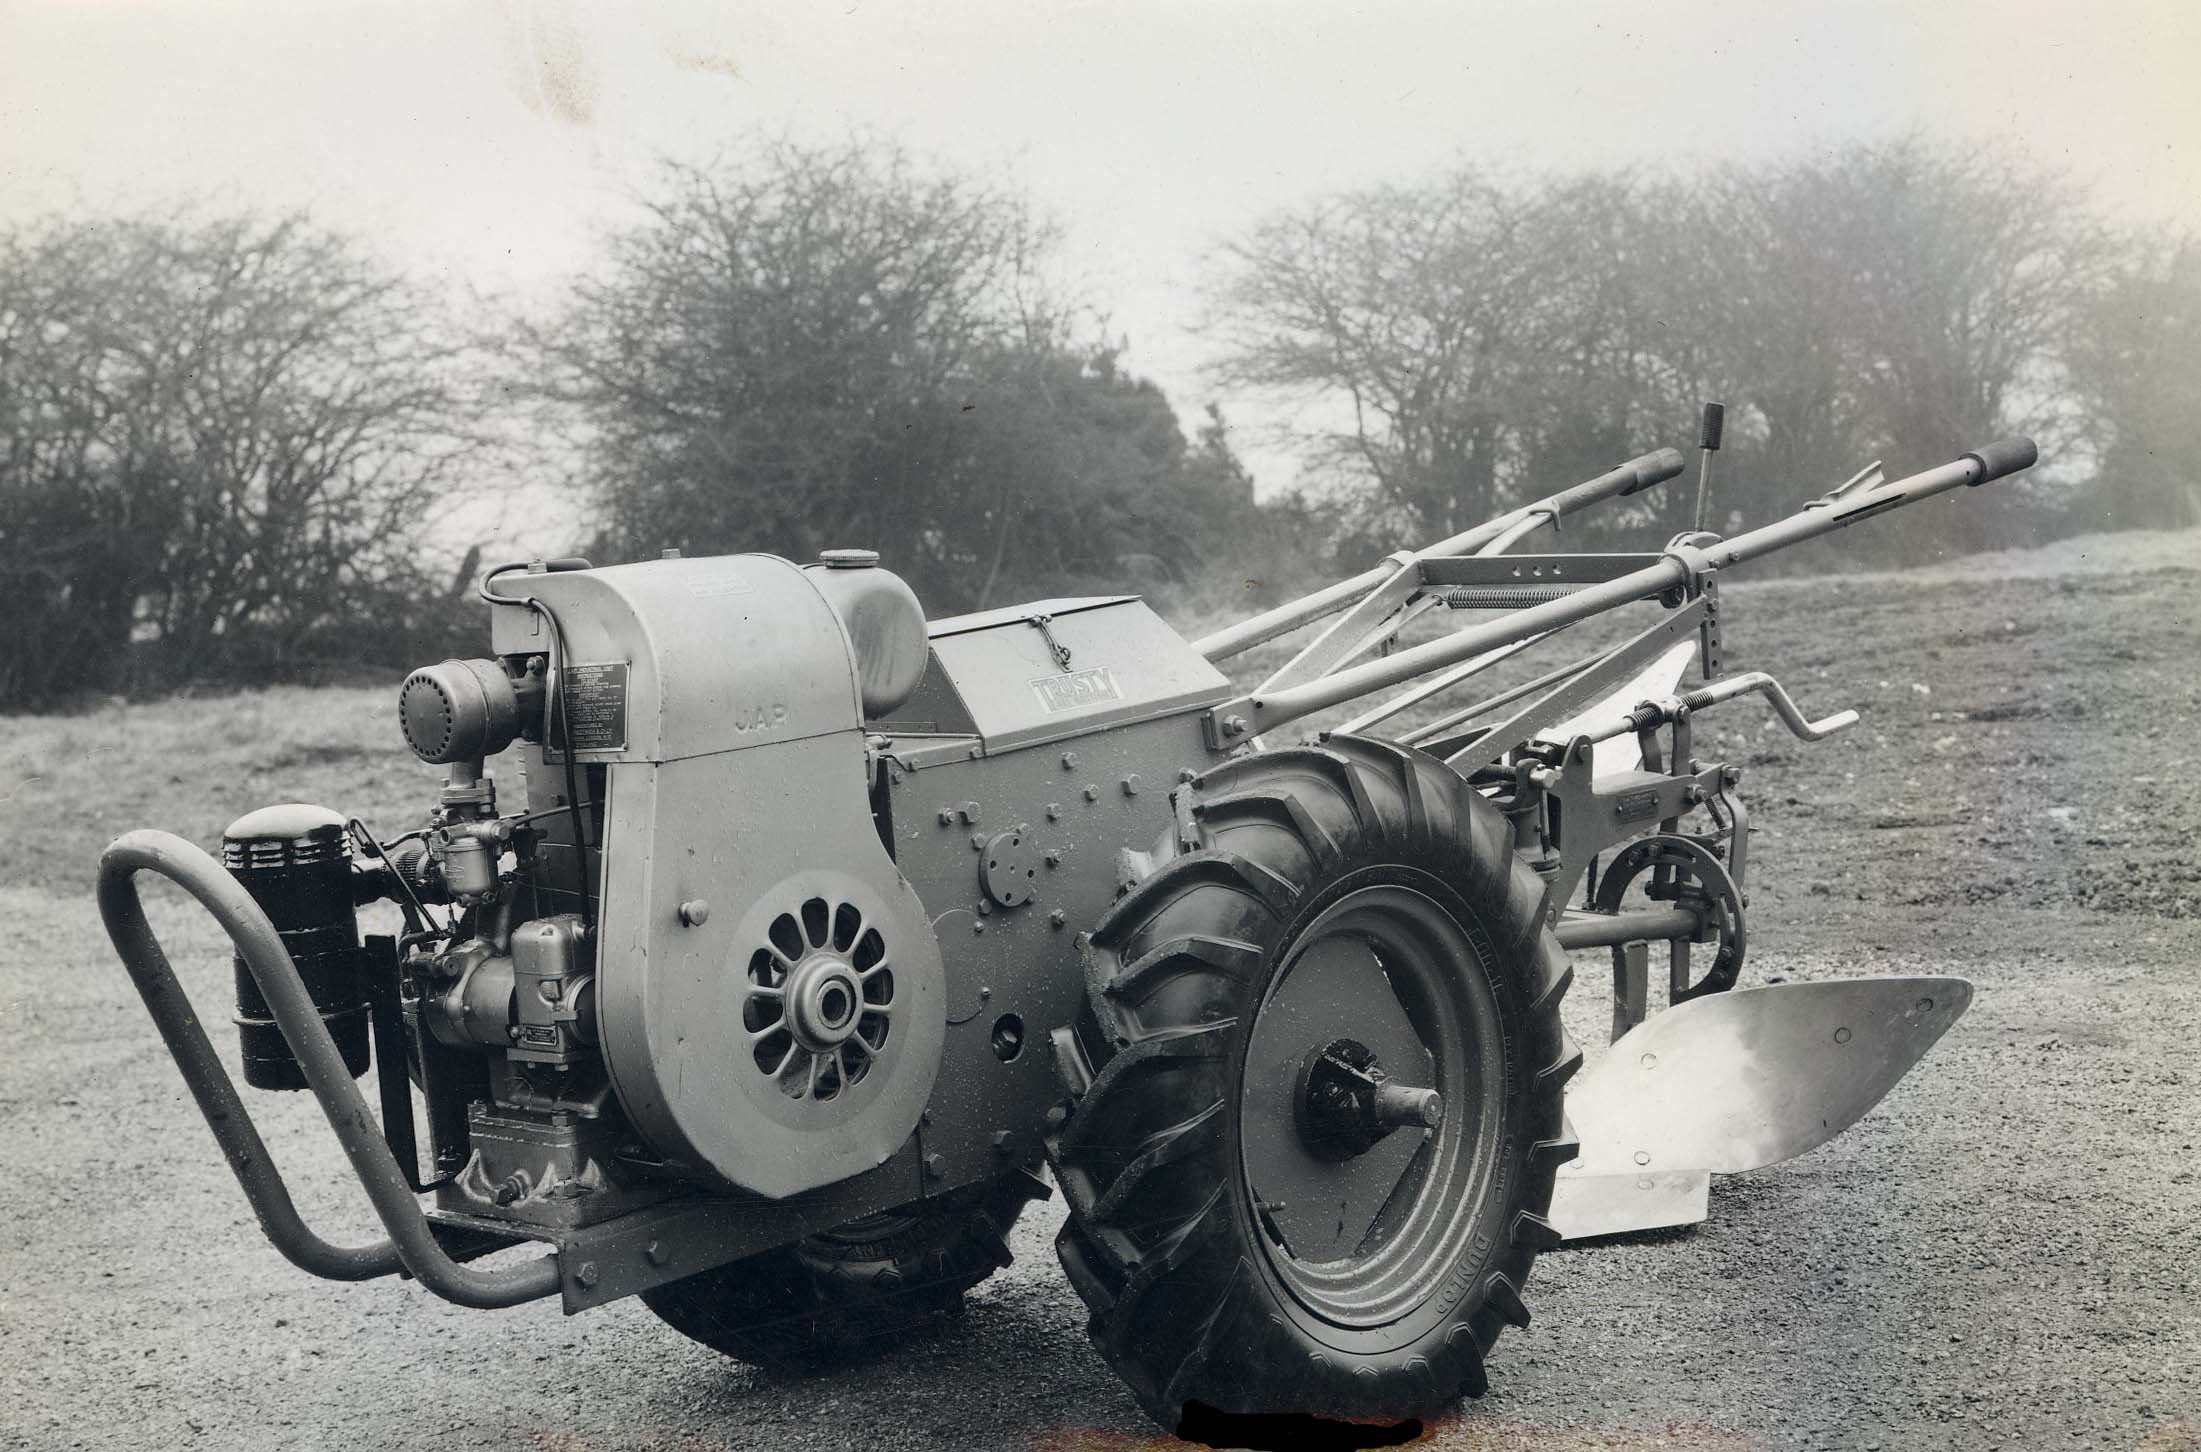
September 28, 2022 at 8:24 am #40023trusty220KeymasterYou’re right, Charlie!
That looks to be a very interesting Trusty. In standard form as manufactured it would have been a 3-speed + reverse transmission driving through later type reduction gears (the sliding axles signify this). The engine looks to be a JAP 5 and the reversible plough is a nice addition, unusual but not a rarity. It will have been made after 1950 but if you let me know the serial number from the back of the transmission case I can narrow it down a little more and enter it onto the Trusty Register. You can access this, together with many more Trusty products, under the “Survivors” Tab at the top of the page.
Later, local additions appear to be the two toggle handles and operating rods that disappear into the rear of the transmission casing- I wonder what they do? Perhaps you’ll enlighten me! Also the wheels aren’t the standard 2-wheel tractor wheels but they bear a similarity to the ones fitted to the front axle of the Mk1 Trusty Steed, so I can’t say for certain that they are factory fitted or not; at least they’re unusual!
I’ve included a factory photo of a similar machine taken when new for comparison.
Attachments:
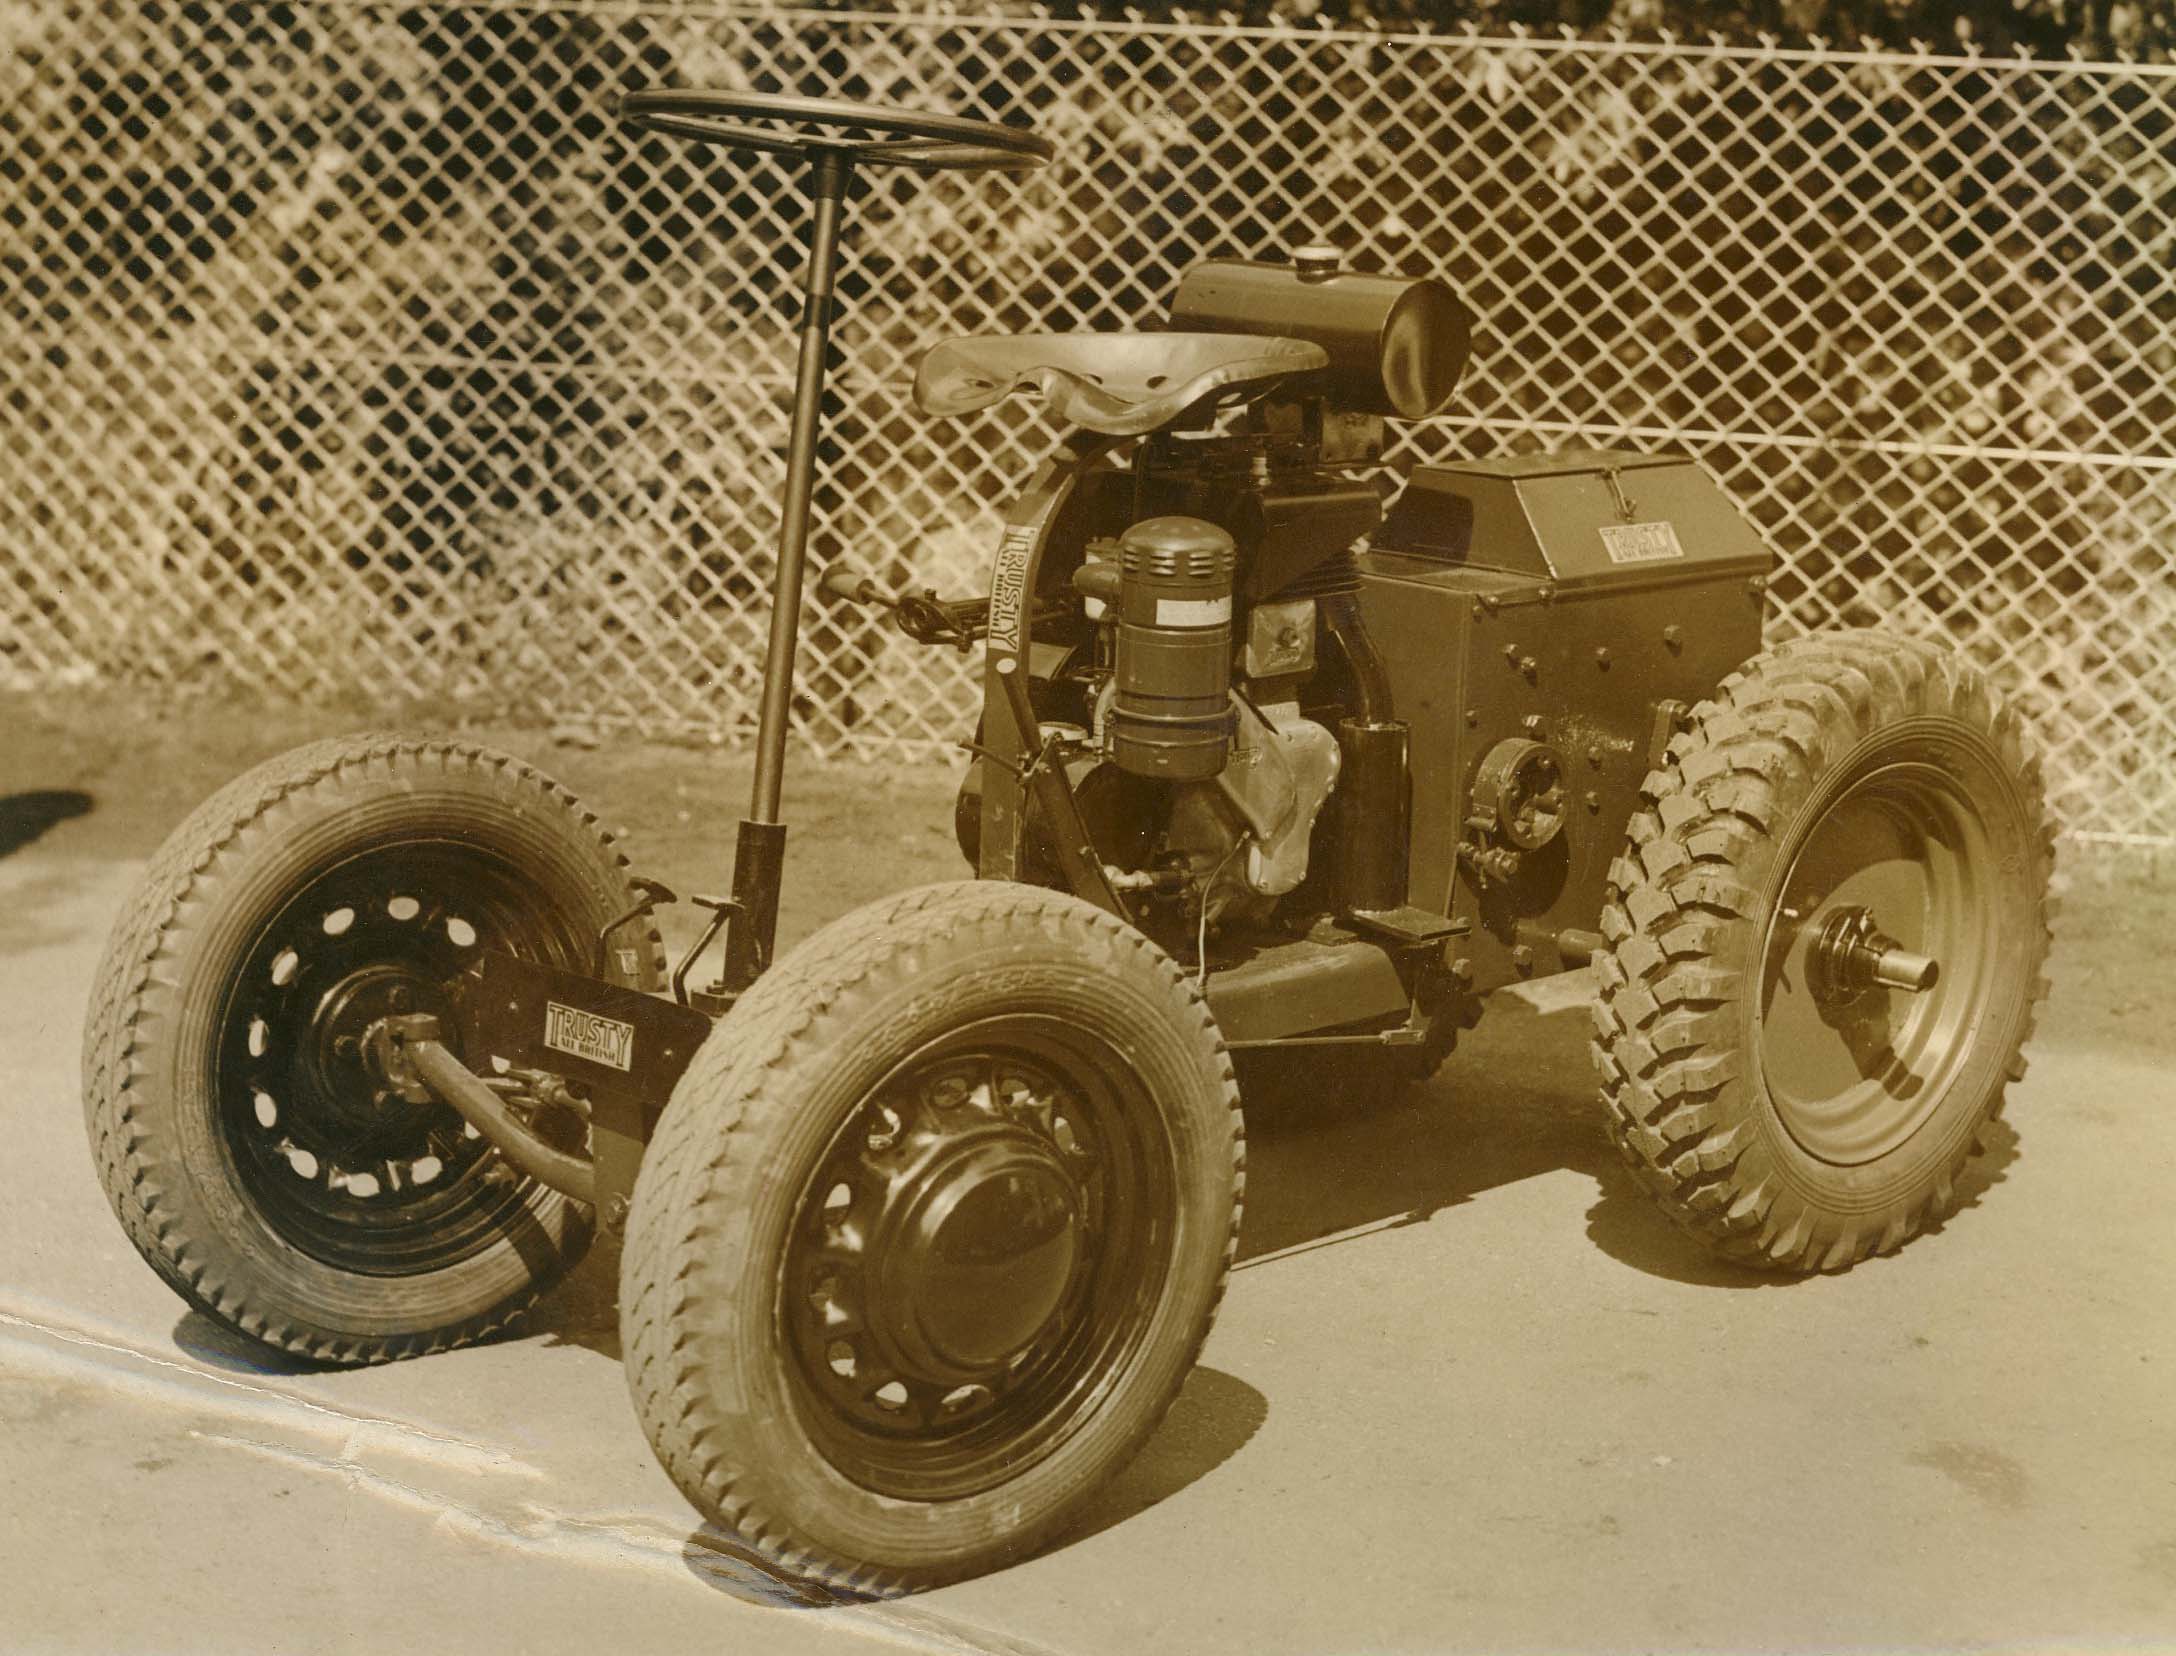
September 27, 2022 at 3:14 pm #40017trusty220KeymasterHere is a section of the relevant drawing of the walking stick. The outer tube is number 40 with the inner plunger number 41. You will notice that the plunger has a groove around it’s base which the pin (number 44) locates into which then joins parts 43 and 41 together. This means that the pawl (43) should move up and down with the plunger (41). All that is below the plunger is the coil spring (42) and the bottom of the tube.
From your comments I wonder if the bottom of part 41 has sheared off leaving the coil spring compressed below it and out of sight. What happens if you tap it gently? Does it move?
Attachments:
September 26, 2022 at 1:22 pm #40005trusty220KeymasterI assume that you mean the “walking stick” handles either side of the operator’s platform which lift the front units clear of the ground. The spring that pushes the plunger out into the slot is quite a large diameter spring that fits inside the outer tube of the walking stick; it’s quite conceivable that somebody has pushed the plunger in at the top and it’s compressed the spring and it’s now stuck with rust inside the bottom of the walking stick.
All I can suggest is to remove the pin at the bottom which holds the pawl in place and see if you can free it with loads of oil and patience! Good Luck! One little tip I can give you is that the two roll pins at the bottom of the walking stick used to break on a regular basis as well as the two at the front of the machine which lift the cutting units. We used to replace the standard roll pins with spirol pins which were made of spring steel wrapped tightly in a spiral; these used to flex slightly and absorb any jarring shocks that would normally shear off the standard roll pins.
As regards your V-belt I would suggest that you take it to your nearest bearing supplier; they usually supply belts of all shapes and sizes and would be able to match your belt up with something new. The replacement part from Ransomes was GSF3506QH but the book doesn’t give any dimensions.
The tensioner sounds like it is fitted correctly how you describe. Yes, it does take some of the wrap-around away from the pulleys but all belts and chains should have a straight run on their drive side- in this case the cutter clutch pulley will rotate clockwise as you look at it which means that the power will be transmitted in tension on the lower run of the belt between the pulleys. The slack side of the drive will be on the top run, so the tensioner needs to be on the top run of the belt to take up the slack. If you were to put the tensioner on the bottom run all that would happen would be that the belt would pull into a straight line and leave the top run flapping about loose.
Keep going, there can’t be that much left to do!
September 23, 2022 at 4:40 pm #39987trusty220KeymasterHello, Angus,
I’m sorry to hear your news and can sense your frustration. All correspondence for inclusion in The Cultivator should be sent to CULTIVATOR-EDITOR@outlook.com but if you’re still experiencing difficulties please send me an email; I’ve sent you a PM with my personal email address.September 18, 2022 at 10:57 am #39967trusty220KeymasterIf you need any more help at least you know where we are now, and thanks for letting us know how it worked out.
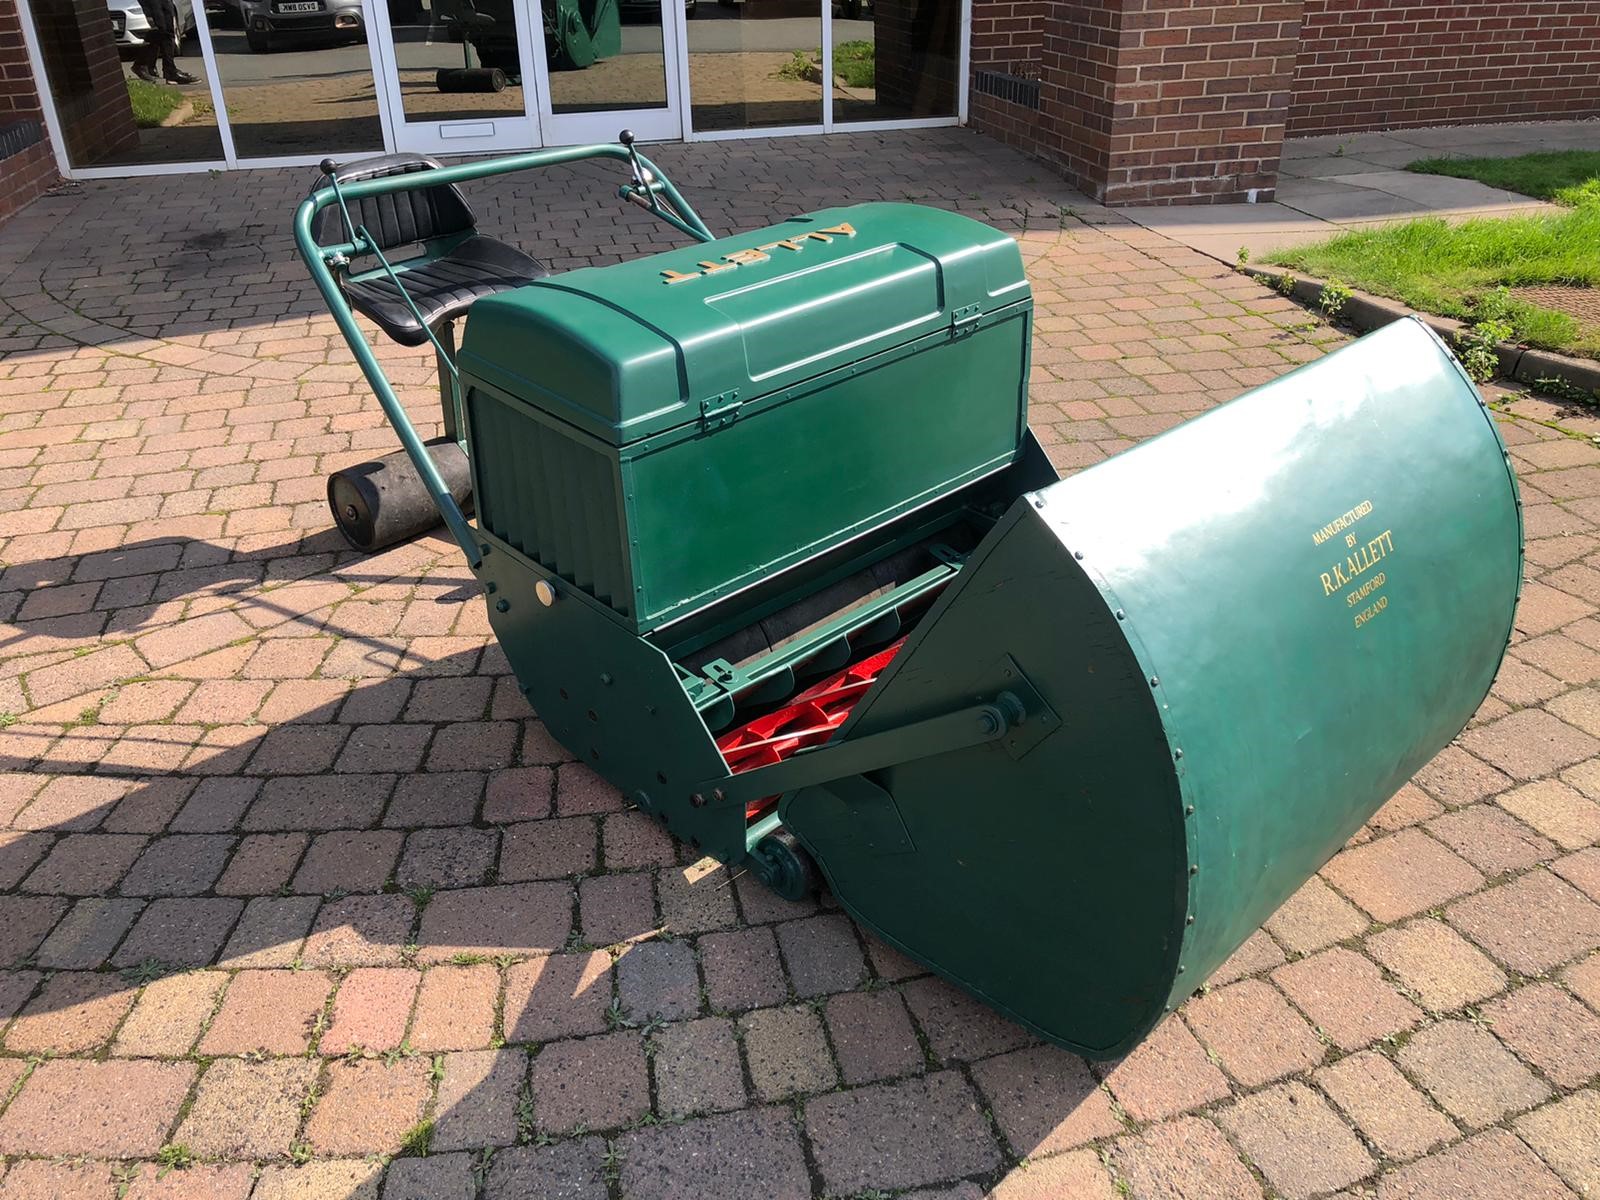
September 15, 2022 at 8:38 pm #39951trusty220KeymasterAs a postscript, the project team from Allett came over yesterday to collect the Regal now that it’s finished.
Suitably refreshed (Mrs. Geoff had been baking cakes all morning!) they took it away and sent me some photo’s of it outside it’s new home, the Reception at Regal House, Hixon.
They seemed to approve of the work I’d done, so let’s hope it has a long second life welcoming visitors to the factory for many years to come.
My thanks go to all at Allett Mowers Ltd. for allowing me to tinker with something that is undeniably part of their company’s history.
Attachments:
-
AuthorPosts