Forum Replies Created
-
AuthorPosts
-
April 20, 2020 at 9:07 am #33915
 trusty220Keymaster
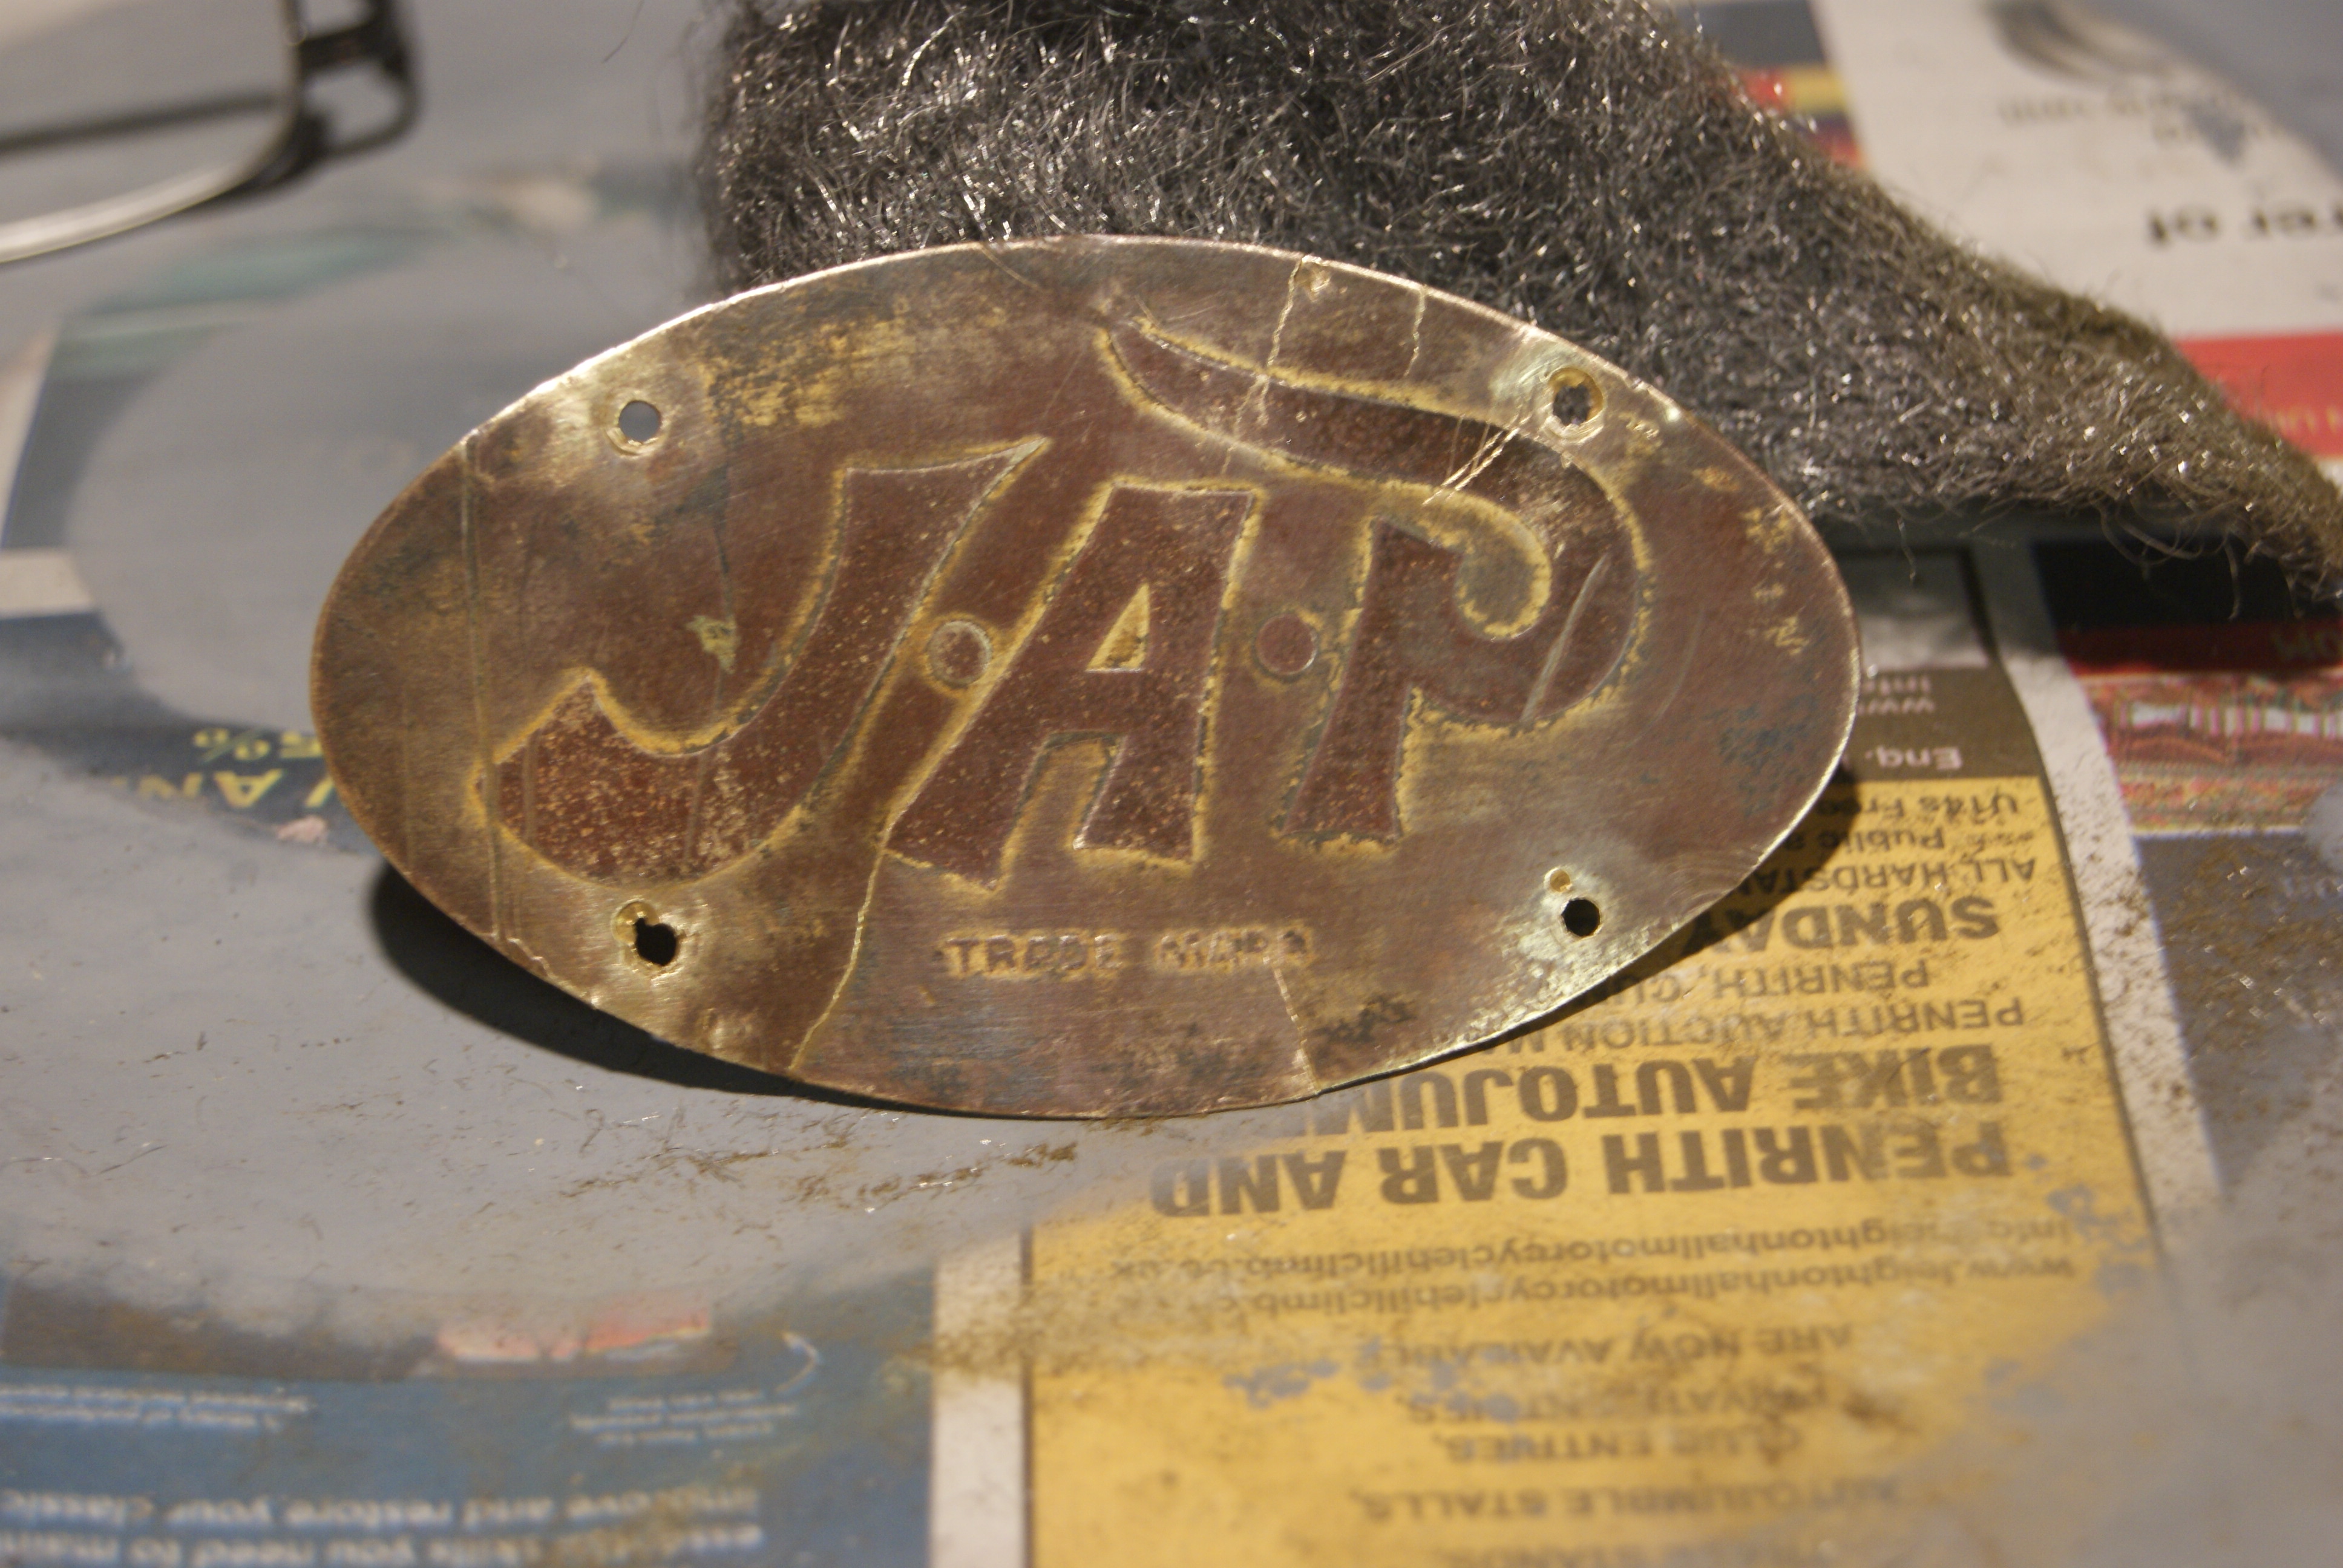
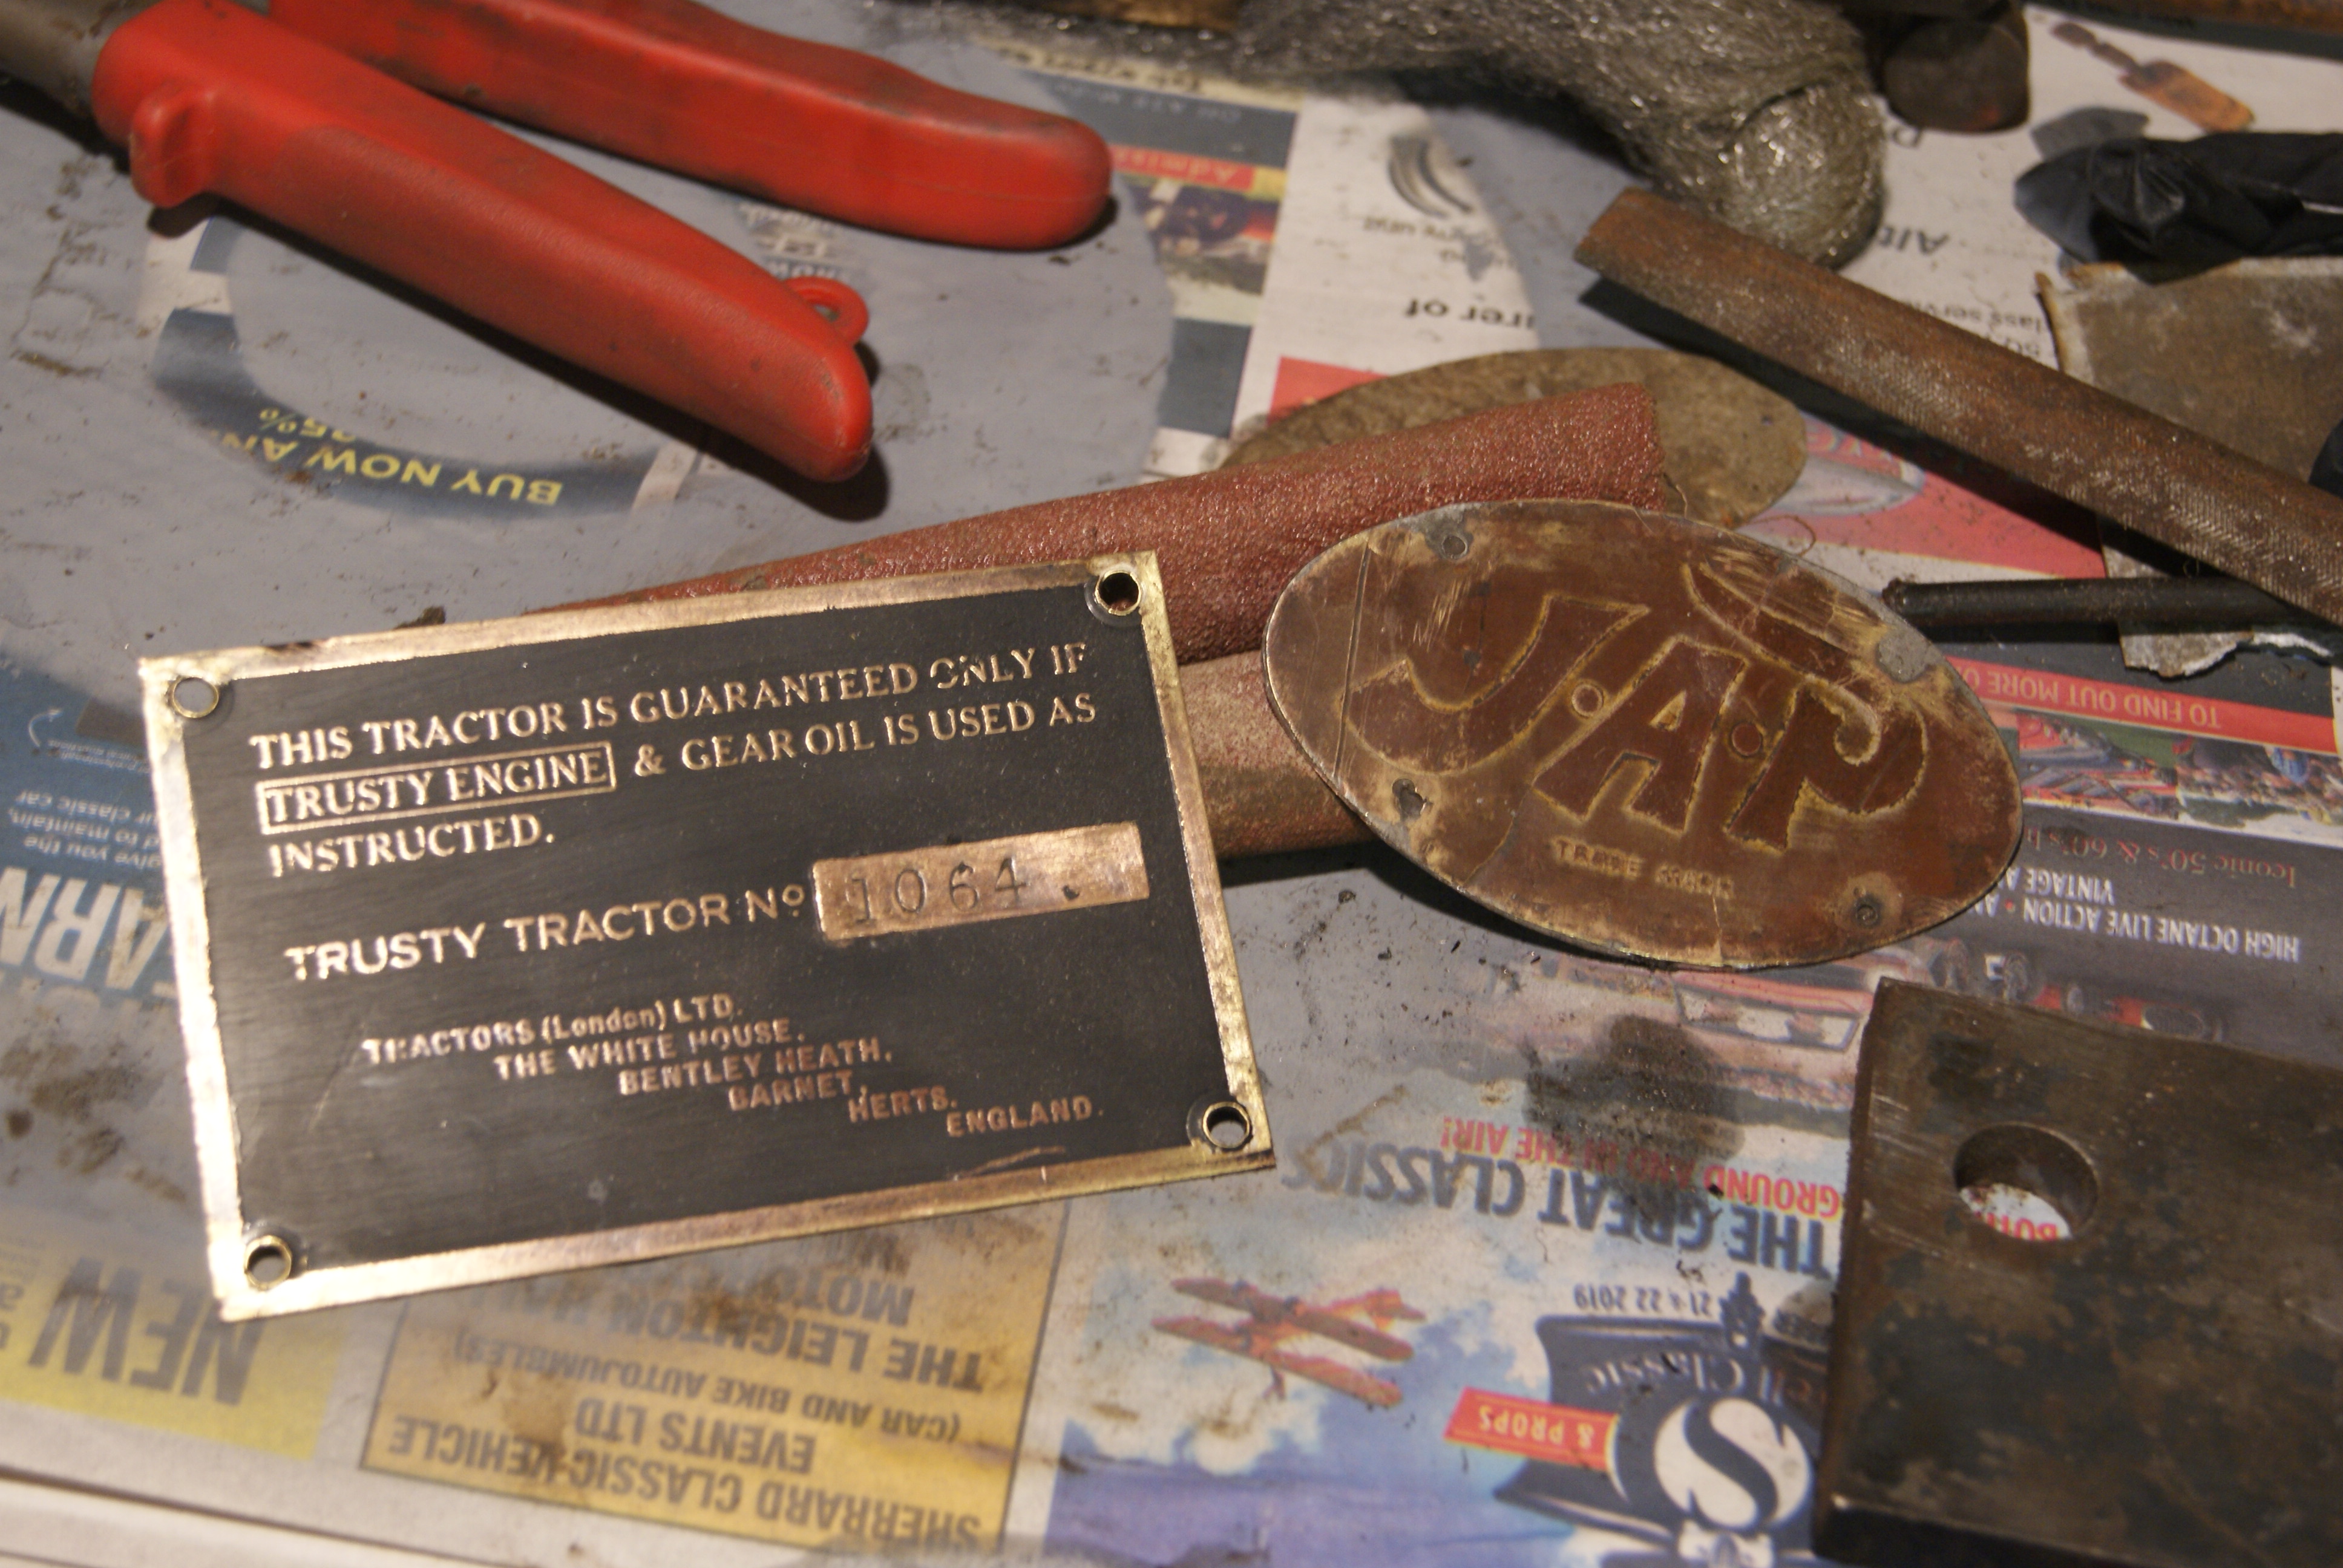
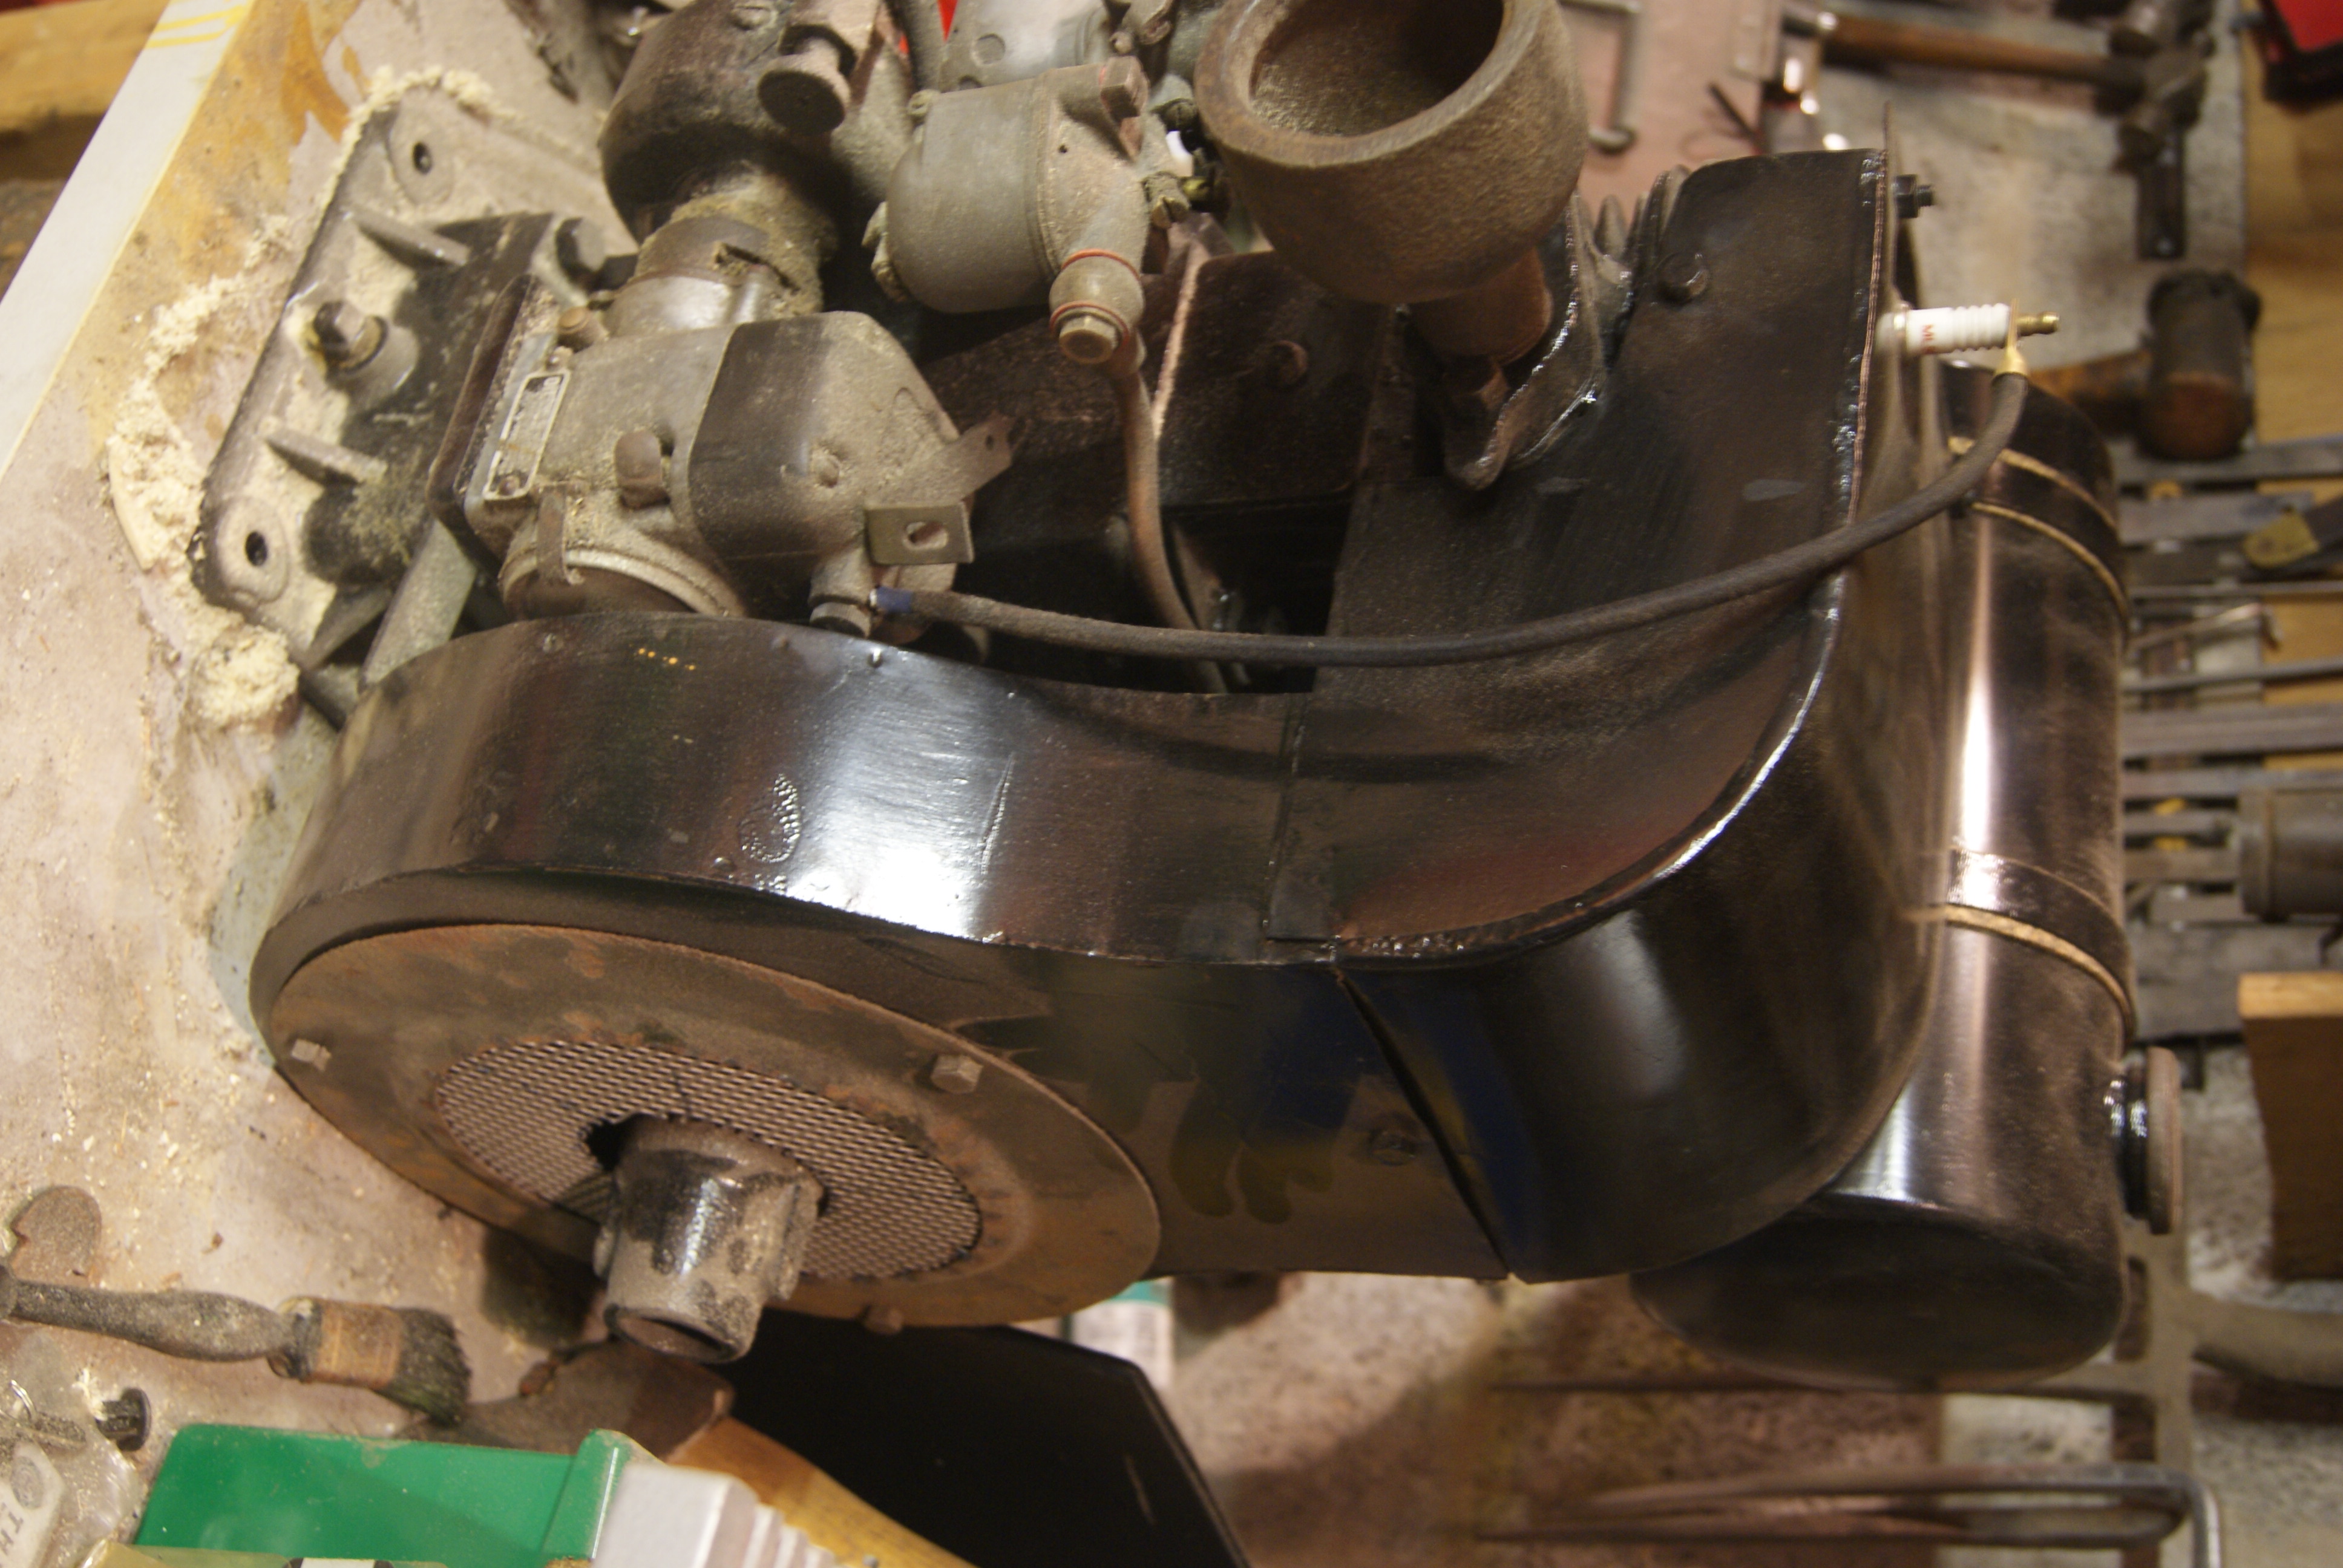
Now I’m really stating to get into the swing of this rebuild! As a challenge I thought that I’d tackle the badge on the cowling just above the flywheel- the early JAP 5’s had an oval brass plate rivetted to the cowling instead of having JAP embossed into the steel like the later ones had.
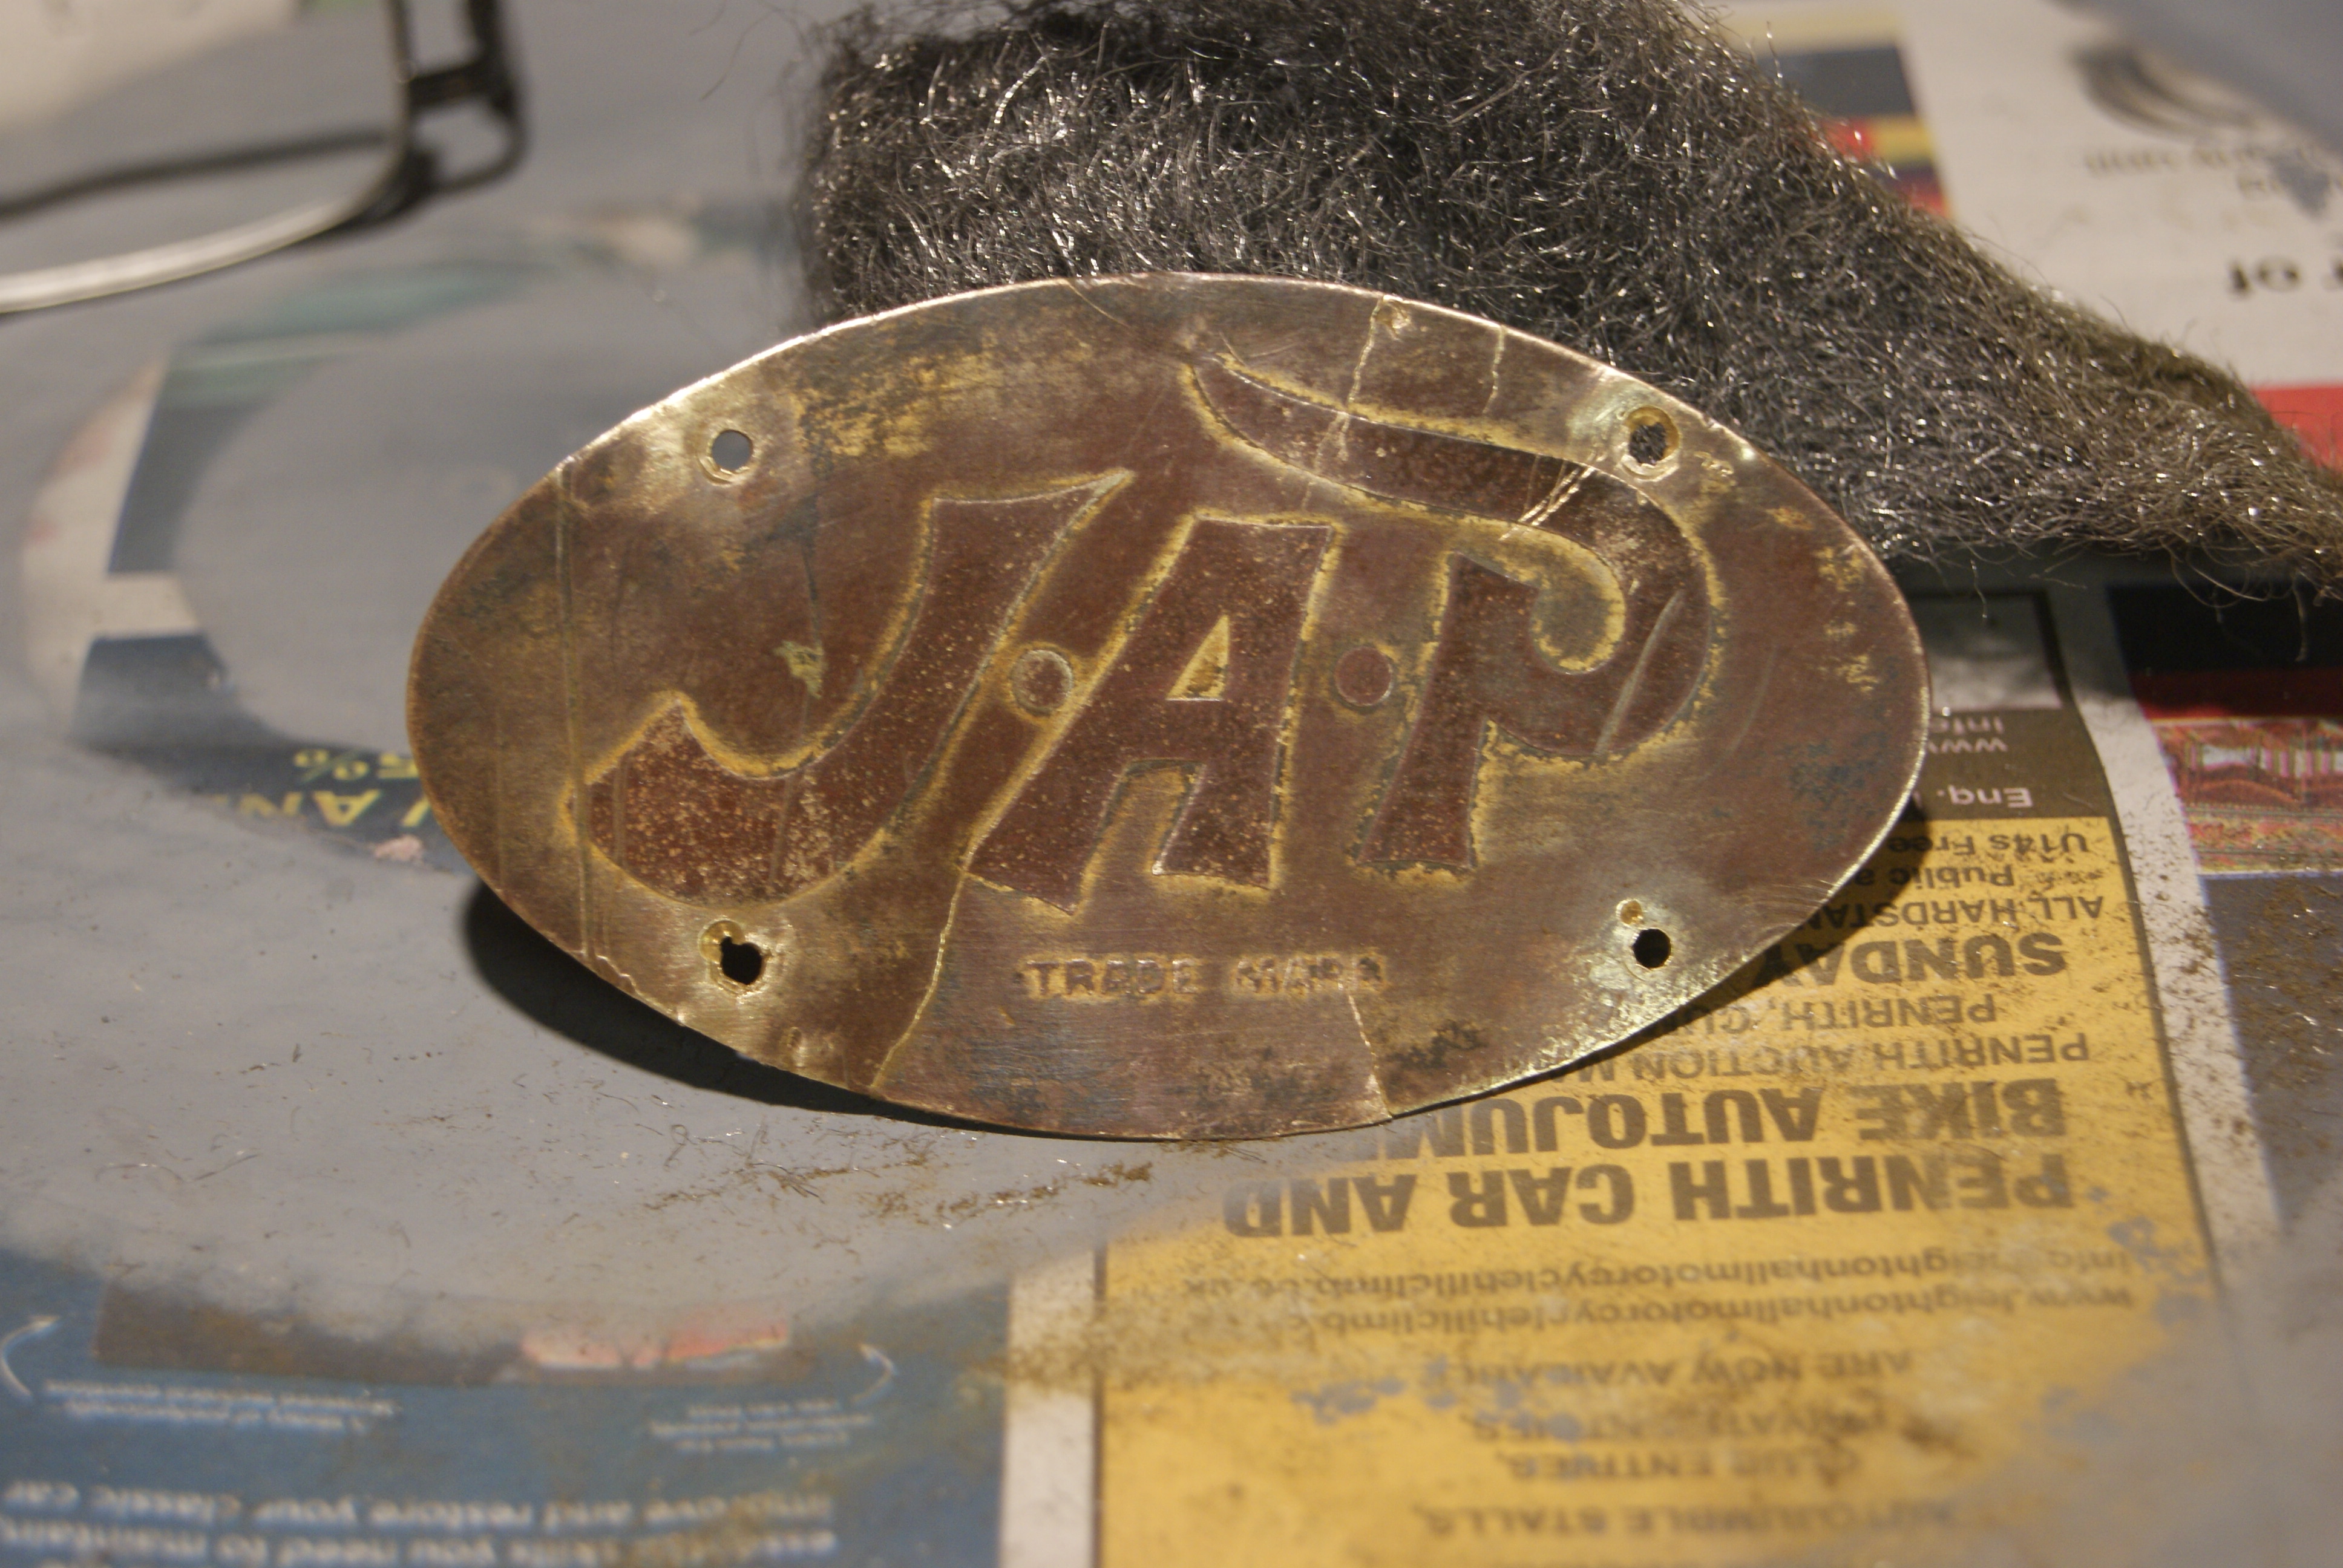
As with all older machinery they have survived much longer and been through a lot more wear than some of the younger ones and so there is usually more to repair. This is no exception. The oval brass plate was still in one piece but only just- it had cracks all over it and the rust behind it had pushed it into all sorts of stretched shapes around the rivets; still, it hadn’t been forced with a screwdriver in an attempt to steal it, so I thought it worthwhile to try to repair it.
First off was to re-heat it using a little butane blow torch that I have. This will anneal it and make it more pliable, otherwise the cracks will spread once you try to work the material. I flattened it out as best as I dared on a flat anvil using a small hammer, then turned it over and spread solder thinly and evenly over the back of it using the blow torch again to get a larger area warm. The knack is quite easy once you’ve tried it a few times and you can get the solder to flow to the warmer areas using the flame of the blow torch; if the solder is too thick in places all you have to do is warm it up again and it will spread out.
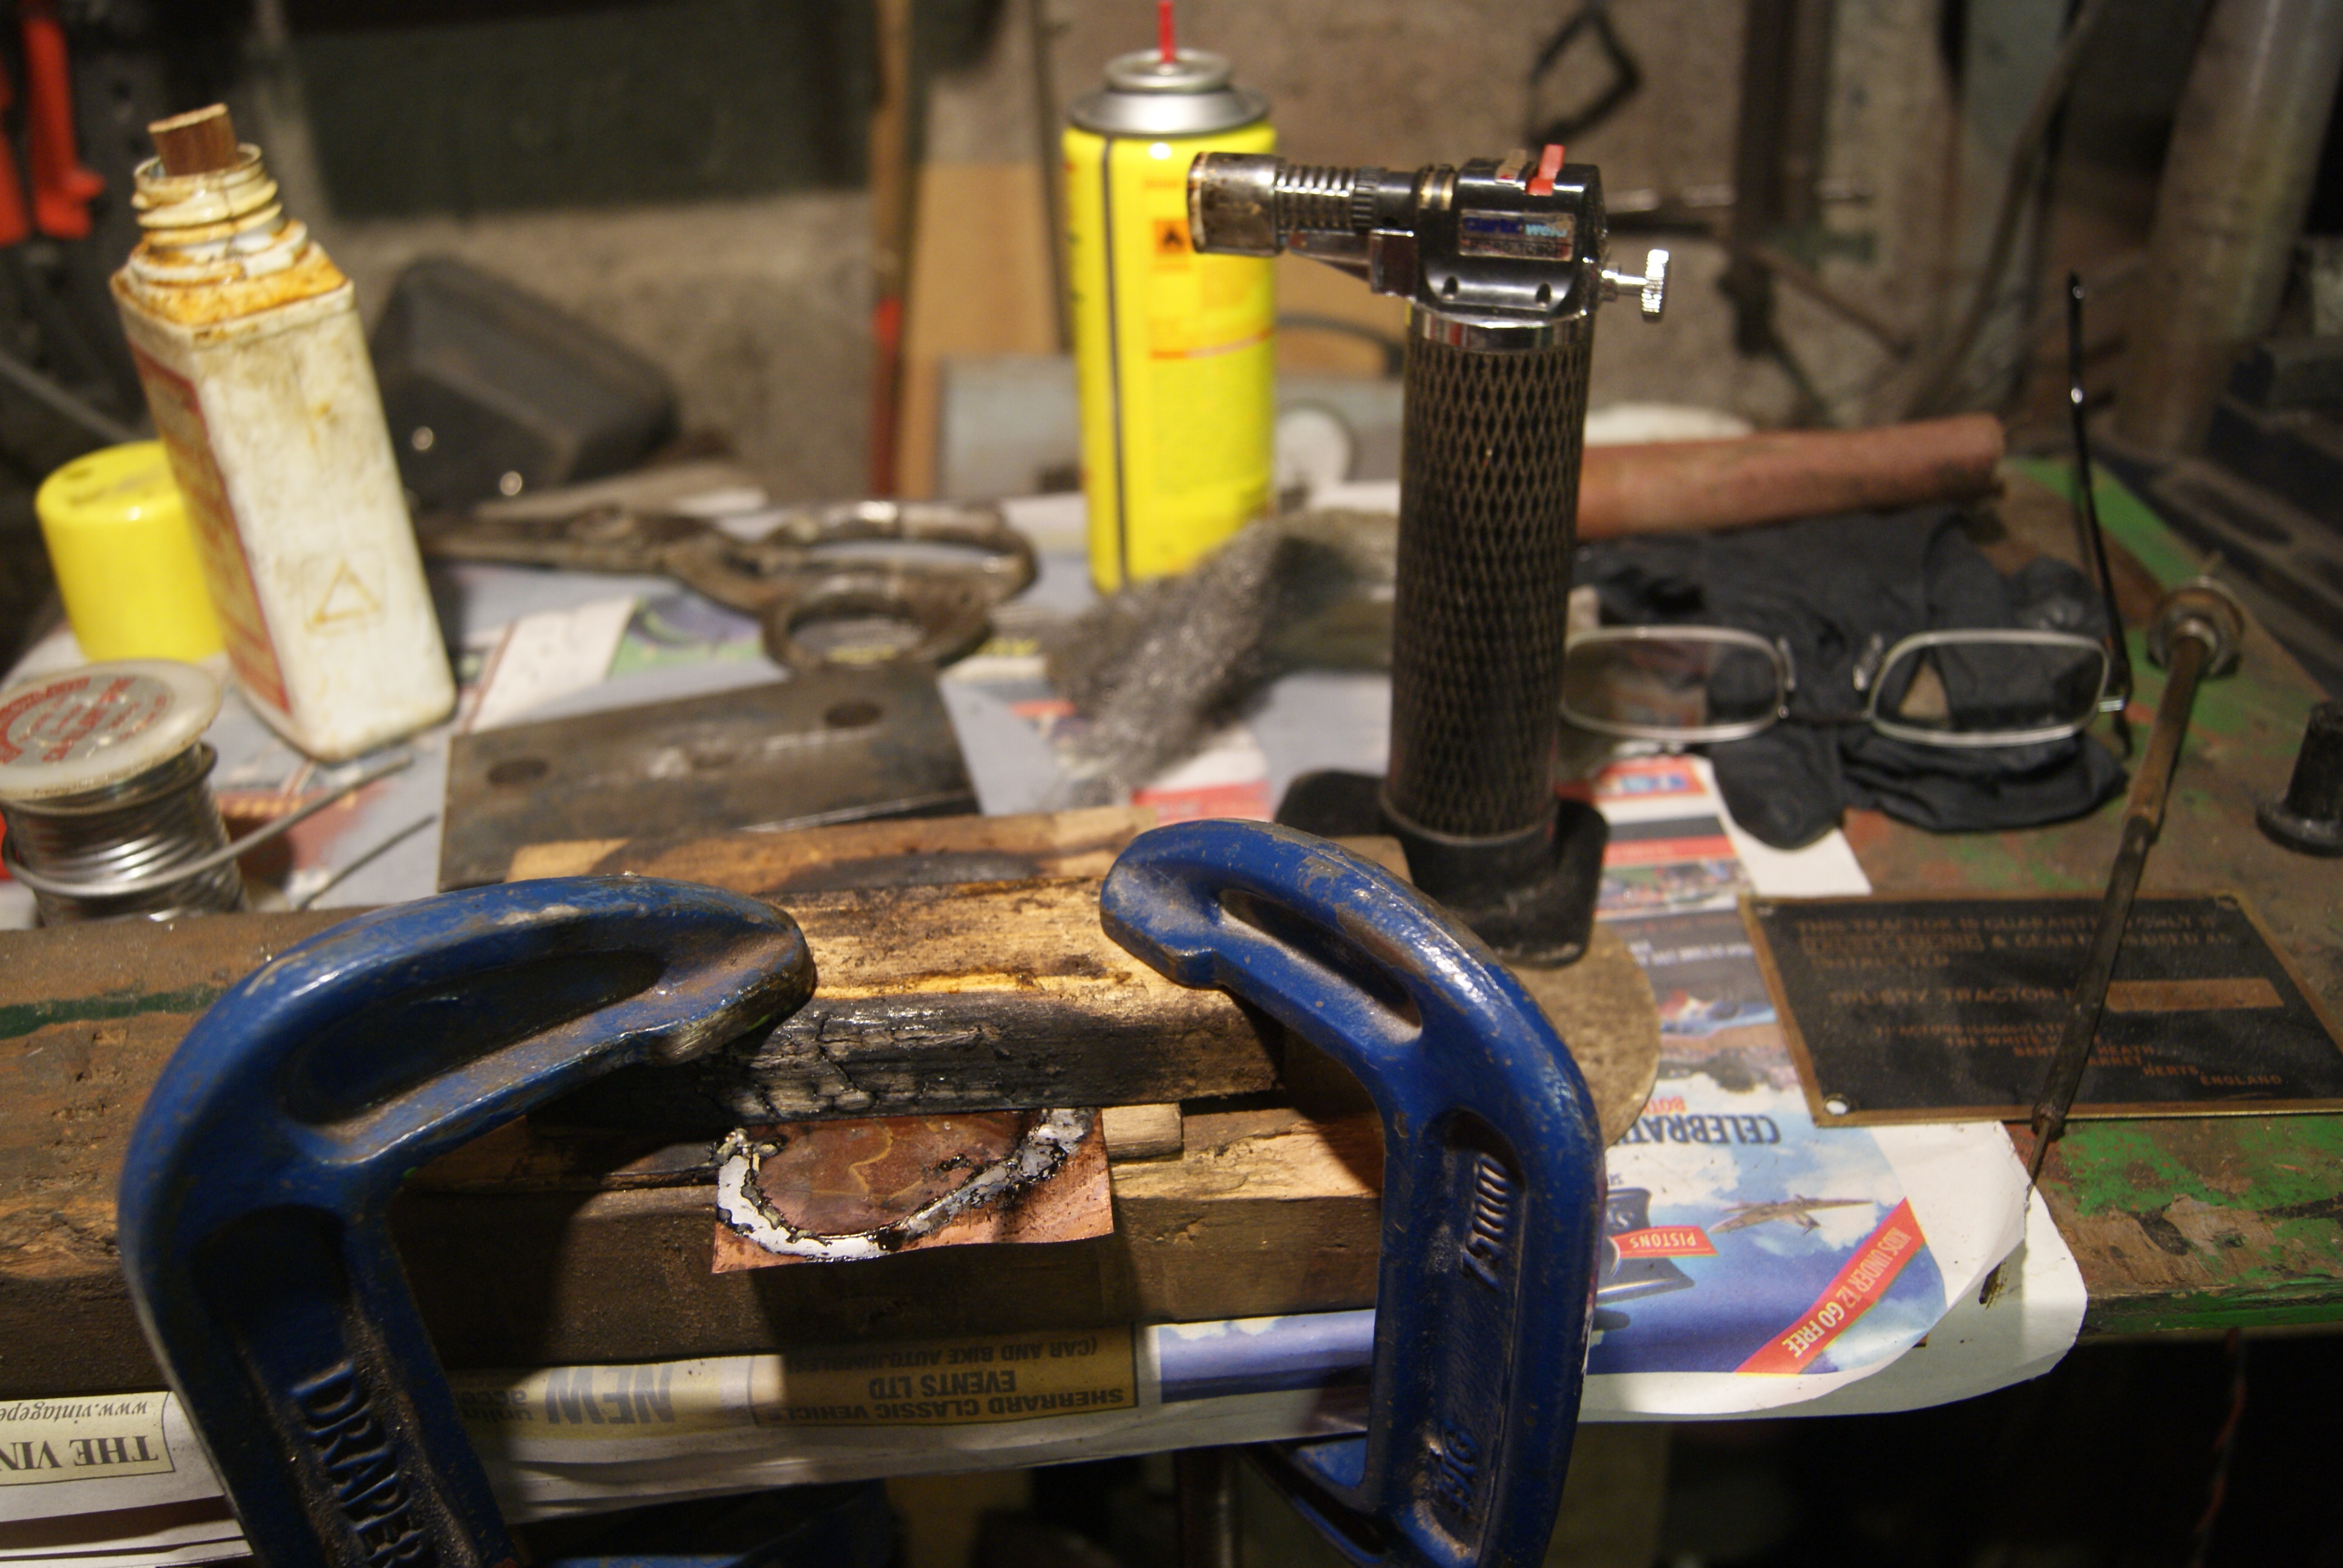
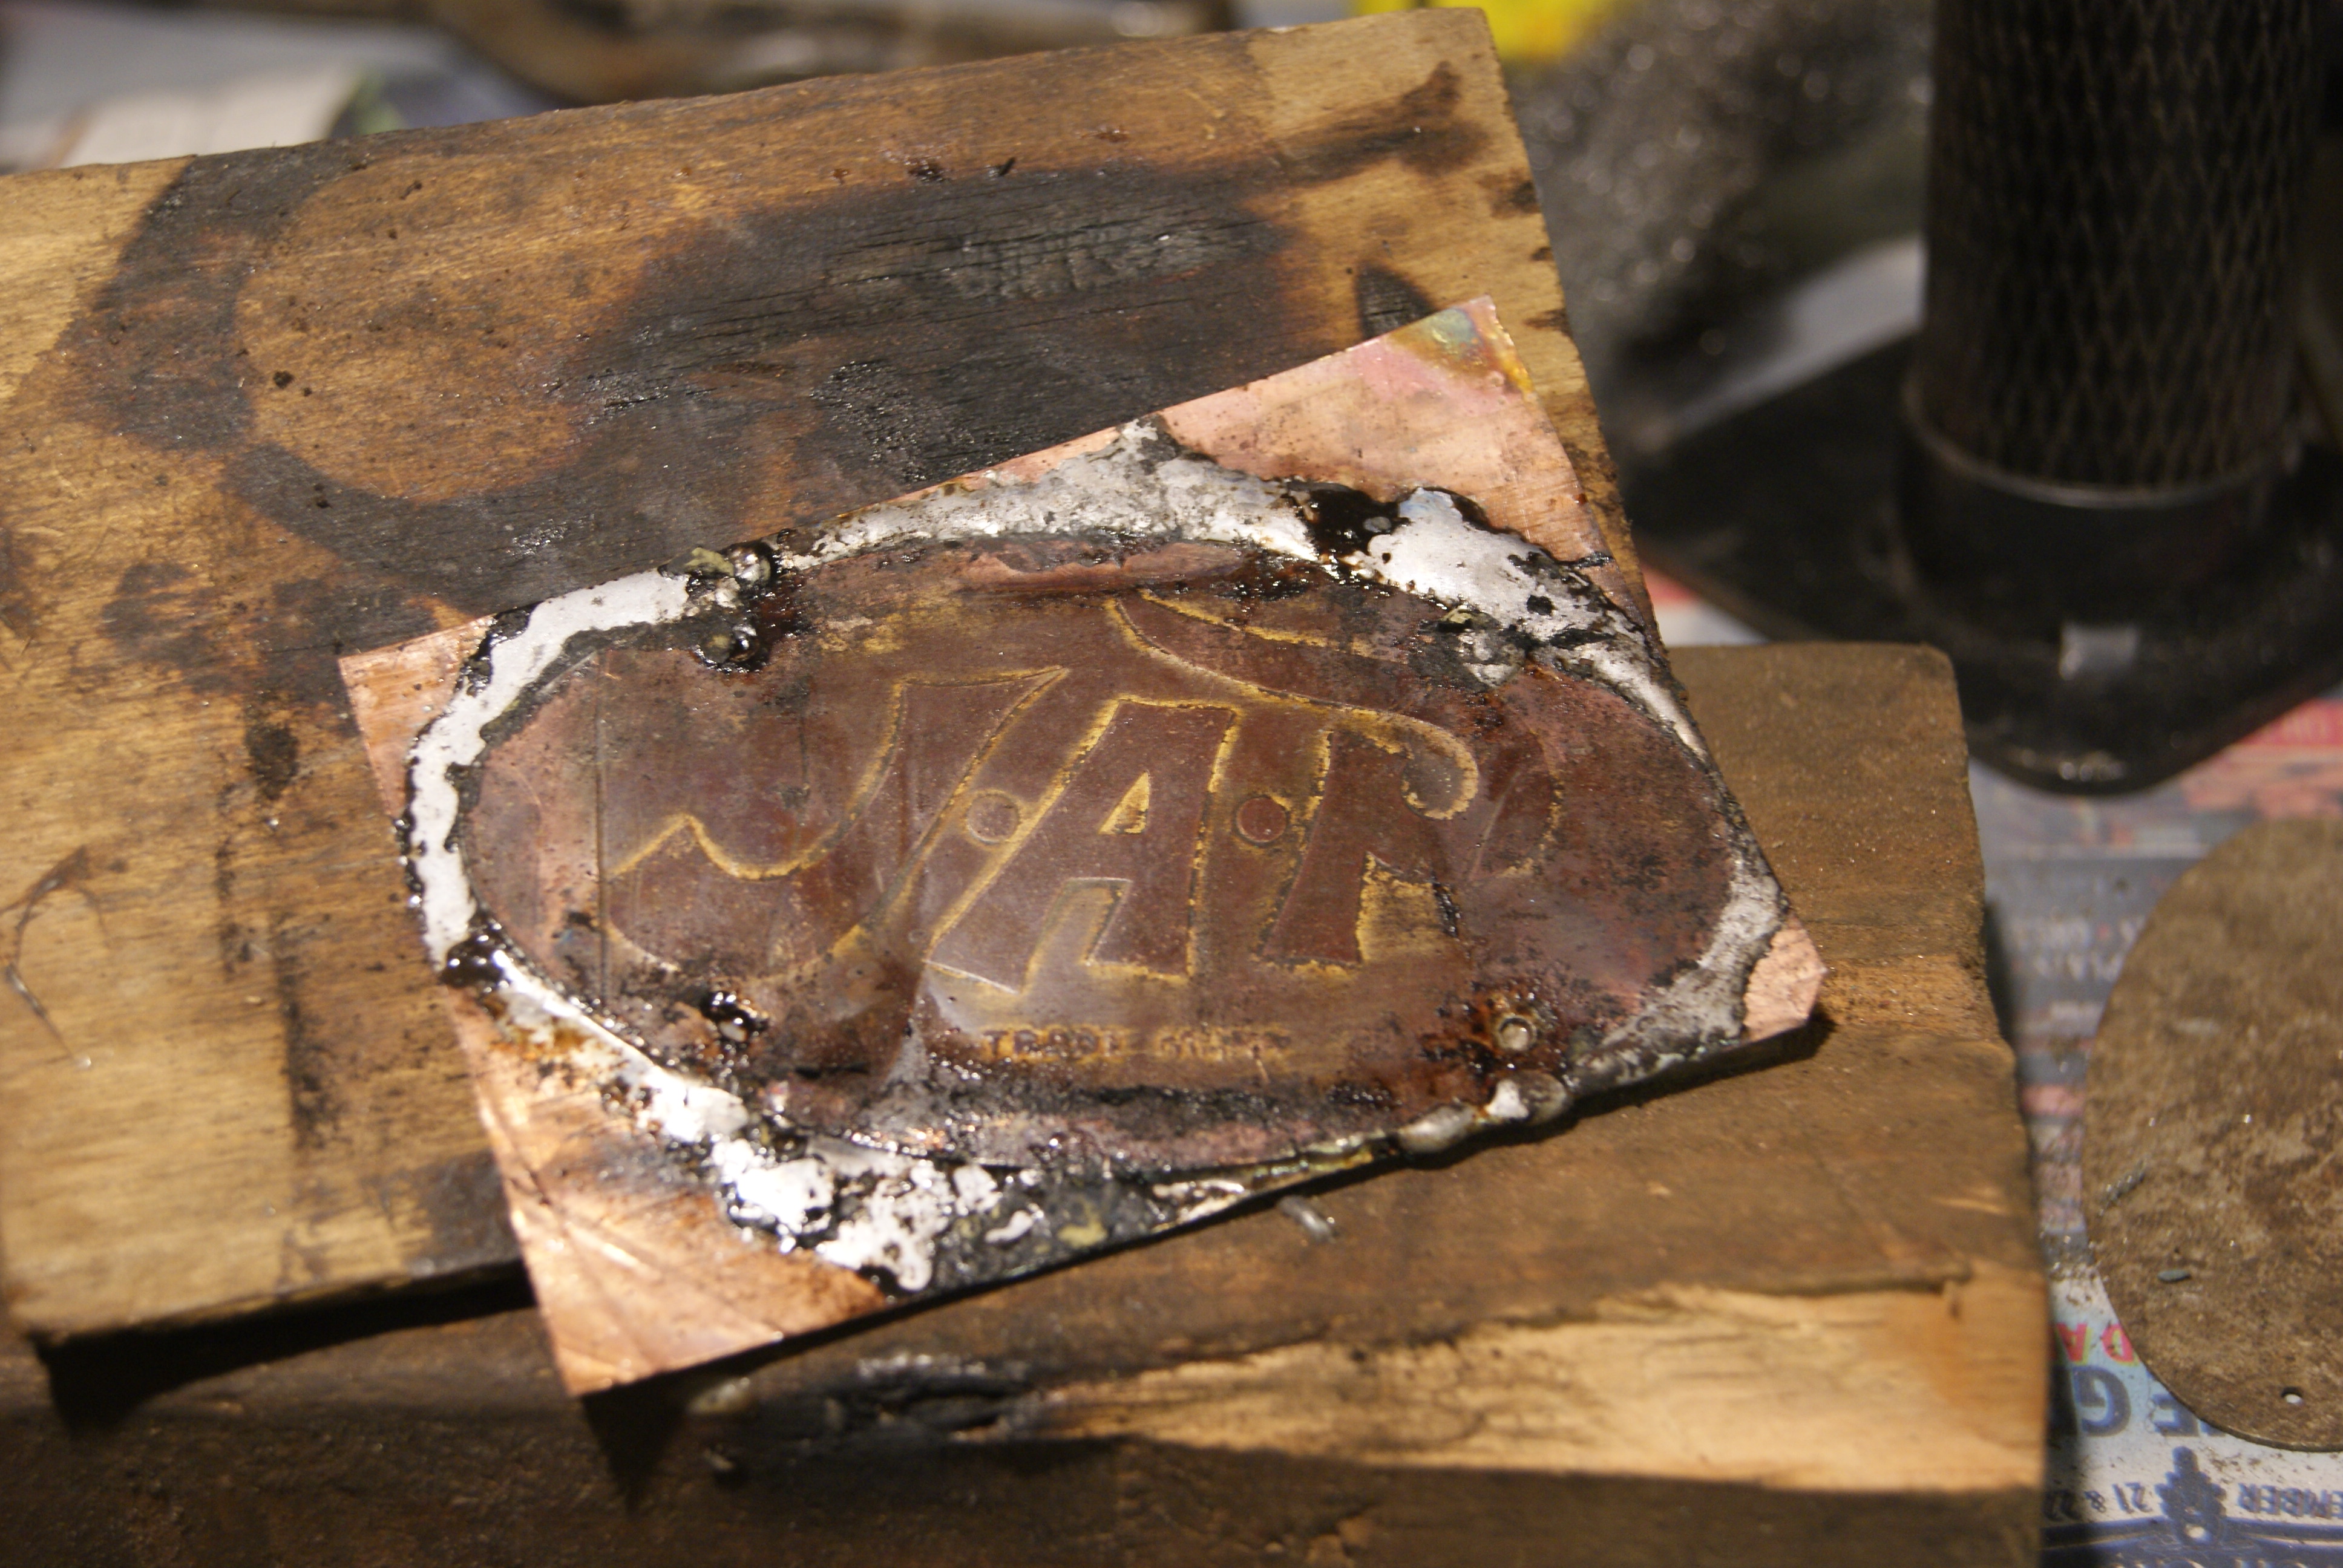
Now, here comes the clever bit- I turned it over again and pressed the soldered side against a thin sheet of copper. A flat block of wood underneath and another, narrower one clamped across the top with G-clamps made sure that there was plenty of pressure pushing the two together, then I heated the sides of the brass plate that were still exposed (that’s why I used a narrower block of wood on top, so I could still get to heat the brass and melt the solder whilst the pressure was till on).
If you’ve done it right you should see little beads of solder squeezed out of the join between the plates but if your plate is still a little wavy like mine was you will need to re-position the blocks a few times to make sure that you can get to heat all of the brass plate. Patience is the key and I found that every time I re-positioned them the two plates came that little bit closer together until the whole assembly was flat.
All you have to do then is clean it up with a file and it’s as good as new- well better, really, because it’s original!
Attachments:
April 18, 2020 at 2:57 pm #33894trusty220KeymasterAnother day, another step closer to finishing!
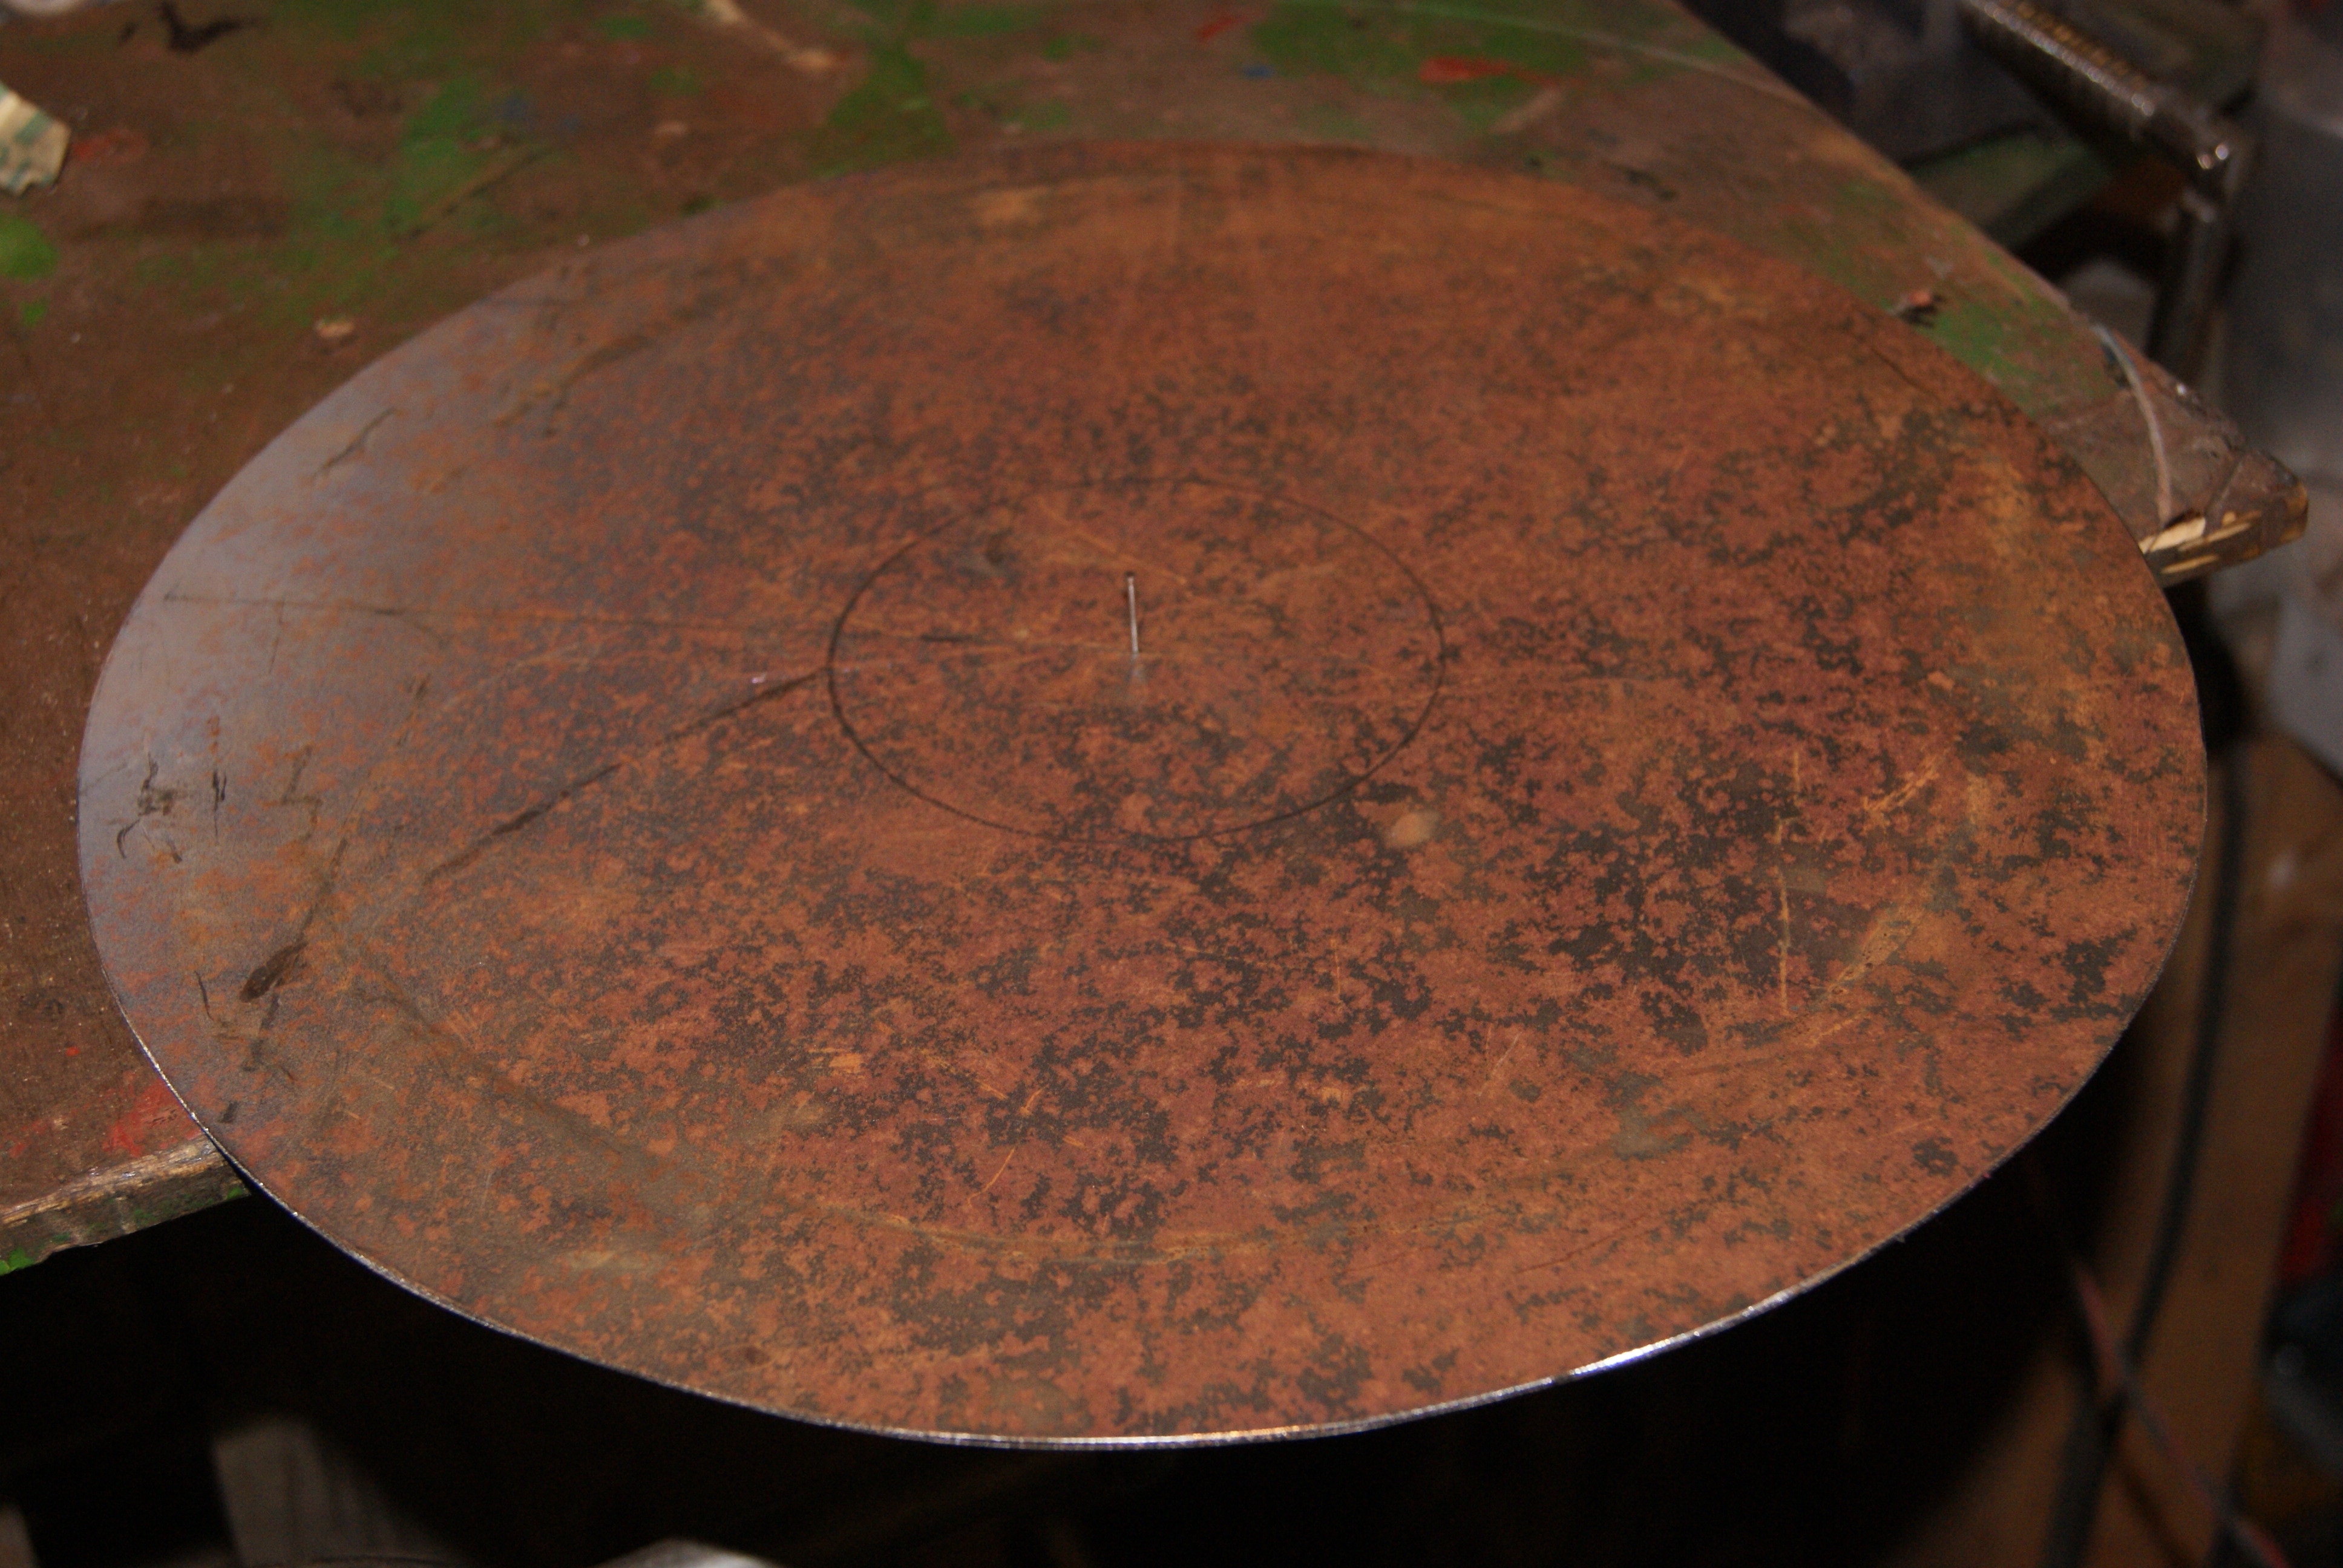
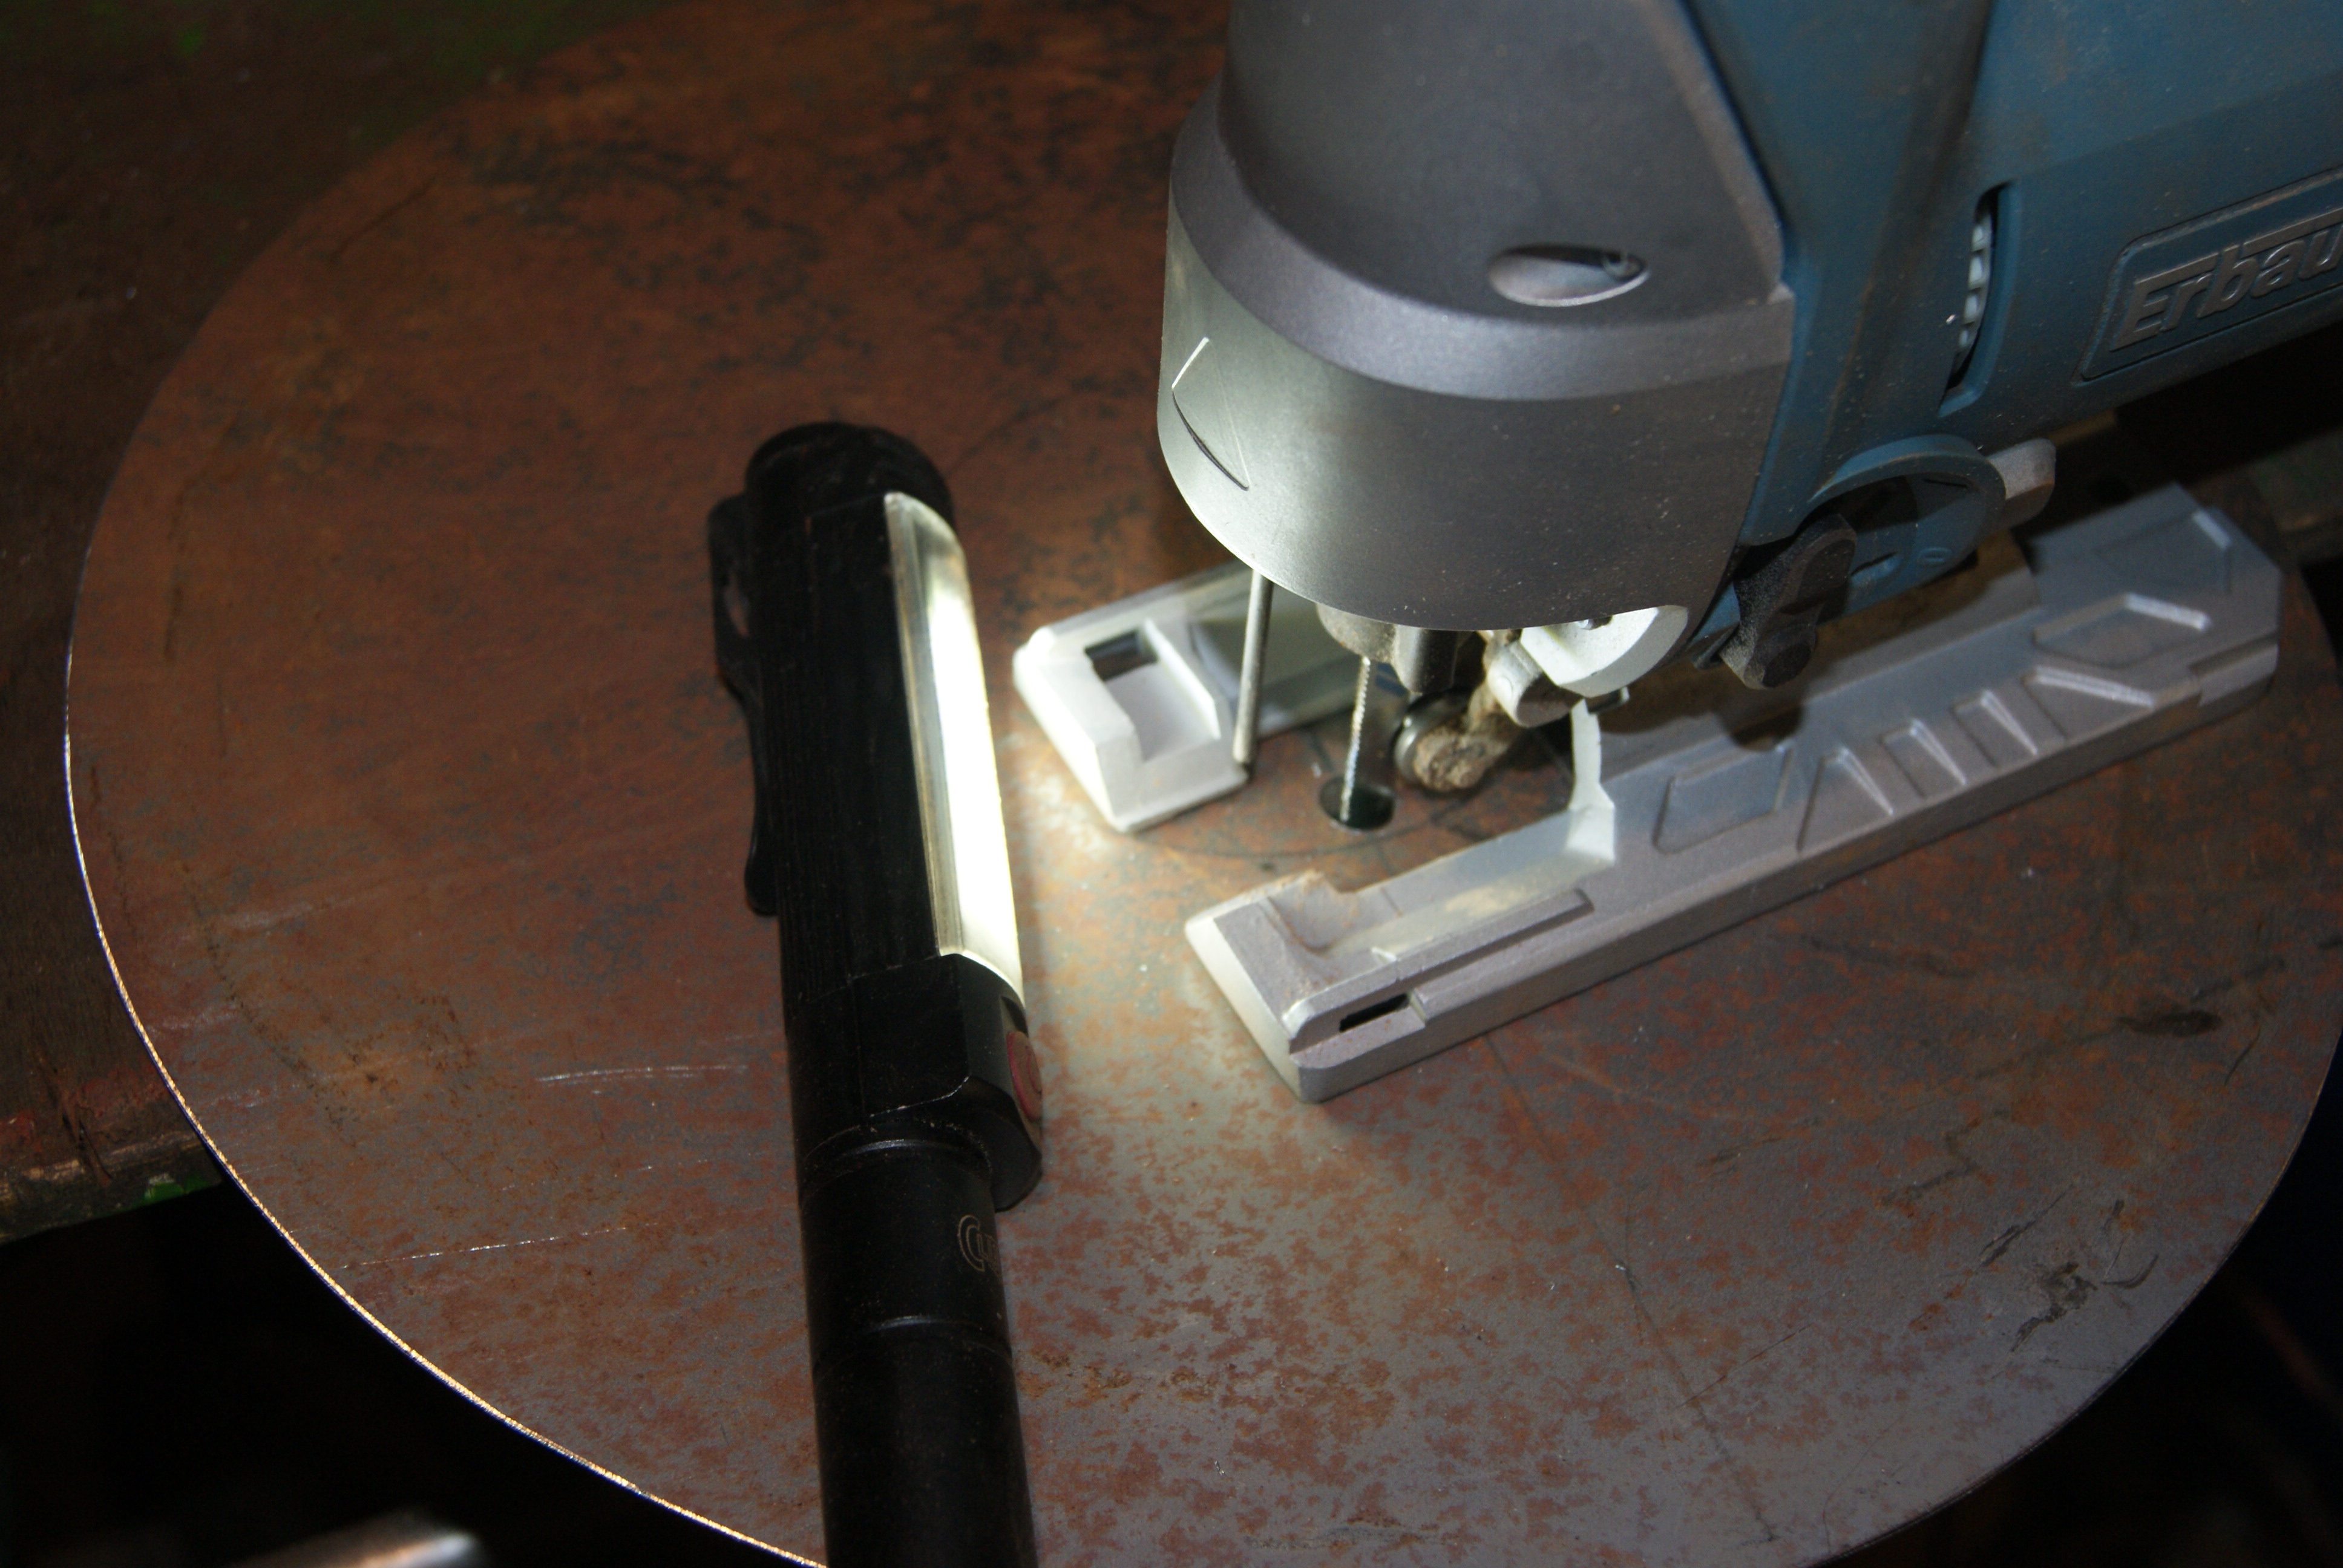
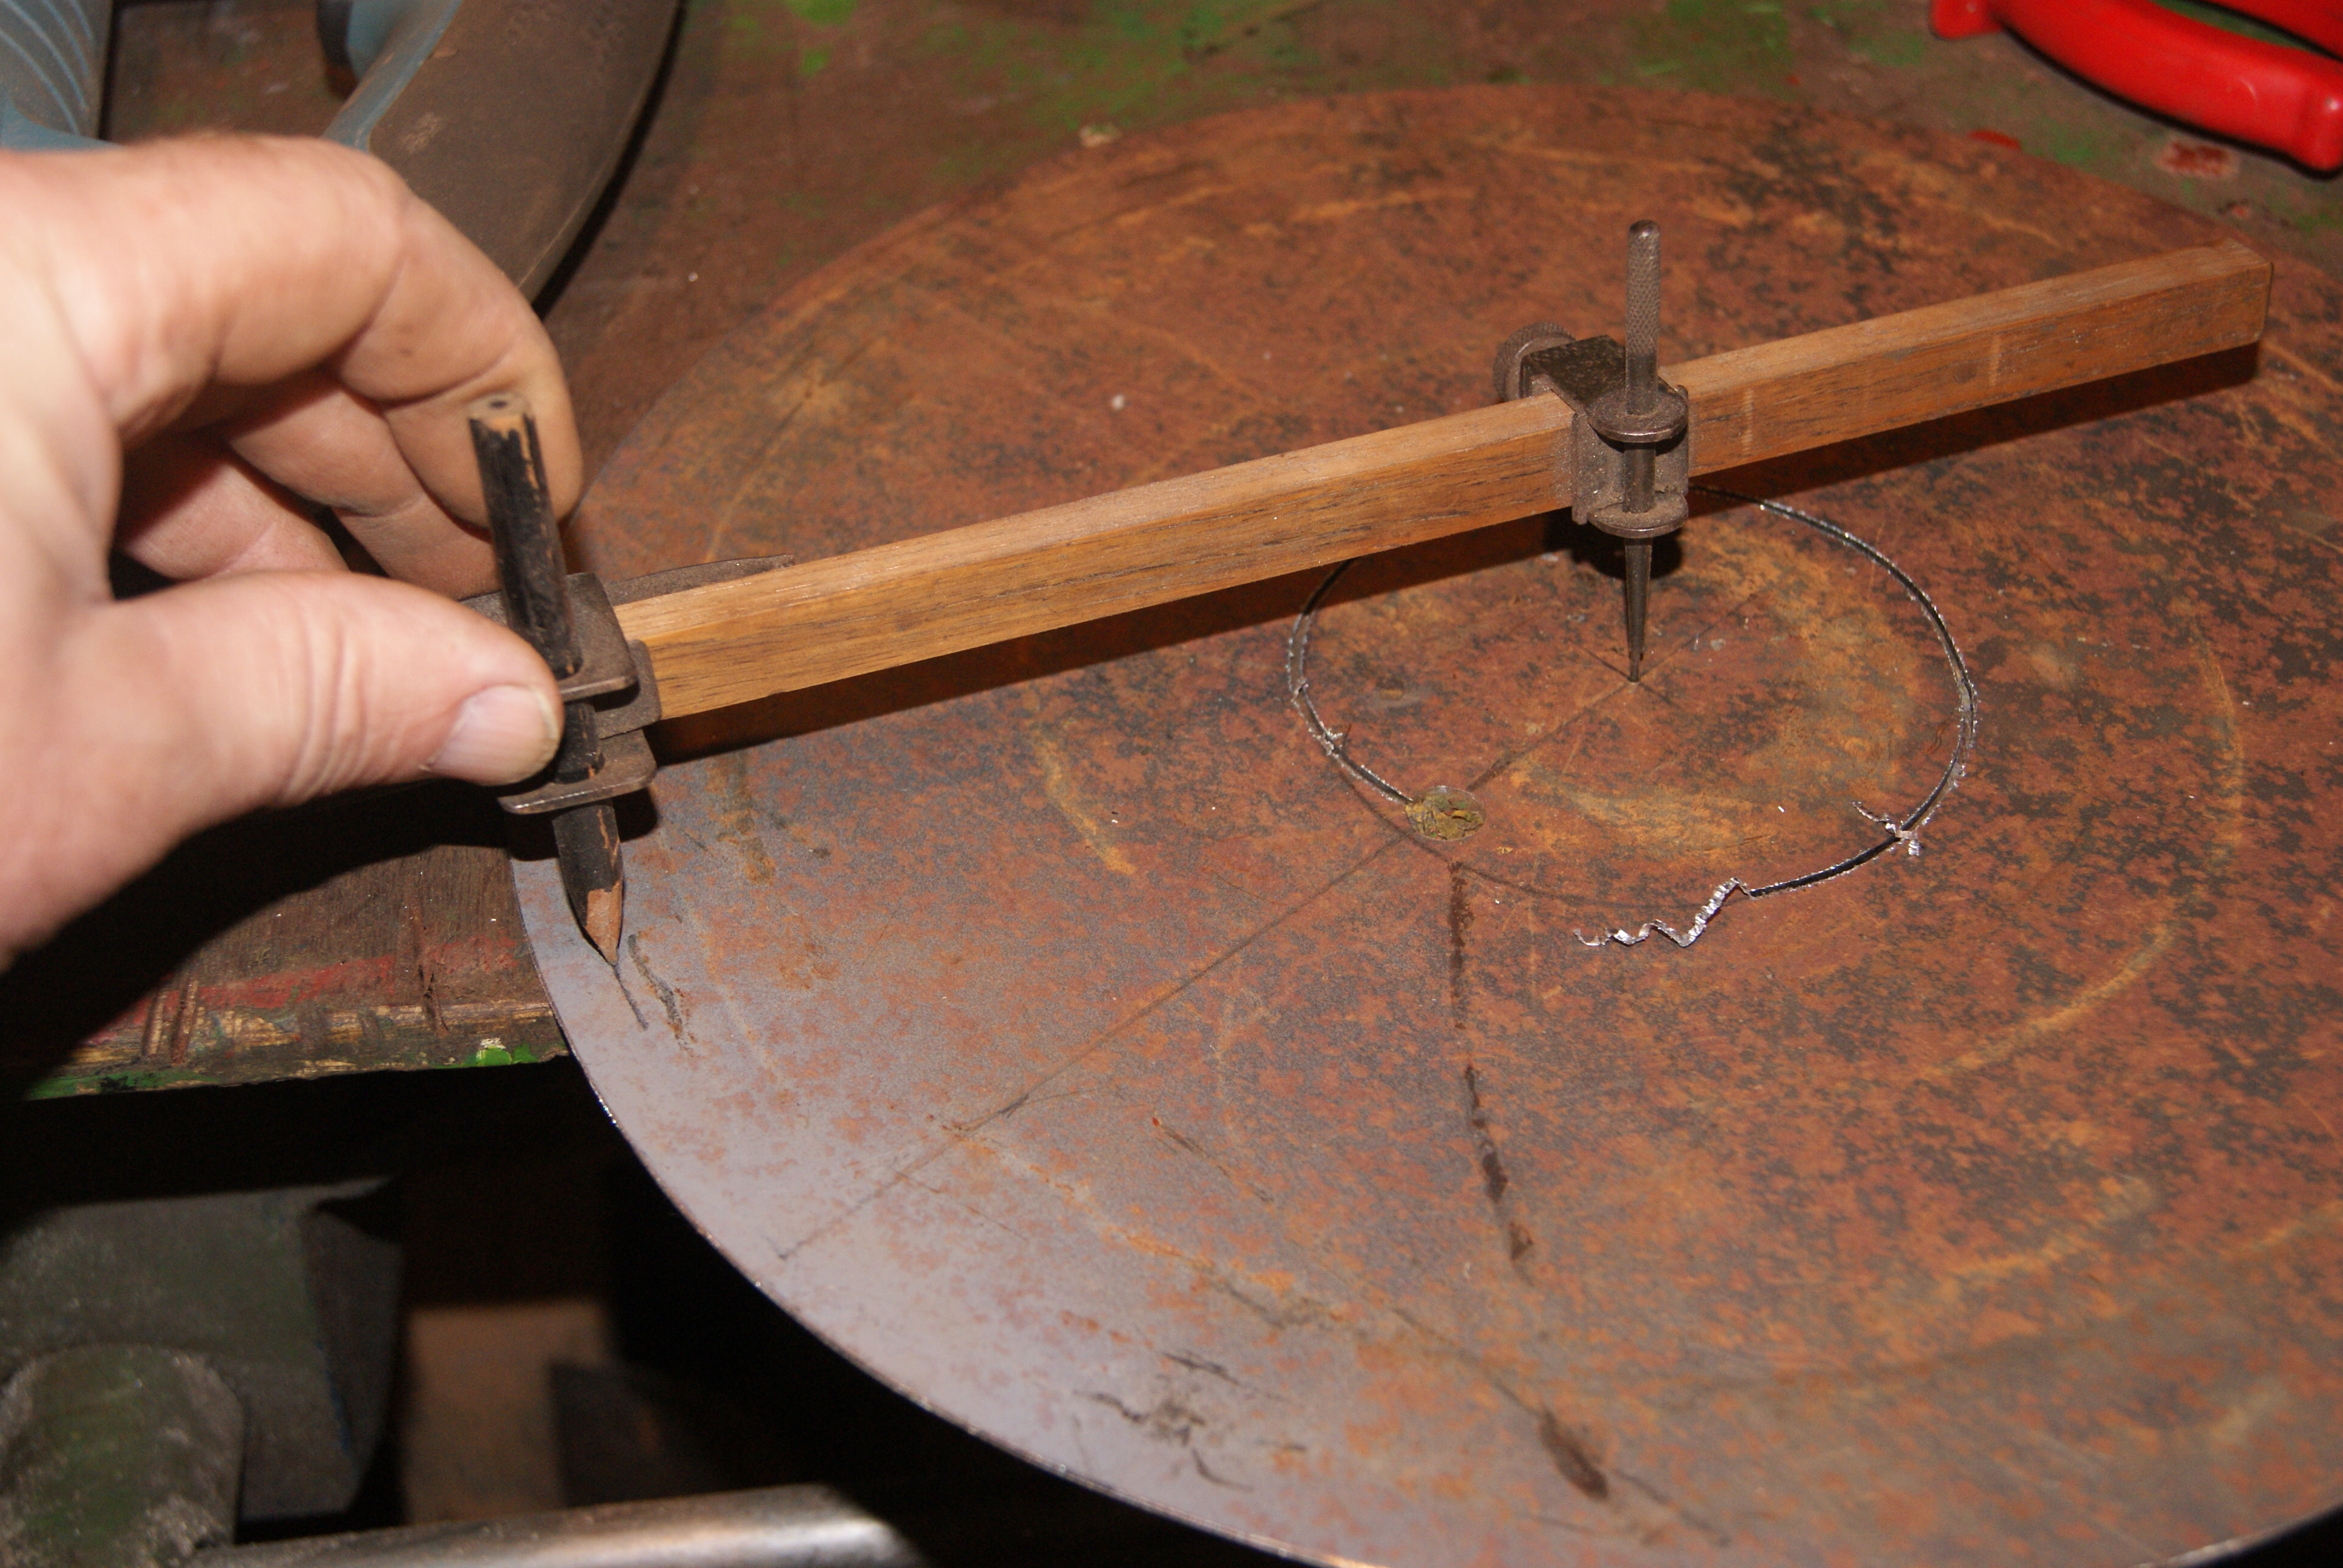
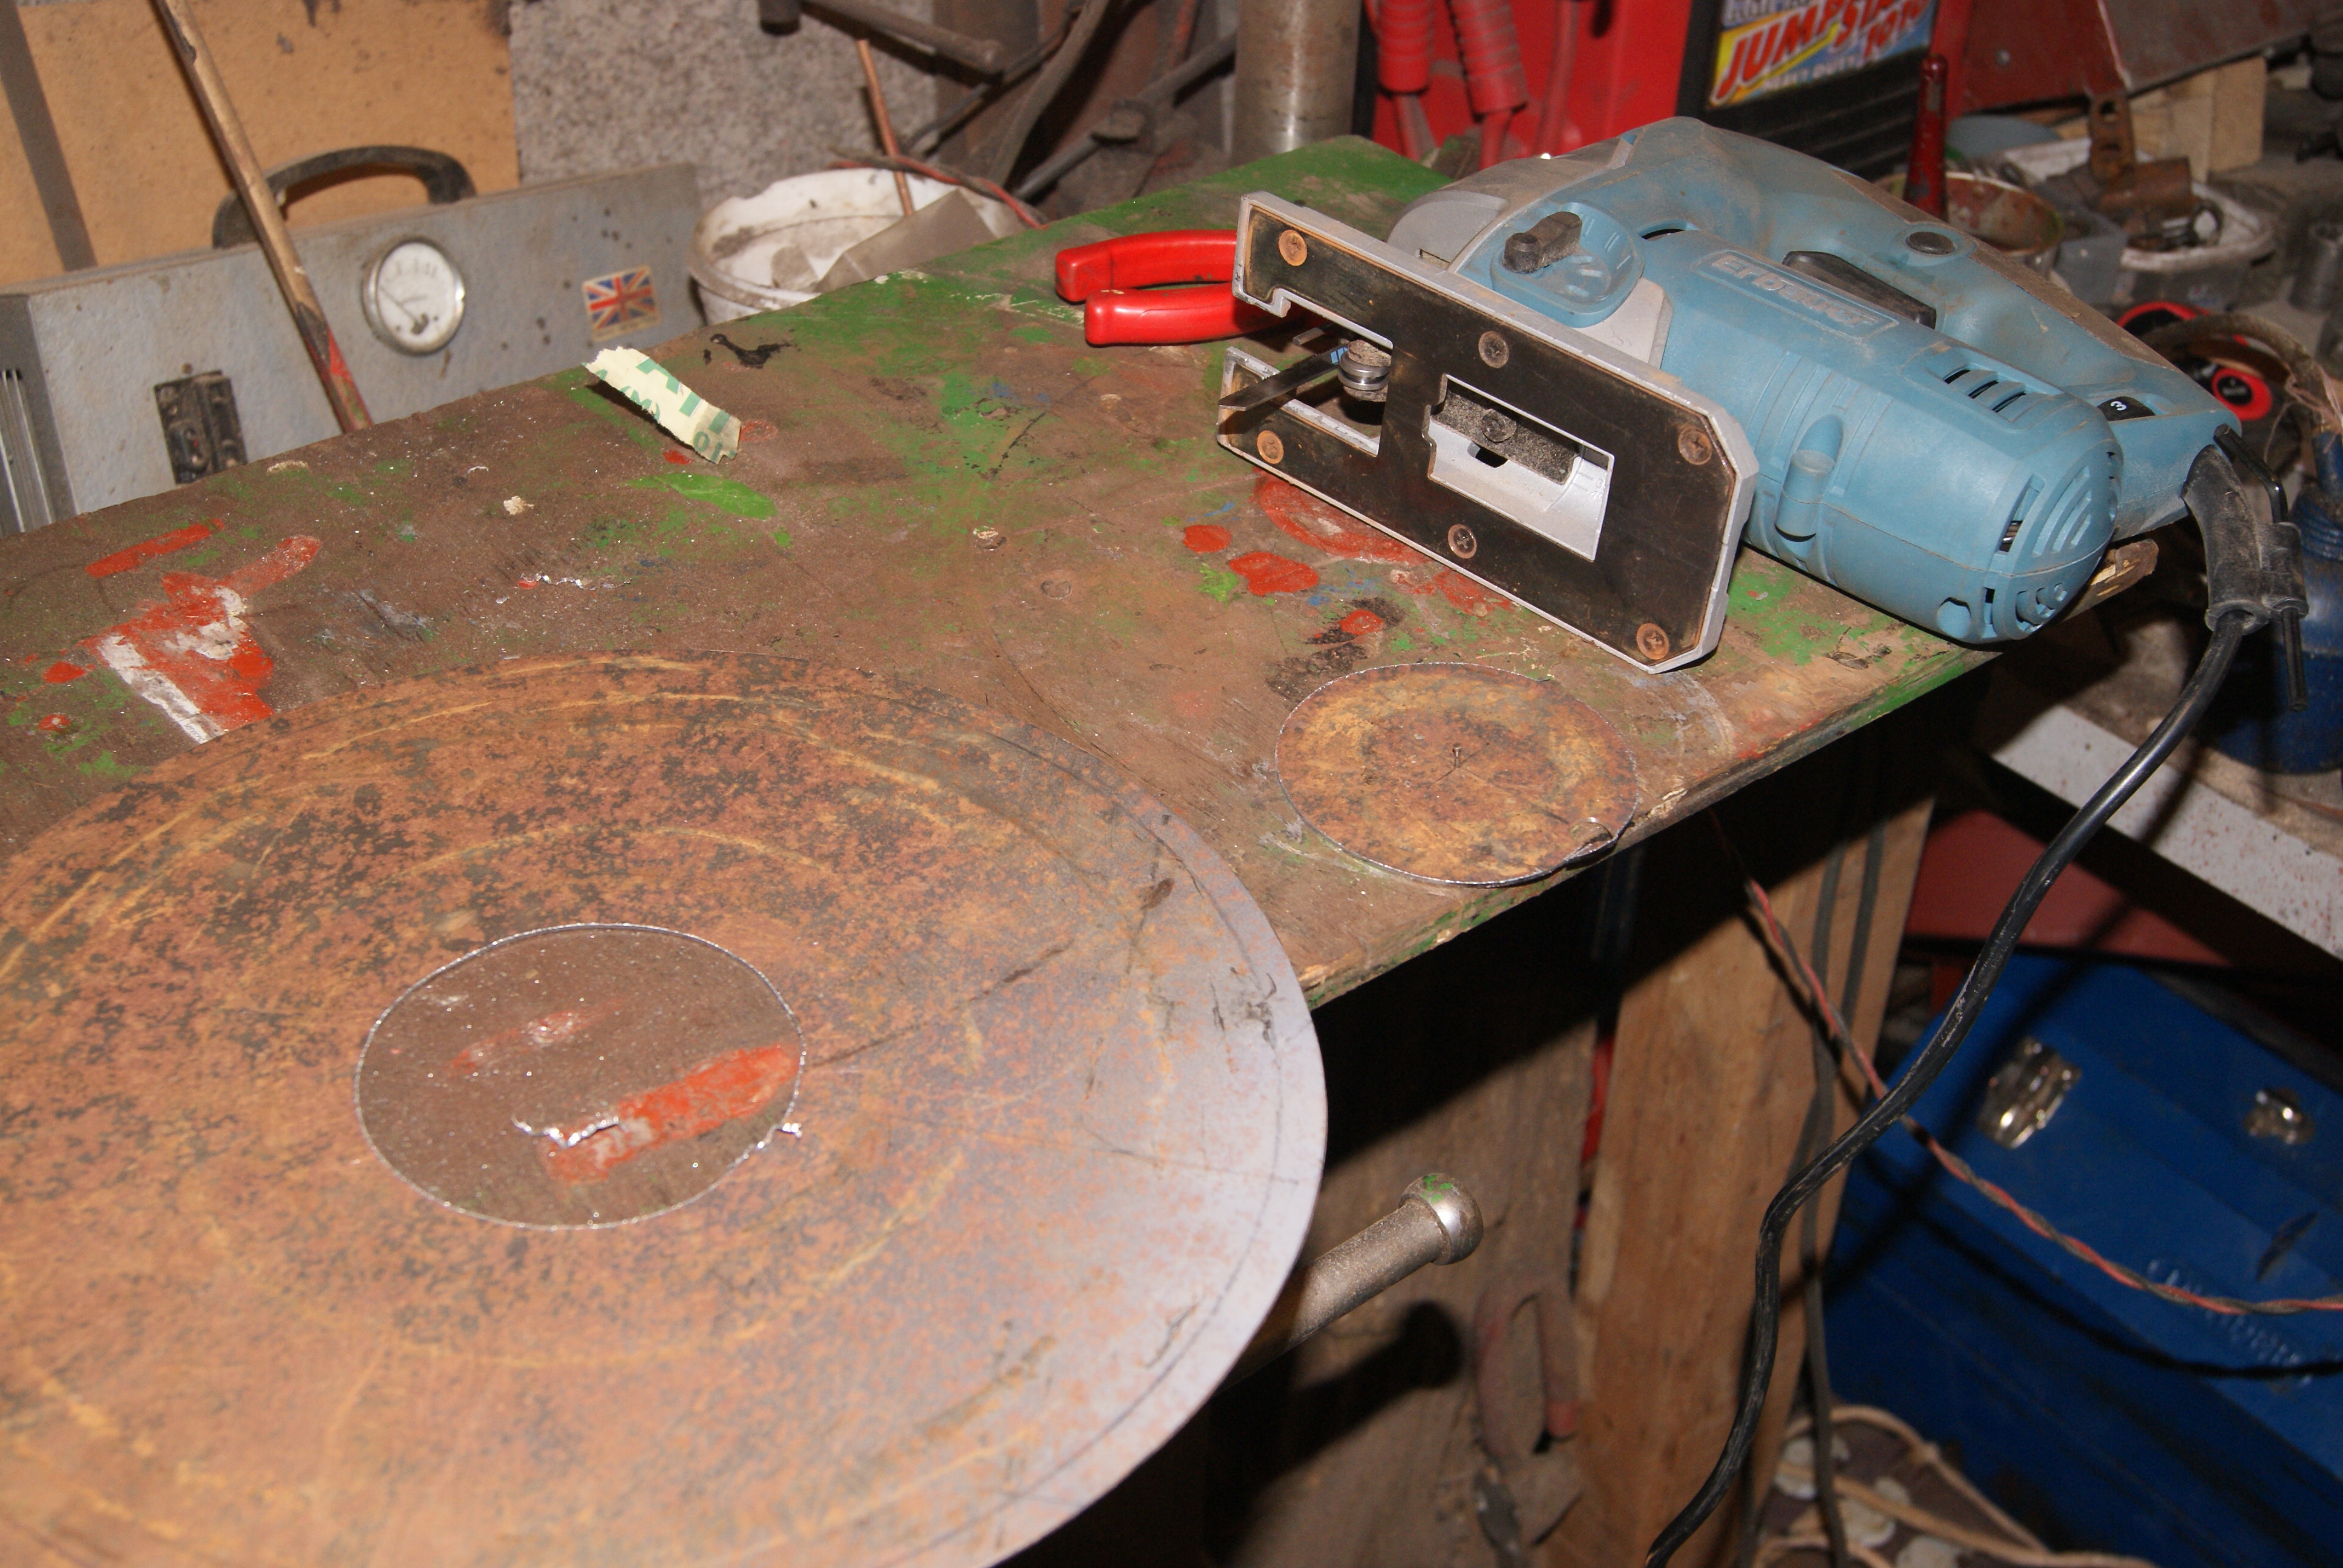
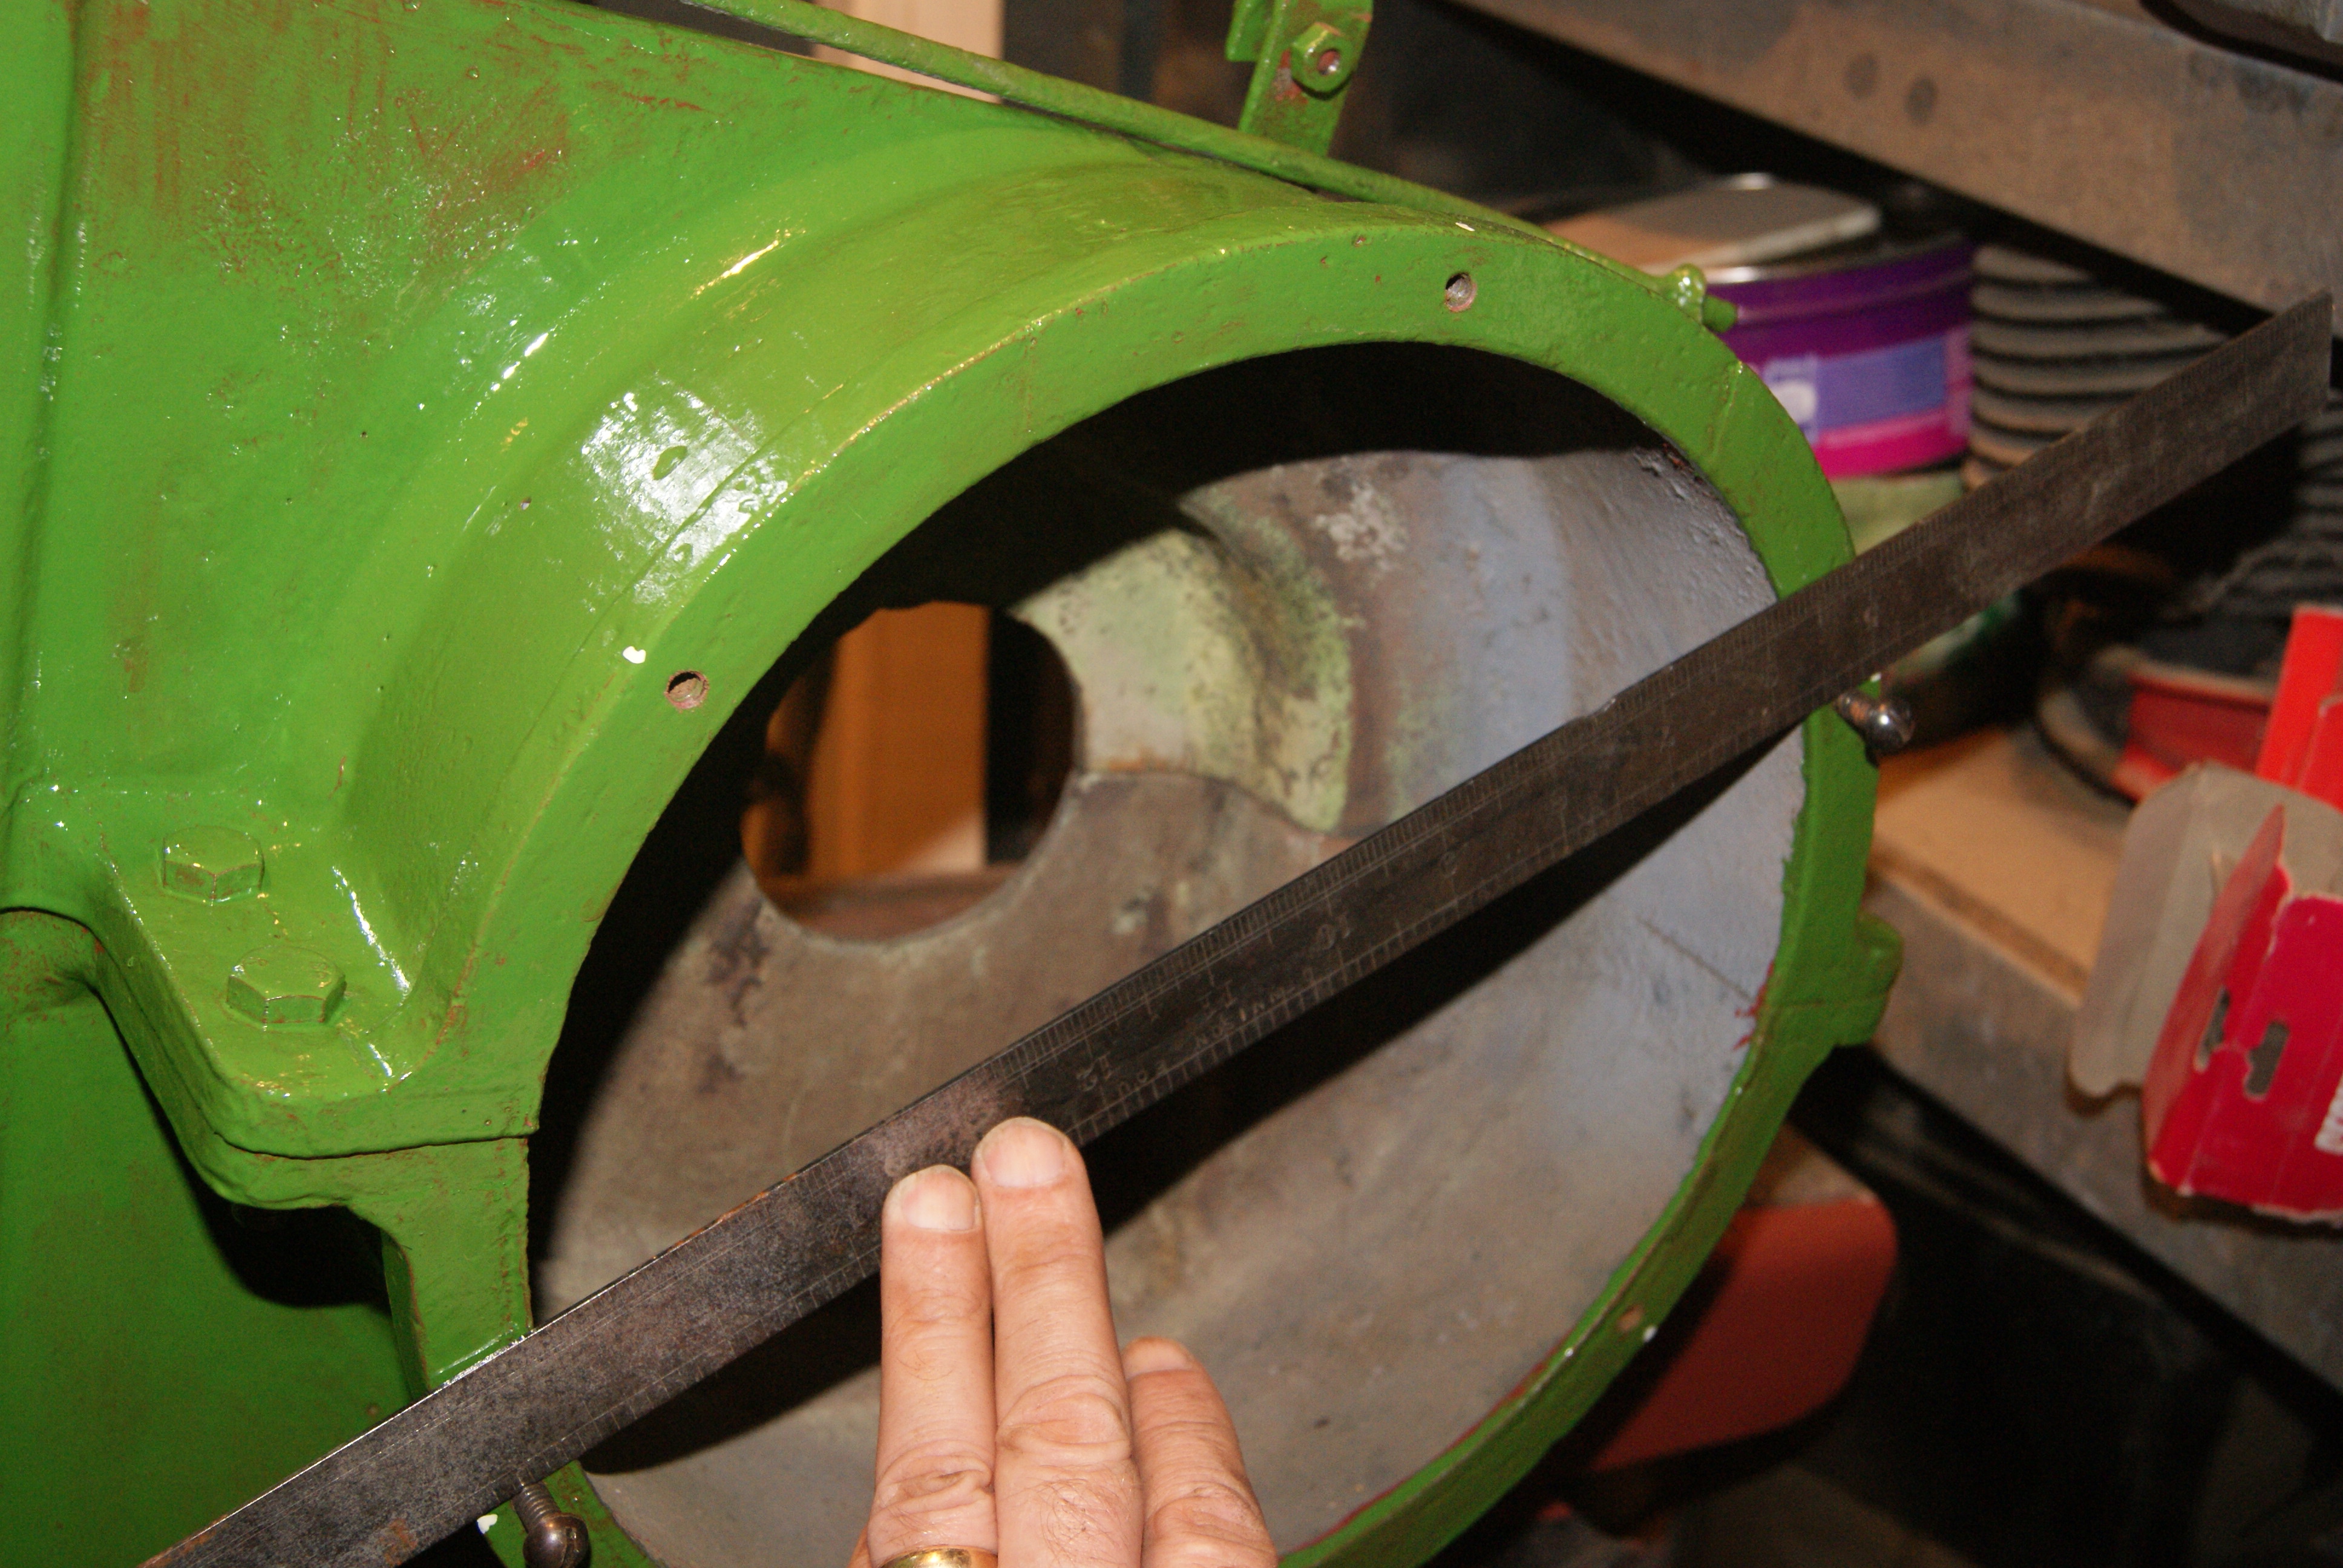
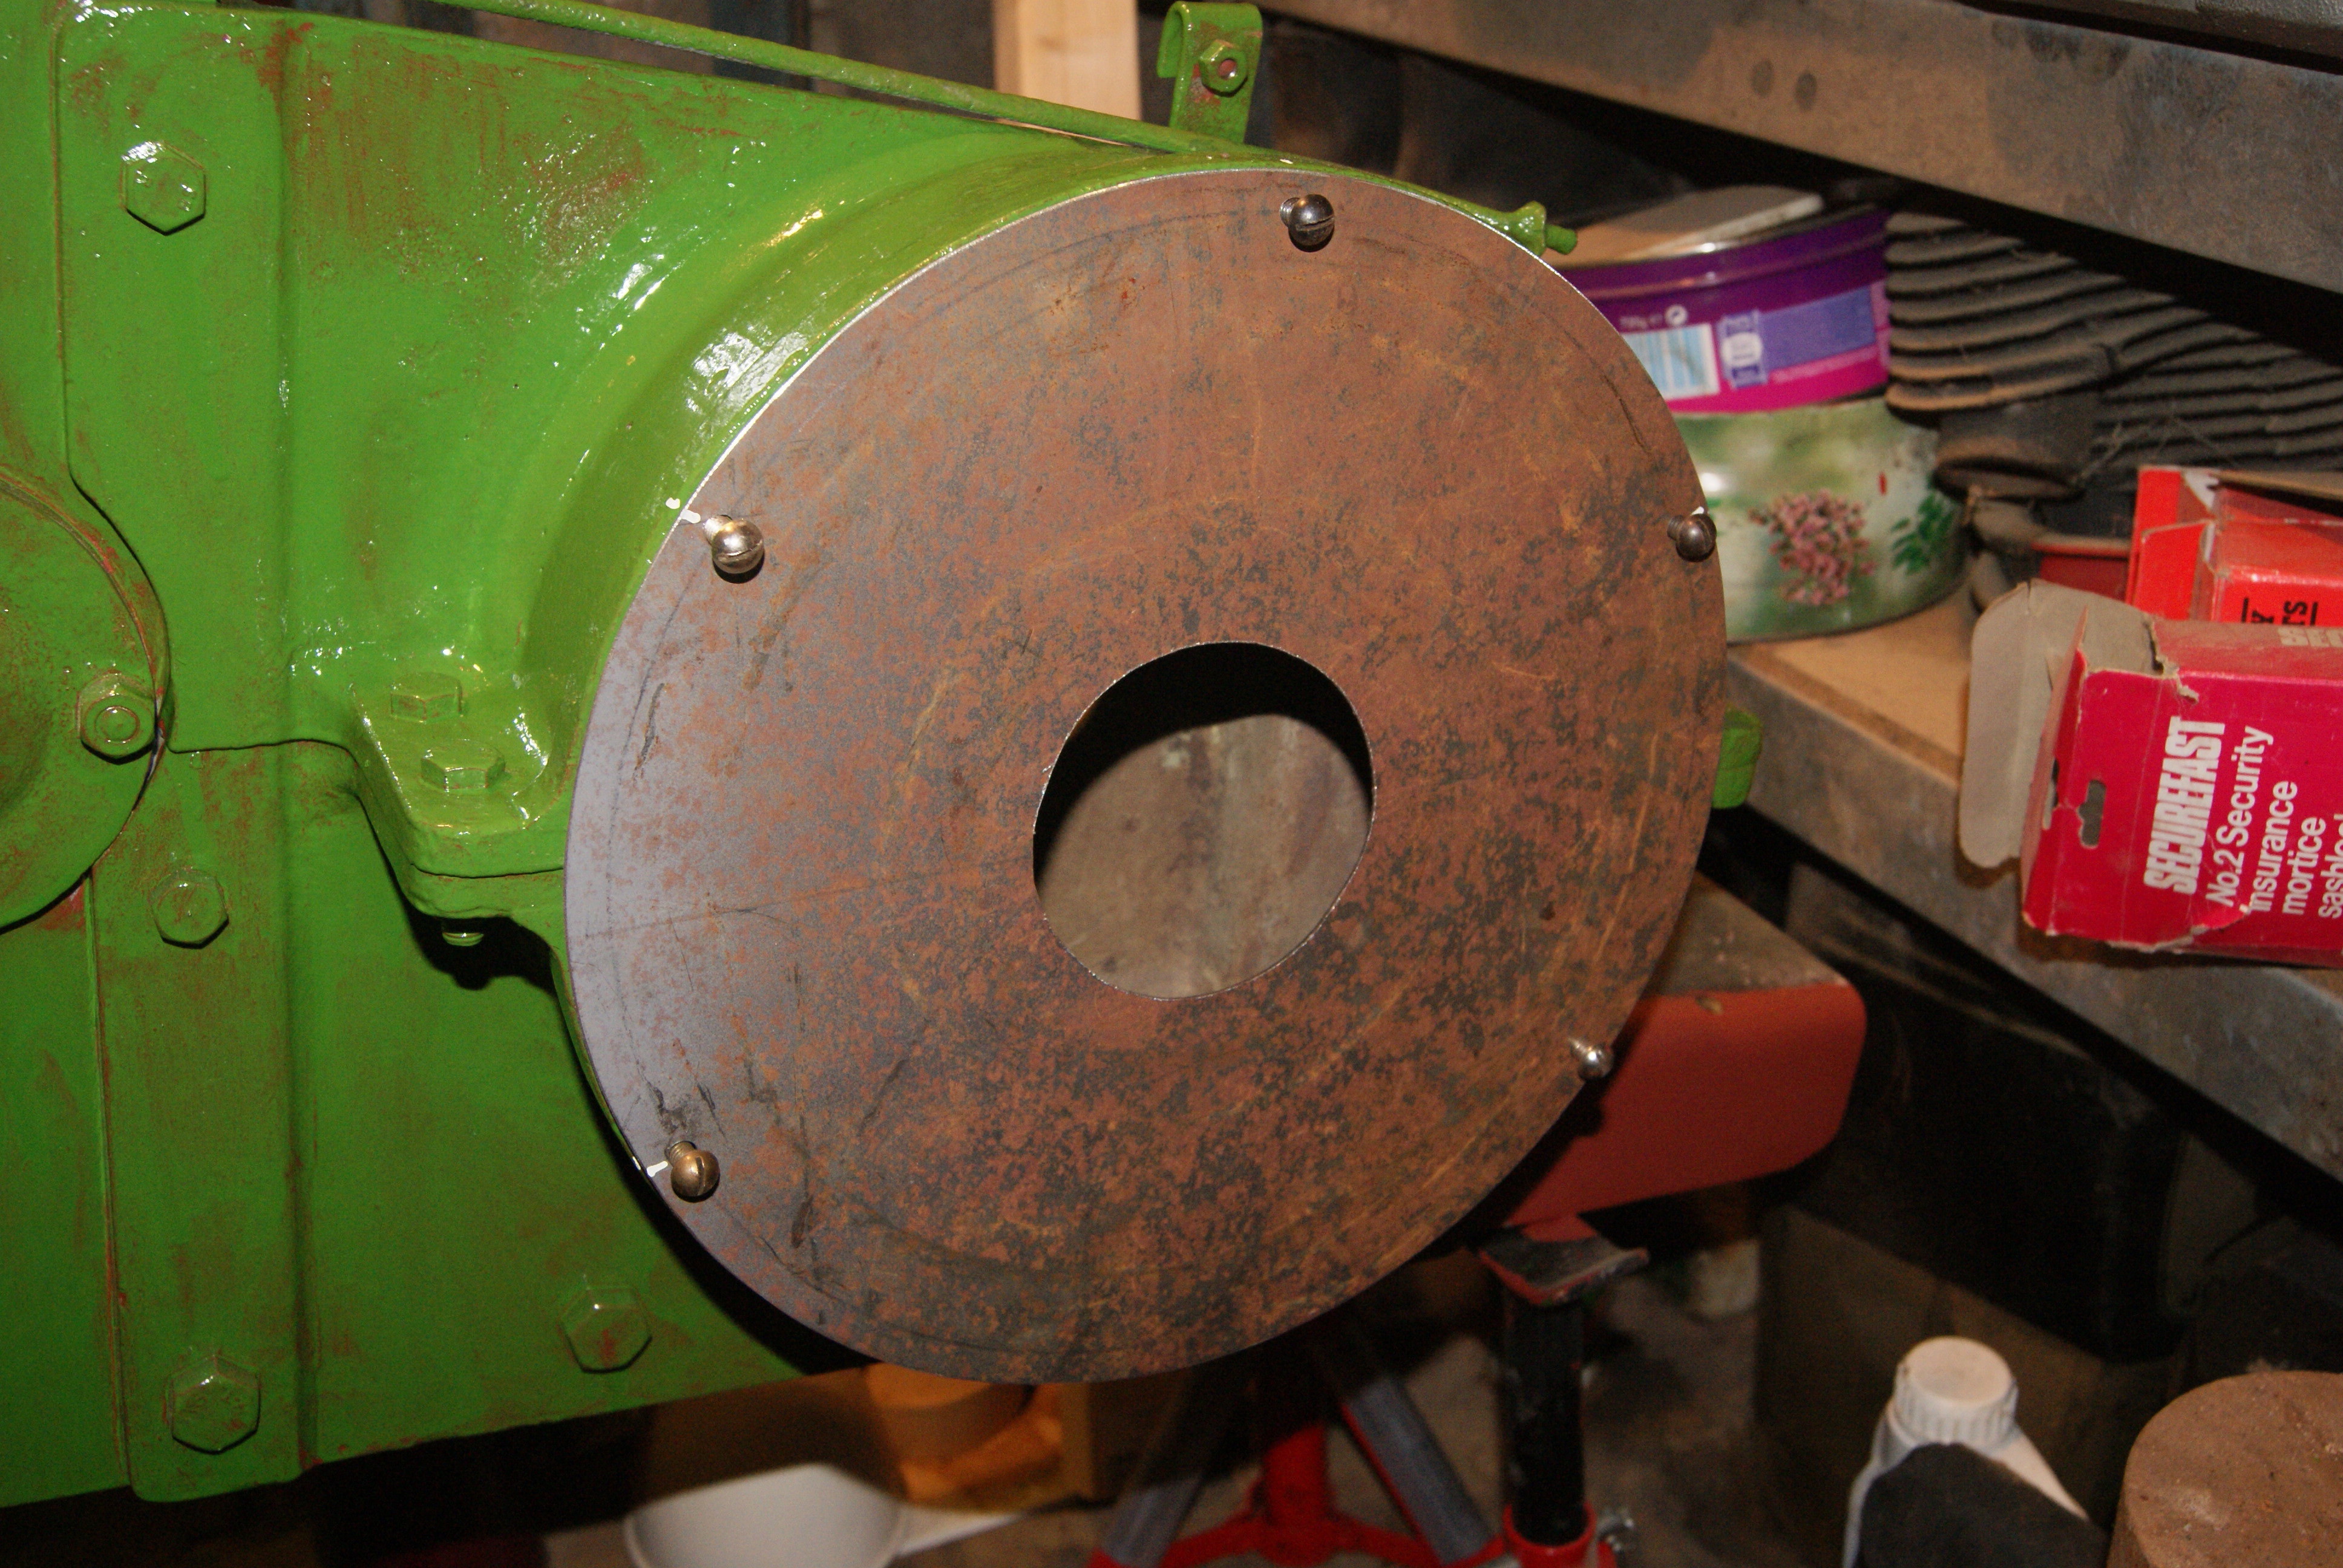
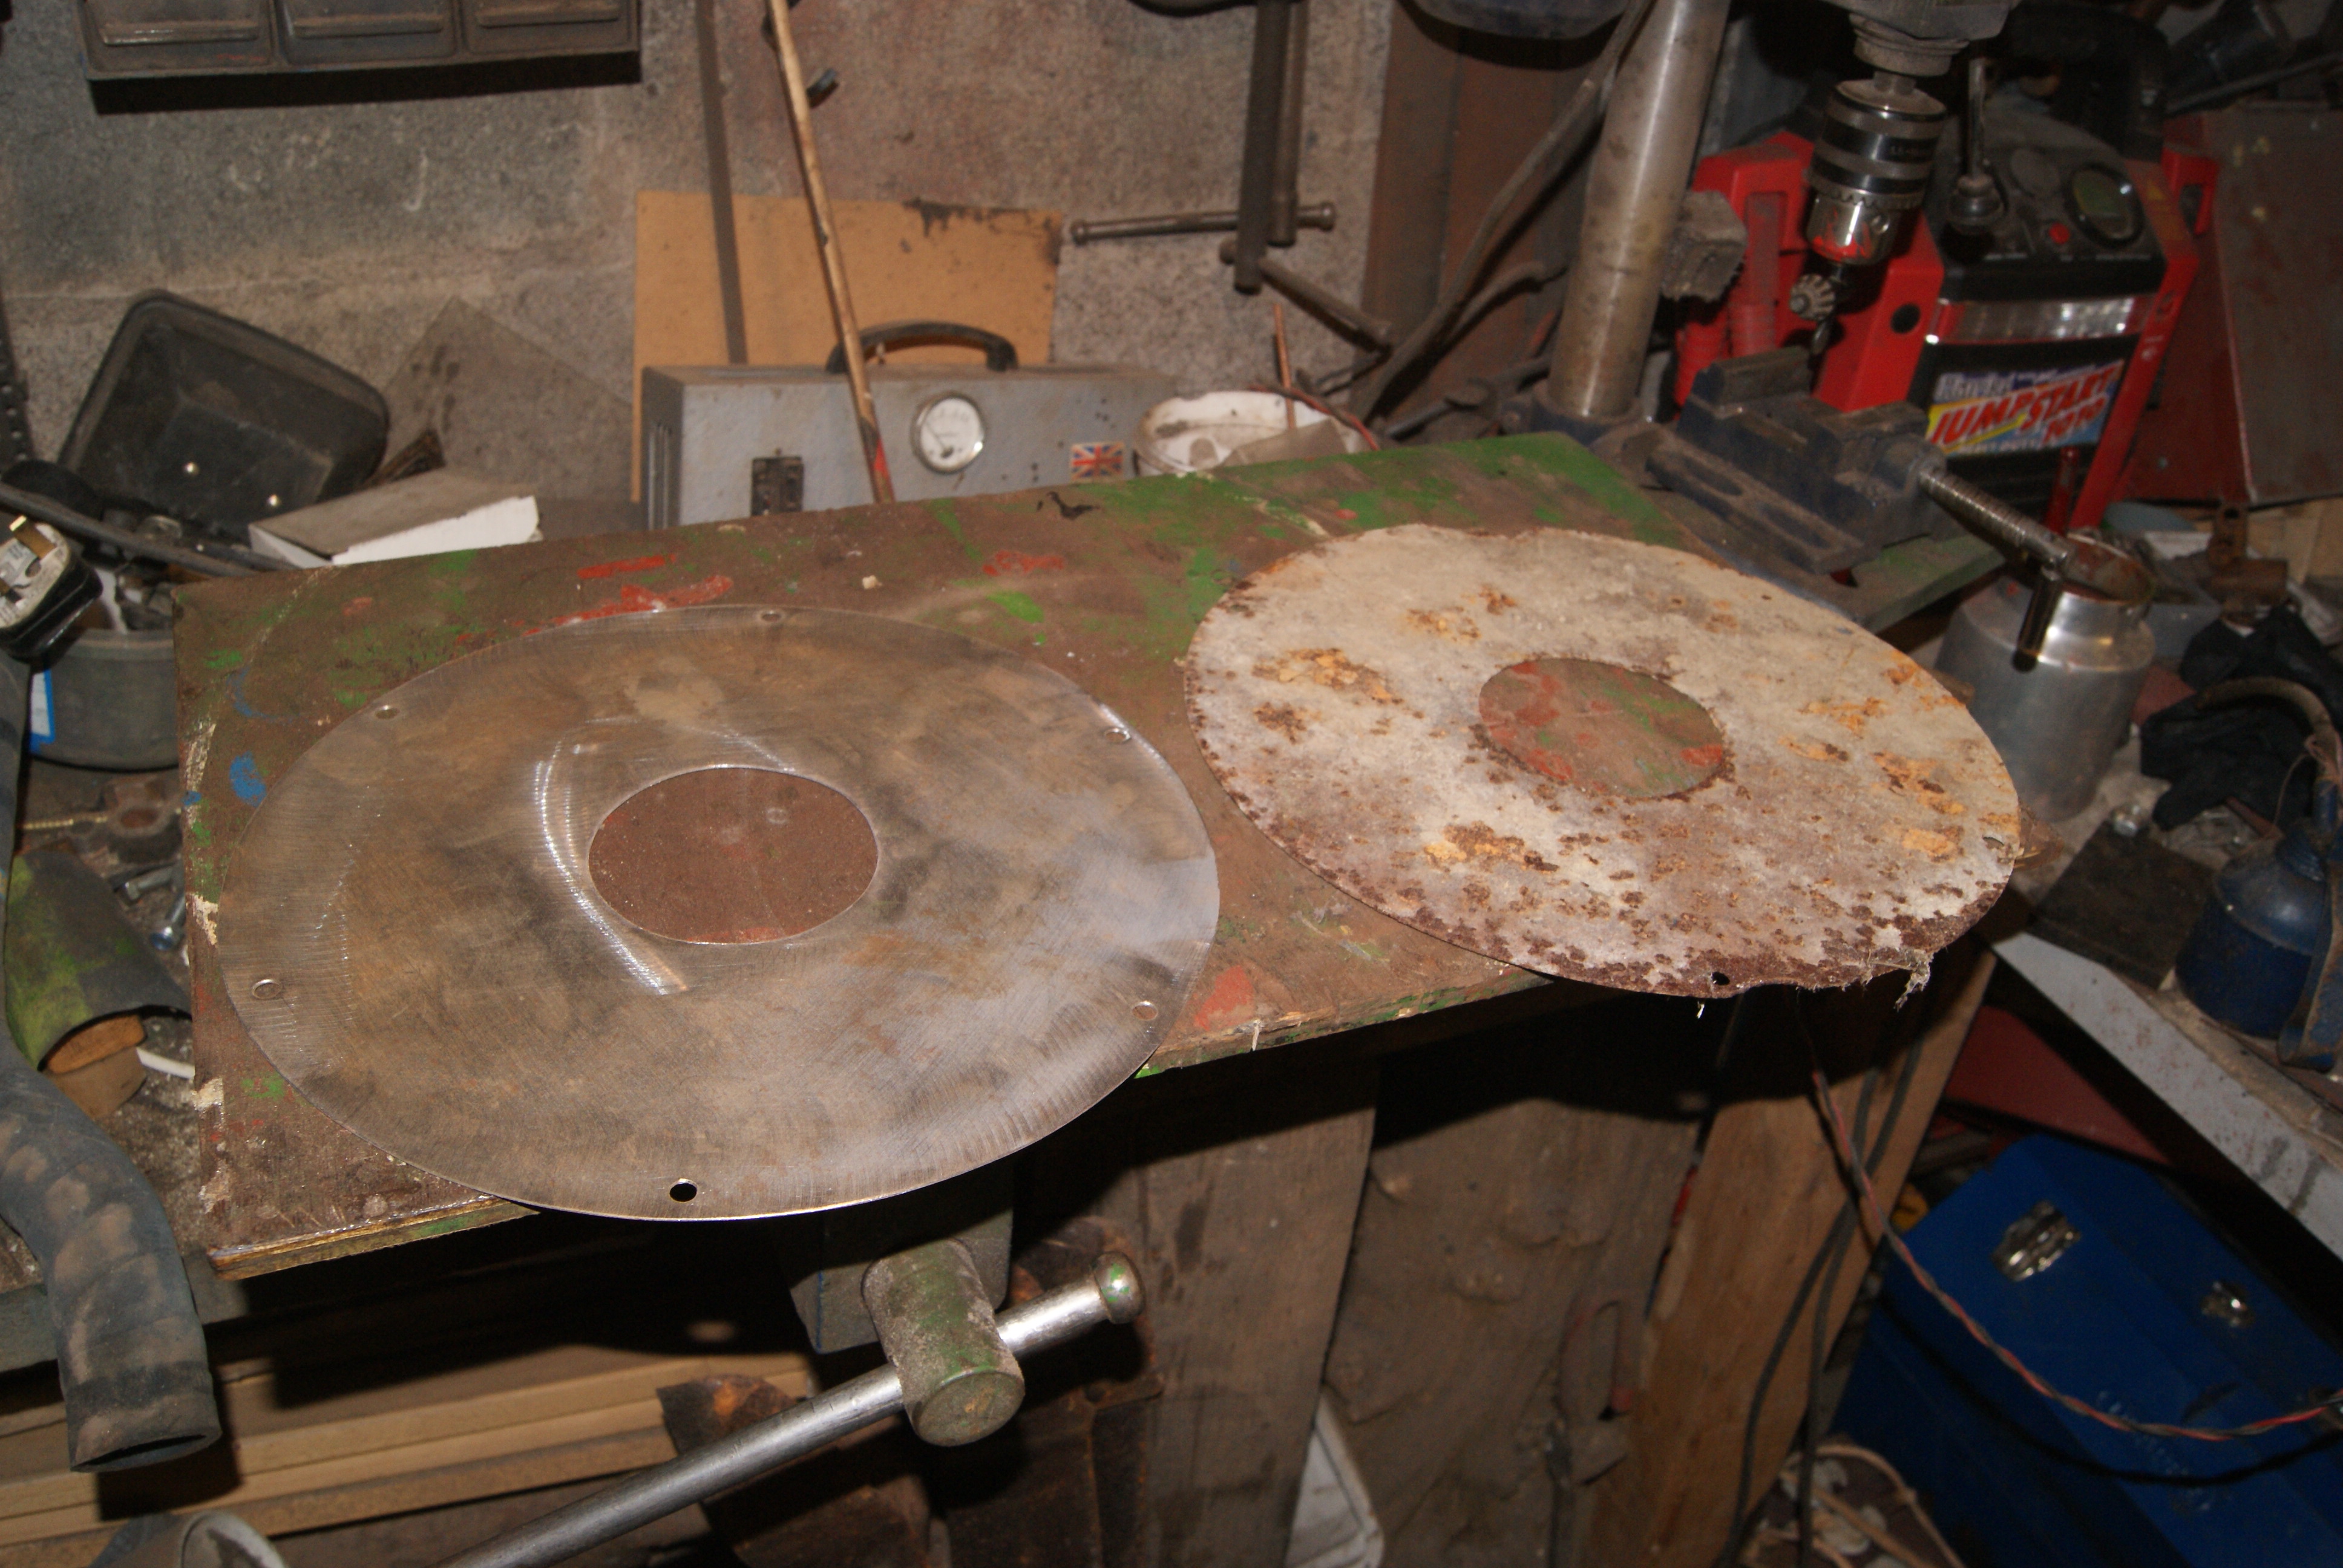
One thing that I never had with this tractor was the clutch cover. It’s only made from flat sheet with a 3 1/2″ hole for the clutch carrier to stick through so I thought that I’d spend this very dreary, rainy day making it. I did have a used one that Hortiman gave me last year (or was it the year before?) but I thought it would be easier to make a new one, especially as there was a part missing from the used one (sorry, Chris!).
The plate itself is easy if you have a large pair of compasses. Outside diameter is 12″ with a 3 1/2″ concentric hole in the centre; the important thing to remember is to mark the pcd for the six retaining screws at 11 1/4″ before you cut the centre out- if you look at the pictures you’ll see that I only just remembered in time!
The holes for the retaining screws have to be in the right places and so I marked their positions on the outside, then transferred these markings to the pcd circle to drill them. Beware- they are not equidistant and so the plate will only fit one way round. You have been warned!
Attachments:
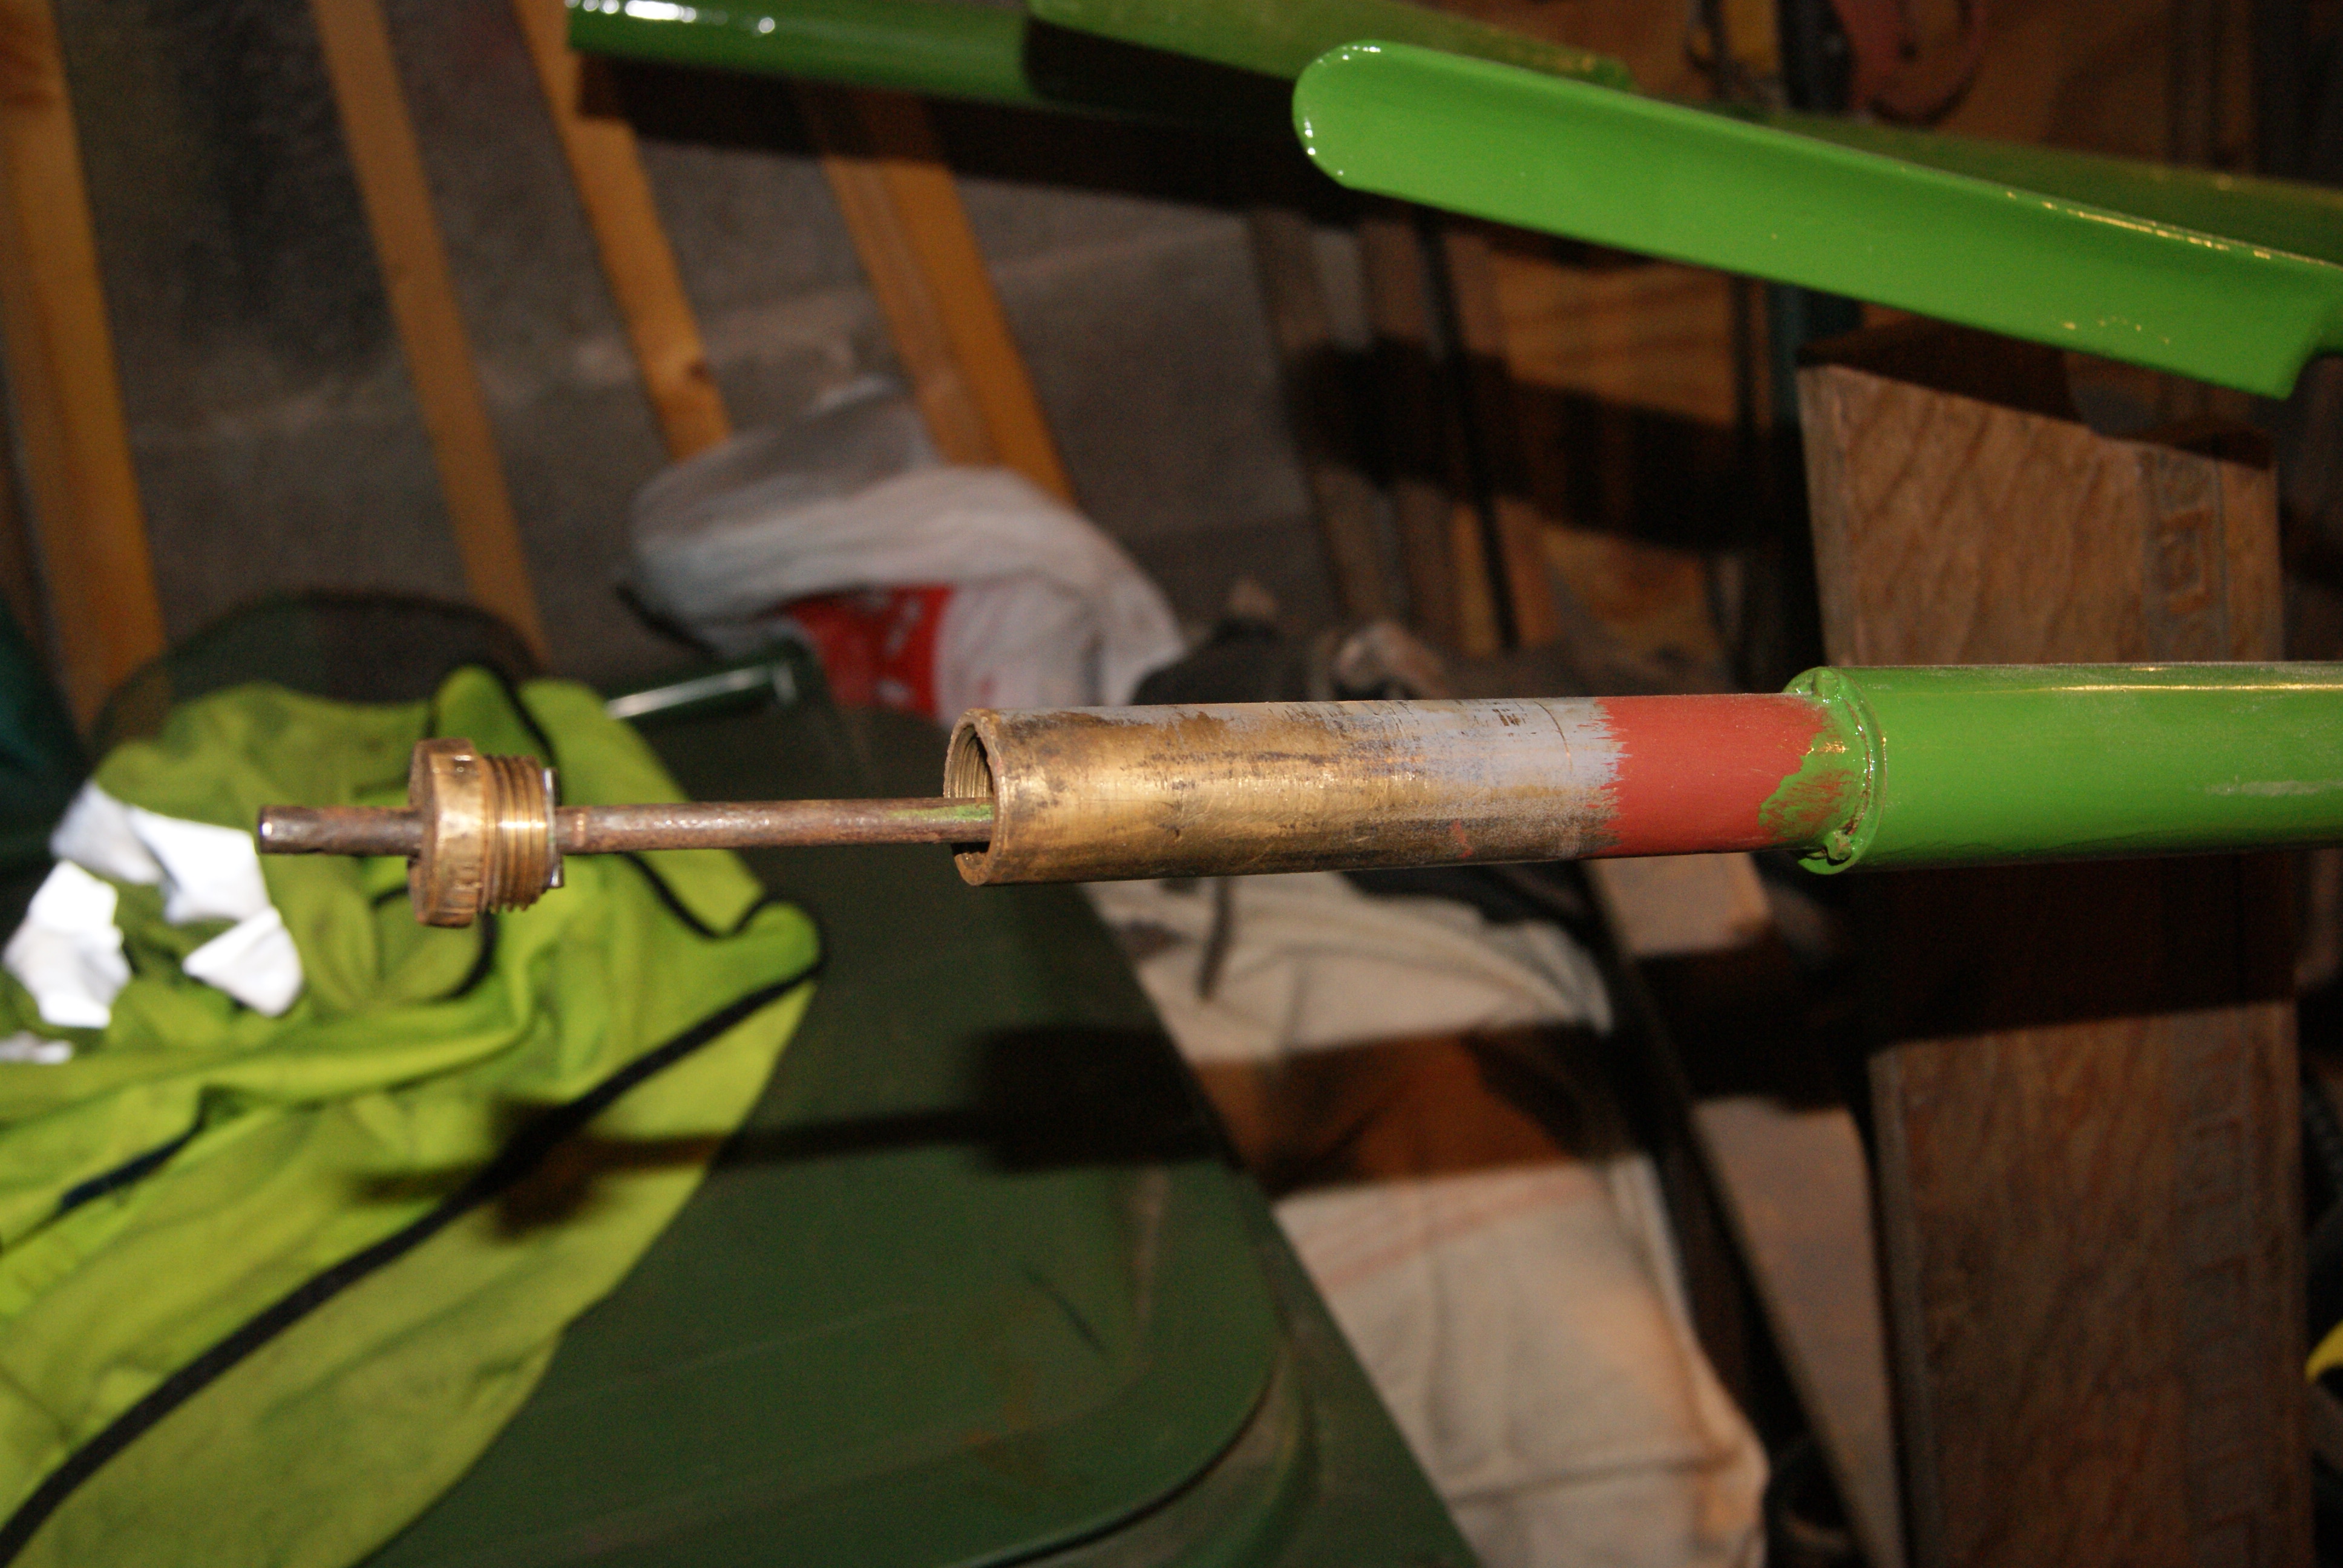
April 17, 2020 at 5:38 pm #33870trusty220KeymasterThe throttle control on this early model is quite well engineered in comparison with the later tractors. It was probably discotinued because it used up too much raw material as well as production time, but it deserves a mention here just in case any of you come across anything like it and don’t know how it works (or comes apart).
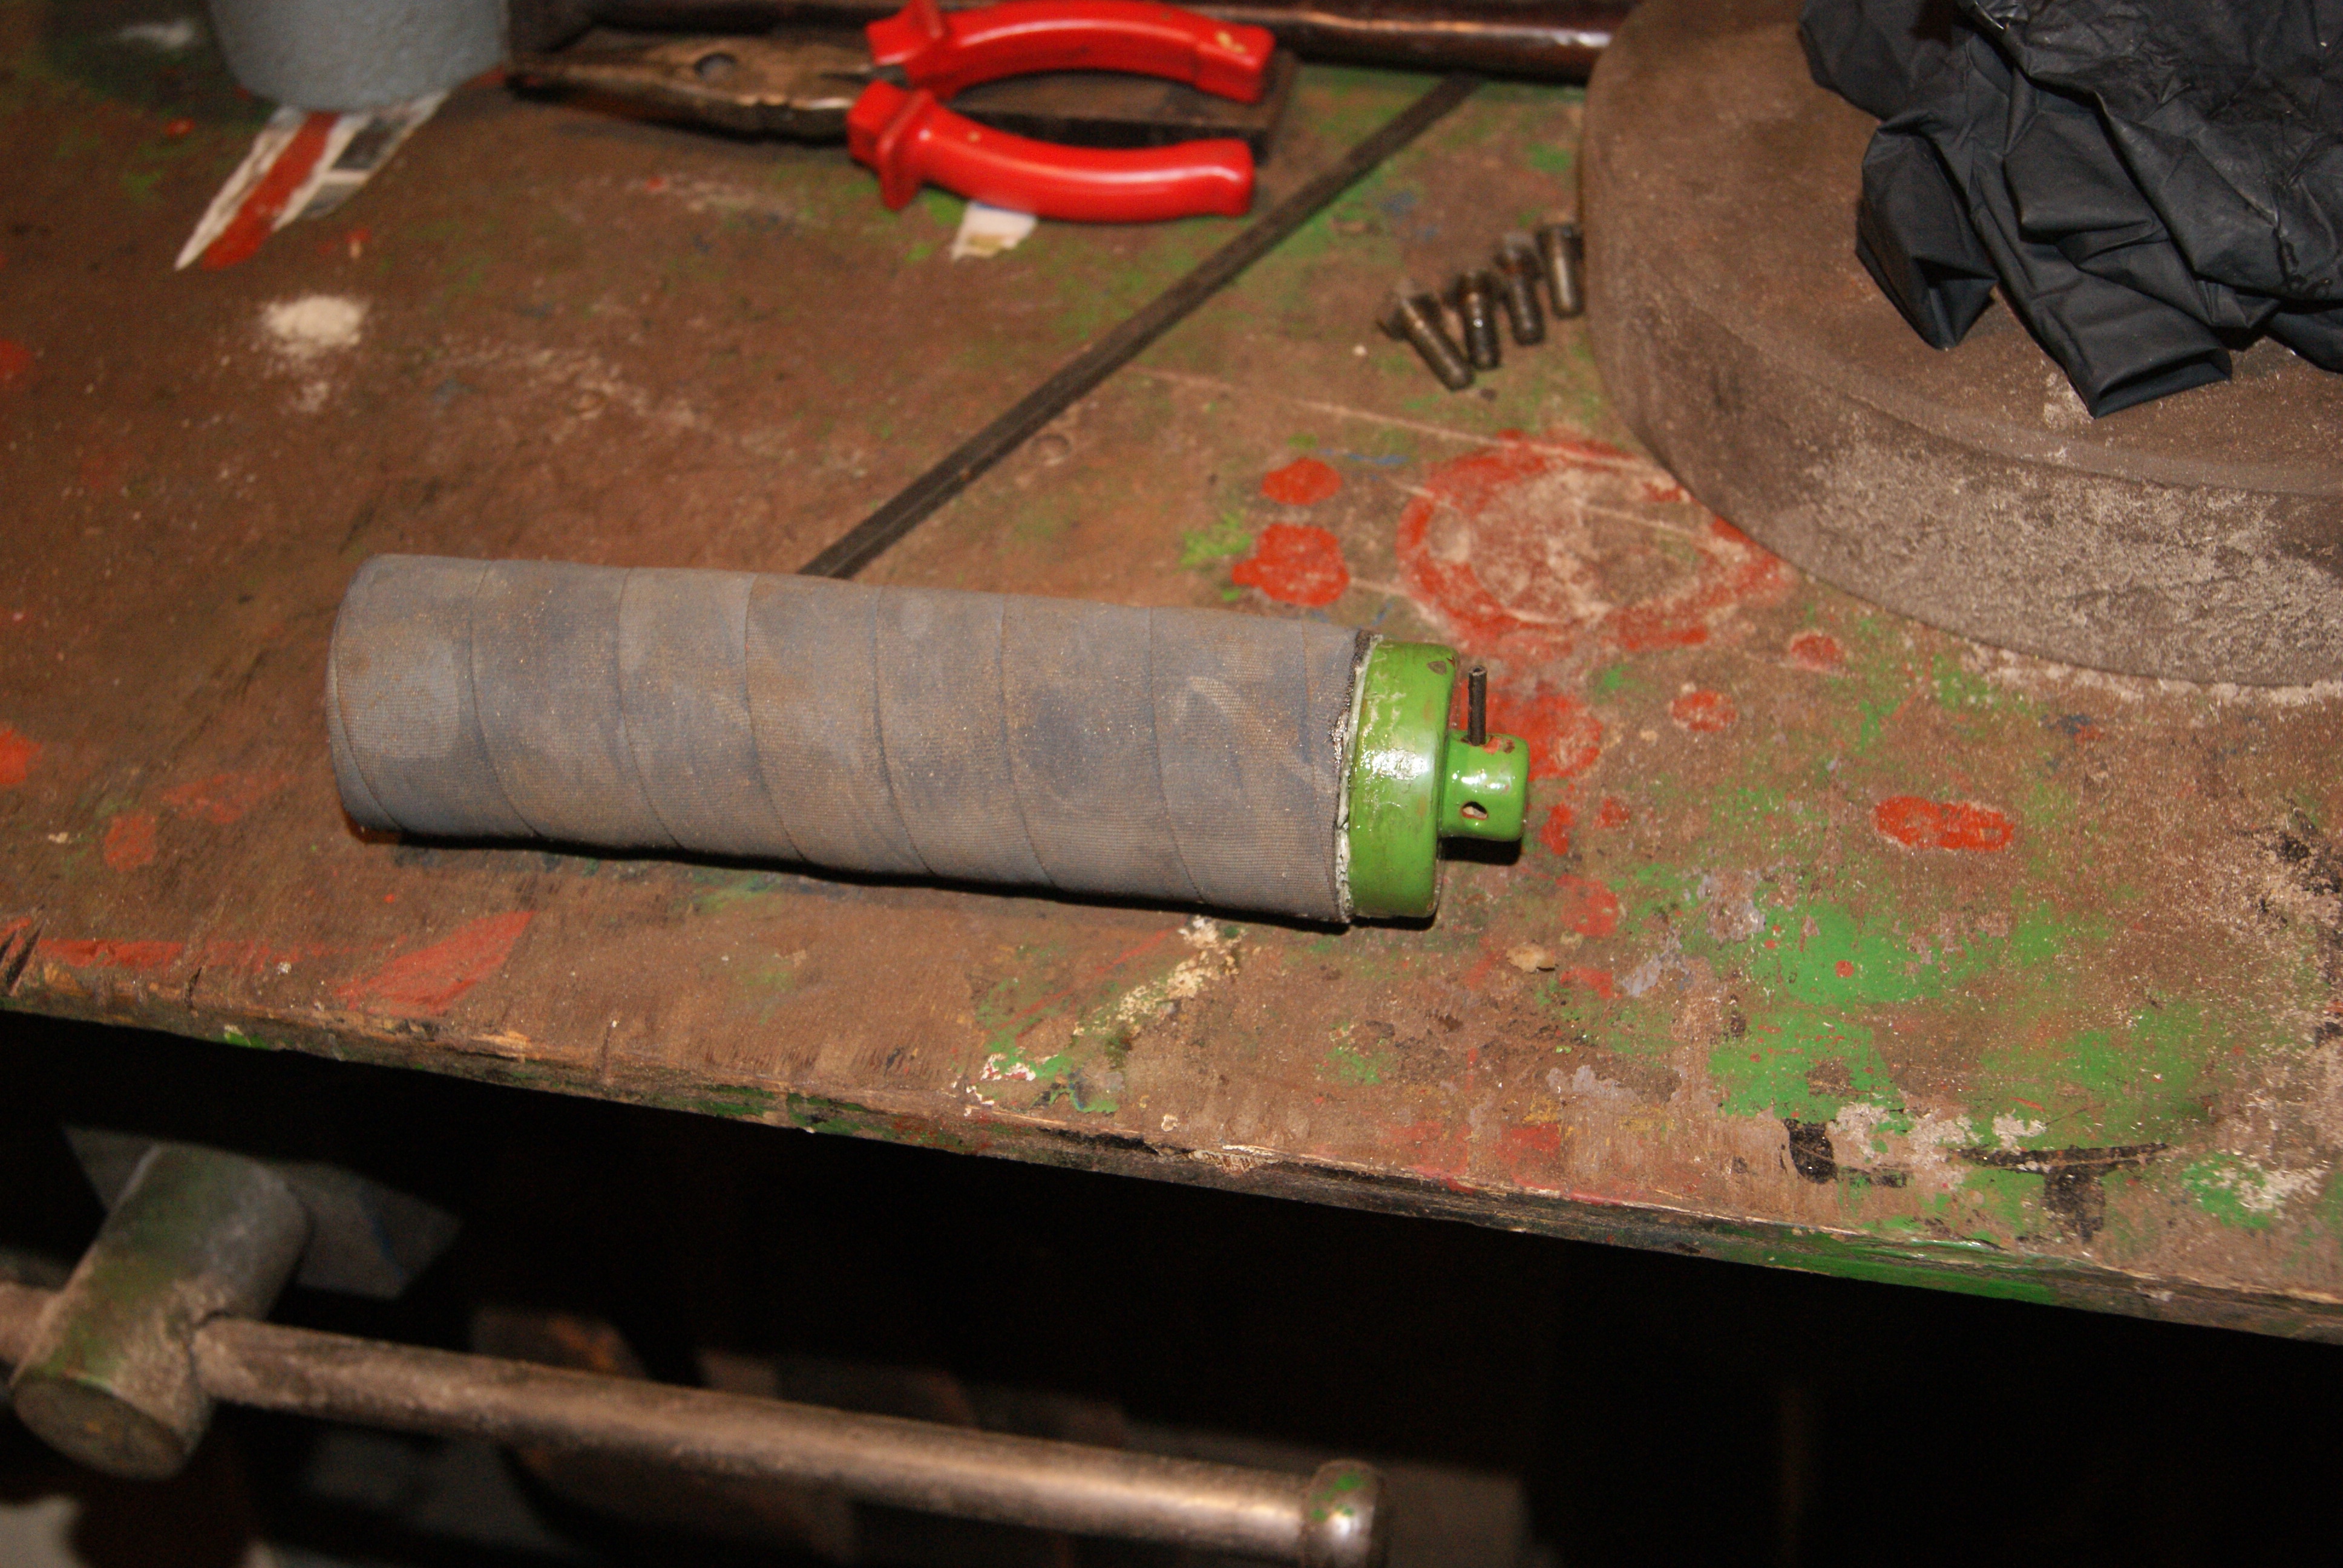
The photo’s will show the assembly in better detail and I’ll leave you to look at them. Suffice to say that the whole assembly is made from brass to prevent corrosion and the throttle rod passes through a screwed-in ferrule at the outer end of the stationary part of the mechanism. The twist grip rotates around that and is secured to the rod with a roll pin at it’s outer end, so the twist grip turns the throttle rod directly and the motion is transferred to the front of the machine.
A handy little tip for those of you making your own Trusty hand grips- I always use car radiator hose from our local motor factor who sell it in straight lengths 1 metre long. This is similar to what the factory used and it does cut down the vibration quite a bit, so it’s worth doing. The only trouble is, if you put it in the vice and saw it off with a hacksaw it looks awful and you get a far from straight cut; if you put a length of tape around it, though, and cut it with a long, sharp knife just on the edge of the tape you get a straight cut that is perpendicular to the handles (i.e. it doesn’t wander off and look like Stevie Wonder did it).
Now, where did I put that First Aid kit………..?
Attachments:
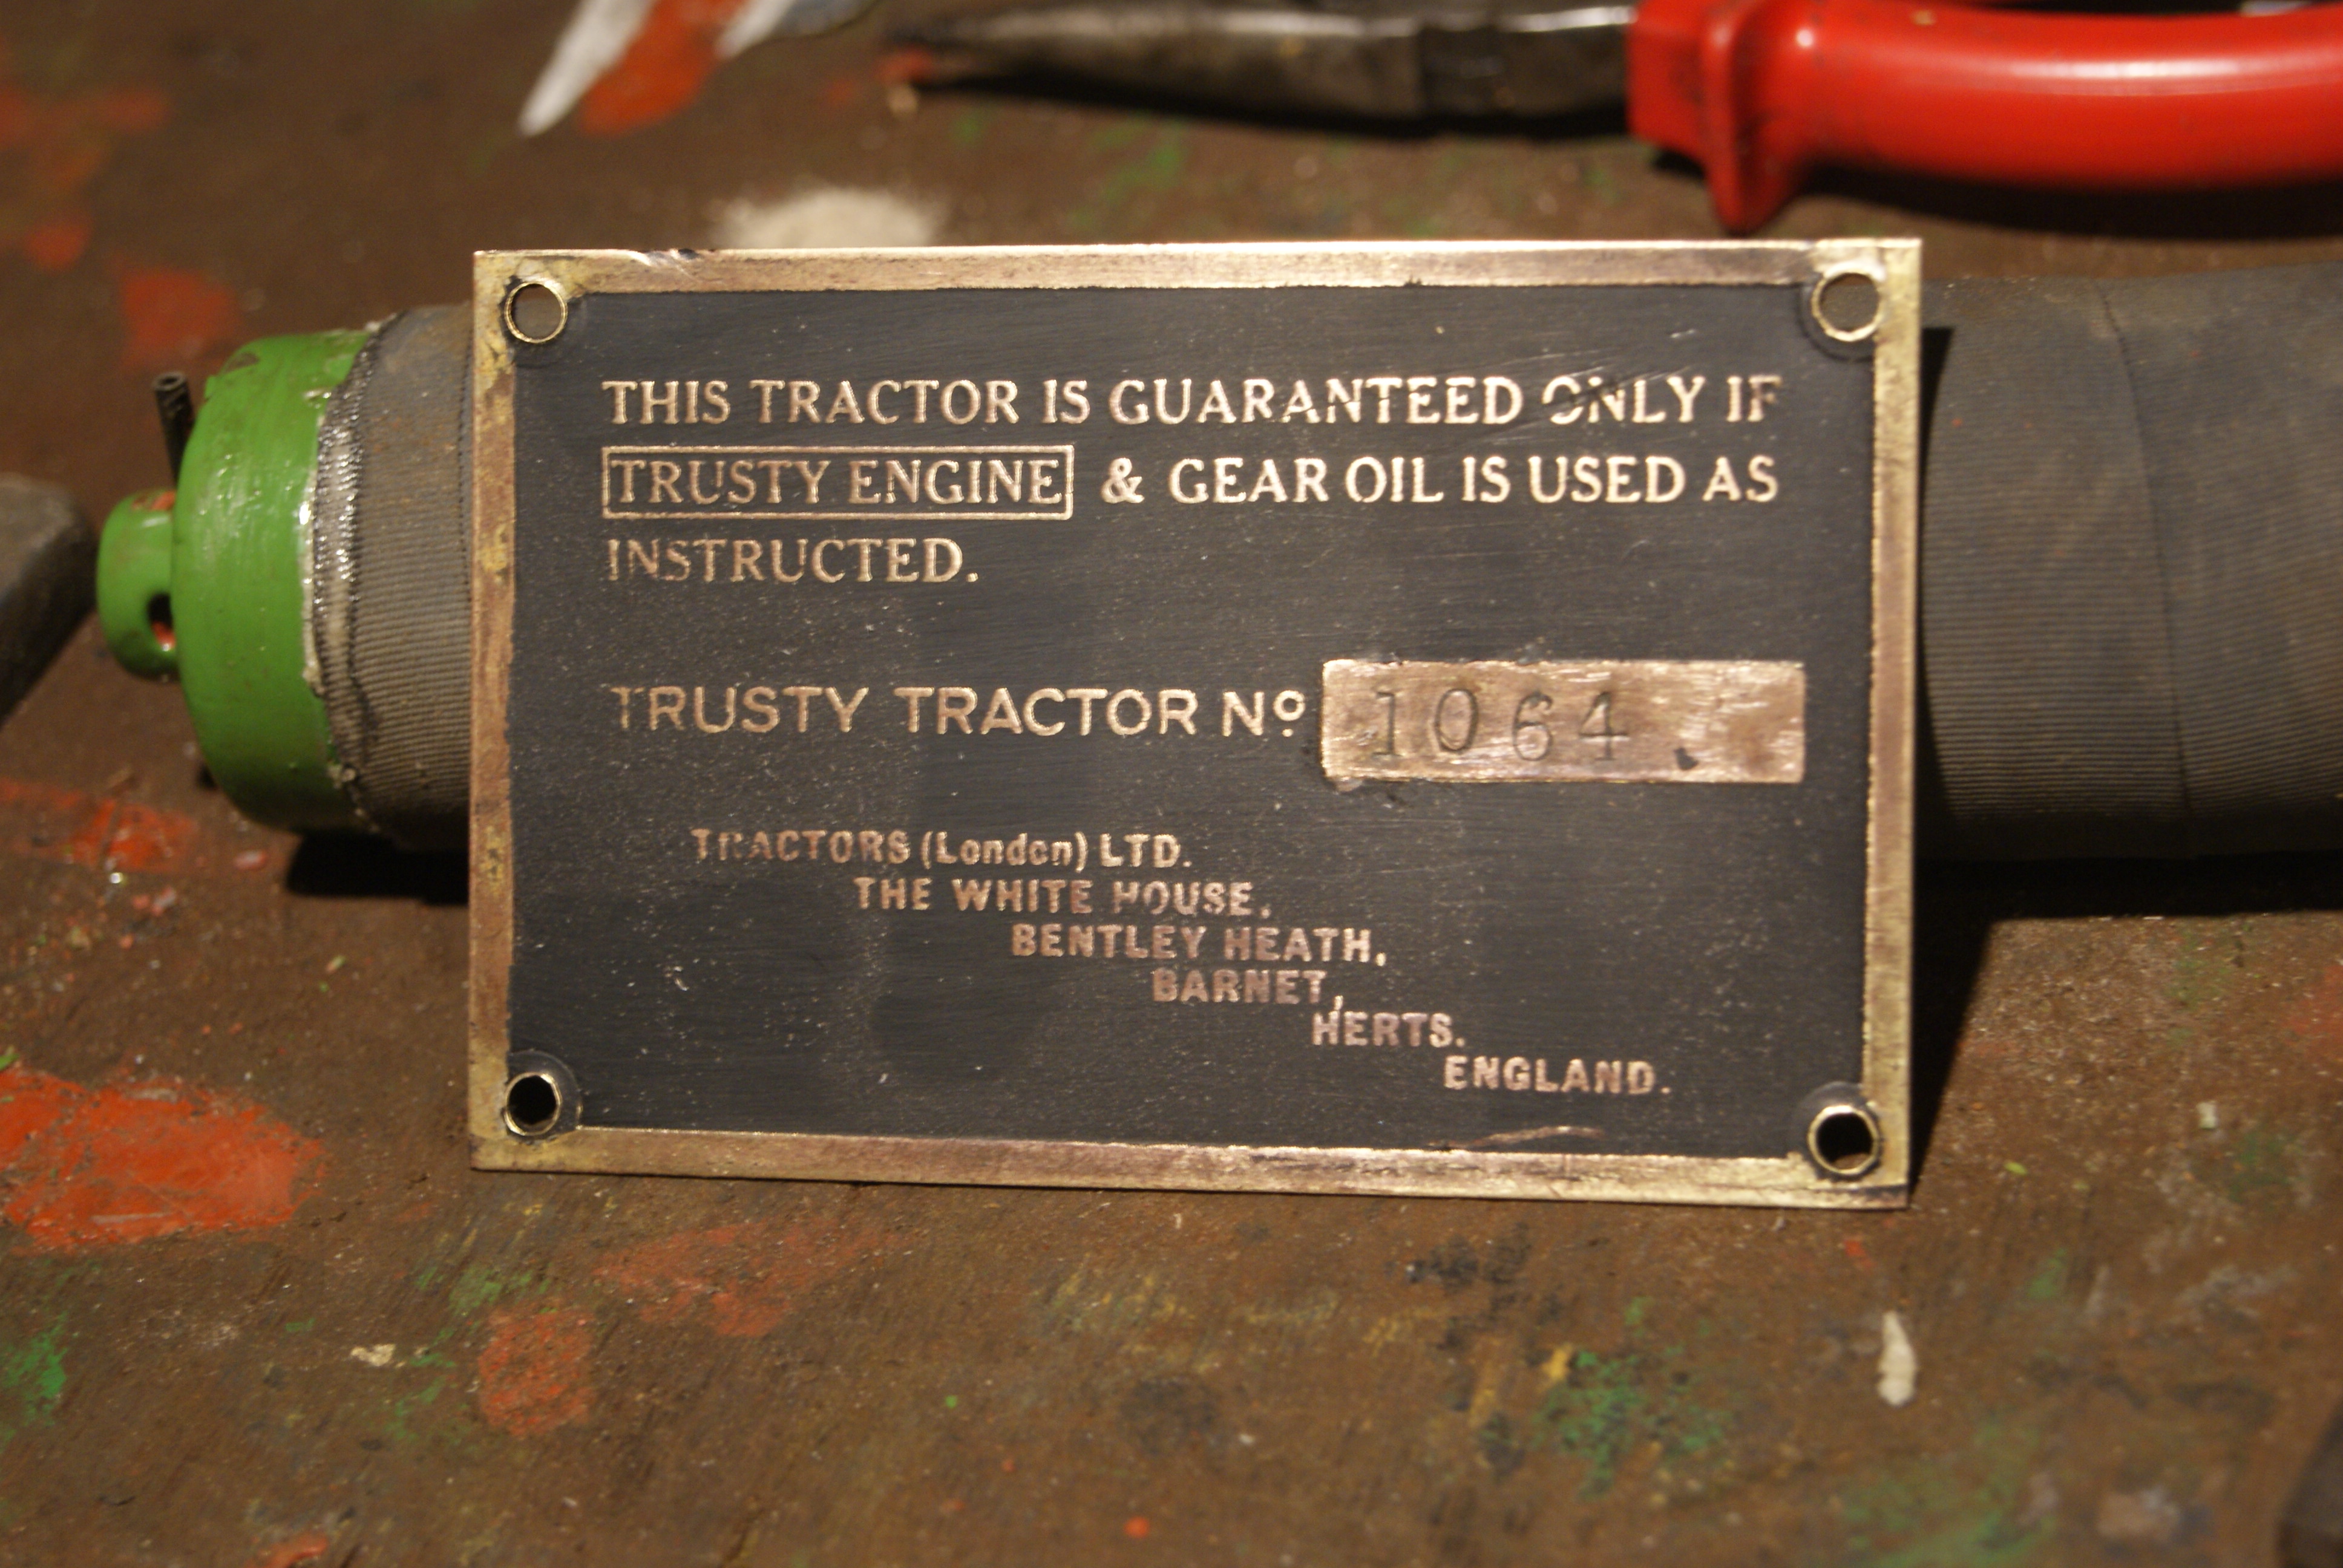
April 17, 2020 at 5:23 pm #33866trusty220KeymasterExperimenting over Christmas I came across a great way of restoring serial number plates. You can see the result in the previous post; if I’m being brutally honest it should be chrome plate for the letters and border with a gloss black background, but with all of the chrome gone I thought it looked just as good with brass coloured letters. Either way, it’s better than a polished brass plate I thought!
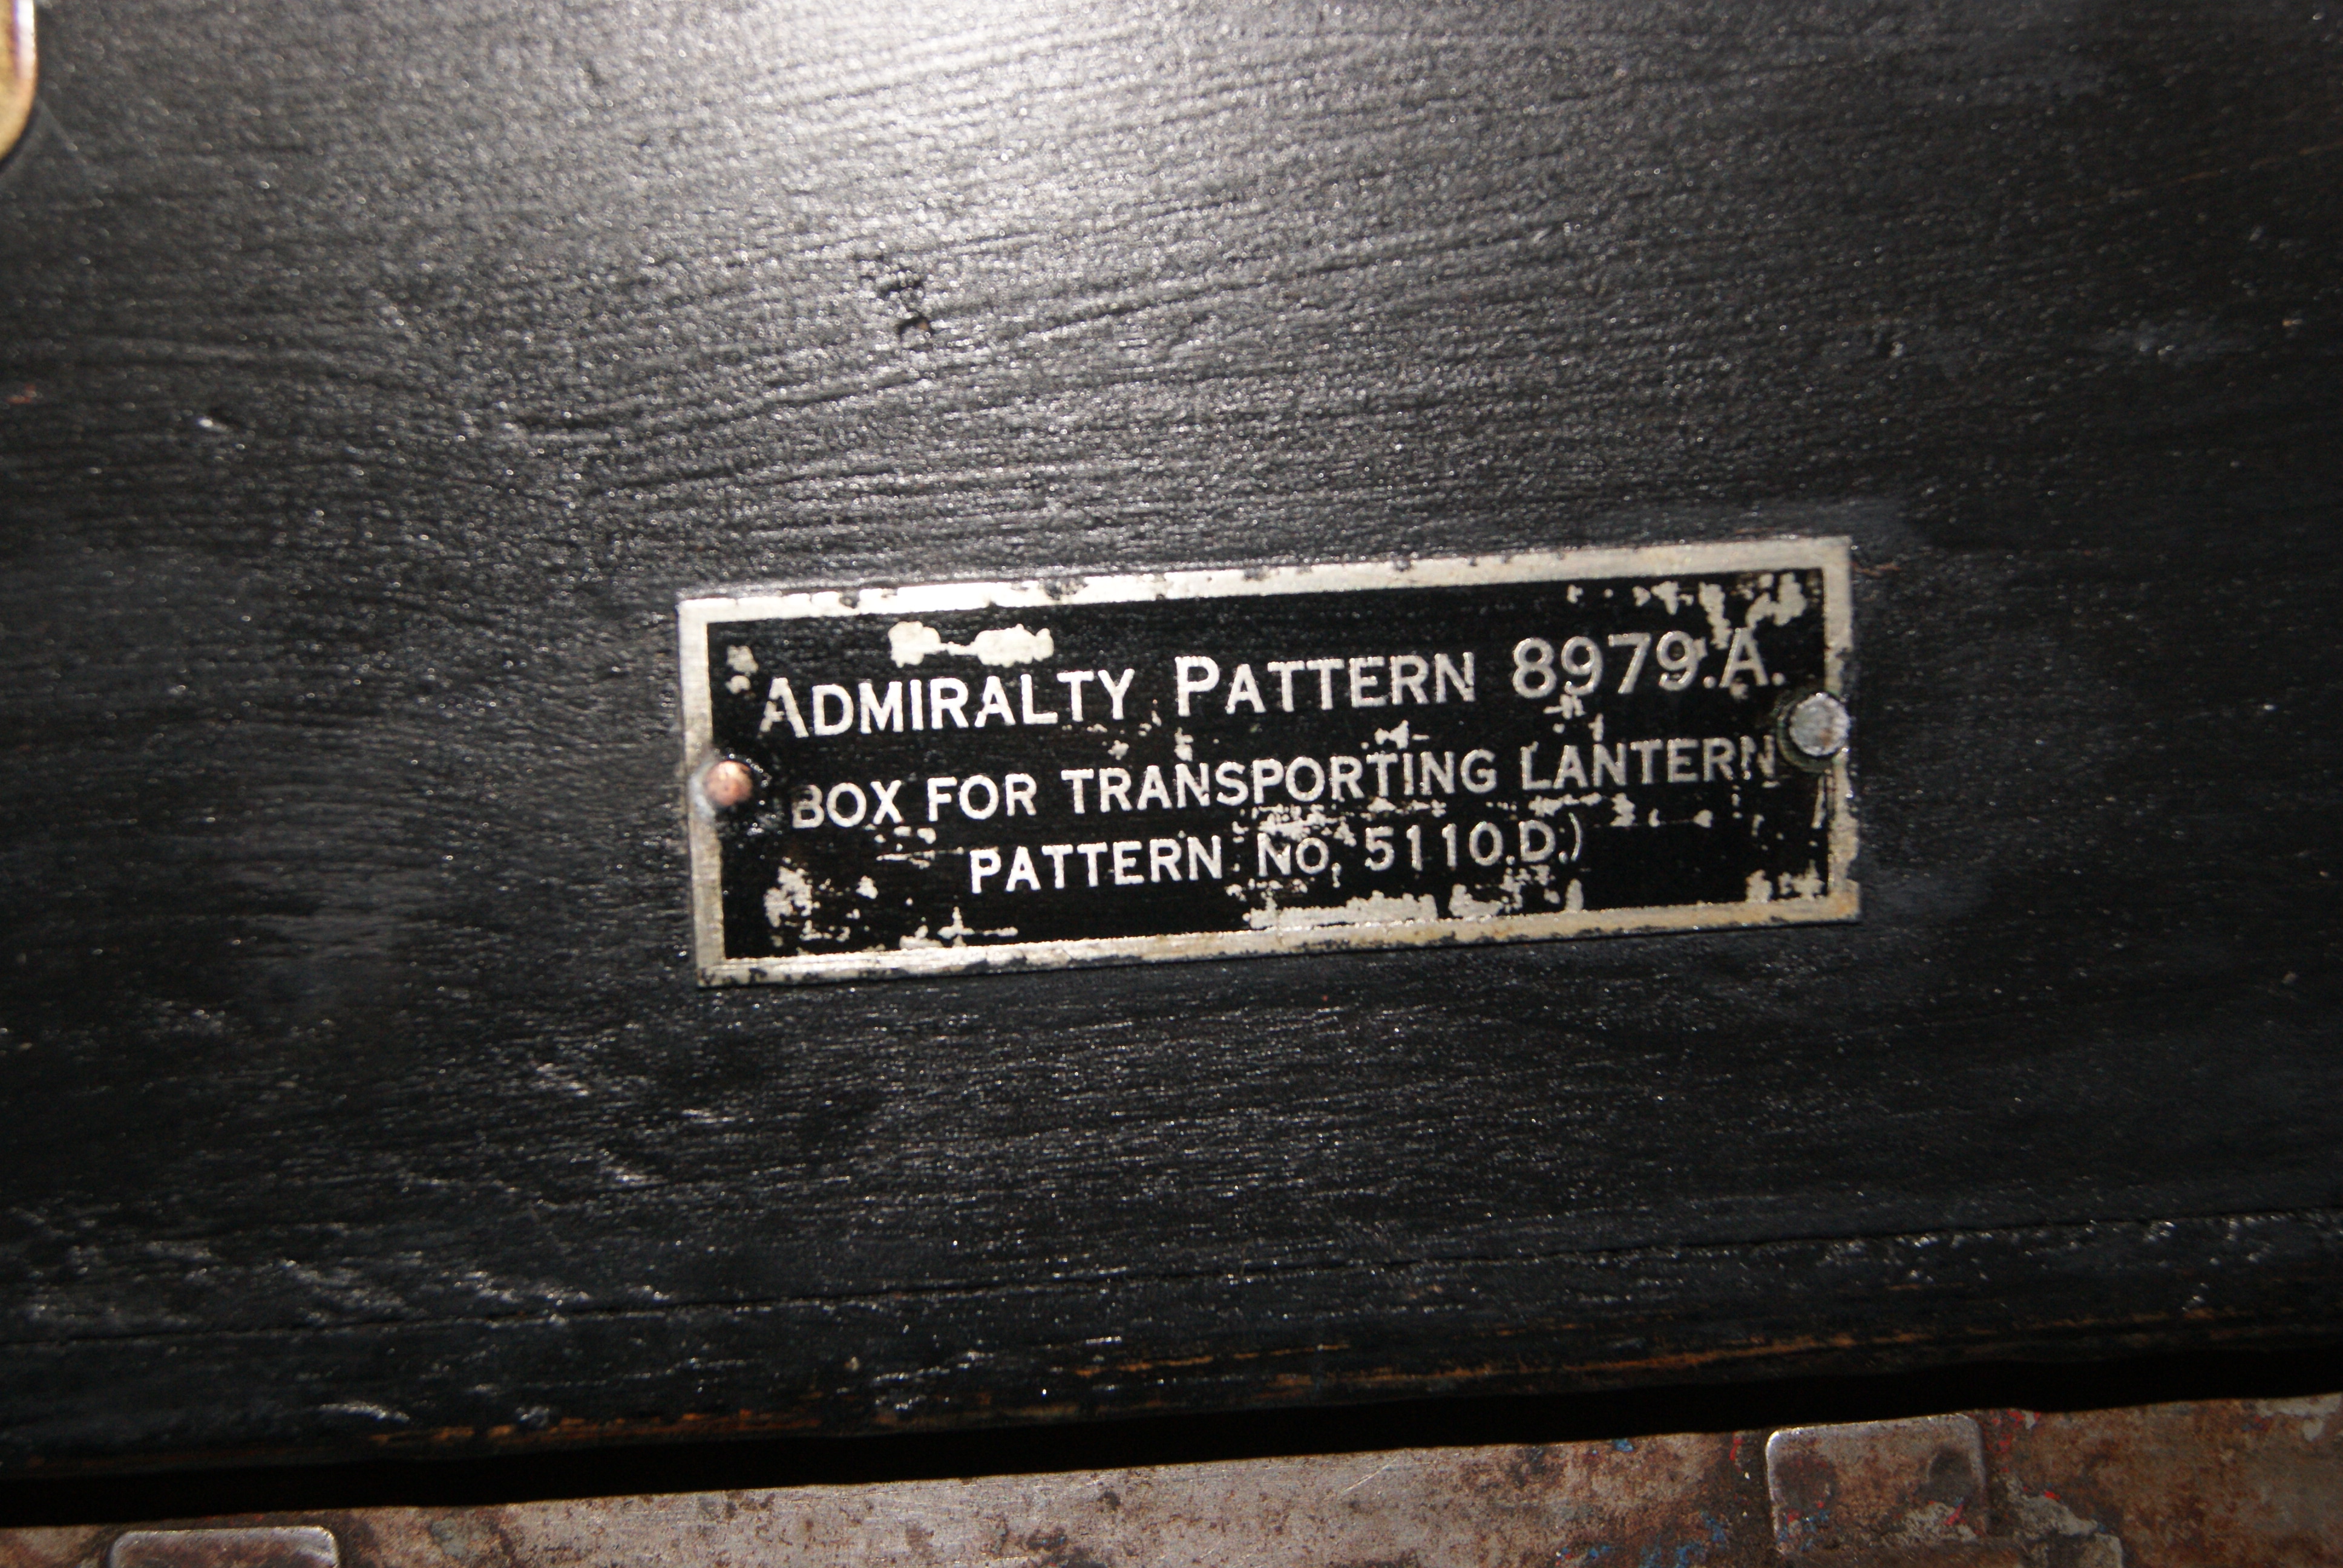
The story started when I was clearing out my late mother’s house about twelve months ago. In the loft I came across an old wooden box that me and my brothers had all played with as kids and we had kept wooden building blocks in it. On the front it had an Admiralty plate and it looked military-ish, so I did a bit of digging and it turns out it was used for storing an Aldis sognalling lamp in- that took me back to my gliding course at RAF St Athan when we used one to signal the winch drivers. I just had to have a lamp to put in it!
Restoring the box was easy- I had to replace one side and reproduce the combed joins at the corners, but when it came to the plate on the front I was in new territory. Taking it off I cleaned it up and gave it two coats of gloss black. Screwing it down to the workbench I then rubbed it over with fine steel wool and the letters shone through silver leaving the black background intact. Sorted!
Sometimes you can rub too hard and go through the black paint, but if that happens all you do is put more paint on and wait for it to dry. Simples!
Attachments:
April 17, 2020 at 3:16 pm #33857trusty220KeymasterHello, All,
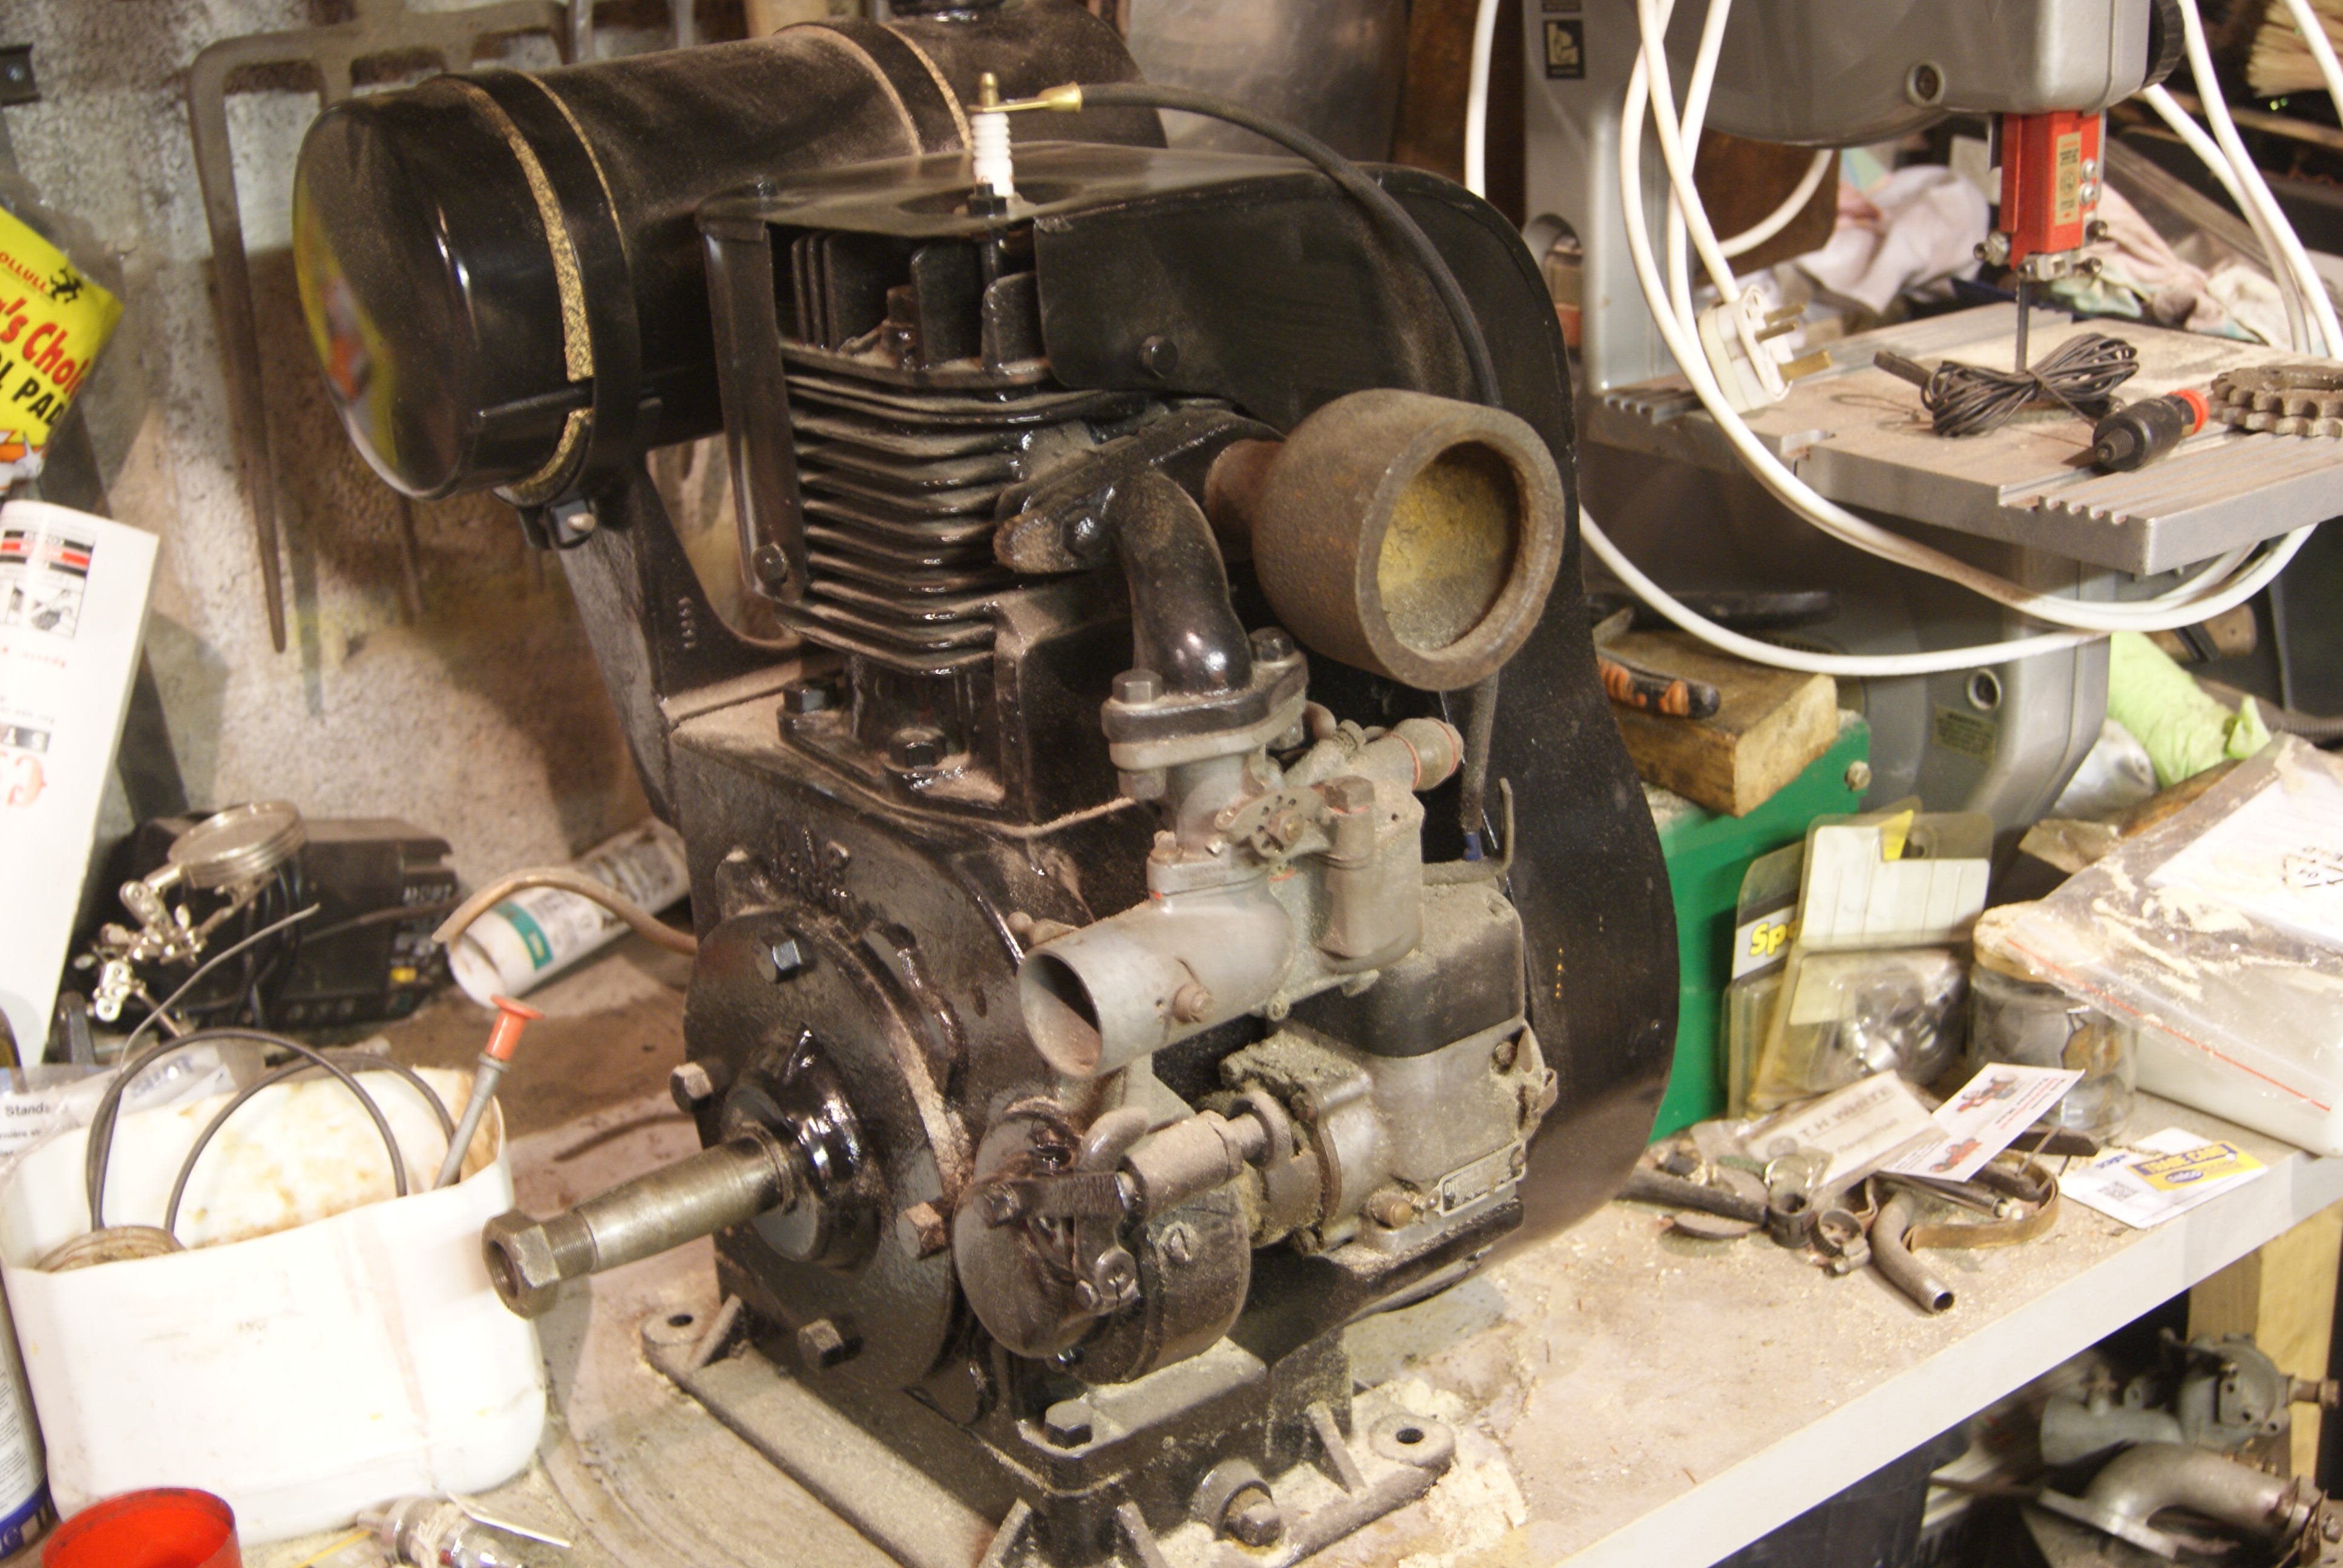
I’m just kick-starting this project for the fourth time. Let’s hope that I can see it through to the finish this time without anything going wrong!
Here are a few photo’s to be getting along with so you can see how far I’ve got since the last time I posted.
Attachments:
April 13, 2020 at 9:23 am #33804trusty220KeymasterIn the meantime I think I will try to order RAL5024 Pastel Blue from Rawlins Paints and see what I get. Delivery is quoted as 5-7 days at present so don’t expect an answer soon!
Thanks for your help, John. Let’s hope this lockdown doesn’t carry on for too much longer.
April 10, 2020 at 8:37 am #33783trusty220KeymasterSo far only one reply- from Rawlins Paints funnily enough (thanks John!)- with a very helpful chap who is asking for a standard paint code number. I have absolutely no idea what the original code was.
Do any of you have any ideas? HELP!!!!
April 10, 2020 at 8:34 am #33782trusty220KeymasterYou are quite correct- some of the earlier models had a locally sourced mid-deck when they were sold in this country. I can remember a B6000 with a mid-deck and belt drive from the front end, but they were far from common as most were sold to nurserymen for rotavating in greenhouses. I think the deck was made by Sturdilux but it was a long time ago now, so don’t quote me on it!
What we used to find with the B6000 (I haven’t come across a B7000 in this country) was that the rear PTO was smaller than standard and rotated in the opposite direction; it also had smaller than Cat 1 three point linkage when fitted, but most had the bolted-on rotavator that they left Japan with as well as the very deep tread rice tyres.
April 10, 2020 at 8:23 am #33781trusty220KeymasterI tend to try to preserve paintwork if you can see a lot of it- especially things like original decals- as it can be a reference aid in years to come. A general deep clean then run over with an oily rag can look just as good as it shows the age of something.
If there isn’t much of the paint left then I always end up putting on new paint to improve it’s looks.
Either way I’m sure that you’ll do a good job. Best of luck.
April 8, 2020 at 3:13 pm #33765trusty220KeymasterThanks for your suggestion. I have now sent emails to quite a few suppliers- including Rawlins Paints- and I am just waiting to hear back from them.
As a side-line I thought that I’d send one to Hammerite to see if their mixing service could supply the metallic colour that I’m looking for.
I will report back on progress as soon as I know anything.
March 19, 2020 at 11:41 am #33564trusty220KeymasterThanks for letting us know, Dave. I get the feeling that it’s the first of many that are going the same way, at least until the weather warms up and the virus situation starts to subside.
March 8, 2020 at 9:46 am #33422trusty220KeymasterCertainly a worrying trend from the politicians. When the whole of the classic car/vehicle movement only accounts for .1% of the CO2 produced, how long will it be before the petrol producers decide that it isn’t economically viable to refine two grades of fuel and concentrate on the mass-market represented by E10 petrol?
Or should we go the whole way and just convert all of our petrol machinery to electric now and have done with it?
February 25, 2020 at 9:20 am #33380trusty220KeymasterTry your local John Deere groundcare dealer. Most of the groundcare products use Yanmar engines and John Deere can supply spares.
Good luck!February 25, 2020 at 9:13 am #33379trusty220KeymasterIt puts my workshop to shame but at least it gives me something to aim at once I’ve moved!
February 9, 2020 at 10:35 am #33223trusty220KeymasterThe LX series was very under-rated at the time. Many dealers considered it to be purely domestic, but we sold a few of them to our local authority to cut grass around the housing estates and they lasted quite a few years beyond their budgeted life in this harsh environment.
Kawasaki V-Twin engine, hydrostatic transmission and very simple electrics made for a very durable machine. The first thing to show signs of wear was the mower deck, especially if lazy operators did not clean underneath the deck after use and it rotted through from the inside.
Well worth saving and the fact that it has a John Deere label would normally mean that it will sell quite well. Good luck with it!
-
AuthorPosts