Forum Replies Created
-
AuthorPosts
-
January 22, 2020 at 9:16 pm #33117
 trusty220Keymaster
The clanging sound is coming from the centrifugal clutch drum. They all do it when the clutch is on the point of engaging- another few revs and the clutch shoes are flung hard against the inside of the drum and the clanging stops. Similarly if you drop the revs a little from the clanging point the return springs will pull the shoes away from the drum and the clanging stops as well.
If the clanging persists you will need to have a look inside the drum because you may have a broken return spring, but it’s unlikely. If the noise disappears when you rev it up or down I would leave it alone.
If you do dismantle the clutch remember that the shoes are fitted in the trailing position so that they disengage cleanly. If you put them in the leading position (i.e. with the loose end of the shoe facing in the direction of rotation) it will still work and the shoe will dig itself into the drum harder the more load is put onto it; the trouble is it won’t disengage and when you get to the bit where you’ve got to turn to go back the other way it won’t stop. Handy if you’re in the middle of the outfield, but if you’re cutting your lawn your hedges will suffer badly.
The lever on the left of the handlebar looks like a clutch lever- don’t be misled, it’s really a parking brake that operates a drum brake in the end of the rear roller!
Good luck with it.
GeoffJanuary 19, 2020 at 5:44 pm #33106trusty220KeymasterThe question has been asked before and the definitive answer is that a two-wheeled Trusty is a pedestrian operated machine. The Bogey Seat is an attachment, in the same light as a plough is an attachment, and it doesn’t alter how the tractor itself is classified for insurance purposes.
In comparison, a Trusty Steed was designed as a ride-on machine and is classified as such.
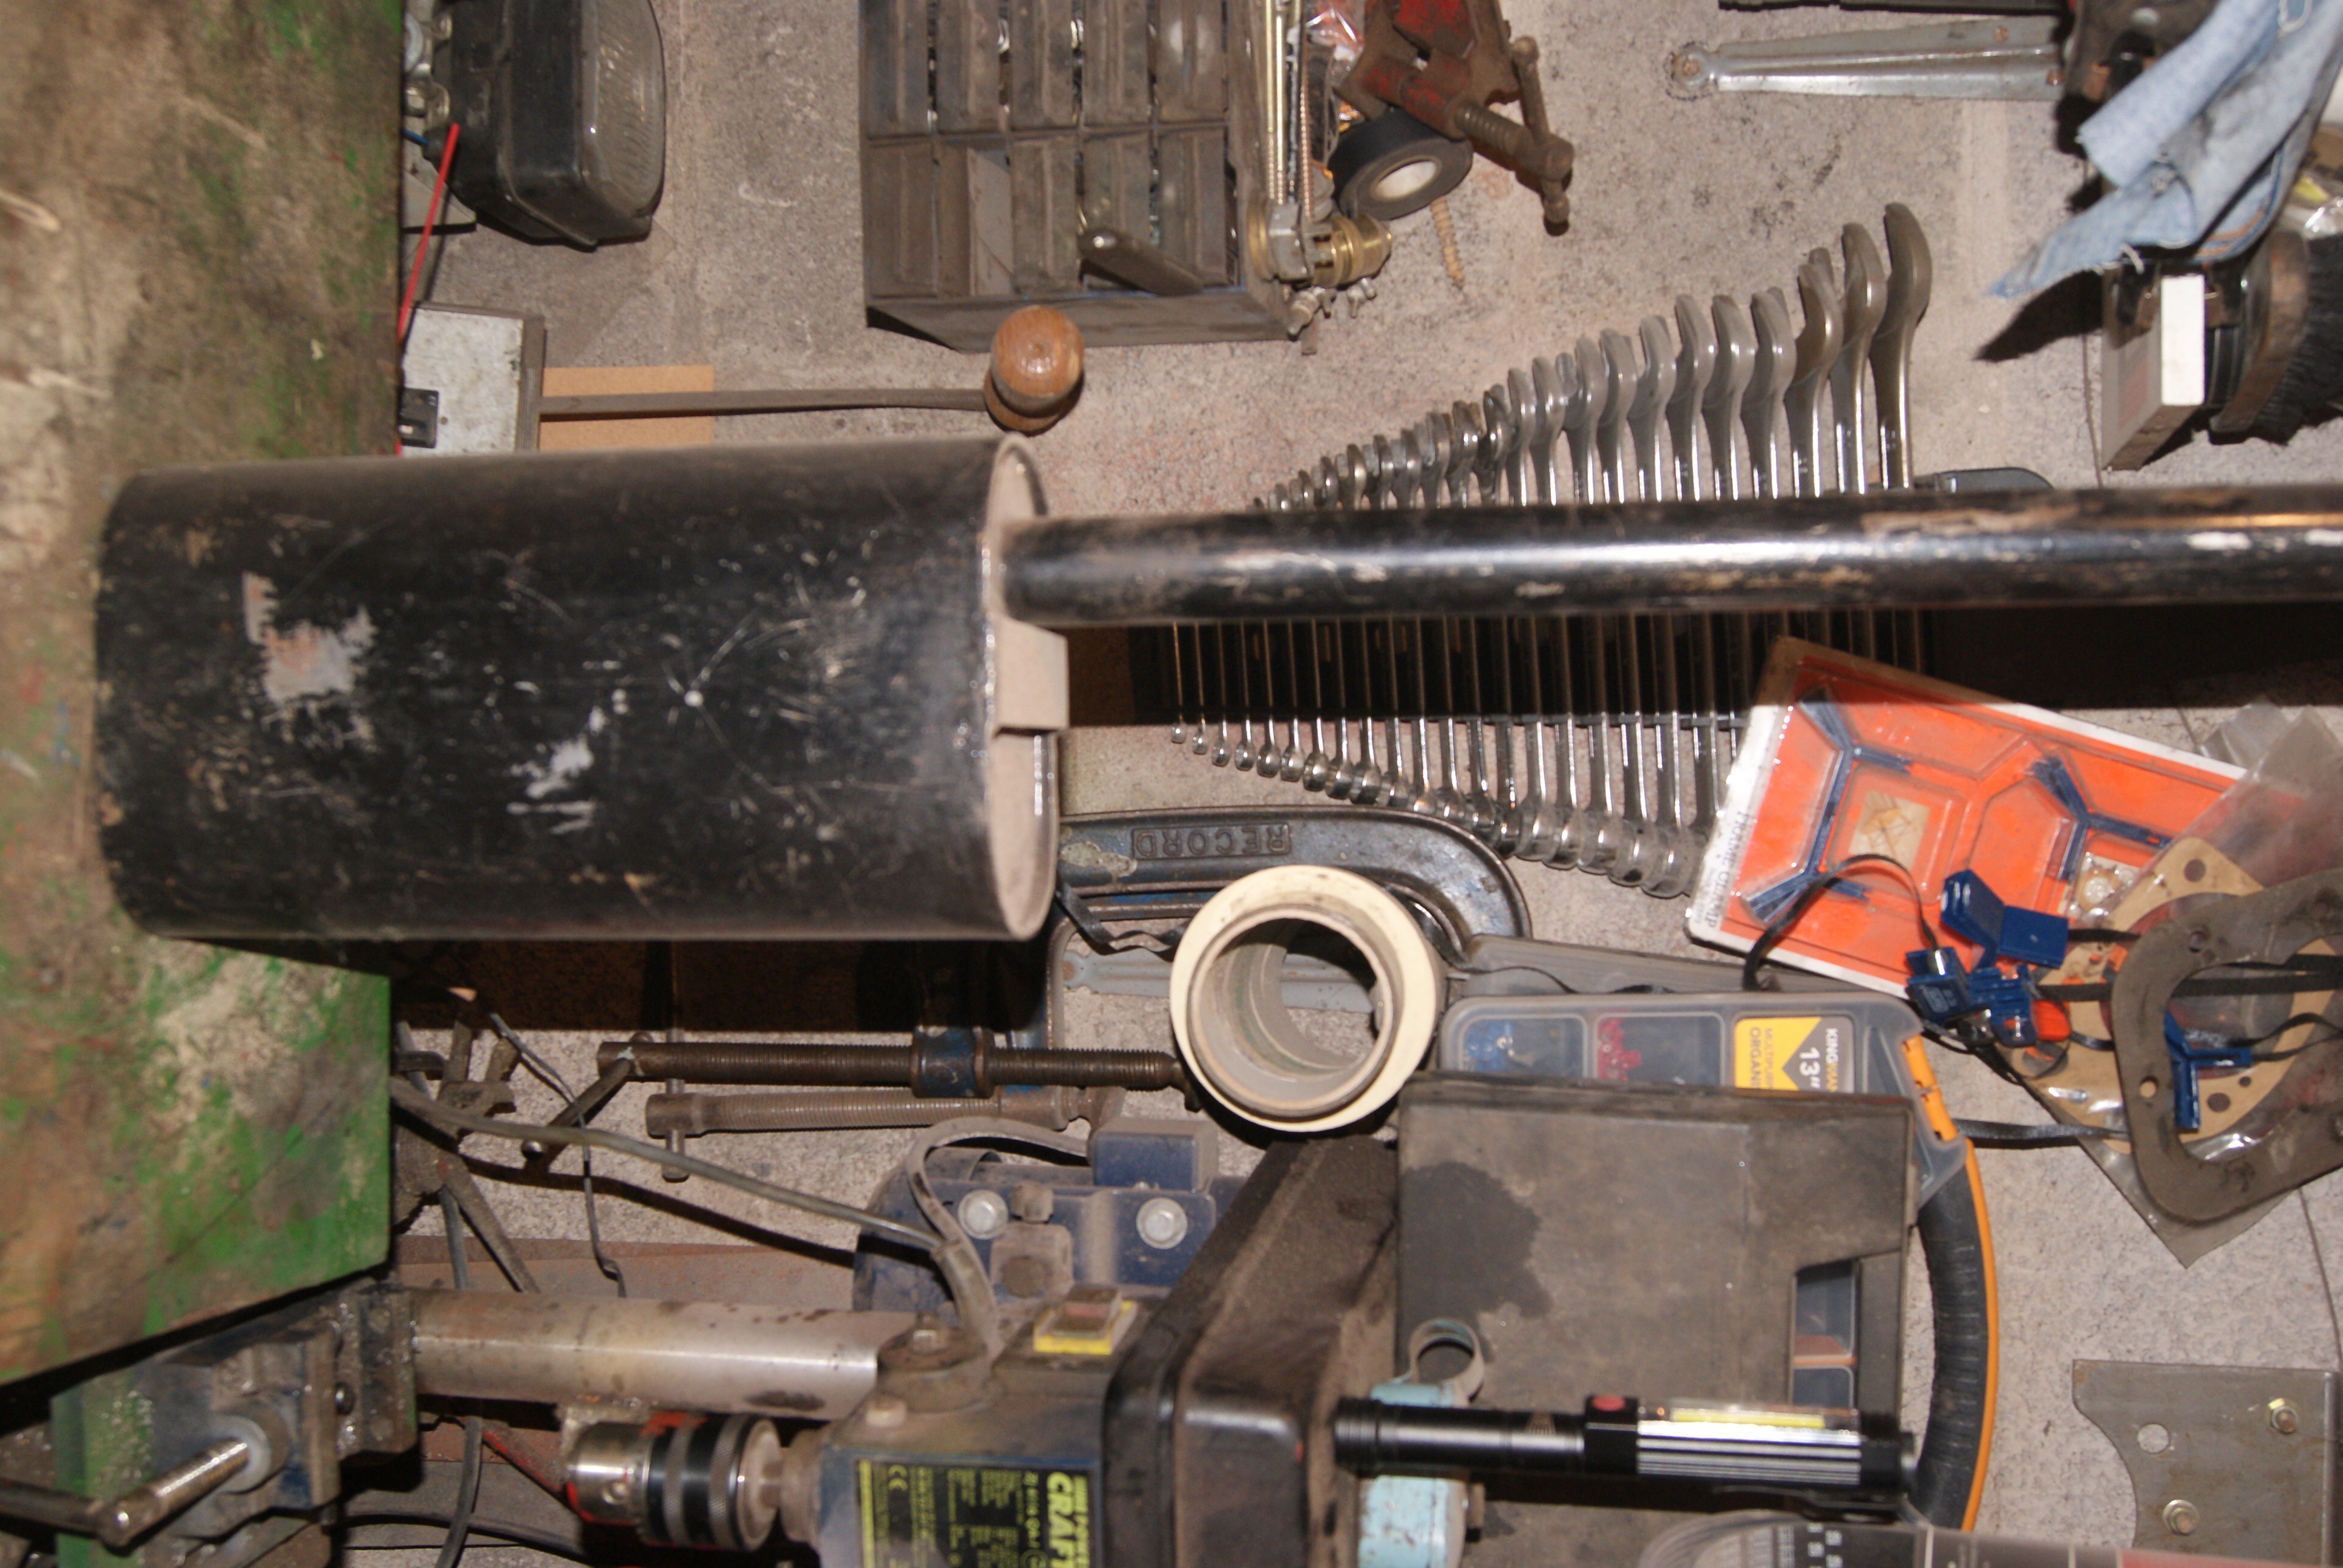
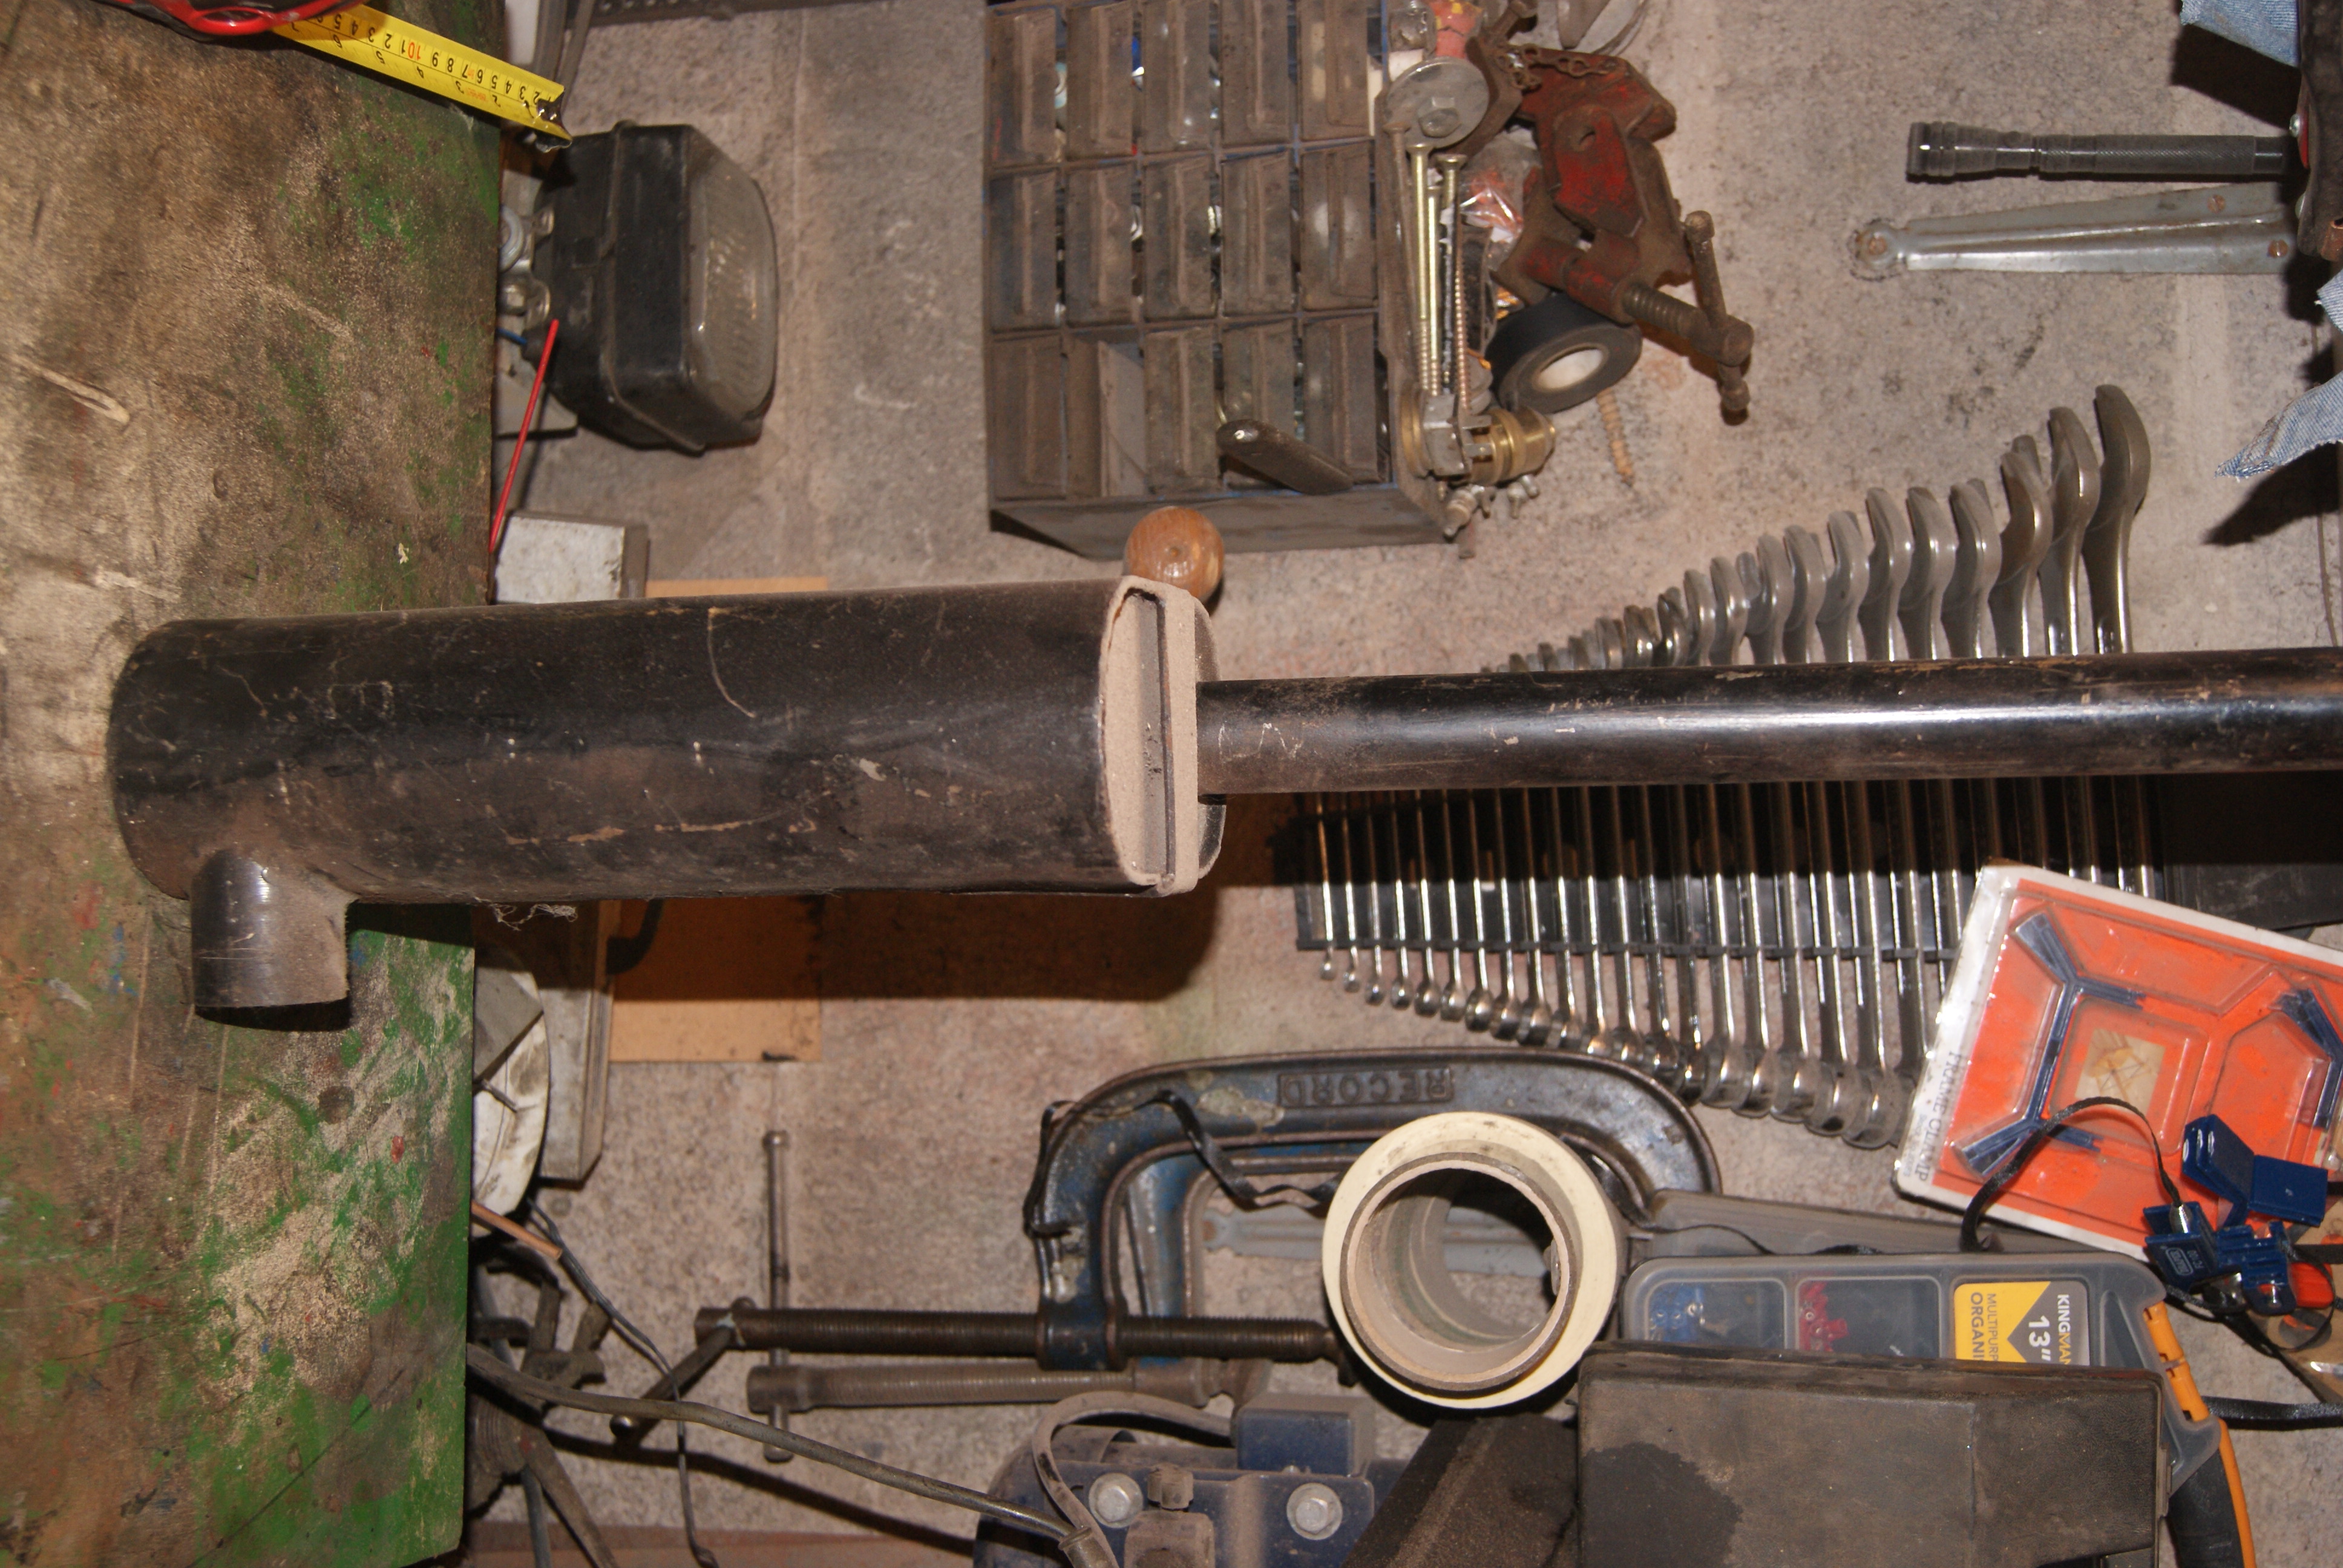
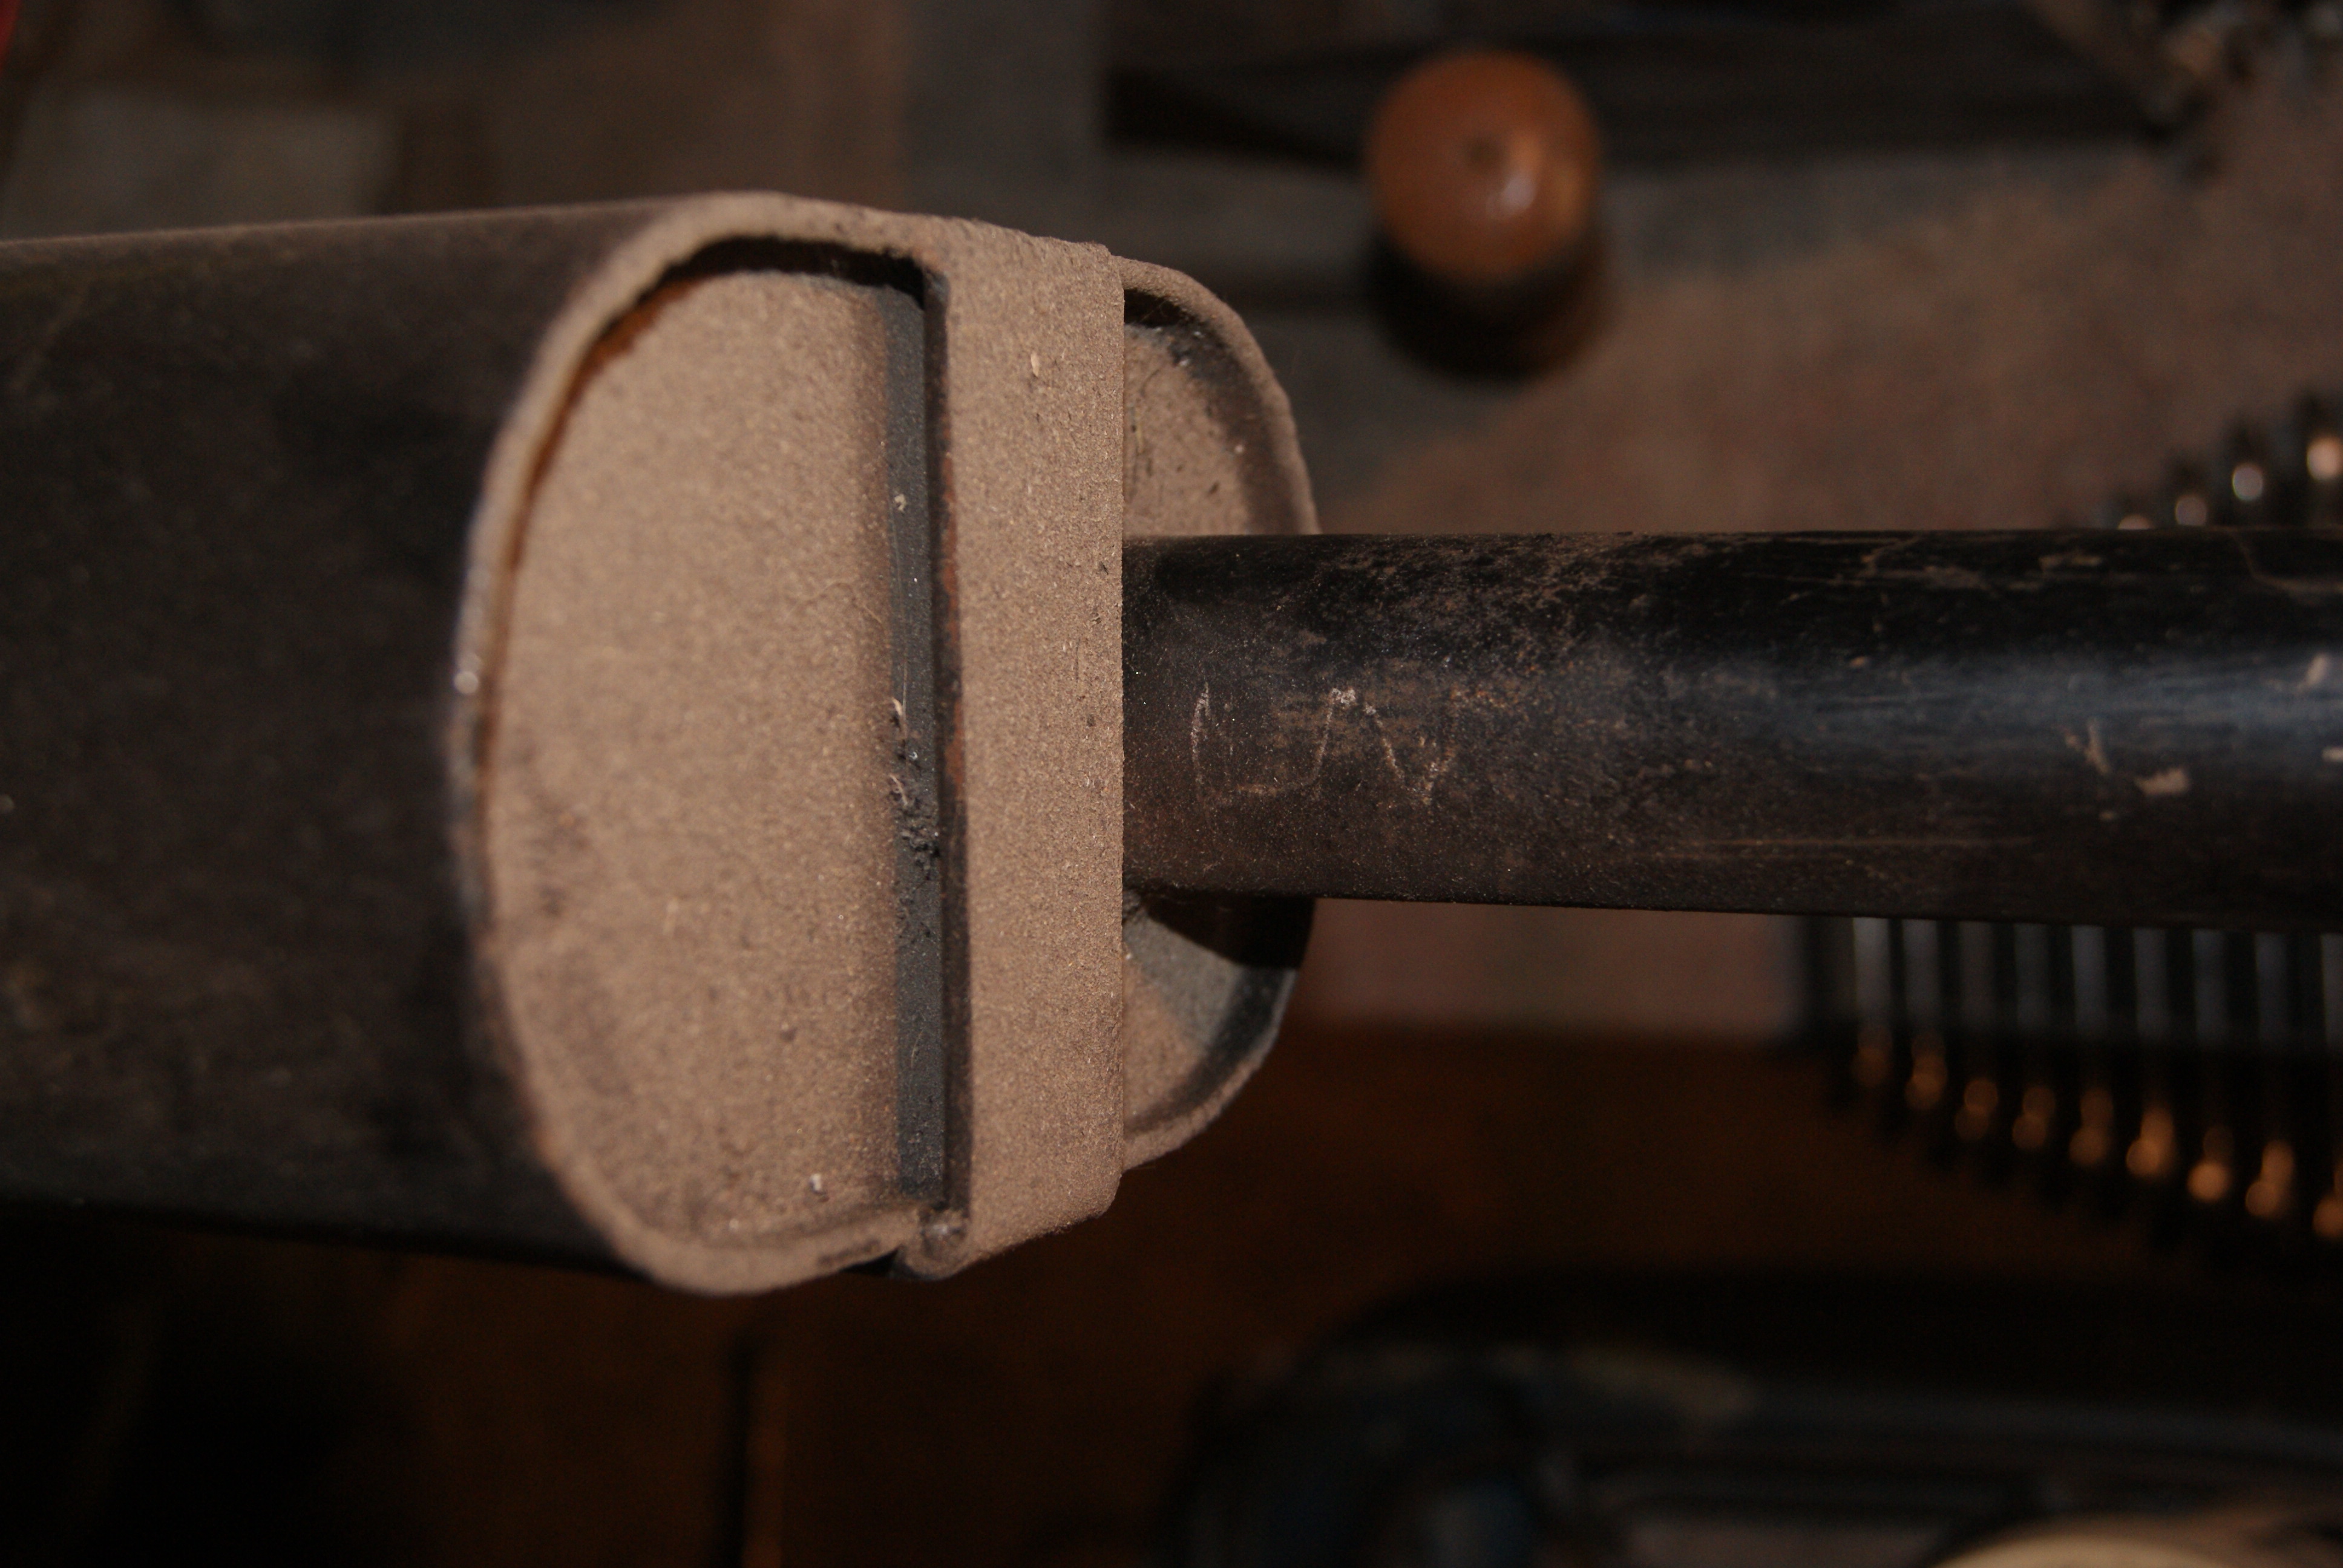
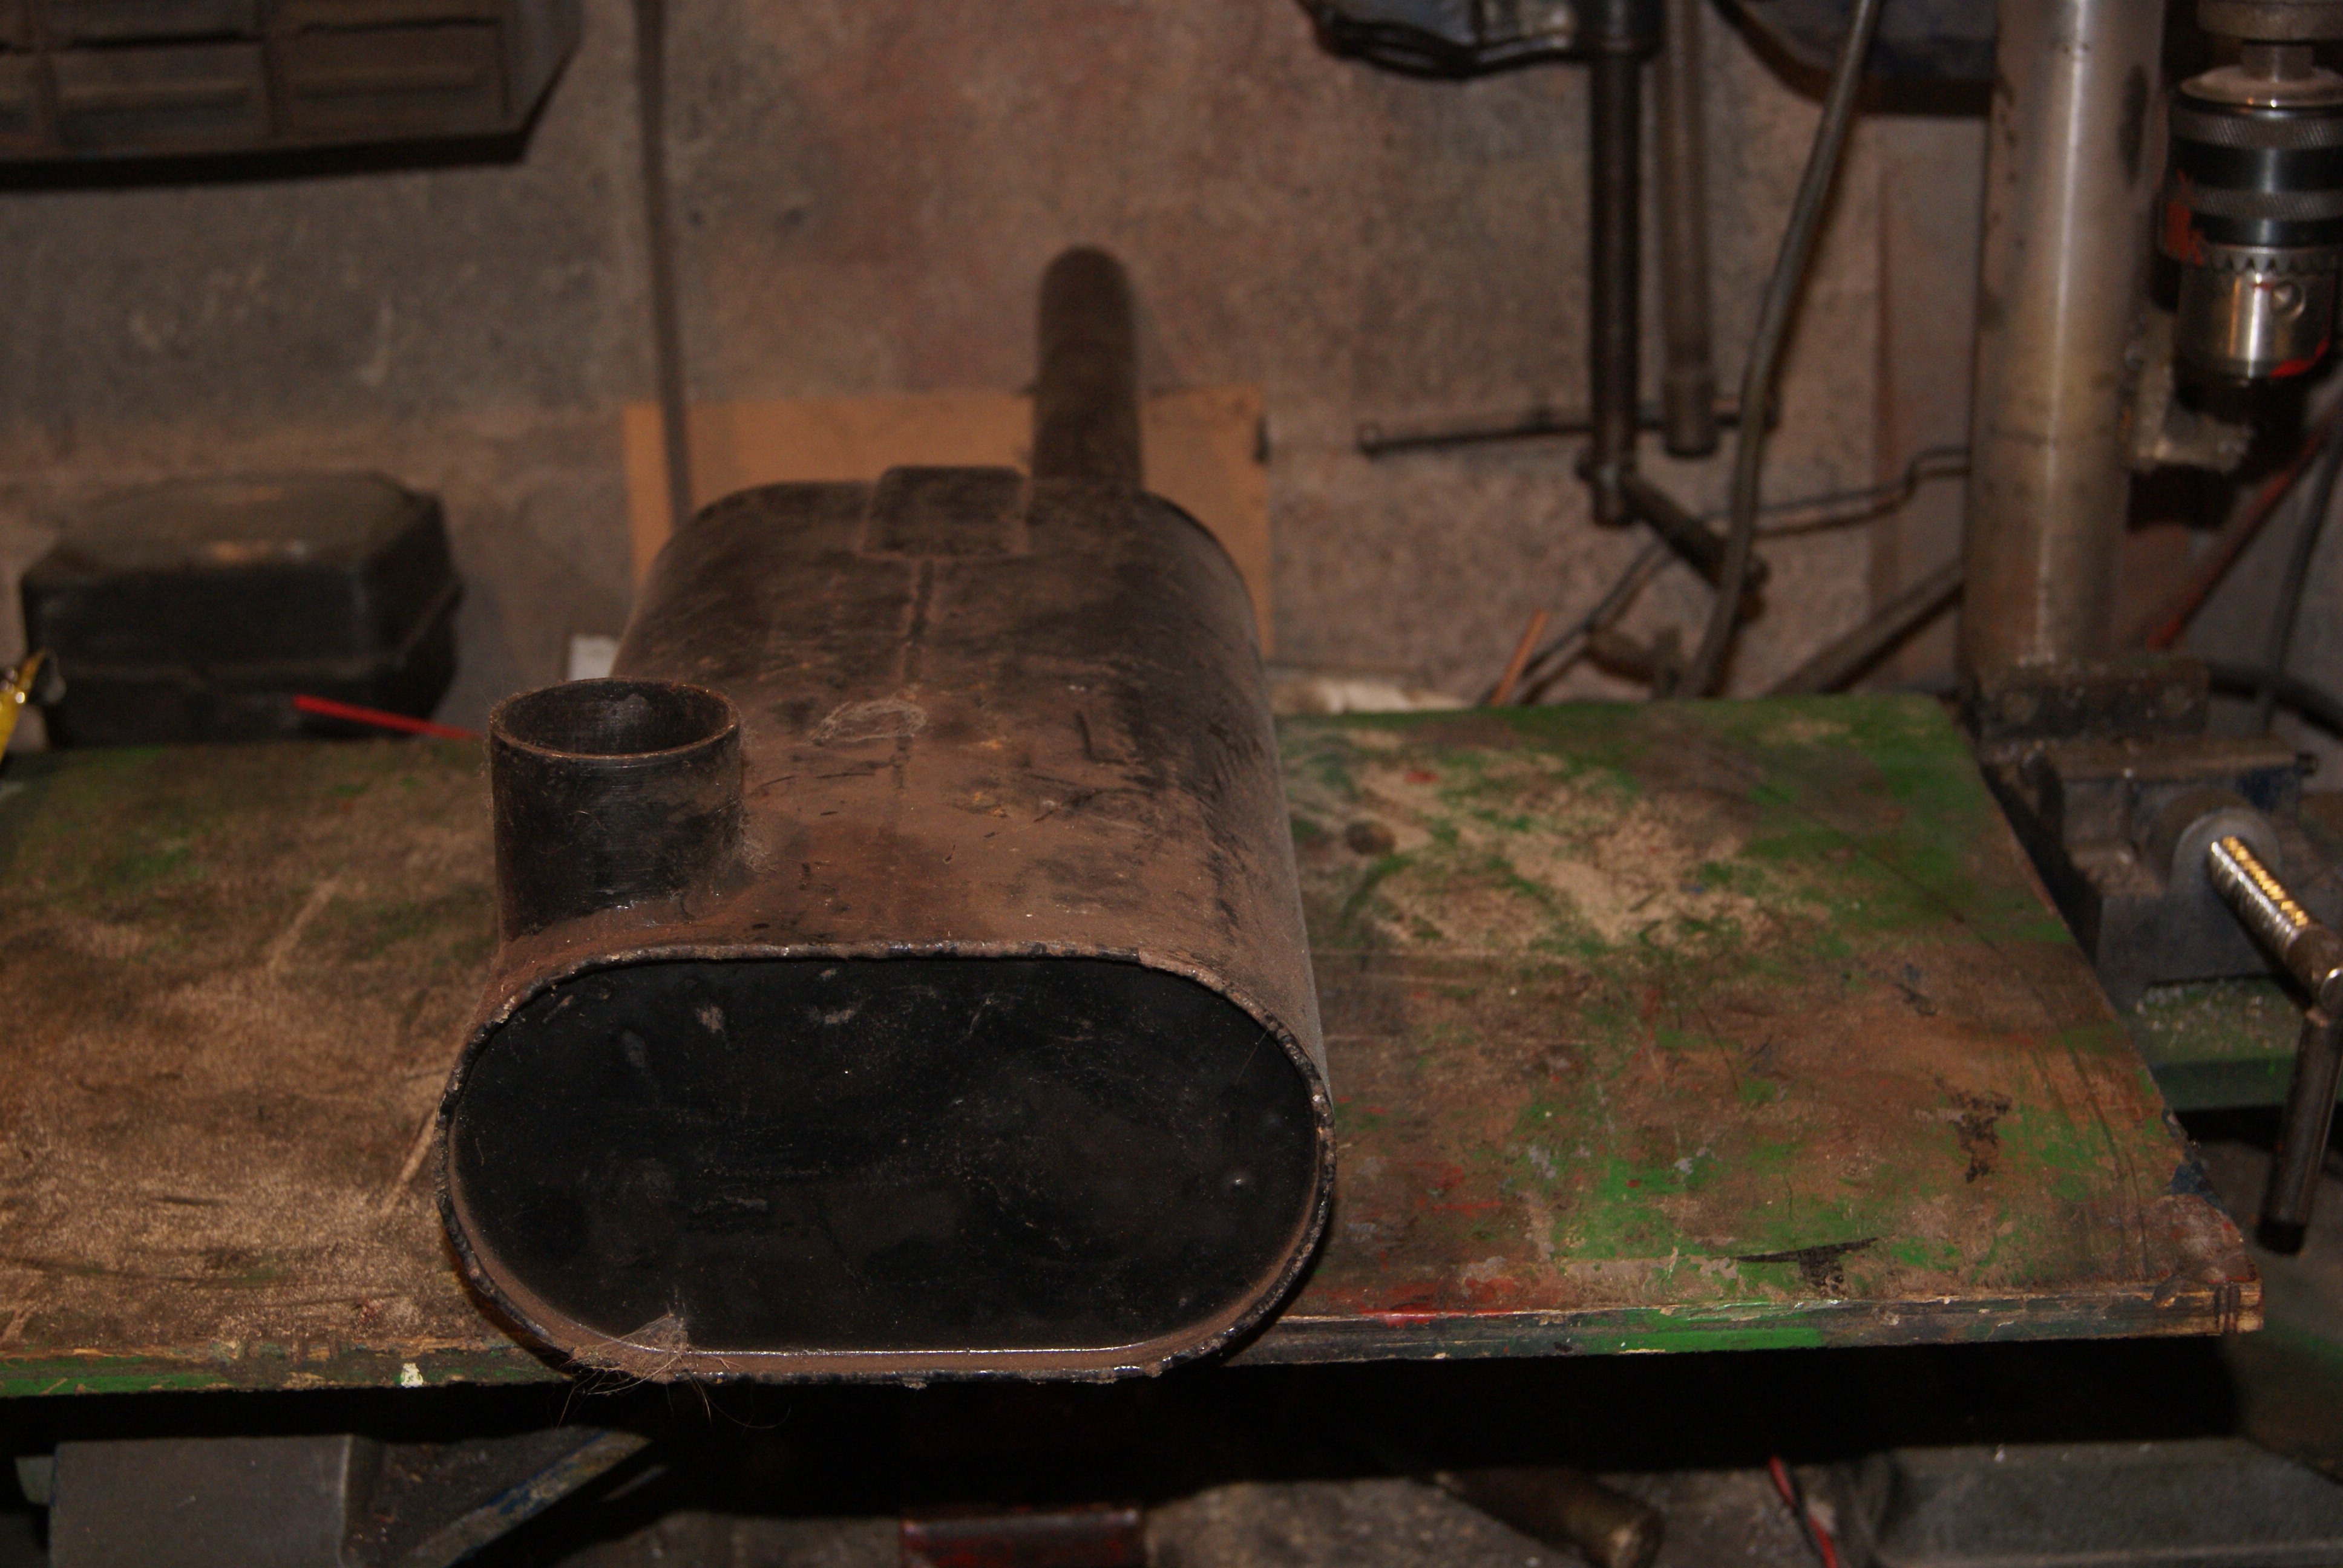
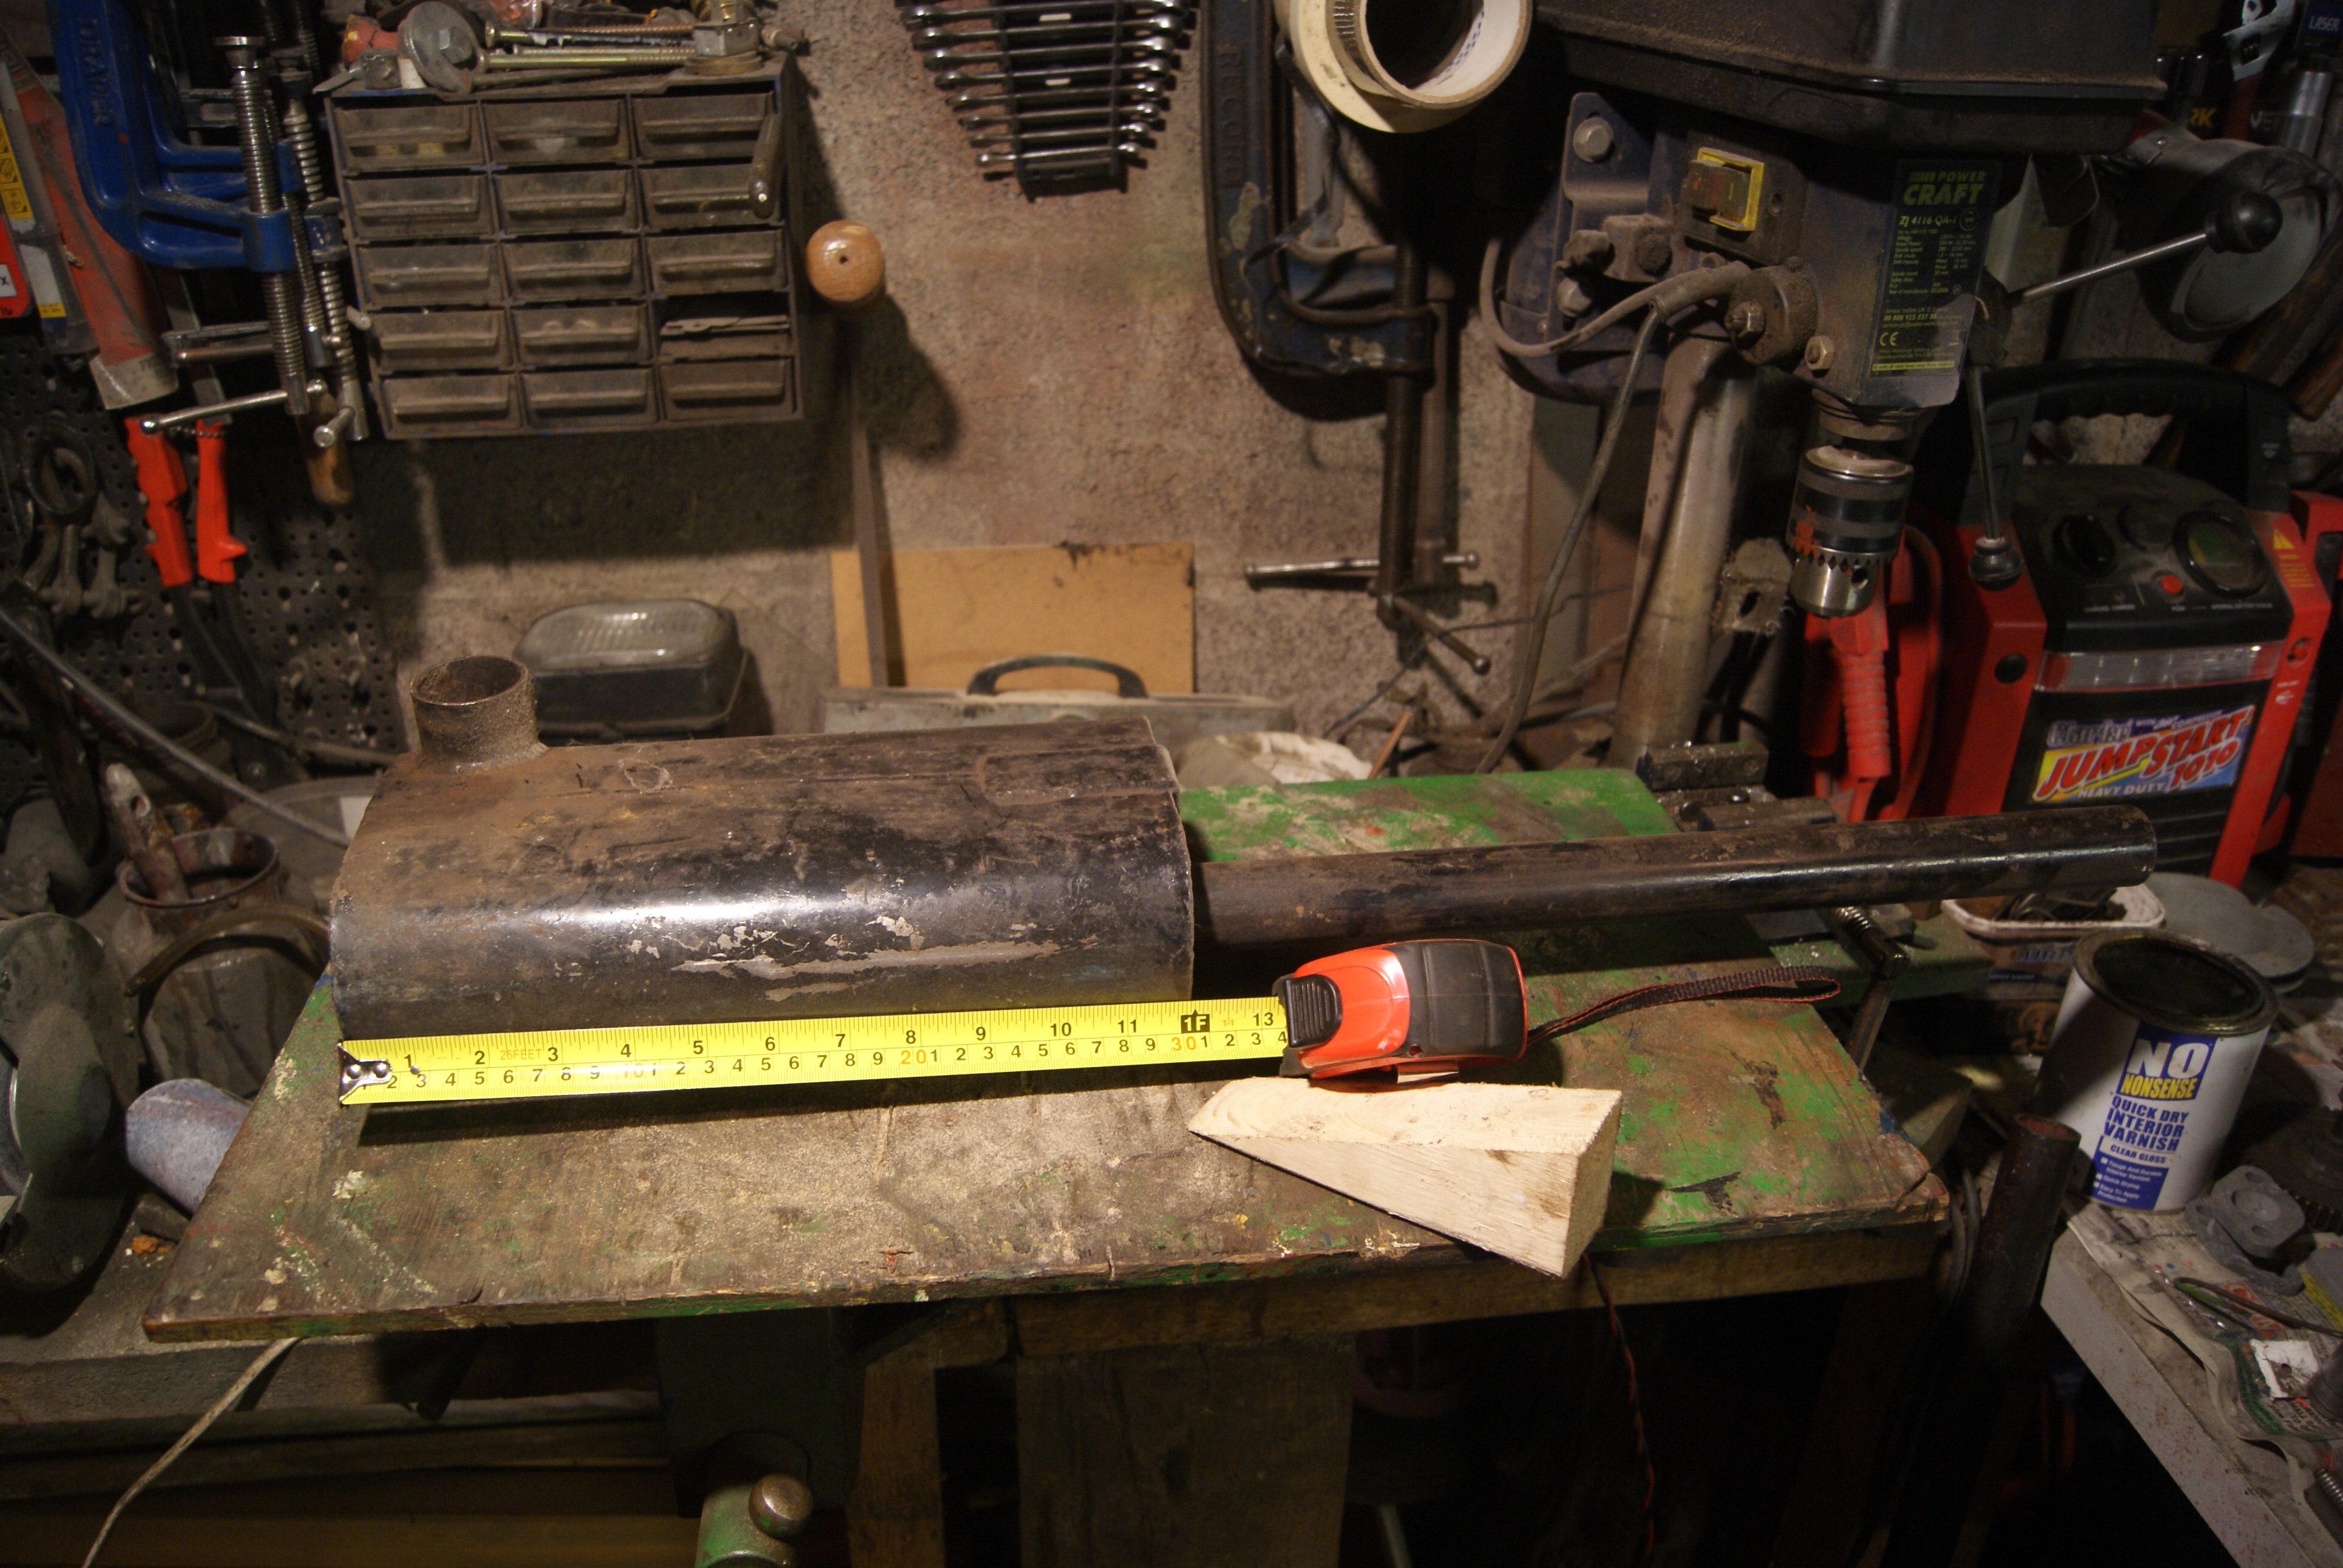
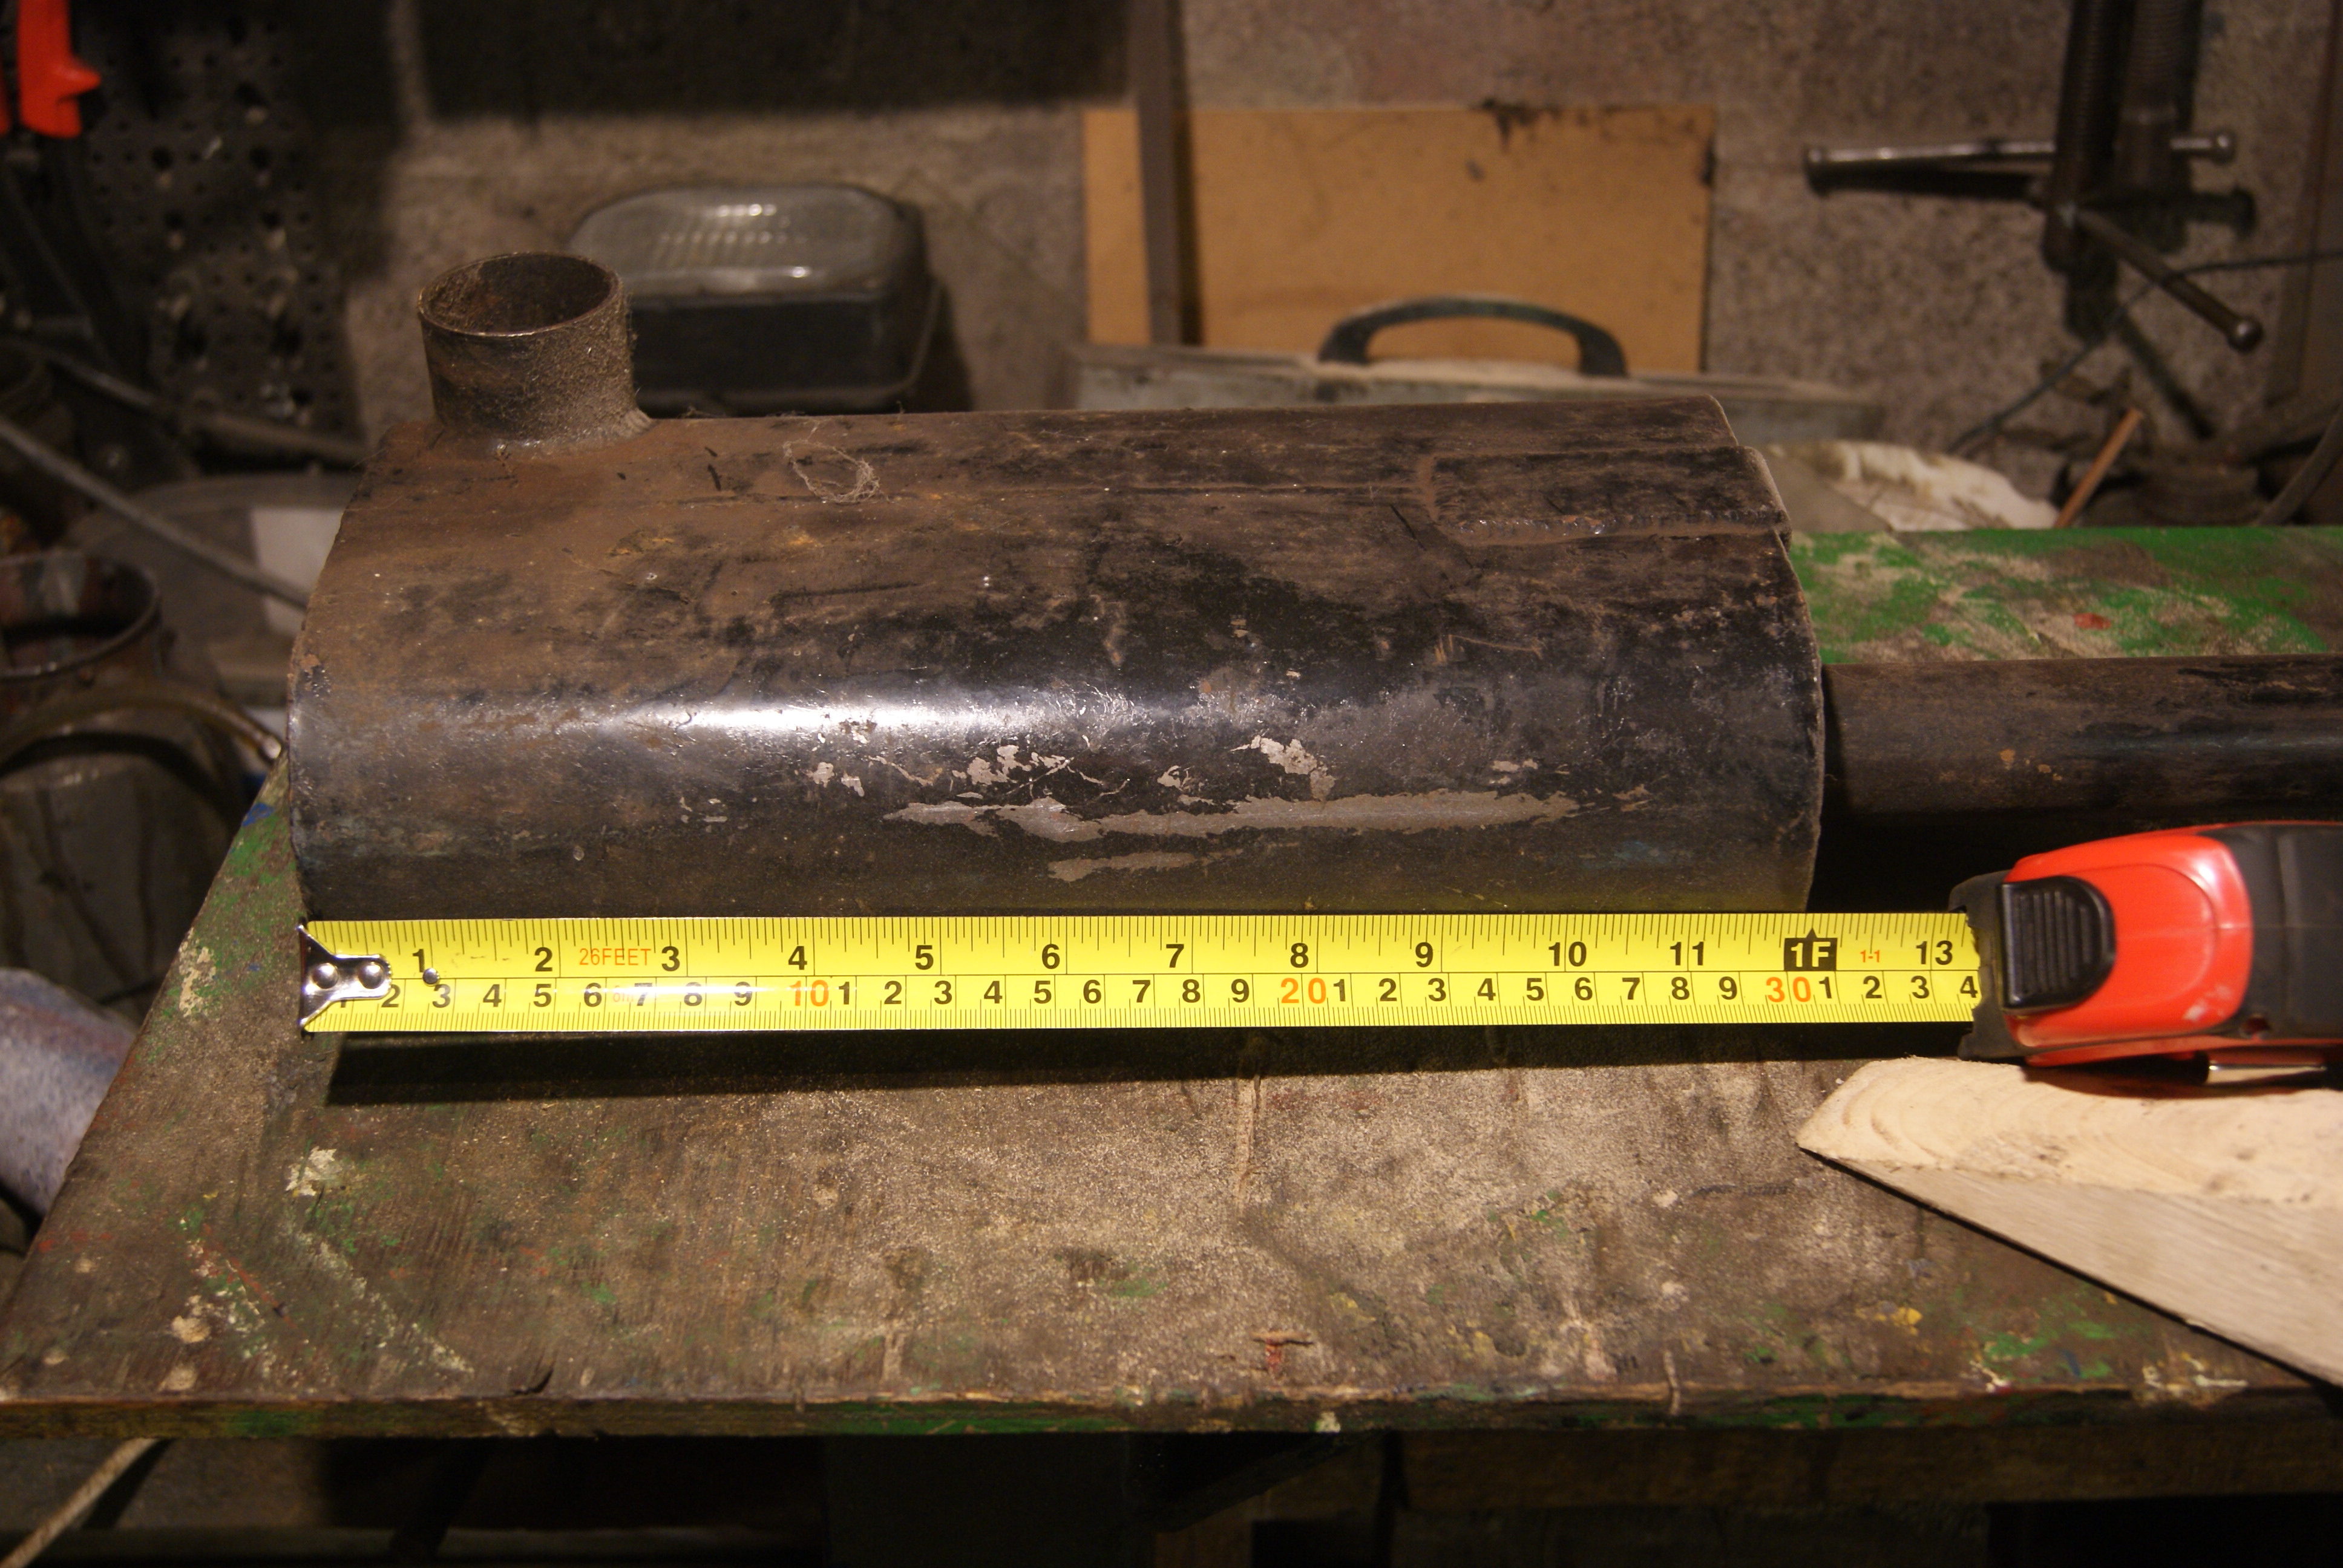
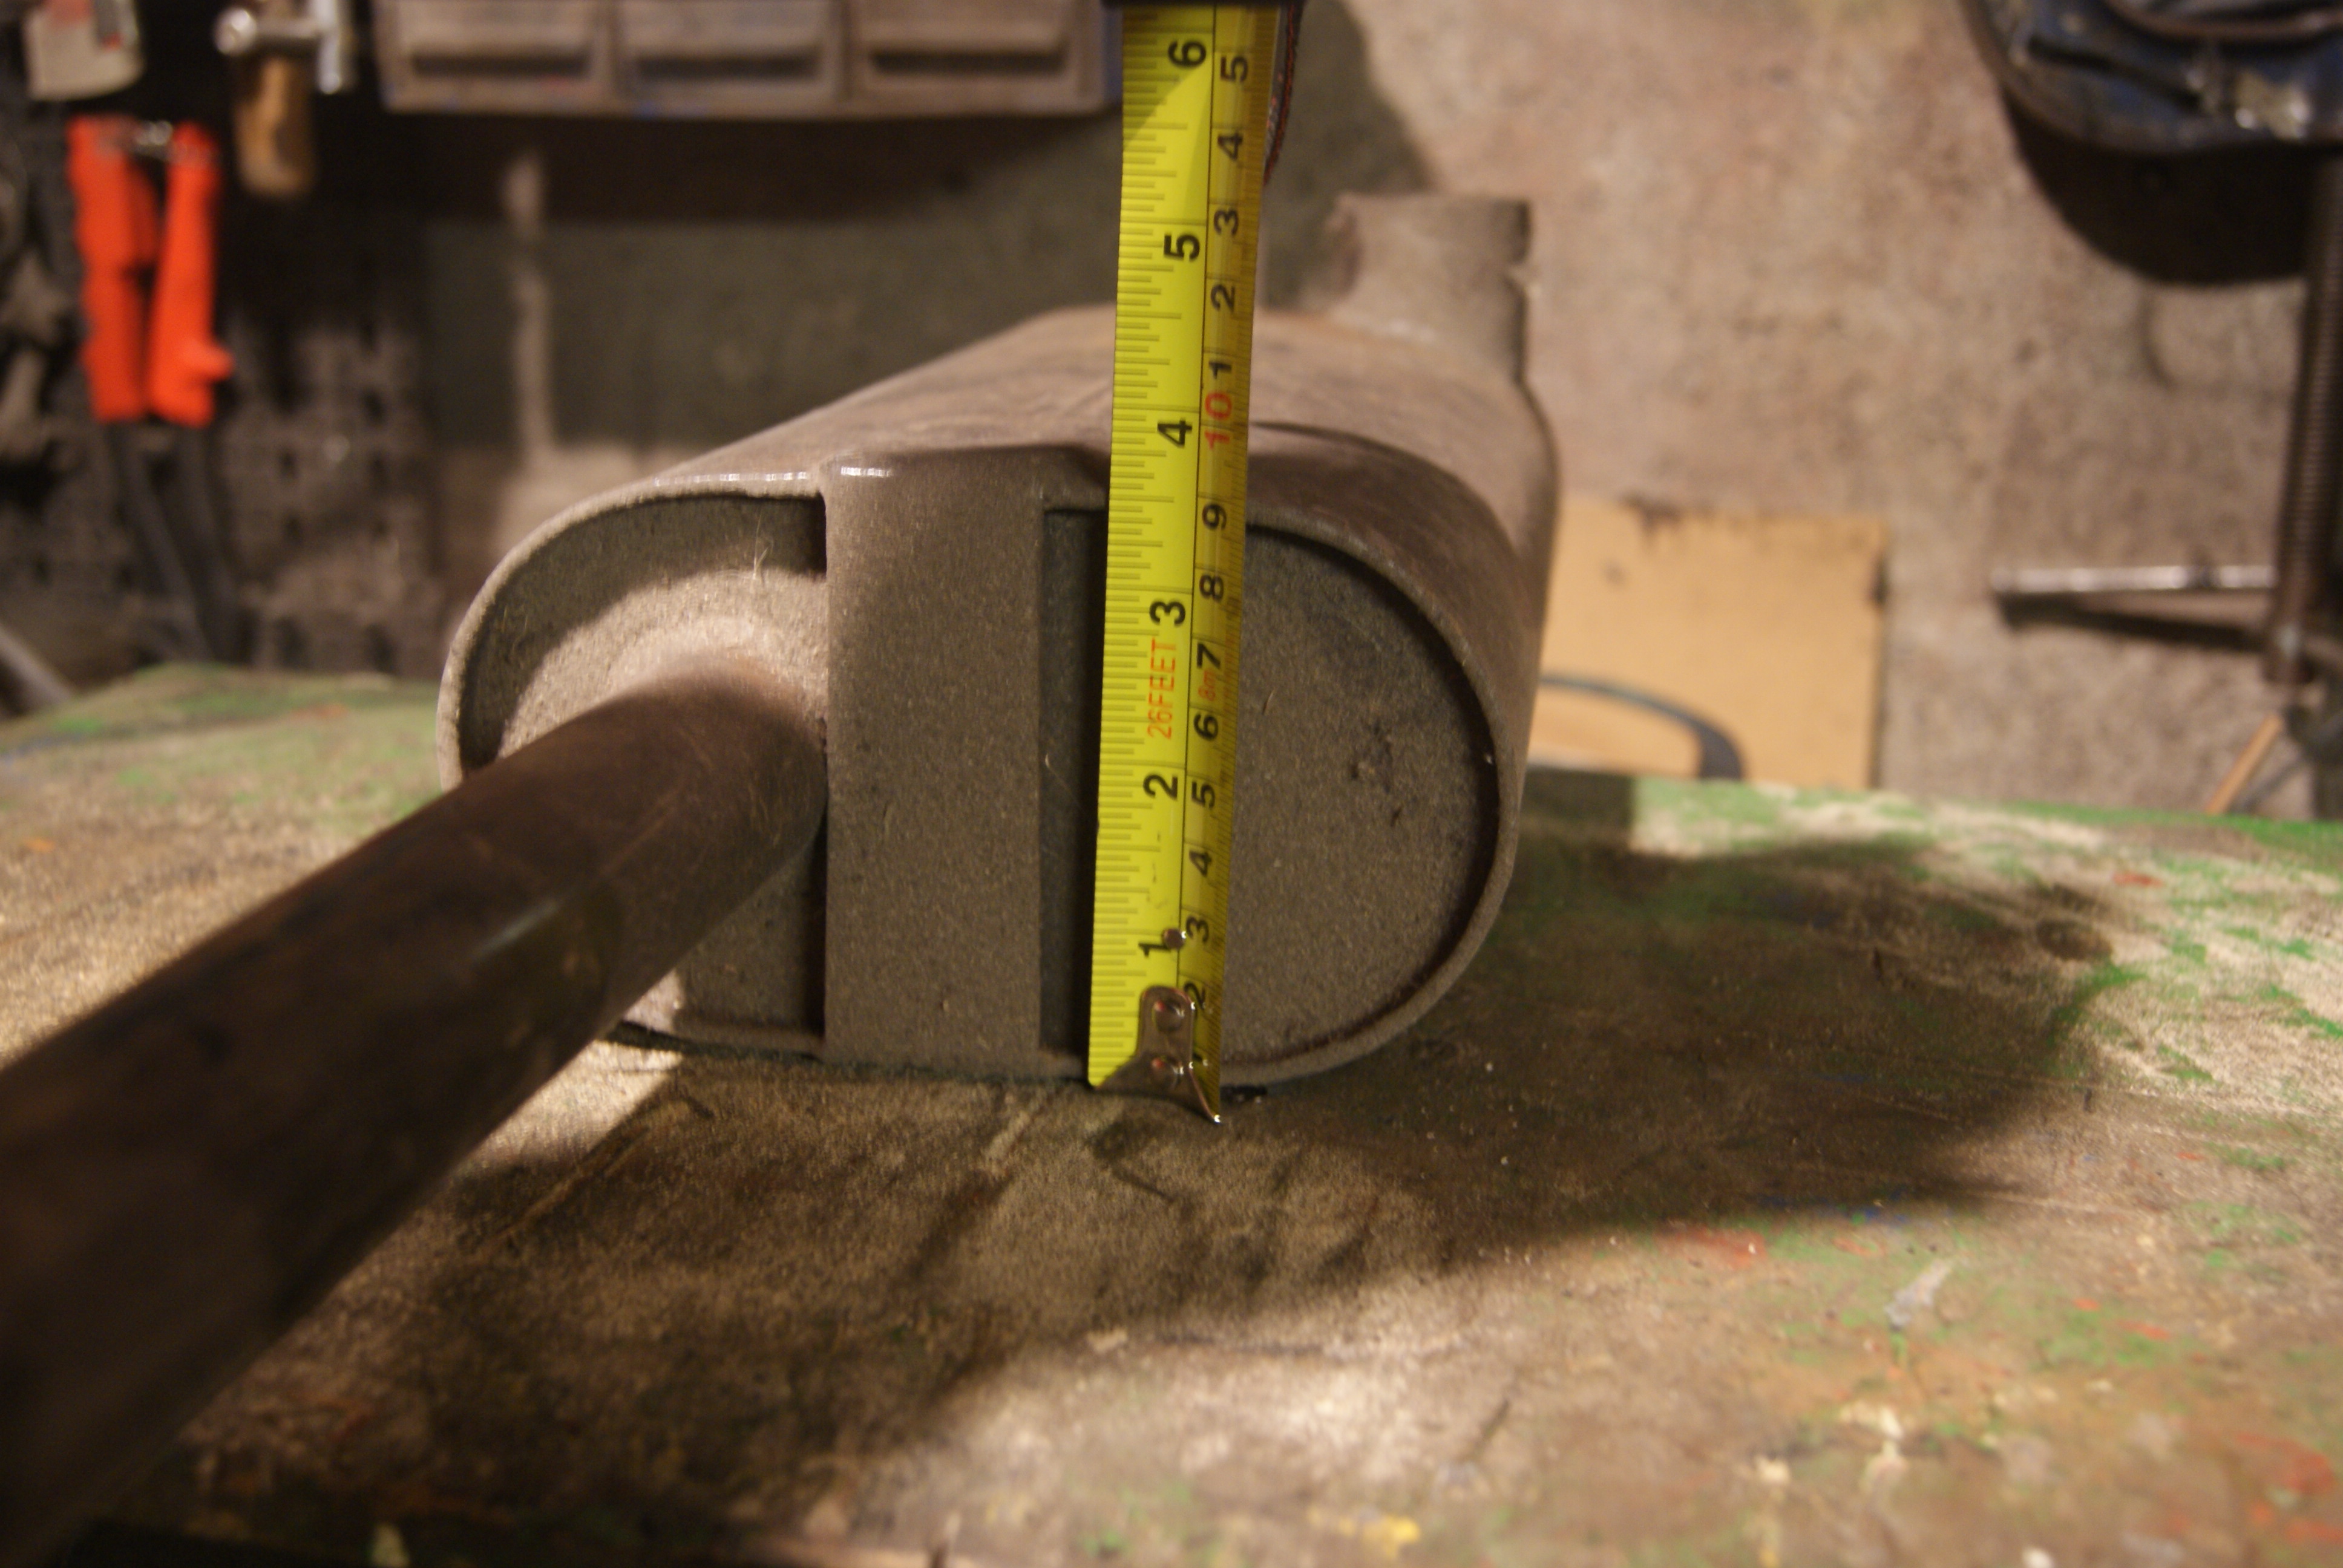
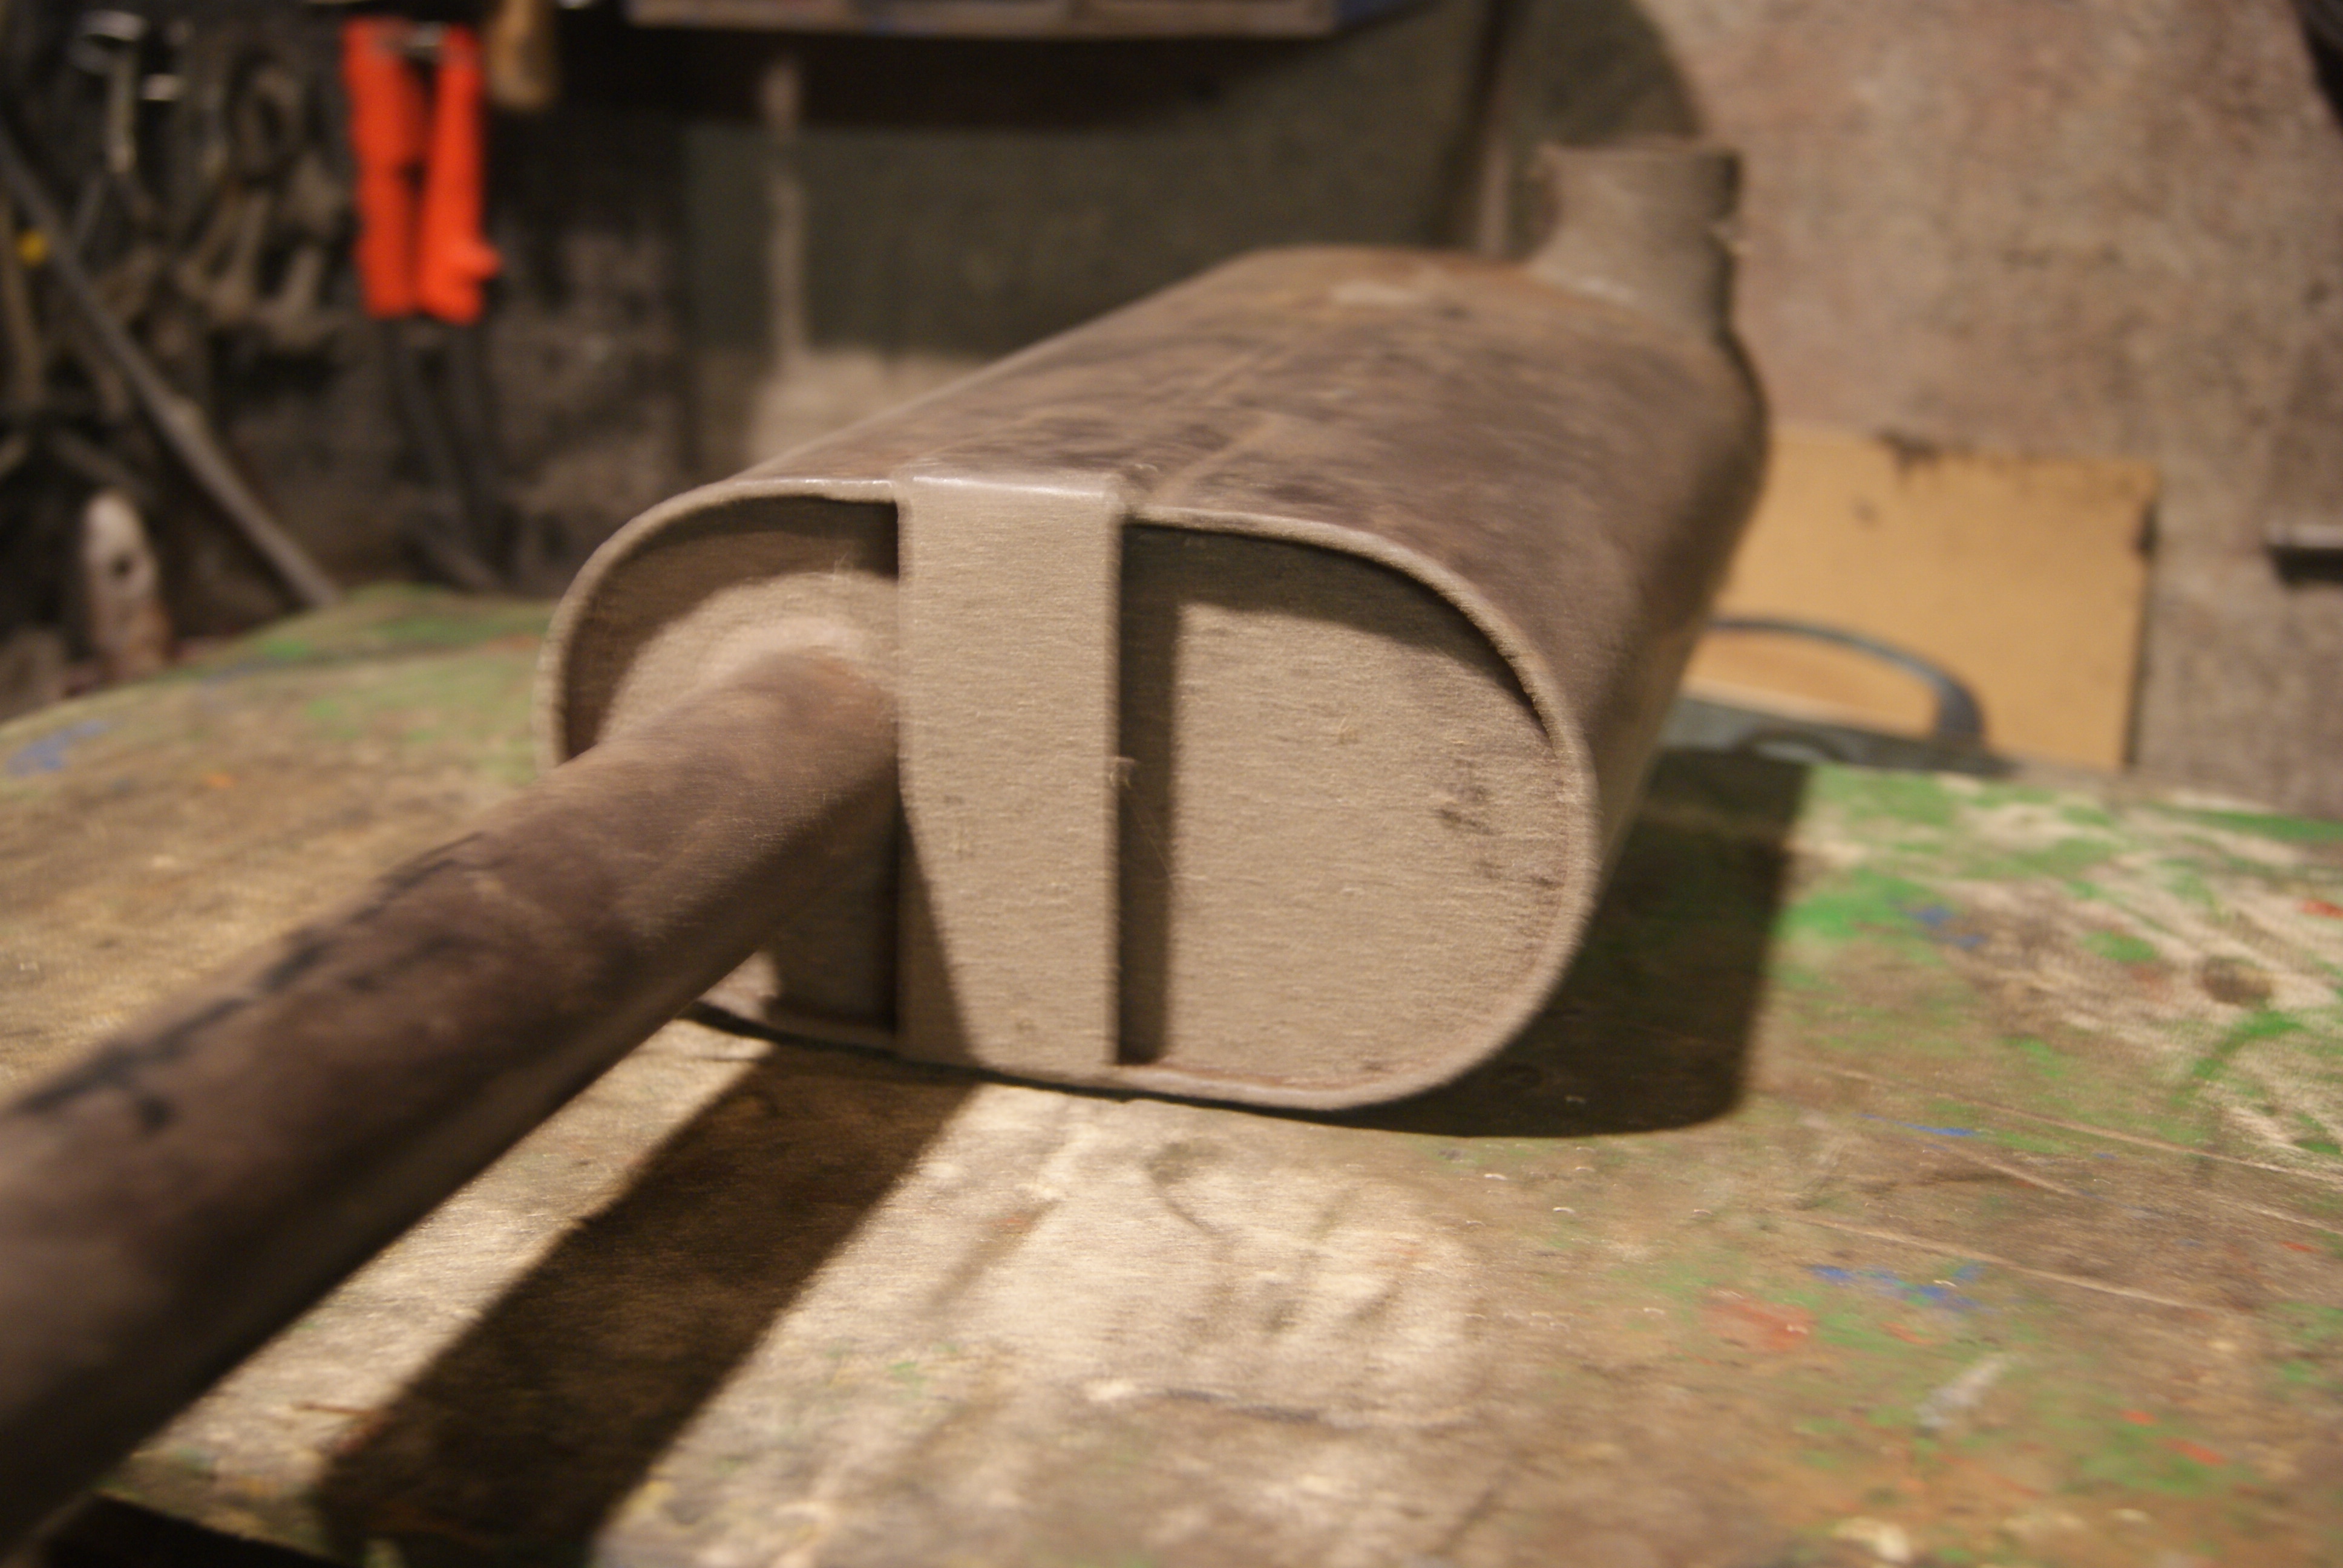
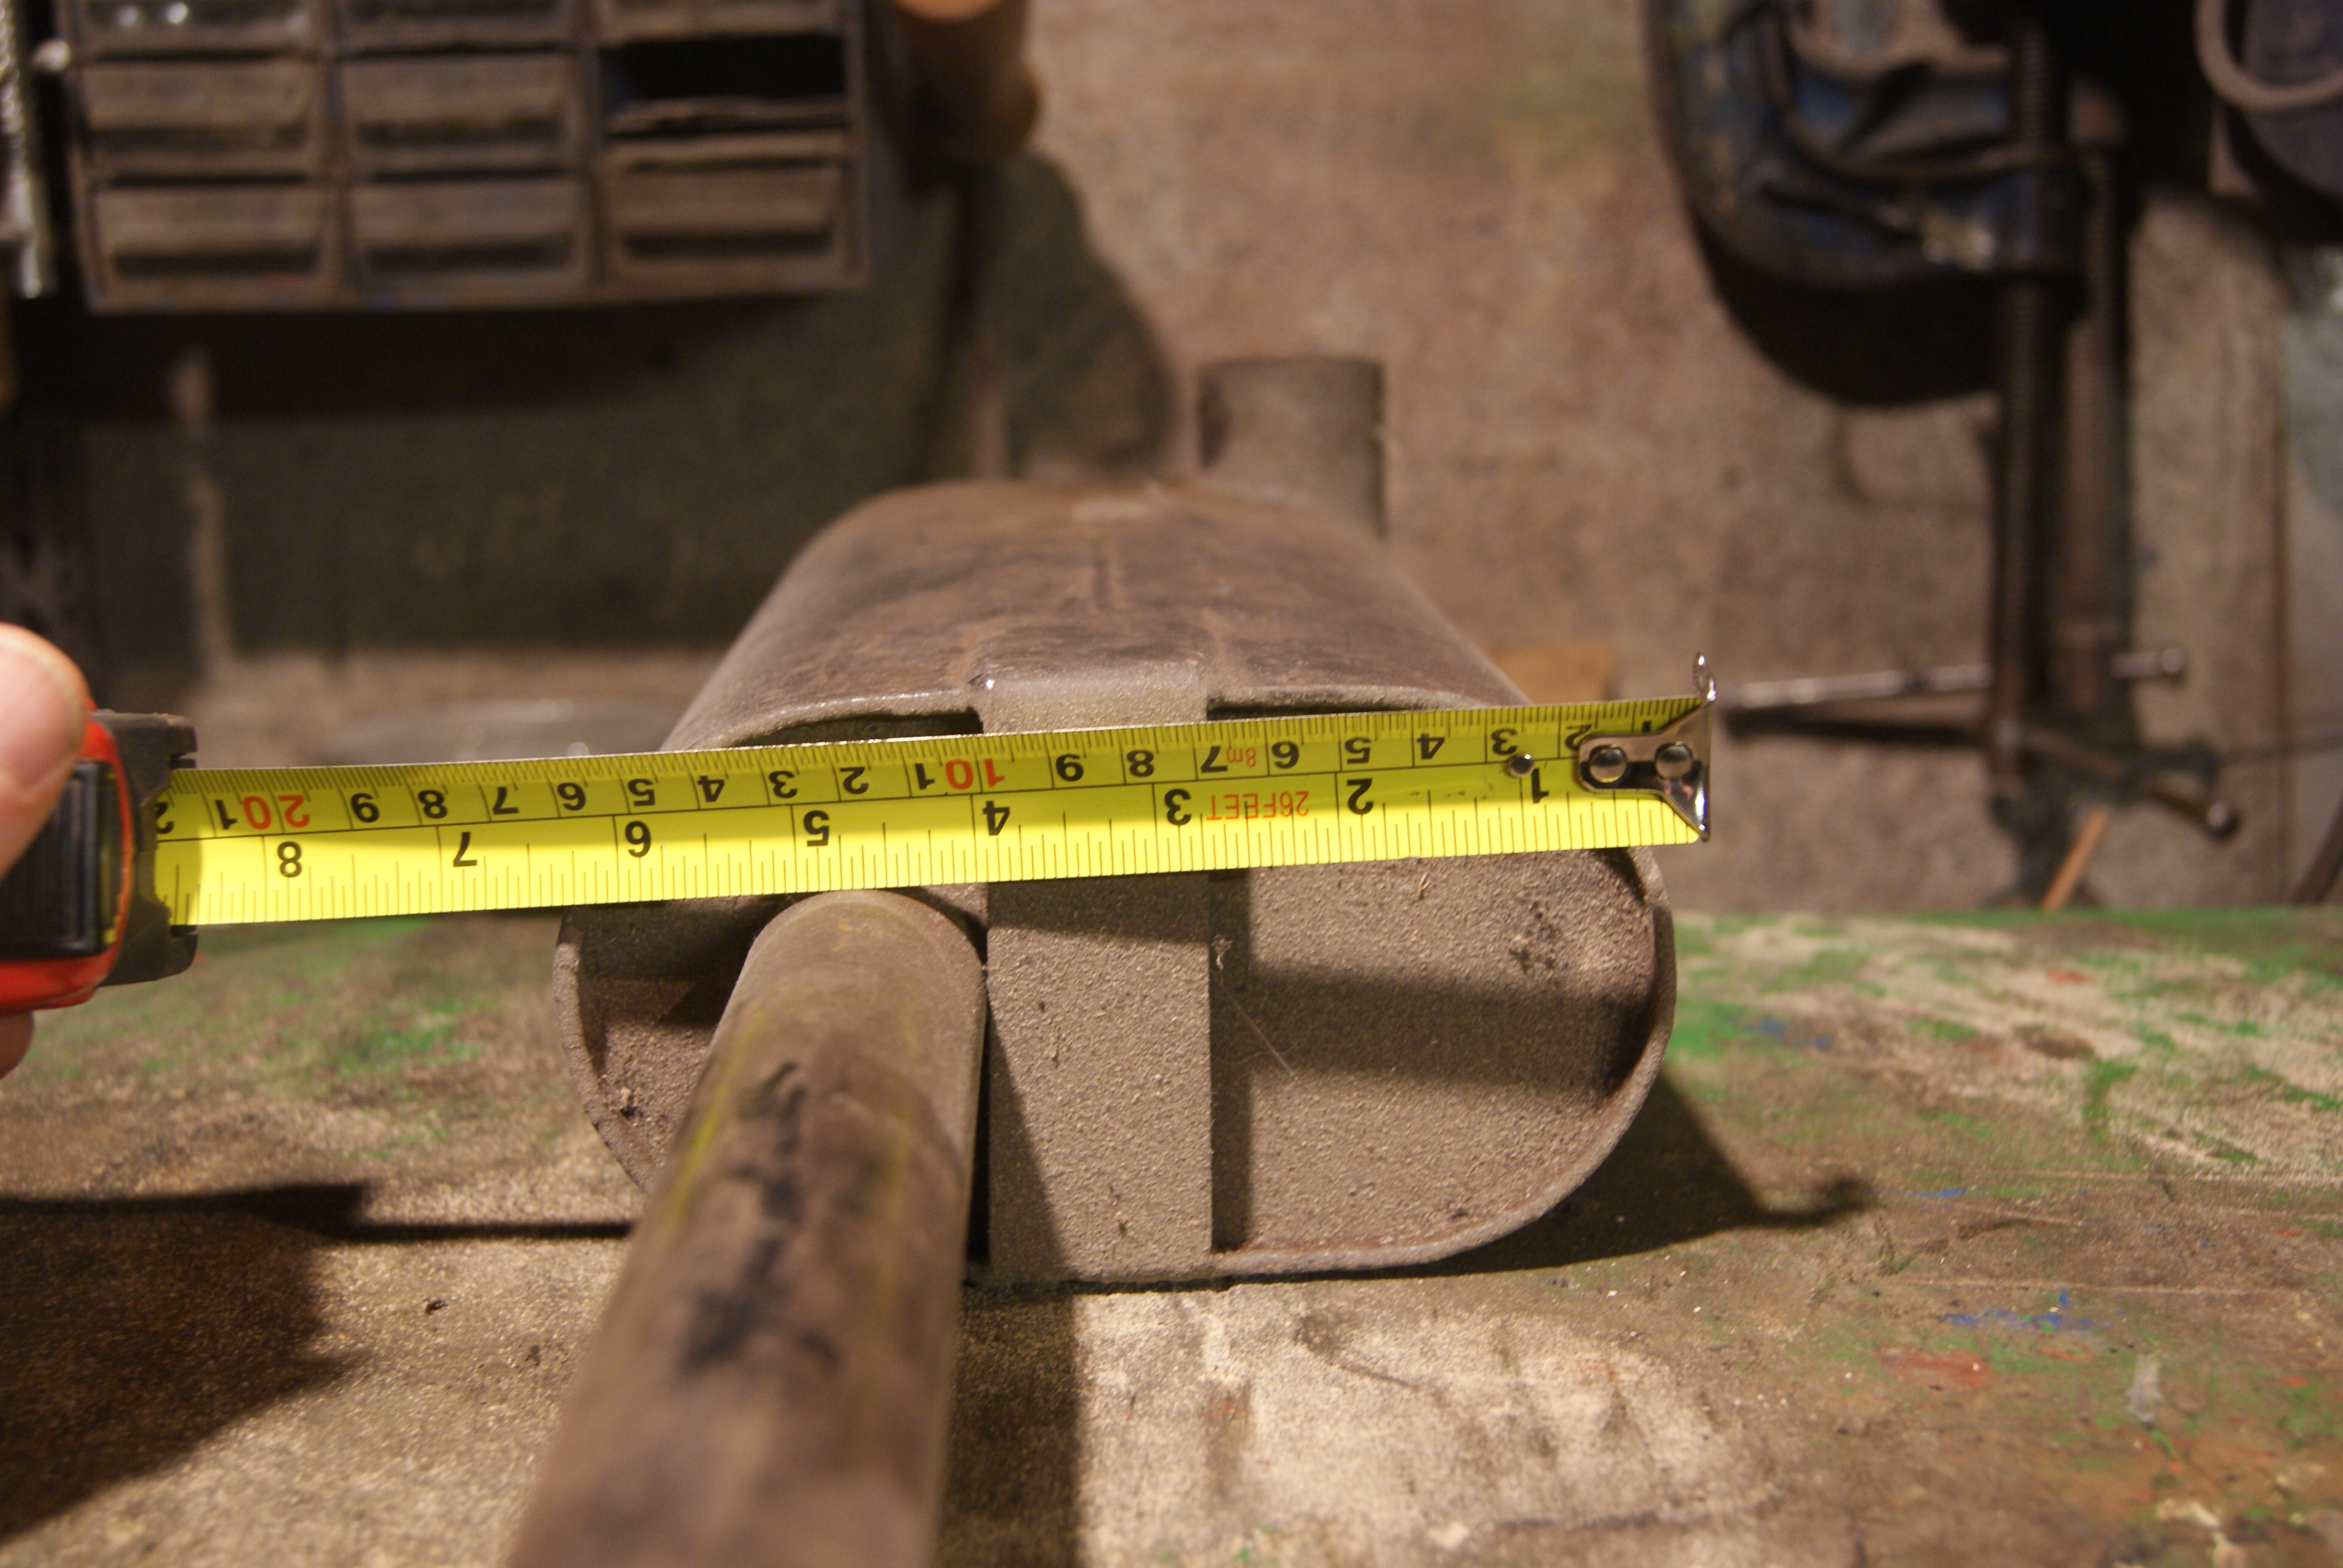
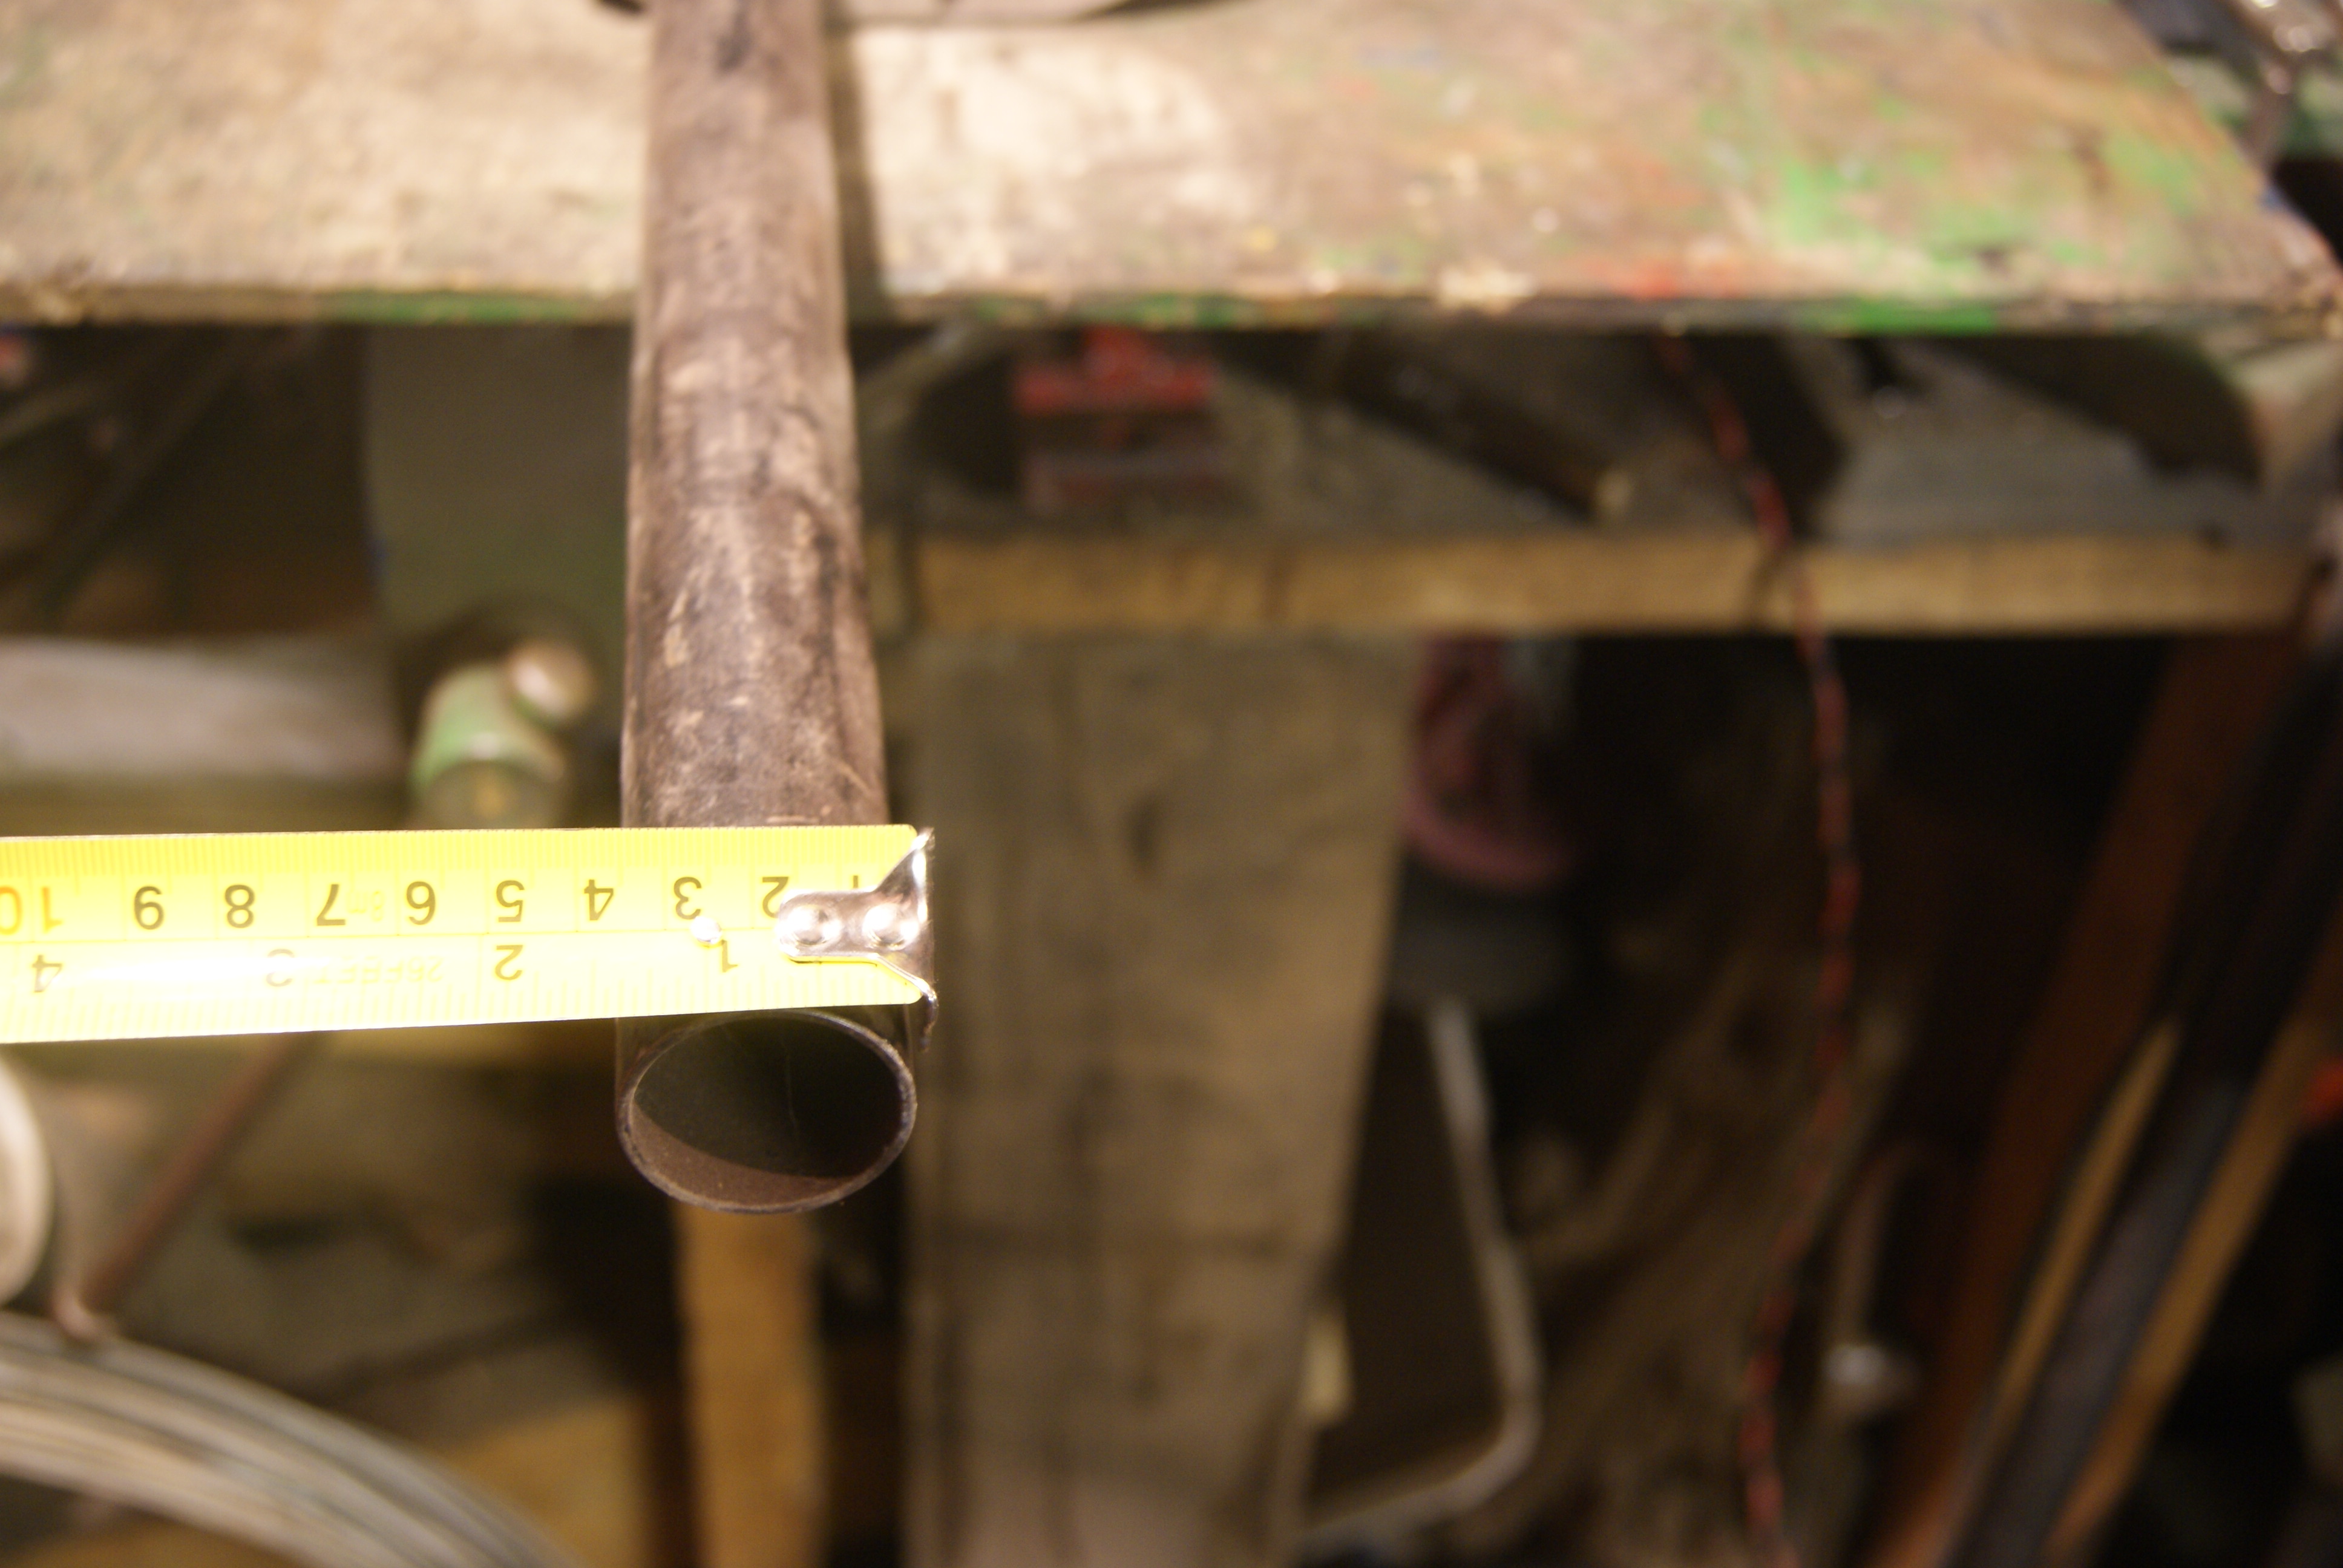
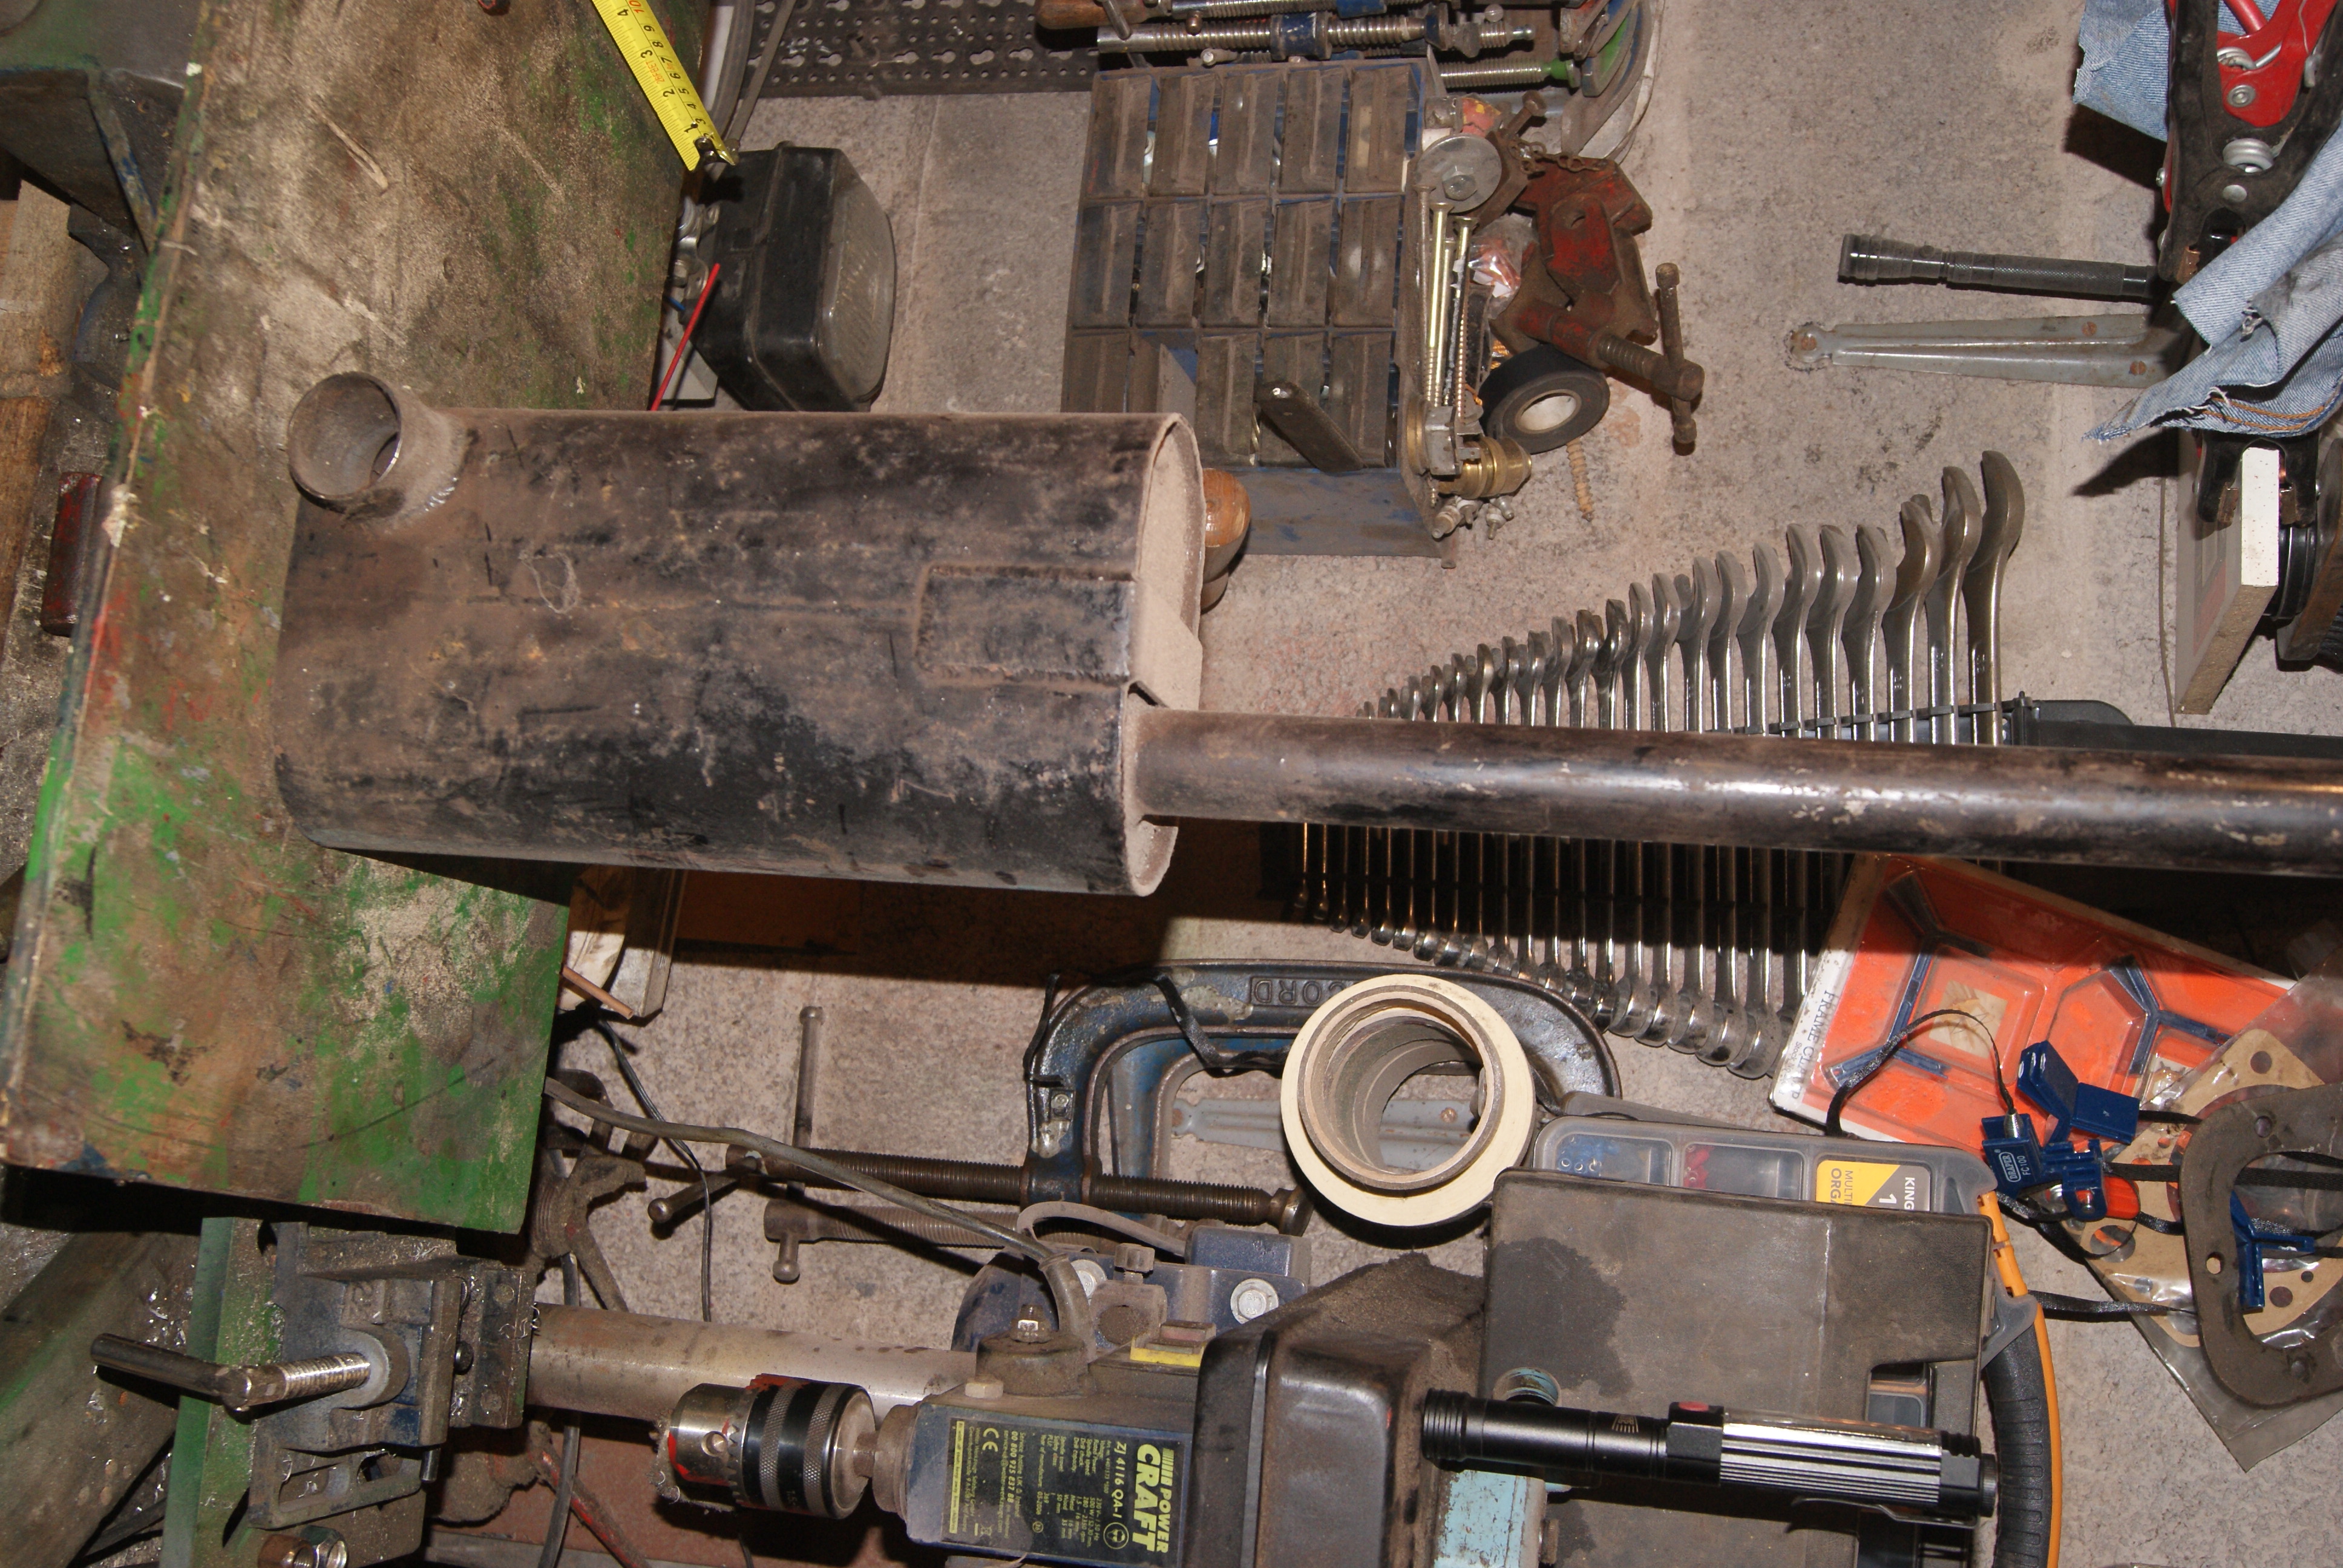
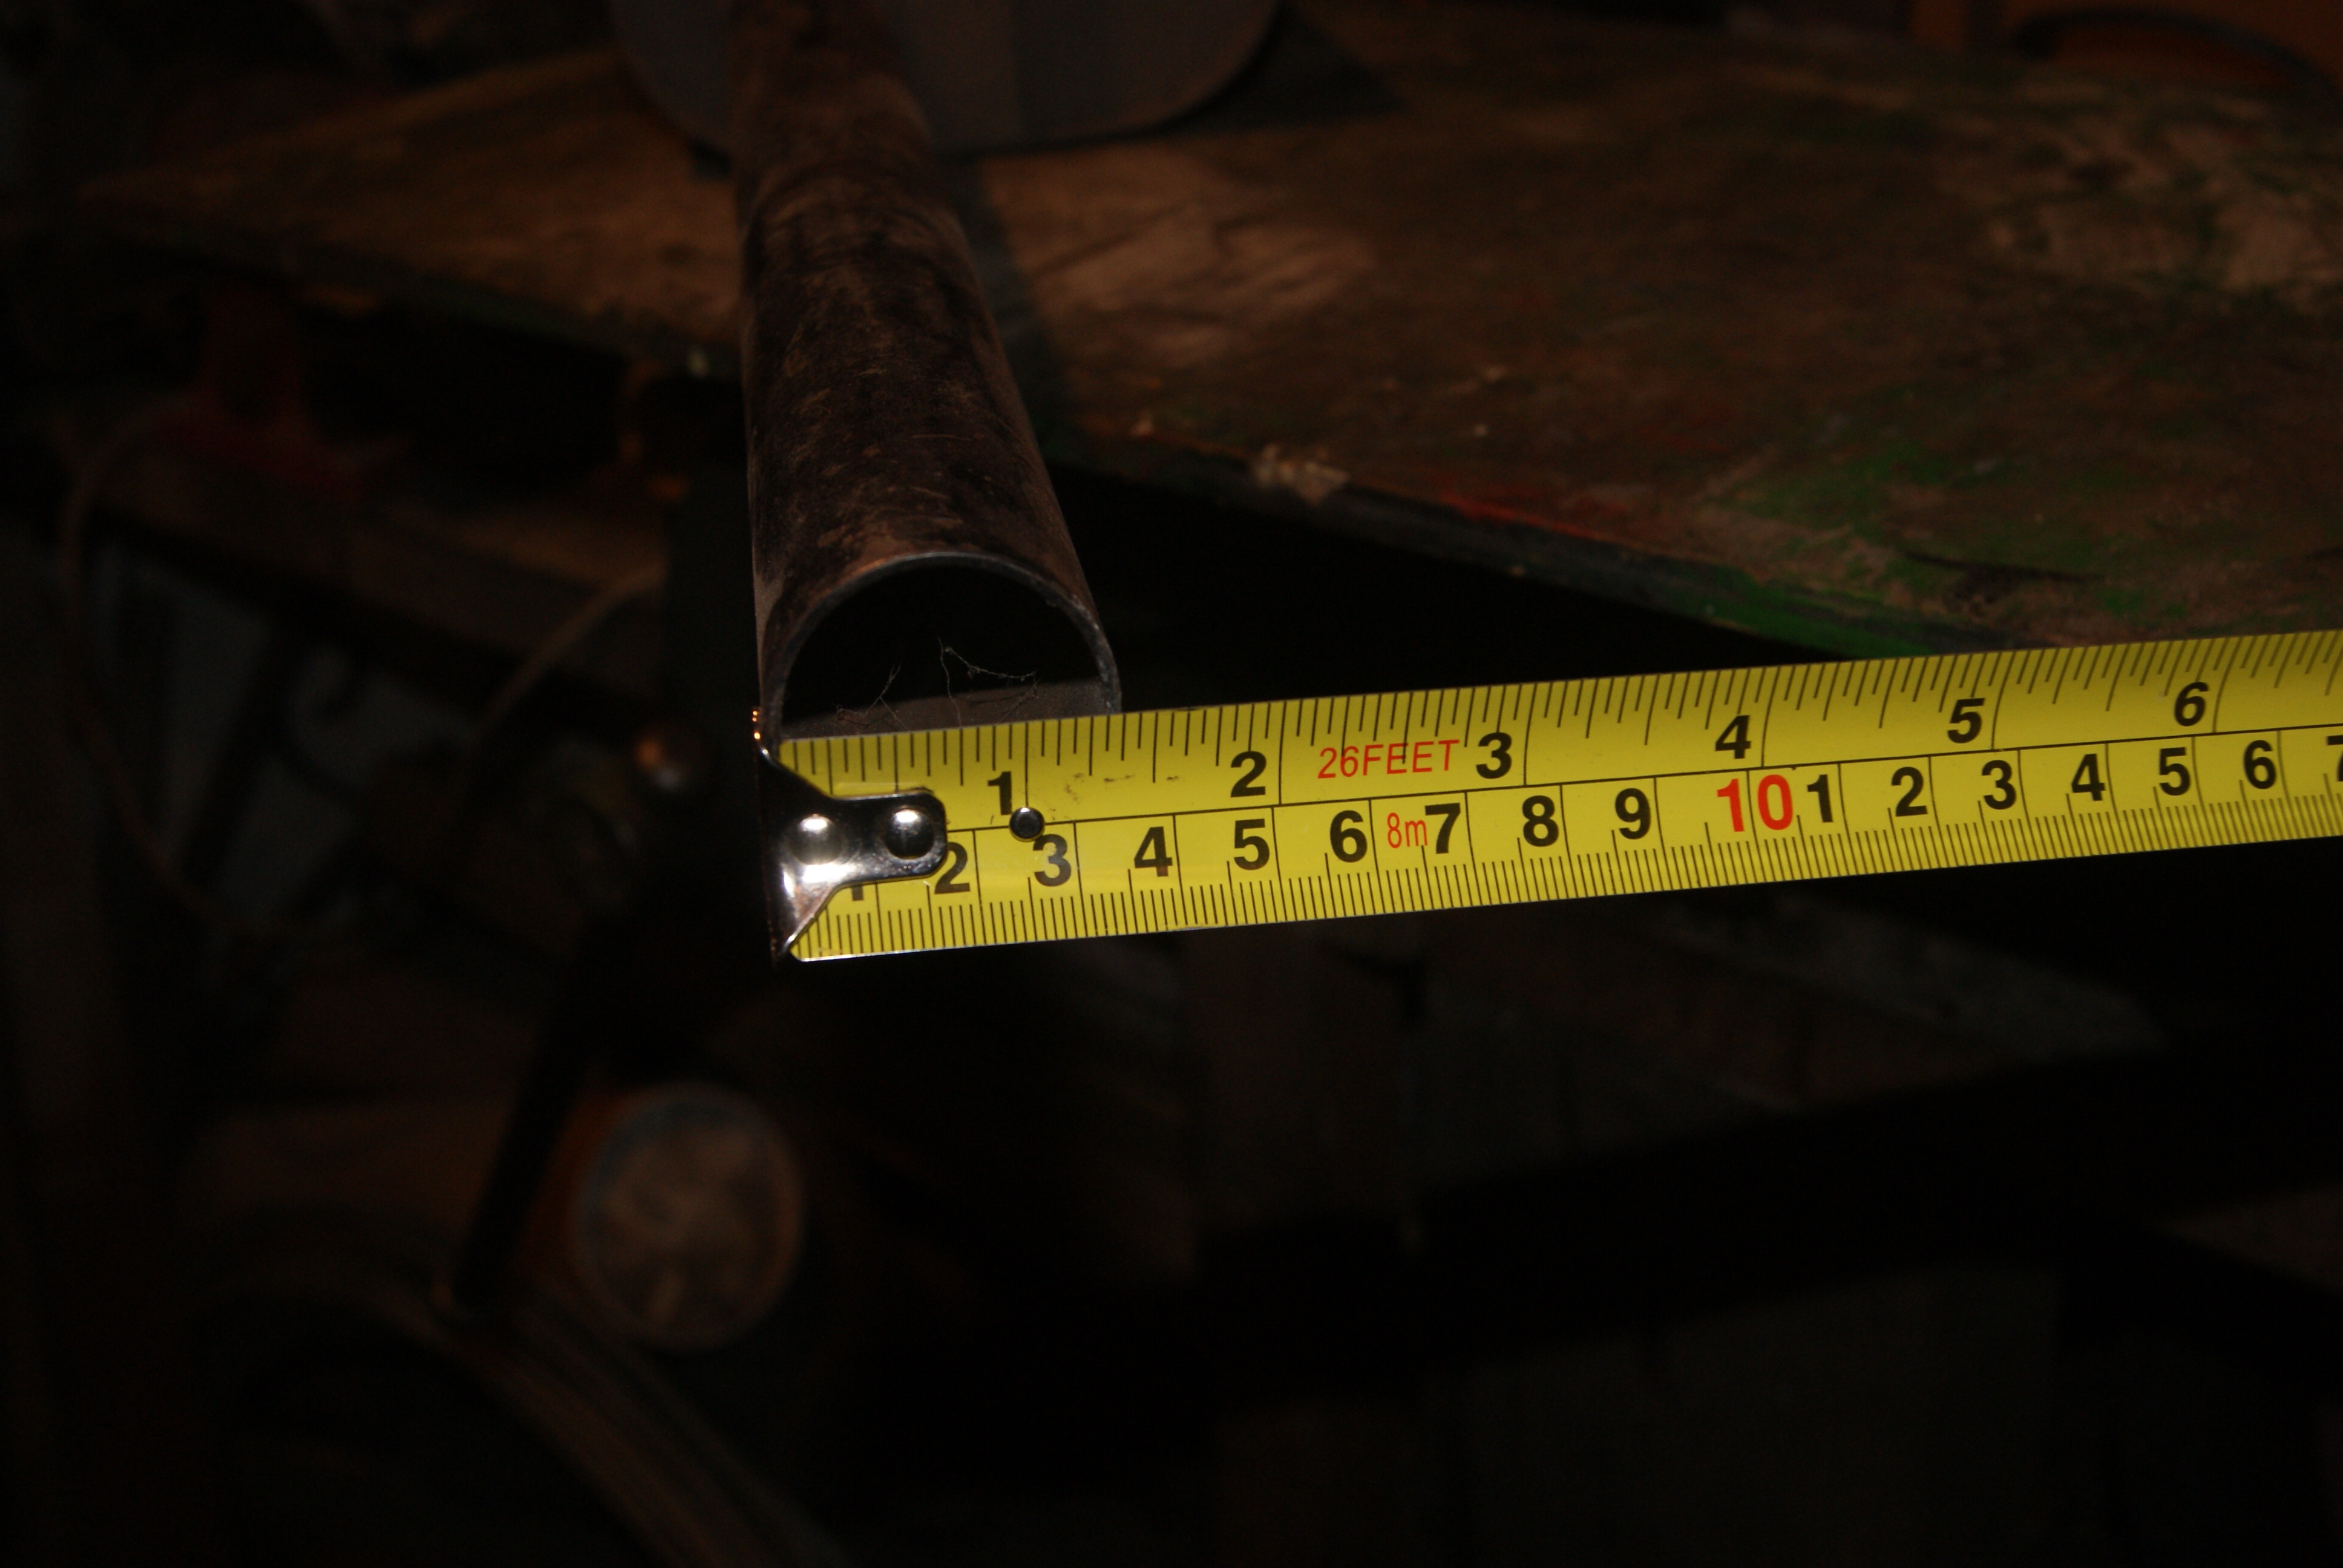
January 17, 2020 at 8:54 pm #33081trusty220KeymasterI’ve been in the workshop tonight with the camera and here are the pictures as promised. The exhaust is an original one that I picked up from the factory before it closed, so you’re not going to get much better for originality.
Attachments:
January 17, 2020 at 11:17 am #33078trusty220KeymasterI have an original exhaust. I will take some photo’s for you with dimensions if you want to make your own.
GeoffJanuary 7, 2020 at 12:04 pm #33026trusty220KeymasterWell done, Alan. A few years ago they tried to introduce it at Newark- I think it was going to be £5 entry- and so many people raised objections that it was never implemented for the show.
Organisers need to understand that it costs us enough as it is to attend their shows. Admittedly these are hidden costs with things such as fuel bills, camping (or hotel) costs as well as food and many other things including running a suitable vehicle to transport the exhibit. Charging an entry fee for exhibits is that final straw that is just that little too much.
Without our exhibits they don’t have a show.
I would say that these are my own personal thoughts and are in no way meant to be the official club standpoint. What do the rest of you think?
Geoff
December 21, 2019 at 8:43 pm #32950trusty220KeymasterIt is a very distinctive name and that’s why it attracted my attention in the first place. It is definitely the Holttum that appears many times in the sales records of Tractors (London ) Ltd; I have never come across the name spelt with one “t” and so I suspect it may have been a typo if your memory is correct.
December 20, 2019 at 2:57 pm #32933trusty220KeymasterHolttum have come up quite a few times with my Trusty research and were a very active horticultural machinery dealer in the Cambridge area, so it doesn’t surprise me that they would come up with such a novel idea.
It’s the first time that I’ve even heard of it and would make an interesting exhibit if anybody found one.
December 13, 2019 at 11:58 am #32821trusty220KeymasterI use the Brick and Patio Cleaner that Jewsons sell. It’s quite a dilute Sulphuric Acid and so it is kinder on the metal than some others. Either way it seems to work well enough but you need to do the soaking in a well-ventilated place because it will give off Hydrogen Sulphide (H2S) which can be harmful (and flammable) if allowed to build up. The missus can be a problem as well because she objects to the smell!
I’m going to try Caustic Soda on the aluminium to see if that is going to shift the grime; I’m going to have to experiment with test pieces first before I risk the crankcase.
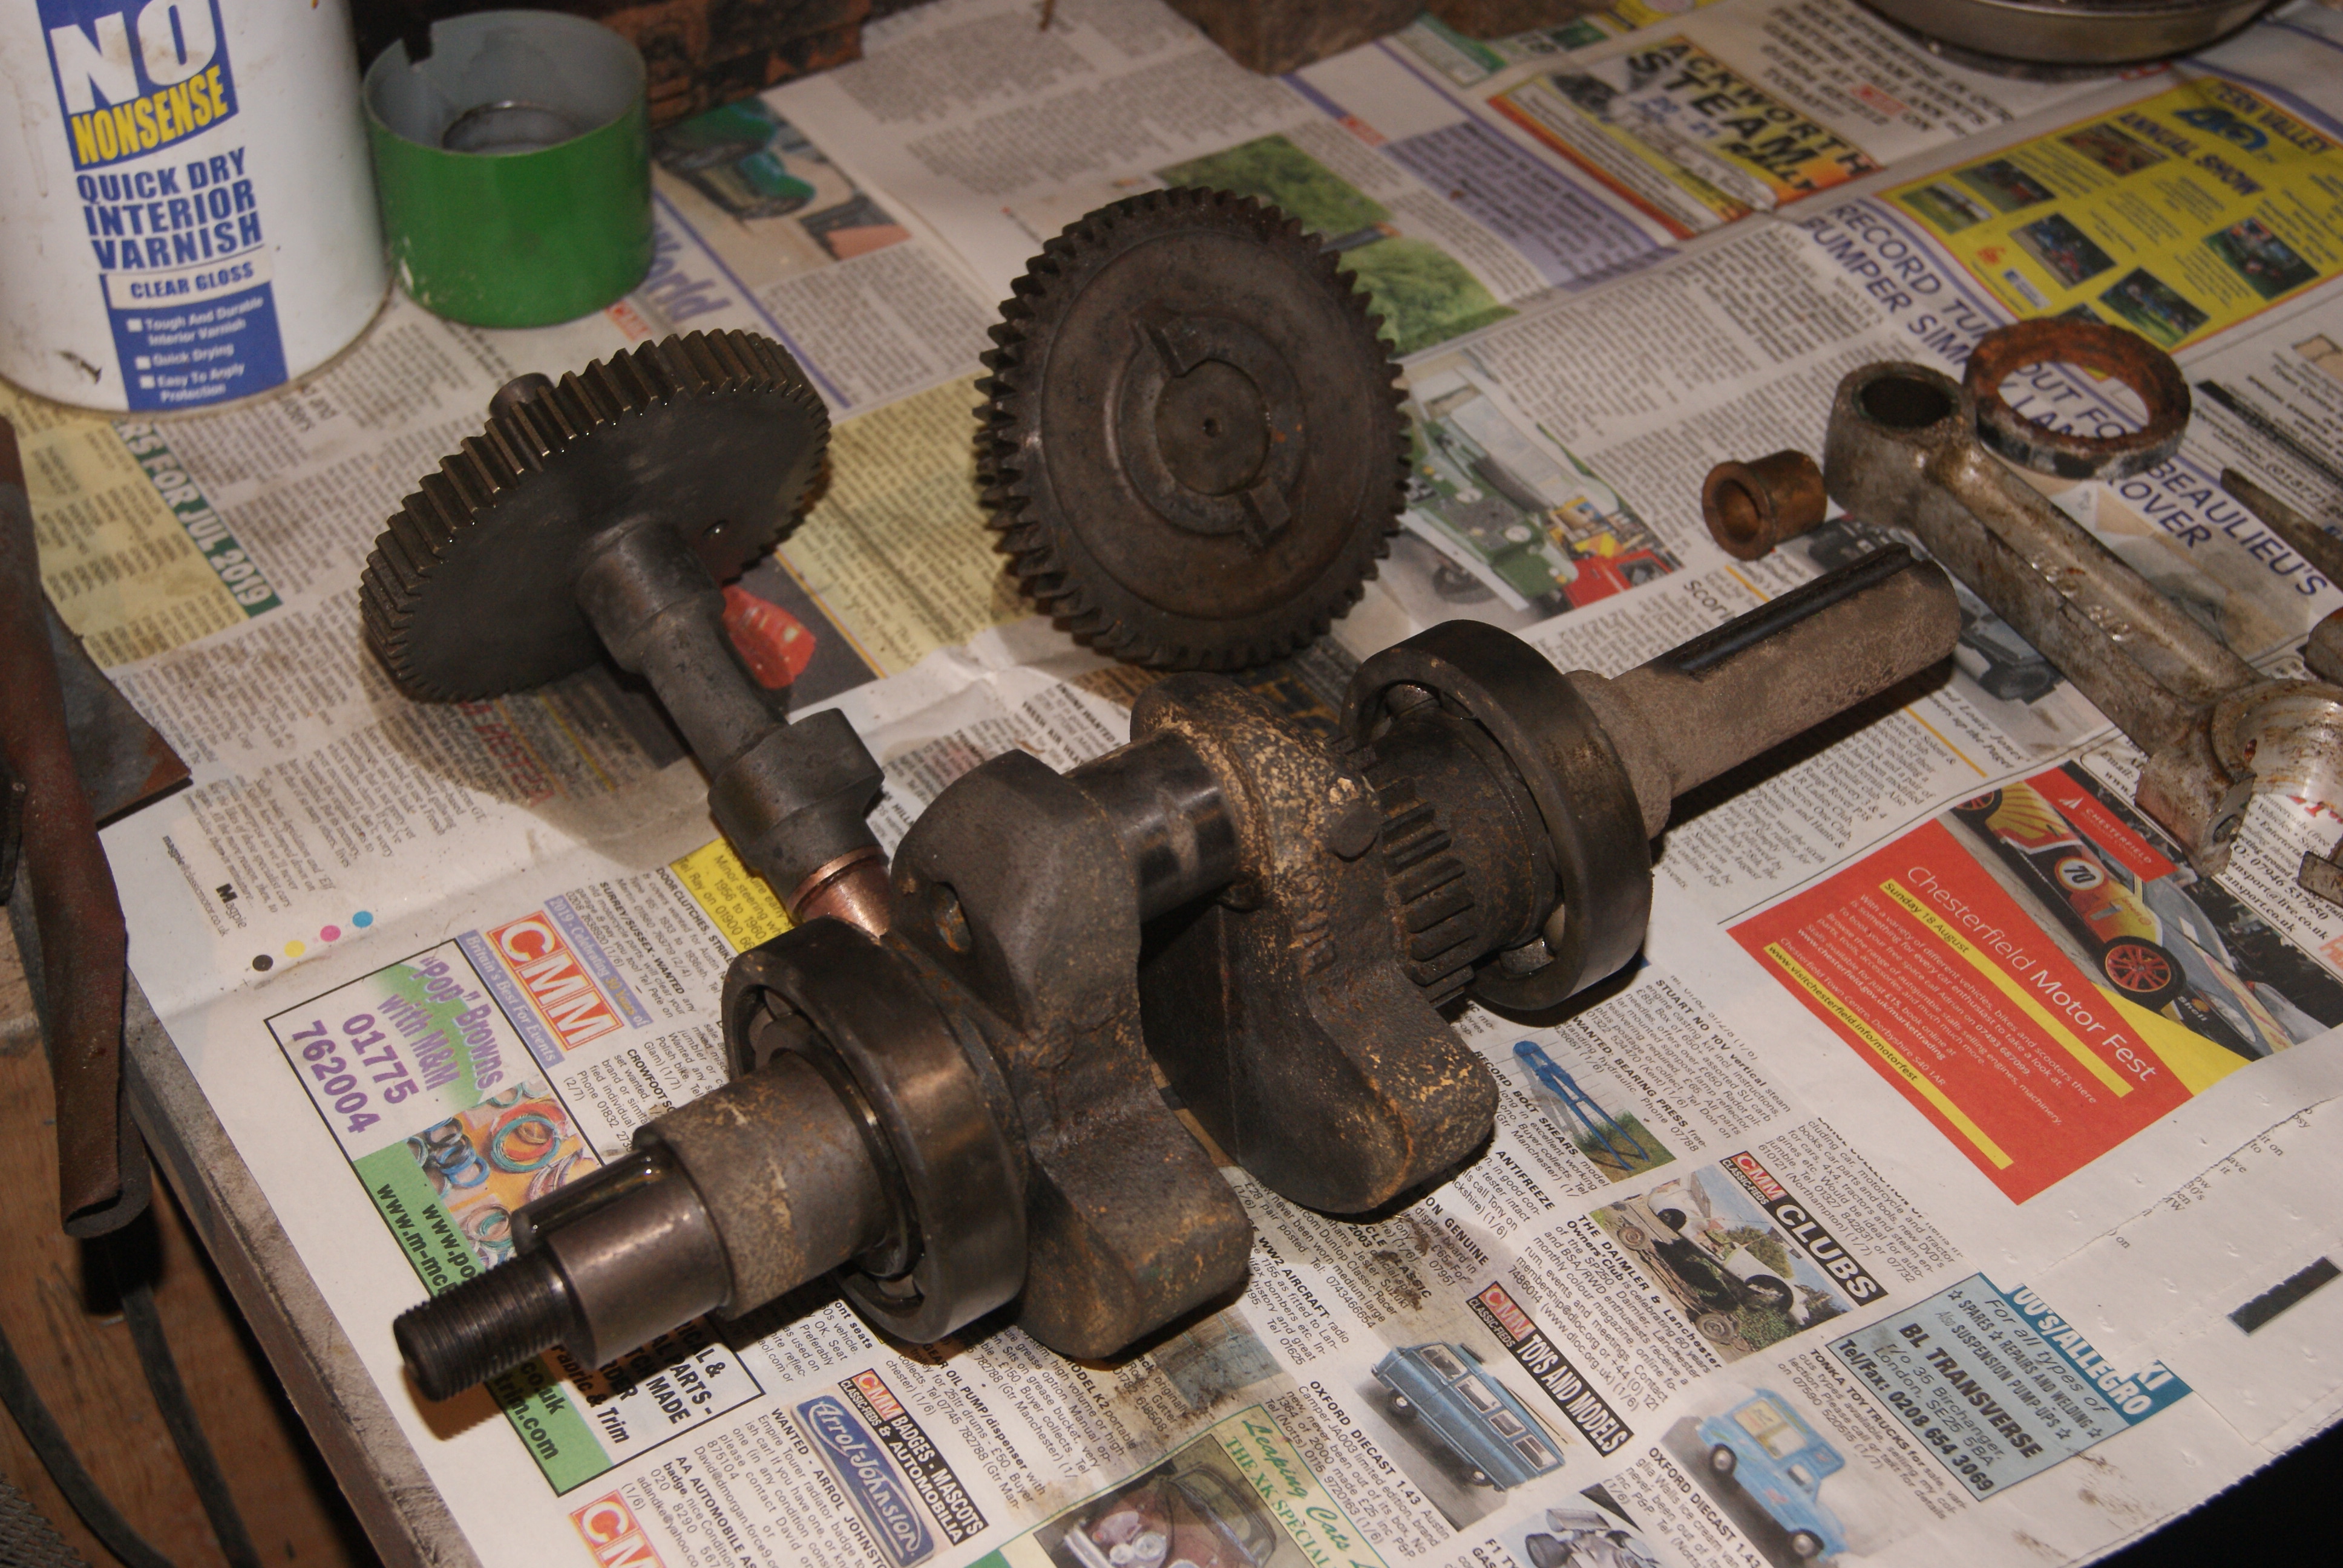
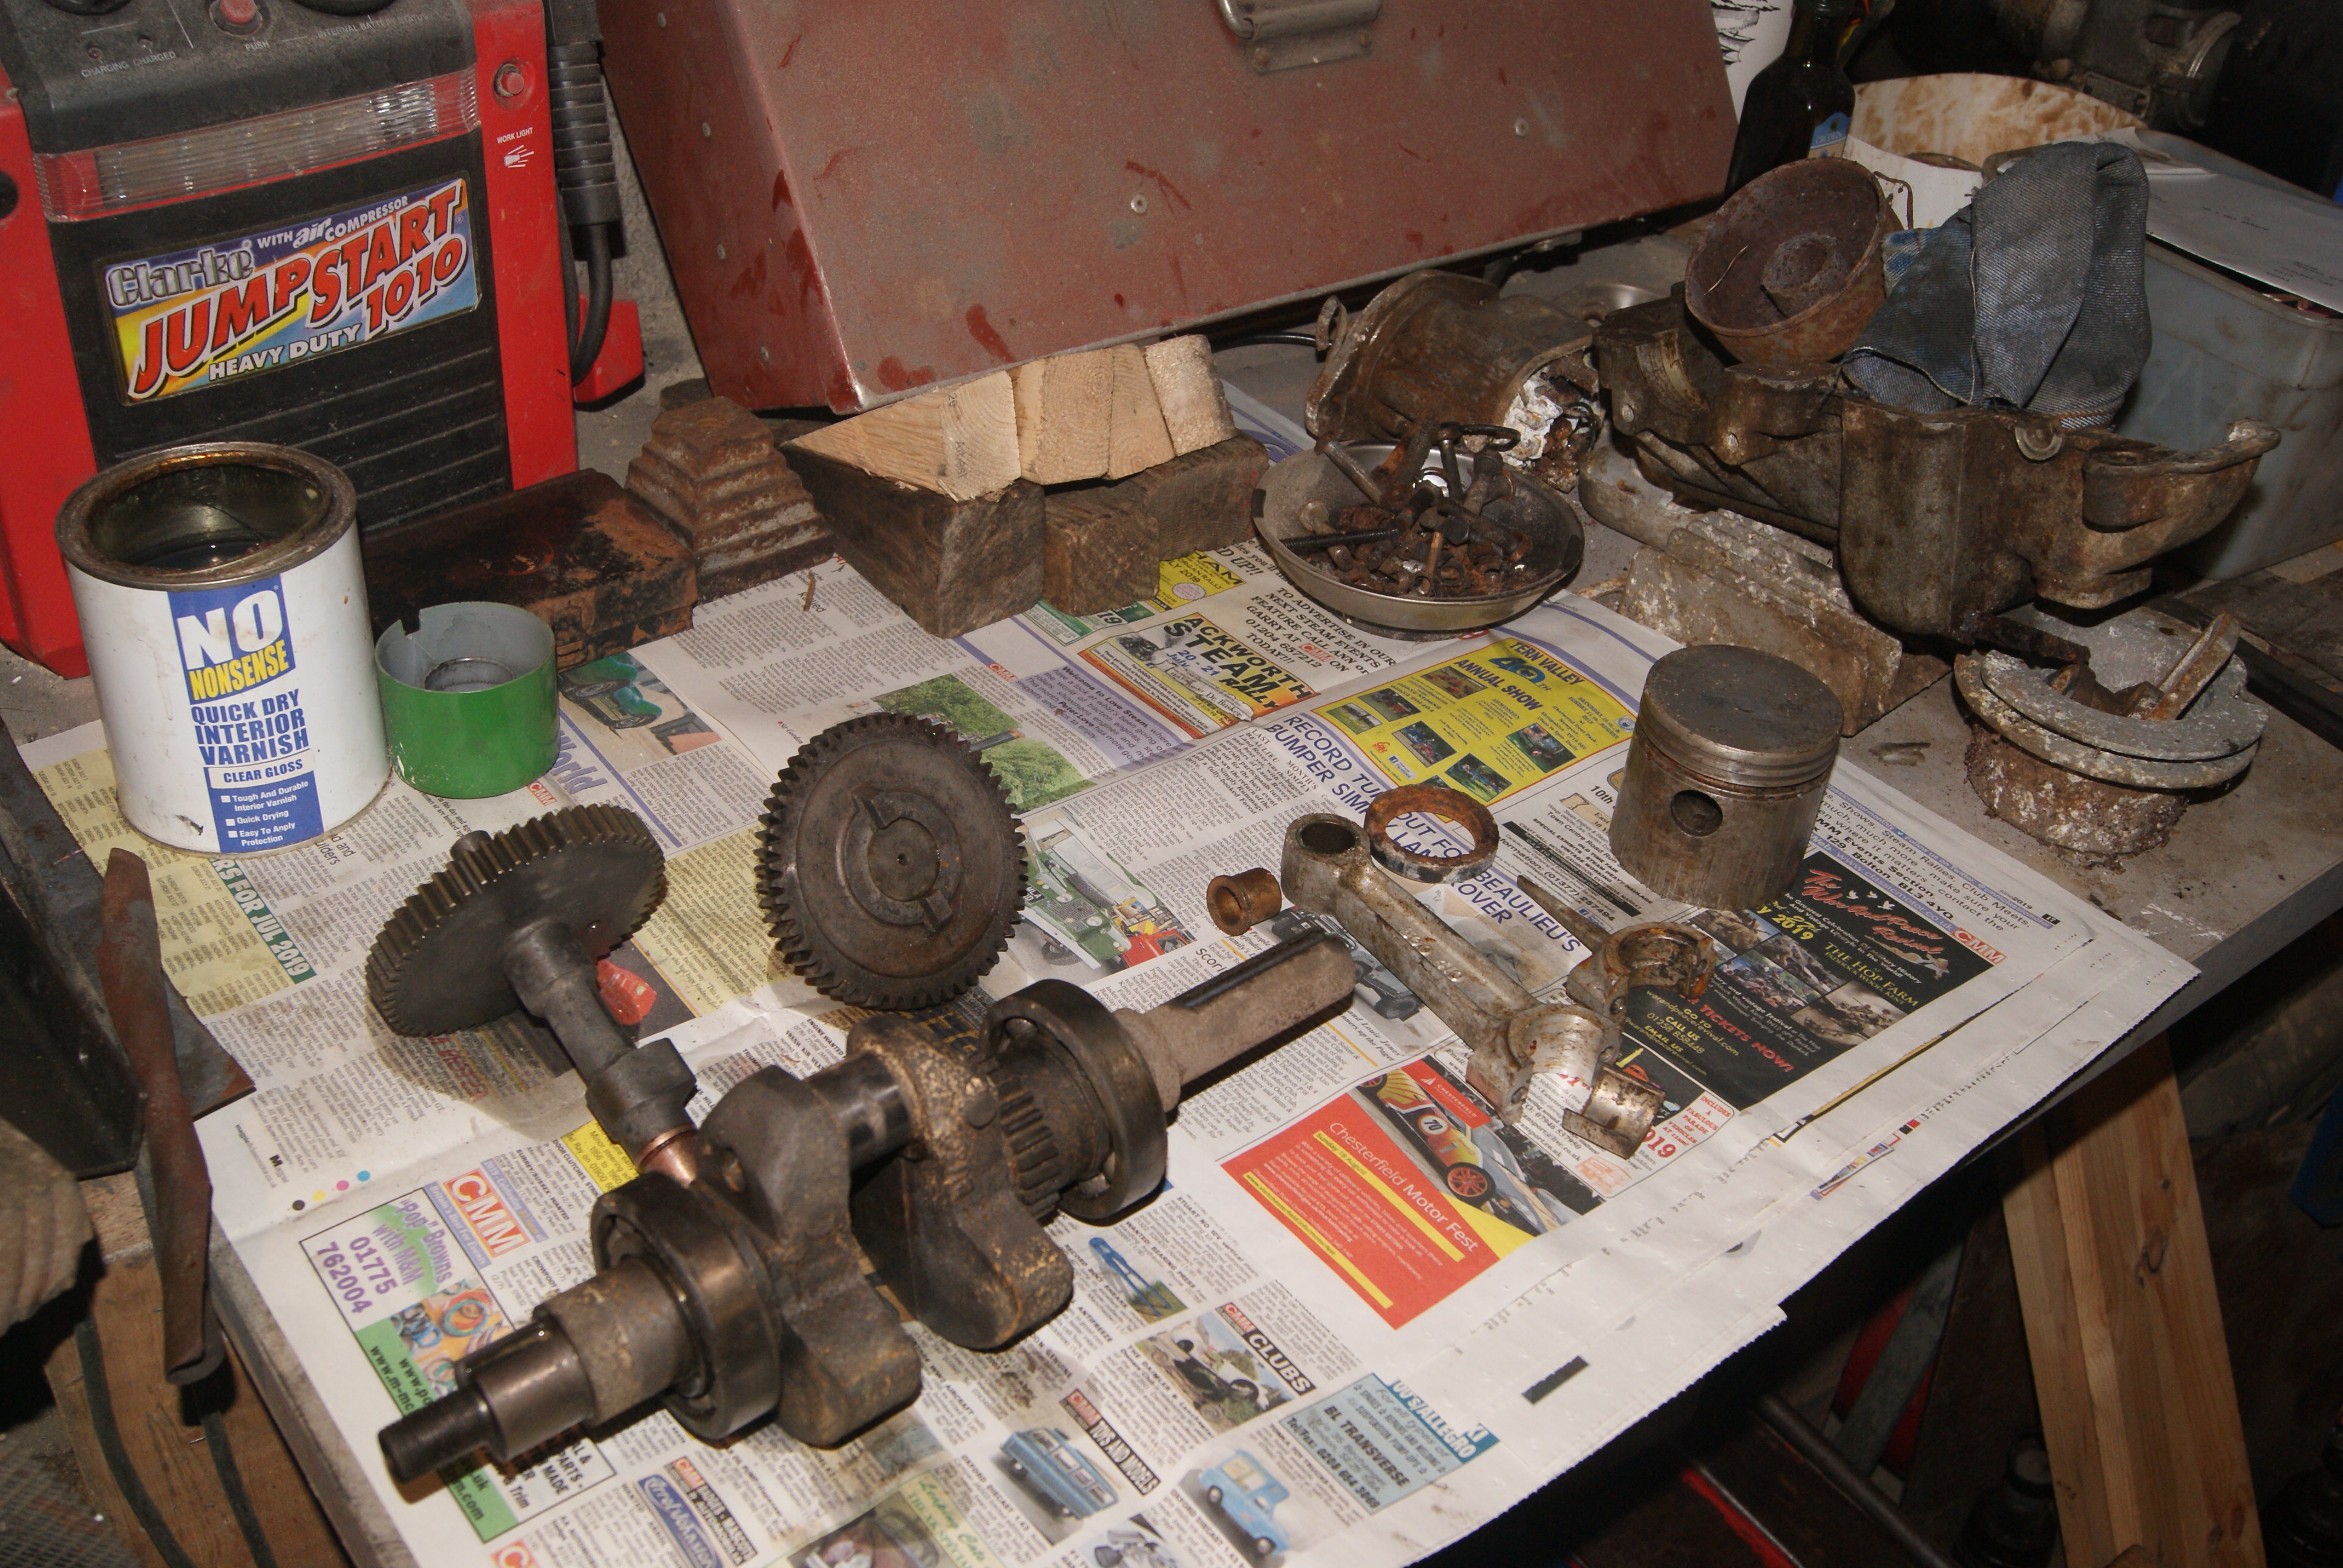
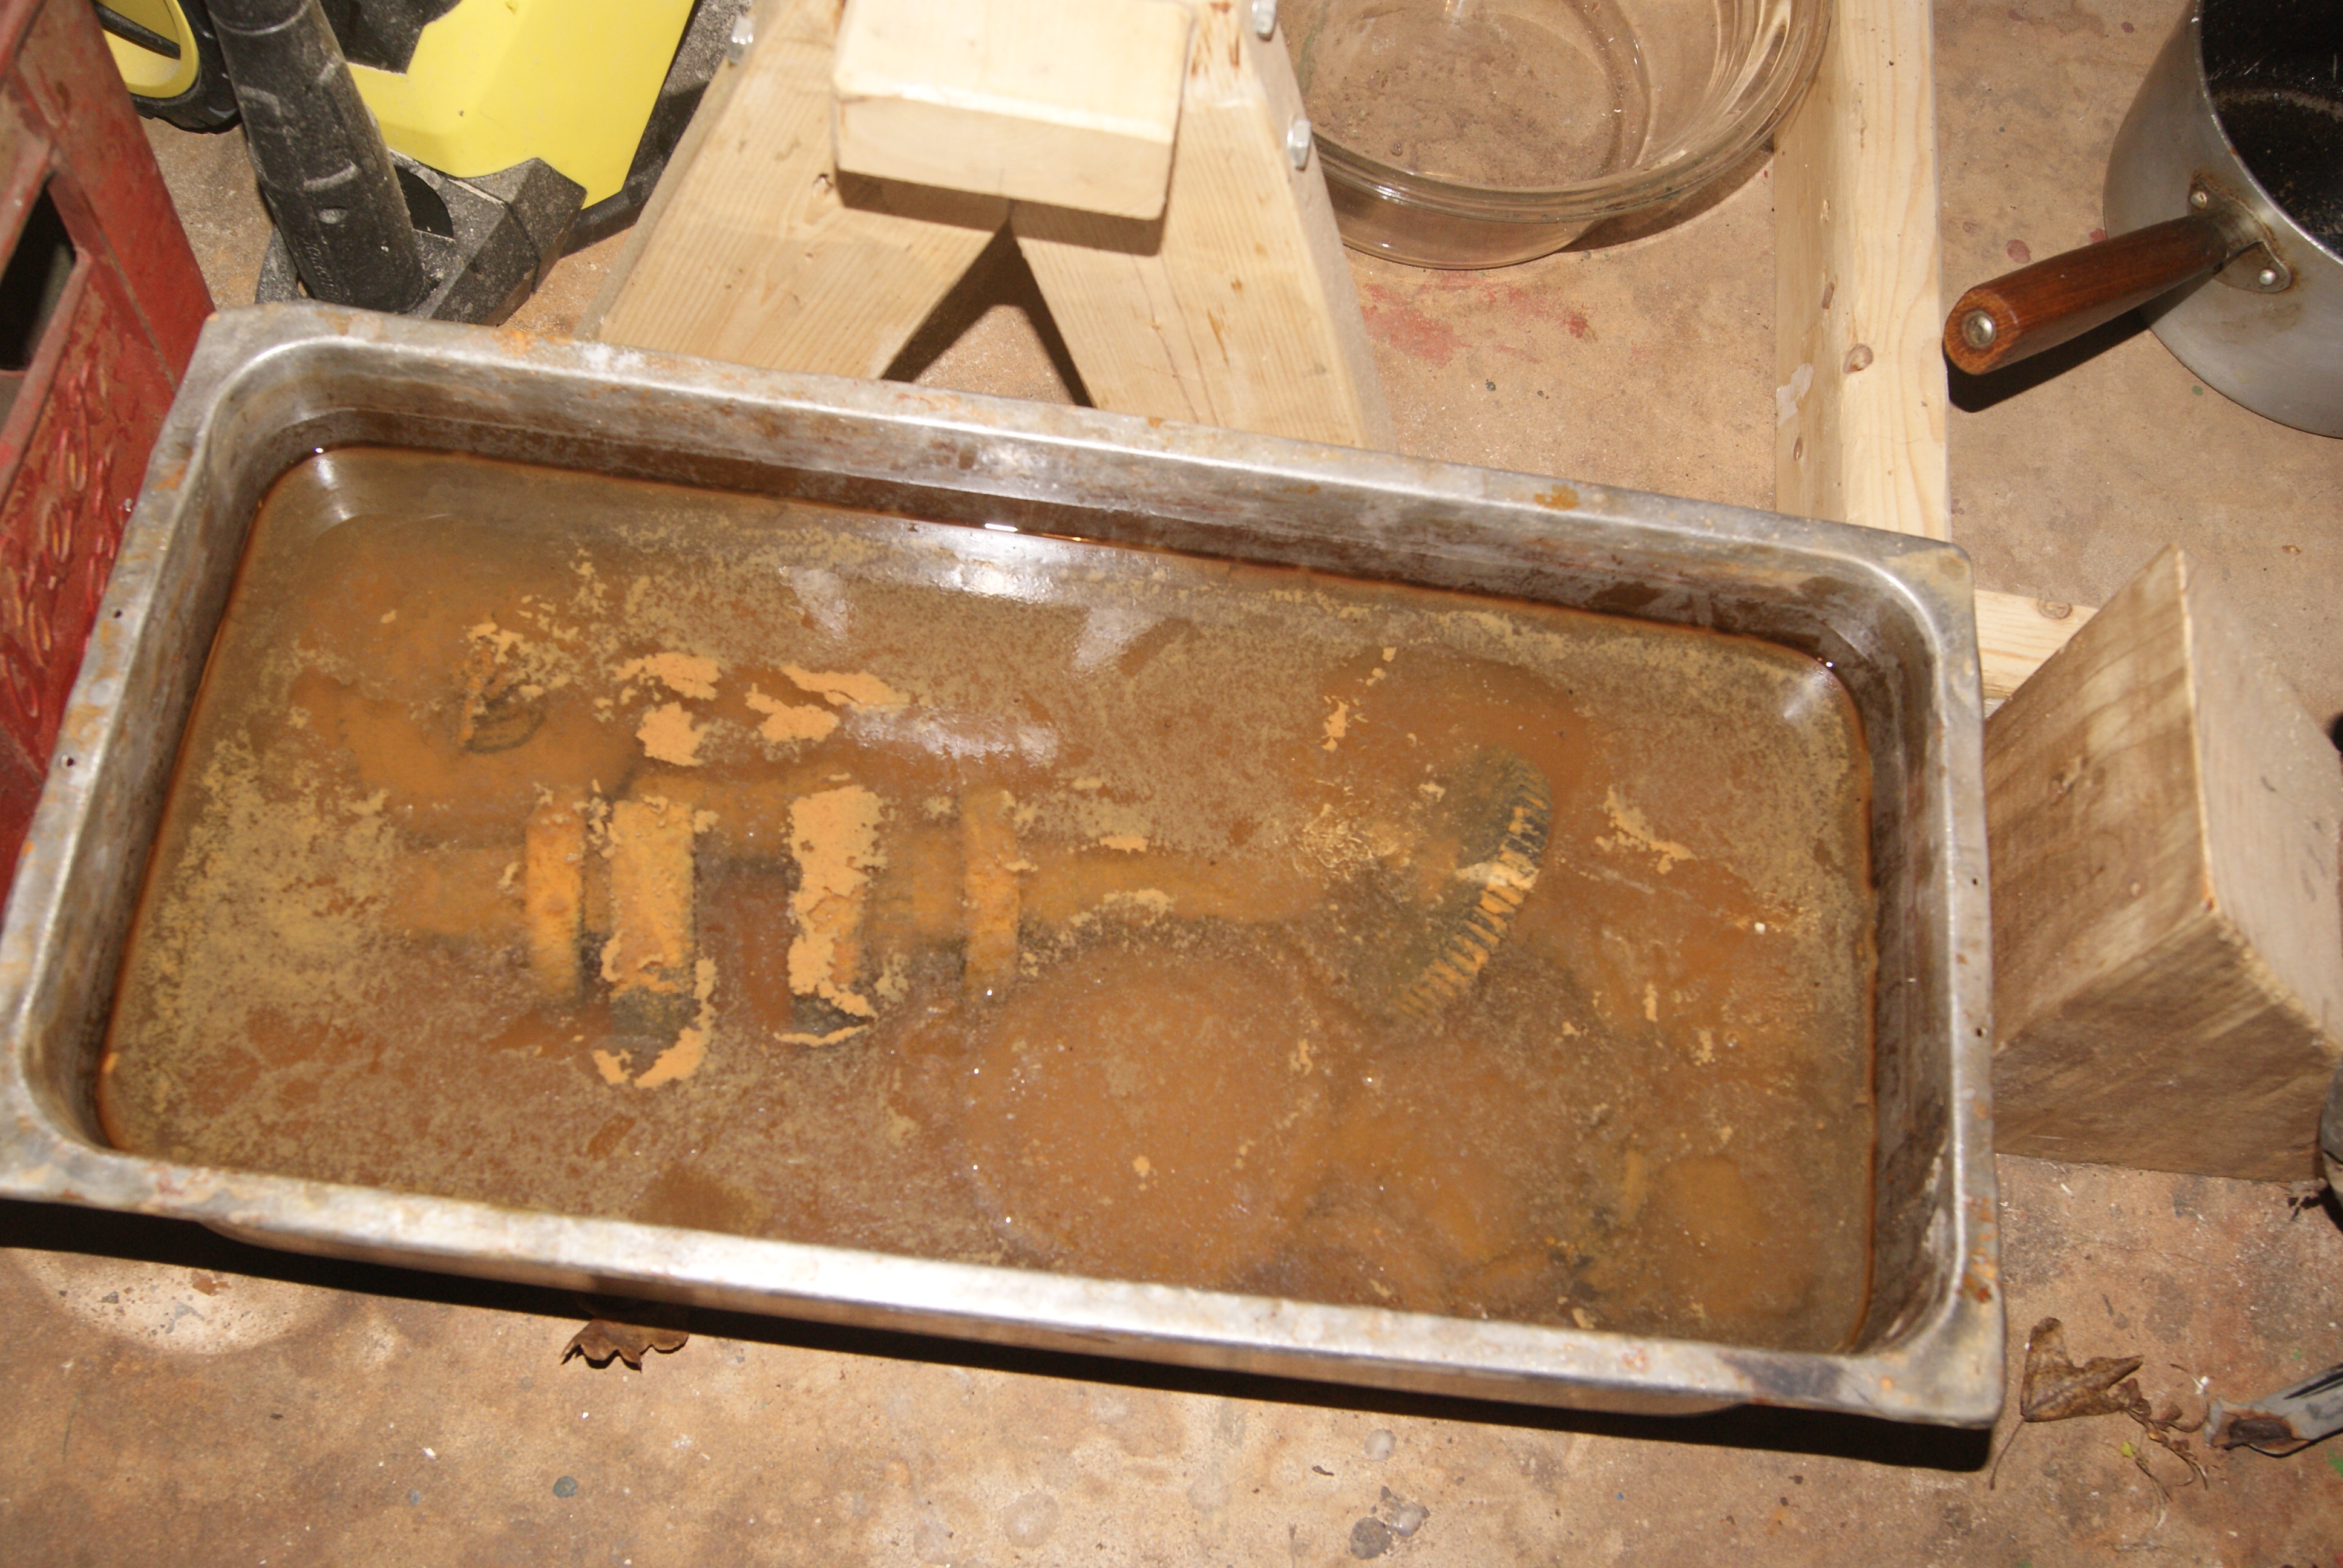
December 11, 2019 at 4:31 pm #32805trusty220KeymasterNow that you’ve seen the horror story of the internals of this engine here is the proof of the effectiveness of the acid treatment method. Compare the pictures of the cleaned items with those of the same items in “as found” condition and be amazed!
It is important to keep them covered in oil once cleaned up as the moisture in the air will start more corrosion off. All I’ve got to do now is do the same treatment to the barrel to try to free up the valves- as you can see it’s now in the neutralising solution and starting to react.
The crankcase will keep me occupied in the meantime. The clean-up will not be quite so easy with the cast aluminium but if I take my time I hope to do it justice.
Attachments:
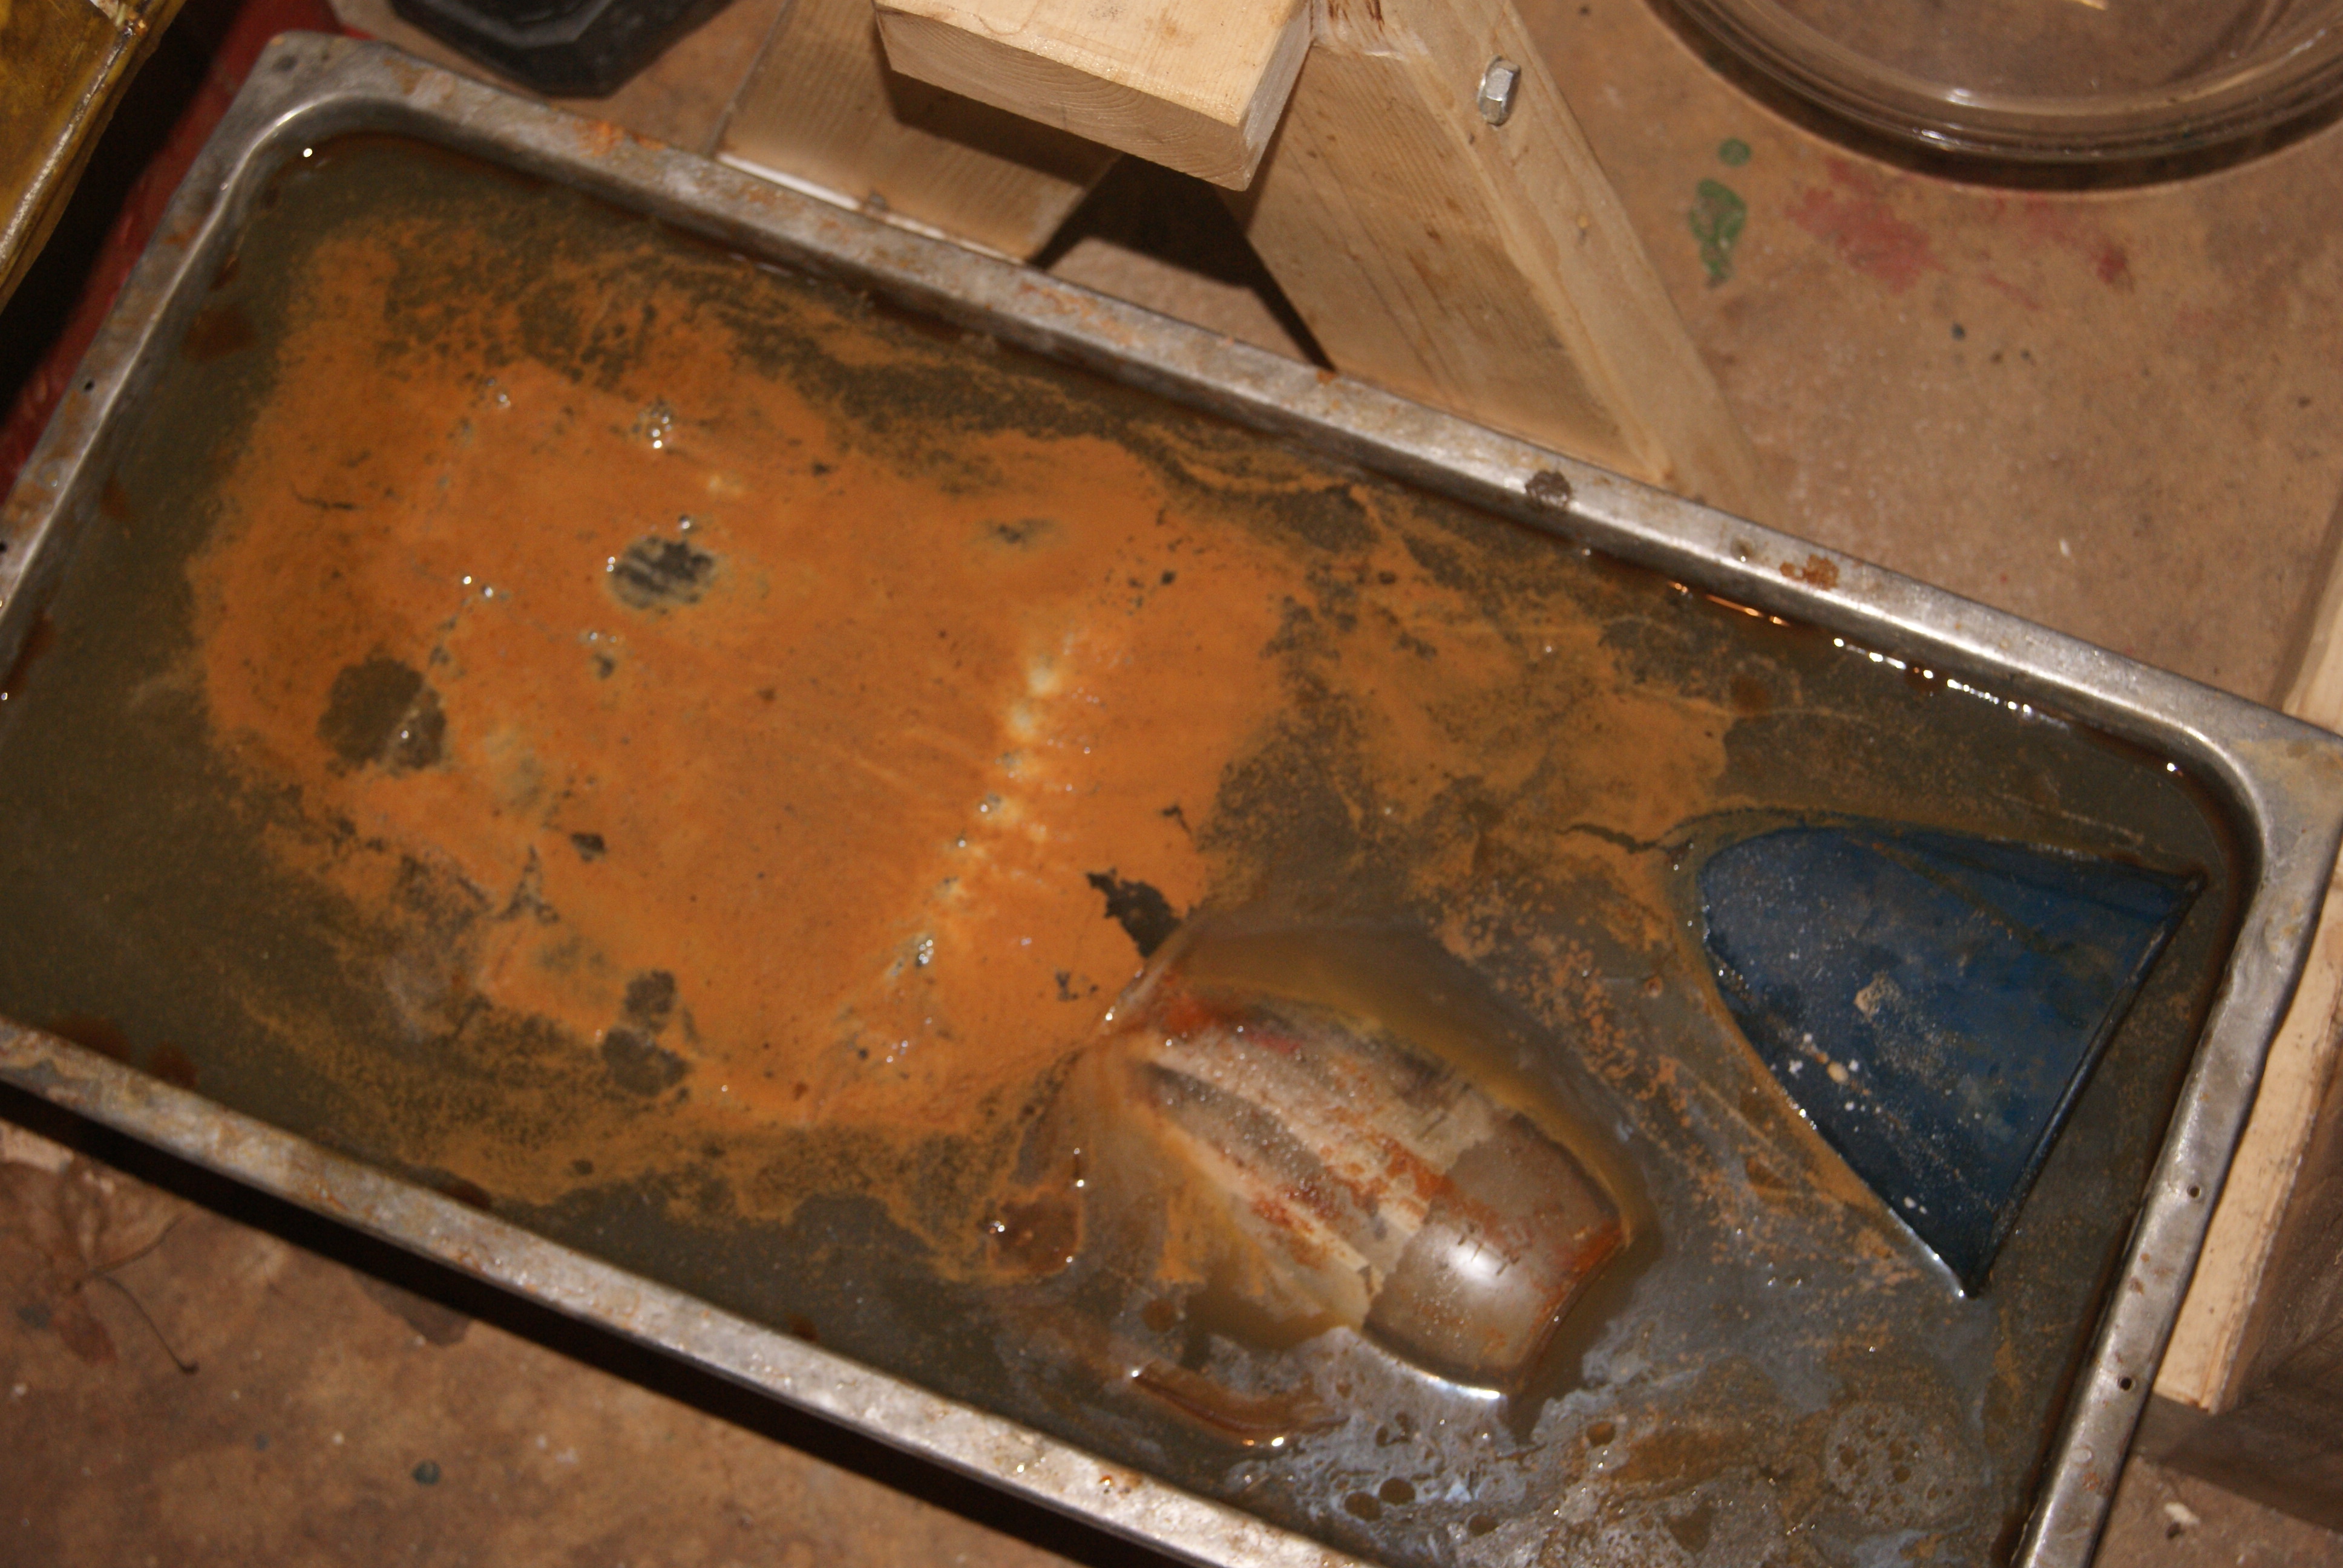
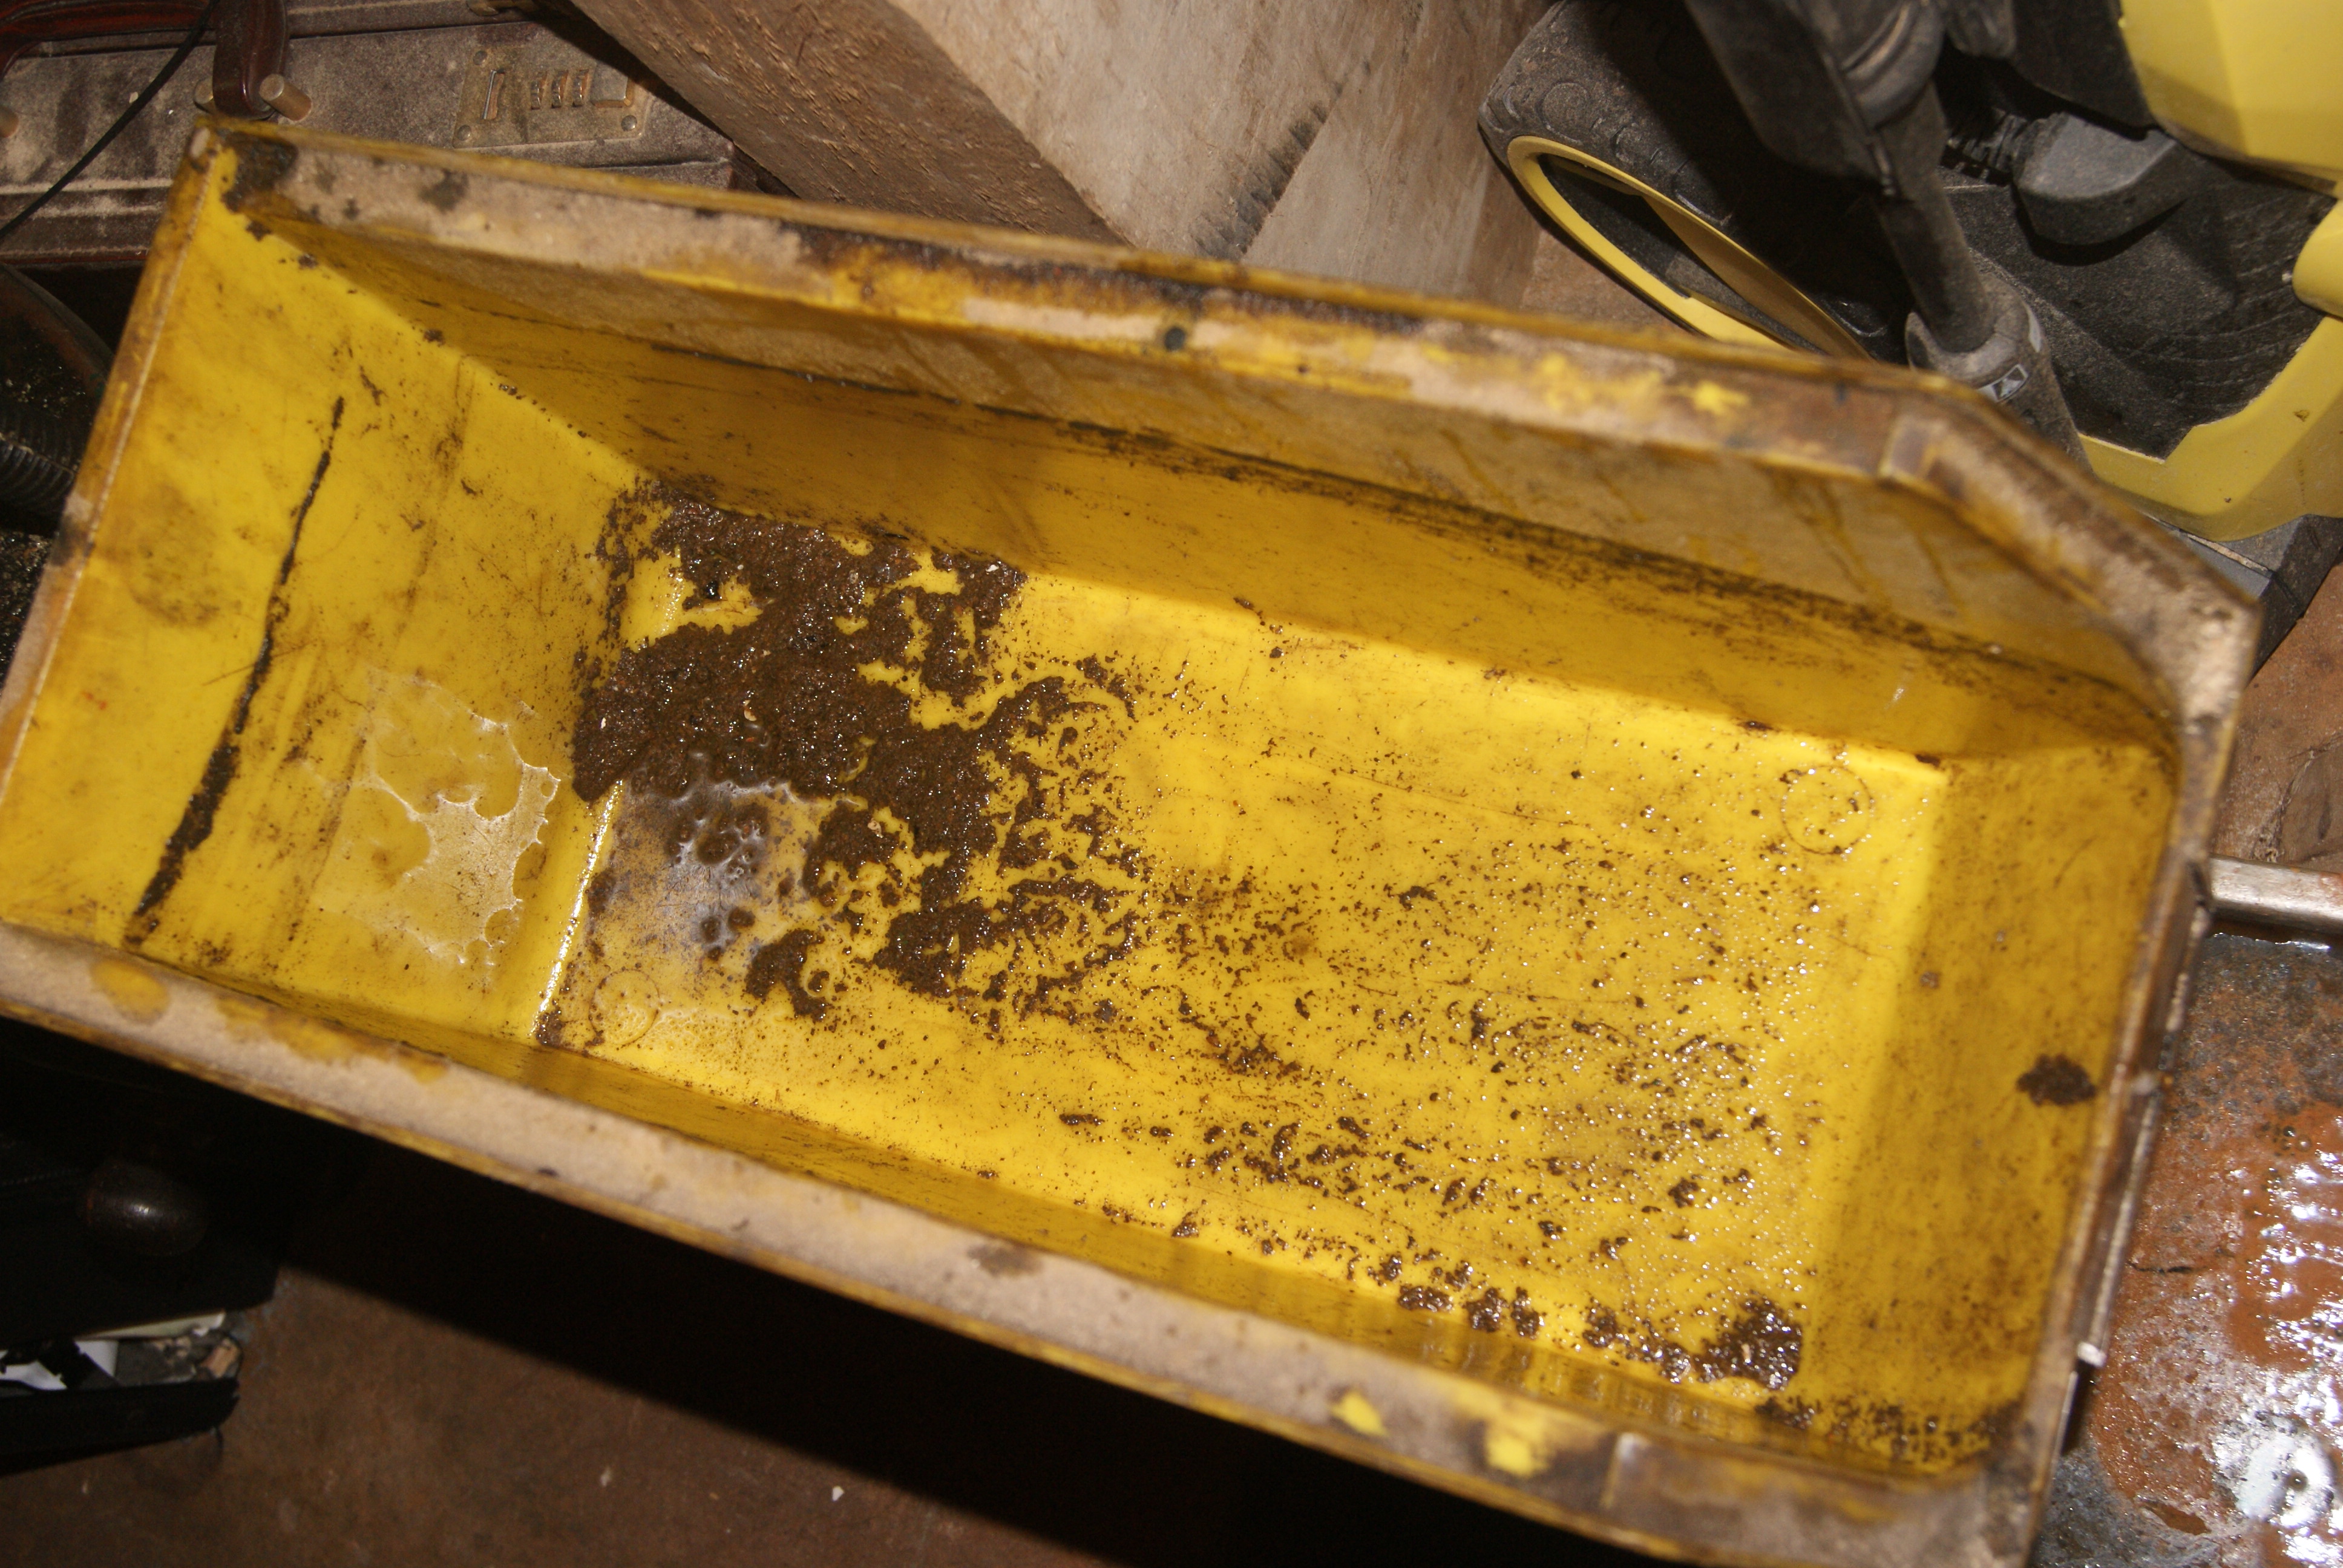
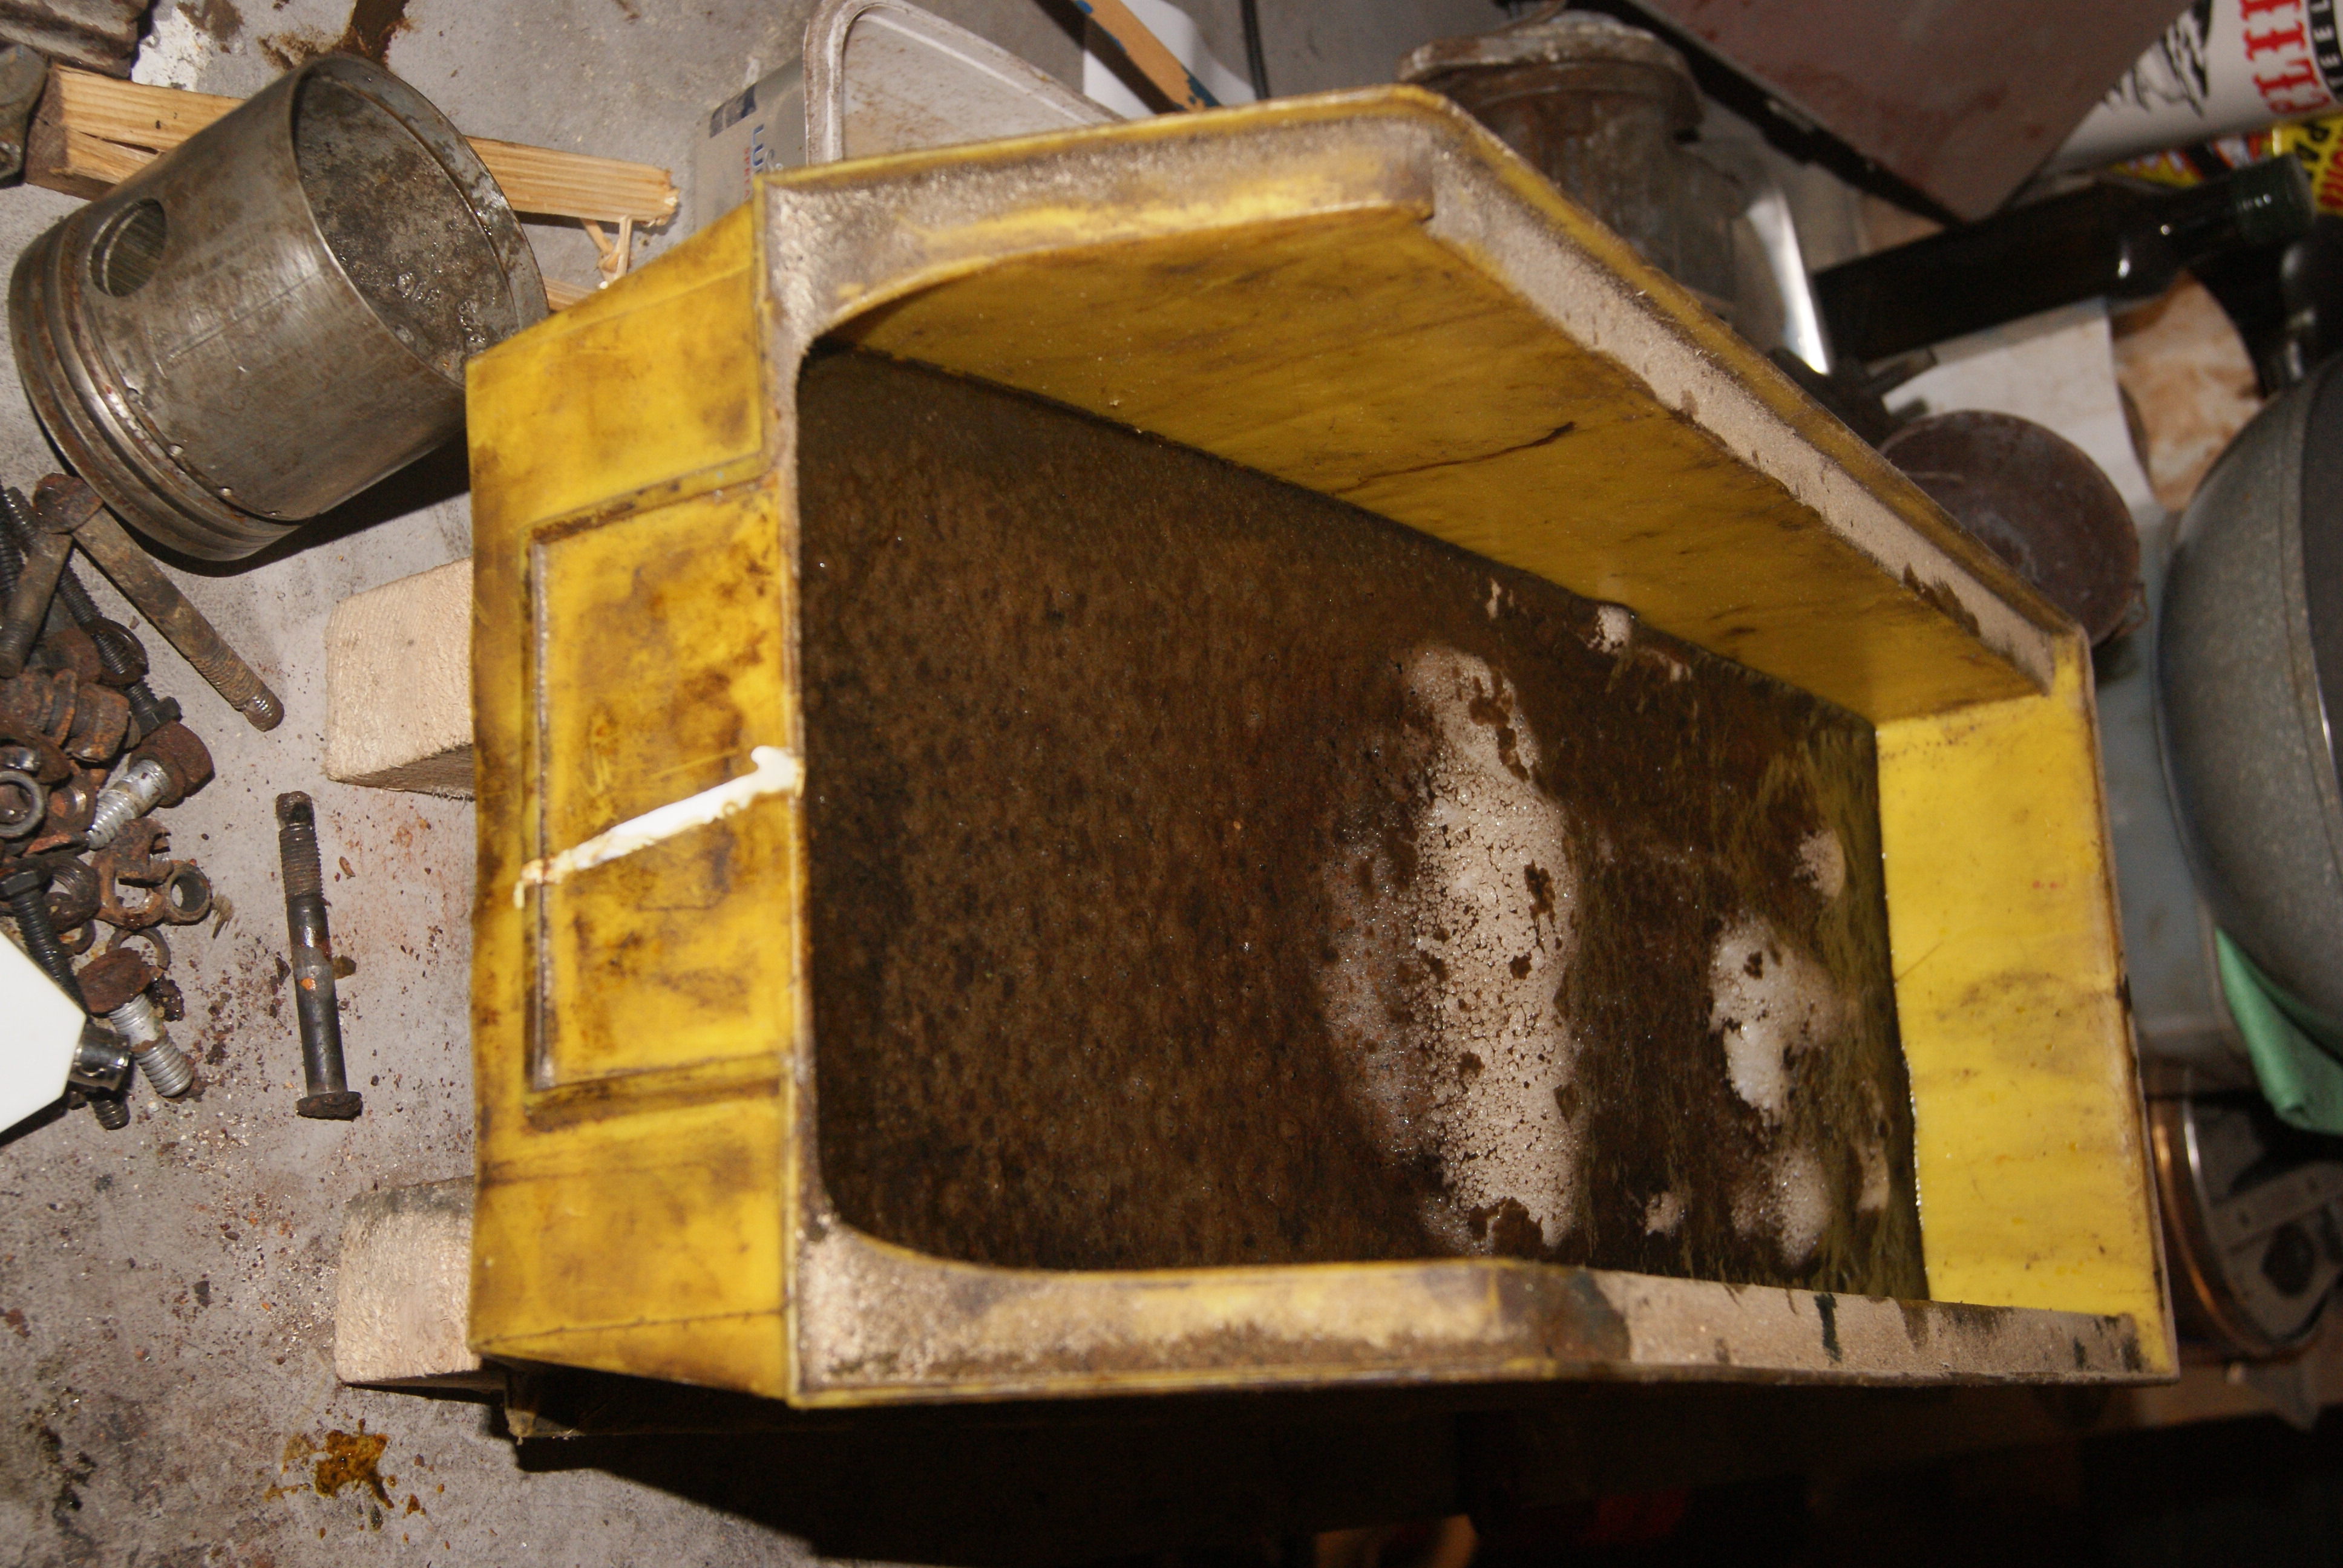
December 8, 2019 at 7:41 pm #32800trusty220KeymasterI’ve been a little busy over the last few days, but here are a few pictures just to keep your interest alive. The crankshaft, camshaft and intermediate magneto drive gear went into the acid bath for a clean up; they are now getting a bath in bicarbonate to neutralise the acid and looking very good already. The barrel still has it’s valves in- both are stuck fast in their guides, so a long soak in the acid will be the order of the day to try to free them up as gently as possible. You can see the effect of the acid bath in the one photo as there is a build up of froth from the reaction with great big flakes of rust floating on the top- I really hope there is something left when I pick it up again!
Attachments:
December 4, 2019 at 12:11 pm #32796trusty220KeymasterI didn’t realise there was no quick reference section, so please don’t waste too much time looking for it.
From the conversations that I’ve had so far with his niece it appears that he only had dealings with BSA Engines, Enfield Engines and Villiers if that narrows it down at all.
December 4, 2019 at 7:53 am #32791trusty220KeymasterHi, Angus,
The edit button seems to work for me. What can/can’t you see on the posting at your end? Have you got the row of buttons to the right of the date and time?December 4, 2019 at 7:49 am #32789trusty220KeymasterNo pictures this time, but I’ve managed to separate the piston from the barrel. After boiling in oil then cooling down for 24hrs whilst still in the oil bath I was just cleaning it off ready to have another look at it; tapping with a piece of wood onto the piston got me nowhere and I was thinking of taking it to work to press it out when I had an idea.
Out came my biggest G-clamp and with a piece of wood across the base of the barrel I wound the foot down onto the piston crown. I did it as tight as I could by hand and still no movement; next stage I gave the end of the G-clamp a sharp tap with a copper mallet and the G-clamp came loose! Two or three repeats and I could see definite movement in the piston, so I carried on and it’s now out of the bore.
The piston skirt is scored quite deeply in places and the rings are stuck in. The rust marks show that it was held along the whole length of the piston on the complete circumference, so I think it’s lucky that I got it out with so little damage in the end.
Has anyone got a Hepolite catalogue? The piston has Hepolite cast into the inside of the skirt with a part number of 17529 cast into the other side. Any ideas?
December 1, 2019 at 9:33 pm #32784trusty220KeymasterThanks for that, Andy. No doubt you remember the track rod ends fitted to the Ransomes Motor Triple- they were off the Hillman Imp as well!
December 1, 2019 at 5:28 pm #32782trusty220KeymasterI think I’m leaning towards the prototype camp still. I have just sent Paul Childs an email detailing all of the part numbers that I’ve found inside the engine. We’ll see if he can identify it from the photo’s, otherwise it may be that the person that built it used a combination of parts from established manufacturers to cut down the cost of developing a new engine.
All of the steel parts are now being gently stripped in the acid bath. The piston has flatly refused to budge from it’s safe little hideout in the barrel and so I’ve given it a bath in boiling oil for an hour this afternoon to try to free it off. It will have a soak in the cooling oil for 24 hours then I’ll have another go at it; if all else fails then I’ll put it under the press to see if it will move, but that will be a last resort and only if I know that I can get a replacement piston (just in case!).
Has anybody successfully managed to clean aluminium castings gently by soaking them, or is the only way to do it with a brass brush and lots of elbow grease?
-
AuthorPosts