Forum Replies Created
-
AuthorPosts
-
December 15, 2013 at 5:37 pm #4106
 darmic1Participant
Thats brilliant, thanks for the info. It makes it older than I first thought!
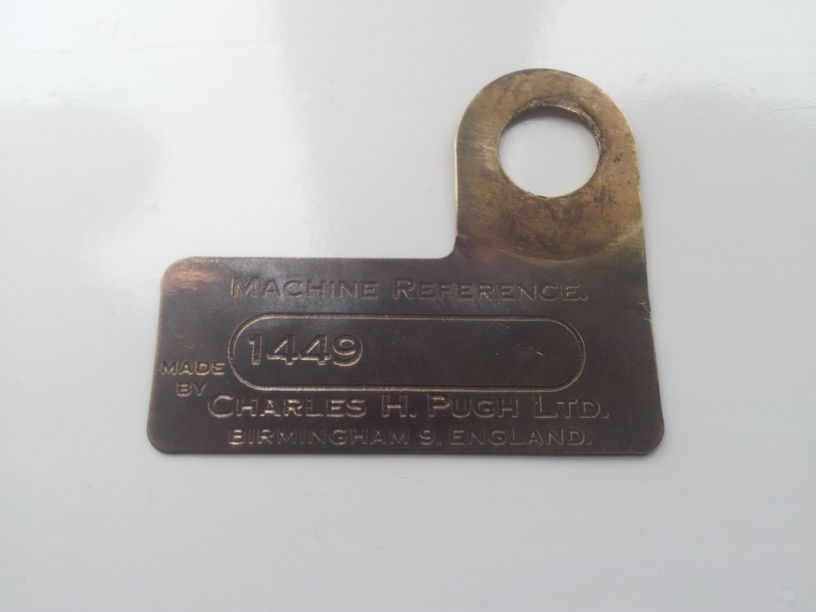
Can anyone tell me which Villiers 2 stroke engine this is? And confirm the carb to be a Villiers junior please?December 15, 2013 at 10:18 am #4060darmic1ParticipantHave found the following plate on the machine, it seems this is a Machine Reference number. Don’t know if this denotes the year in some way. The number shown is 1449, I thought 14″ and 49cc???
Attachments:
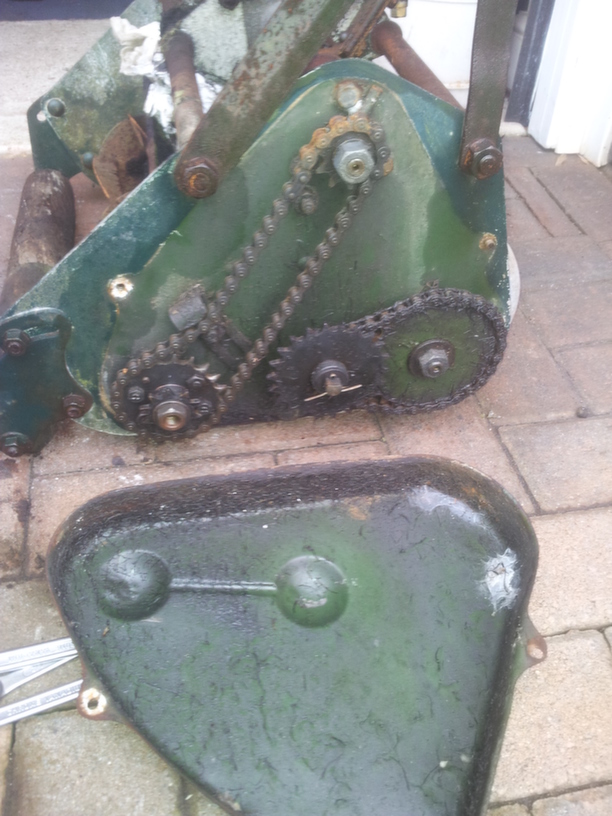
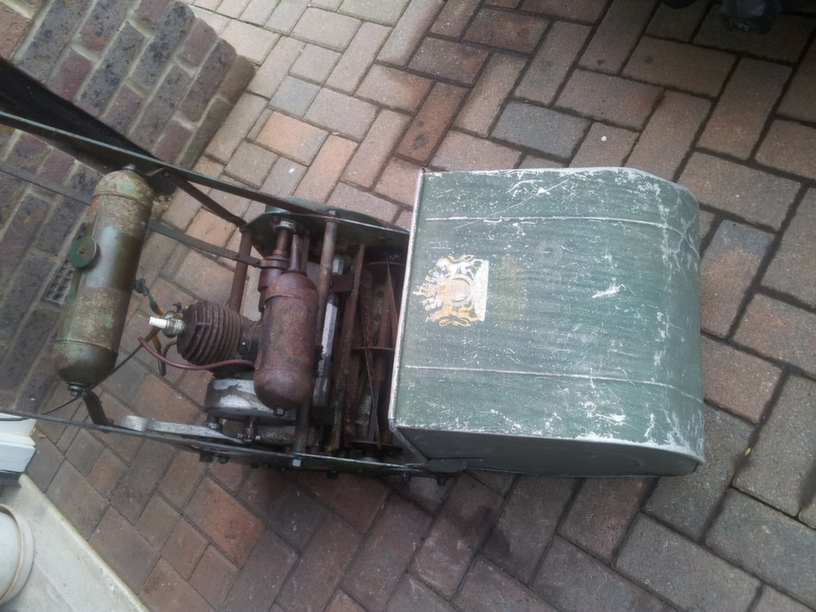
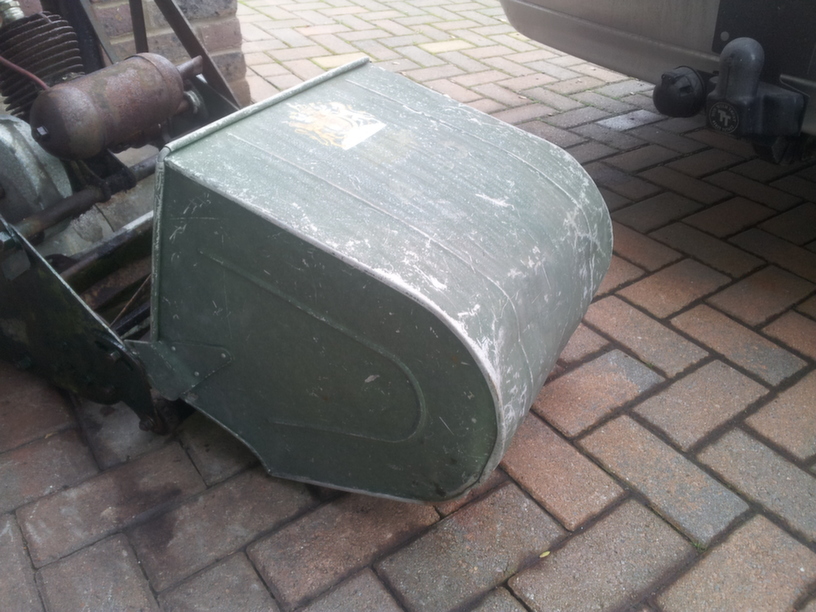
December 15, 2013 at 1:07 am #4052darmic1ParticipantStarting the strip down, discovered the chain which drives the rollers is missing, not sure this was removed to make this machine a push mower instead of driven. Here’s a couple of pictures showing the condition of the chain and sprockets. I think this machine has been re-painted previously, as the paint under the cover is quite a few shades lighter. I’m thinking the lighter colour is original Atco Green, its a slightly yellower green, almost a dirty green, if that makes sense.
Attachments:
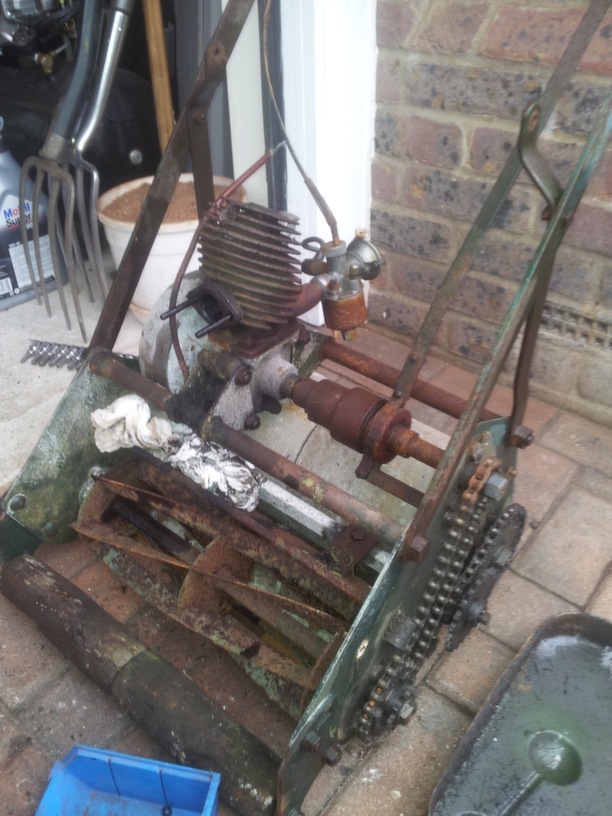
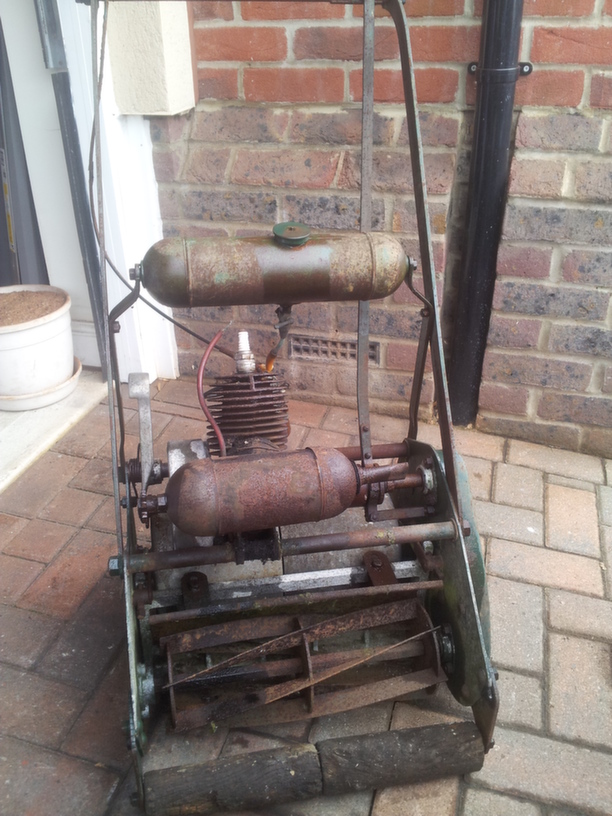
December 15, 2013 at 12:59 am #4046darmic1ParticipantWell, I’ve picked up the mower. Its in pretty good condition, the engine is free and turns nicely, it even has good compression. I am unable to try to start it at present as the fuel tank, tap and carb are gummed up. There is now neat petrol hopefully un-gumming everything. I’m going to strip the engine. just to make sure the rings are completely free and de-coked. Here’s a few pictures before I started to strip it down.
Attachments:
December 15, 2013 at 12:45 am #4044darmic1ParticipantToday’s stuff seems to be made to last 3 or 4 seasons at best, unless your paying ridiculous money.
December 11, 2013 at 9:06 pm #3963darmic1ParticipantHi John, I figured a different coloured machine was needed to tone down the mass of Orange in the garage! We will see what its like when I pick it up on Saturday. Have no idea what its like up close…….
December 11, 2013 at 5:38 pm #3952darmic1ParticipantThats what made me buy it…. Have no idea what state the engine is in, whether it runs or not. It just looked complete and not beaten up like some i’ve seen. If for whatever reason its going to be too expensive to repair, it will probably break it as spares for more than the £10 its cost me.
December 11, 2013 at 11:37 am #3945darmic1ParticipantThanks for that info Martin, will have a good look when I pick it up Saturday!
December 7, 2013 at 9:18 pm #3836darmic1ParticipantCongratulations Gareth and Keri!
December 4, 2013 at 6:29 pm #3702darmic1ParticipantThe Allen Scythe looks great, re the pictures not being in order, See my post in the Help and Information section on the matter. You will need to rename the pictures alpha numerically, so 001,002,003 etc….. It does work then!
November 29, 2013 at 5:26 pm #3504darmic1ParticipantThe new parts for the spare magneto finally arrived, New condenser, stop button, spring clips, HT lead and plug cap. Fitted all the new parts and tested. Pleased to report its all working as it should. I made a short video of it being turned by hand……
November 12, 2013 at 9:16 am #2931darmic1ParticipantThanks Charlie, Always pays to lay out the parts in the order they are removed. Just reverse that order on re-assembly. And take lots of photographs! This was the 3rd of these Wico mags i’ve rebuilt, getting pretty good with where all the bits go now. Not sure on the costs of rebuilding Magneto’s, but as with any professional service’s offered, Im sure it wont be cheap!
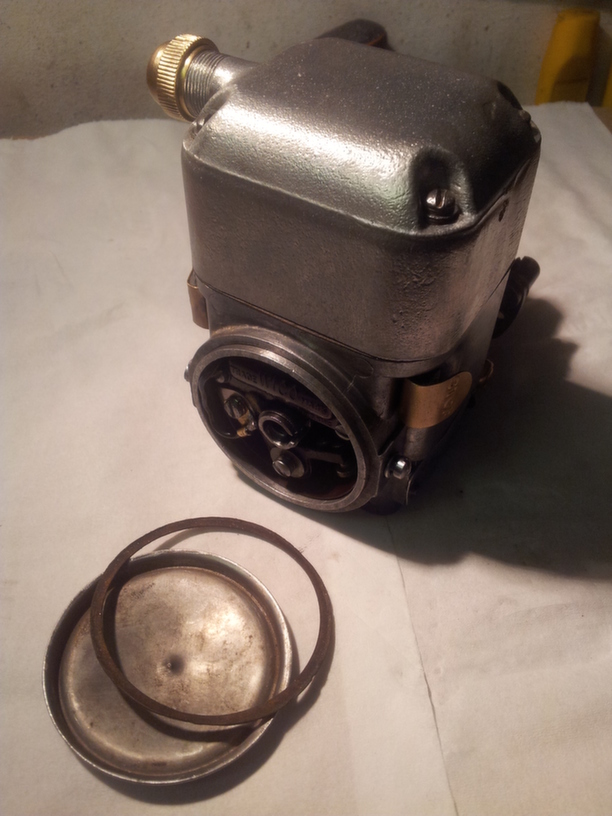
November 11, 2013 at 11:35 pm #2920darmic1ParticipantThe only parts of this Magneto which I will have to purchase will be some new Points cover clips, a new copper core HT lead and a spark plug cap. I will also purchase a pair of new stop buttons as one of these has a crack in the brass.
As I said earlier, Tingly fingers! Note to self, When testing Impulse mechanism, don’t let the exposed output tab of the coil come into contact with palm of hand, Shocking, quite literally!!!Attachments:
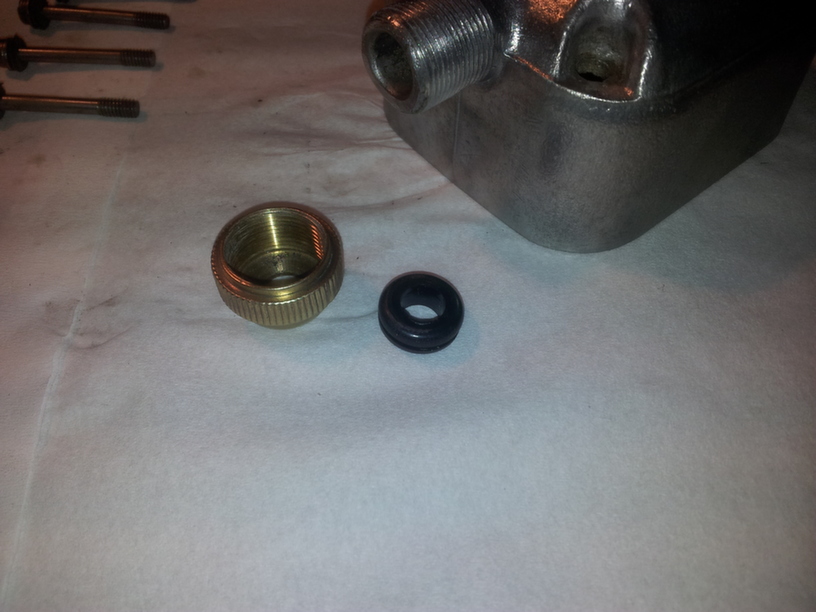
November 11, 2013 at 11:24 pm #2918darmic1ParticipantThe Cap also has a Brass Terminal nut, through which passes the HT lead. This nut also should have a waterproof gland preventing moisture from travelling down the HT lead. This I replaced again using a larger rubber grommet.
Attachments:
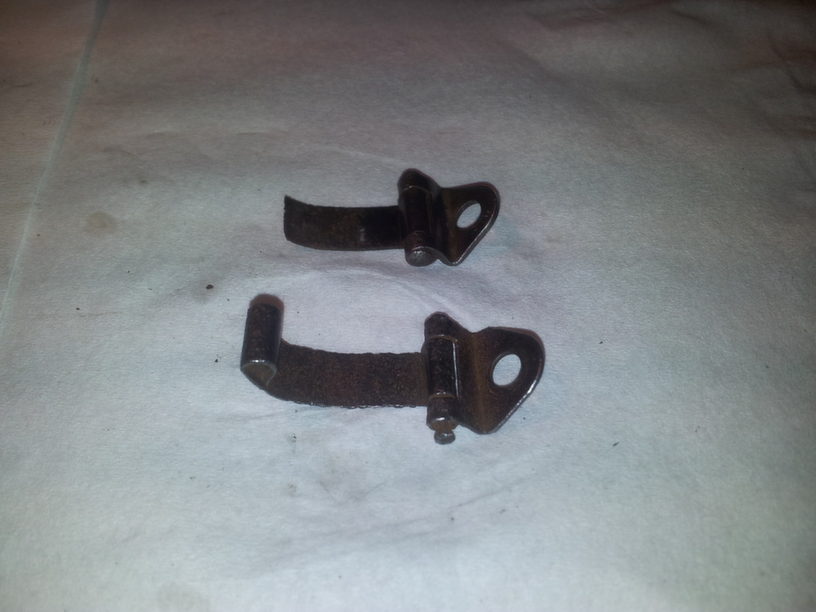
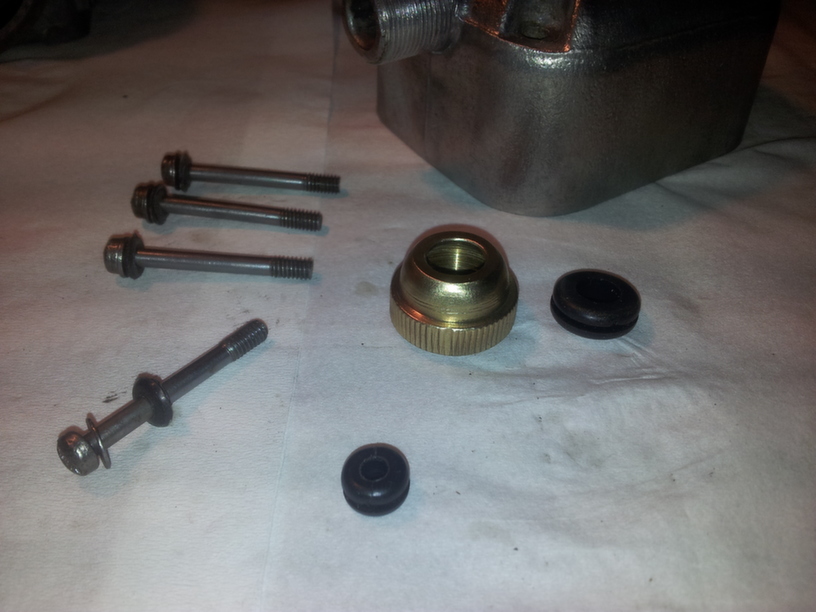
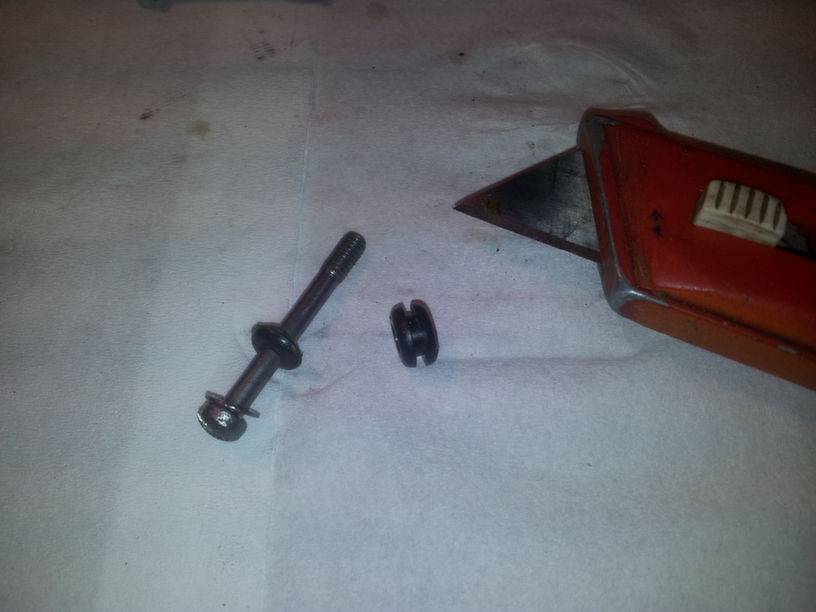
November 11, 2013 at 11:20 pm #2915darmic1ParticipantThe Aluminium cover screws originally had a rubber washer to prevent any water ingress down the screw shaft. These had completely perished. New ones were made by cutting small rubber grommets in half and placing on the screw shaft.
Attachments:
-
AuthorPosts