Forum Replies Created
-
AuthorPosts
-
February 8, 2015 at 6:06 pm #11622
 trusty220Keymaster
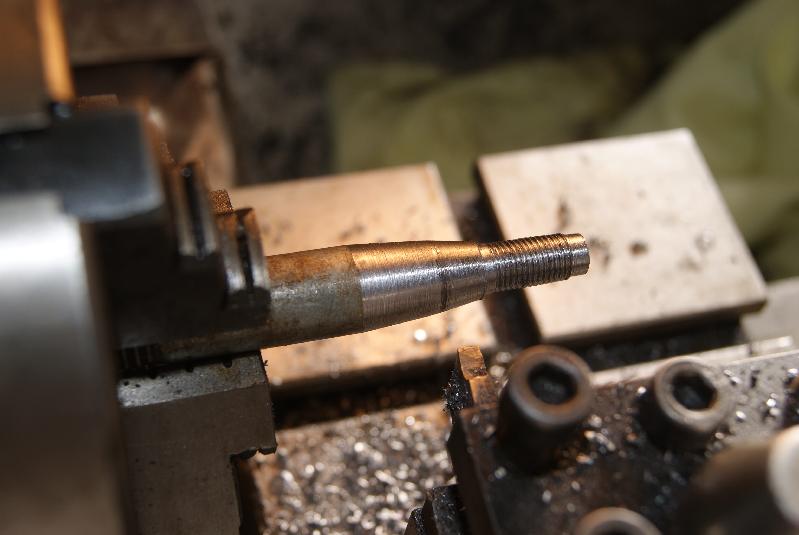
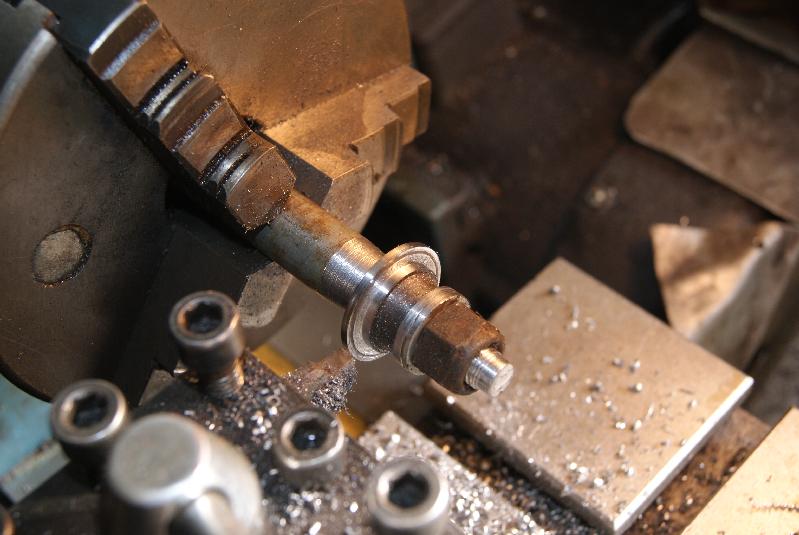
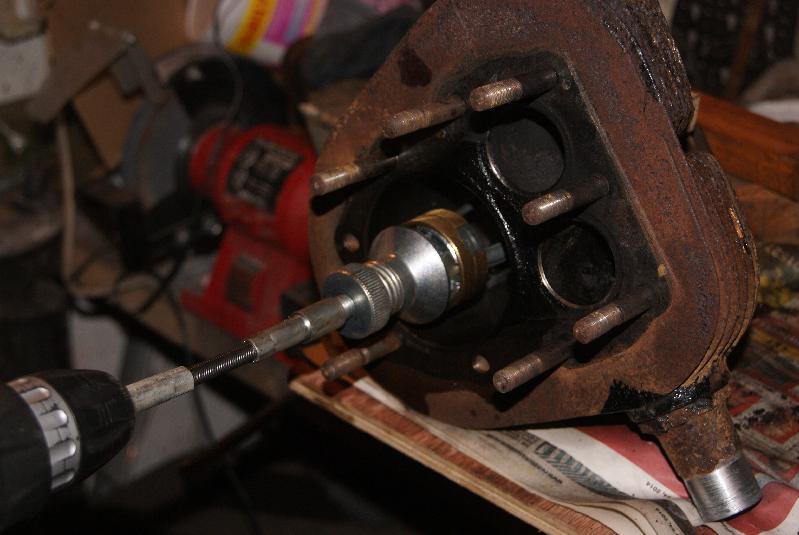
I’ve been having trouble with finding valve caps and springs for this engine. If it were a little newer then it would present no problems, but the design goes back to the 1920’s and apparently the more modern Nortons were two-cylinder. I’ve found a very helpful chap at Norvil Motorcycles in Burntwood who did a bit of spadework and came up with some numbers; apparently the same valves are fitted to a more modern machine so the inner tapered hole for the collets would be the same, but the outer seating where the spring sits was much bigger. I decided to buy two (at £19 each!) because I really didn’t have any choice, then turned up a tapered mandrel on the lathe to hold them with so that I could turn them down to size.
You can see from the pictures how I did it, it’s just a shame that I didn’t have a shiney new nut to put on the mandrel.
I now have two valve spring caps, I have a set of valve seat cutters on loan (that I left at work!) so all I need now is a valve spring and the job’s a good ‘un.Attachments:
January 27, 2015 at 7:09 pm #11540trusty220KeymasterThanks for that, Angus, I was of the same mind myself. Luckily one of my friends has a set of Nu-Way cutters that he is willing to lend me, so problem solved.
I’m in the trade myself, but whereas we used to rebuild engines in the 80’s when I was still in the workshop, these days it is more economic to replace an engine rather than repair it; it does go against the grain a bit, but when someone like Kubota can supply a new 4-cylinder diesel engine for a little over £3k (and it comes with a 12 month guarantee) then there is no point in repairing an old one at today’s labour rates because it comes out at about the same price and you are left to stand the warranty.
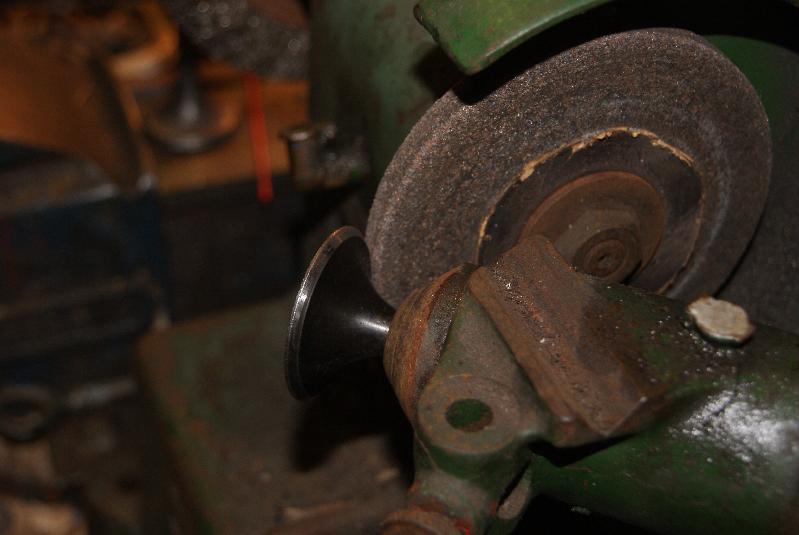
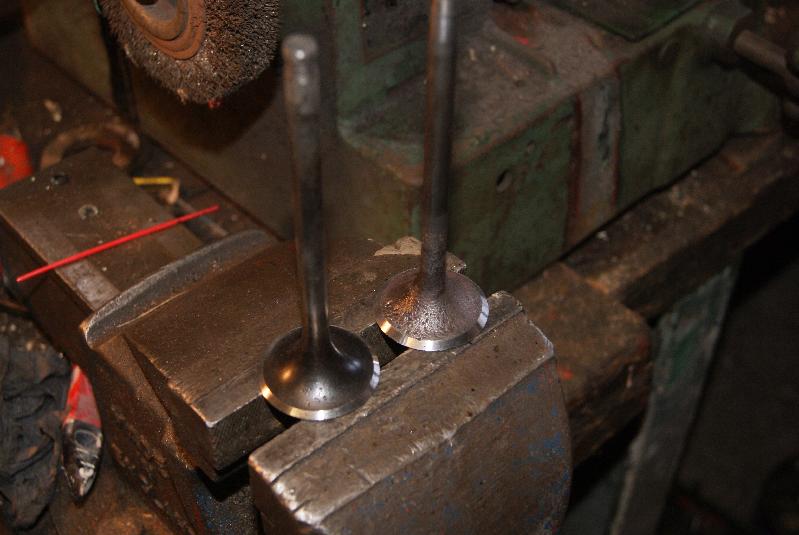
I’ve gone off track a bit, but the reason I mention it is because we don’t have anything like valve seat cutters sitting on the shelf any more. They are regarded as an unnecessary expense these days- have you seen how much they are asking for a set? Over £400 for a simple set! Daylight robbery!January 25, 2015 at 1:48 pm #11518trusty220KeymasterI’ve been after a valve re-facing grinder for some time now, so I used this rebuild as an excuse to bite the bullet and buy one. You can see from the photo’s what it does.
The old valve shown is the exhaust valve and it’s very badly pitted just about everywhere. A few minutes on the grinder and it resembles a usable valve again; don’t get me wrong, if it was going into a high speed engine then it would be scrapped, but as this is such a low-speed application with low power requirements then I thought it justified to re-use the old one. You can see the difference once the two valves have been finished- next job is to cut them into the seats, and I don’t have any re-cutting tools. I will try to use the new face of the valve to cut the seat with coarse paste, so watch this space!Attachments:
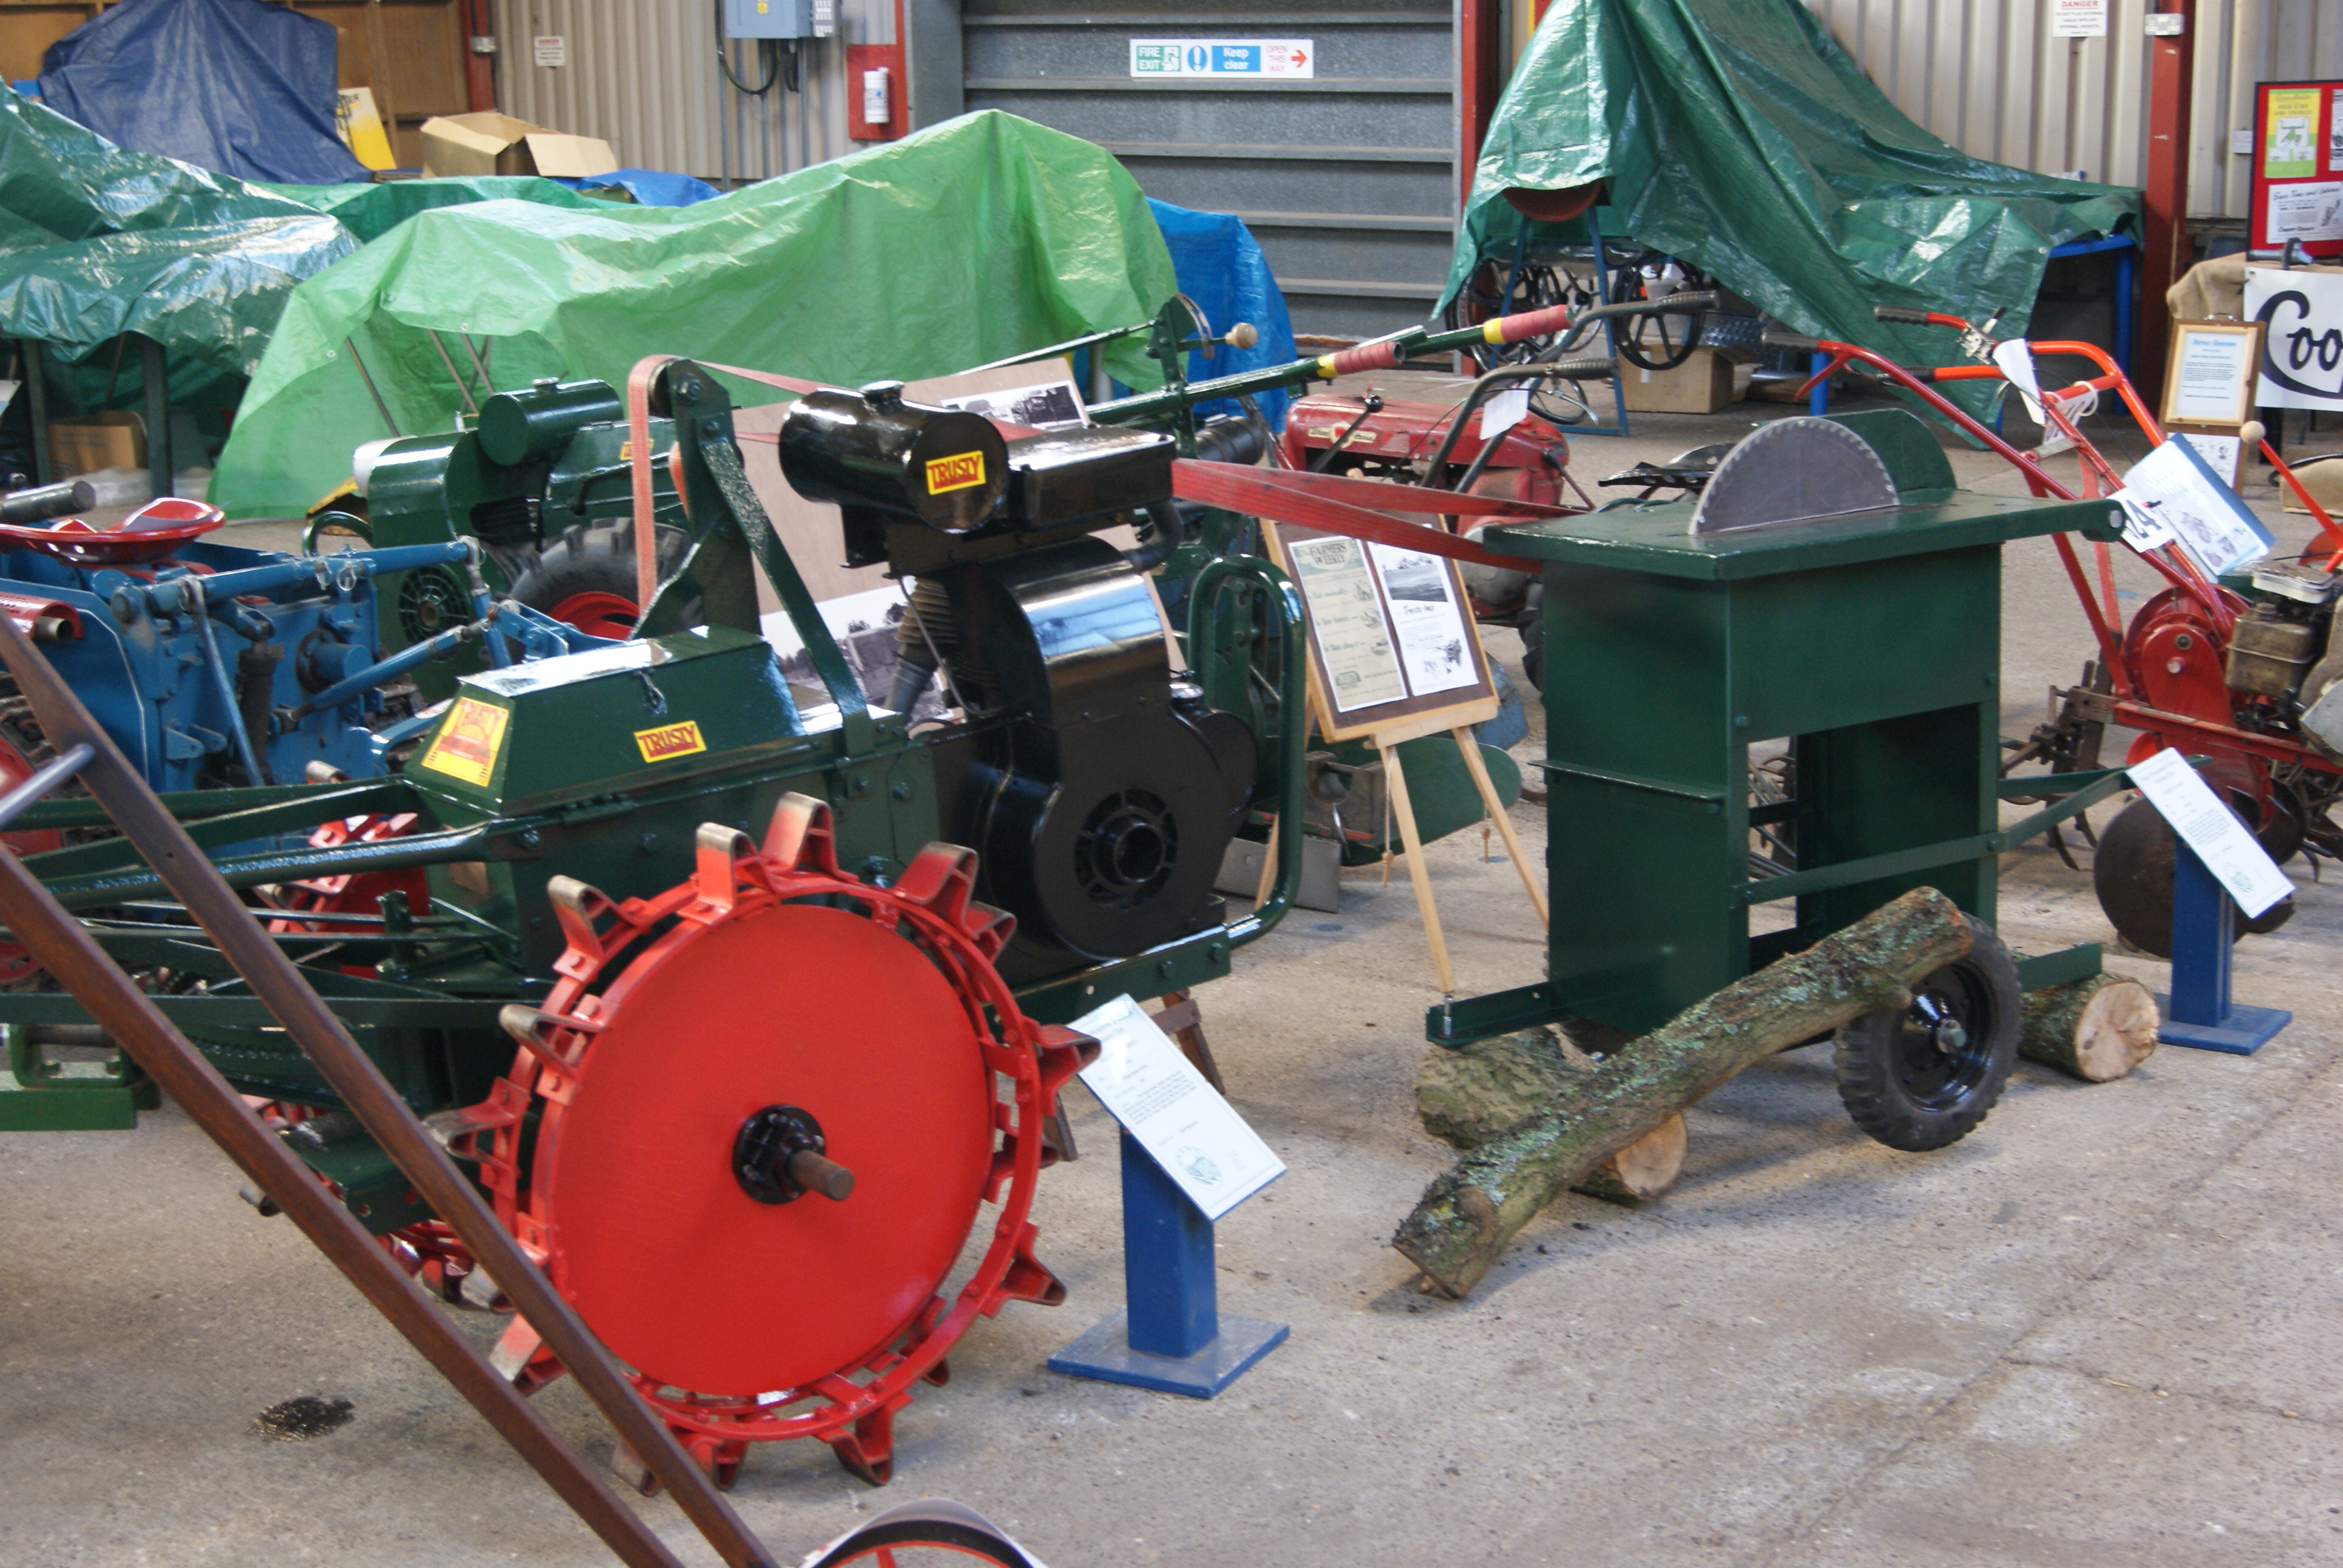
January 21, 2015 at 7:42 pm #11508trusty220KeymasterBefore you ask- no, it wasn’t me, I don’t think I’m brave enough! Here’s a picture of mine set up at Newark in 2013.
Attachments:
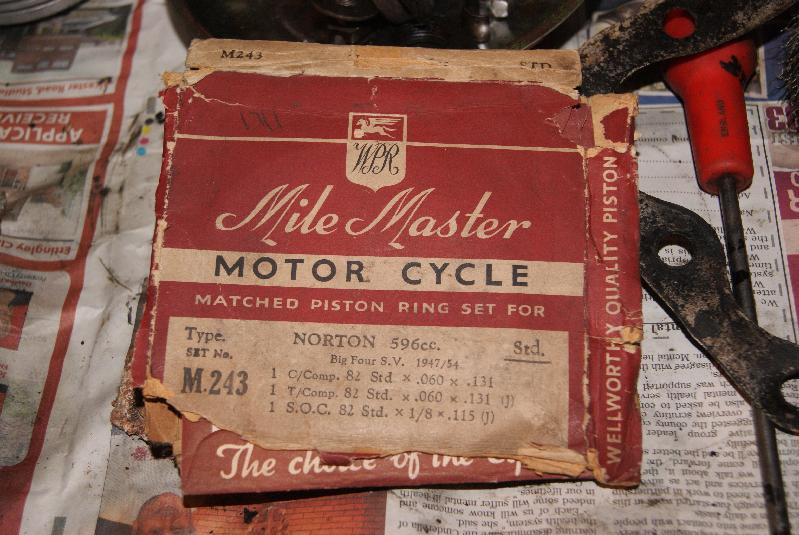
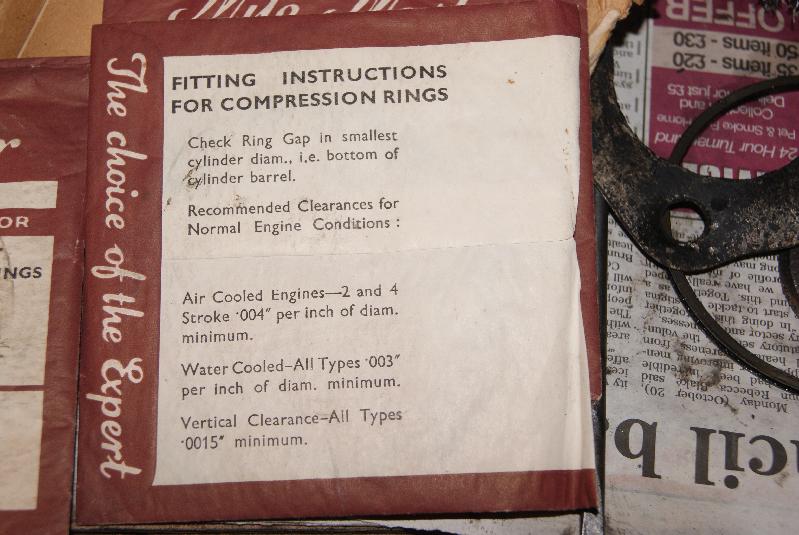
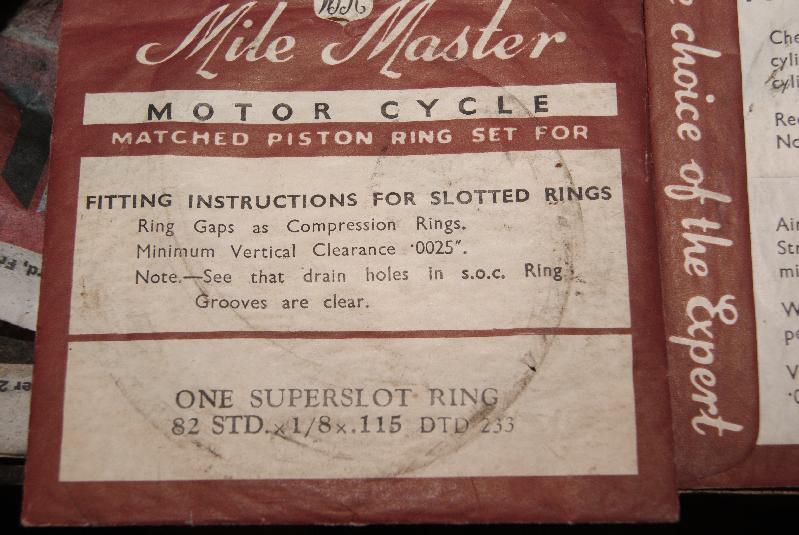
January 21, 2015 at 7:26 pm #11500trusty220KeymasterThings have come to a grinding halt at the minute whilst I try to source parts for this build. First to arrive were the piston rings (£20 from that popular auction site) which were unused old stock from somewhere. Have a look at the packaging- I think it’s great- but more to the point it has instructions on that apply to all engines when rebuilding. Have a read on the photo’s, it’ll save me the trouble of copying it all out!
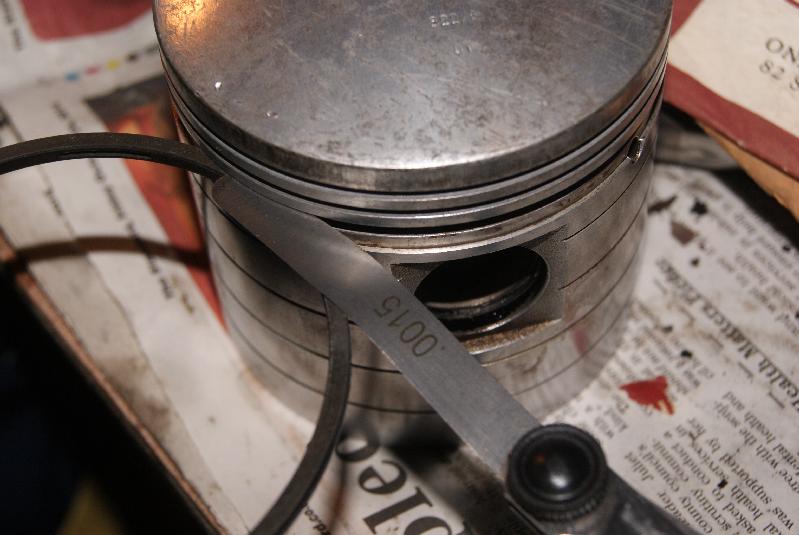
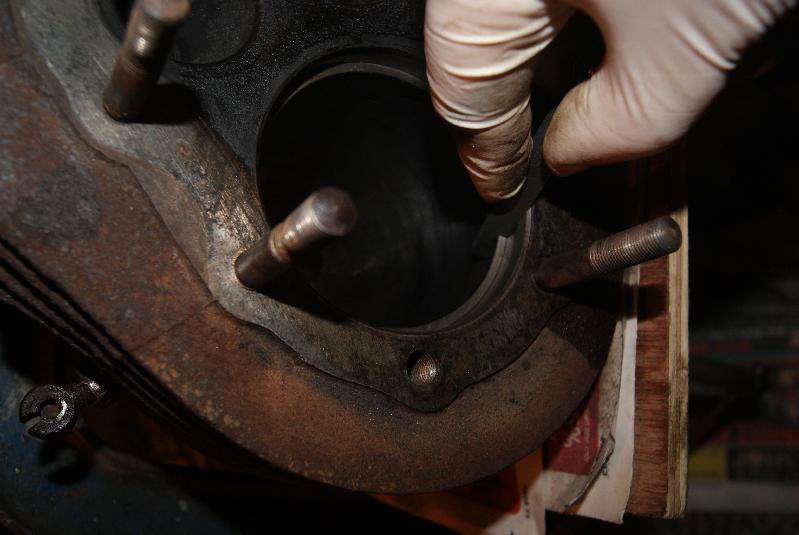
I’ve checked all of the gaps at top and bottom of the bore and they all come out at around 12-15 thou which is spot-on for this diameter. I also measured the side gap in the grooves on the piston and they were all fine, so next stage is to sort out the valves/springs/retainers and the valve seats.
I’ve just bought a valve re-facing grinder so I can try it out on these valves at the weekend- more in a few days after I’ve picked it up from Cheshire!Attachments:
January 10, 2015 at 3:29 pm #11396trusty220KeymasterThings have been going a little too smoothly lately for my liking, and just when I thought that it was going to be a straightforward job some little gremlin has thrown a spanner in the works.
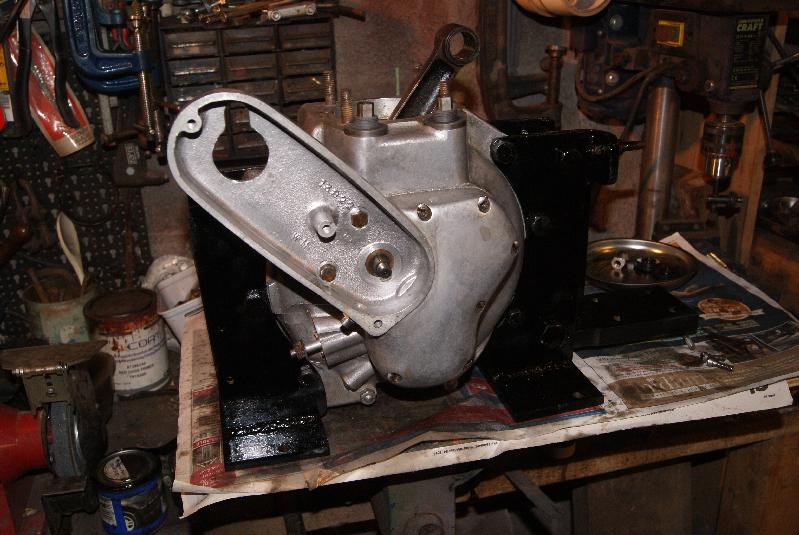
As you can see, the bottom end of the engine was going along very nicely indeed so I turned my attention to the top end. This is where all the problems seem to be- still, life would be boring if it was all simple, now wouldn’t it?
I started off with taking the valves out; quite a bit of persuasion was needed on both valve spring retainers to get the collets to free off, then once the springs, collets and retainers were removed the valves were heavily coated in coke (on the exhaust valve) and the tops of the valves where the collets sit had burred over. Plenty of gentle filing with an oilstone soon de-burred the valve stems, but there still seems to be a problem with the clearance on the exhaust valve guide allowing exhaust gases into the valve chest so a replacement valve guide may be on the shopping list.
After cleaning up the valves didn’t seem too bad but the spring retainers had worn down until they are razor thin, so they will have to be replaced.
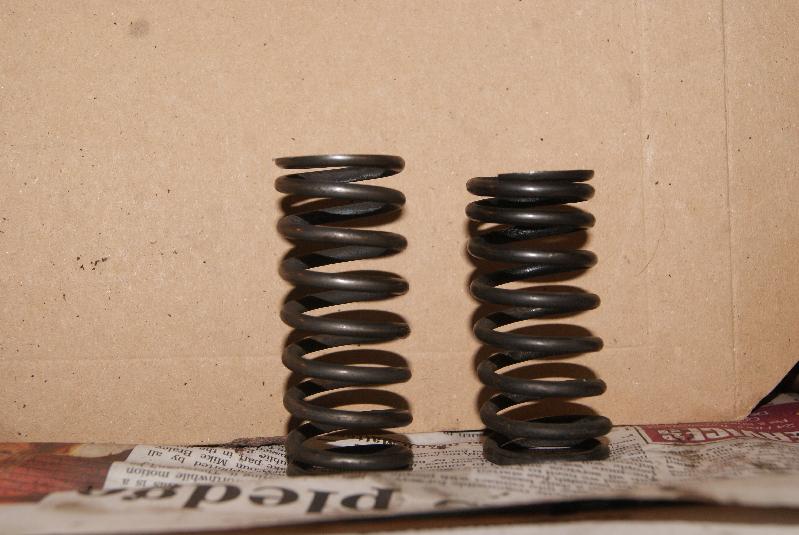
The springs are a different length – they should both be the same- so they will have to be replaced, or the exhaust spring at least.
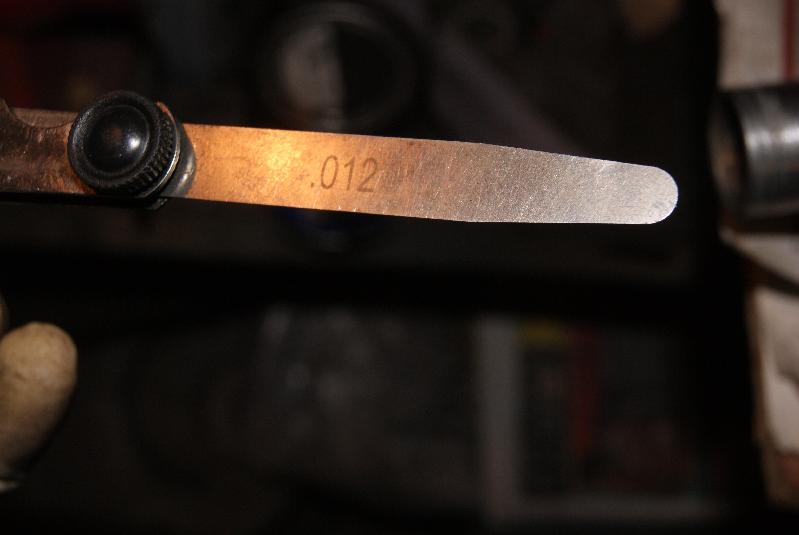
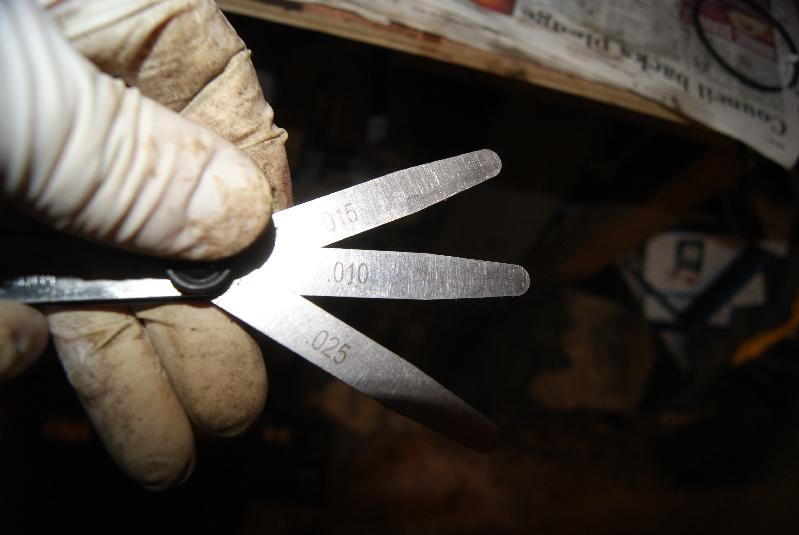
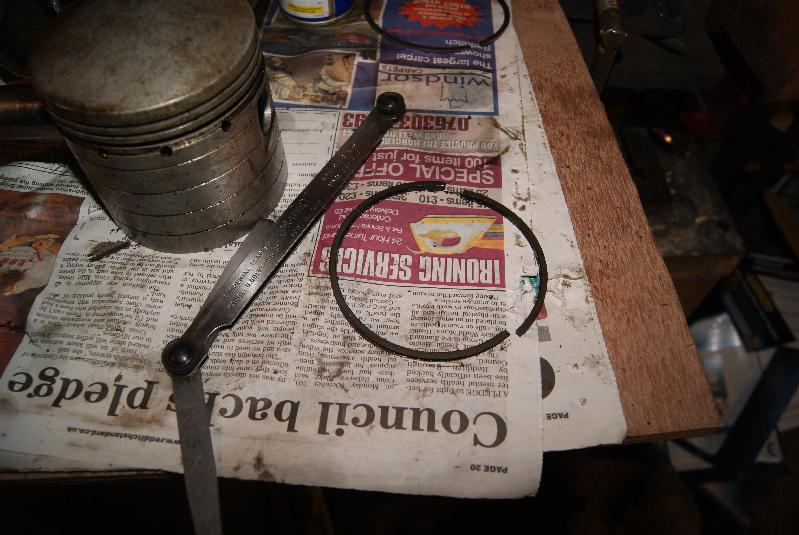
Depressed enough already, I turned my attention to the bore and decided to give it a light honing to get rid of the glaze on the inside. Besides, the coke build up at the top was too great to push the piston into the bore so something had to be done to clean it up. The honing process went off alright, so the next step was to test the end gaps of the piston rings. I got two off with no bother (although I thought they looked a bit thin) but when I got to the last one (the oil control ring) it decided that it wasn’t going to play; it came out of the groove just fine, then as I was sliding it up the piston it broke in two. The only reason that I could think of was that it must have been excessively worn down, so I thought it best to check the other two rings in the bore.
The end gap is what you look for when checking piston rings, and it is usually somewhere around 15 thou. for a normal gap; you have to allow some room for the cast iron to expand as it heats up, but anything over 25 thou. is getting a little sloppy. Both rings measured in at over 50 thou., at least that’s the figure that I stopped measuring at!
So, work is now halted whilst I locate the necessary parts. I’ll try to get away with the inlet valve, valve guide and spring but I will have to replace the exhaust valve guide, exhaust spring and both spring retainers as well as a new set of piston rings and a full gasket set.Attachments:
January 1, 2015 at 3:31 pm #11298trusty220KeymasterI was going to ask where I could order one or two from. Most would come in handy!
Happy New Year to both of you, I think most of our members have been nursing sore heads today after last night.January 1, 2015 at 11:02 am #11290trusty220KeymasterAll of the JAP 5 engines that I have worked on have been cycle thread which is also known as CEI. The most recognisable feature is that CEI is always 26 threads per inch (TPI) no matter what the diameter, so if you have a thread guage you should be able to recognise it quite easily. The hexagon heads seem to vary from early British sizes (BSW or BSF) on the early ones, transferring to the American sizes (AF) later on, but no matter what the head size is the thread is always CEI.
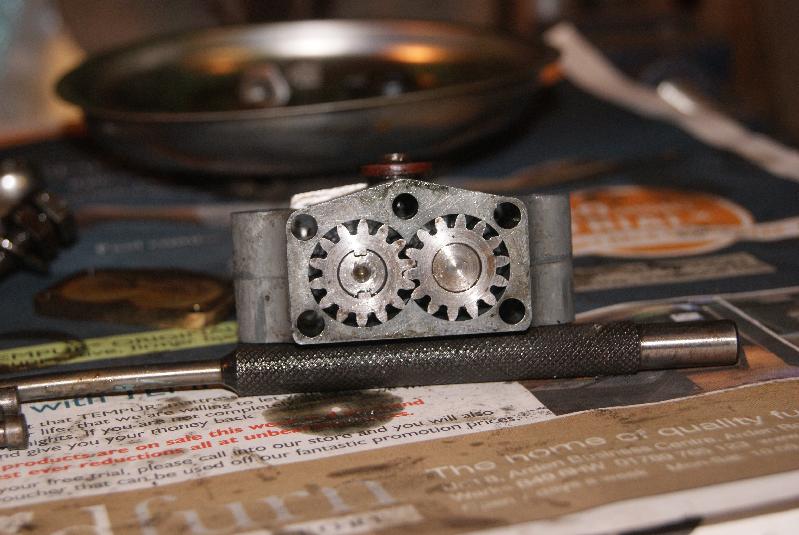
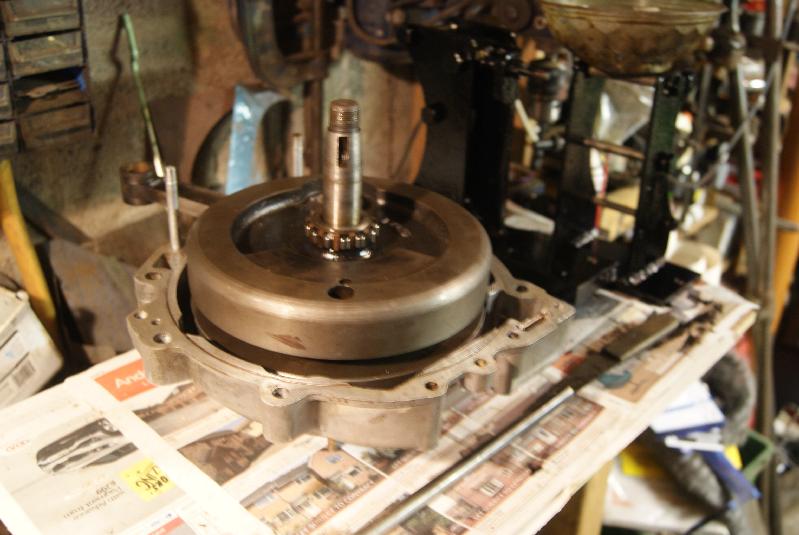
I hope that helps- Happy New Year!December 29, 2014 at 5:51 pm #11251trusty220KeymasterAll of this work would be wasted if we didn’t check the oil pump over for faults. This engine is quite sophisticated for it’s time in having a force-fed lubrication rather than the splash type that is still in current use today; splash lubrication is exactly what it sounds like- a splasher will throw oil all around the inside of the engine and some of it will actually do what it’s supposed to do. It’s cheap, and that’s why it is still used. Norton have done the job properly, however, in that oil is force-fed from a pump through the end of the crank to the big-end; it is then allowed to circulate inside the engine until gravity makes it fall down to a small sump from where it is sucked out and returned to the external oil tank. Most racing engines and aero-engines use an identical system because it allows for proper cooling of the oil before it passes through the engine again.
Norton have taken it to another stage in that they have made the two pumps in one- the scavenge side that sucks the oil out of the engine is twice as big as the inlet side, and you can see this from the photo’s. The idea is that if the oil gravity-feeds through to the engine whilst the engine is not running then there will be a large pool of oil in the crankcase which needs to be got rid of; because it is being sucked out twice as fast as it is being pumped in, then it is drained quite quickly.
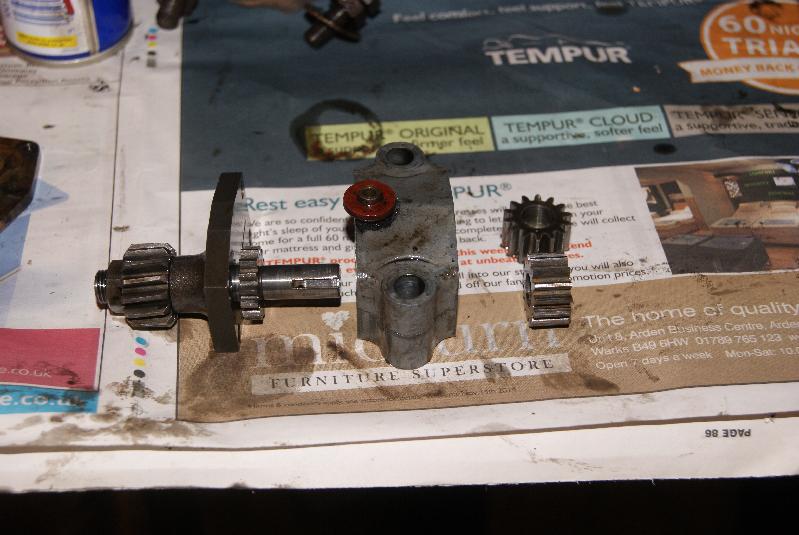
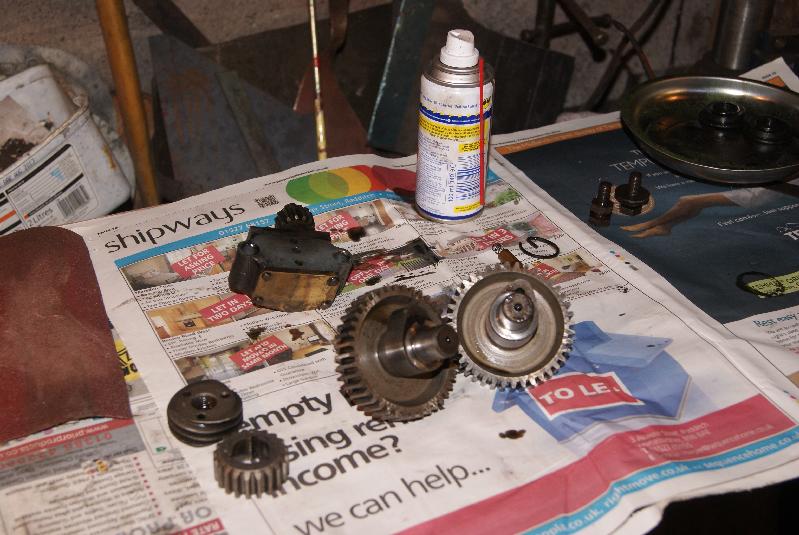
Take the pump apart by removing the four screws on the side where the gear drive goes in. You will find that the bottom brass plate will fall off as soon as the last screw is removed. You can then remove the two gears of the scavenge pump and pull the main drive shaft out of the body to expose the pressure pump at the top.
Inspect the pump as normal, i.e. check end plates for deep scoring and check housings and shafts for play. Assuming everything is good then you can re-assemble and fit to the engine with it’s two nuts; make sure that you fit a fibre washer on the outlet so that it seals against the inside of the timing cover.
Timing cover is next and this has an oil gallery running inside which has an outlet opposite the end of the crankshaft; so that the two marry up there is a spring-loaded plunger that is fitted to the timing cover- ensure that this is fitted and is free to move in and out, otherwise the crank will not get it’s oil.
Fit the timing cover with gasket sealant and that’s the bottom end of the engine complete- go out for a pint!Attachments:
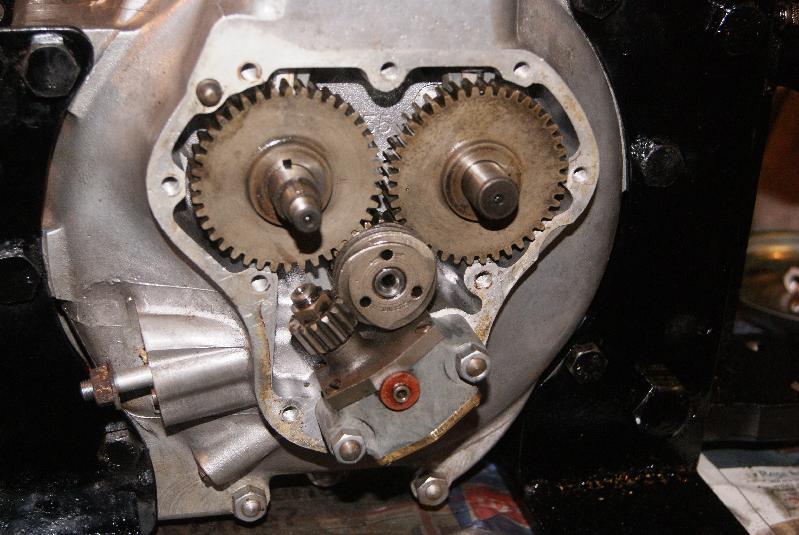
December 29, 2014 at 5:25 pm #11248trusty220KeymasterThat’s it, Christmas over and back to work in the garage. It’s freezing, so best to work on the engine rather than respray the Trusty trailer because the paint will never dry at this temperature.
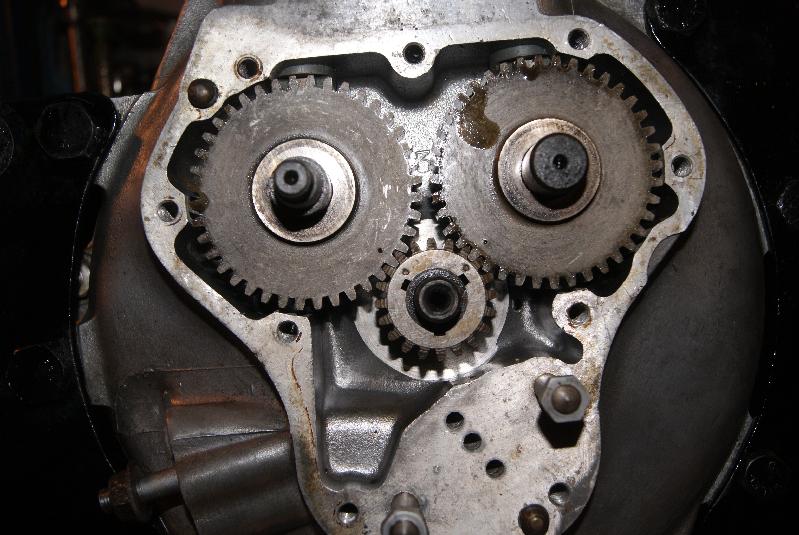
Well, then, where did I get to? Camshafts, timing gears and oil pump next, I think. It sounds simple but beware, it’s very easy to get it expensively wrong.
First on the crankshaft is the timing gear; the gear itself has three keyways and two dots for timing marks, so here’s what you do:
Set the crankshaft to TDC- this will put the keyway and key in the crankshaft at the 6 o’clock position;
with the dots on the timing gear facing away from the engine (i.e.pointing towards you), put the dots at the 10 o’clock and 2 o’clock positions;
there should be a keyway at the bottom of the gear that lines up with the key in the crank, so push it on until it stops hard against the shoulder on the crank;
starting with the inlet camshaft (that’s the one with the thread on the end of it), lift the cam follower and position the cam so the dots on timing gear and cam line up, then slide it all the way home into it’s bearing bush;
repeat for the exhaust cam and you should end up with something like the photo below, with both cams fitted and all the dots lining up.
If you want to do the test and rotate the engine to make sure the valve timings are right then go ahead- the easiest way is to position the crank on TDC again, only this time between the exhaust stroke and the inlet one; you should see the exhaust closing as the inlet opens (this is called “on the rock”).
Assuming everything is OK, go ahead and fit the worm drive for the oil pump, but beware that it is a left-handed thread so you tighten it anticlockwise. make sure that you do this up tightly because it also retains the timing gear on the crankshaft.Attachments:
December 23, 2014 at 1:53 pm #11180trusty220KeymasterThere are parts lists available and they do come up from time to time on that auction site. I can let you have a copy on email- I’ll send you a pm so that I can get your email address.
December 23, 2014 at 1:50 pm #11179trusty220KeymasterYou beat me to it! Merry Christmas and a Happy New Year to all of our followers.
See you at Tractor World!December 23, 2014 at 1:47 pm #11175trusty220KeymasterWhilst we’re looking at Pattisson products, here’s another little gem that I found earlier on in the year. We used to hate them in the workshop, and all of a sudden there don’t seem to be any left. I certainly haven’t seen one for some time……..unless, of course, you know different!
Attachments:
December 22, 2014 at 9:14 pm #11165trusty220KeymasterHe said it was a job he gave to the apprentice. Management does have it’s benefits!
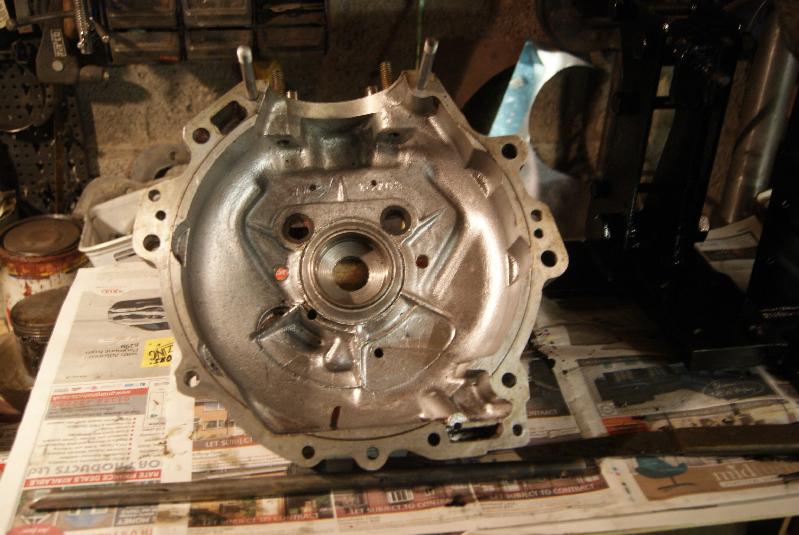
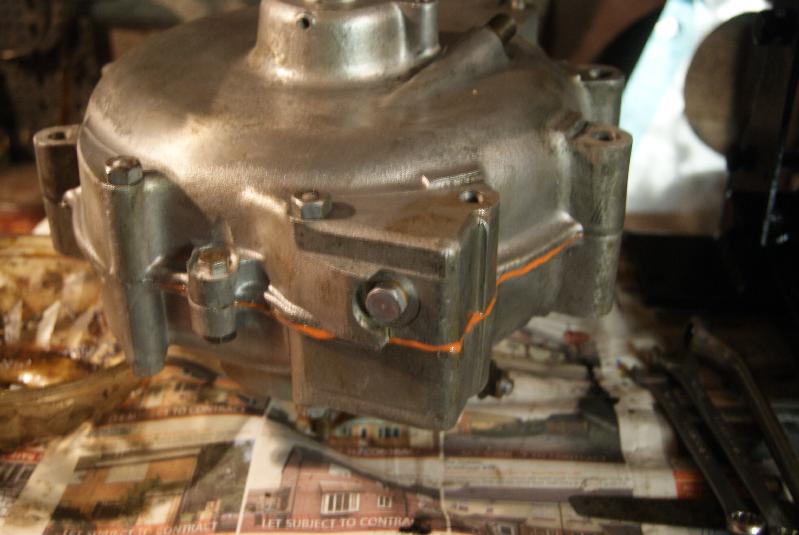
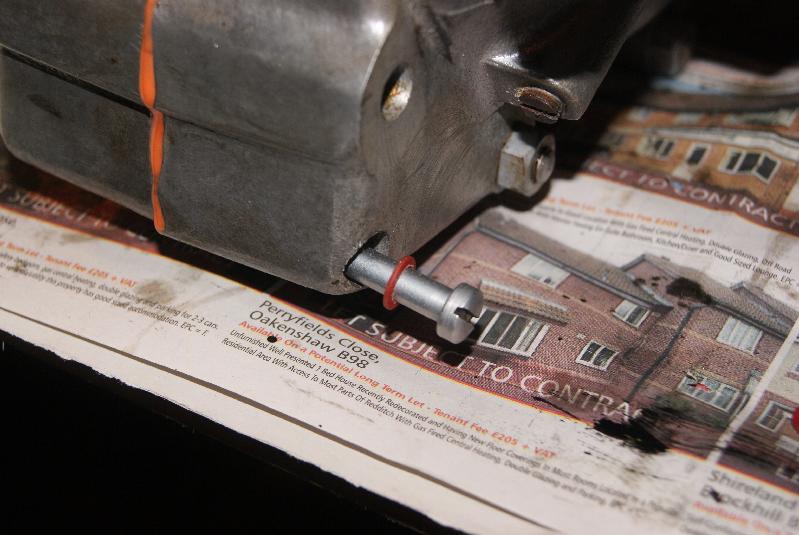
December 22, 2014 at 9:02 pm #11159trusty220KeymasterWell, that checked out OK so the next bit is to put it back in the engine. As you probably realise now, this is not a normal engine; it originally started life in the 1920’s as a motorbike engine which is why it has a circular crankcase and internal flywheels. It also has a dry sump, which means that the oil is pumped out of the crankcase into a separate tank to cool, then pumped back into the engine. The pump that sucks it out of the engine has a pick-up pipe at the front of the engine in the small square reservoir that you can see in the photo’s. It has a screw holding the outer part of it together, and this must have a fibre washer under the head otherwise the oil will track down the screw and make a mess on the floor.
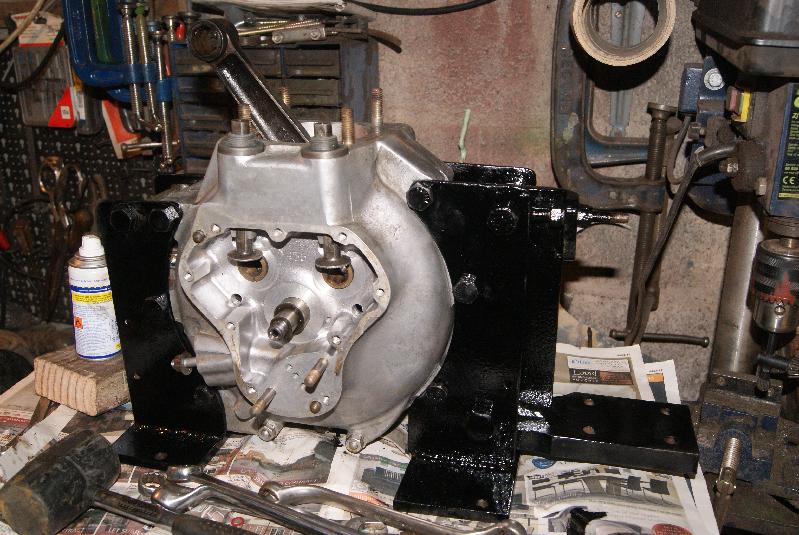
Another part of re-assembly is checking the end float of the crankshaft. There is no easy way of doing this other than putting it all together and trying to move the crank in and out, then taking it apart to put shims under the bearings and trying it all over again. Very time consuming but very necessary, and you shouldn’t skimp on this stage.
Once you’ve done this to your satisfaction you can bolt the engine mountings back on to stabilise the whole assembly and give yourself a pat on the back!Attachments:
-
AuthorPosts