Forum Replies Created
-
AuthorPosts
-
March 25, 2019 at 4:39 pm #30772
 trusty220Keymaster
One thing that I picked up back in the Nineties was regarding the JLO name. One of the reps working for IPU (who imported Dori mowers from France) used to say that the name stemmed from Esperanto- it was supposed to be a common Europe-wide language to bind the countries together with one language- and it translated into English as, “A Good Tool”.
Esperanto never really got off the ground and very few people these days have even heard of it; another great idea that came out of Brussels!
March 18, 2019 at 8:02 am #30712trusty220KeymasterI’ve used the string method many a time and never had it fail yet! Another method is to insert a wooden wedge through the exhaust port on a 2-stroke to lock the piston. That way you aren’t putting undue pressure on the threads of the spark plug hole.
If you’re undoing flywheel nuts another tip is to look to see if it has a left hand thread- most are standard right hand, but every so often you come across a left-hooker and you only strip the thread once!
March 15, 2019 at 1:56 pm #30692trusty220KeymasterLooks like the spade and fork are Terex items.
March 14, 2019 at 7:48 am #30680trusty220KeymasterBut she told me I was the only one! I’ll never trust another woman again.
March 13, 2019 at 4:29 pm #30659trusty220Keymaster…….and there was me thinking that I was the only one!
We will see what we can do to make it more secure. It’s surprising how many times we get bombarded by these spam emails and every so often one gets through. It makes you wonder why these people bother.
March 12, 2019 at 6:31 pm #30646trusty220KeymasterCertainly with the Trusty the shades of green varied considerably. Paint was difficult to come by and many manufacturers used what they could get their hands on most of the time, so it would be difficult to pin down a paint code as a definitive one.
I think Alan’s advice is the best- find a piece that has not been exposed to the sunlight and get it colour-matched by a professional tradesman.
March 12, 2019 at 6:25 pm #30644trusty220KeymasterWell, at least you can see where it came from. I’m surprised that you don’t get more screws coming loose with those noisey things!
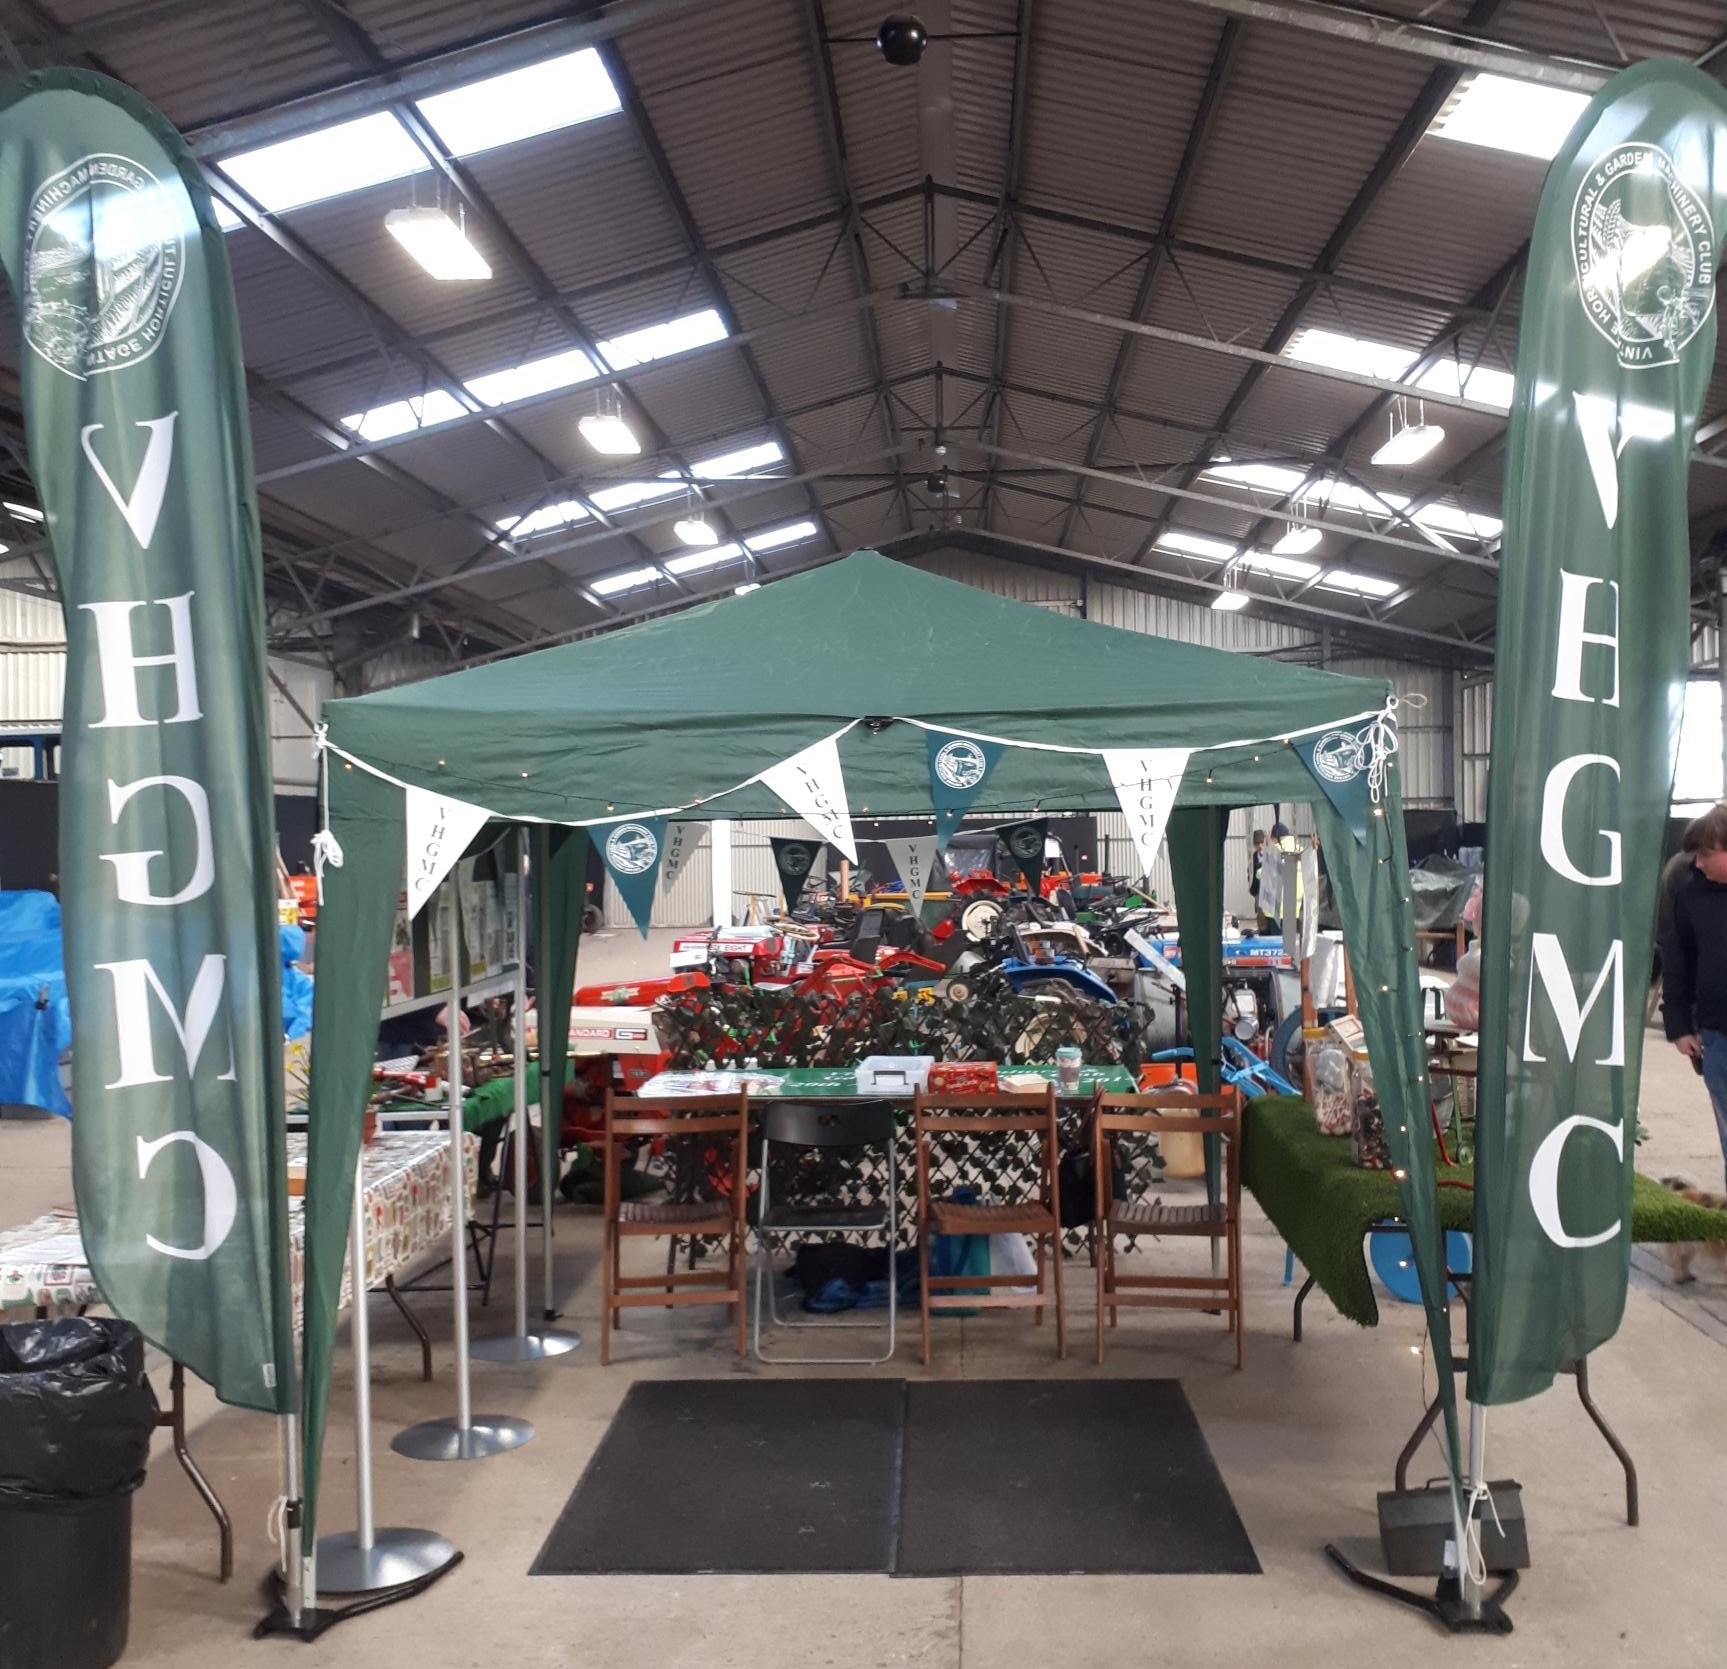
March 5, 2019 at 8:38 pm #30589trusty220KeymasterSandra has sent me this picture of the new stand that she put together. Well done, Sandra!
Attachments:
March 3, 2019 at 1:35 pm #30574trusty220KeymasterDoes anyone else have a photo of the stand?
March 1, 2019 at 6:50 pm #30554trusty220KeymasterSome very good photo’s, Alan. I don’t suppose you have any of the new club stand that Ivan and Sandra have put together? With noticeboards, a gazebo, flashing lights and bunting I should think it was quite eye-catching. A pity that I couldn’t be there to see it.
February 7, 2019 at 12:57 pm #30300trusty220KeymasterOne test that you can do when running it on the drill is to decrease the speed gradually (you need a variable speed drill for this) and watch what the spark does. I’m guessing that once you get down to a speed equivalent to tick over or just above the spark disappears. This would indicate a coil that is starting to break down internally and the only remedy is a replacement coil.
Best of luck.
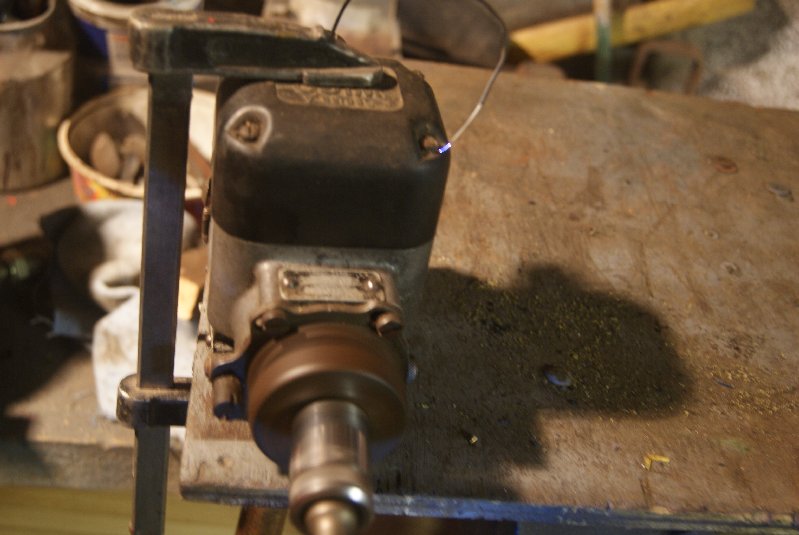
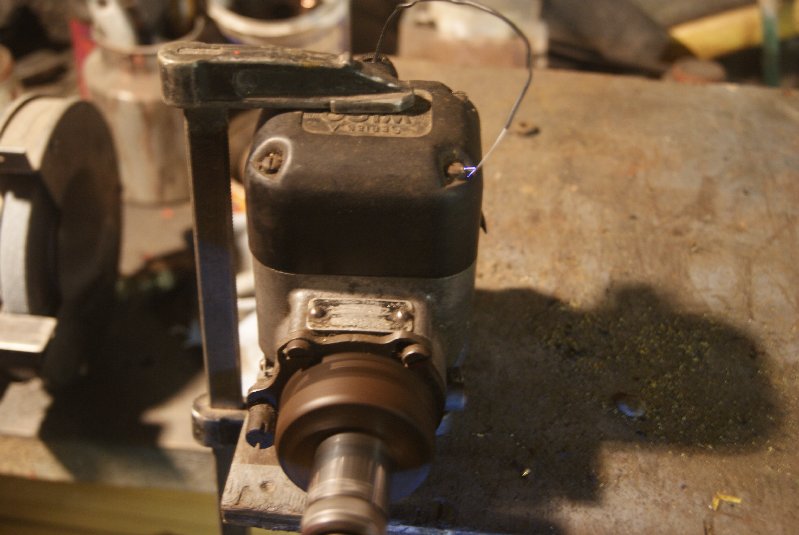
February 3, 2019 at 4:57 pm #30270trusty220KeymasterI was checking my magneto this afternoon and thought that I’d take some pictures just to show you the set-up. You don’t need anything special. I clamped the mag to the bench (I normally use a piece of wood under the clamp to save damaging the cap, but you wouldn’t see the spark if I’d used it), then screwed a piece of rigid wire to the HT lead connector- I’ve straightened out a paper clip before now. Point the loose end of the wire at one of the screws that hold the cap down to the body, put a rubber band around the finger on the impulse starter to keep it retracted, then spin the mag using a variable speed drill fitted with a 3/4″ AF socket. You can buy socket adapters for less than a fiver from Screwfix which work really well.
You should see quite a spark from the end of the wire if everything is working properly, and this one reached nearly to 1/2″ long this afternoon.
Attachments:
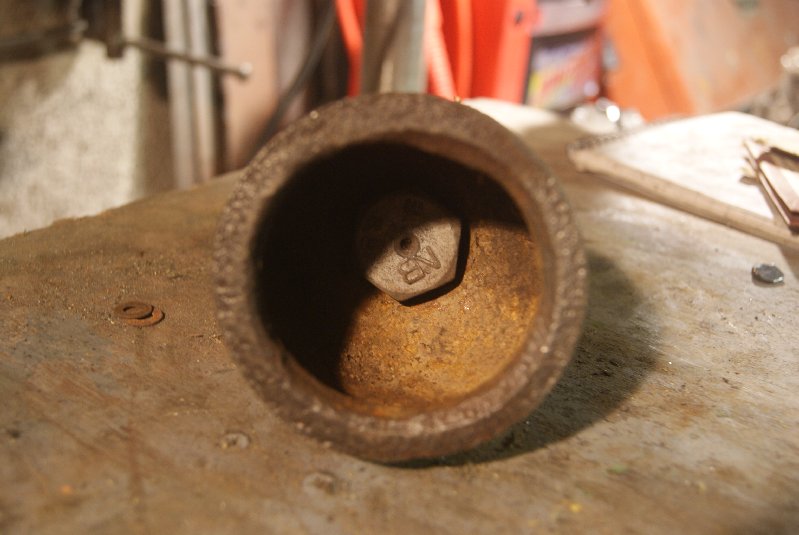
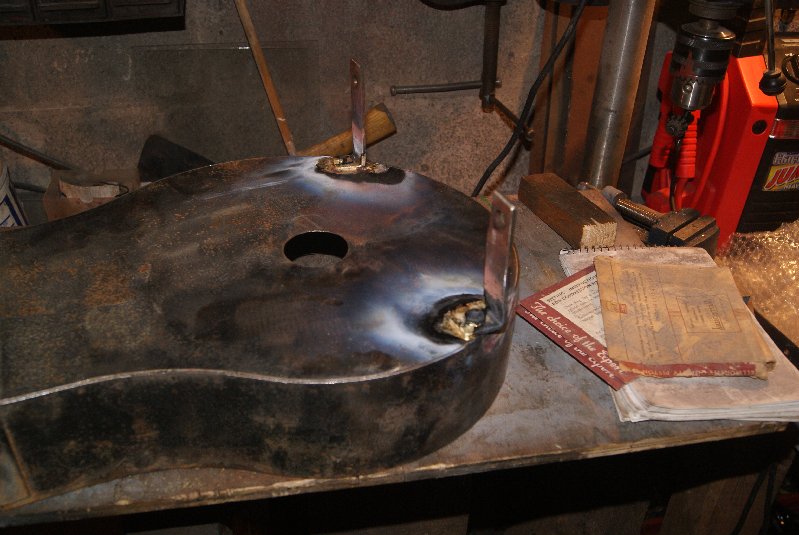
February 3, 2019 at 4:47 pm #30261trusty220KeymasterIt’s been a bit cold for the workshop recently, but I braved the cold to do a little more today. The exhaust I have mounted on a rather large bolt so that I can turn the end flat and true. The intention is to make a ring to go on the outside with a small lip on the inside edge that will hold some pierced steel sheet; the ring is held on with three or four small screws. At least it will look like a new one then.
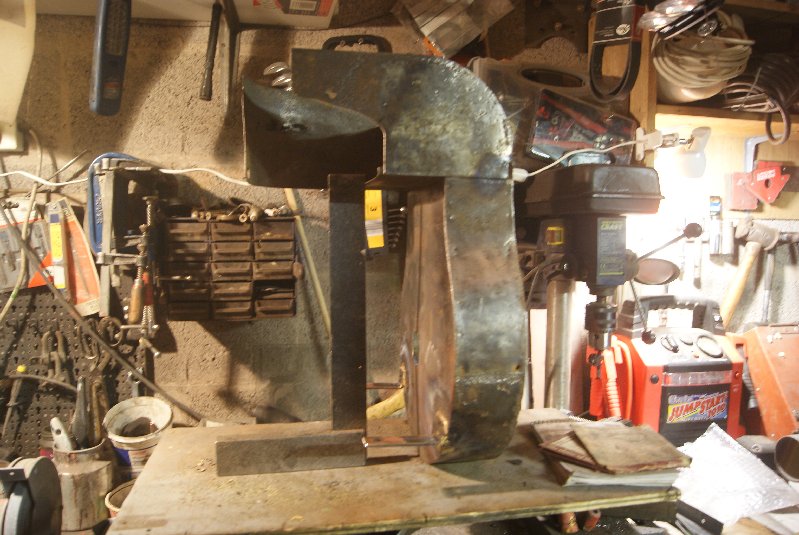
The feet have been brazed back onto the cowling and the whole lot tidied up including a small amount of panel beating. Next step will be etch primer then a thin smear of P38 to fill the craters that the rust left behind, then a top coat of gloss black. At least, that’s when the weather warms up a bit!
Attachments:
January 28, 2019 at 7:50 am #30200trusty220KeymasterI had a case like this some years back with a Trusty. It had a Wico A magneto and you could wind it over on the starting handle and get a series of bangs out of the exhaust every time it fired, but it would not carry on and start. Every now and again it would start up and run sweetly, then back to “bang, bang, bang” on the starting handle when you tried to start it next time.
The problem was traced to the coil just starting to break down internally; I tried a friend’s magneto on it at a ploughing match just to rule it out and to my surprise it ran beautifully, then back to the same old “bang, bang, bang” when I replaced my own one.
Try to get hold of a proven spare magneto, or otherwise you could take yours off and run it on the bench with a drill with a socket on the drive shaft nut to test the spark.
I hope that helps.
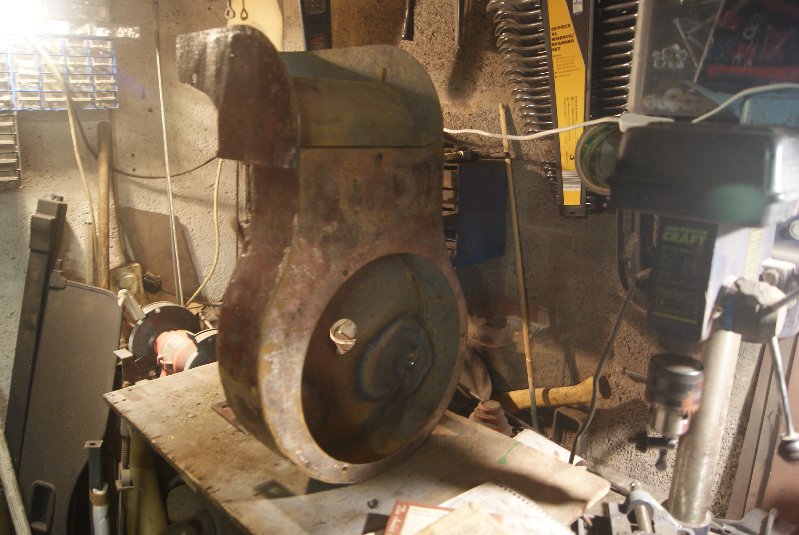
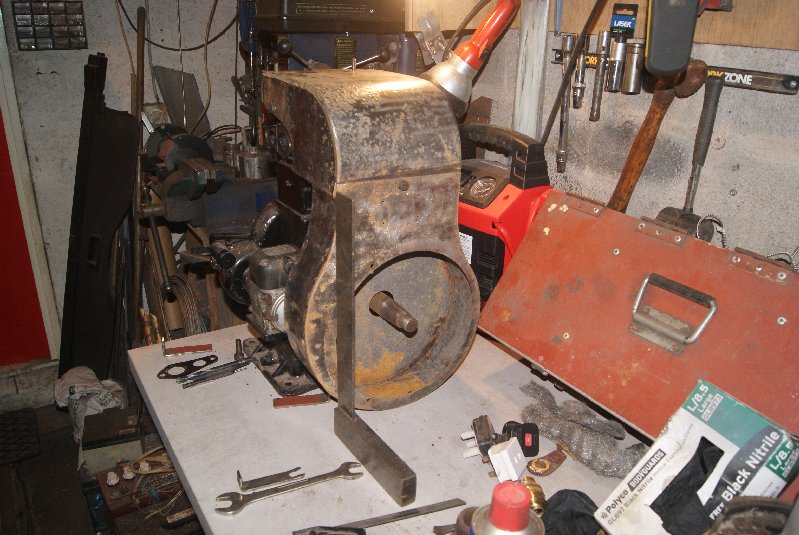
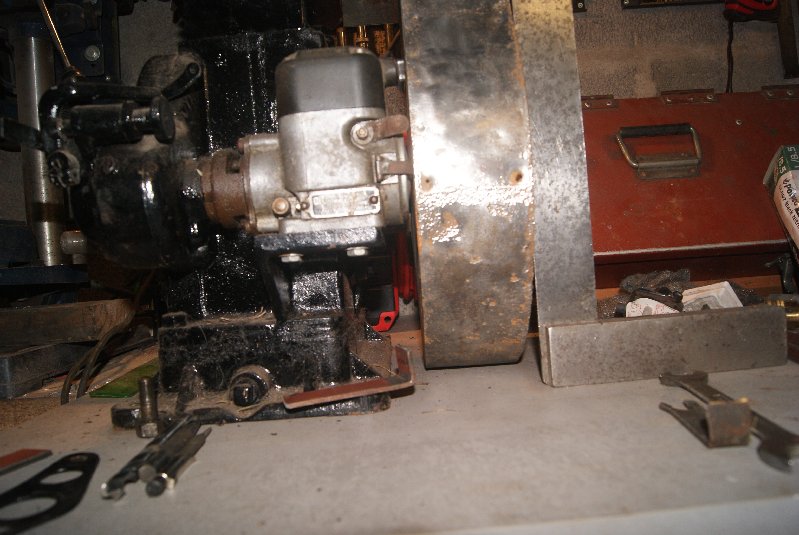
January 26, 2019 at 6:44 pm #30168trusty220KeymasterI may have forgotten to mention that I actually started this rebuild some time ago but had to put it to one side when my father passed away. I kept the engine in my workshop and started to overhaul it, only to put it to one side at the same time; I have recently dug it out and have started to attend to the “tricky bits”.
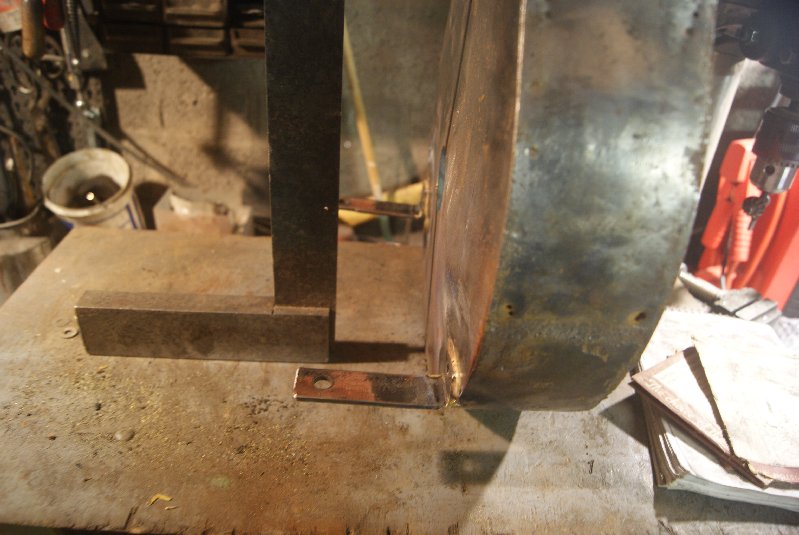
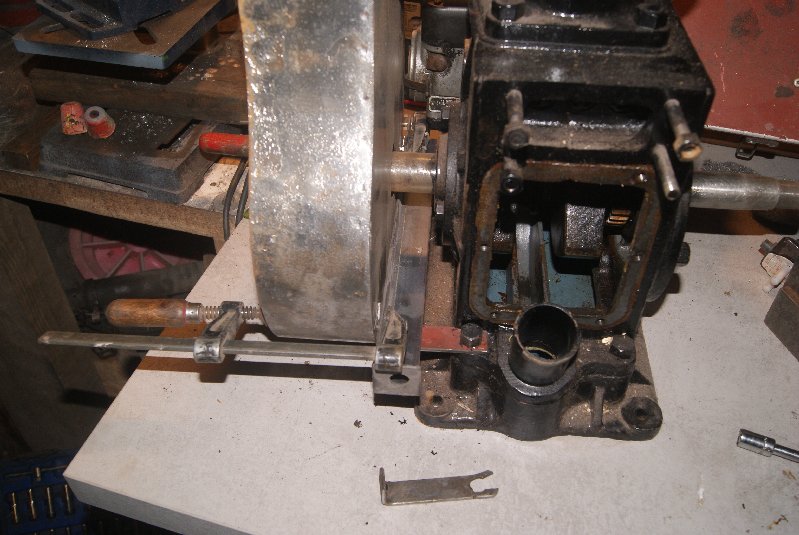
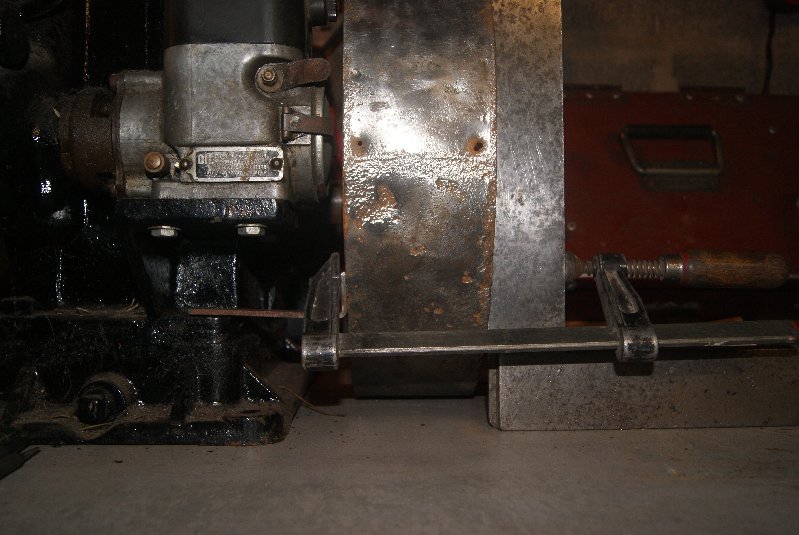
From the pictures you will see that I have given the cowlings the treatment with brick acid. It has removed all of the old black paint and the rust as well, returning everything to shiny silver steel but with pit marks in it.The original legs that hold the bottom of the cowling had seen better days and needed to be replaced, so they were cut off and new ones fabricated. As you can see from the pictures it is important to ensure that these legs are the correct length so that the outer face of the cowling is vertical otherwise all of your hard work will look bad. The large square is lining up the outer face whilst the top is lined up by the studs in the head; all I needed to do then is to measure the distance to the holes for the sump bolts and everything should work. I haven’t brazed the legs on yet so that is still a “work in progress”, more later.
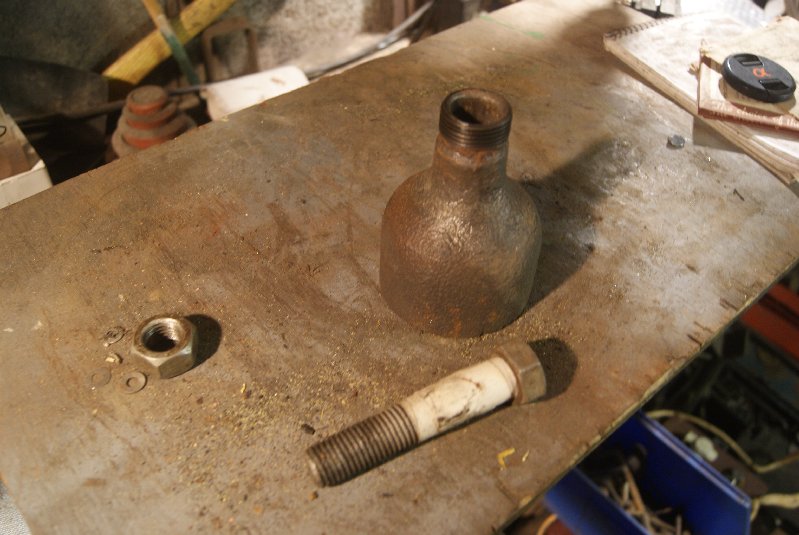
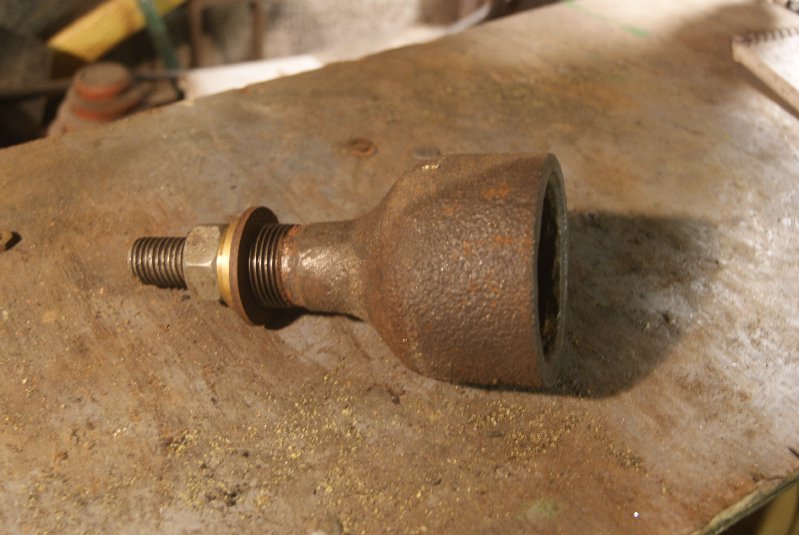
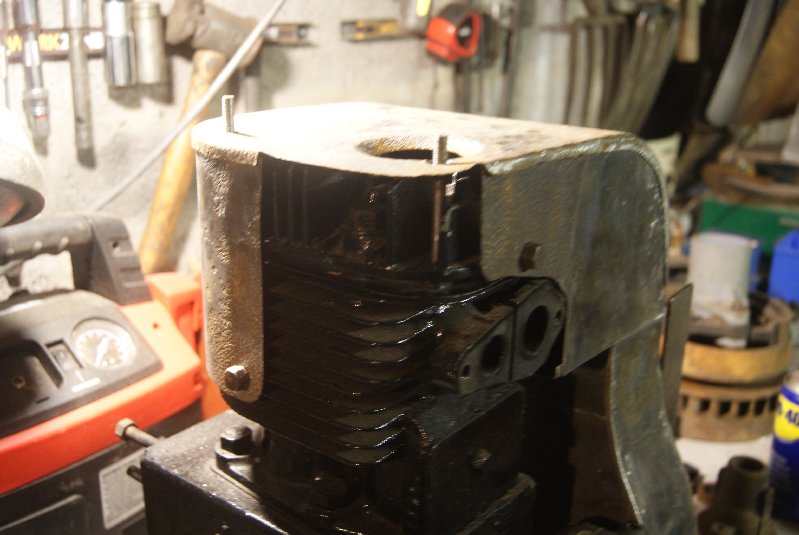
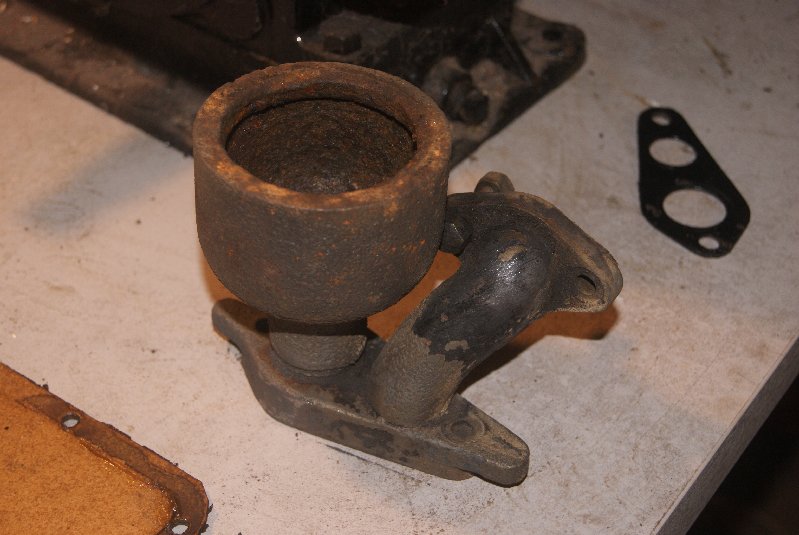
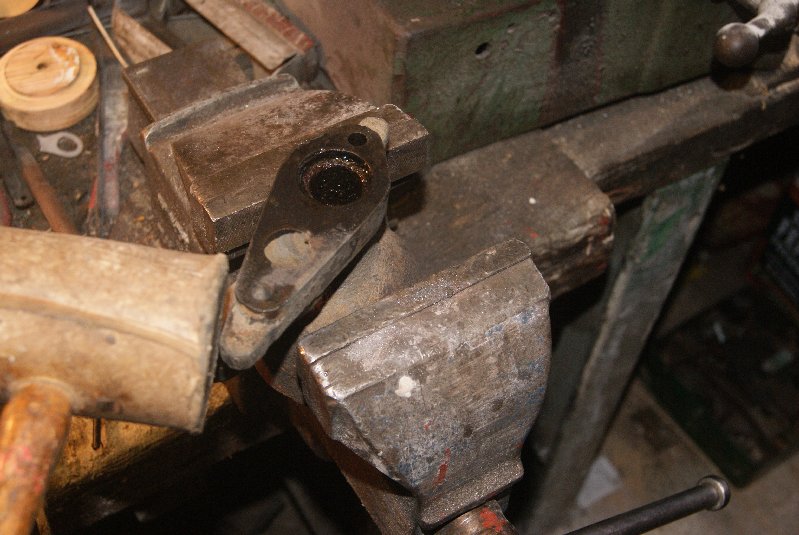
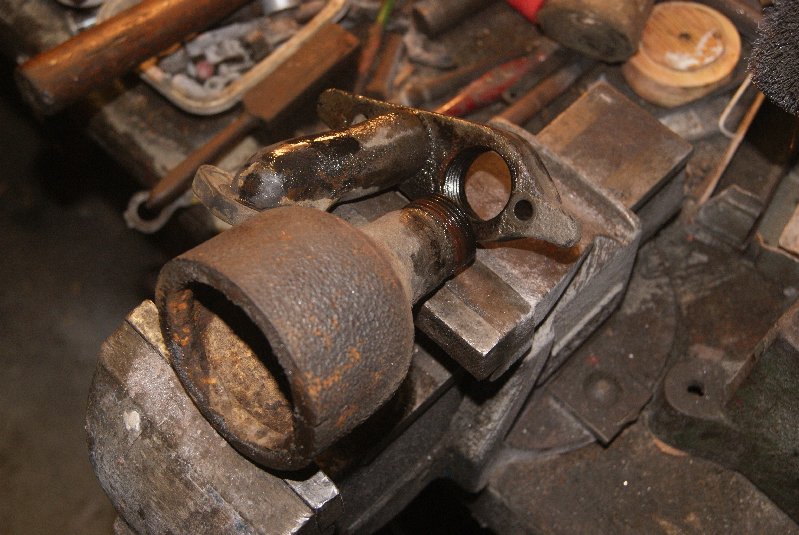
Another unusual feature of this engine is the inlet manifold that spans both the inlet and exhaust ports. The later JAP 5 engines had separate inlet and exhaust manifolds, but this one was to give me a headache because the cast iron “bottle” type exhaust was screwed into the manifold and trapped the bolt that holds the manifold to the barrel. The exhaust simply had to come out but it was rusted in through years of weathering,
Out came the brick acid again for a whole week’s worth of chemical soaking, then (just as Mrs. Geoff was moaning about the strange smell) I clamped the exhaust in the vice and gently tapped the manifold backwards and forwards with a hide mallet. Eventually it started to move after much persuasion, bearing in mind that it is made of cast iron and is therefore as brittle as a Toffee Crisp. Surprisingly the thread was like new when completely unscrewed, so I will be able to turn the outer edge on the lathe and make another closure plate and retaining ring to restore it’s originality.
Enhjoy the photo’s, more to come soon.
Attachments:
-
AuthorPosts