Home › Forums › The Main Forum Area › Projects › Early Trusty Rebuild
- This topic has 101 replies, 14 voices, and was last updated 3 years, 10 months ago by
 trusty220.
-
AuthorPosts
-
October 3, 2020 at 5:42 pm #35461
 trusty220Keymaster
“She Who Must Be Obeyed” helped me unload it after I bought it from the late Brian Carter, so I can’t hide it. At least she knows I’m not lying when I tell her,” Yes, I’ve had that for some time but it’s been at the back of the pile. You remember it, don’t you?”
Come on, admit it, how many of you have used that one before???
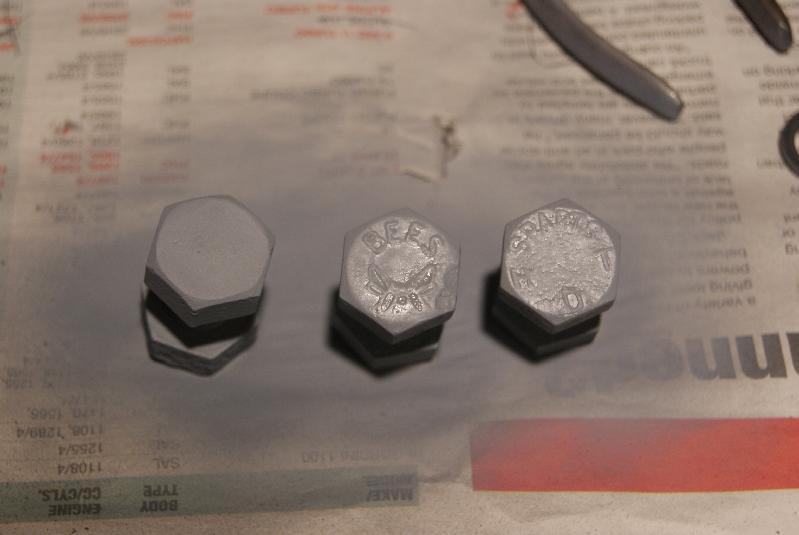
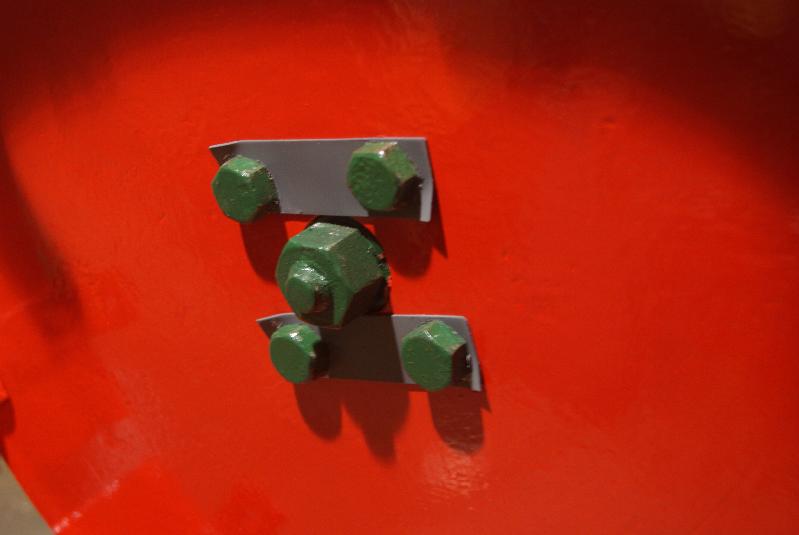
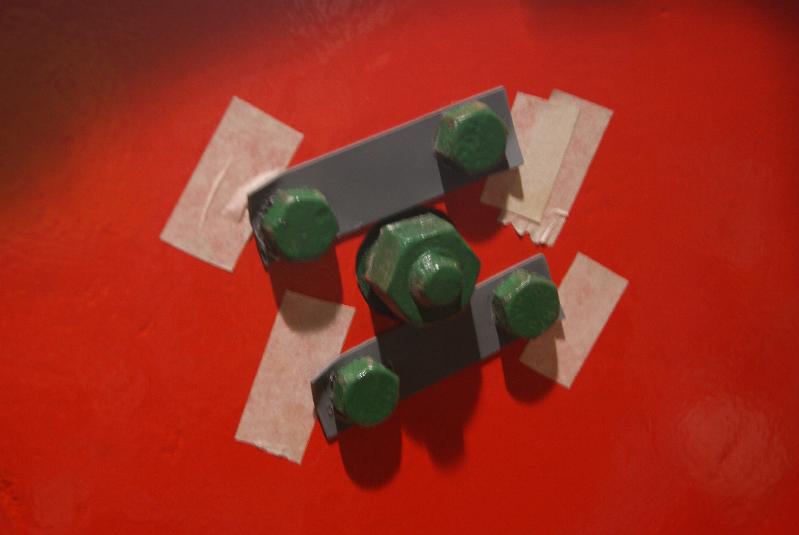
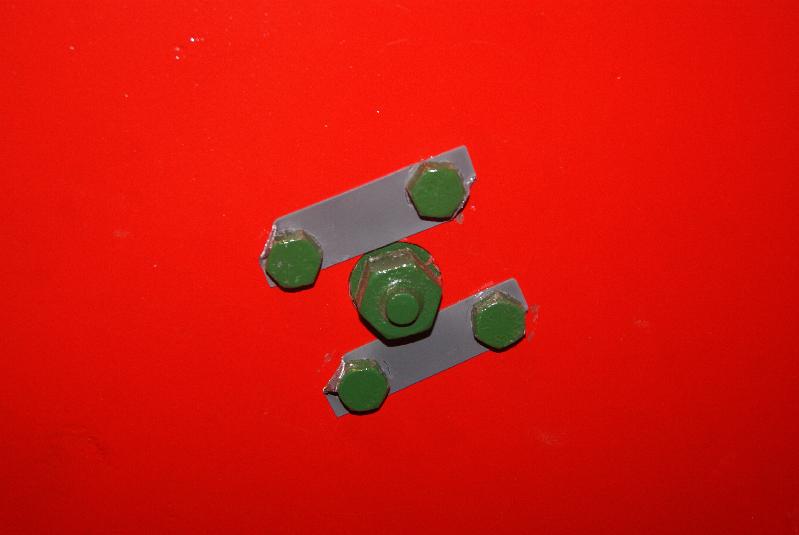
On to business- today has been wet and so I was confined to the garage again to carry on with the wheels. Searching for bolts I came across two very interesting ones; one had the name “BEES” and a drawing of a bee stamped in the head and the other had “SPARTS” stamped in. They have come from these wheels but apart from that I know nothing of their origin. Do any of you know which companies used these trade marks? Pictures below if you don’t believe me!
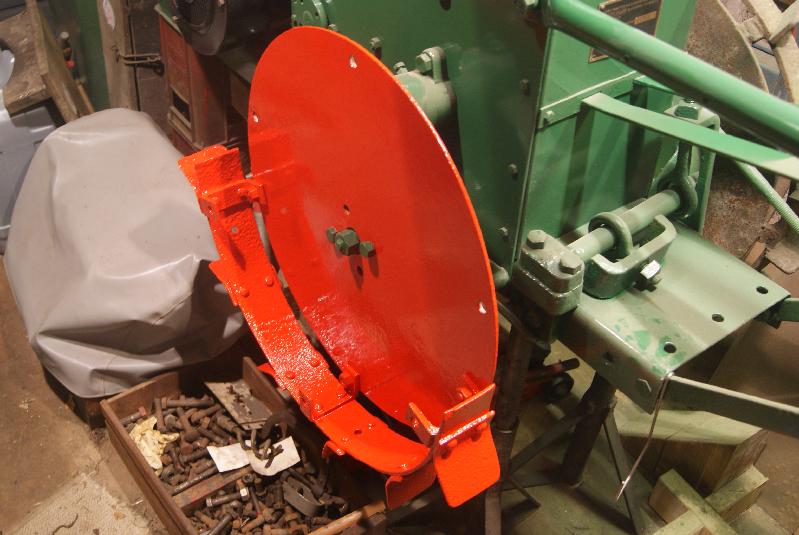
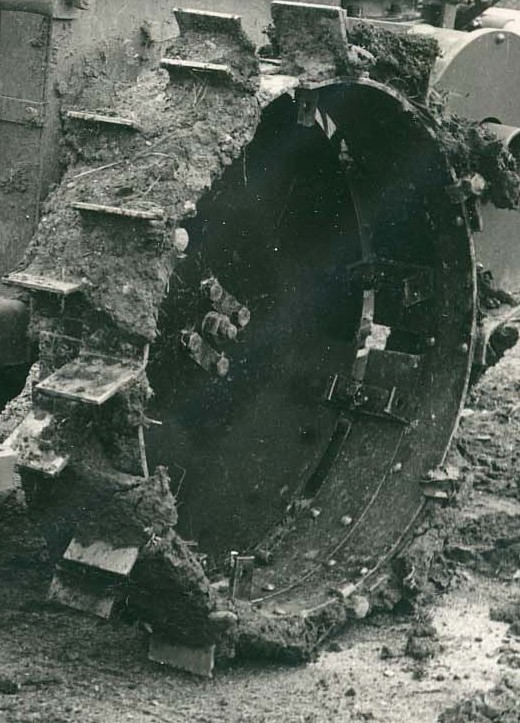
One segment is now fitted to the wheel disc and painted, the second half of the inner segment is on the bench with the first coat of red on it. Once they are both fitted there is a second row of strakes which fit to the outside of this but these are rivetted to a continuous strip that has been rolled into a circle; it is clamped to the first row with a series of hook bolts which I’m going to have to make somehow (I haven’t worked that one out yet).
Attachments:
October 6, 2020 at 9:29 am #35519trusty220KeymasterThe wheel has been progressing well so far and I have fitted the second segment to complete the inner ring of strakes; no drama whatsoever and you will see the finished item in the pictures.
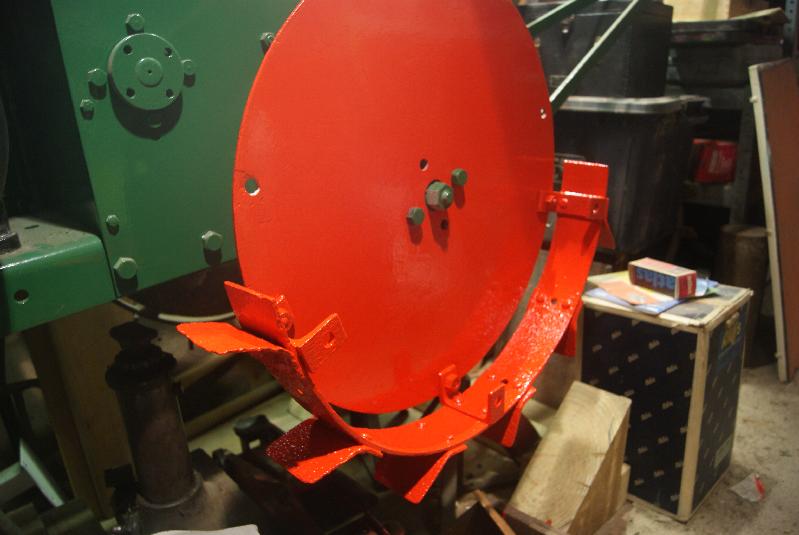
One thing that normally gets missed off most Trusty restorations is the locking strips that prevent the wheel bolts from coming undone in use. With iron wheels the vibration is considerable and the bolts can shake loose quickly if not tightened on a regular basis and so the factory fitted two strips of metal to each wheel to keep the bolts tight. They are a simple thing to make: each strip is 3 1/2″ long by 1″ wide with two 1/2″ holes drilled 2 1/2″ apart. They fit under the head of the wheel bolt and the corner of the strip is turned upwards against one of the flats of the bolt head once the bolt is tightened. You get the idea from the pictures.
Years ago when they were new I don’t suppose much thought was given to protecting the paintwork when knocking these tabs over; I didn’t want to undo my good work, so I started by sticking a piece of masking tape alongside each tab. The masking tape will tear easily and so I used a patch of insulating tape over this to take the abrasion of the cold chisel; it did work but I think Duct Tape would have been stronger. Why didn’t I just stick that to the wheel and forget the masking tape? the glue they use on these tapes can lift the paint off and so I needed something a little less aggressive next to the paint.
You can judge for yourself the results.
Next job is to find some way of making the hook bolts to attach the outer ring. I don’t want to use roofing bolts because the thread is always metric and I want to keep this true to how it was made. Nobody said it was going to be easy!
Attachments:
October 7, 2020 at 7:45 am #35535 charlieKeymaster
Looking good. I guess making the J bolts will require the correct size round bar, a suitable jig for bending the bar and the application of heat to ease the bending process.
October 7, 2020 at 1:23 pm #35538trusty220KeymasterThat’s the problem, Charlie. Looking at the old pictures it looks like they used 1/2″ round bar turned through 180 degrees to form a “J” and threaded (probably 1/2″ BSF) on the other end. A small curved washer was used to hold it to the outside so that the two rings were held between two hooks that could be bolted up tight.
I can get hold of the round bar but my problem at the moment is how to heat it to get it to bend without all my workshop stuff. The rest is pretty simple engineering that I can do with the tools I have in the garage; I wonder if the gas stove will get it hot enough? Better check the fire extinguishers first!
Attachments:
October 8, 2020 at 8:14 am #35556charlieKeymasterI have a Rothenberger Super Fire torch which runs on MAP gas, that would get the bar glowing red without too much trouble.
October 9, 2020 at 12:00 pm #35563trusty220KeymasterThat would work but I’ve already bought a birthday present for Mrs. Geoff. Oh well, I could always buy her one for Christmas!
October 9, 2020 at 8:24 pm #35570halfa
ParticipantI love the attention to detail, I also can’t bring myself to use metric thread bolts on my trusty’s. Mapp gas on a blow lamp will easily heat 1/2 inch bar to red hot.
October 11, 2020 at 10:49 am #35577trusty220KeymasterThanks for the advice. When you’ve got to spend £100 you need to be certain it will do the job. How is your Norton engine these days?
October 21, 2020 at 4:43 pm #35618trusty220KeymasterRaining again today so a few hours in the garage.
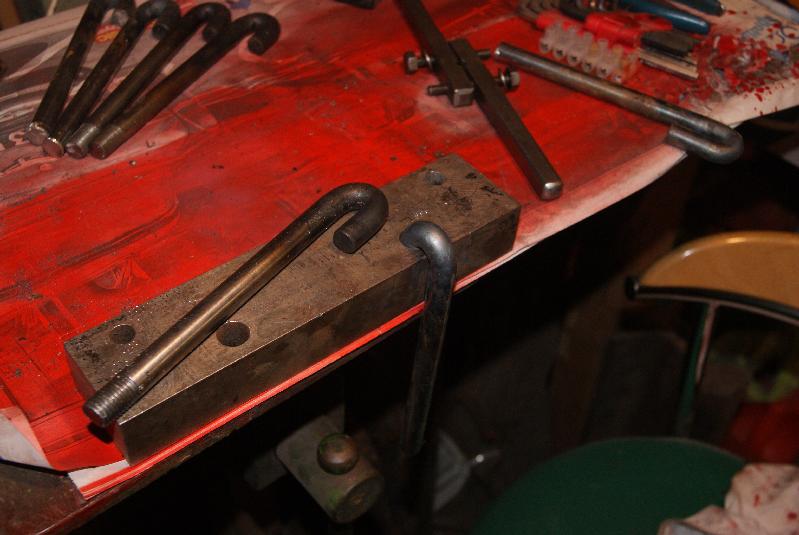
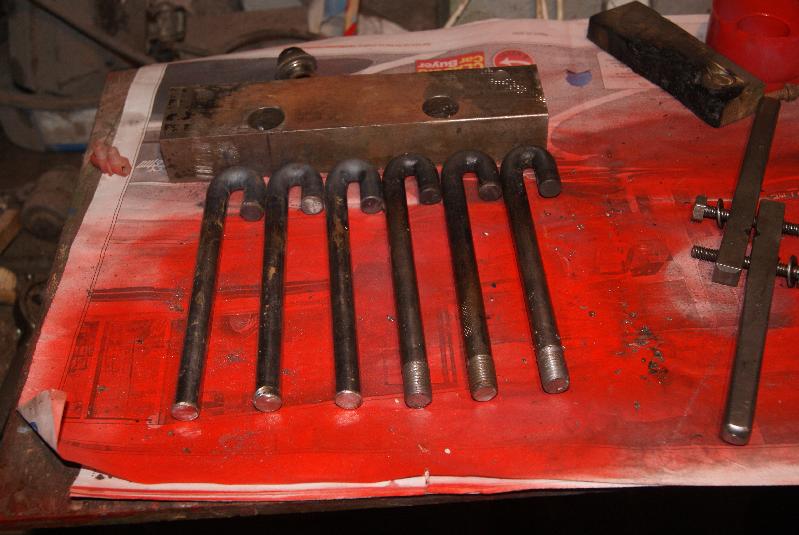
I managed to buy some 1/2″ bright round bar from the steel stockist up the road and so I went over to see Johnny Polish; he has an oxy-propane set, so armed with my jig I hurried over to see him. Each one was warmed up to cherry red, inserted in the hole in the jig and bent through 90 degrees before the heat went out; a quick warm up again and the second part of the bend was completed by tapping with a hammer to get the complete 180 degree hook that I wanted.
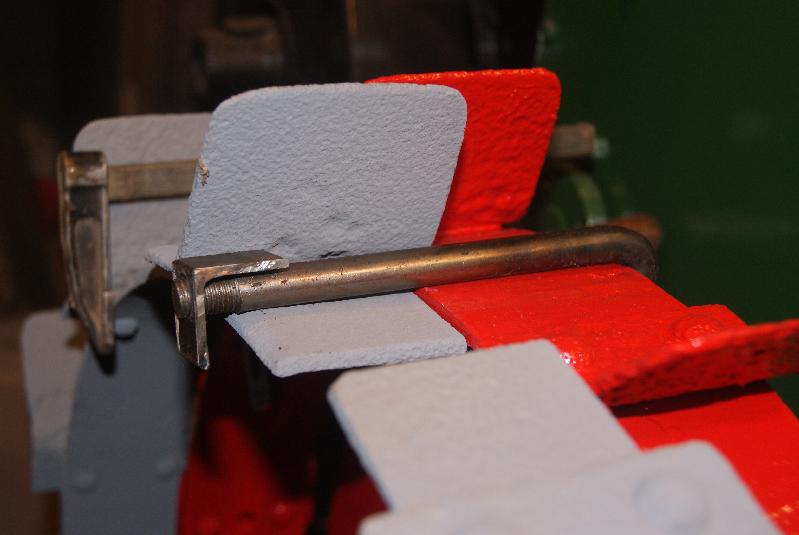
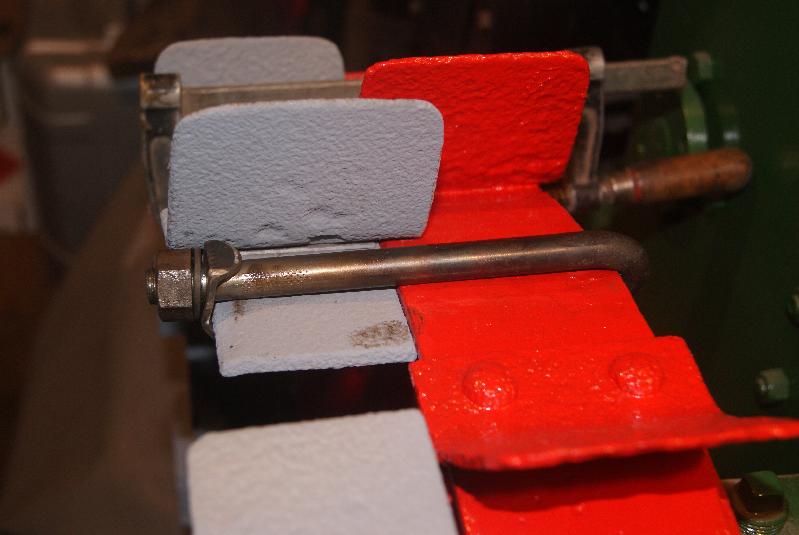
Back home I cut a 1/2″ BSF thread on the other end and the hook was finished. If you study the old factory photo’s of the wheels you will see that there is also a special washer that goes under the nut to keep the other end of the hook bolt in contact with the rim. It has a flange on the top to stop it tipping and a hooked piece underneath which holds it in place under the outer rim.
Starting with a piece of angle I drilled a 1/2″ hole for the hook bolt to go through, then cut and hammered the rest of it into shape until it looked something like the original. It seems to work and you can judge for yourselves whether it looks right or not- I now know why the outer row of strakes wasn’t fitted when I bought it off Brian, because they are an absolute swine to get lined up and clamped down. I’ve left that for another day when I’ve got a fresh round of enthusiasm and my blood levels have recouped! Thinking about it, that’s probably why the wheels are painted red- so they don’t show the blood!
Attachments:
October 22, 2020 at 8:34 am #35633charlieKeymasterLooking good, very satisfying when it goes to plan.
October 22, 2020 at 6:09 pm #35640trusty220KeymasterThanks for your kind comment, Charlie. I’m juggling this rebuild with work on the farm and rebuilding my trailer, that’s why there are large gaps inbetween stages. One day….
October 24, 2020 at 8:00 pm #35656ParticipantHi Geoff, the Norton project is going very well thanks, really enjoying it. Your restoration standards are inspiring me to do it justice.
October 26, 2020 at 10:30 am #35686trusty220KeymasterThanks for your kind words again. Don’t forget, take your time because the results will last longer and give you more pleasure than if you rush the job and regret it afterwards.
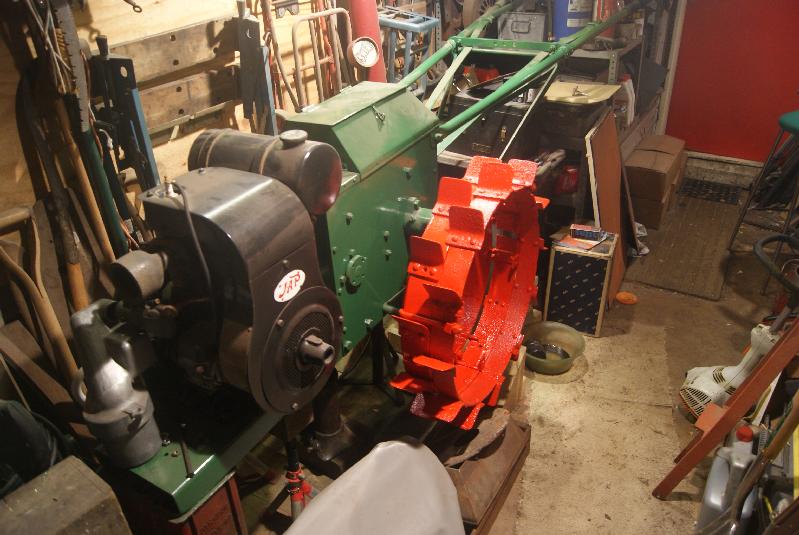
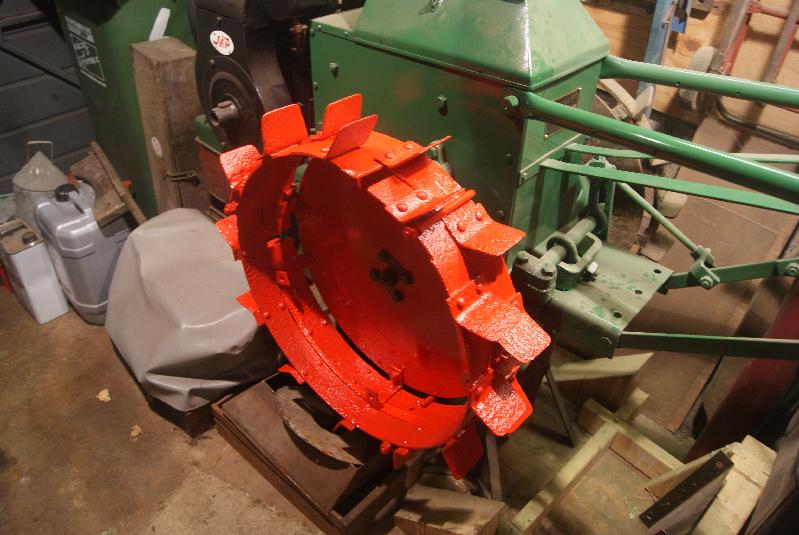
November 1, 2020 at 5:44 pm #35705trusty220KeymasterWhat weather! Unable to work on the trailer- it’s in a barn but the wind is blowing from the wrong quarter- and far too wet to get anything done on the farm, the garage was the best place this weekend. The job that needed finishing was the wheel on the Trusty; everything was complete but needed painting before assembly, so that was done on Saturday ready for a final go on Sunday.
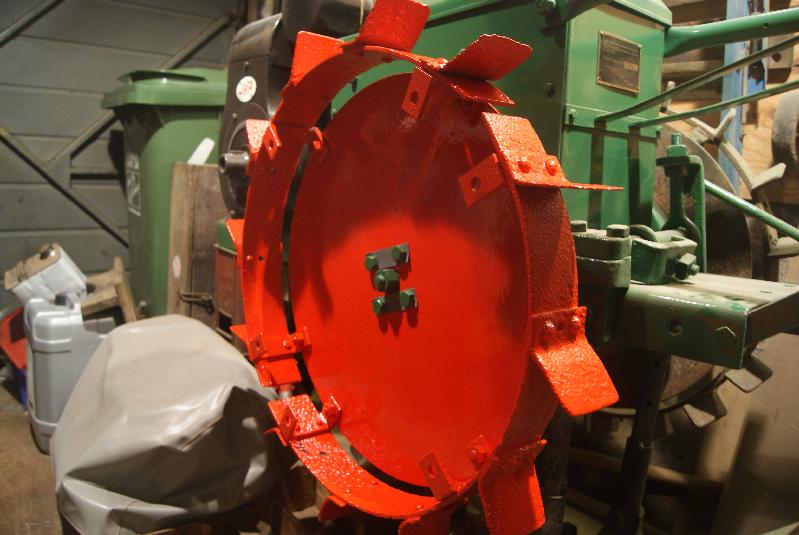
As you can see from the finished pictures it was worth putting the second row of strakes on, but it did make me swear more than a little and my knuckles and fingers have suffered as a consequence. The problem was that the second row of strakes is rivetted to a steel ring that was probably circular when it was made but is now oval with some circular bits- you can see my problem! It is compounded by the way the strakes are overlapped as well, so that once lined up they do slot into place but it is a major operation to slot each one into place one at a time.
The best method I found was to contract the ring with a ratchet strap so that it was roughly the right diameter, then start at one end (the ends aren’t welded) tapping the strakes with a rubber mallet and pulling them in with a hook bolt. Working around the rim, tapping each strake in turn to start it then pulling it in with a clamp I eventually found myself back to the beginning.
I then awarded myself a pint mug of tea before splashing some red paint all over it to hide the blood stains. One thing that I avoided doing was skimming the metal with filler to smooth it off, because there will be so much movement of the metal as the weight of the tractor comes on it that the filler would soon flake off, then it would look worse than if I’d never bothered. If you look closely you will see that the strakes are quite pitted still for this reason. Still, the overall effect is quite pleasing so it will have to do unless I make some new strakes and rims, but then it wouldn’t be original.
Attachments:
November 24, 2020 at 2:33 pm #35978trusty220KeymasterThe trailer is now finished and back out of the barn, the two Internationals are now in the barn out of the weather for the winter and the fields are too wet to do anything on, so it’s back to the Trusty.
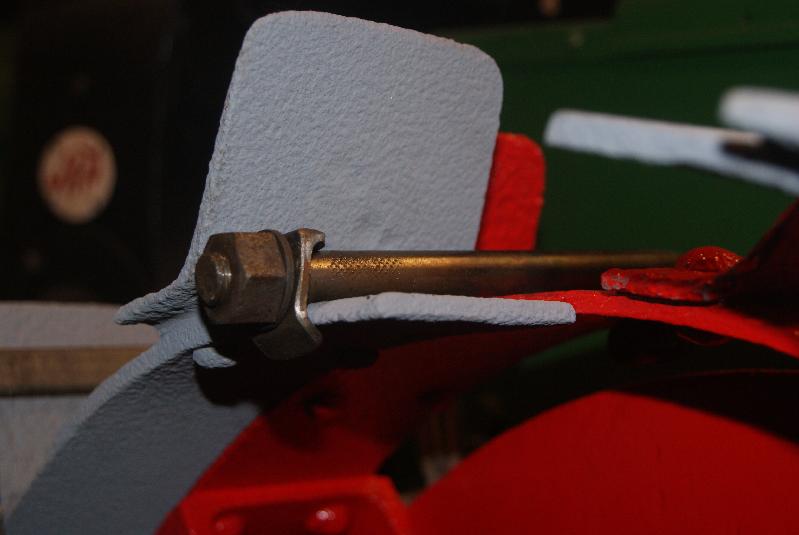
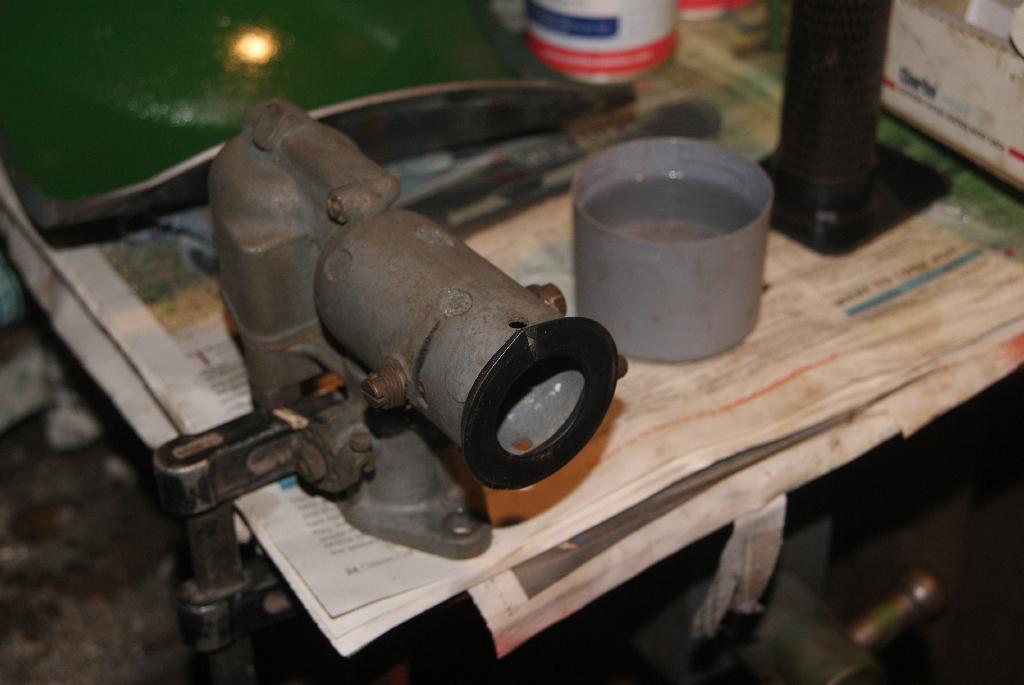
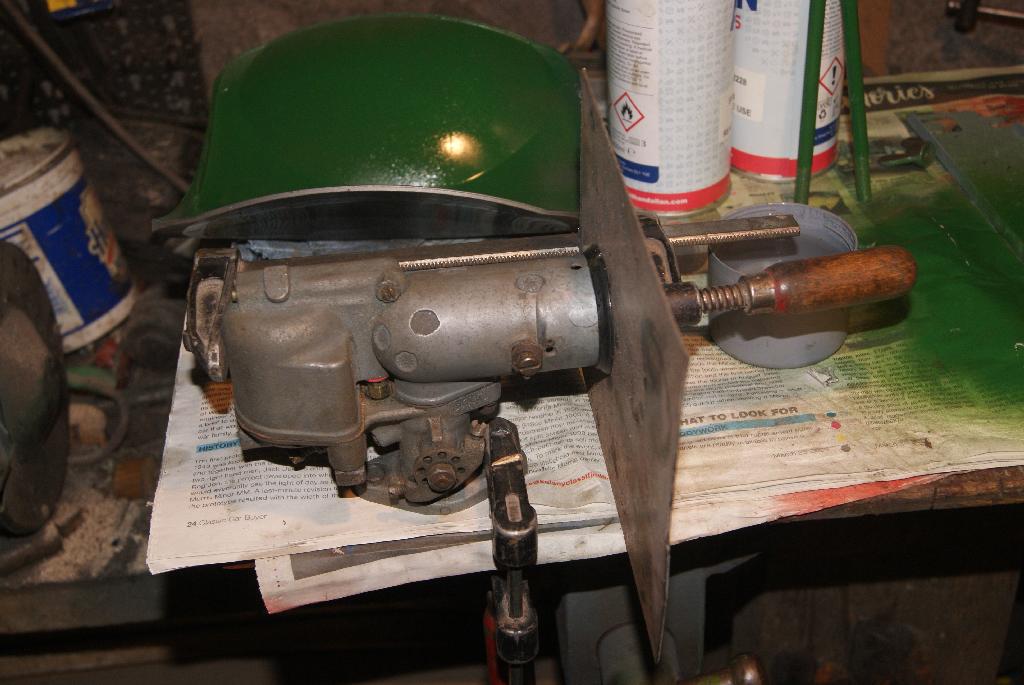
With the first wheel finished and painted it was time to sort out the front end before I lower it down and turn it around so that I can work on the second wheel. The air filter is a distinctive feature of this early model and it simply has to be right; what I can’t work out is how the top of the filter is supposed to connect with the carburetter. The lower part is easy enough to work out and all I needed to do was to make up some rods that screwed through the chassis. The top of these go through hooks on the top of the filter housing and hold the top housing down to the base. I’ve ordered up some wing nuts to complete the job, so they should look the part once they arrive.
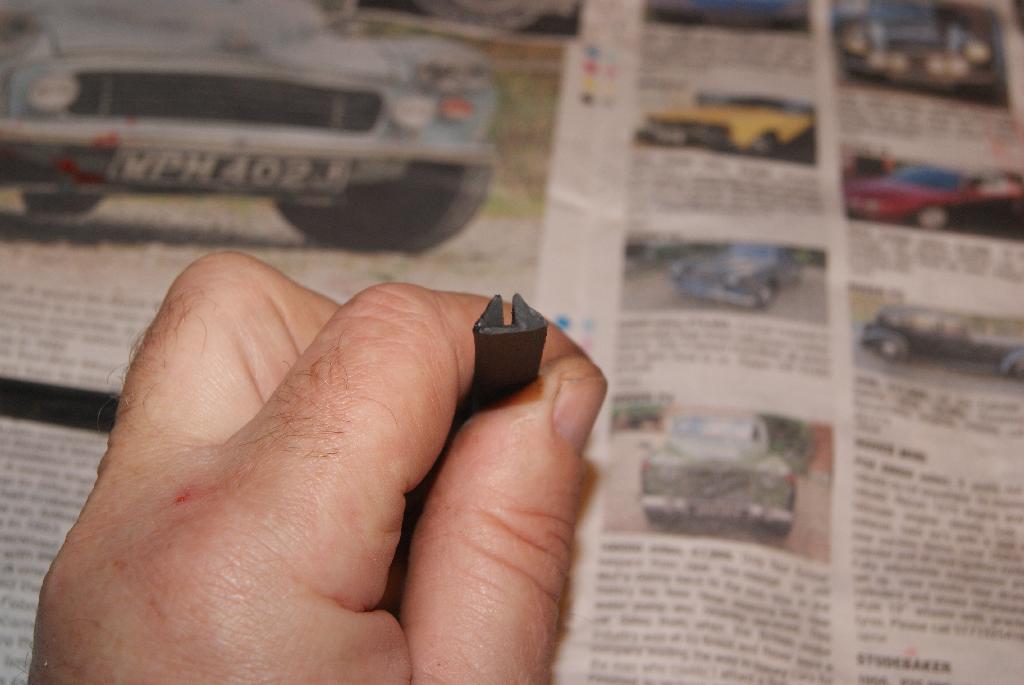
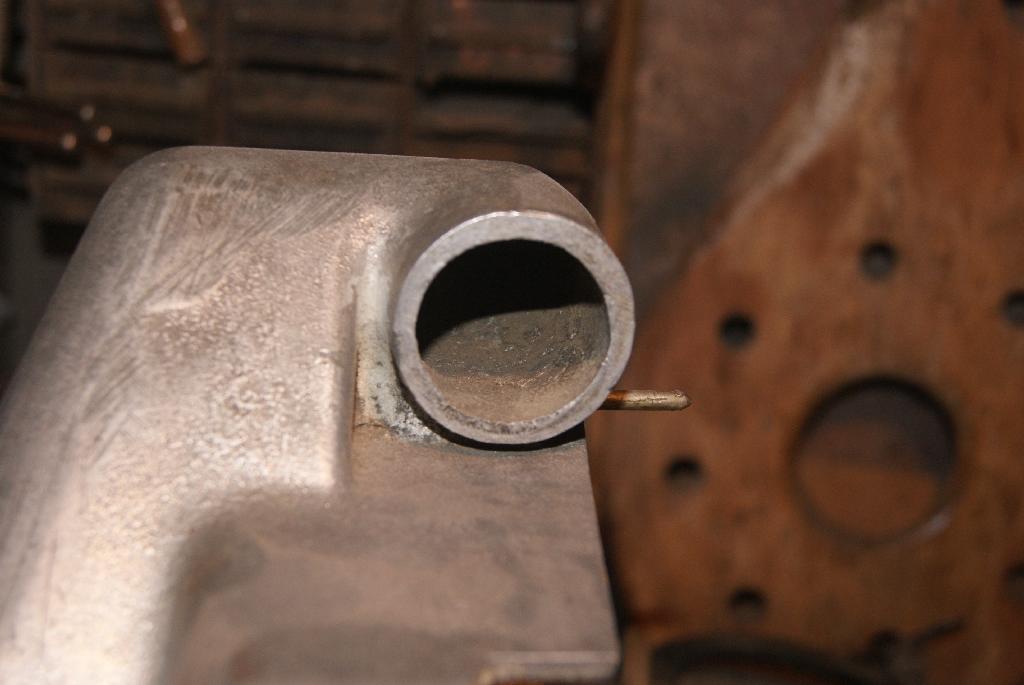
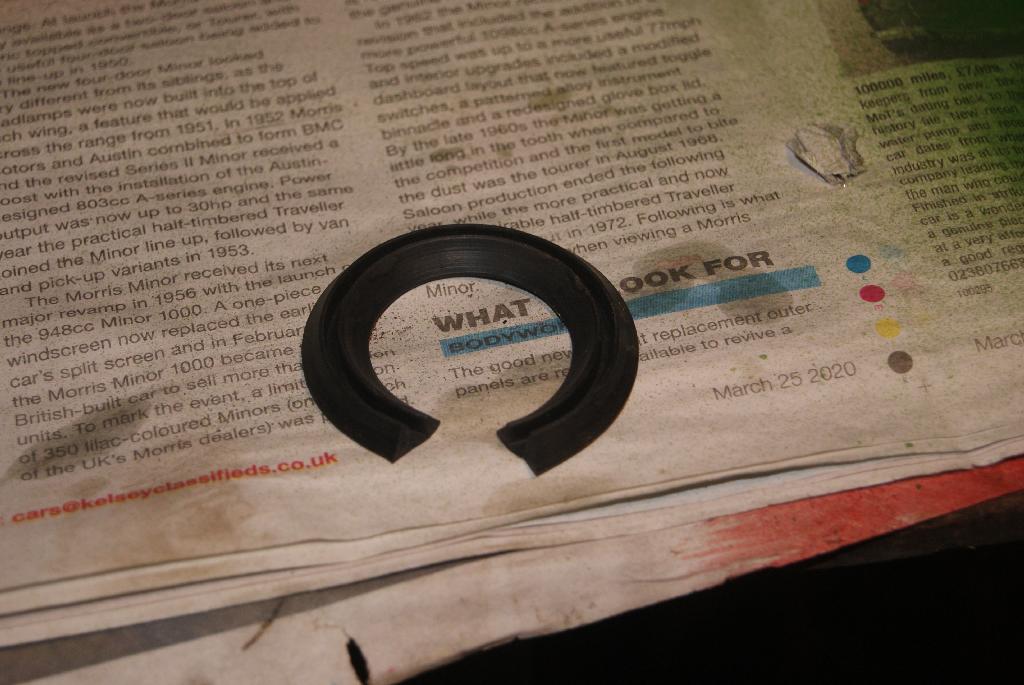
At the top of the housing there is a cast tube which is exactly the same diameter as the inlet of the carb. Unfortunately there is not enough gap at the bottom of the tube to bridge the space with a piece of radiator hose but at the back of the housing there is a small post with a hole at the end; I’m guessing that it was far a spring to hold the housing against the carburetter, so I decided to use some rubber that I have for holding the overriders to the bumper on the GT6. It’s flat one side with a groove in the other (see picture) and would look just right if I could get it to go round the small tube.
The secret to getting it workable is to get it hot, so into boiling water it went and then quickly pressed into position to cool. That sounds easy but took quite a few attempts before an acceptable result was achieved, then I found I’d cut it too short! Never mind, it was an experiment to see if I could get it to retain it’s shape, so I made another one a little longer and trimmed it to fit at the end. Clamping a steel plate over it, I heated up the carburetter body and the steel plate then left it to cool and it worked! I’ve now taken it all apart and put expanding glue inside, then clamped it all up again.
Cup of tea time, methinks!
Attachments:
-
AuthorPosts


- You must be logged in to reply to this topic.
VHGMC Forums
Got a machine and need info or have a question? Then a post in the VHGMC forums is a great place to start!
Who's Online
There are no users currently online