Forum Replies Created
-
AuthorPosts
-
August 10, 2015 at 8:56 pm #14000
 trusty220Keymaster
Getting colder……..
August 10, 2015 at 7:05 am #13997trusty220KeymasterKeep going……
One of you was starting to get warm, but I’m not saying which one!
August 9, 2015 at 6:12 pm #13994trusty220KeymasterThat would be a very long post!
Try again; no more clues for a couple of days!
August 9, 2015 at 2:44 pm #13992trusty220KeymasterTry again.
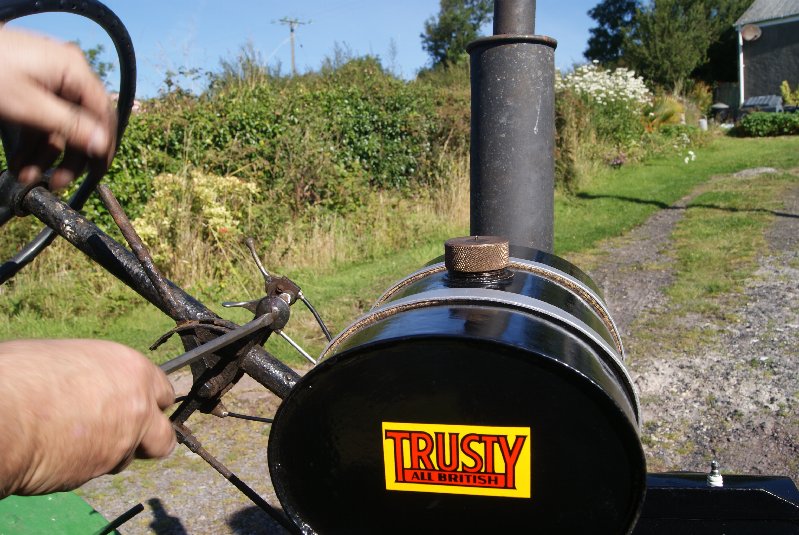
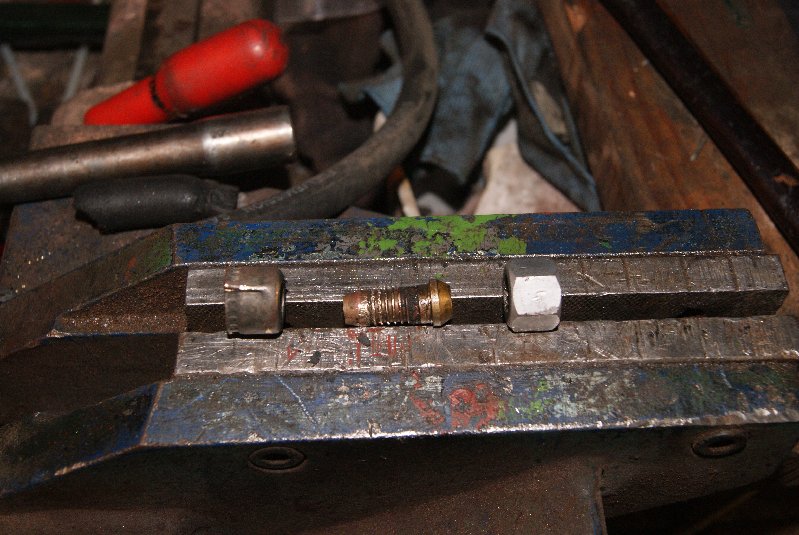
First clue:- The cylindrical piece at the base does not have a bottom.
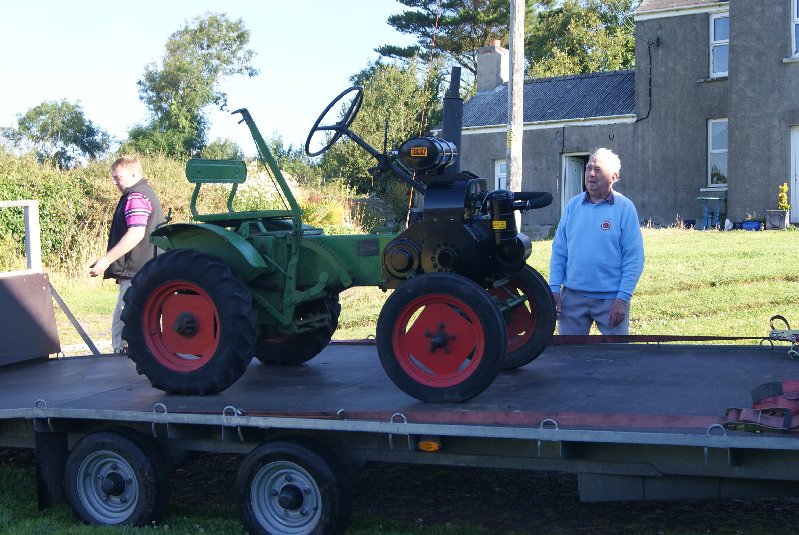
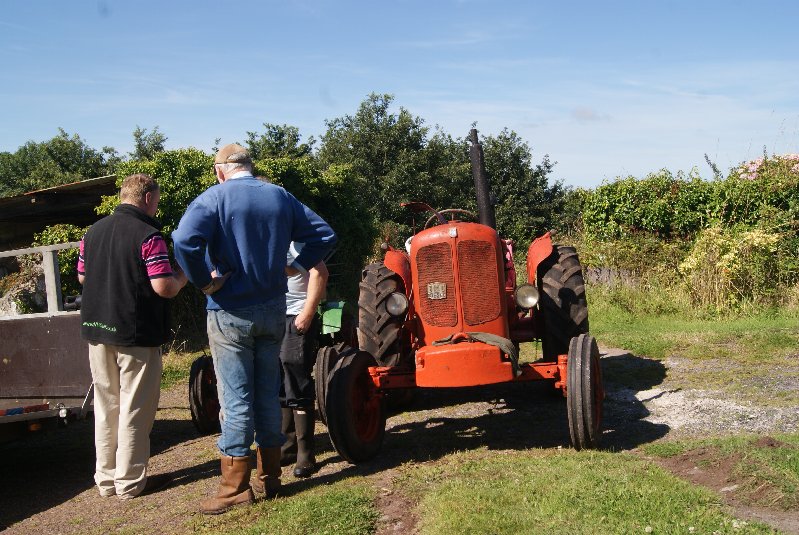
August 9, 2015 at 1:56 pm #13983trusty220KeymasterThe final part of this saga took place yesterday when we took the Trusty back to Wales. Lovely weather (as you can see from the pictures) but it didn’t go entirely according to plan.
We got there nice and early so that the owner, Pete, could have a good look at it before he went off to do his voluntary work at a local museum. Once at the farm we unloaded it onto a piece of level ground so that I could start it up. As you can see from the pictures there isn’t much level ground in the neighbourhood, but there was a bit at the back of the trailer and so I prepared to start it up where it was unloaded.
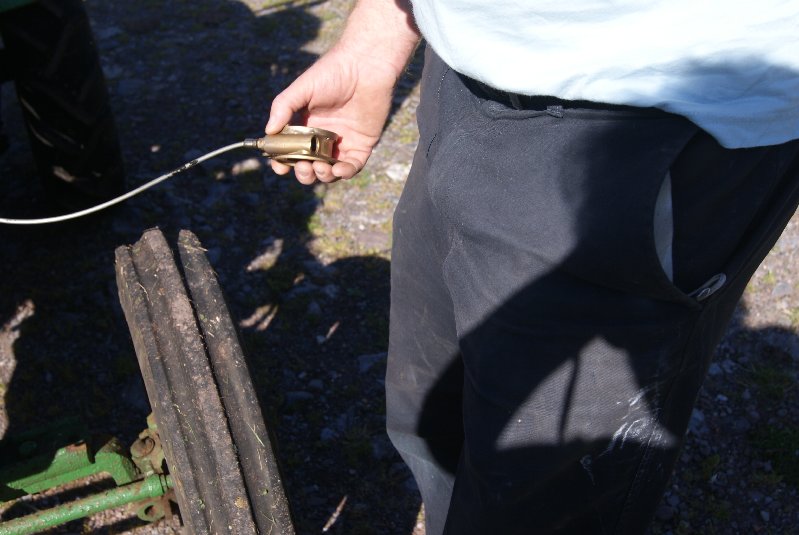
Wind the strap onto the pulley, set the throttle to 1/4 open, turn the petrol on and flood it on the carburretor, set the ignition to “Retard”- the advance/retard cable came loose at the magneto end! It was either the nipple had come off the cable or the cable had come out of it’s collet inside the mag, so I had to do a quick strip down to find out.
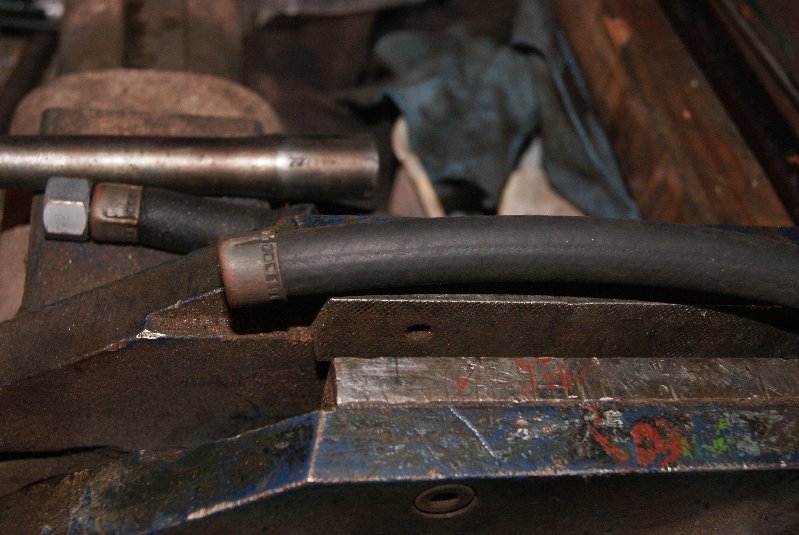
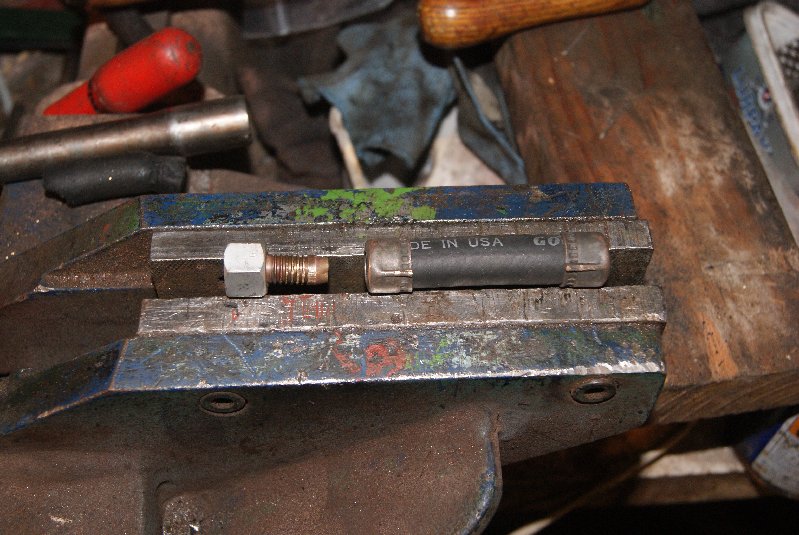
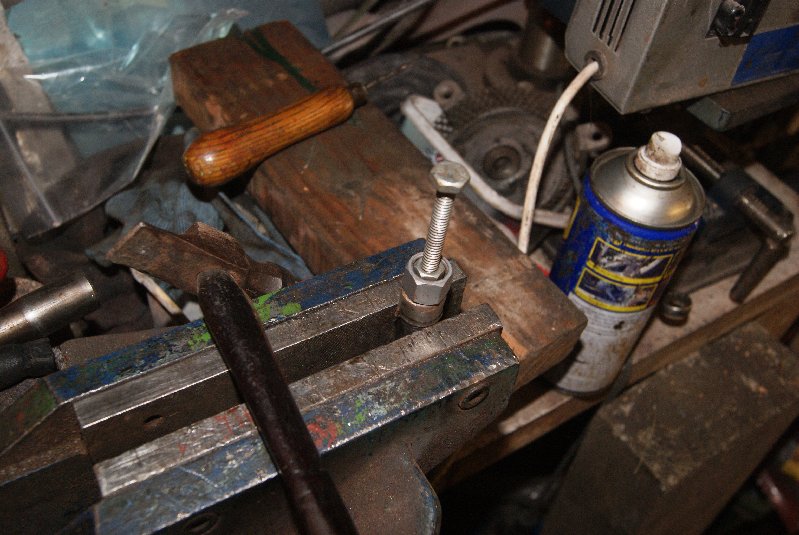
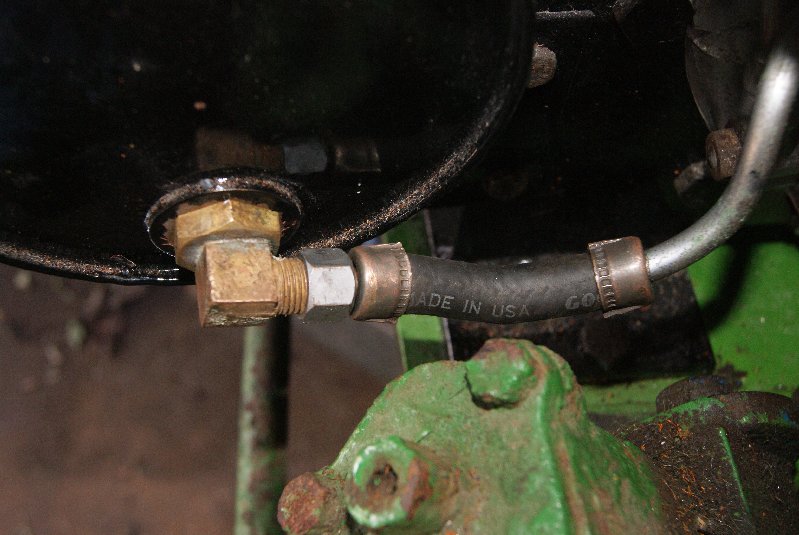
Luckily it was the latter- I think the cam ring had jammed in it’s housing, then when I moved the lever the cable pushed the collet out of it’s location and came free. A quick re-assembly, tightening the collet at the same time so that it couldn’t happen again and fingers crossed- it started! Pete couldn’t climb up onto the footplate because of his arthritis, but his son Barry had a go and went for a spin up and down the farmyard. It was going great until yours truly had a go back up the farm drive; I put it into third gear and gave it full throttle, then halfway to the top the engine just died. Jumping off I found that the nipple had come unsoldered from the end of the petrol pipe, so it was back to the farm to see what we could do.
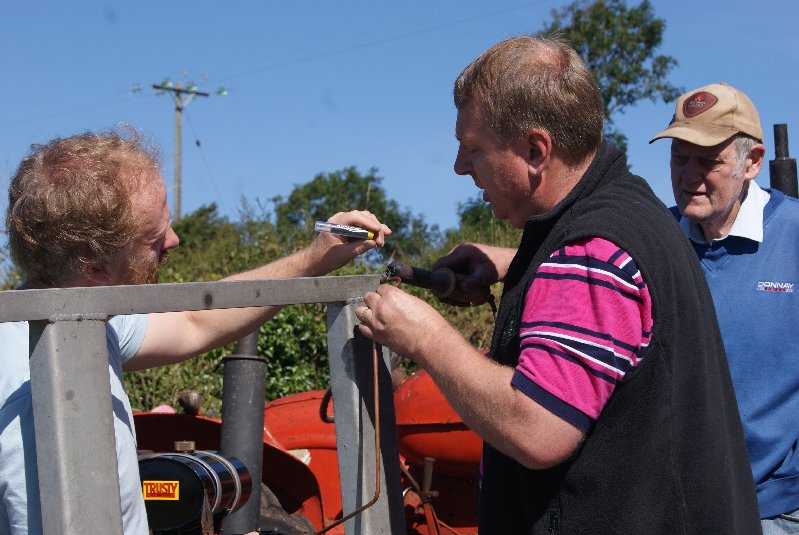
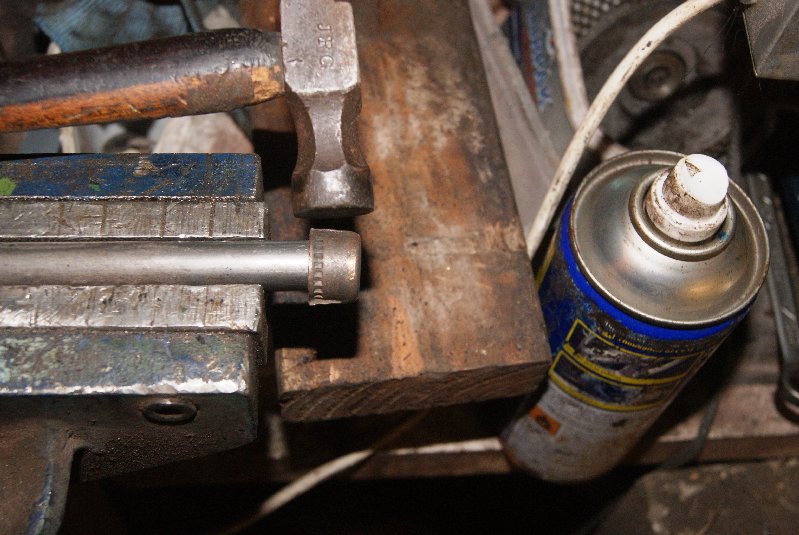
Pete’s neighbour, Dave Packer, came to the rescue with a calf de-budding tool. It was really a large soldering iron that you could clip onto a tractor’s battery so that you could de-bud (de-horn) calves in the field, so Barry brought the Nuffield round and we set to work trying to get enough heat into the joint to melt the solder. As you can see from the pictures it was a team effort to repair it but eventually proved successful. Quite an eventful morning and I can’t thank Barry and Pete enough for mucking in to help.
It was quite ironic that the parts that let me down were parts that I hadn’t worked on- the magneto was an outside repair and came back with the cable fitted and the petrol pipe seemed fine when I polished it up; it just goes to show that you can’t take anything for granted. It reminds me of a blackboard in one of my customers’ workshops- in big letters across the top is chalked, “ASSUME NOTHING!”.
How right he is!
Attachments:
August 5, 2015 at 7:54 pm #13957trusty220KeymasterLeave some room for me- I’ll get there on the Saturday.
August 5, 2015 at 5:36 pm #13956trusty220KeymasterThat doesn’t sound normal at all, I’m afraid.
My best guess is to look at the magneto timing because it sounds a little too advanced. It can produce the effect that you describe without being too far out of adjustment.
The best way to double check it is to remove the cover plate on the top of the cowling and unscrew the bolt (which is really a plug) underneath. This will allow you to insert a rod straight down onto the piston crown so that you can find TDC without dismantling anything. It is then easy to turn the engine backwards so the piston descends 3/8″.
Another mistake that I’ve seen with these Big Four engines is that the direction the magneto turns is different, depending on the model. The one you should have is the 639cc version as opposed to the 598cc version that is found on the 2-wheeled Trusty.
As the 639 takes the magneto drive off the inlet camshaft the points assembly rotates in a clockwise direction, but the 598 takes the drive off the end of the crankshaft and the mag turns the opposite way. If you are following the wrong manual you may have got the timing wrong and not be aware of it.
I’m assuming that you have retarded the magneto before starting and that the adjustment doesn’t slip back to fully advanced on it’s own?
By the way- the Trusty that Steve “the Gnome” was talking about belonged to me, and it was his “drop of the good stuff” that b*****ed up my engine. It ran fine until he put some Lincolnshire cocktail in, and it ran fine again once I’d taken it all out again and put some good old Shell Unleaded in. Draw your own conclusions, but he’s not allowed anywhere near the filler cap any more!
I hope that helps, Sean. The offer’s still open if you want it.
August 4, 2015 at 6:31 pm #13950trusty220KeymasterWhere are you in the country? Do you want me to come over and run my eye over it?
August 4, 2015 at 1:31 pm #13946trusty220KeymasterThanks for that vote of confidence. We’re just a normal group of blokes that like to share our knowledge with like-minded people. There’s absolutely no point in falling out with others, no matter what the reason.
This is our hobby and, as such, it should be enjoyable.
Am I right?August 4, 2015 at 1:24 pm #13945trusty220KeymasterThanks for that but I found some at work! Because I’m on leave Monday and Tuesday I didn’t want to contact work, but when my enquiries proved fruitless I decided to call the stores manager. It turned out that he keeps some by for older pedestrian mowers (we still get a few Ransomes Auto Certes mowers in for repair) and so I went over to pick some up. It’s made by Comma and is sold in 5 litre tins with a picture of an MG TC on the outside.
Anyway, I filled the oil tank and put some petrol in the other tank, wound the strap on to the starter pulley, turned it back against compression and pulled. OWWWW B****r!!!
What I had forgotten to do was to set the magneto to fully retarded and it had stopped the engine dead, straining my wrist and making me curse.
Try again with the magneto set to retarded and after a few pulls it went. It runs rough on retard, but once it is set to advanced it settles down to a smooth tick over with a lovely crisp beat to the exhaust. I think the main reason that it didn’t fire first time is that the piston rings weren’t sealing in the barrel properly and it needs a little bedding in time. Once the petrol and oil had got up to the top end it went with no trouble at all with no adjustment necessary. Great!
Once it had started the first thing to look at is the oil return line into the tank; if it is flowing with oil then it proves that oil is getting through to the engine and the pump is working properly. If the scavenge side is working then the pressure side to lubricate the engine must be as well.
Idle curiosity led me to tinker with the idle mixture screw; it did exactly what it should do in that it caused the engine to misfire as I wound it in, and so I wound it out again until the smoothness returned. I then turned it out until the engine ran rough again, then halved the amount between the two limits and left it at that. It is an important adjustment in that it not only controls the petrol/air mixture on tick-over but it also controls how the engine picks up when the throttle is opened; there is a series of pin holes drilled next to where the butterfly closes, so that when the butterfly opens it progressively uncovers the holes so that a smooth acceleration is achieved. If you adjust the jet to give a lean mixture on tick-over you run the risk of compromising how the engine accelerates.
Anyway, it runs! Just a few small leaks on the carburretor where I replaced fibre washers and so I’m hoping that the petrol will swell them to seal the drips. Back to Wales on Saturday with it, let’s hope we get good weather on the day!
Thanks for following the rebuild, I’m sorry that it’s taken so long. In my defence I have come across most of the problems encountered on this engine before, but never all on the same engine.
A celebratory drink is called for.August 3, 2015 at 5:24 pm #13939trusty220KeymasterProbably for spreading DDT on a very wide-spaced crop. Possibly sugar beet or turnips, but I’m only guessing. It looks like there should be something to rattle the boxes to persuade the dust to come out as well.
Well done for finding something as unusual as this.
August 3, 2015 at 5:19 pm #13938trusty220KeymasterHi, Dave. You forgot to mention that as it is a club working weekend it is for club members only. If any non-members would like to go there is still plenty of time to join.
August 3, 2015 at 5:16 pm #13937trusty220KeymasterIt’s not mine- I’m doing it for a friend and it’s going back home to Wales this Saturday. I’ll bring a 3-speed Trusty with a plough and the 3-speed with the bogey seat and mower this time.
Update- the exhaust’s now fitted and the paintwork touched up in a few places (mainly where I’ve added pieces and the bolt heads and nuts needed some paint on). Struggling to get hold of some SAE 30 oil to put in it to start it up; if I can’t find any I’ll have to use 20W50, but I’d prefer to use non-detergent oil if possible to give the rings a chance to bed in.
Keep everything crossed!
August 3, 2015 at 8:59 am #13923trusty220KeymasterI’ve got a bit of catching up to do this time, I’m afraid. Besides other things getting in the way I have made steady progress on the project, so much so that it is finished apart from mounting the exhaust.
I will go through some of the more fiddly bits that got me scratching my head in the hope that anyone doing the same work can see how I tackled the job.
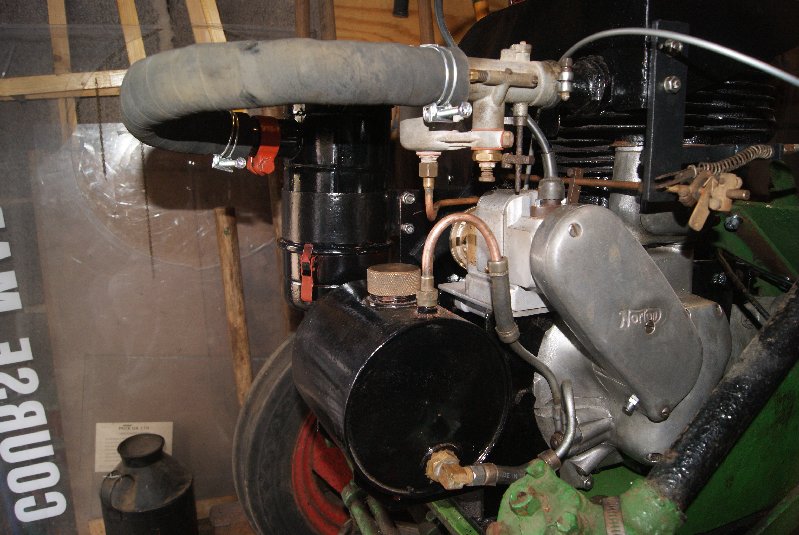
Starting from the front of the engine I decided to fit a new pipe to connect the air filter to the carburettor. This sounds easy, but I couldn’t find one with a suitable sharp bend in it and so I opted for a longer pipe with a more gradual curve; it may work better in keeping the airflow smoother as well, but only time will tell. It was secured at both ends with wire clips like the original was, not with jubilee clips which are definitely a much later idea.
Next to follow was the oil tank and it’s plumbing; this was something that I was dreading because the pipes are designed with an anti-vibration rubber joiner in them. Needless to say, the original rubber had become porous and brittle and wouldn’t have done the job for much longer if I’d left them alone, so back to the spares box to see what I could find suitable. A length of flexible diesel tubing came to the rescue and I thought that if it was suitable for diesel then it should be fine for engine oil. Do I just put it on and find some clips to secure it? I think you know the answer to that one- NO!
These pipes are similar to hydraulic pipes in that they have swaged ends and one of them has a swivel fitting to screw onto the tank outlet. Fortunately the rubber was so brittle that it could be picked out a little at a time to leave a clean surface inside, so I then mounted the swaging onto a round bar and hammered lightly until the swaging expanded very slightly, just enough to get the new pipe in. Once the rubber pipe was in I then tried the copper oil pipe in the centre for a trial fit and couldn’t get it out again it was such a tight fit! Counting this a success I then did all the other fittings the same way, apart from the swivel which had it’s own tail which I had to use a drift to drive in once the external swaging was in place.
I only took this course of action because the pipes do not carry any pressure, they only deliver oil to the oil pump and then return used oil to the tank; if they were to carry any pressure at all then a stronger pipe and fittings would be needed, and sourced from one of the many specialists that there are dotted around the country. Don’t be tempted to use this method on hydraulic pipework, no matter how low the pressure- leave it to the experts!
Cables were the next priority. If you can solder then you can make a cable, they are that easy; the most difficult part is getting the lengths of the outer and inner cables right, and also the fact that we are not furnished with three hands to hold everything in position whilst you solder the nipple back onto the cable. Patience and care are the keys to making a good cable; you can even use old cables if they are not too worn. That’s what I tend to do- I save old cables that have perhaps got a fray on the end but are otherwise quite sound and they provide the raw materials for making up shorter cables.
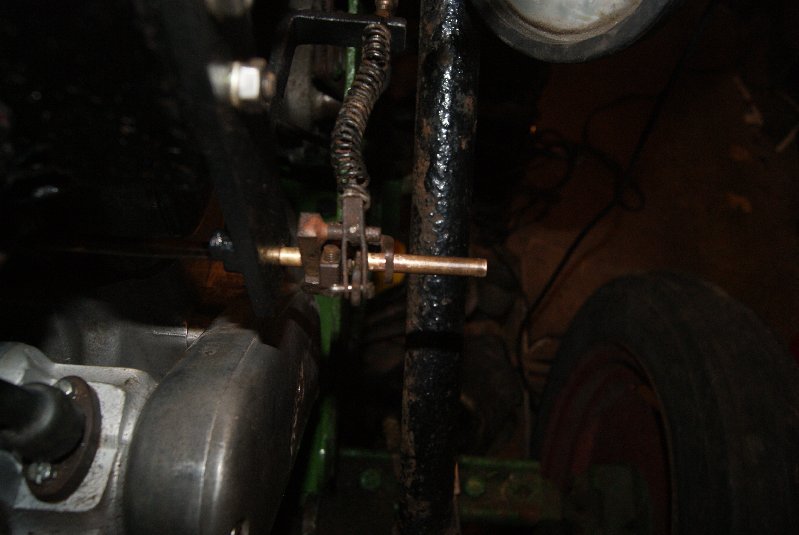
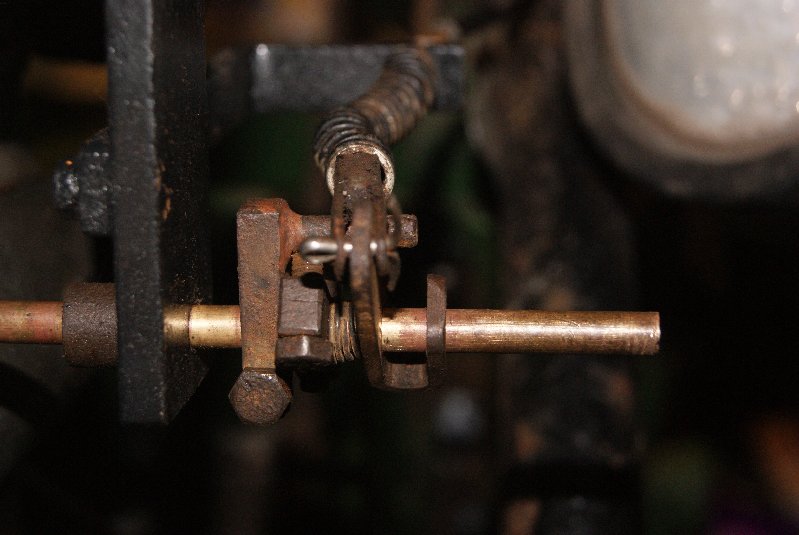
One aspect of the rebuild that really got me thinking was the arrangement of the throttle/governor linkage; how it came to me was obviously not right because somebody had added a tension spring to pull the linkage back to tick-over when the throttle was closed. How it had been assembled on the tractor looked correct but it worked the wrong way around- you could open the throttle and it would respond, but when you closed it the throttle stayed open due to a hairspring keeping the tension on the spindle the wrong way. No matter how I looked at it and turned things around I couldn’t seem to get it to work the way that I wanted until I had a Eureka moment and everything just dropped into place in a different order. I just hope it works when I fire it up!
Apart from a few more mundane run-of-the-mill bits and pieces that’s about it for the rebuild. Next time I will have re-fitted the exhaust and started it up (hopefully!).Attachments:
August 1, 2015 at 9:43 am #13915trusty220KeymasterLooking forward to it already!
-
AuthorPosts