Home › Forums › General › Help and information › Simar 56A Miller Drive Shaft
- This topic has 6 replies, 3 voices, and was last updated 11 years, 3 months ago by
andyfrost.
-
AuthorPosts
-
January 18, 2015 at 4:53 pm #11482
 vhgmcbuddyMember
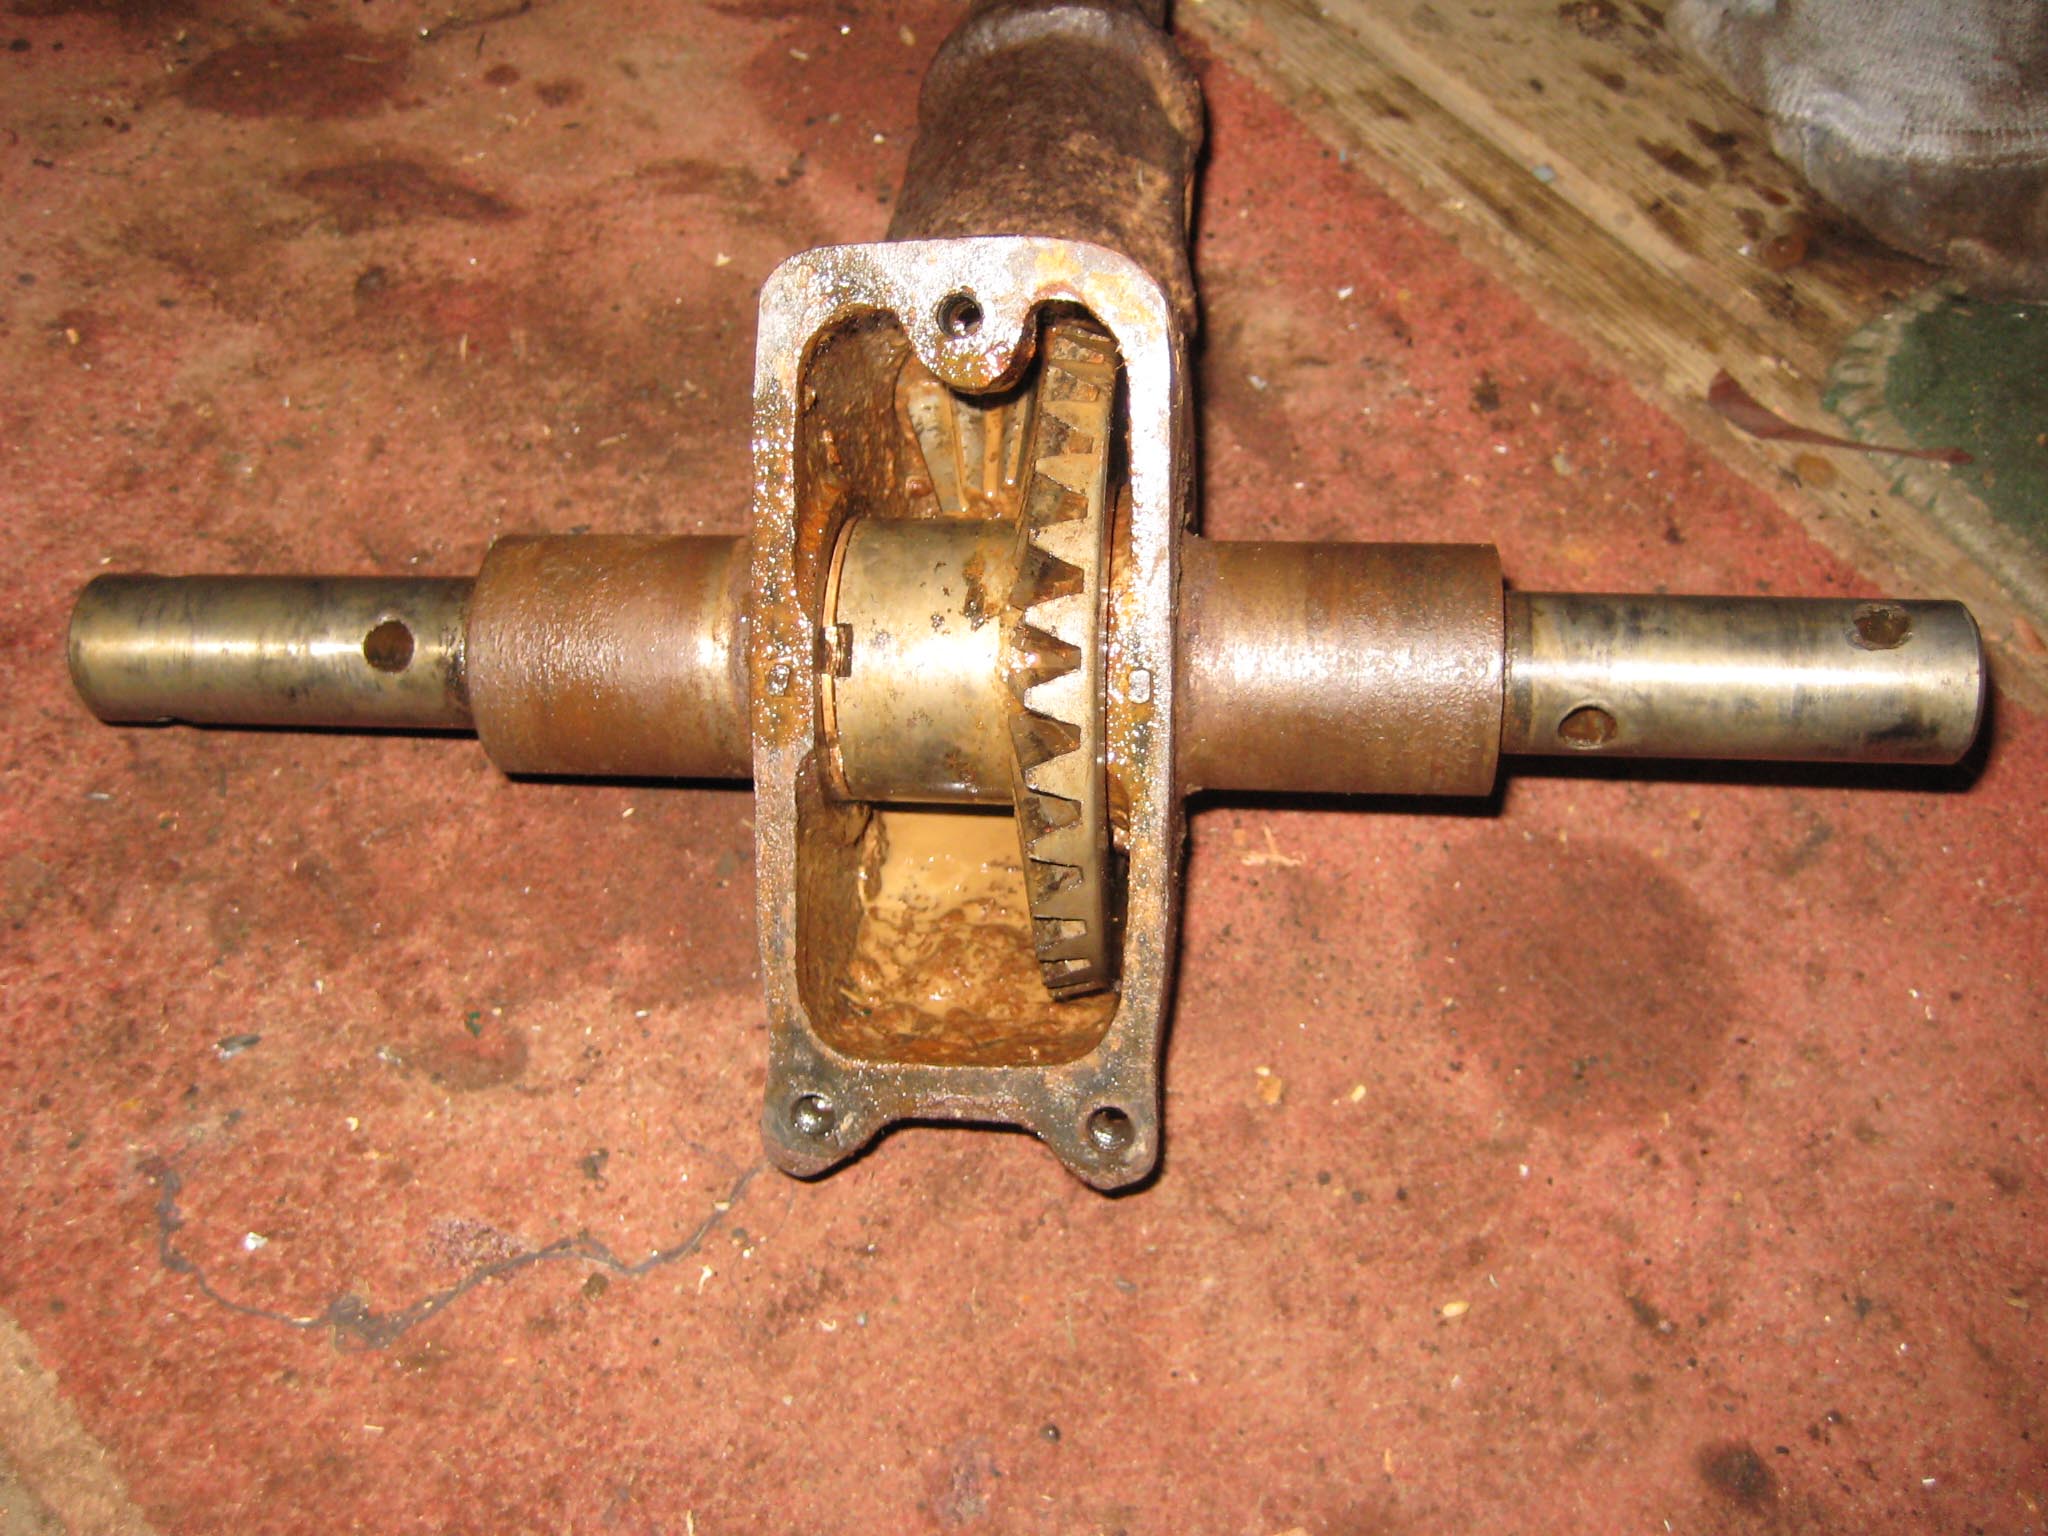
Can anyone advise on how you go about removing the miller drive shaft from the gearbox casing on a Simar 56A? The parts list shows that the crown gear is keyed to the drive shaft, but there is no obvious means of removing the shaft from the casing, other than driving the shaft through from one end. The key way does not extend along either end of the protruding shaft, so I am reluctant to attempt the big hammer treatment without getting some expert advise first!!!
The only thing I can see is that there is a small bent tab on the distance washer between the casing and the crown gear. This locks into a corresponding recess on the crown gear, which I assume is to ensure that the washer rotates with the crown gear.
I have attached some photos of the items in question.Thanks,
Sean
Attachments:
January 19, 2015 at 8:49 am #11488 charlieKeymaster
Not something I have ever taken apart so far. I assume you need to get it apart to replace worn bushes. Rather than big hammer I think it would be far safer to support side of casing and use a press to push the shaft out, if that is how it comes out. I think I have a spare drive assembly lying around, I will drag it into the workshop and see if I can work out how it should be removed.
Unless someone else knows the answer.
It might be worth asking on the SIMAR website forum.January 19, 2015 at 6:52 pm #11489vhgmcbuddyMemberThanks for the response Charlie. When I opened the casing, I found that it was about half full of mainly water, with a little oil floating on the surface, so as I plan on using the Simar in the garden for decades to come (hopefully!!), I have taken the decision to fully strip and rebuild the machine. With water being present in the drive casing, I would like to check what state the bushes are in, just in case.
Thankfully, the rest of the machine is in pretty good shape. Must say that I have been most impressed by the standard of engineering. Having cut my teeth rebuilding a Trusty, the Simar is in a different league when it comes to complexity!!
Will have a browse of the Simar website forum. My French is limited to “Oui” & “Non”, but might get lucky and find a helpful photo on there.January 20, 2015 at 9:55 am #11496charlieKeymasterThere are a number of users on the french forum that can speak english so you should be OK.
April 6, 2015 at 5:17 pm #12448vhgmcbuddyMemberAfter much head scratching, I finally took the plunge and dismantled the miller drive. There was some trial and error involved, which did result in some damage, so thought I would share how I did it, so you can avoid the mistake I made.
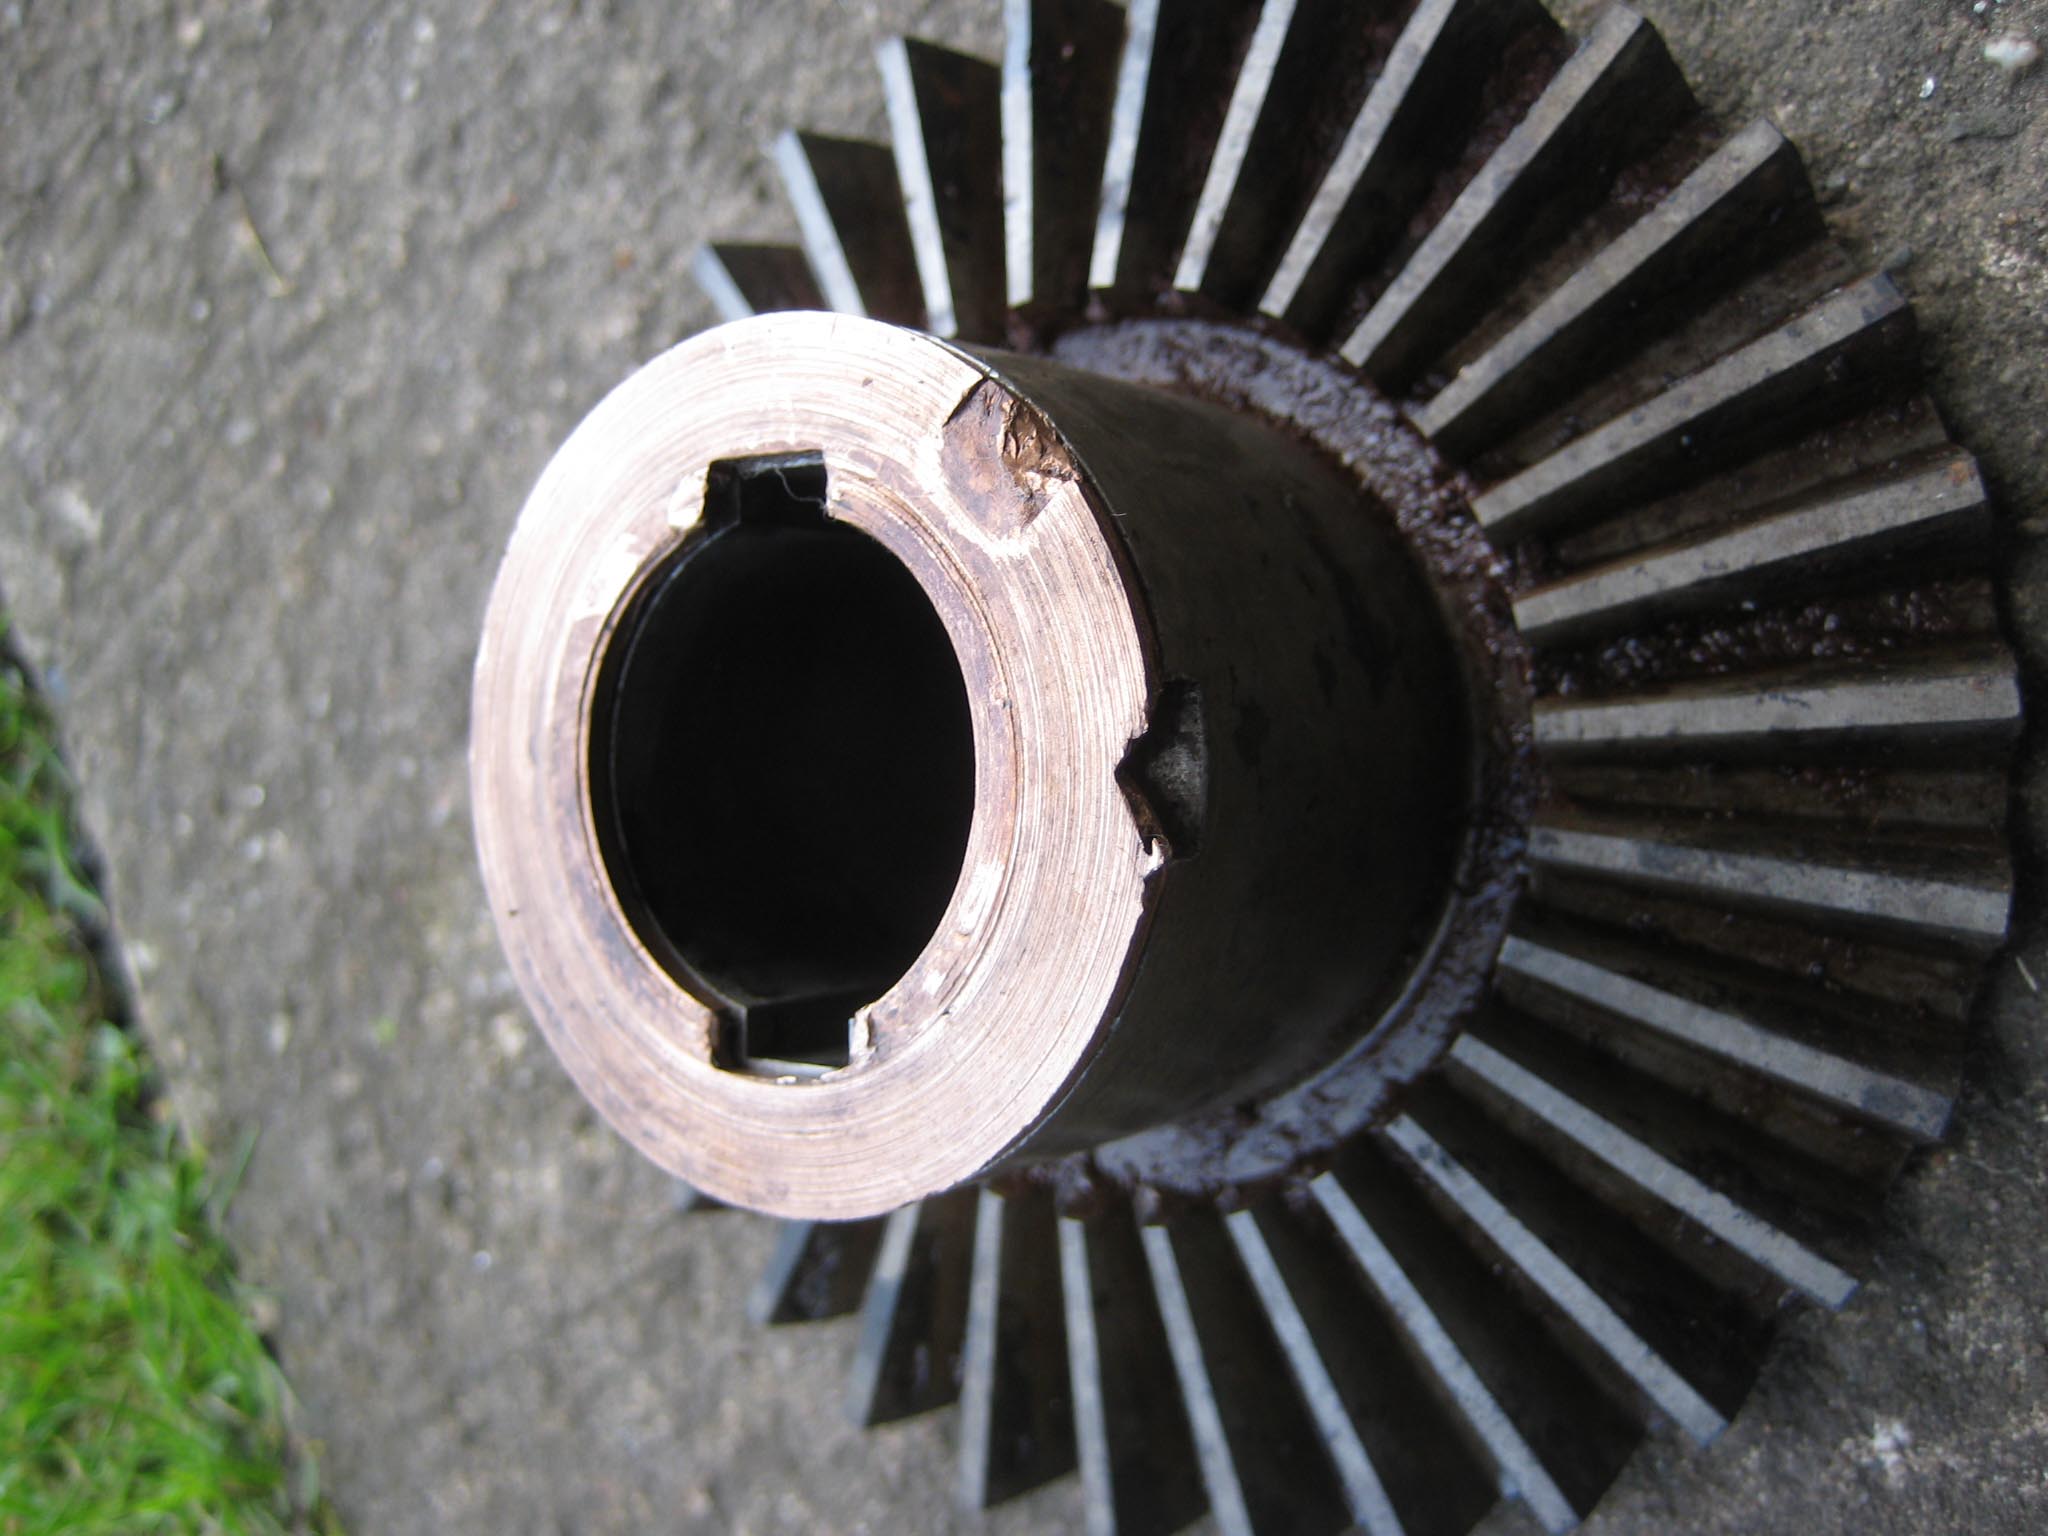
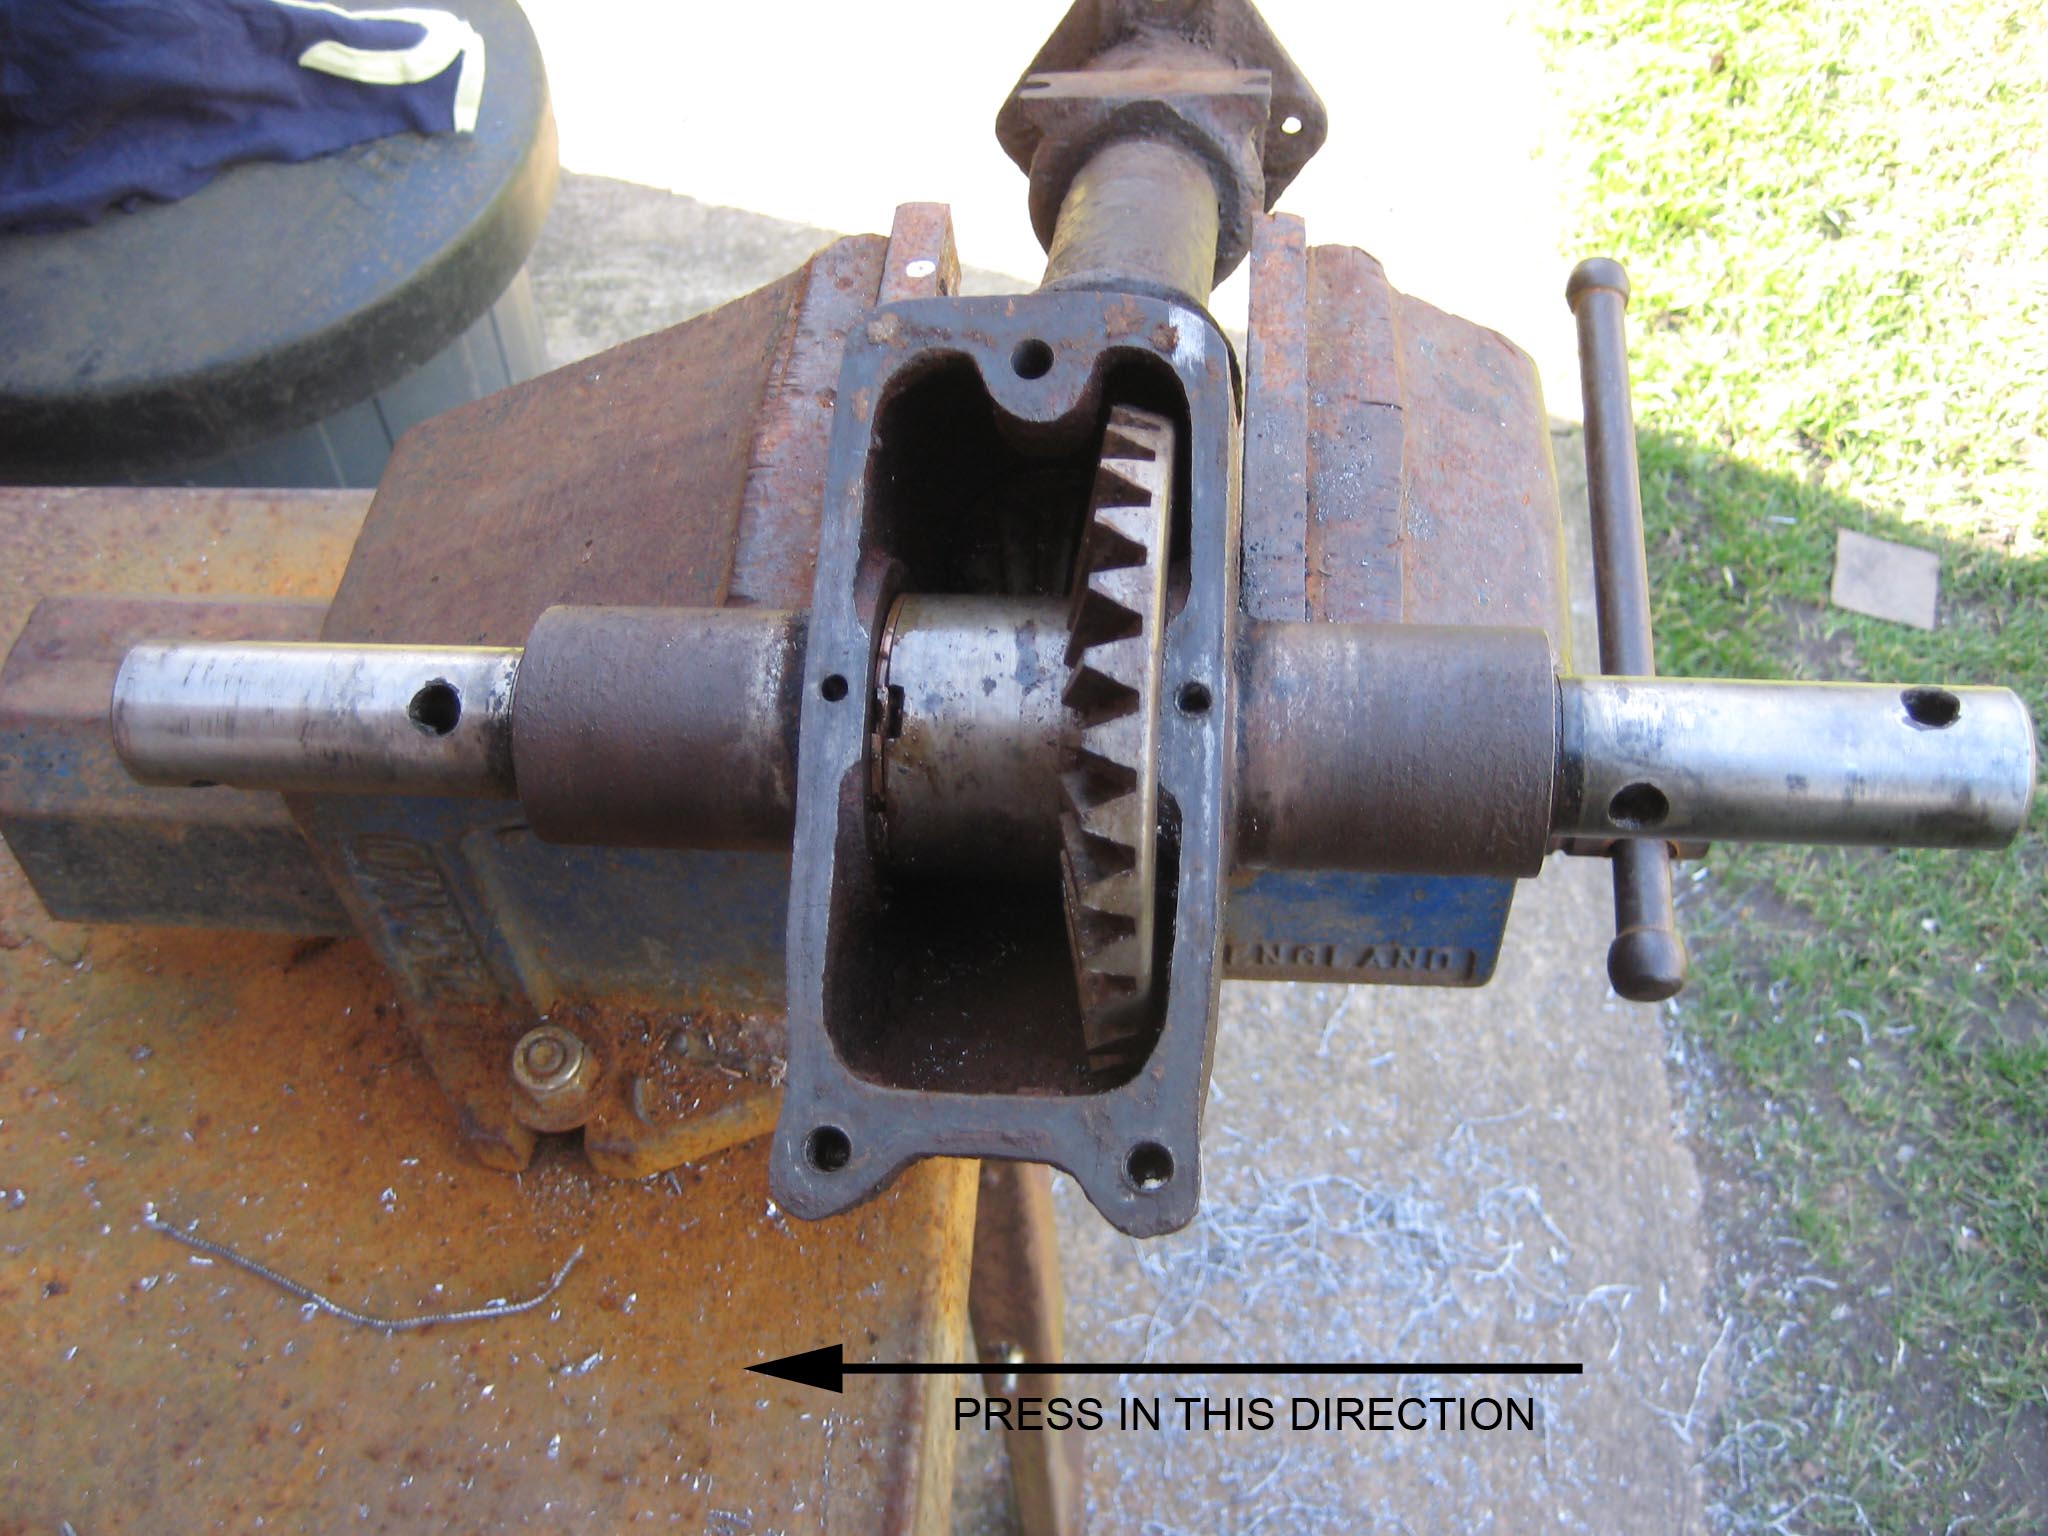
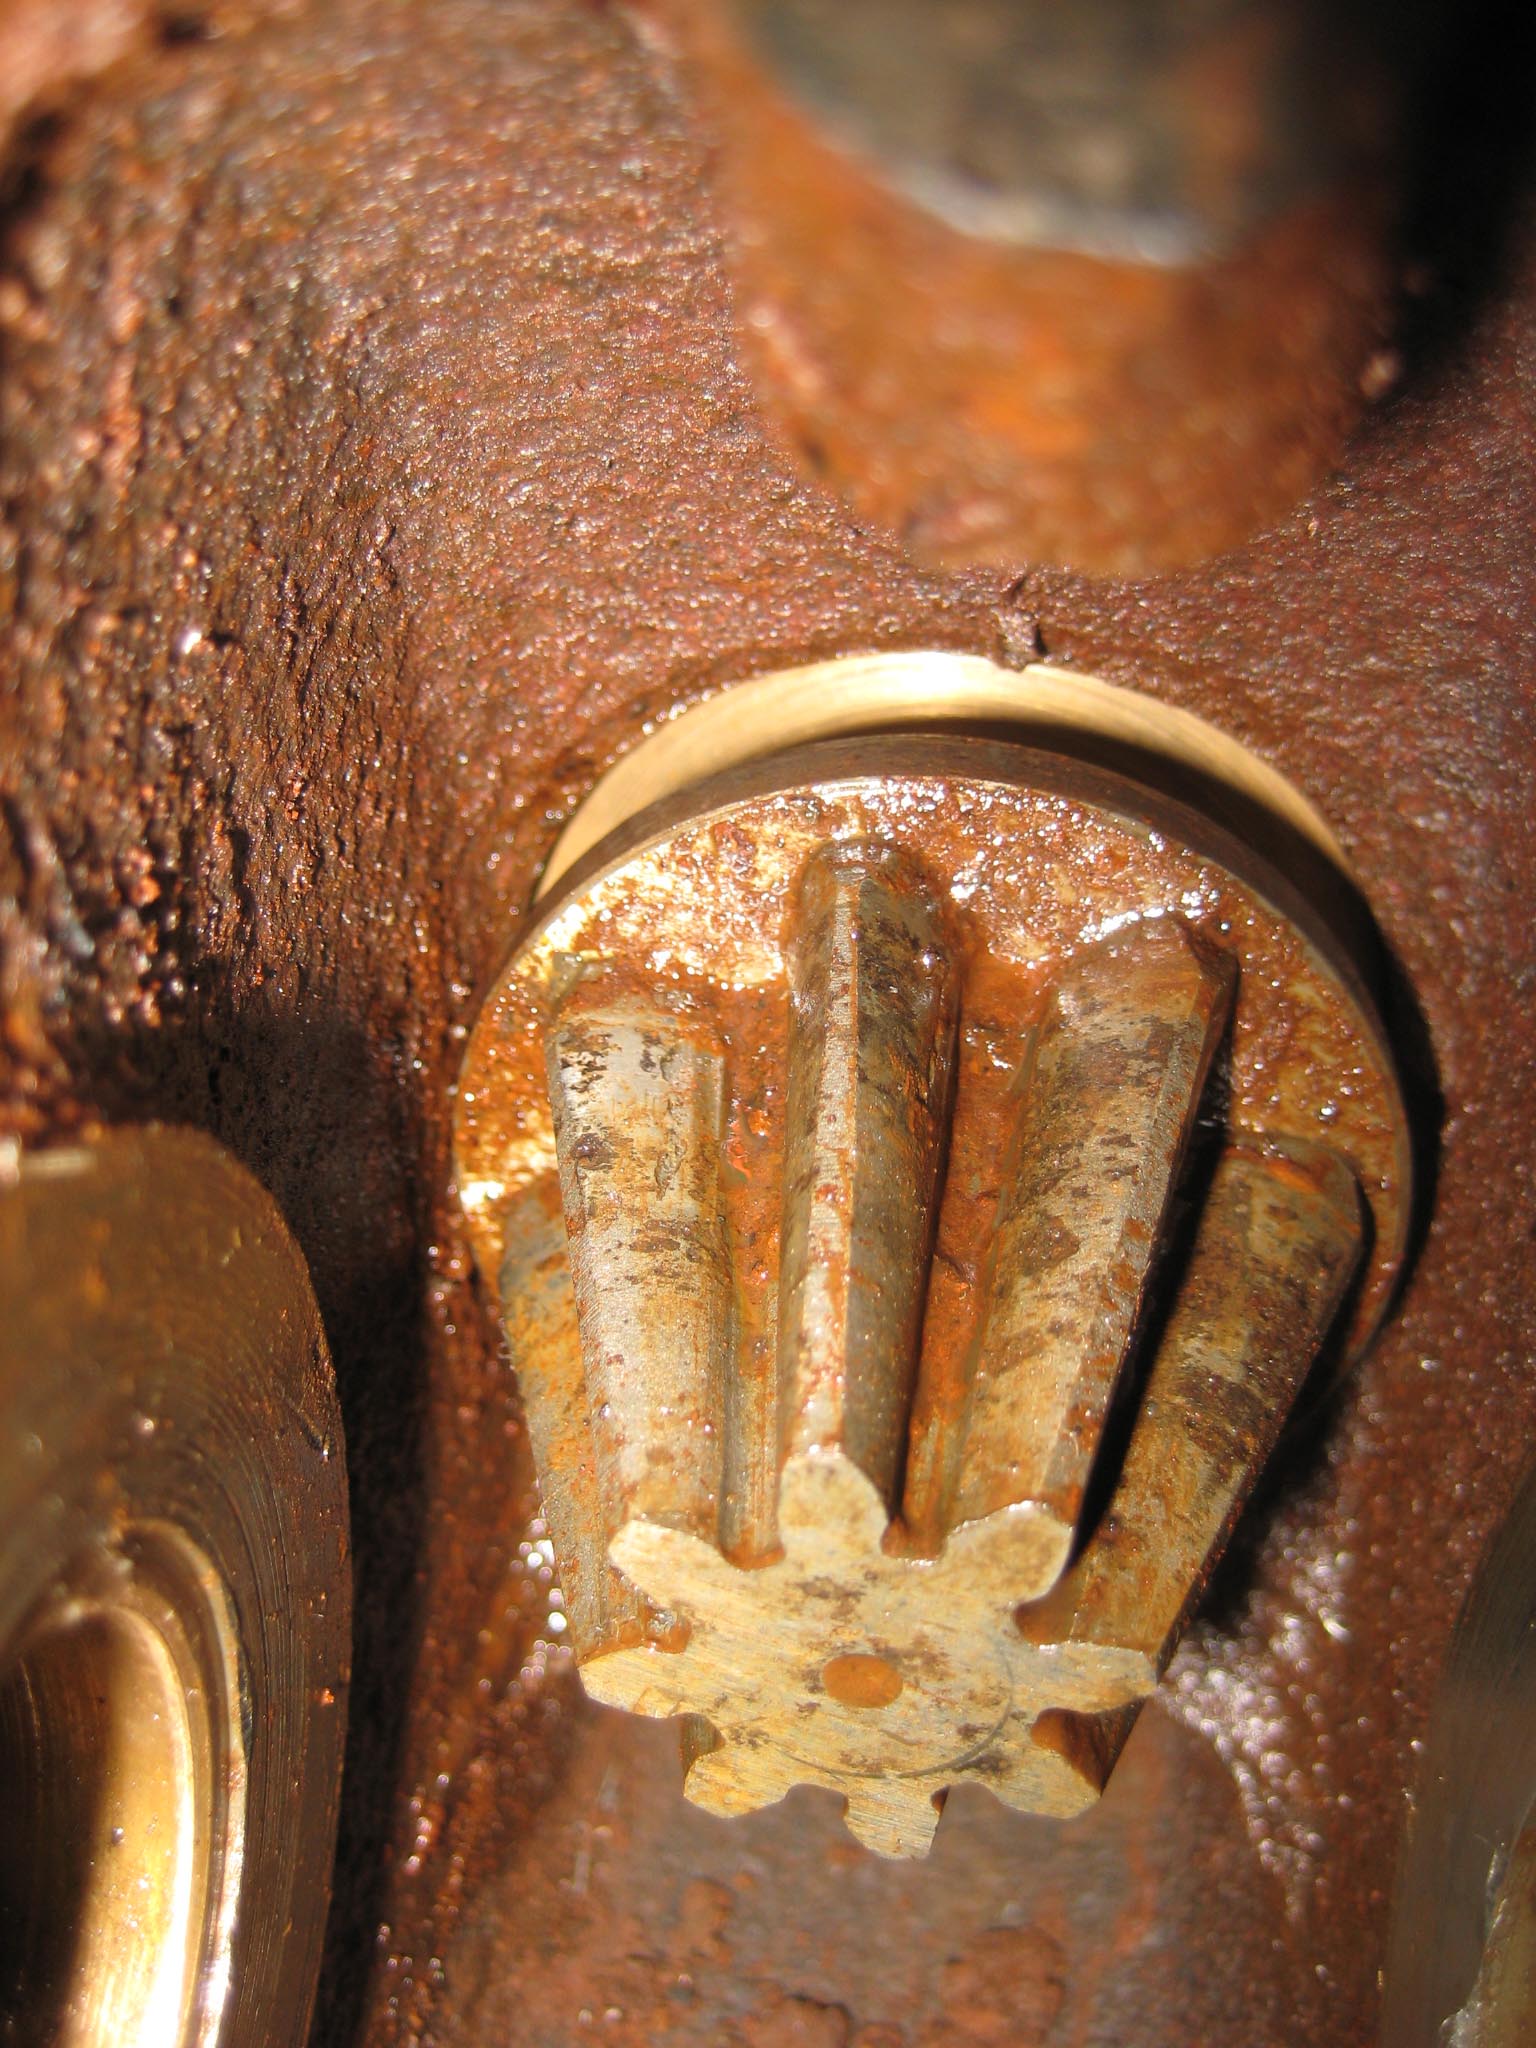
With the miller drive cover removed to expose the gears, there are two locating pins on the axis of the miller drive shaft (see picture 1). These secure the bronze bushes in place and must be removed. When the drive shaft is pressed out, the keys which locate the crown wheel cannot pass through the bushes, therefore the bush is pressed out along with the shaft.
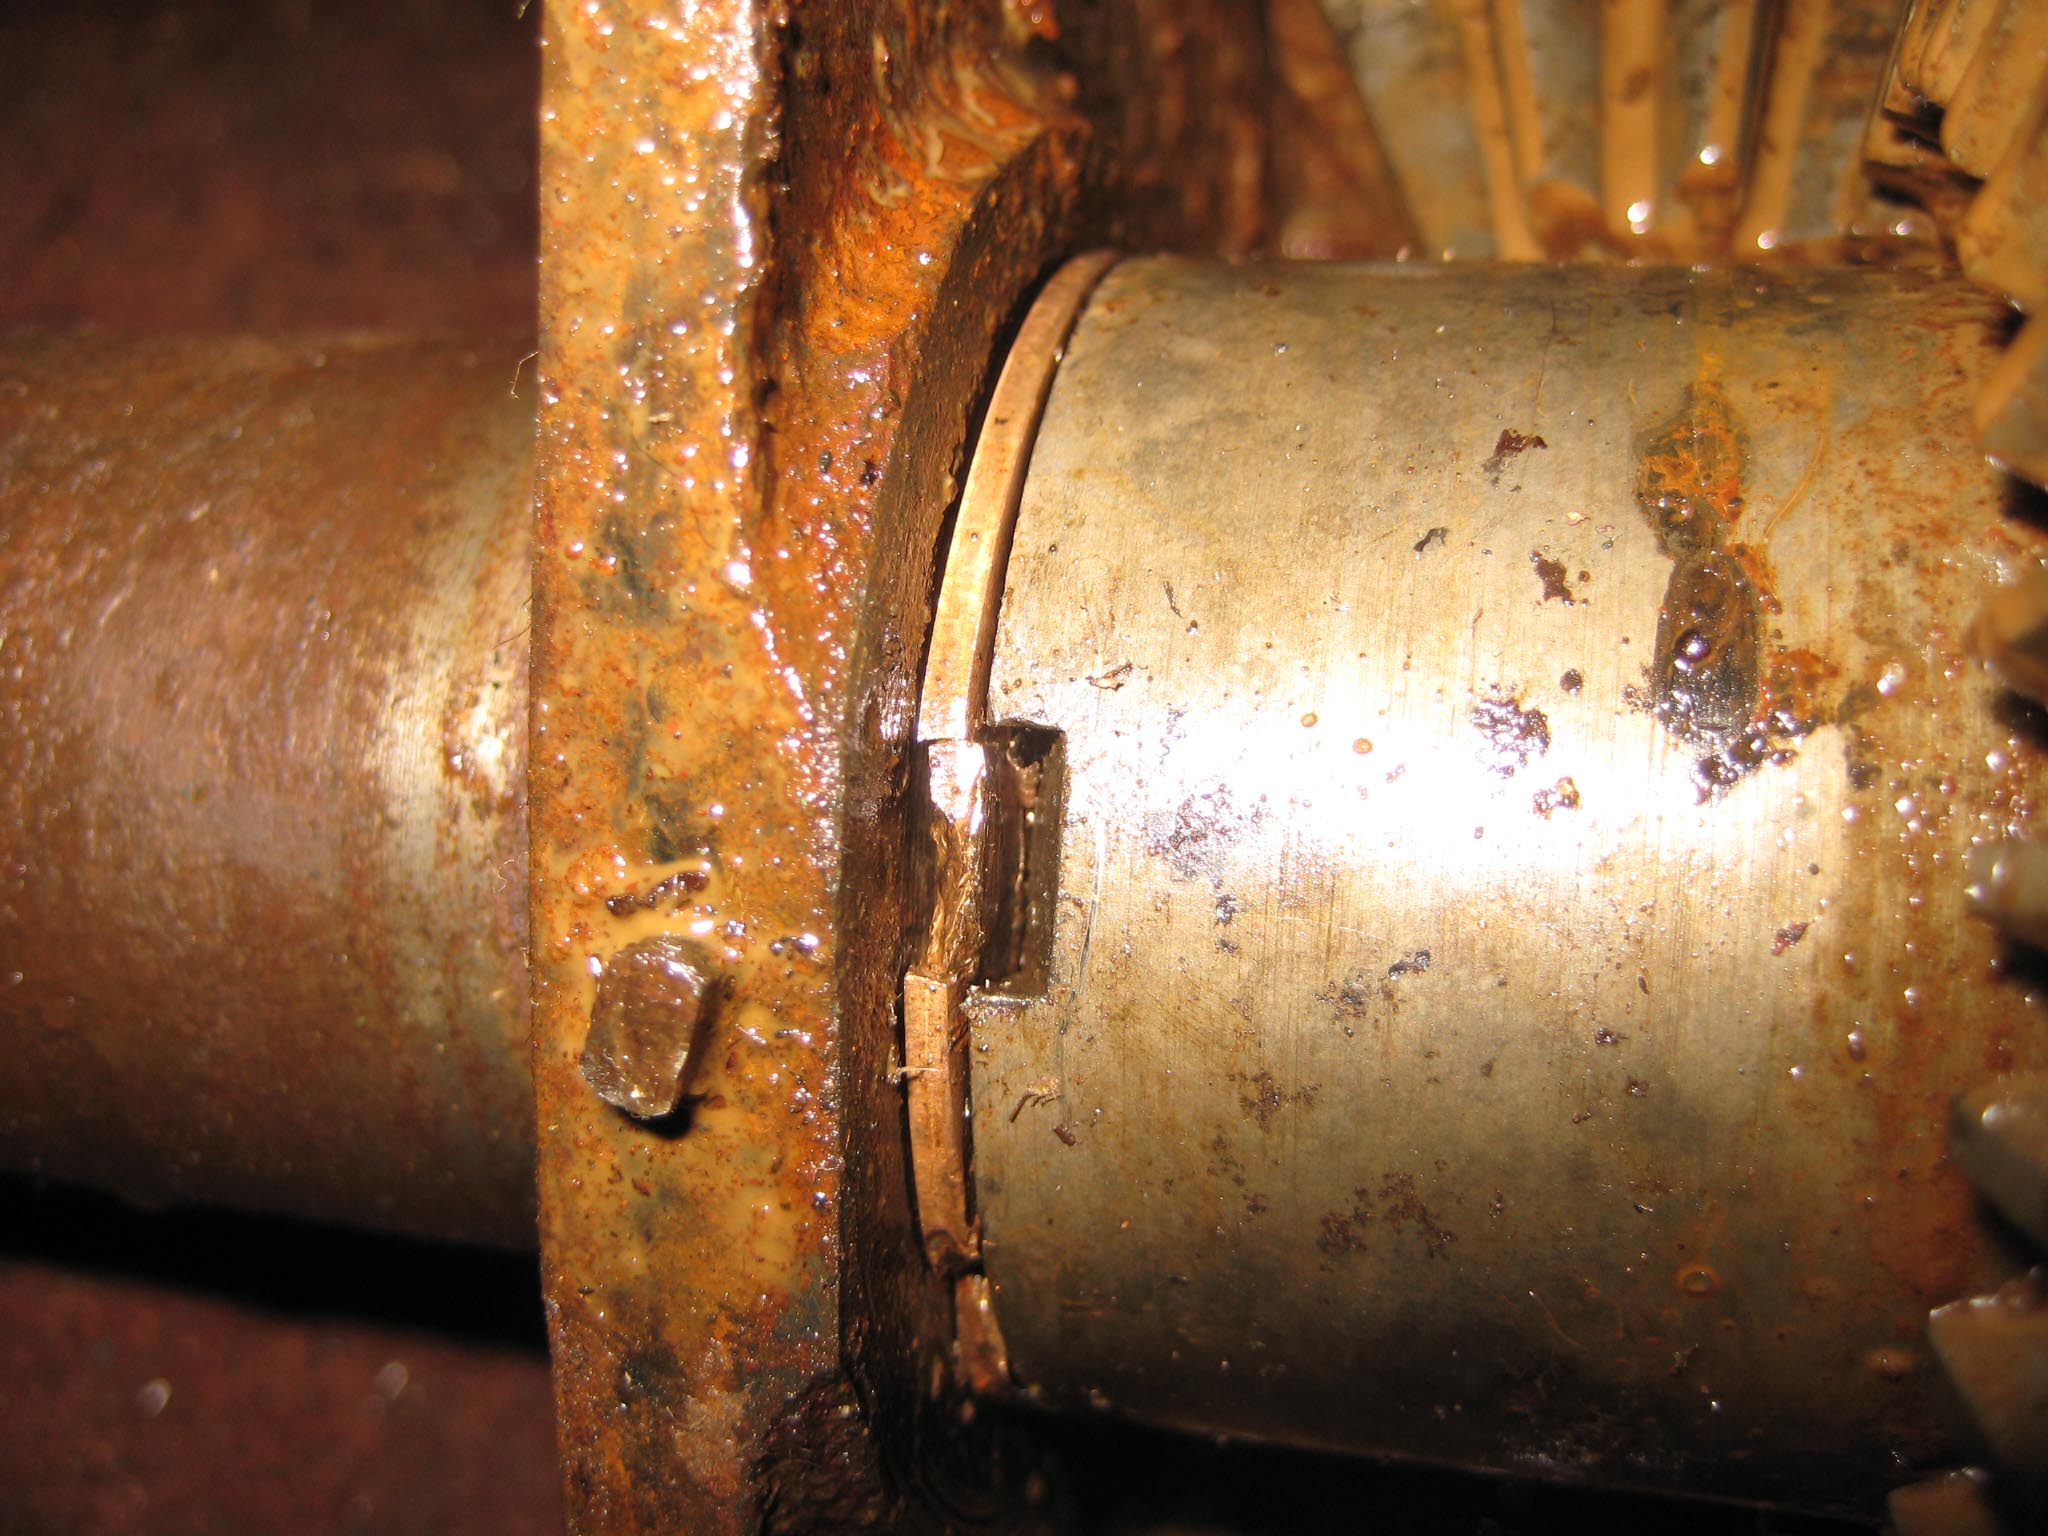
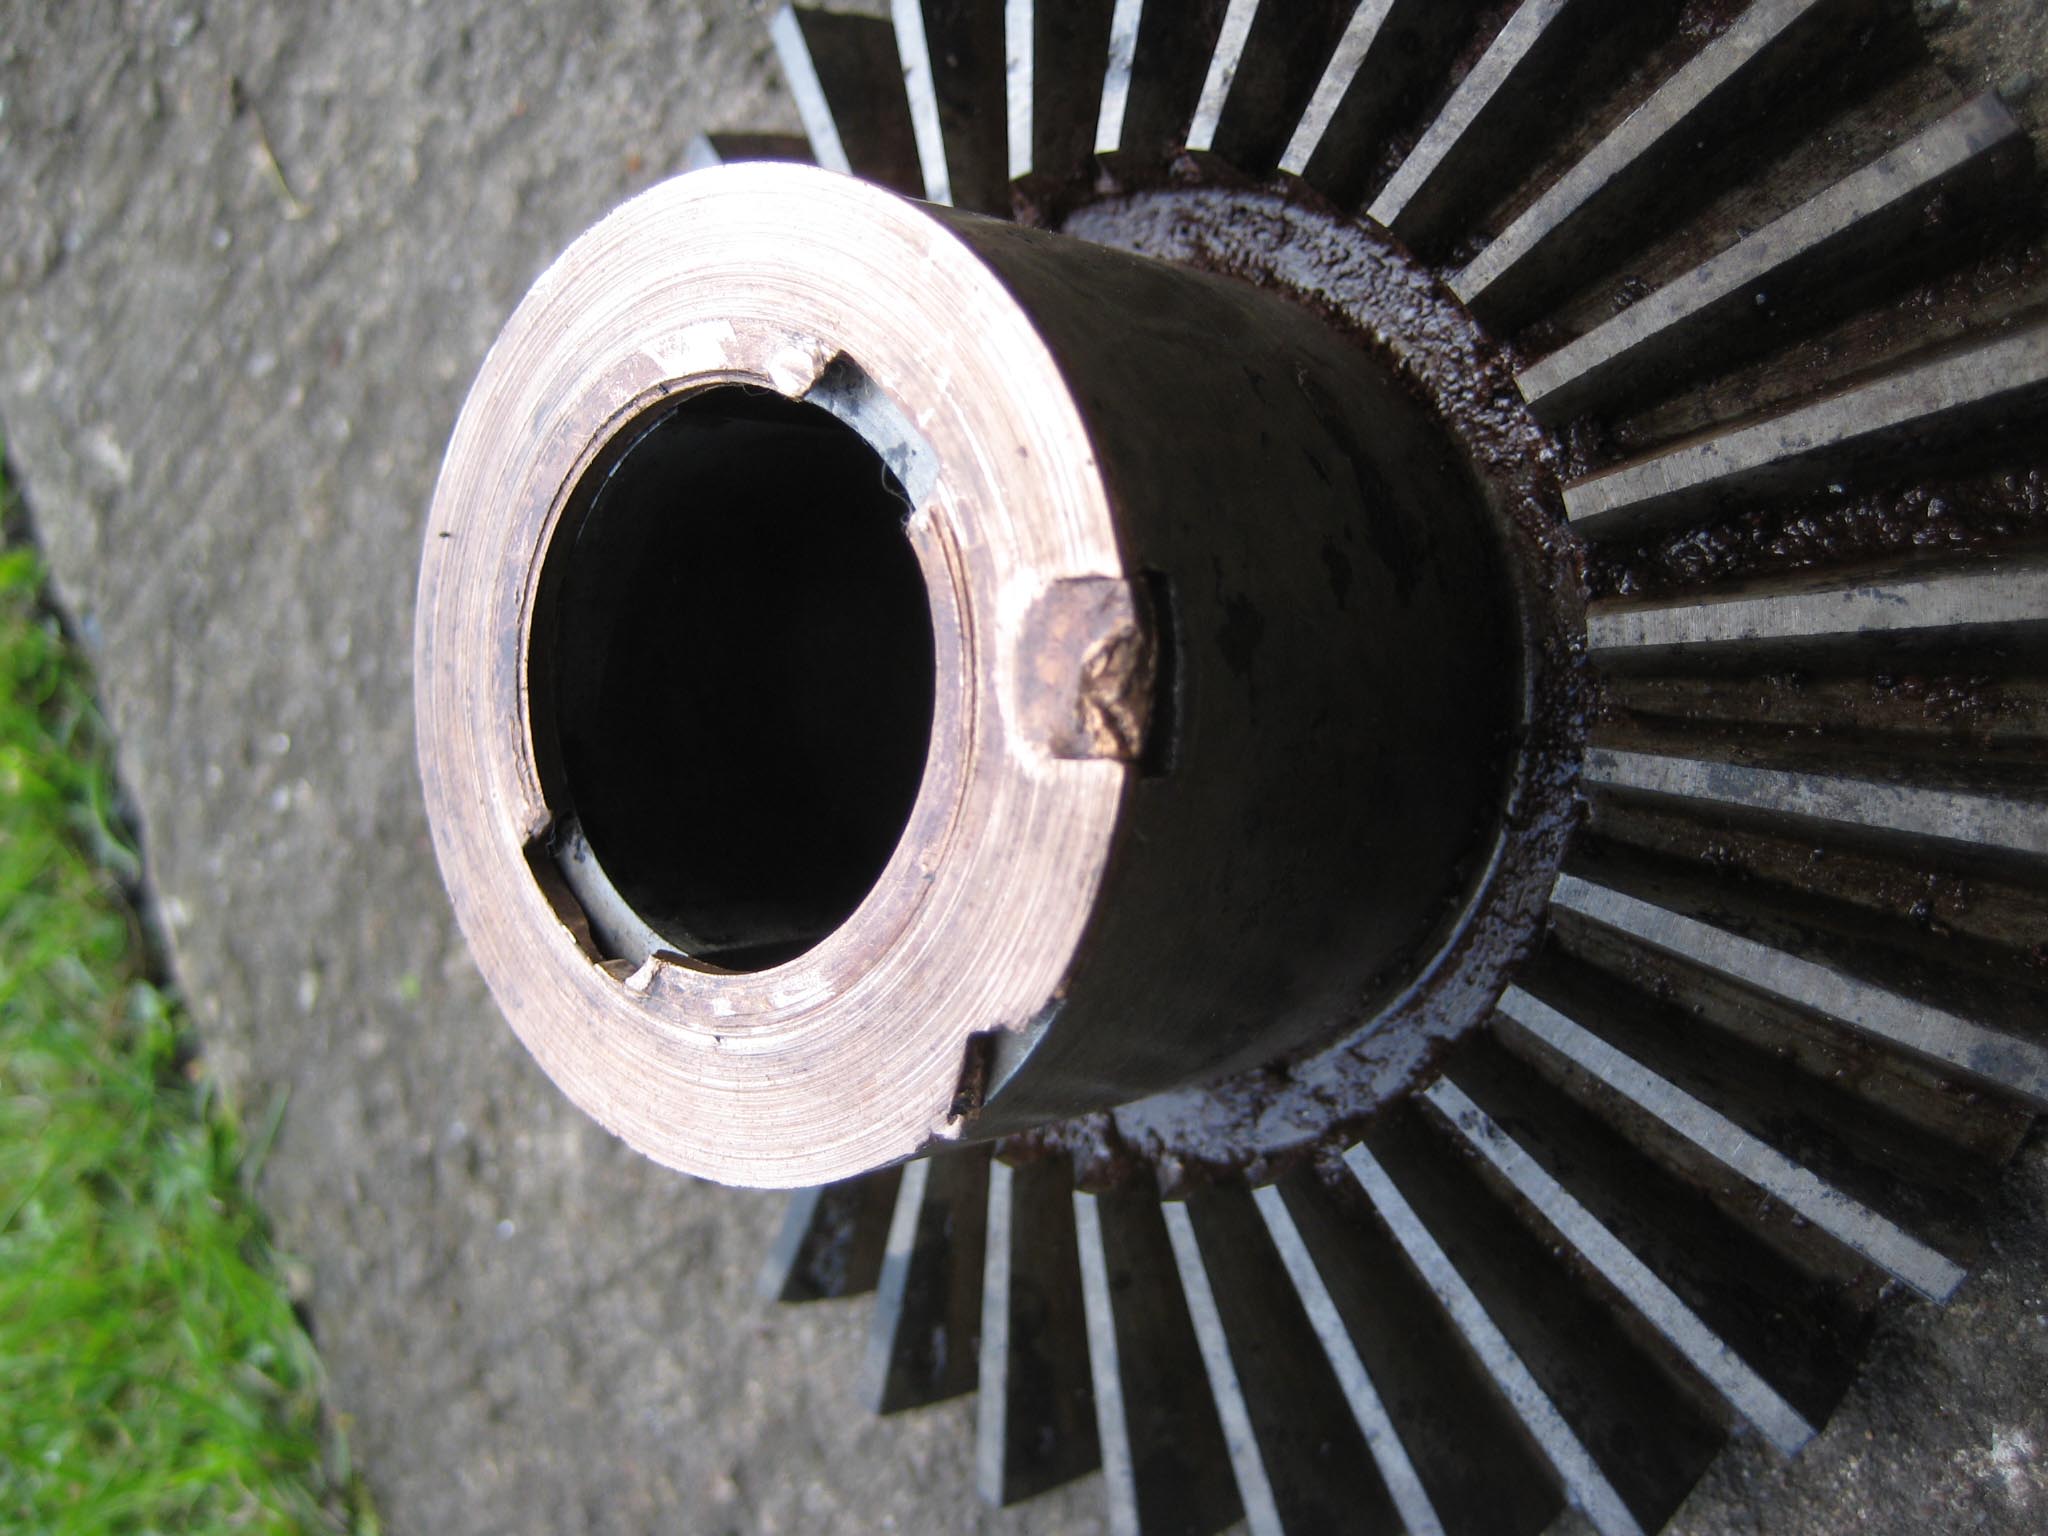
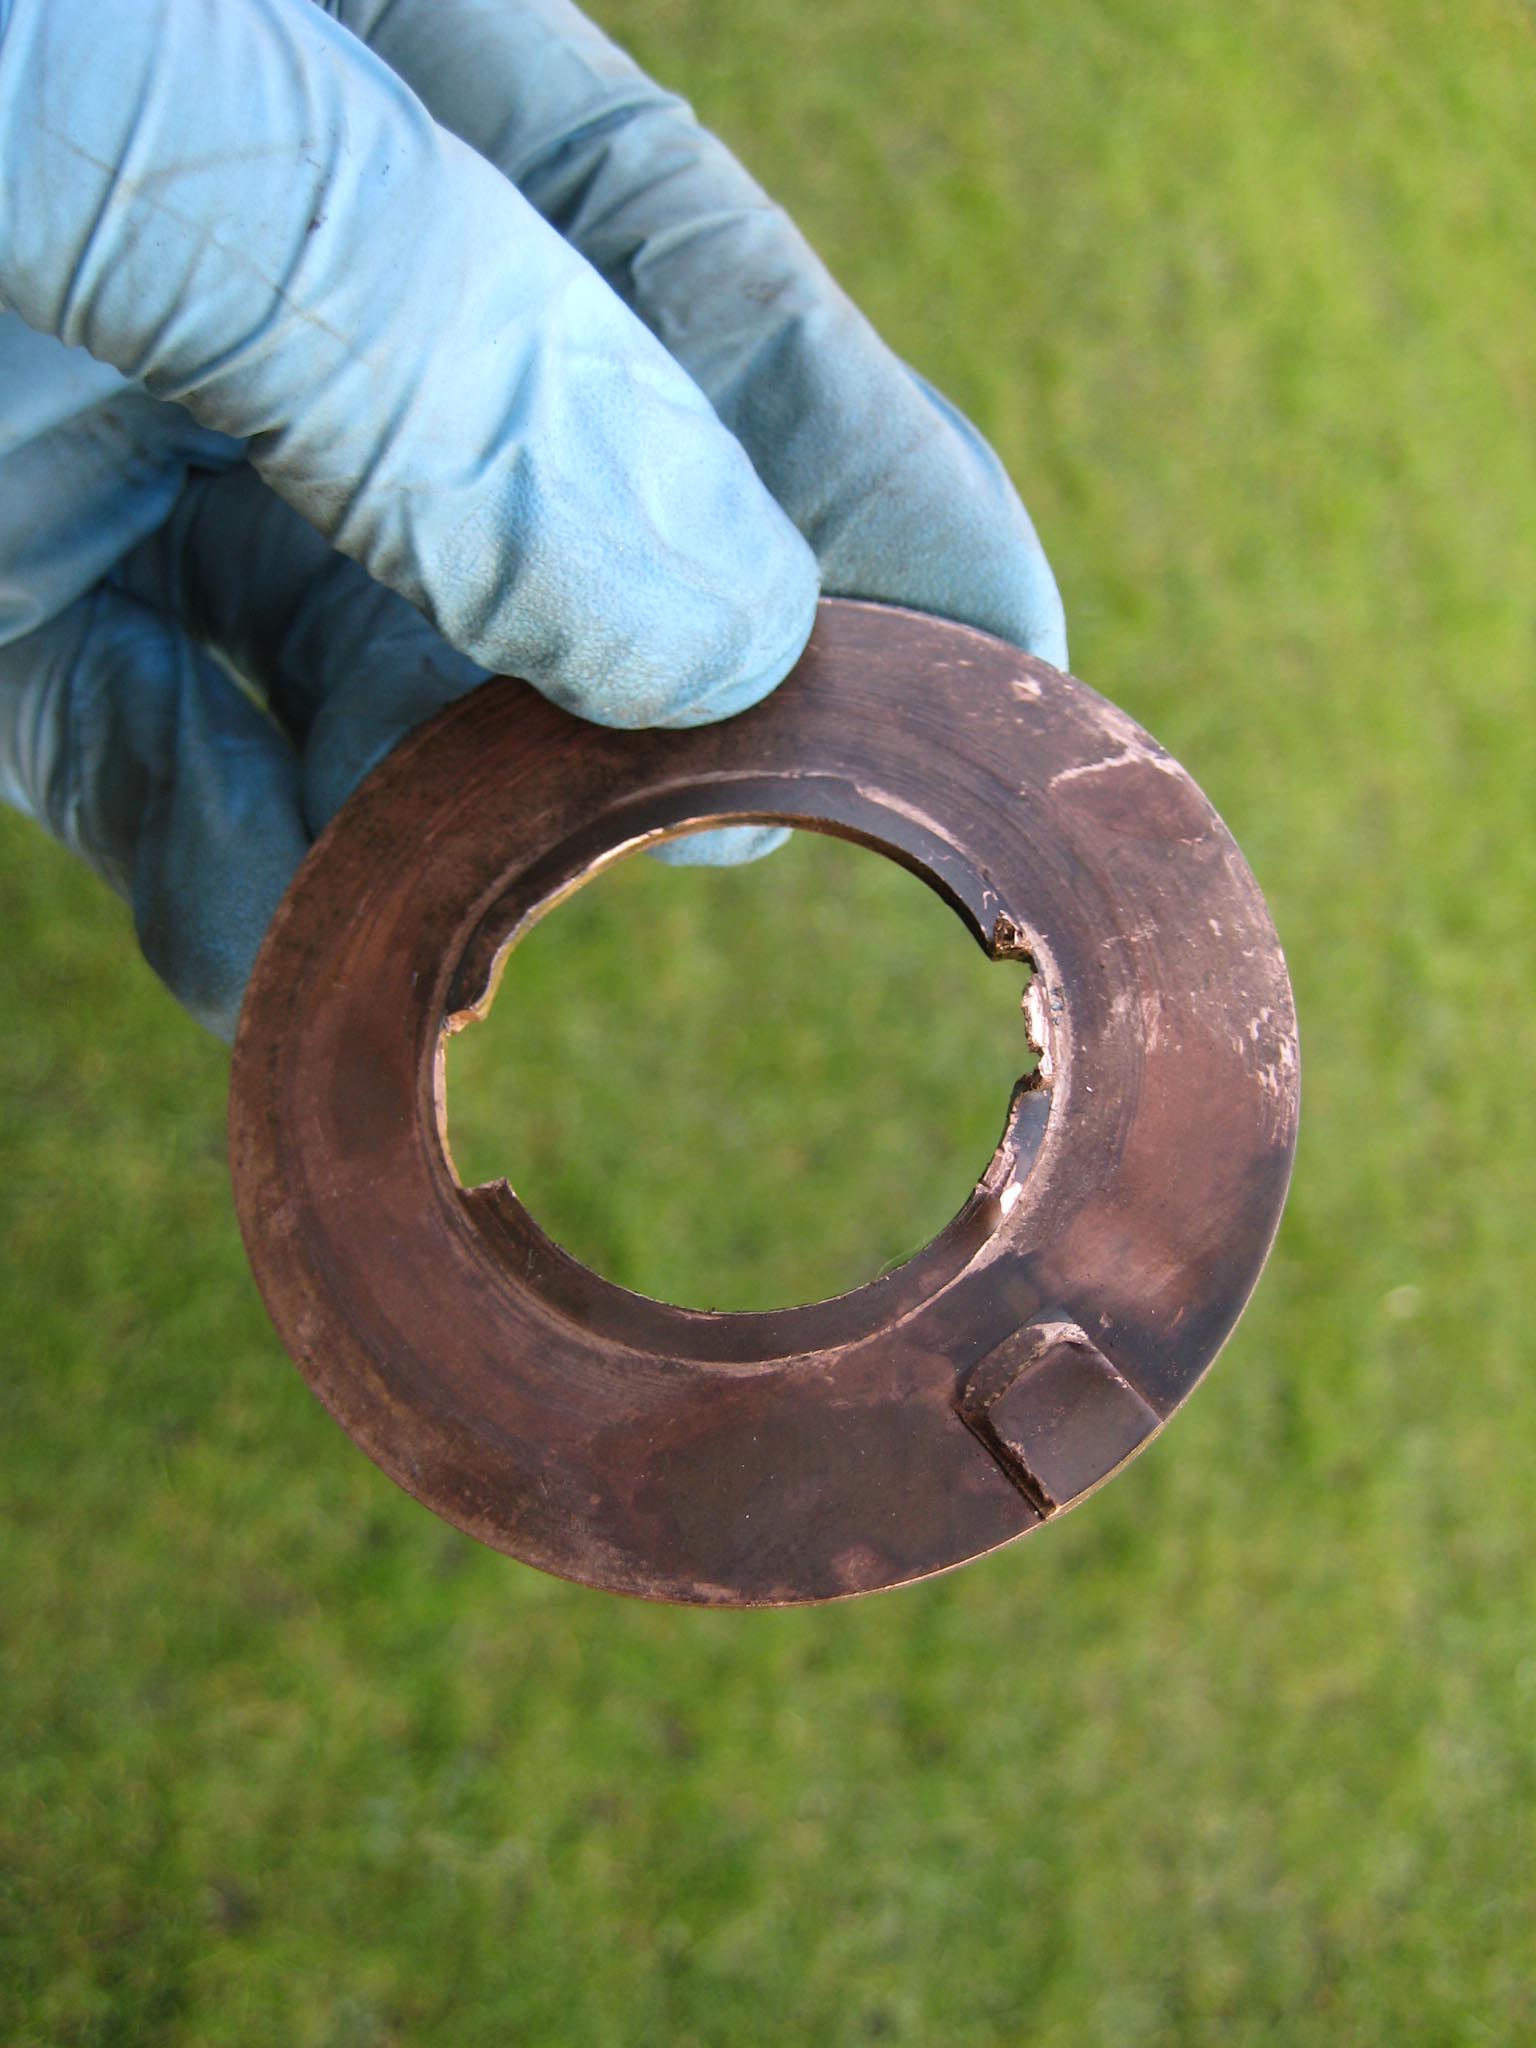
Next step is to align the bronze spacing washer at the left hand side of the crown wheel. This is done by rotating the crown wheel until you can see the locking tab on the washer which is bent over into a matching recess in the crown wheel. Bend the tab on the washer until it is flush, so the washer can now turn independently of the crown wheel. You should also see a ‘V’ shaped notch close to the locking tab. Insert a flat bladed screwdriver into this notch and gently tap the washer around until the notch lines up with the locking tab recess in the crown wheel. The washer has two rectangular notches cut out so the crown wheel keys can pass through. (see pictures 2 & 3). This means the miller drive shaft can only be pressed out in one direction (see picture 4). Unfortunately, all of the above did not become apparent until I had everything dismantled. Being blissfully unaware, sods law came into effect and I pressed the shaft out in the opposite direction, which damaged the bronze spacing washer which is on the right hand side of the crown wheel and does not contain the necessary key slots cut into it (see picture 5).
As previously mentioned, the left hand bush will be pressed out along with the drive shaft. If also removing the right hand side bush, do not get them mixed up as they are handed. They have a helical oil way machined on the inside which carries oil outwards along the shaft as it rotates.
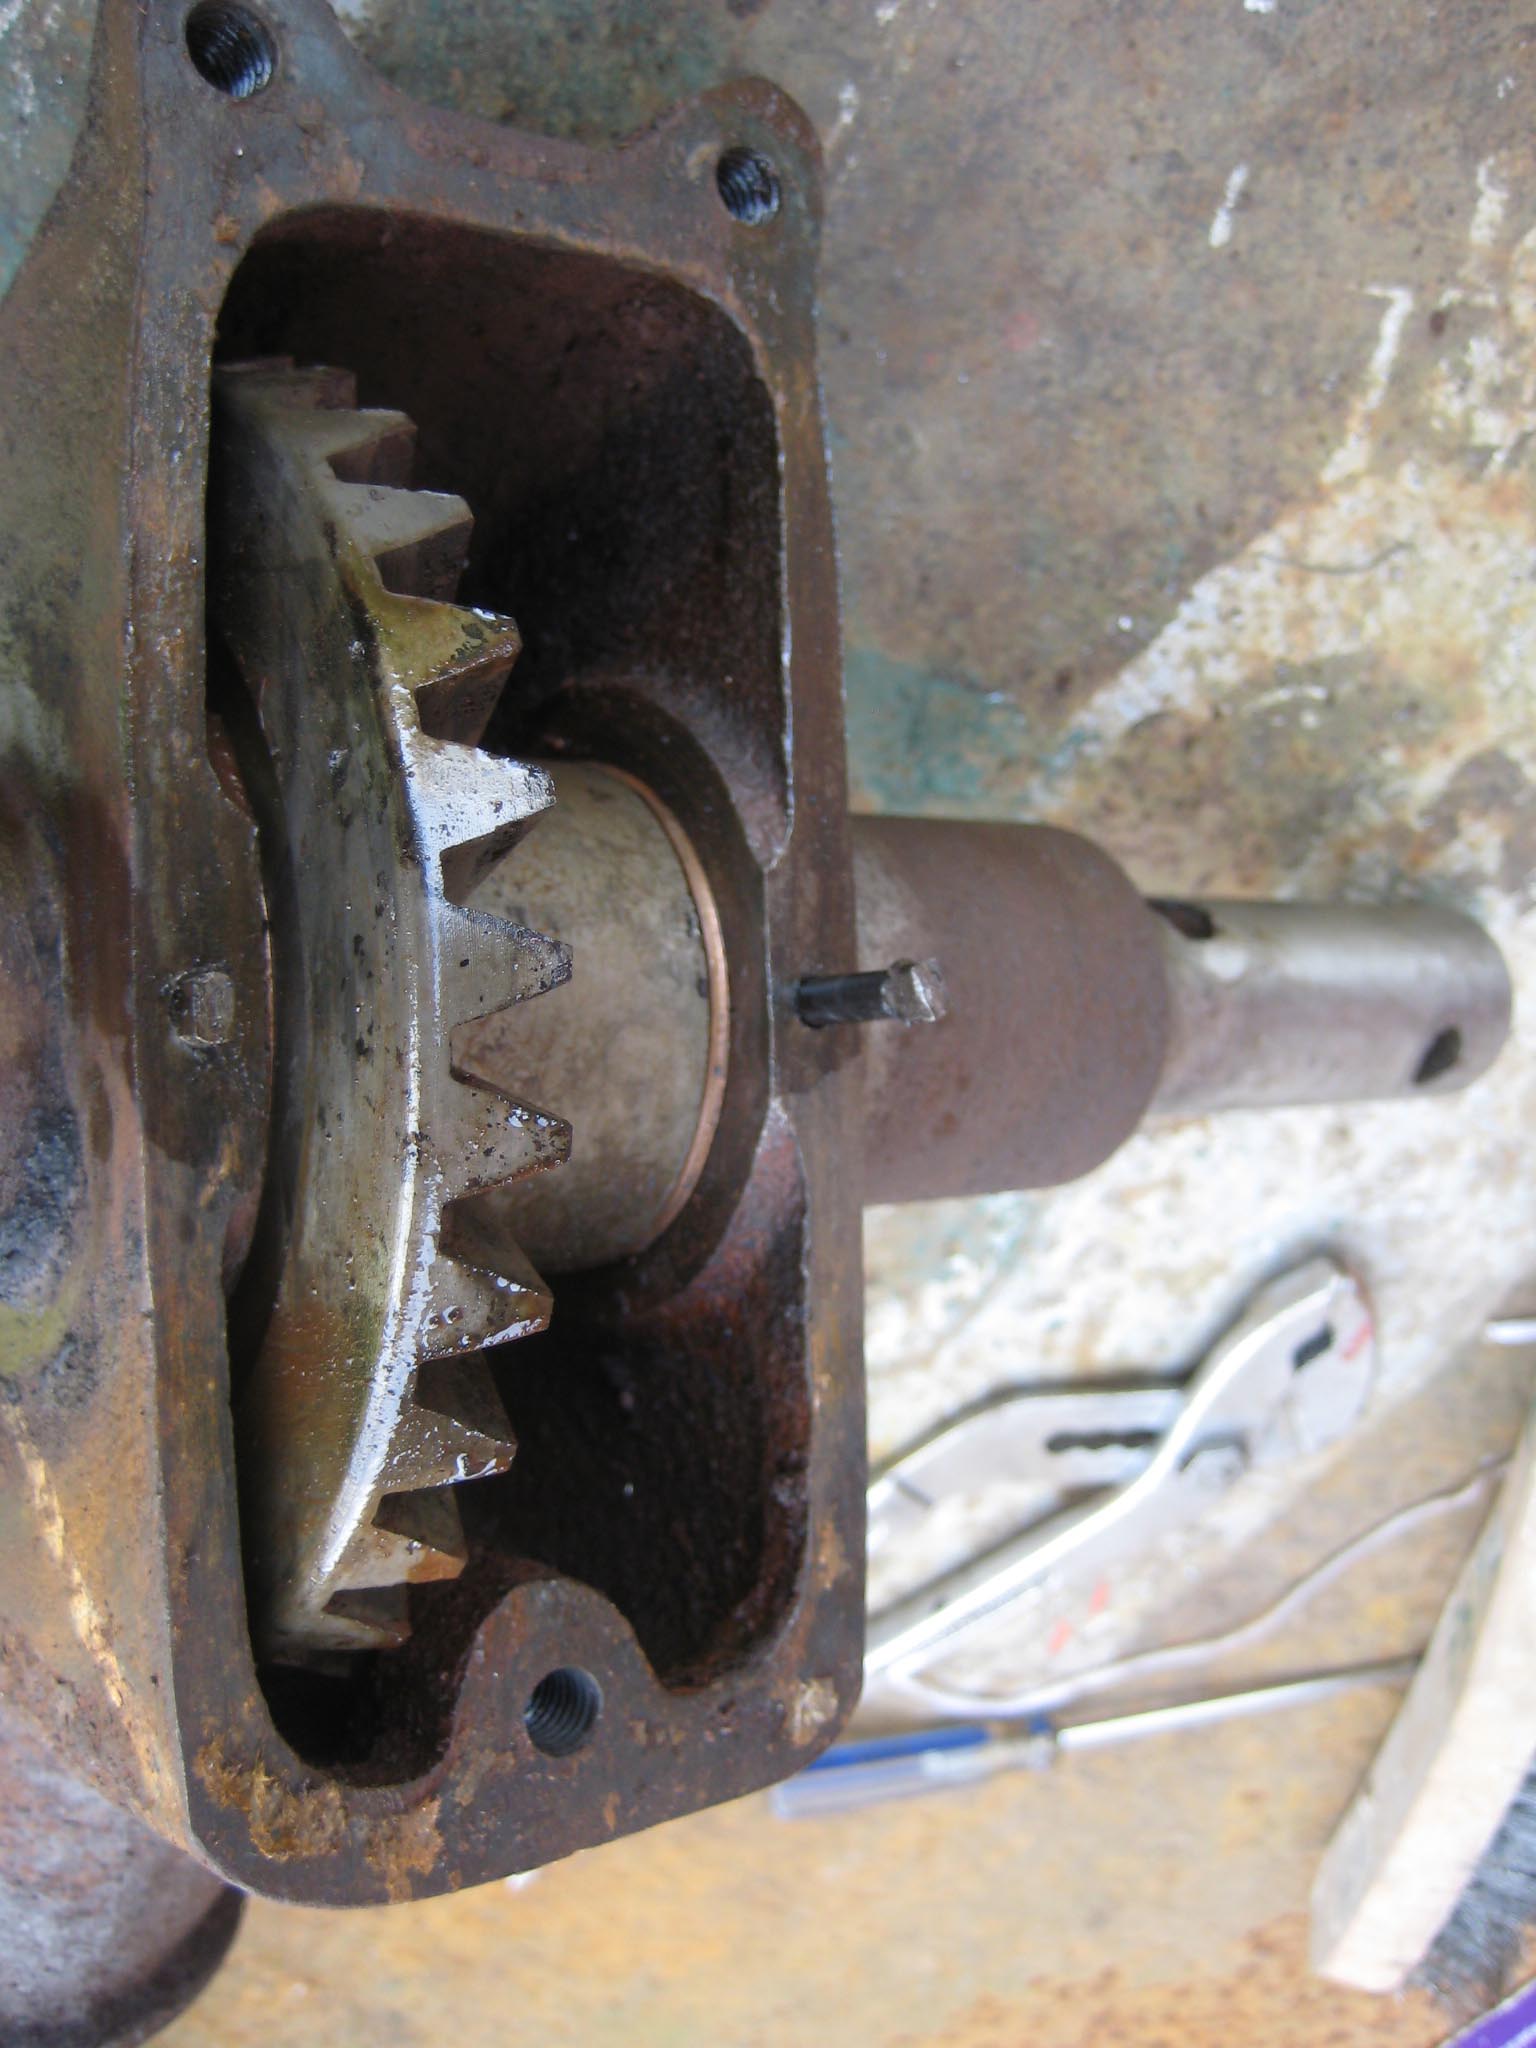
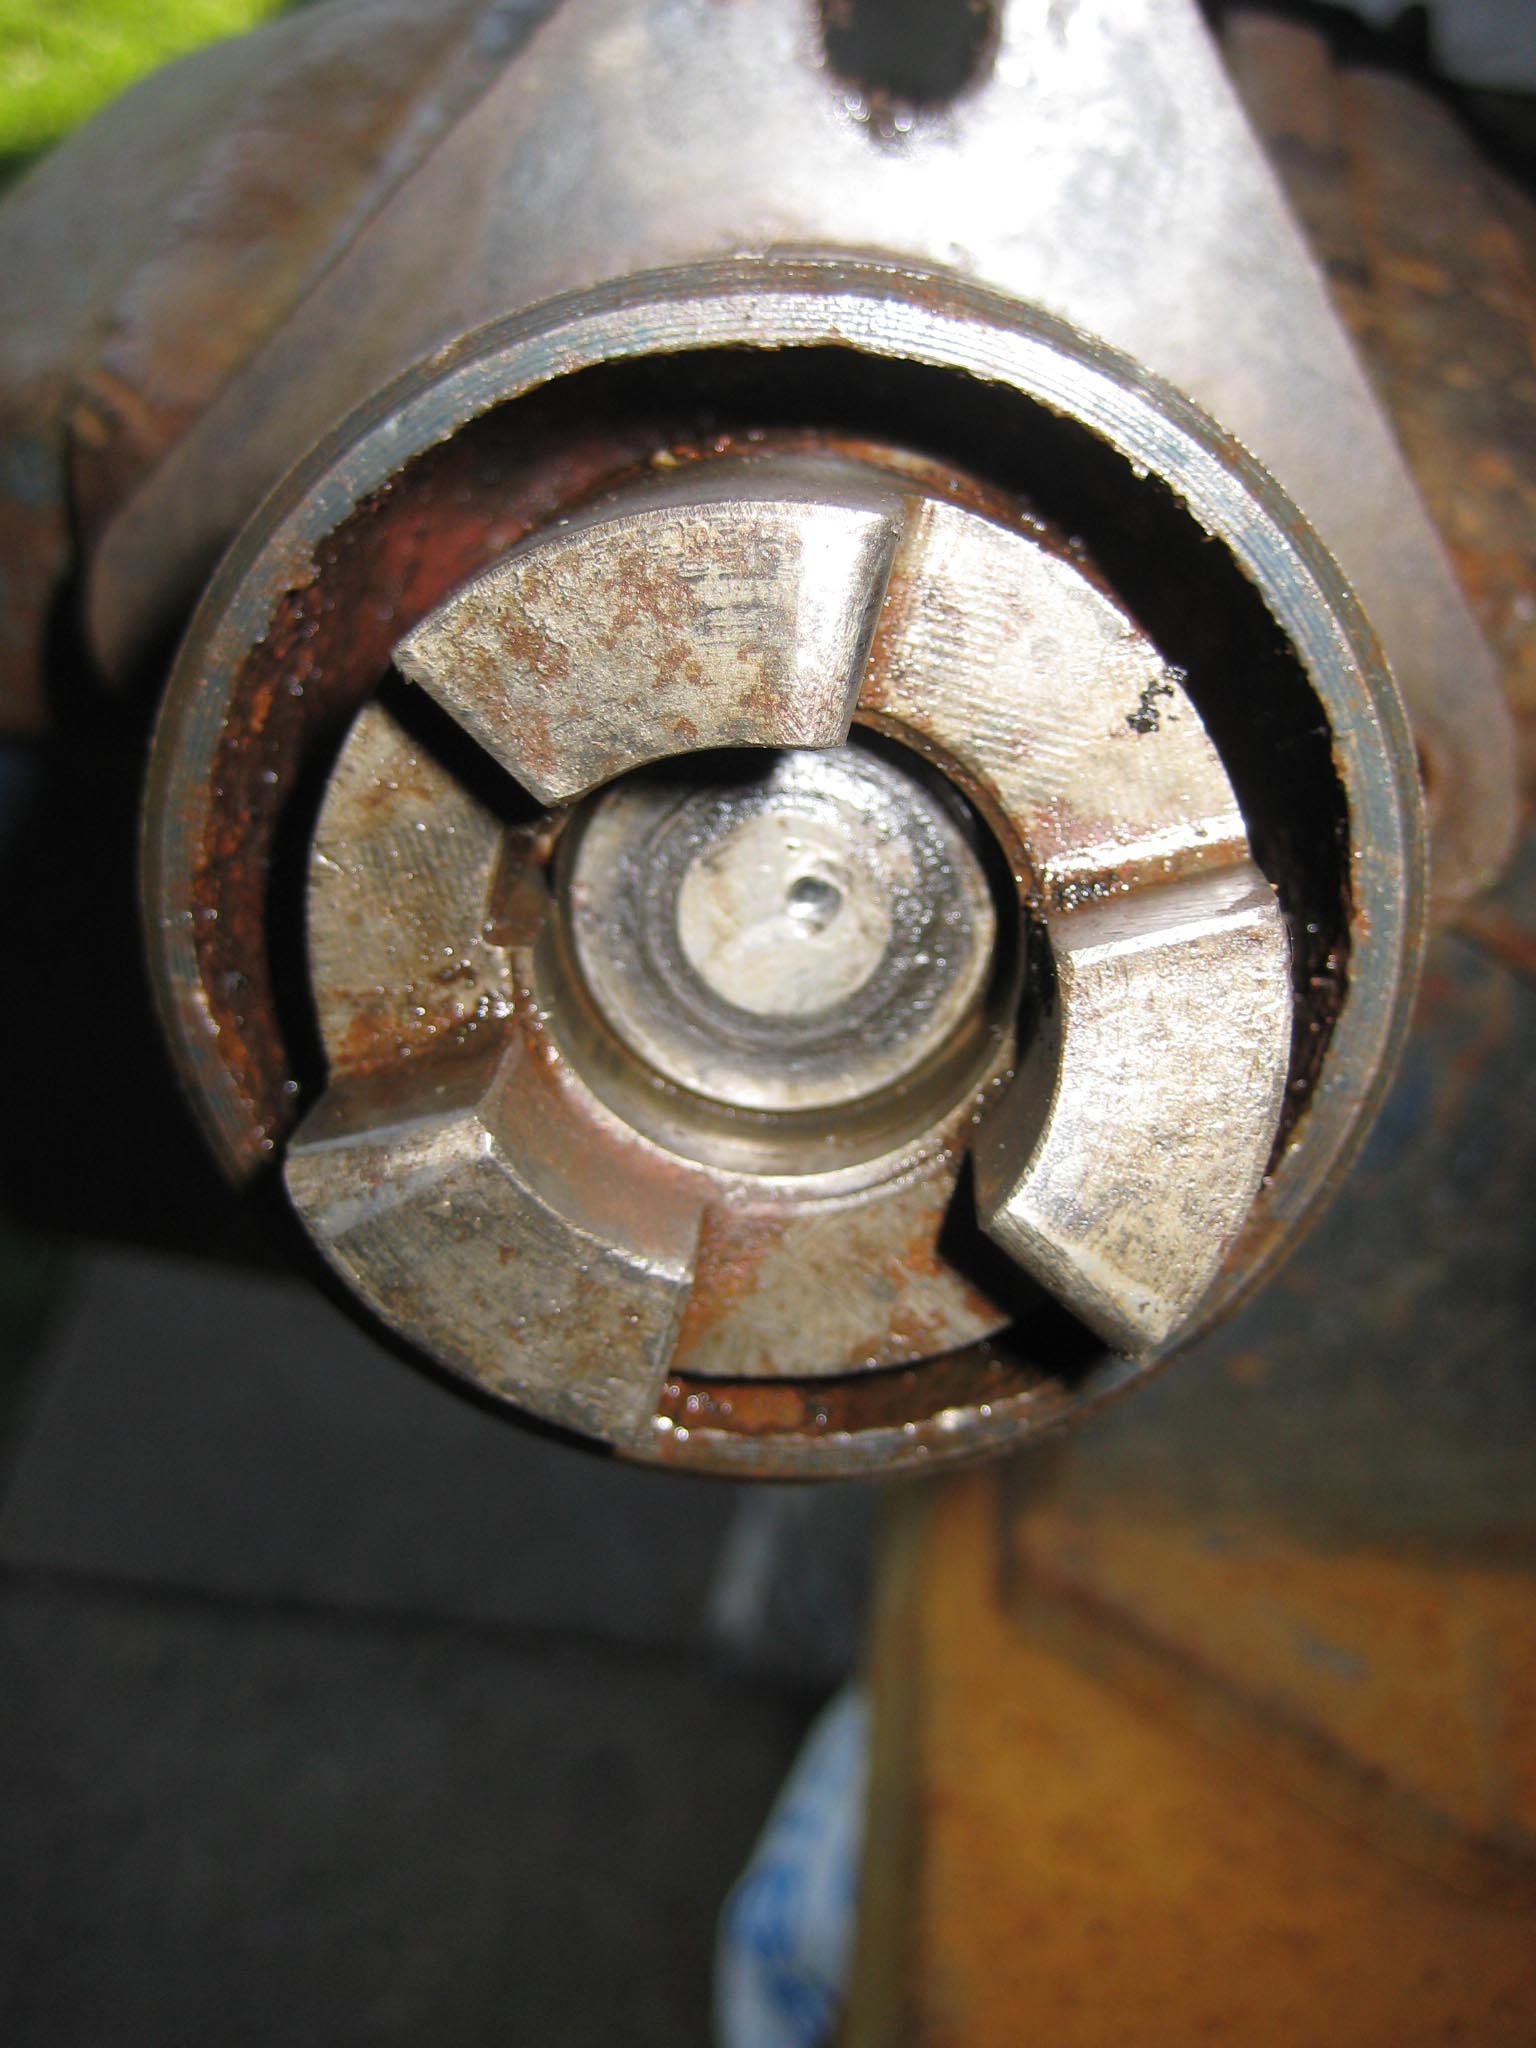
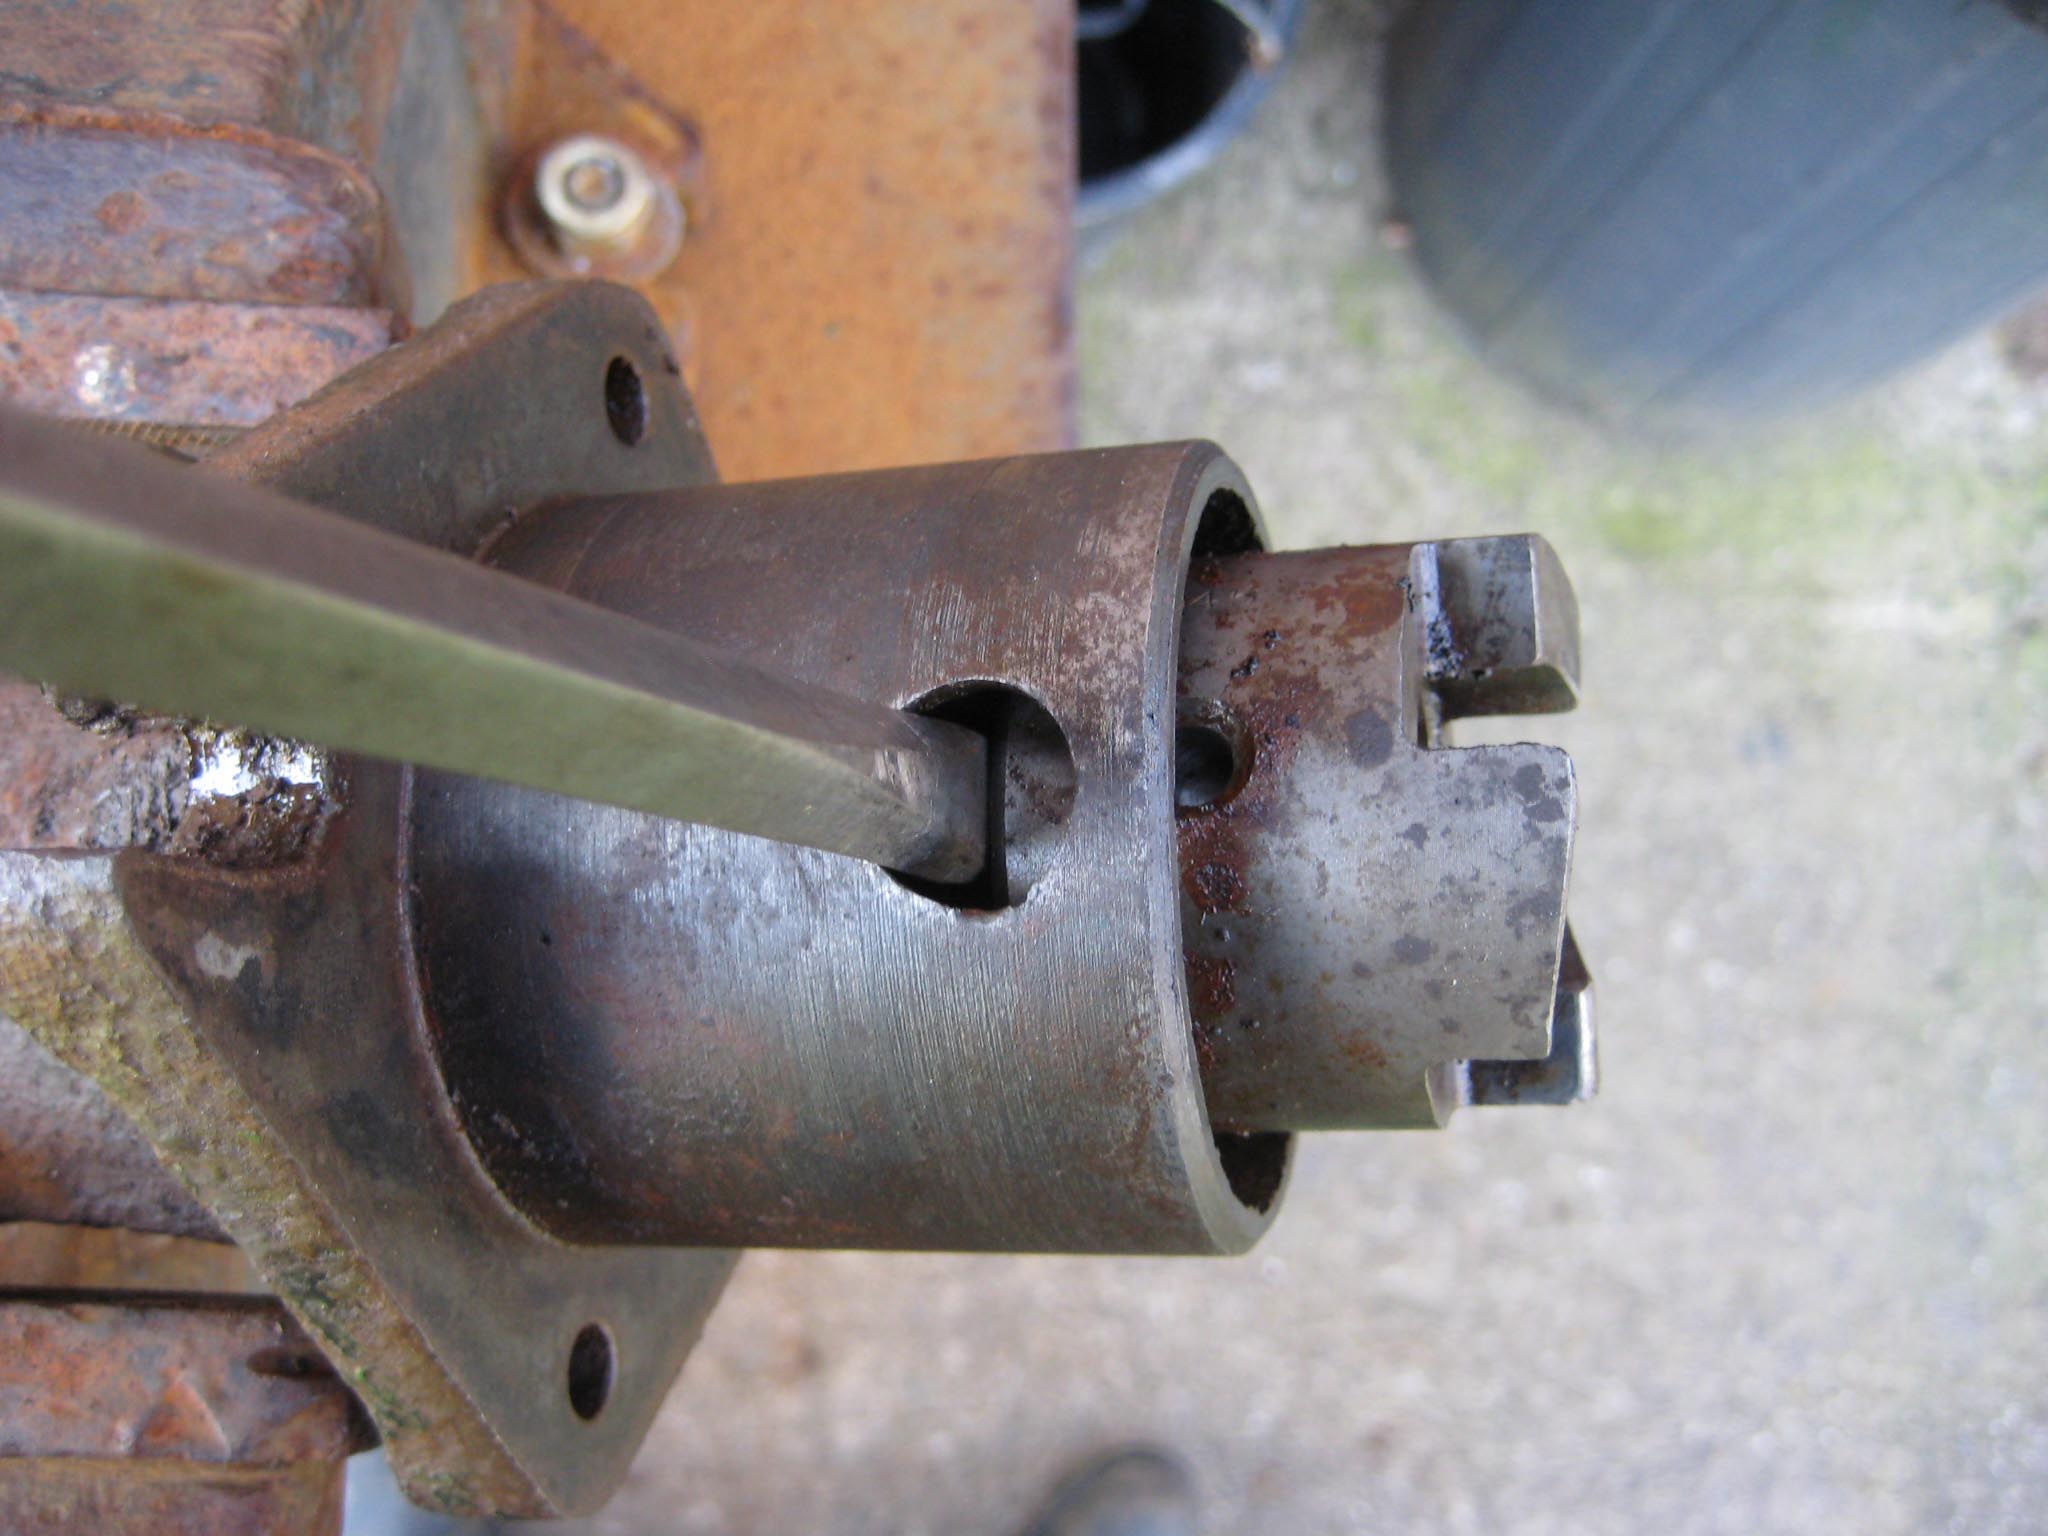
With the crown wheel and miller shaft removed, the pinion can be tackled next. Rotate the dog clutch until the roll pin lines up with the access holes and punch it out. The dog clutch needs to be pulled from the end of the pinion shaft. This is very awkward to do as the puller arms have to fit down the gap between the outside of the dog clutch and inside of the housing (see picture 6). An alternative method is drive the pinion shaft inwards a few millimetres, then from the pinion gear end (see picture 7) drive the shaft back the opposite way. What you are trying to achieve as enough room at the back of the dog clutch to insert a lever (in my case a stout screwdriver) through the roll pin access holes (see picture 8). It may take a few attempts of driving the shaft one way then the other to get the required gap, but it is important to do this in small increments as there is a bronze bush behind the dog clutch which will be damaged by forcing the dog clutch key into it. If you are not replacing the pinion shaft bush, make or buy a suitable puller. Lever the dog clutch from the shaft (penetrating oil and heat to expand the dog clutch may be required).
With the dog clutch out of the way, remove the dog clutch key and the pinion shaft can then be driven out from the dog clutch end.Attachments:
April 7, 2015 at 1:57 pm #12468charlieKeymasterA very informative account of how to get it all apart.
April 7, 2015 at 5:13 pm #12470andyfrost
Participant“Having cut my teeth rebuilding a Trusty, the Simar is in a different league when it comes to complexity!!”
And engineering standards, although as you say they are quite complex .
Andy.
-
AuthorPosts
- You must be logged in to reply to this topic.