Home › Forums › The Machinery Forums › Pedestrian operated machines › MonroTiller Series 3.
- This topic has 10 replies, 3 voices, and was last updated 9 years ago by
 charlie.
-
AuthorPosts
-
May 4, 2015 at 2:06 pm #12887
 joegrgrahamParticipant
Afternoon all,
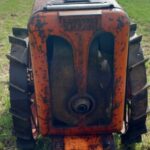
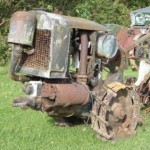
I know there is already a monrotiller thread, but I didnt want to hijack someone elses, so I’m starting a new one.I have just acquired a series 3, unfortunately it is a bit more ‘tired’ than I thought, so firstly, could someone point me in the direction of a manual?.
I haven’t looked too closely yet, but on initial inspection, it will need tyres, an HT lead, cables and an exhaust. I believe Villiers parts are available, but what about the tyres? (3.00×6).
Mine has the slasher tines, were ‘normal’ rotavator tines available?
Are there any known weak spots in these machines I need to be aware of?.
Thanks, Joe.
May 4, 2015 at 5:07 pm #12890 charlieKeymaster
Joe if you google Monro Tiller you should find my website, some info on there about each model. Tyres are obsolete, but are the same as used on Merry Tiller amongst other machine such as the smaller Barford Atom. 4 types of tine were available, knife which are straight, normal digging look like a sickle, hoeing L shaped and scuffling tines. I have owners manual as pdf file includes illustrated parts list.
Weak point is bottom of chain guard on miller drive, it wears through. Make sure you use a straight gear oil in the gearbox, not EP type. Lack of ground clearance can be an issue when working at maximum depth.May 4, 2015 at 5:37 pm #12901 vhgmcbuddyMember
The other weak spot is about 18″ behind the back of the machine, they usually spend far to much time and effort tinkering in the allotment shed trying to get it/ keep it going when if they (should I say I) had got something newer I have the job done in 1/2 the time. That’s a bit unfair, but you’ll see what I mean.
Best of luck.
JamesMay 4, 2015 at 7:21 pm #12907 joegrgrahamParticipant
So tonight I have given my ‘prize’ some closer inspection.
It is serial number 334603, the rotors turn when the engine is turned and……………… nope, thats all the good bits I can find.
No spark, no compression, magneto backplate is broken, exhaust rotten, gearbox full of water, wont engage gears, both tyres cream-crackered, cables inoperative………don’t you just love impulse bids!!
Amazingly, most of the paint is intact, and the rotor cover isn’t rotten!.
Charlie, I have sent you a PM, and James, I couldn’t agree more about the weak spot, but why spend £150 on a good one when you can spend £50 on a piece of c*** and then another £200 getting it to work!
Joe.
May 5, 2015 at 4:16 pm #12930 charlieKeymaster
4603 dates from 26/6/63 a fairly late one, production by Geo Monro ended in 1965.
No spark could be as simple as dirty points or need a complete magneto rebuild with new coil, points and condenser, plus backplate. Lack of compression might be a stuck valve, removal of cylinder head should confirm what problem is. Gearbox full of water is not a good sign, at worst you will have to split gearbox and inspect gears for serious rust. Tyres will be a problem as they are obsolete, same as used on Merry Tiller and small Barford Atom. Control cables can be made.
Happy to give any help and advice I can. Will need to check parts from scrap machines to see what spares I have.May 5, 2015 at 7:21 pm #12933 joegrgrahamParticipant
Another inspection in the cold light of day, and it doesnt look any better!.
Took the spanners to it tonight, the engine refused to budge, so I decided to remove the gearbox top………take a look at the picture to see what I found.
Aside from a vile, rusty, gungy, water-filled mess, the bracket that hold the clutch cable is broken off.Oh bu**er!.
Question now is, do I put it down to experience and chuck it in the bin, or is this the beginning of a long, expensive restoration………
May 5, 2015 at 7:42 pm #12935 joegrgrahamParticipant
I presume the gear visible in the picture isnt supposed to have teeth that shape?
This sorry fiasco does however speak volumes about the quality if Geo’ Monro’s paint shop, from the condition of the outside, no one would suspect that the machine has clearly lived in a ditch for some time.
Charlie, I received then manual, and the offer of advice, many thanks.
Joe.
May 6, 2015 at 2:14 pm #12942 charlieKeymaster
Joe,
the bronze gear is that shape so it meshes with the work on the main shaft. It does not look too bad, I have seen them with sharp edges to the teeth caused by excessive wear. It might be worth giving the gearbox a good wash out with degreaser and a power washer. The engine is held on by 4 bolts/studs. I think I need to have a dig around in the shed and find some Monro bits to photograph to give you an idea of what it should look like and how it should come apart.May 6, 2015 at 2:54 pm #12943 joegrgrahamParticipant
Thanks Charlie,
Its encouraging to know the gear is supposed to be that shape.I’ve got the four nuts off the engine, its just the ‘sticktion’ holding it in at the moment.
I think my plan of attack is going to be to pull it apart into the main sections, flush the gearbox out so I can see what I’ve actually got, and then take it from there.
A couple of pics of the gearbox especially would be greatly appreciated.
Joe.
May 6, 2015 at 4:10 pm #12944 joegrgrahamParticipant
Just a quick one Charlie,
Once the nuts are off the four studs, should the engine just pull off, or is there something inside that needs to be released, the engine is rocking on the studs but doesn’t want to pull forward.I’ve got the rotor box off, and it doesn’t look like its seen a lot of work, there may be hope…………….
May 7, 2015 at 5:30 am #12955 charlieKeymaster
Apart from the four nuts the only other thing to remove from the engine is the throttle cable, it should then just pull off. The only thing I can think that is holding the engine is the clutch. On the engine is mounted a metal disc with 3 fingers, these engage with the clutch disc MT23. The clutch disc is held by spring pressure between MT21 and MT22. I will get some photographs at the weekend so you can see what it looks like when apart.
-
AuthorPosts
- You must be logged in to reply to this topic.

