Home › Forums › The Main Forum Area › Projects › MonroTiller Series 3 resurrection.
- This topic has 10 replies, 2 voices, and was last updated 11 years, 1 month ago by
 joegrgraham.
-
AuthorPosts
-
May 8, 2015 at 8:08 pm #12969
 joegrgrahamParticipant
If you’ve been following my thread in ‘pedestrian machines’, you’ll know about my rather sad Monrotiller. If not, a quick recap:
I bought a series 3 Monrotiller which Charlie has dated to 26/6/1963. Unfortunately it turned out to be somewhat worse than it looked, no spark, no compression, shot tyres and a gearbox full of water. And to put the tin hat on the whole sorry escapade, I broke my trailer on the way to collect the machine! blooming terrible roads, trailer bouncing about so much it broke the welds on the wheelarch bracket!.
On the plus side, the machine has most of the original paint intact, the cowl and fuel tank are in good condition and the rotor box has no rot and looks to have seen very little use.So, as the machine has become a project/calamity, I thought I’d start a project thread about it. This wont be a restoration as I have a strong aversion to painting, and I actually prefer machines in their working clothes (distressed, like their owner). This will just be a record of my misadventures in attempting to get the thing back into life, I went to the chimps tea-party school of engineering so I shall apologize in advance to any purists I may distress with my methods!.
To date, the rotor box has been removed, fuel tank and cowl removed from engine, gearbox cover/handlebars removed.
Now to remove the engine, four nuts removed and engine will pull off, nope, refusing to budge.
First question, the three fingers are determined to be as one with the clutch disc, so can I remove the bronze gear to allow the whole clutch to come out with the engine as there is not really any scope to administer further persuasion in situ.
Thanks, Joe.
May 9, 2015 at 7:27 am #12970 charlieKeymaster
Removal of the bronze worm wheel is not easy and not something I would recommend, it is something you do not want to damage and yours appears to be in good condition. I will be having a rumage in the shed today and will see if I can find an engine gearbox and clutch to see if I can work out what is stopping your engine coming off.
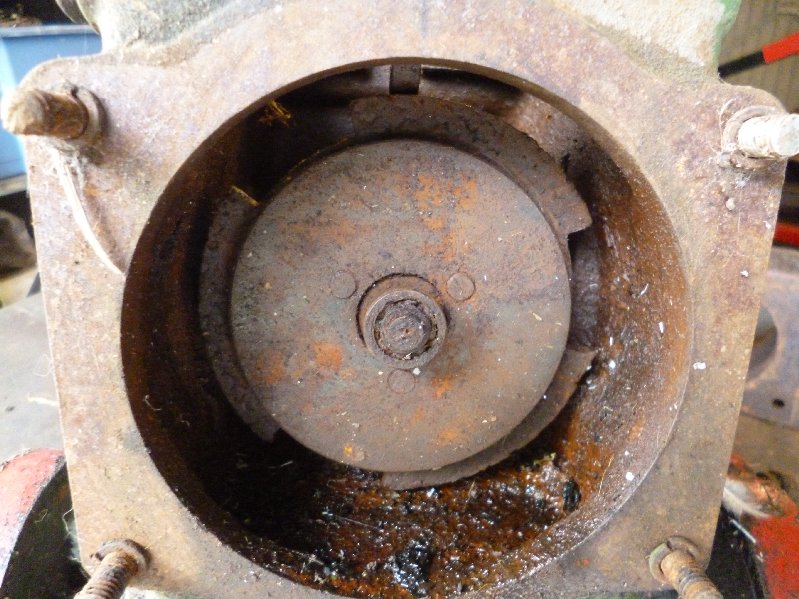
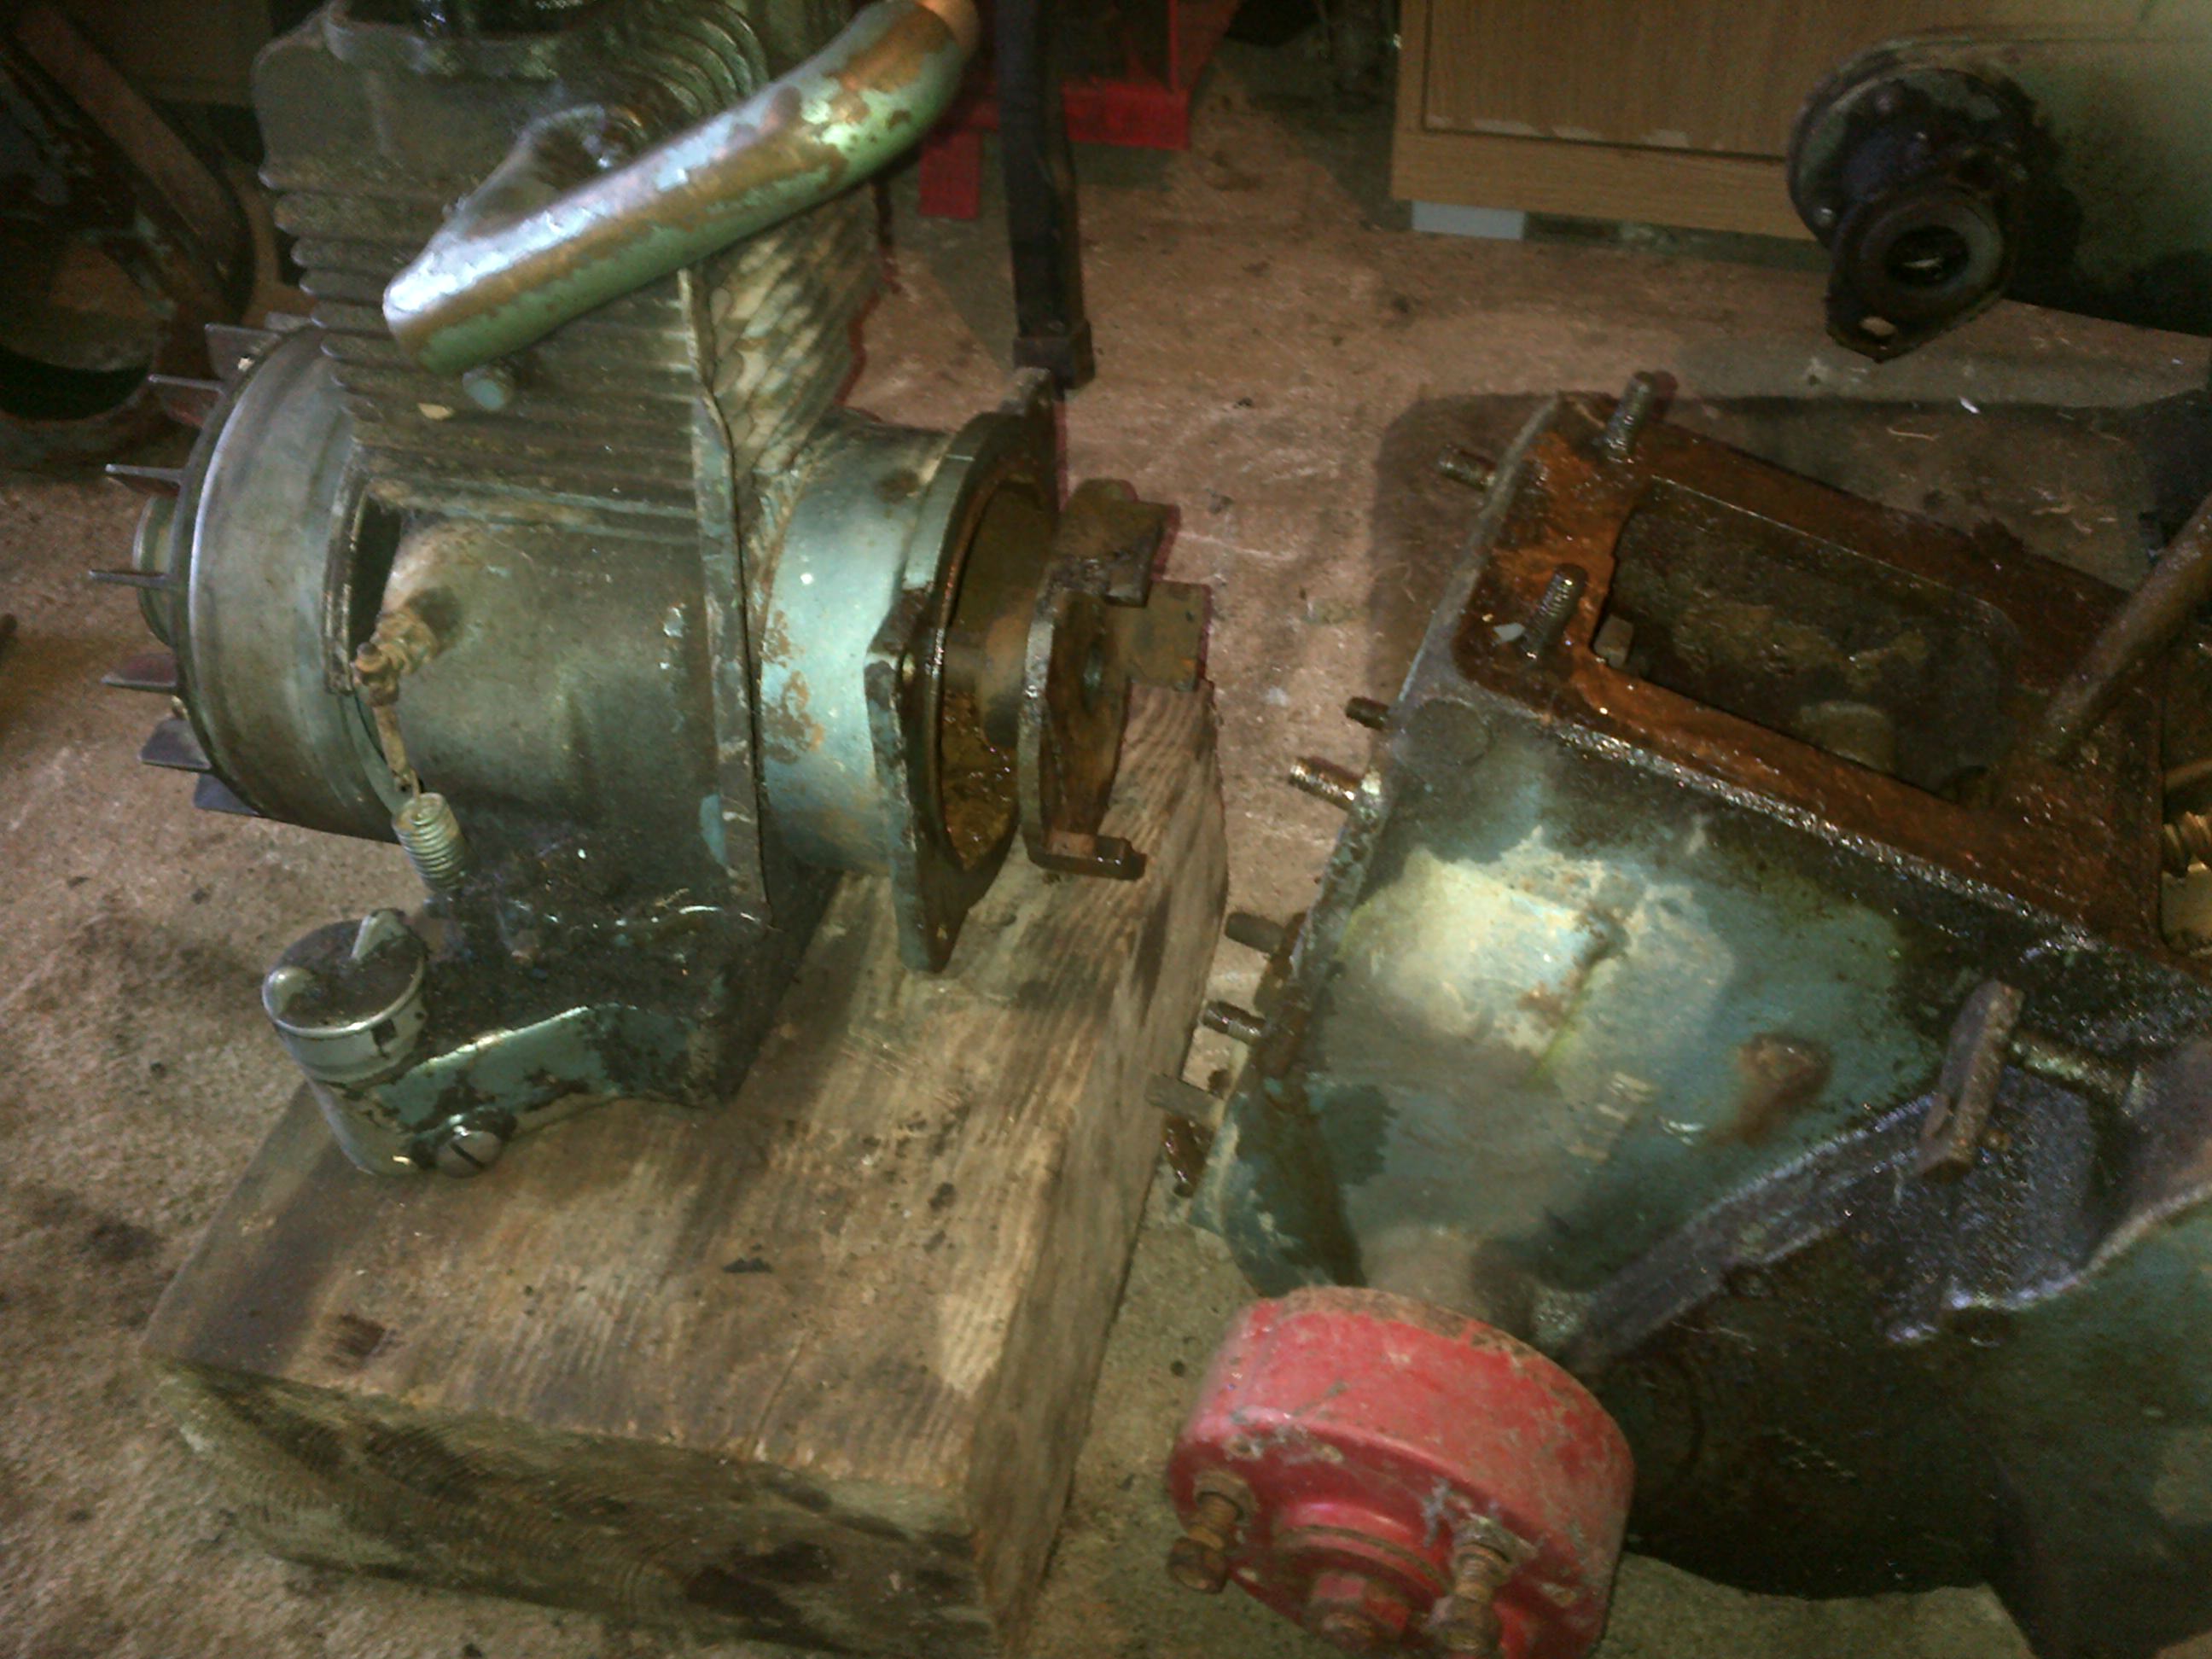
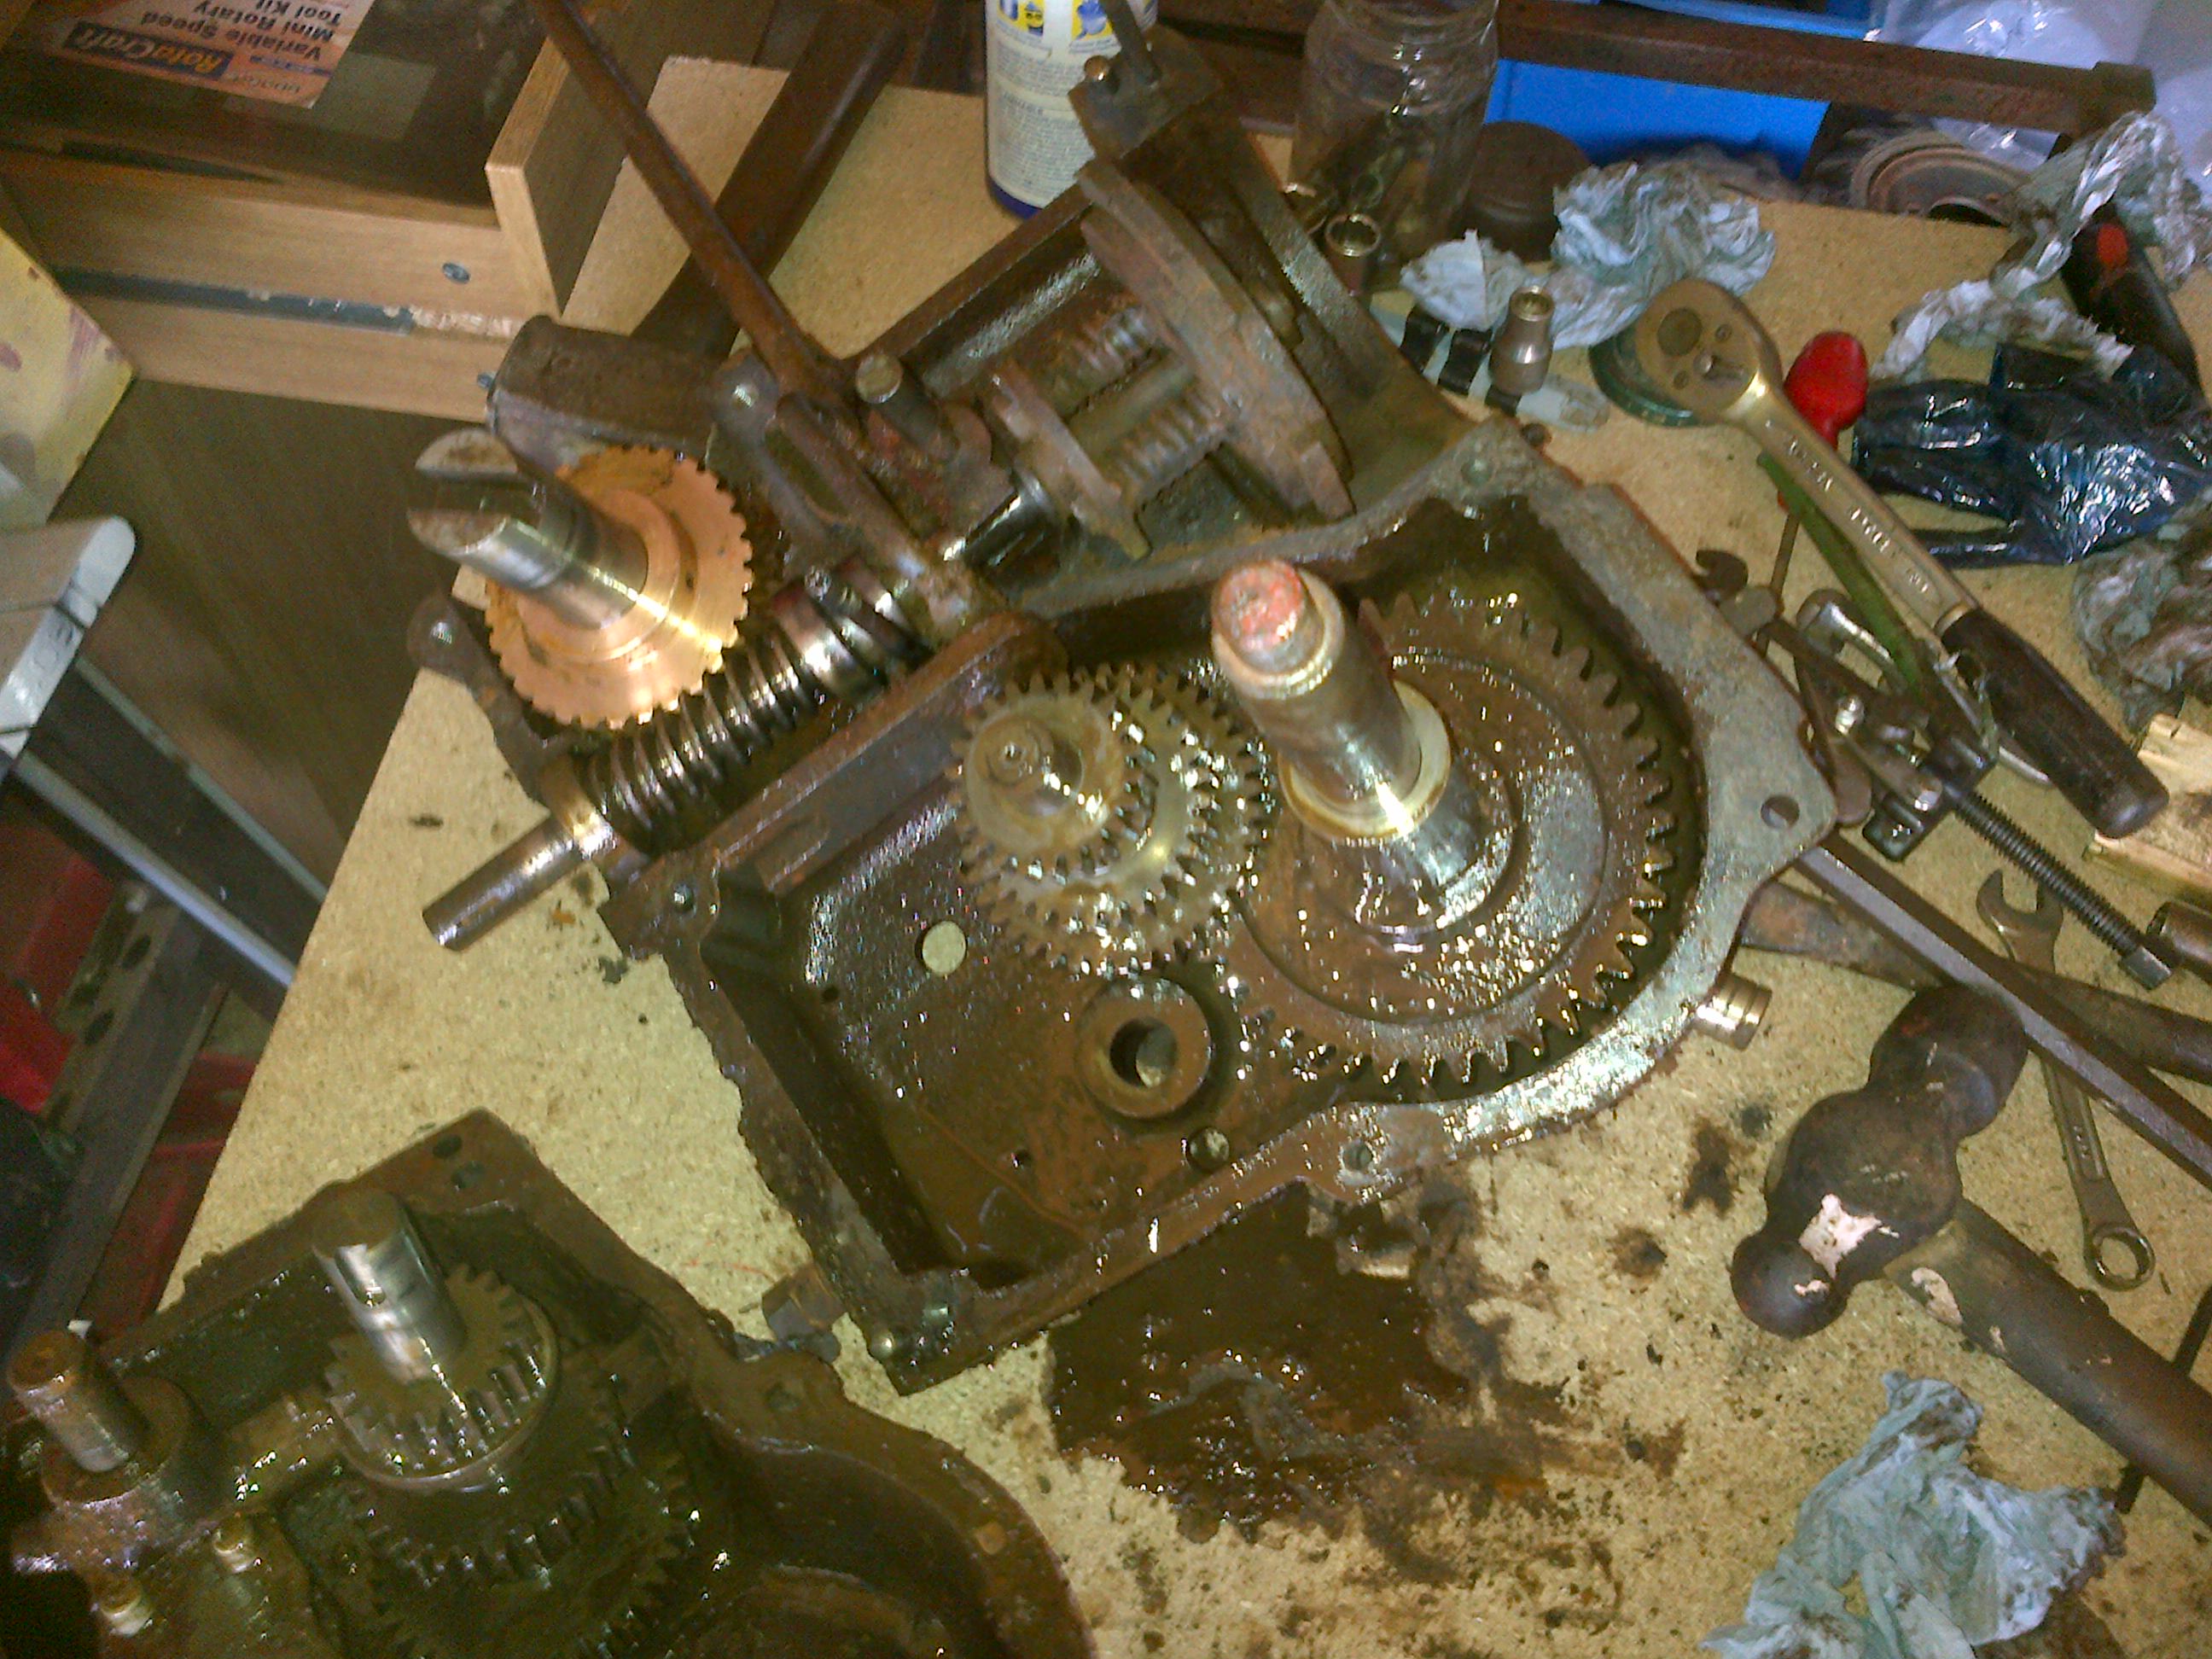
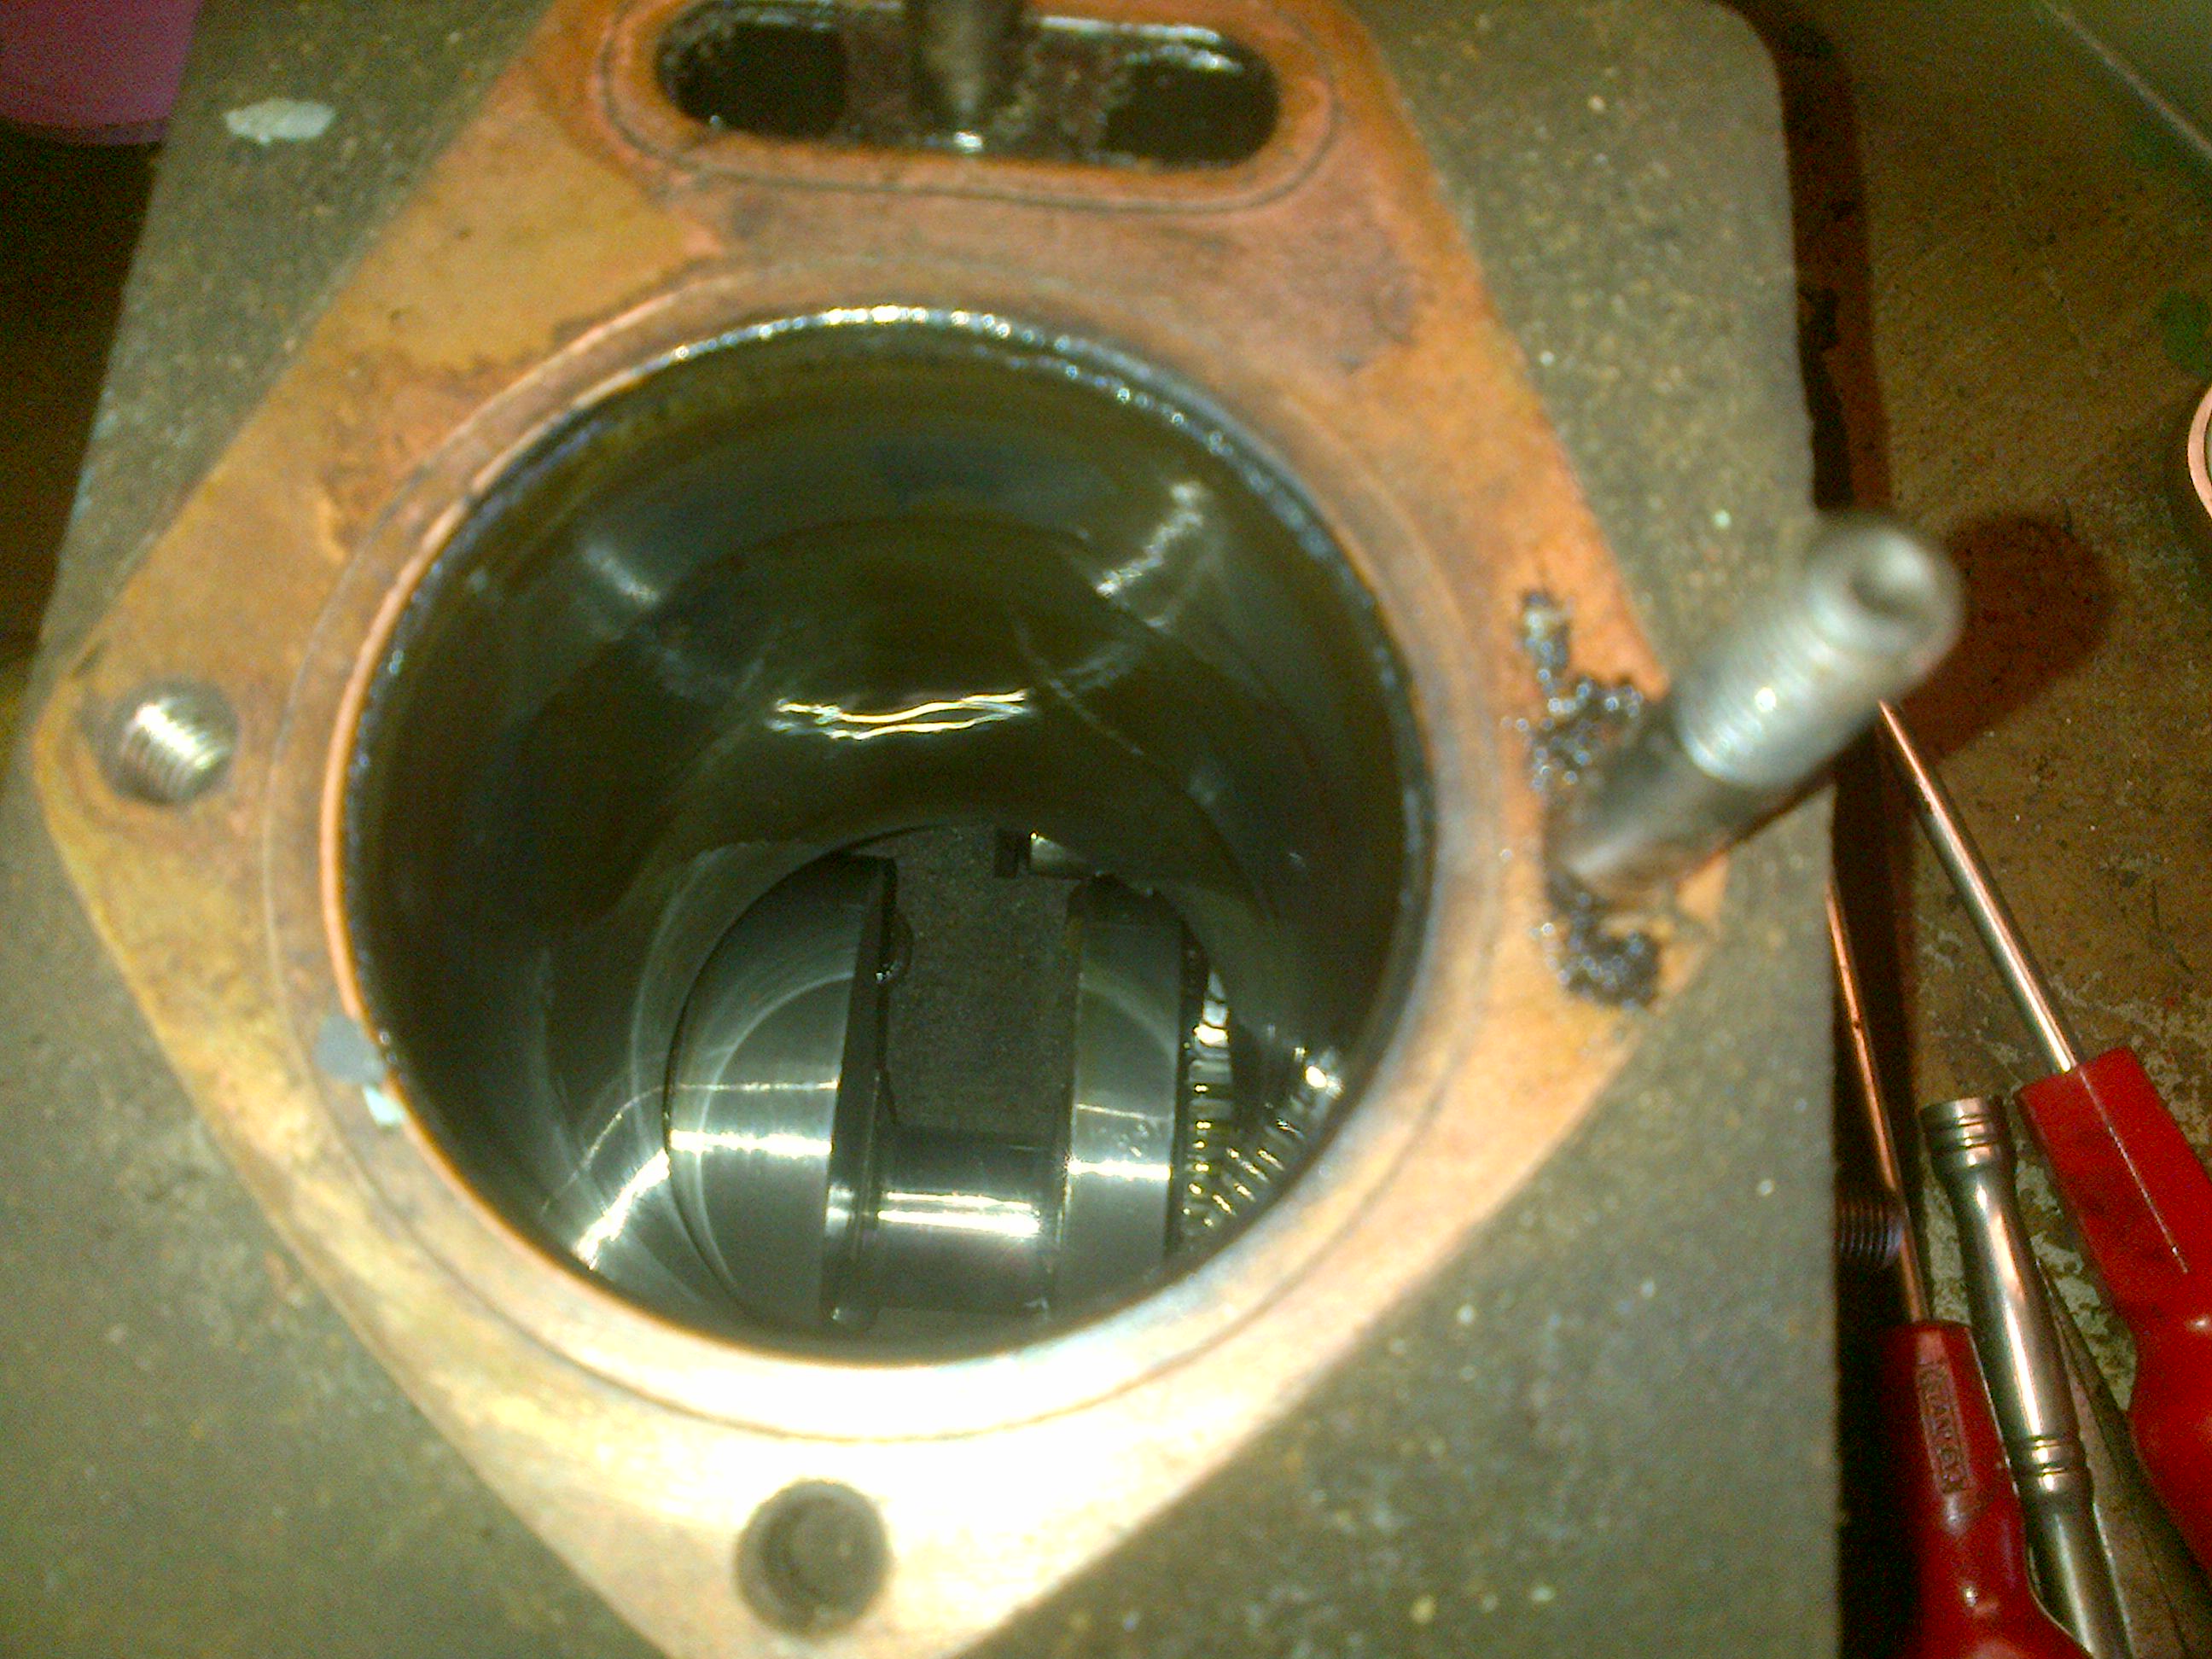
May 9, 2015 at 9:27 am #12971charlieKeymasterI think I can see what the problem is. The bearing MT90 on the end of the input shaft MT18 is probably stuck (rusted) in the clutch drive plate which is attached to the gearbox.Photo shows the bearing I refer to. The only way I can see to separate the engine from the gearbox will be to gently lever the engine off the gearbox, this should either extract bearing from drive plate or pull bearing of end of shaft. Wooden wedges driven between engine and gearbox on both sides to ensure engine comes off square to gearbox. Before starting it will be well worth supporting engine and gearbox on wooden blocks so neither can tip when engine comes off.
I have taken a series of photos showing how to split the gearbox, let me know if you want them.
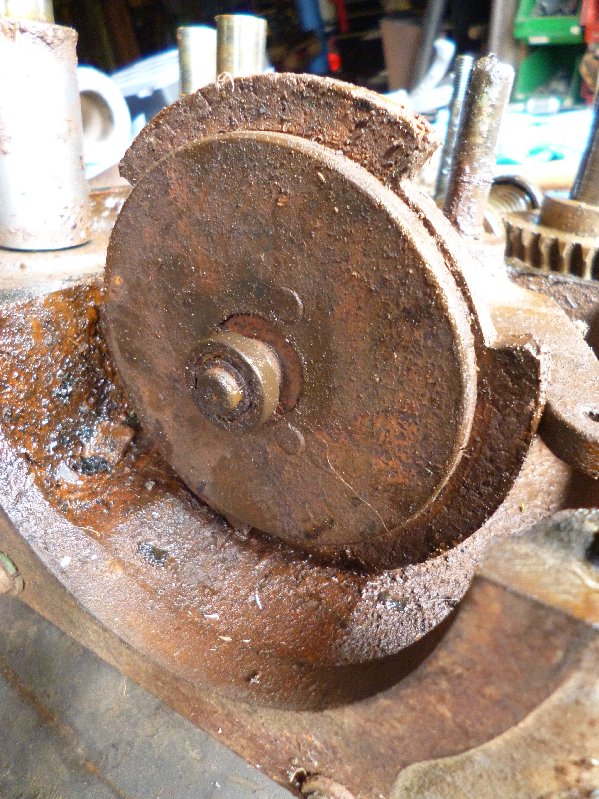
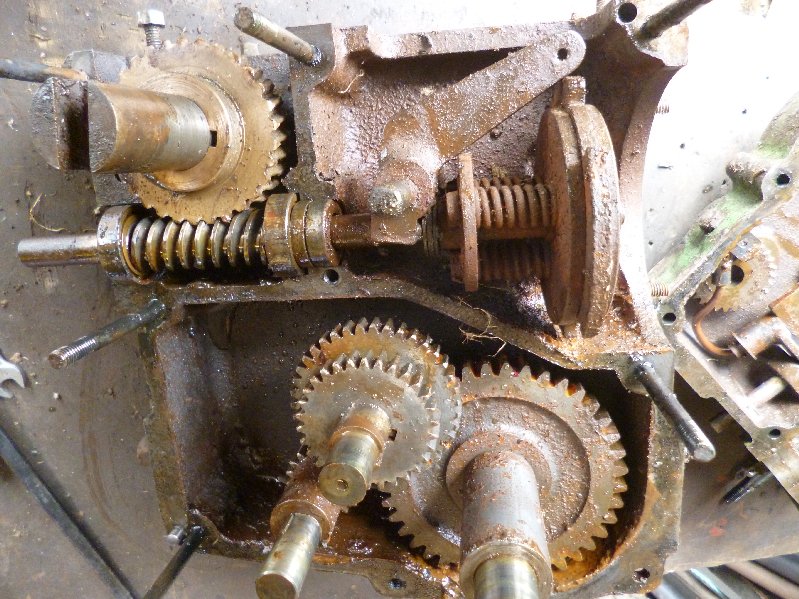
Below left to right, general view of gearbox internals, clutch and bearing which is probable cause of engine sticking.Attachments:
May 9, 2015 at 9:28 am #12975charlieKeymasterNote, the photos show a series 2 gearbox, basically the same as a series 3 but with one less gear ratio, only two speed not three. The reverse gear is mounted on the outside of the gearbox on l/h side on a series 3.
May 9, 2015 at 9:40 am #12976joegrgrahamParticipantThat’s brilliant, thank you Charlie!.
As they say, one seeing is worth a thousand tellings, I’m going to need to split the gearbox to properly clean away the rust and gunk, and to replace/repair the broken clutch release lever so if you could send me the photo’s, that would be great. Could you send them to my email, then I can save them onto a flash drive.
I shall have a go at levers/wedges next time I visit the shed.
Thanks again.
Joe.
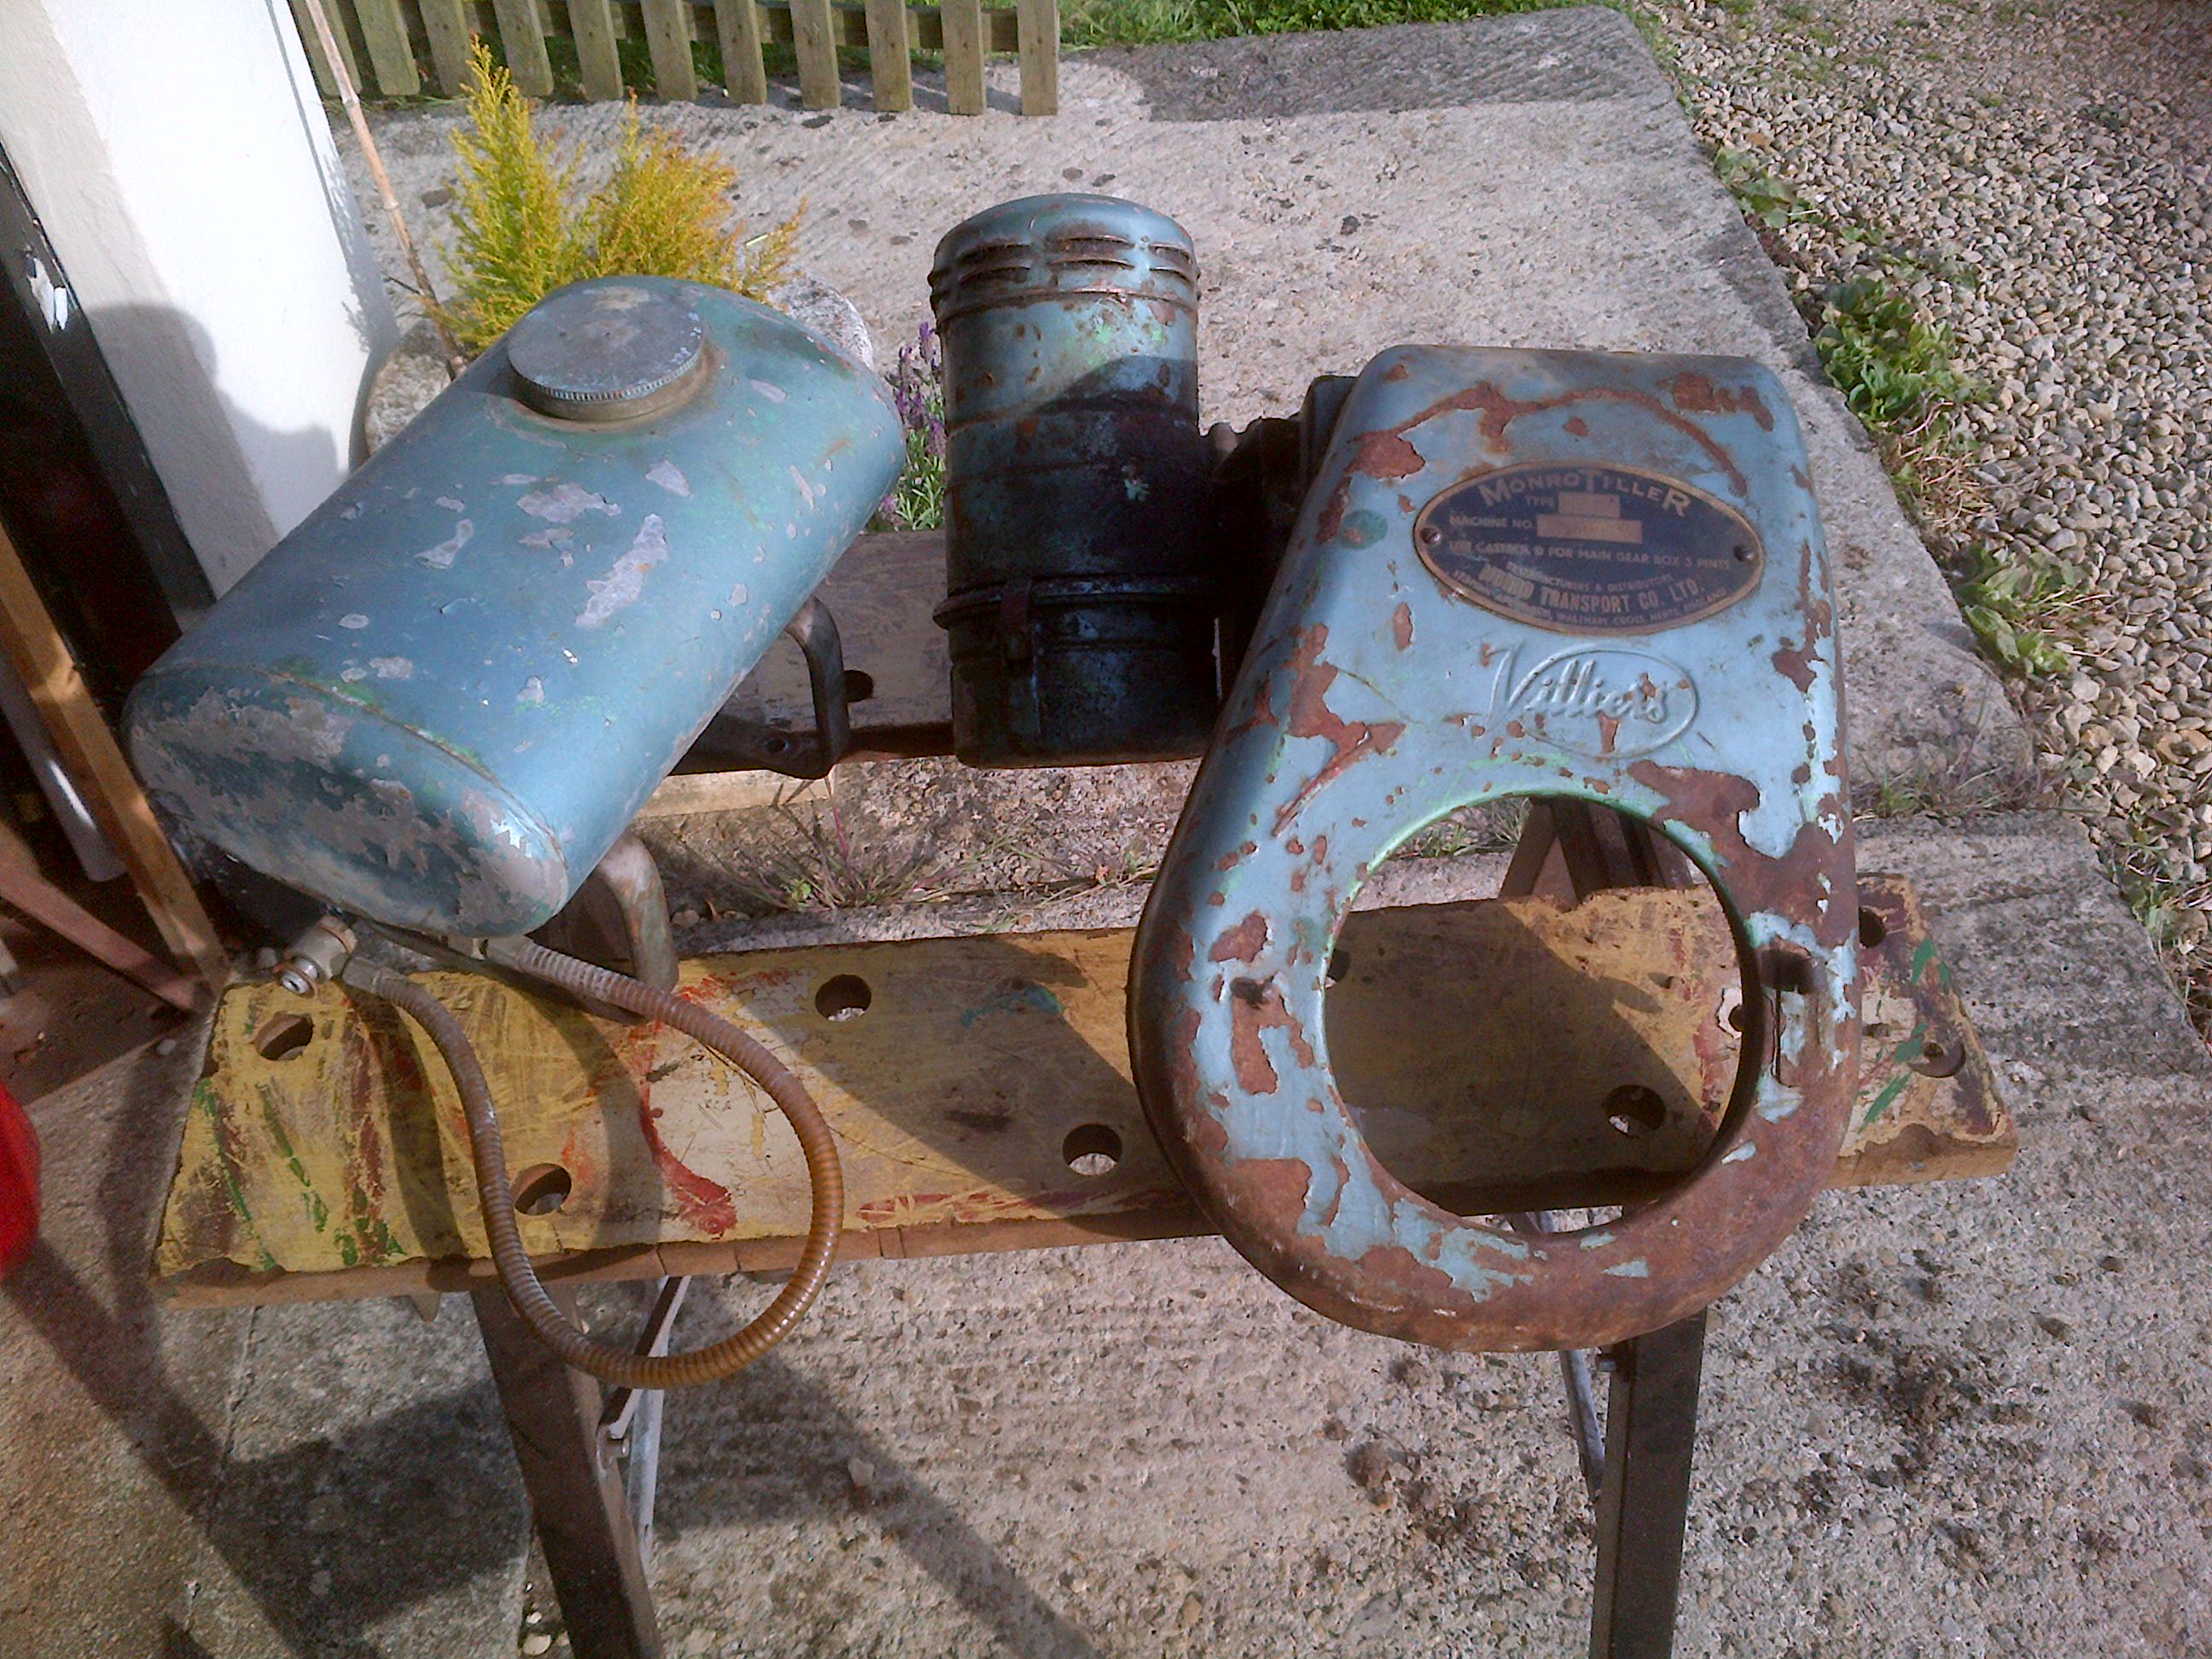
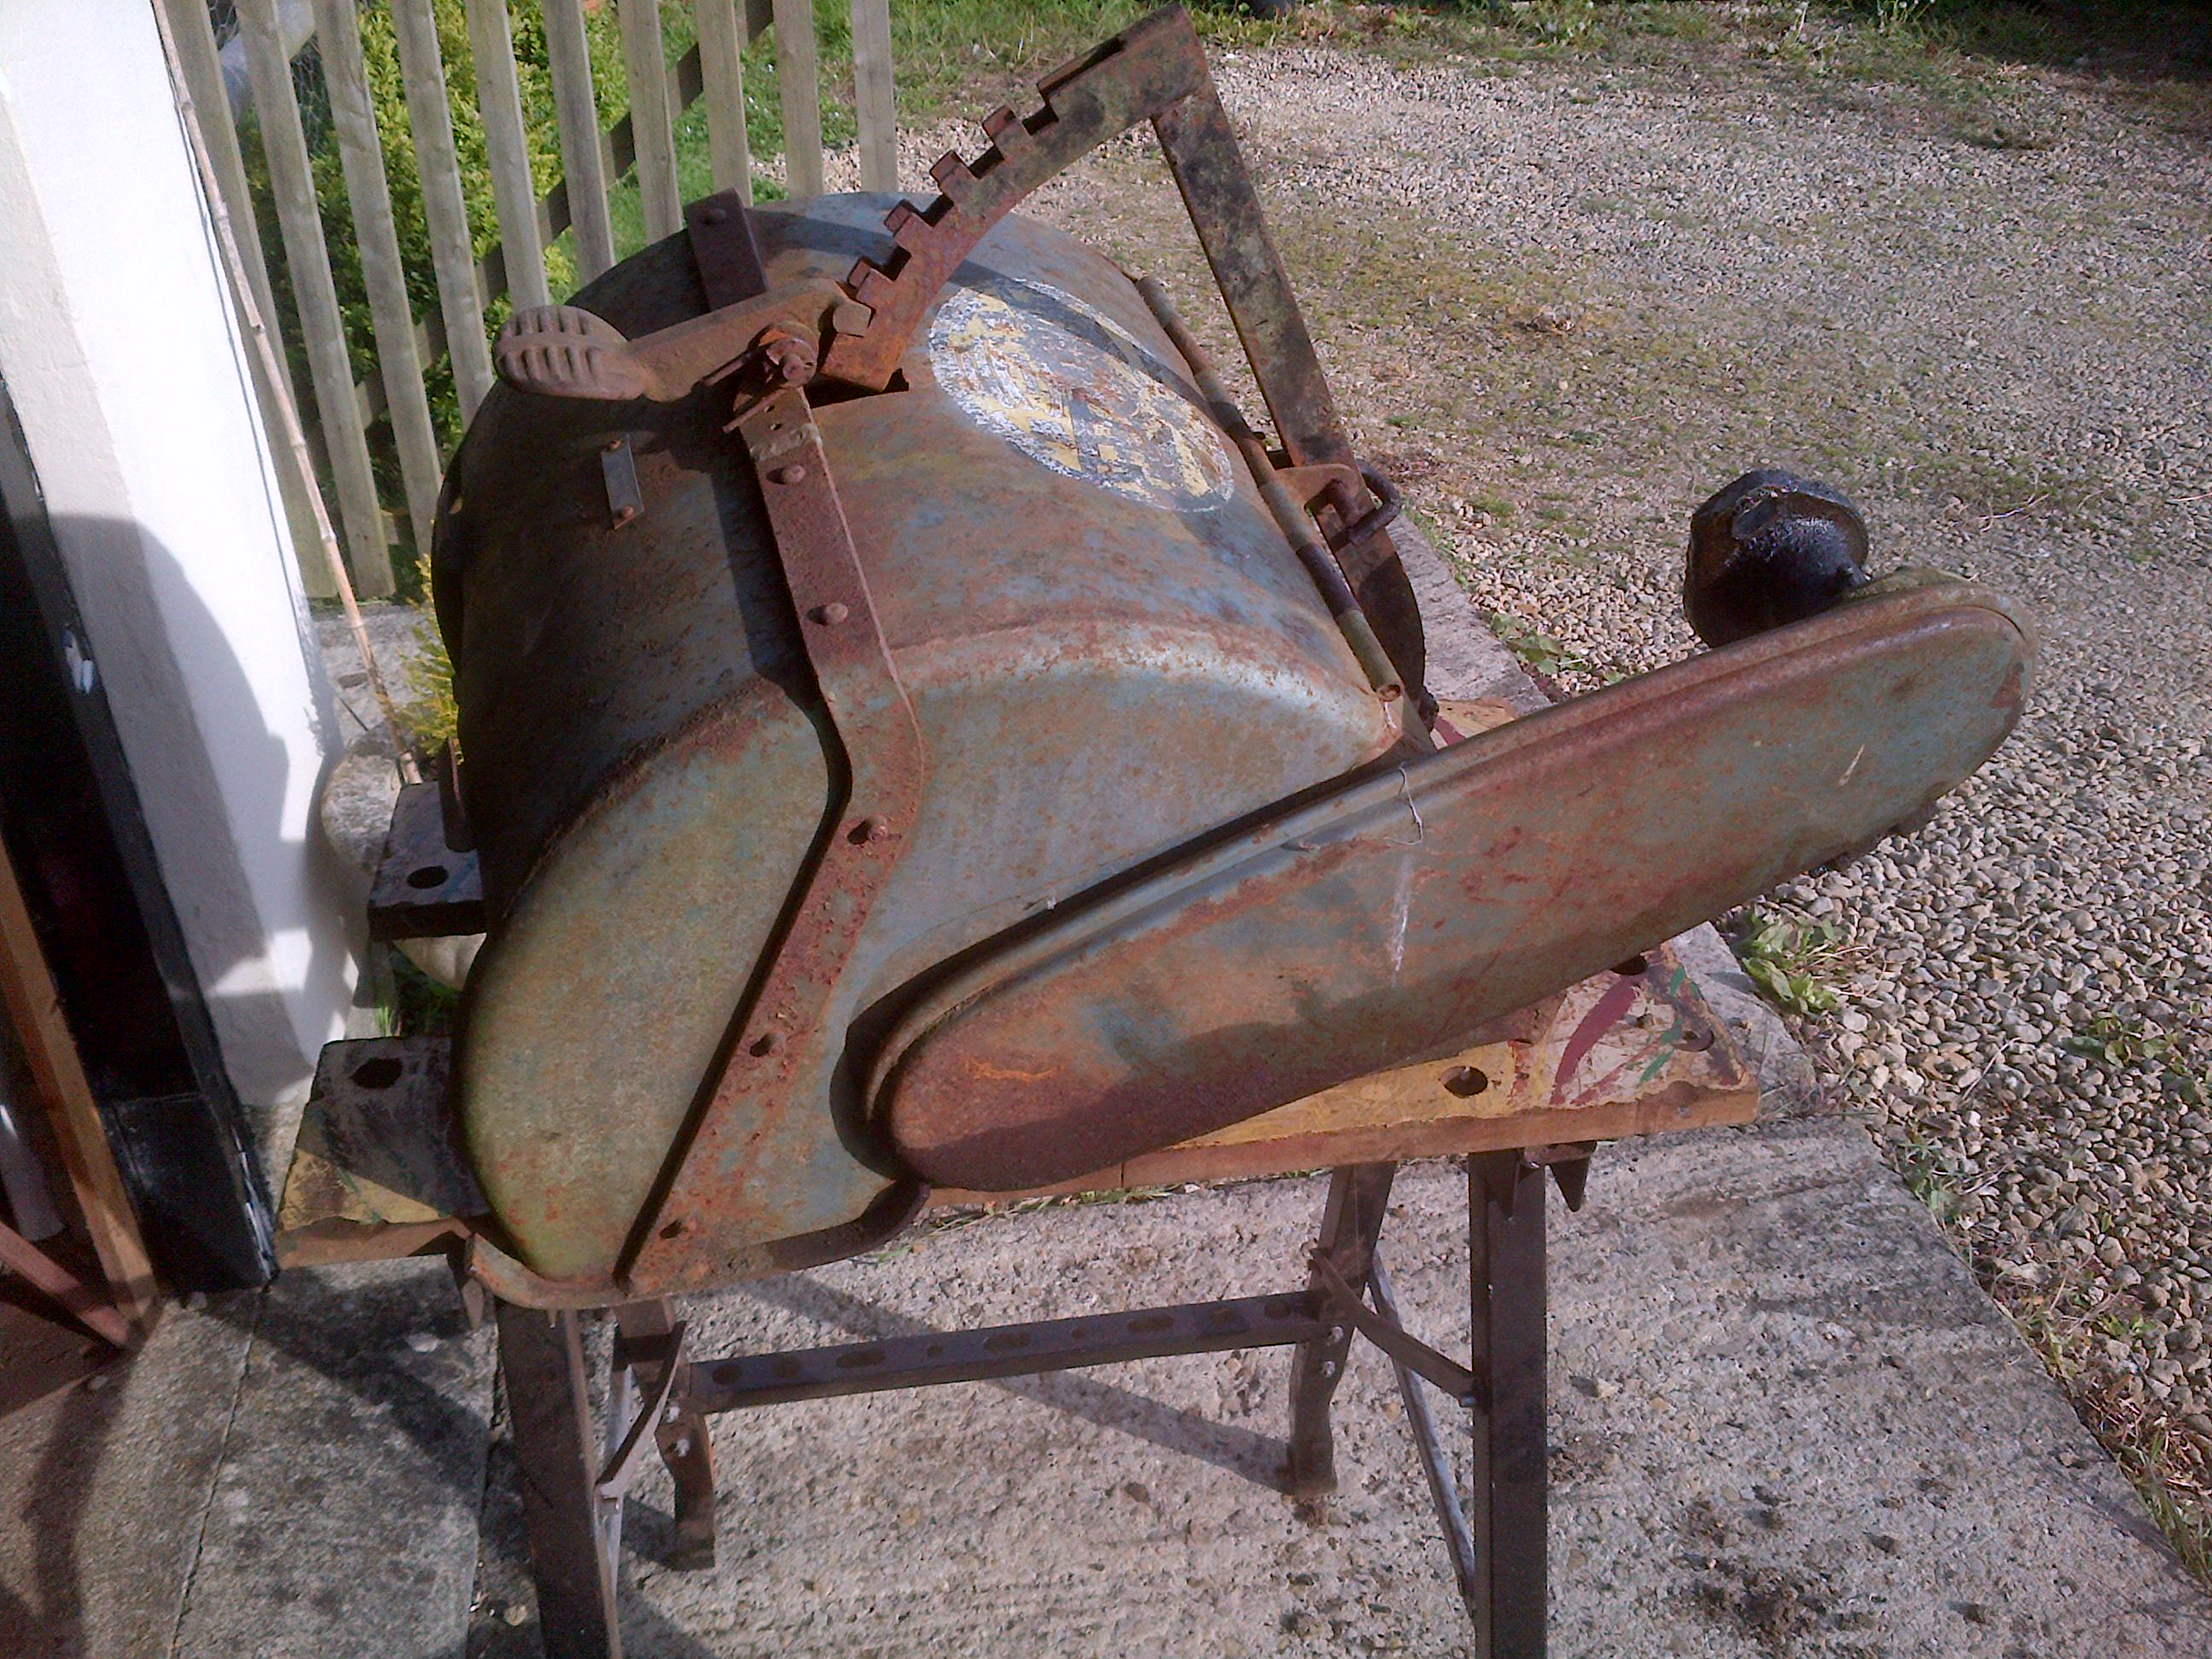
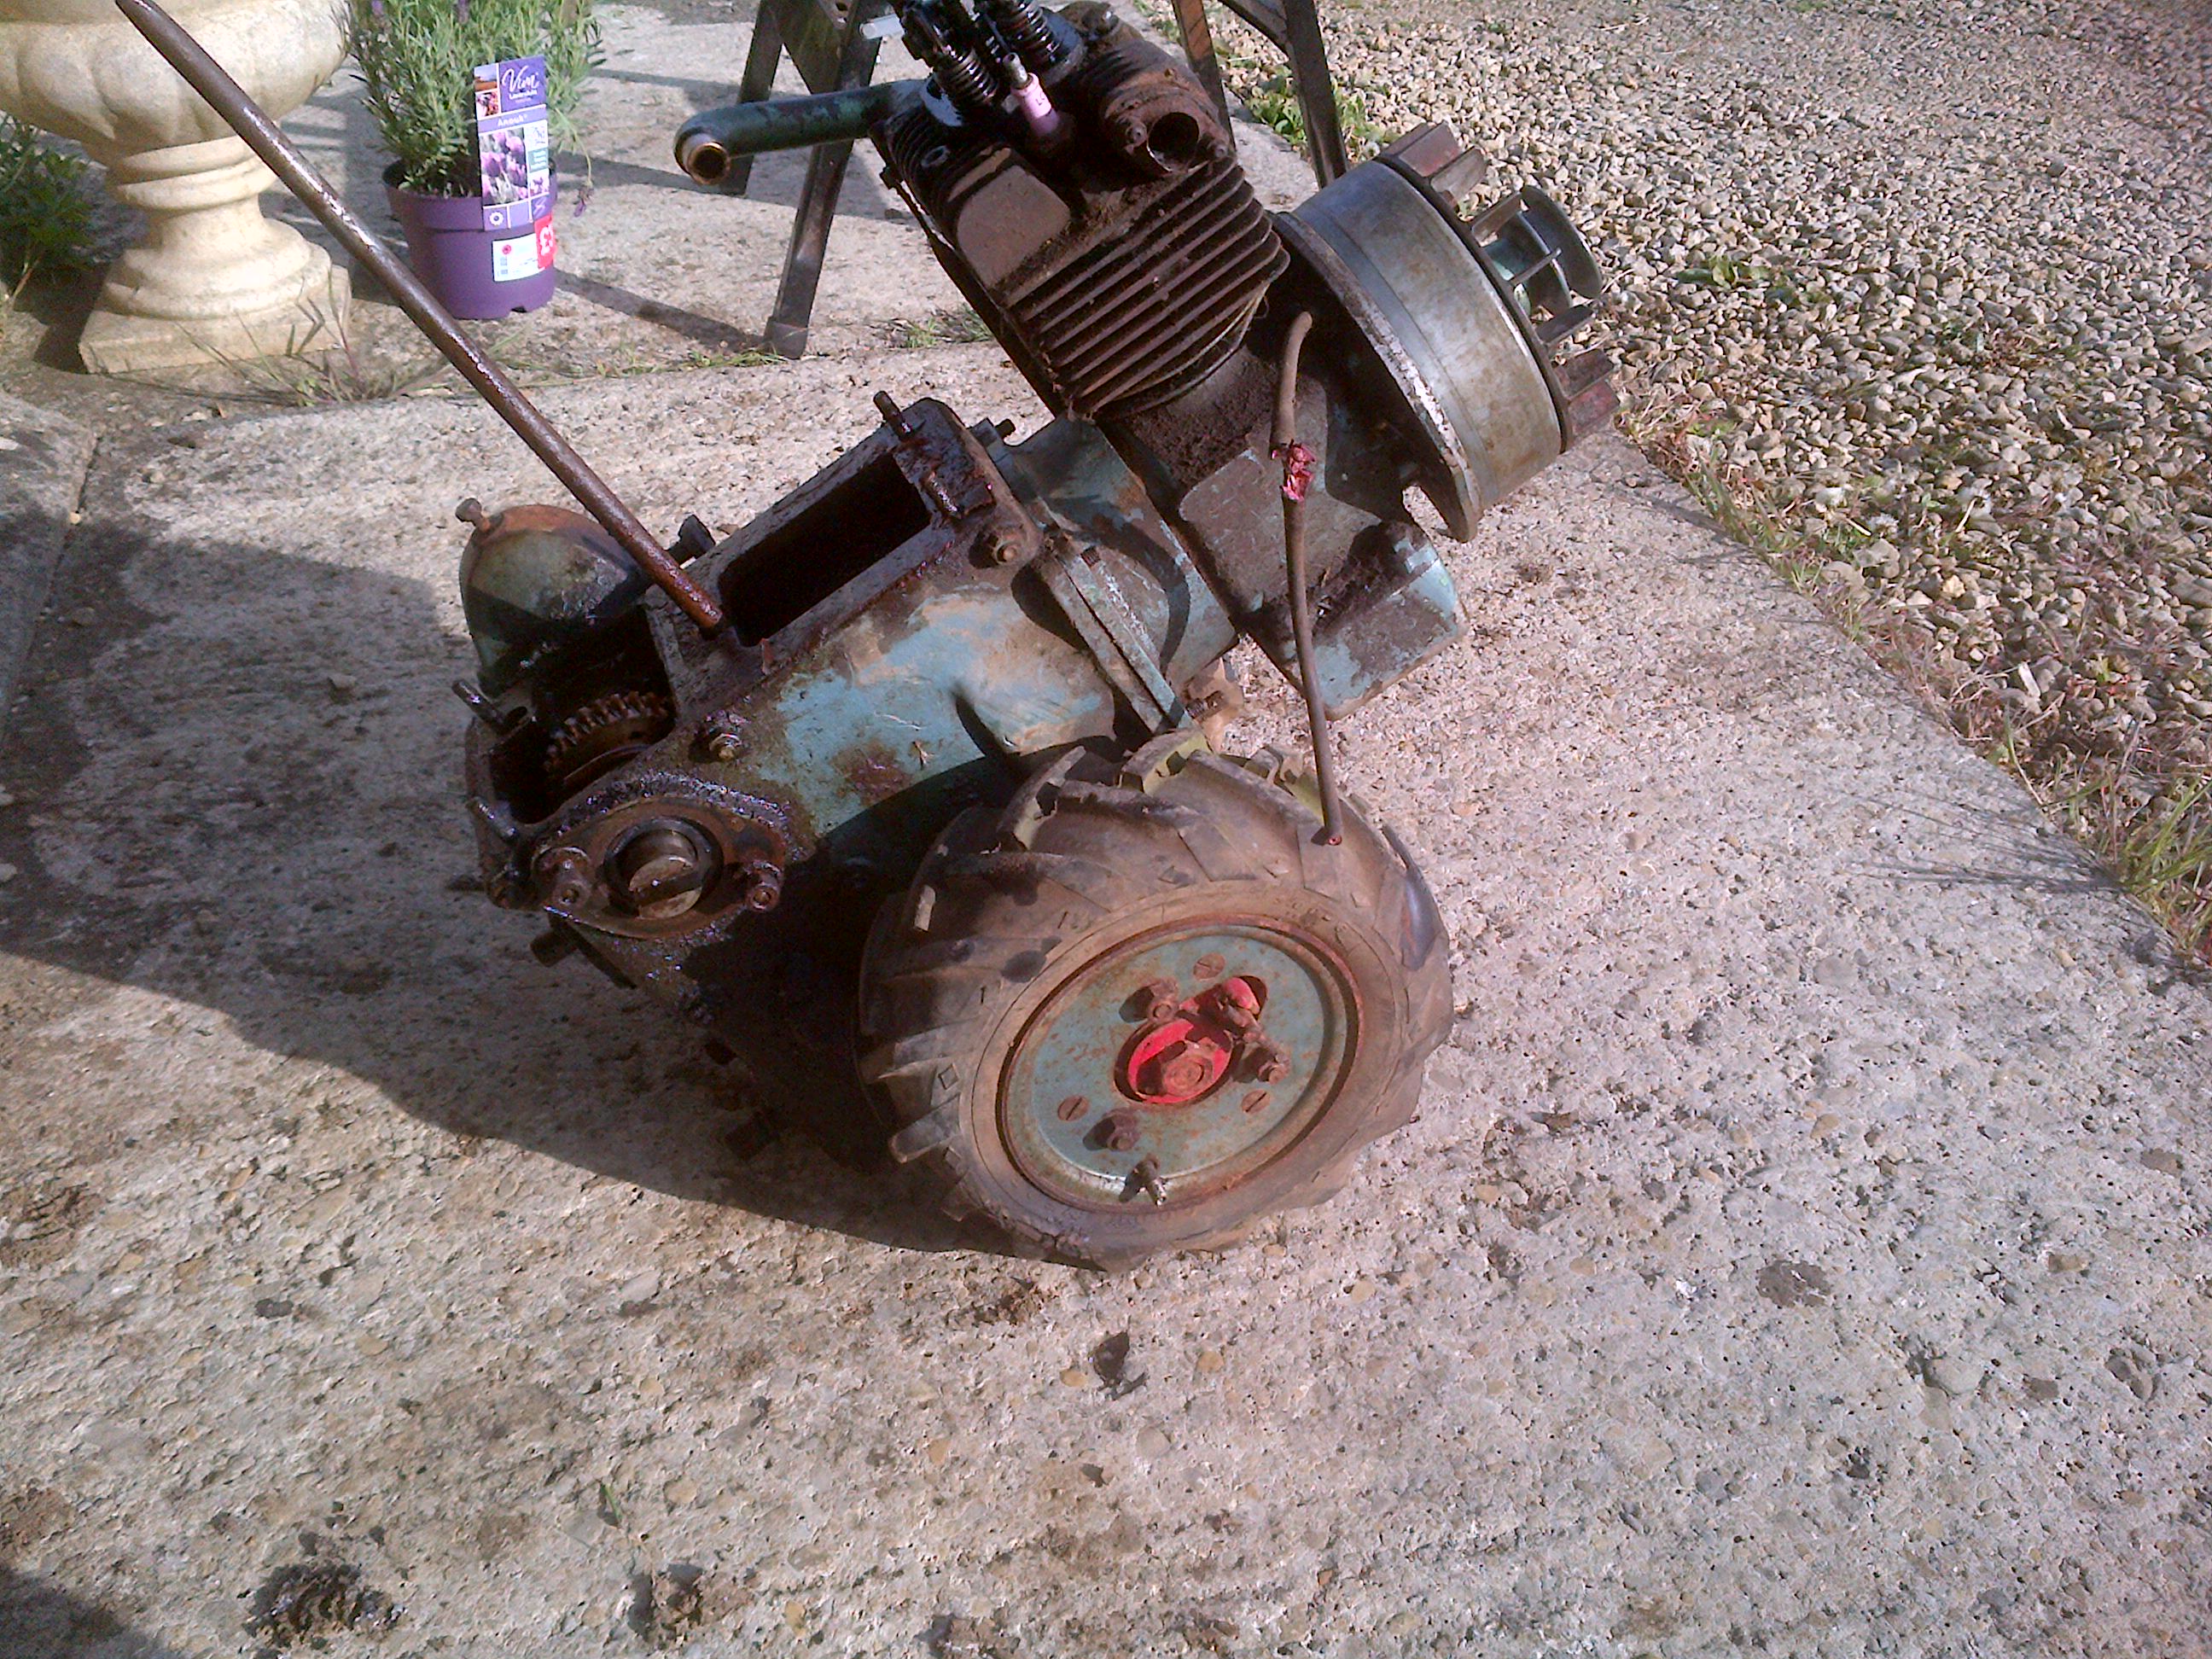
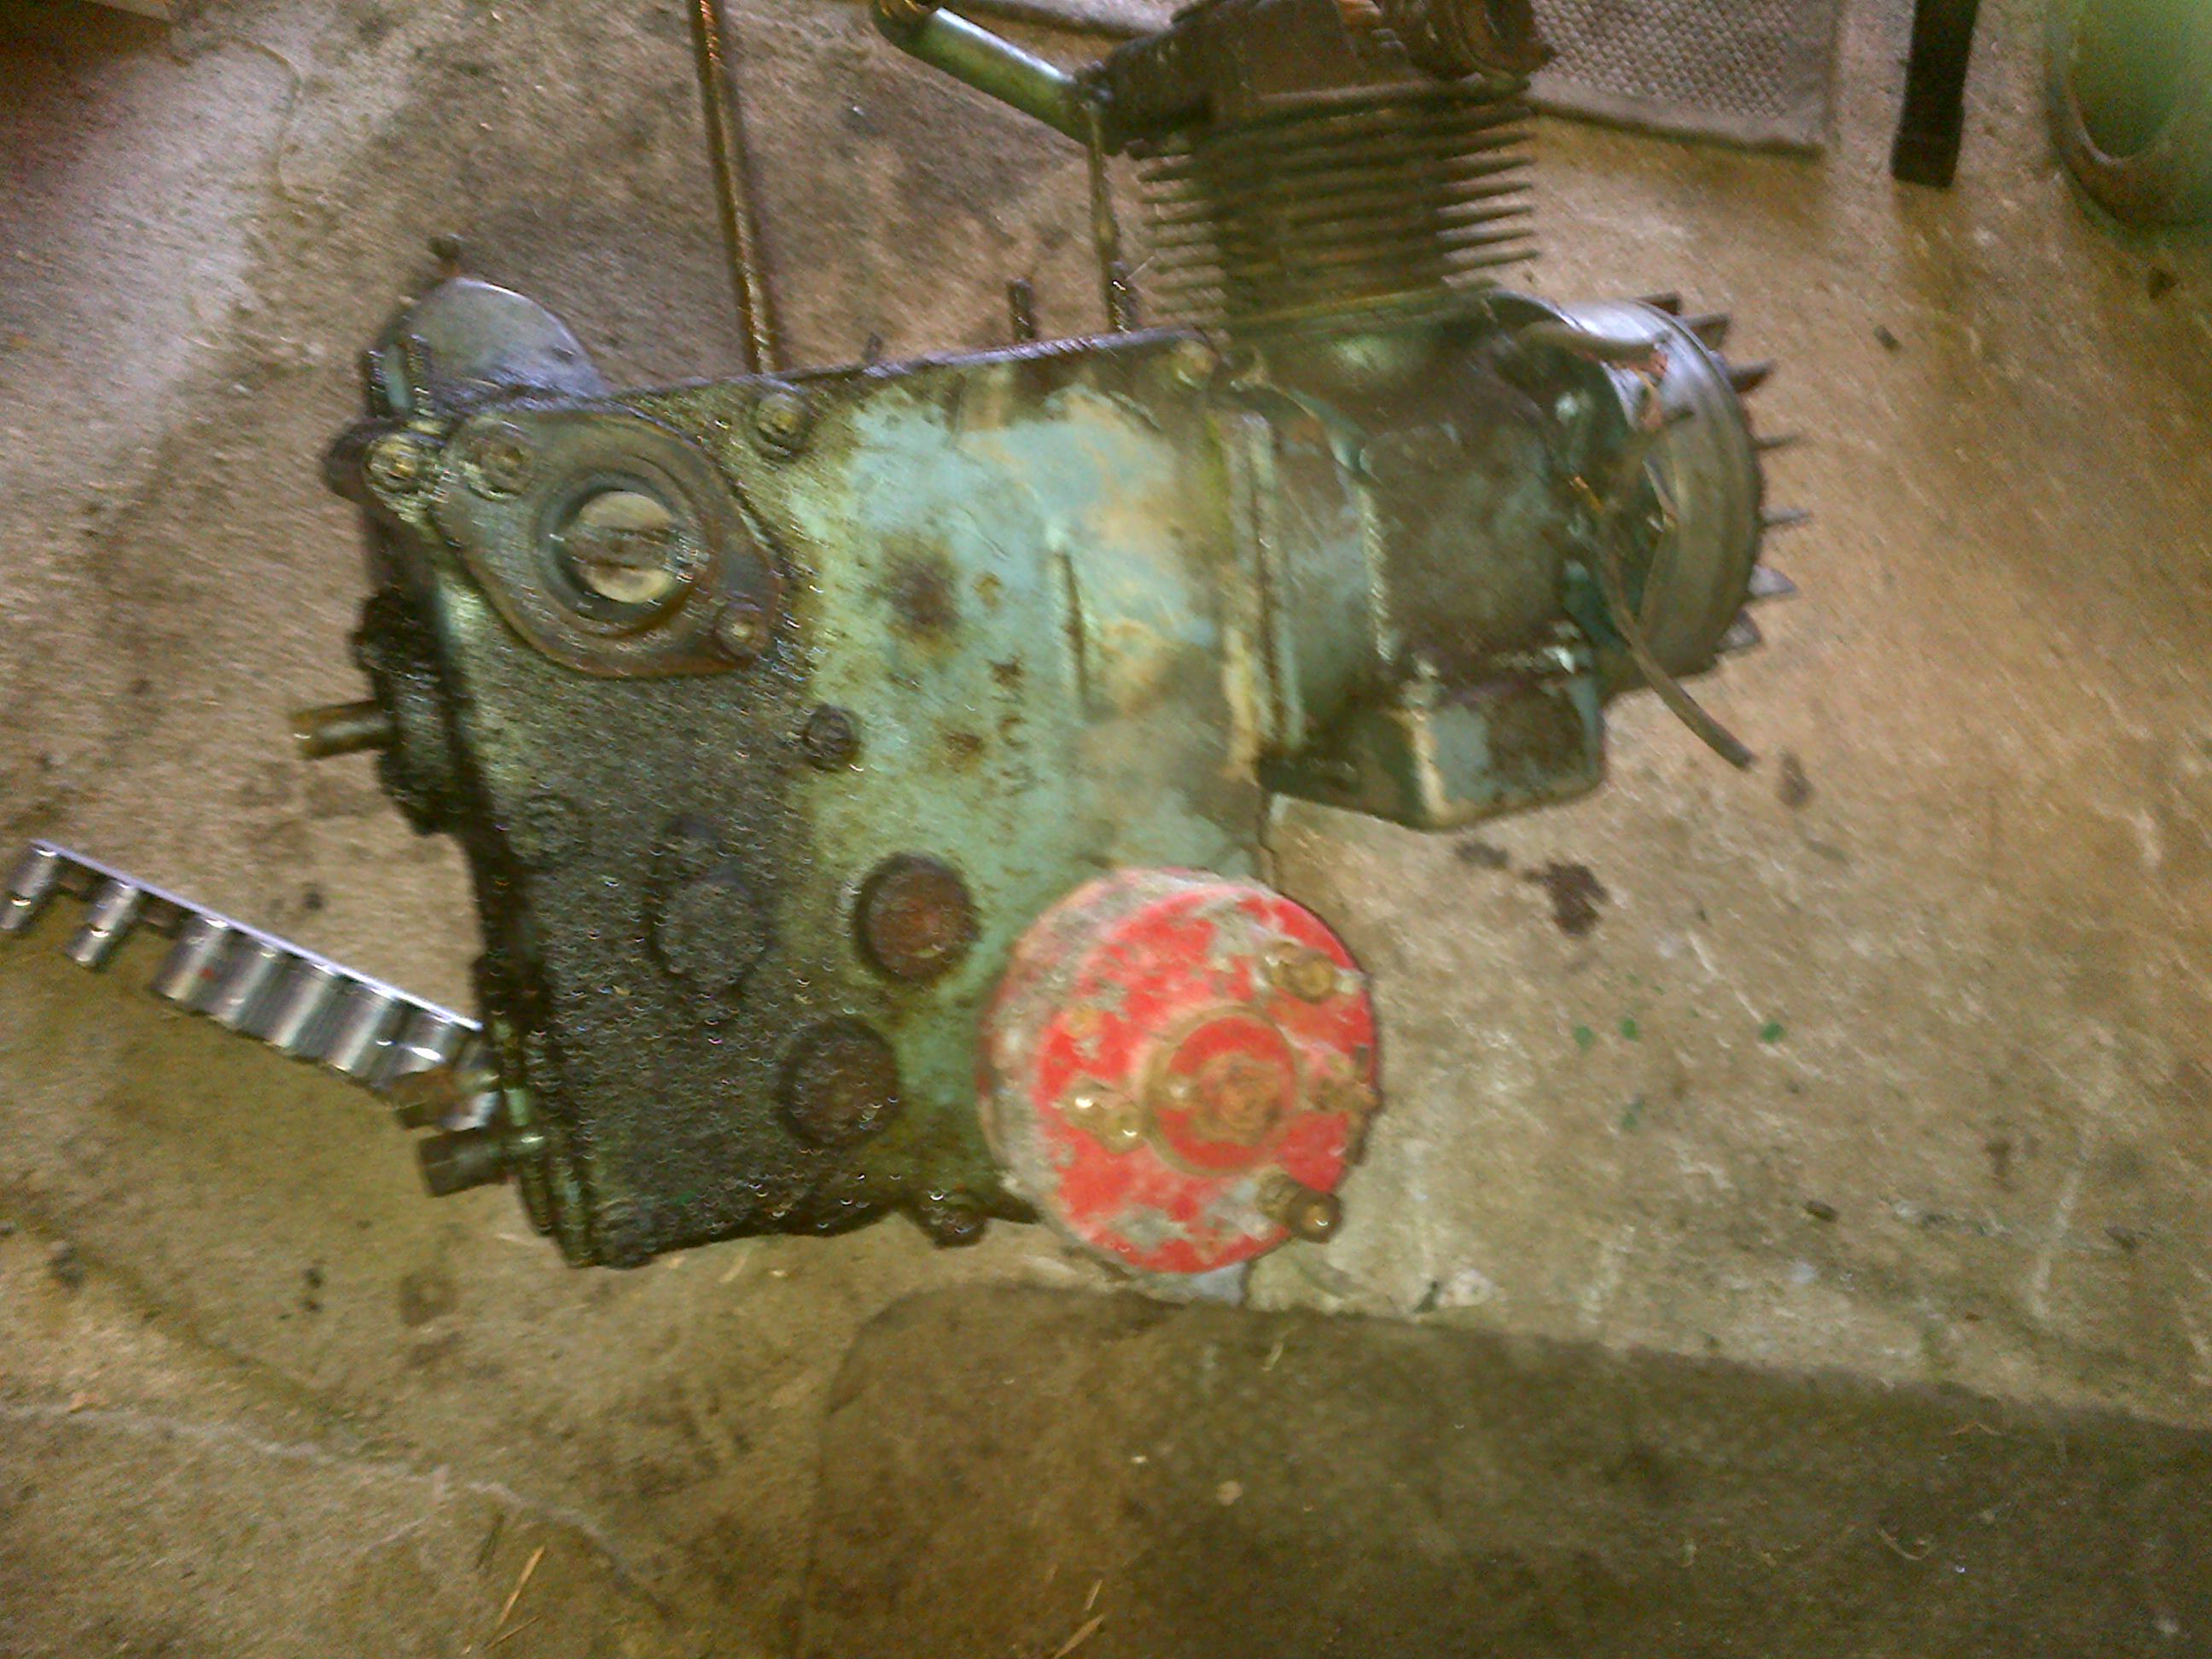
May 9, 2015 at 5:33 pm #12978joegrgrahamParticipantJust a couple of pictures of the machine so far, hopefully putting some context to my ramblings.
As always, I didn’t take any pics of the machine as acquired (too distressing!!).
The pictures show the fuel tank and cowl/air cleaner, both in nice condition, just needing a good clean and an oiling.
The rotor box: again in nice condition, no rot, just one missing tine and a coating of rust on the remaining tines. Again, just a clean/degrease, oiling and it should be good to go.
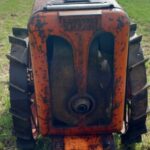
The last pic is the main hulk of the machine, you can see the shot tyres and you’ve seen the picture of inside the gearbox on the pedestrian thread.Joe.
Attachments:
May 10, 2015 at 7:46 am #13003charlieKeymasterThe rotor box has seen very little use by the look of it as the ‘feet’ on the bottom of the side covers seem to have no wear.
May 12, 2015 at 8:08 pm #13037joegrgrahamParticipantEvening all,
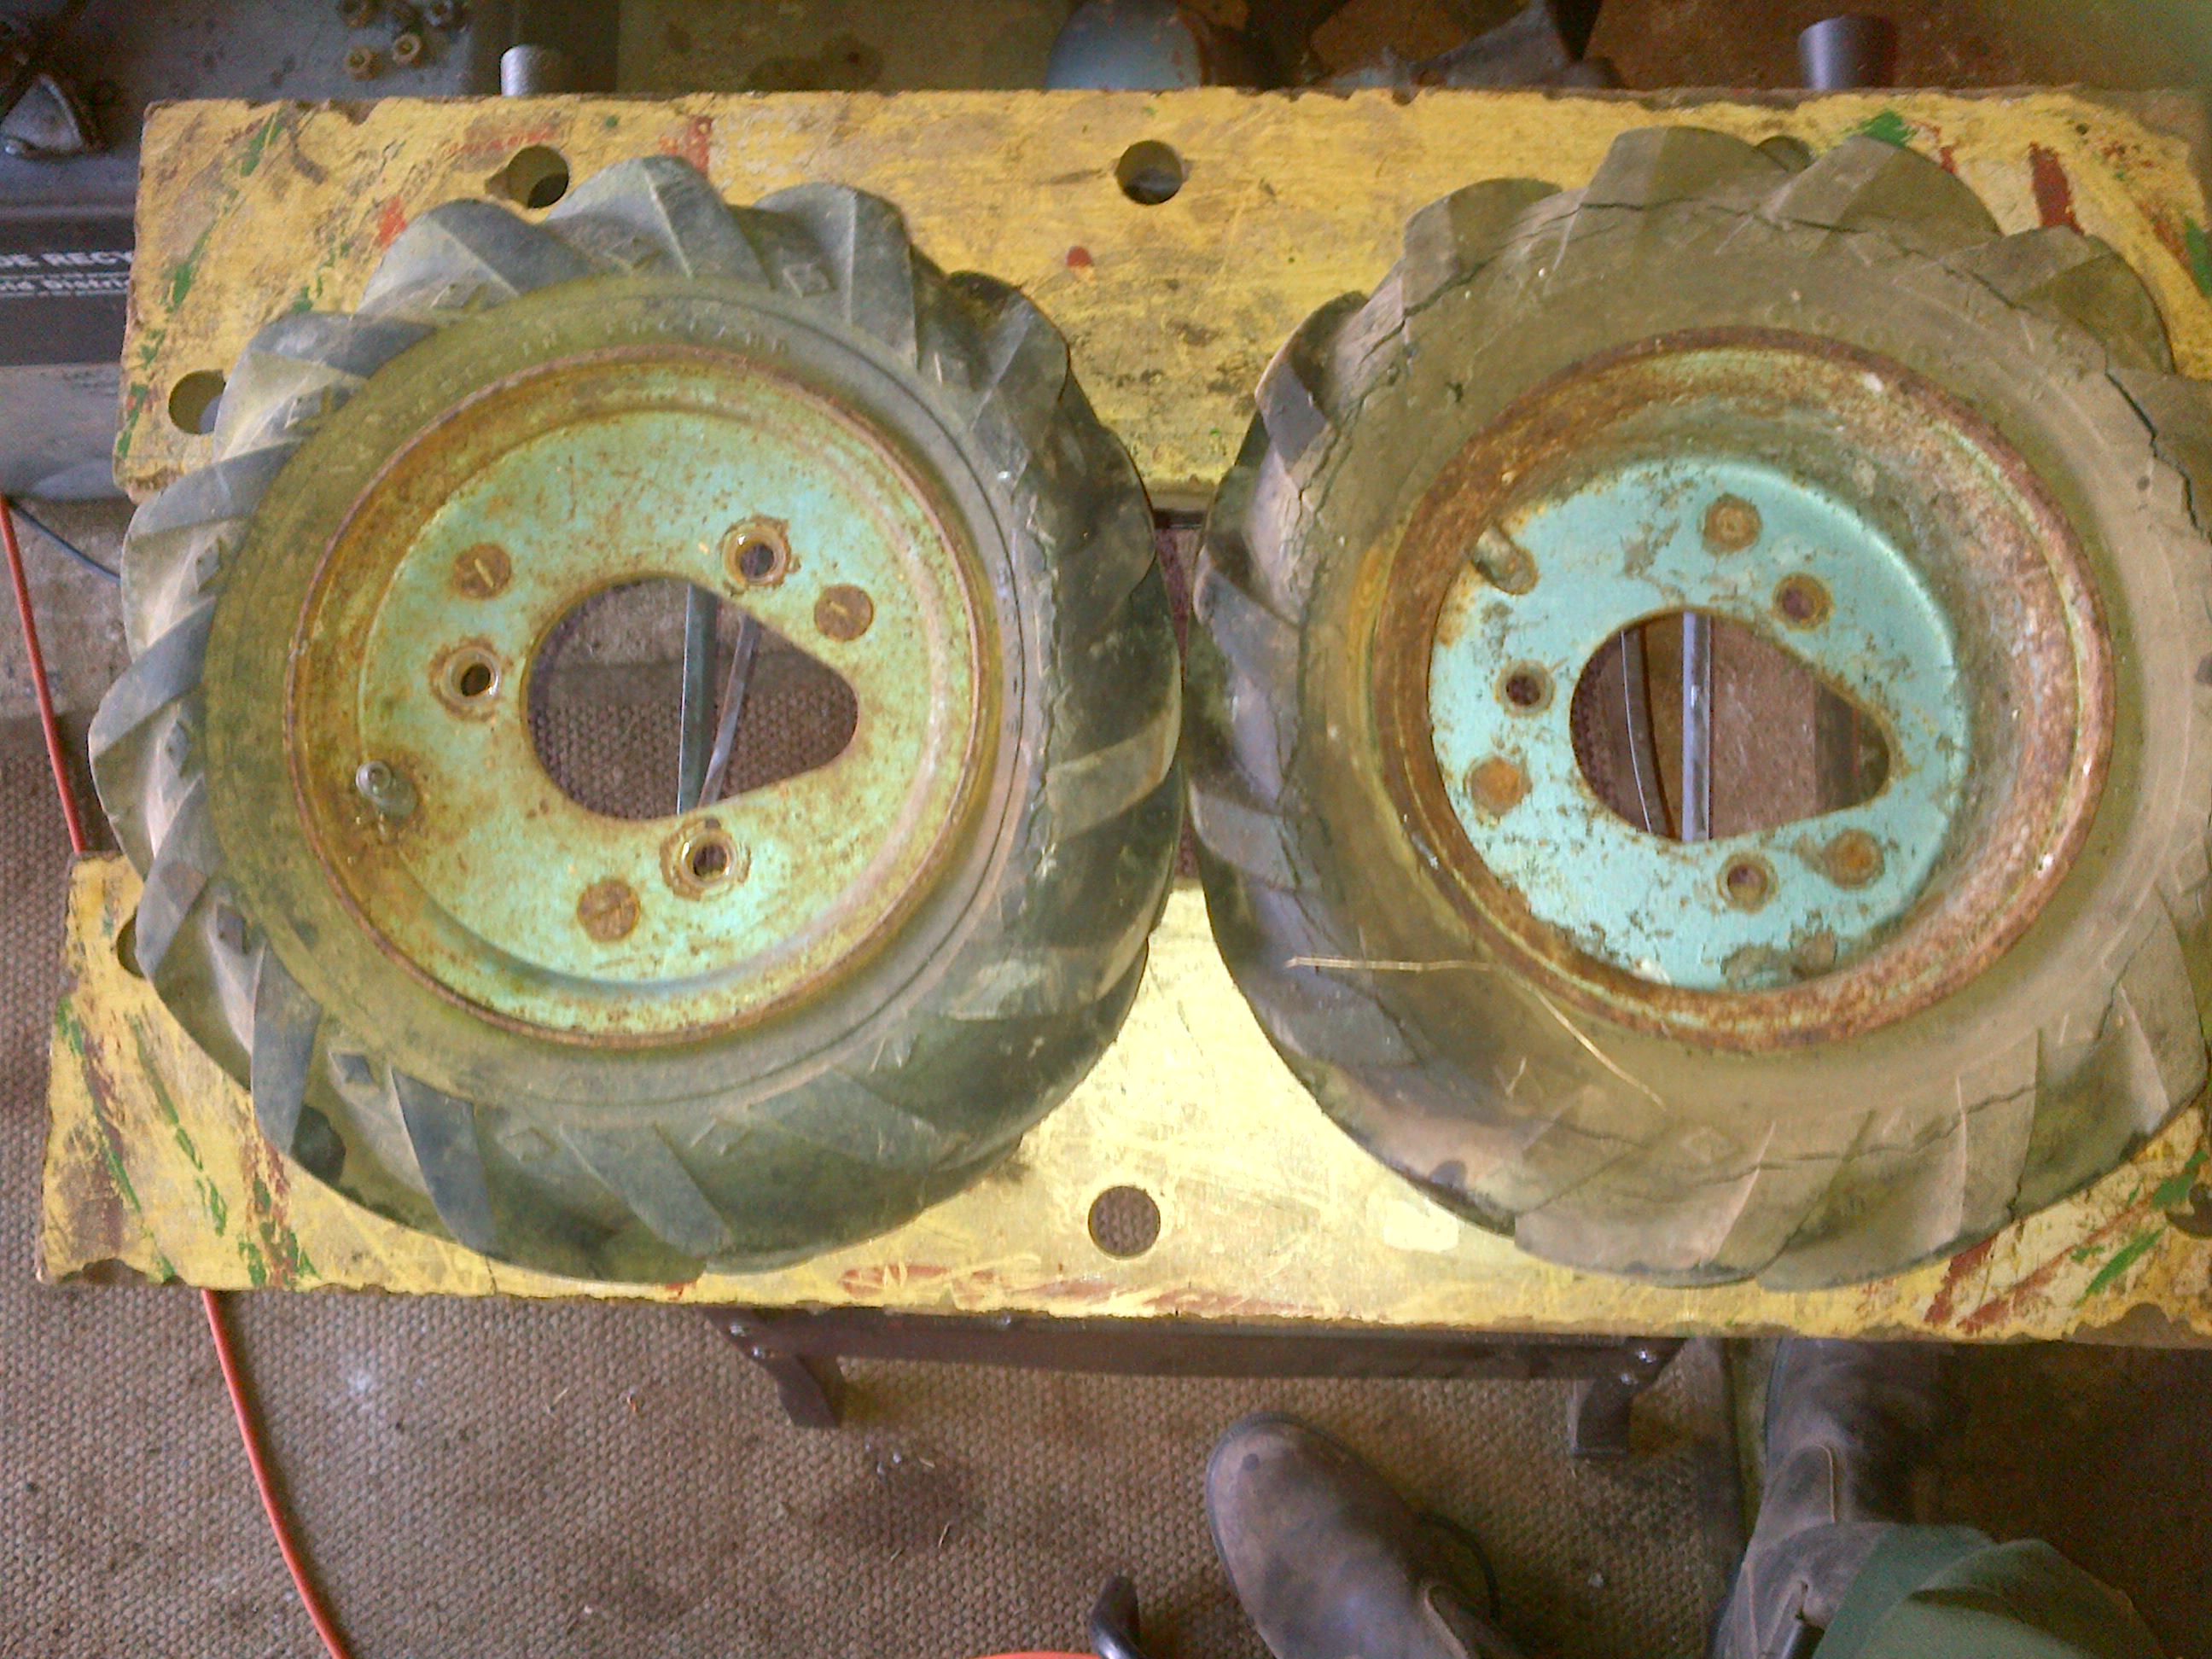
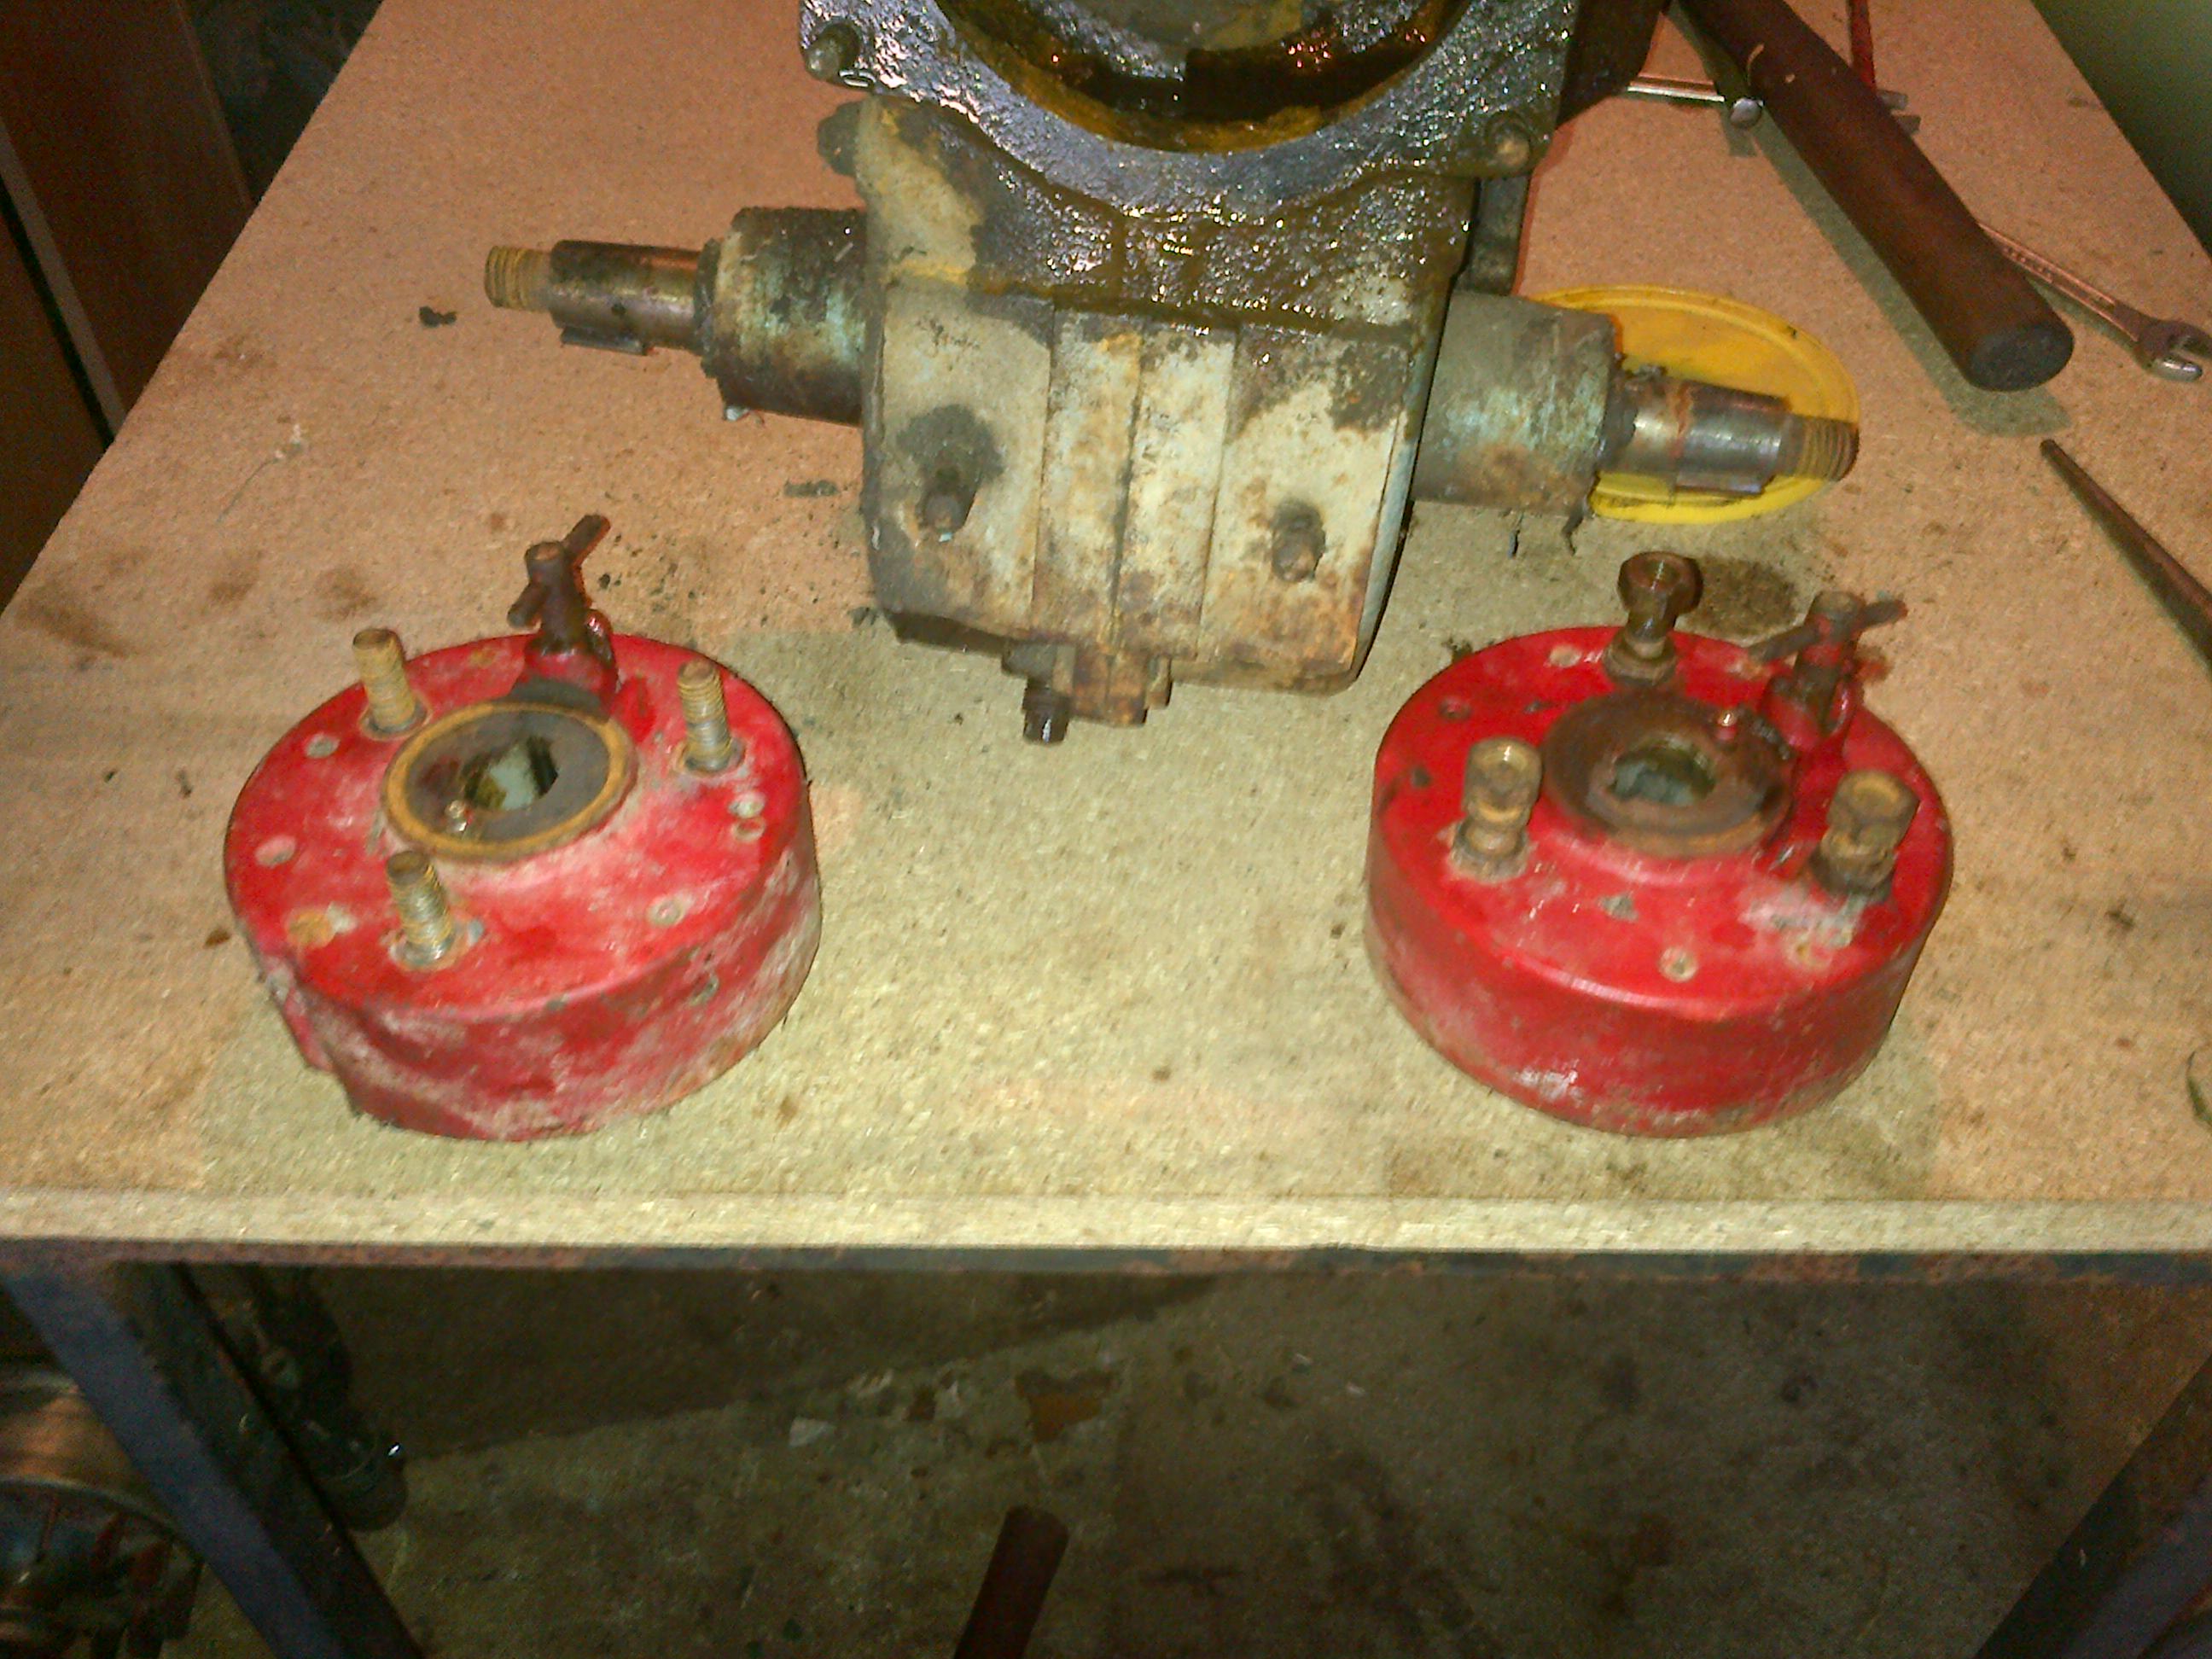
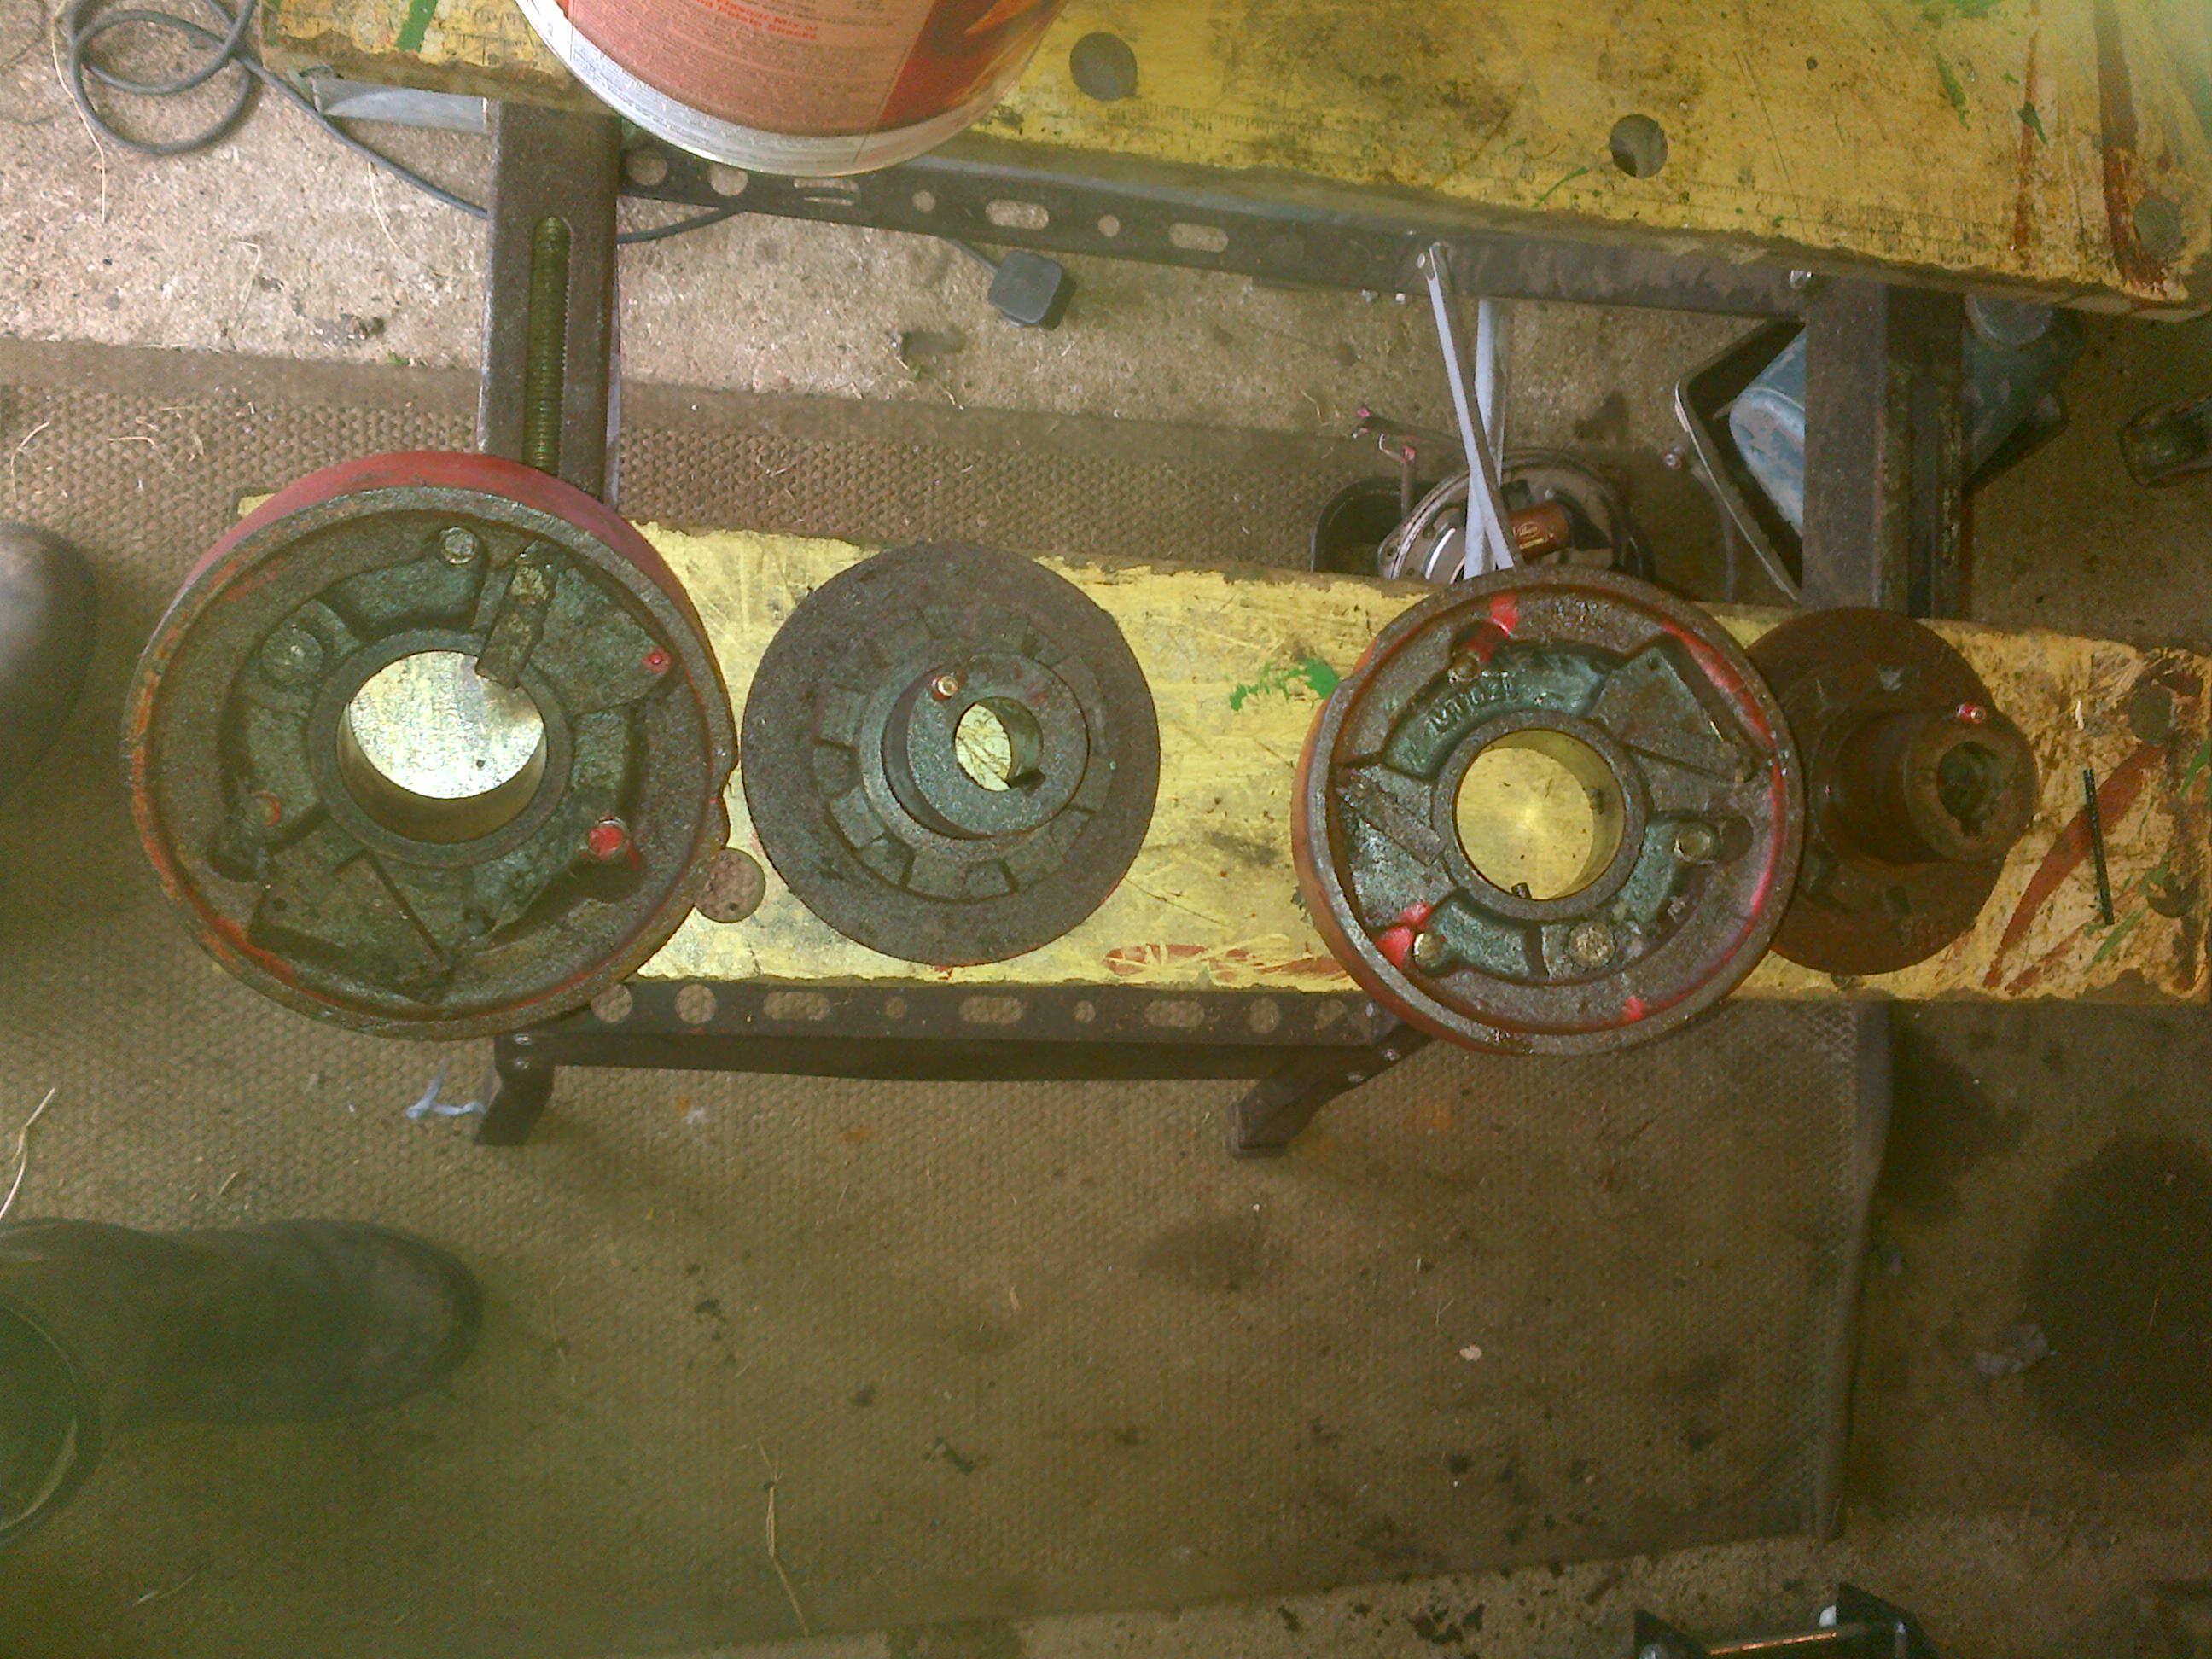
Had a very productive hour in the shed tonight, wheels are off, hubs are off and…………..drum roll please……….the dratted engine is finally seperated from the gearbox!!!. Thanks Charlie, chisel and wedges, and off she came.
One of the hubs meekly succumbed to a few taps, the other caused a bit of a ‘brown trouser’ moment, it wouldn’t tap off so wound a puller onto it, no movement, so gave the back of the hub a tap and BANG, off it went across the shed like one of Barnes-Wallis’ finest!.
Am I right to presume that with the pin pulled out, the hub should freewheel? do they dismantle or would it be best to dunk them in a bucket of diesel for a while?.
Joe.
Attachments:
May 16, 2015 at 7:42 pm #13092joegrgrahamParticipantGood evening everyone.
Lovely day today, so I’ve been taking advantage of the sunshine, mowed the lawns, re-done a border, had a Braai etc.
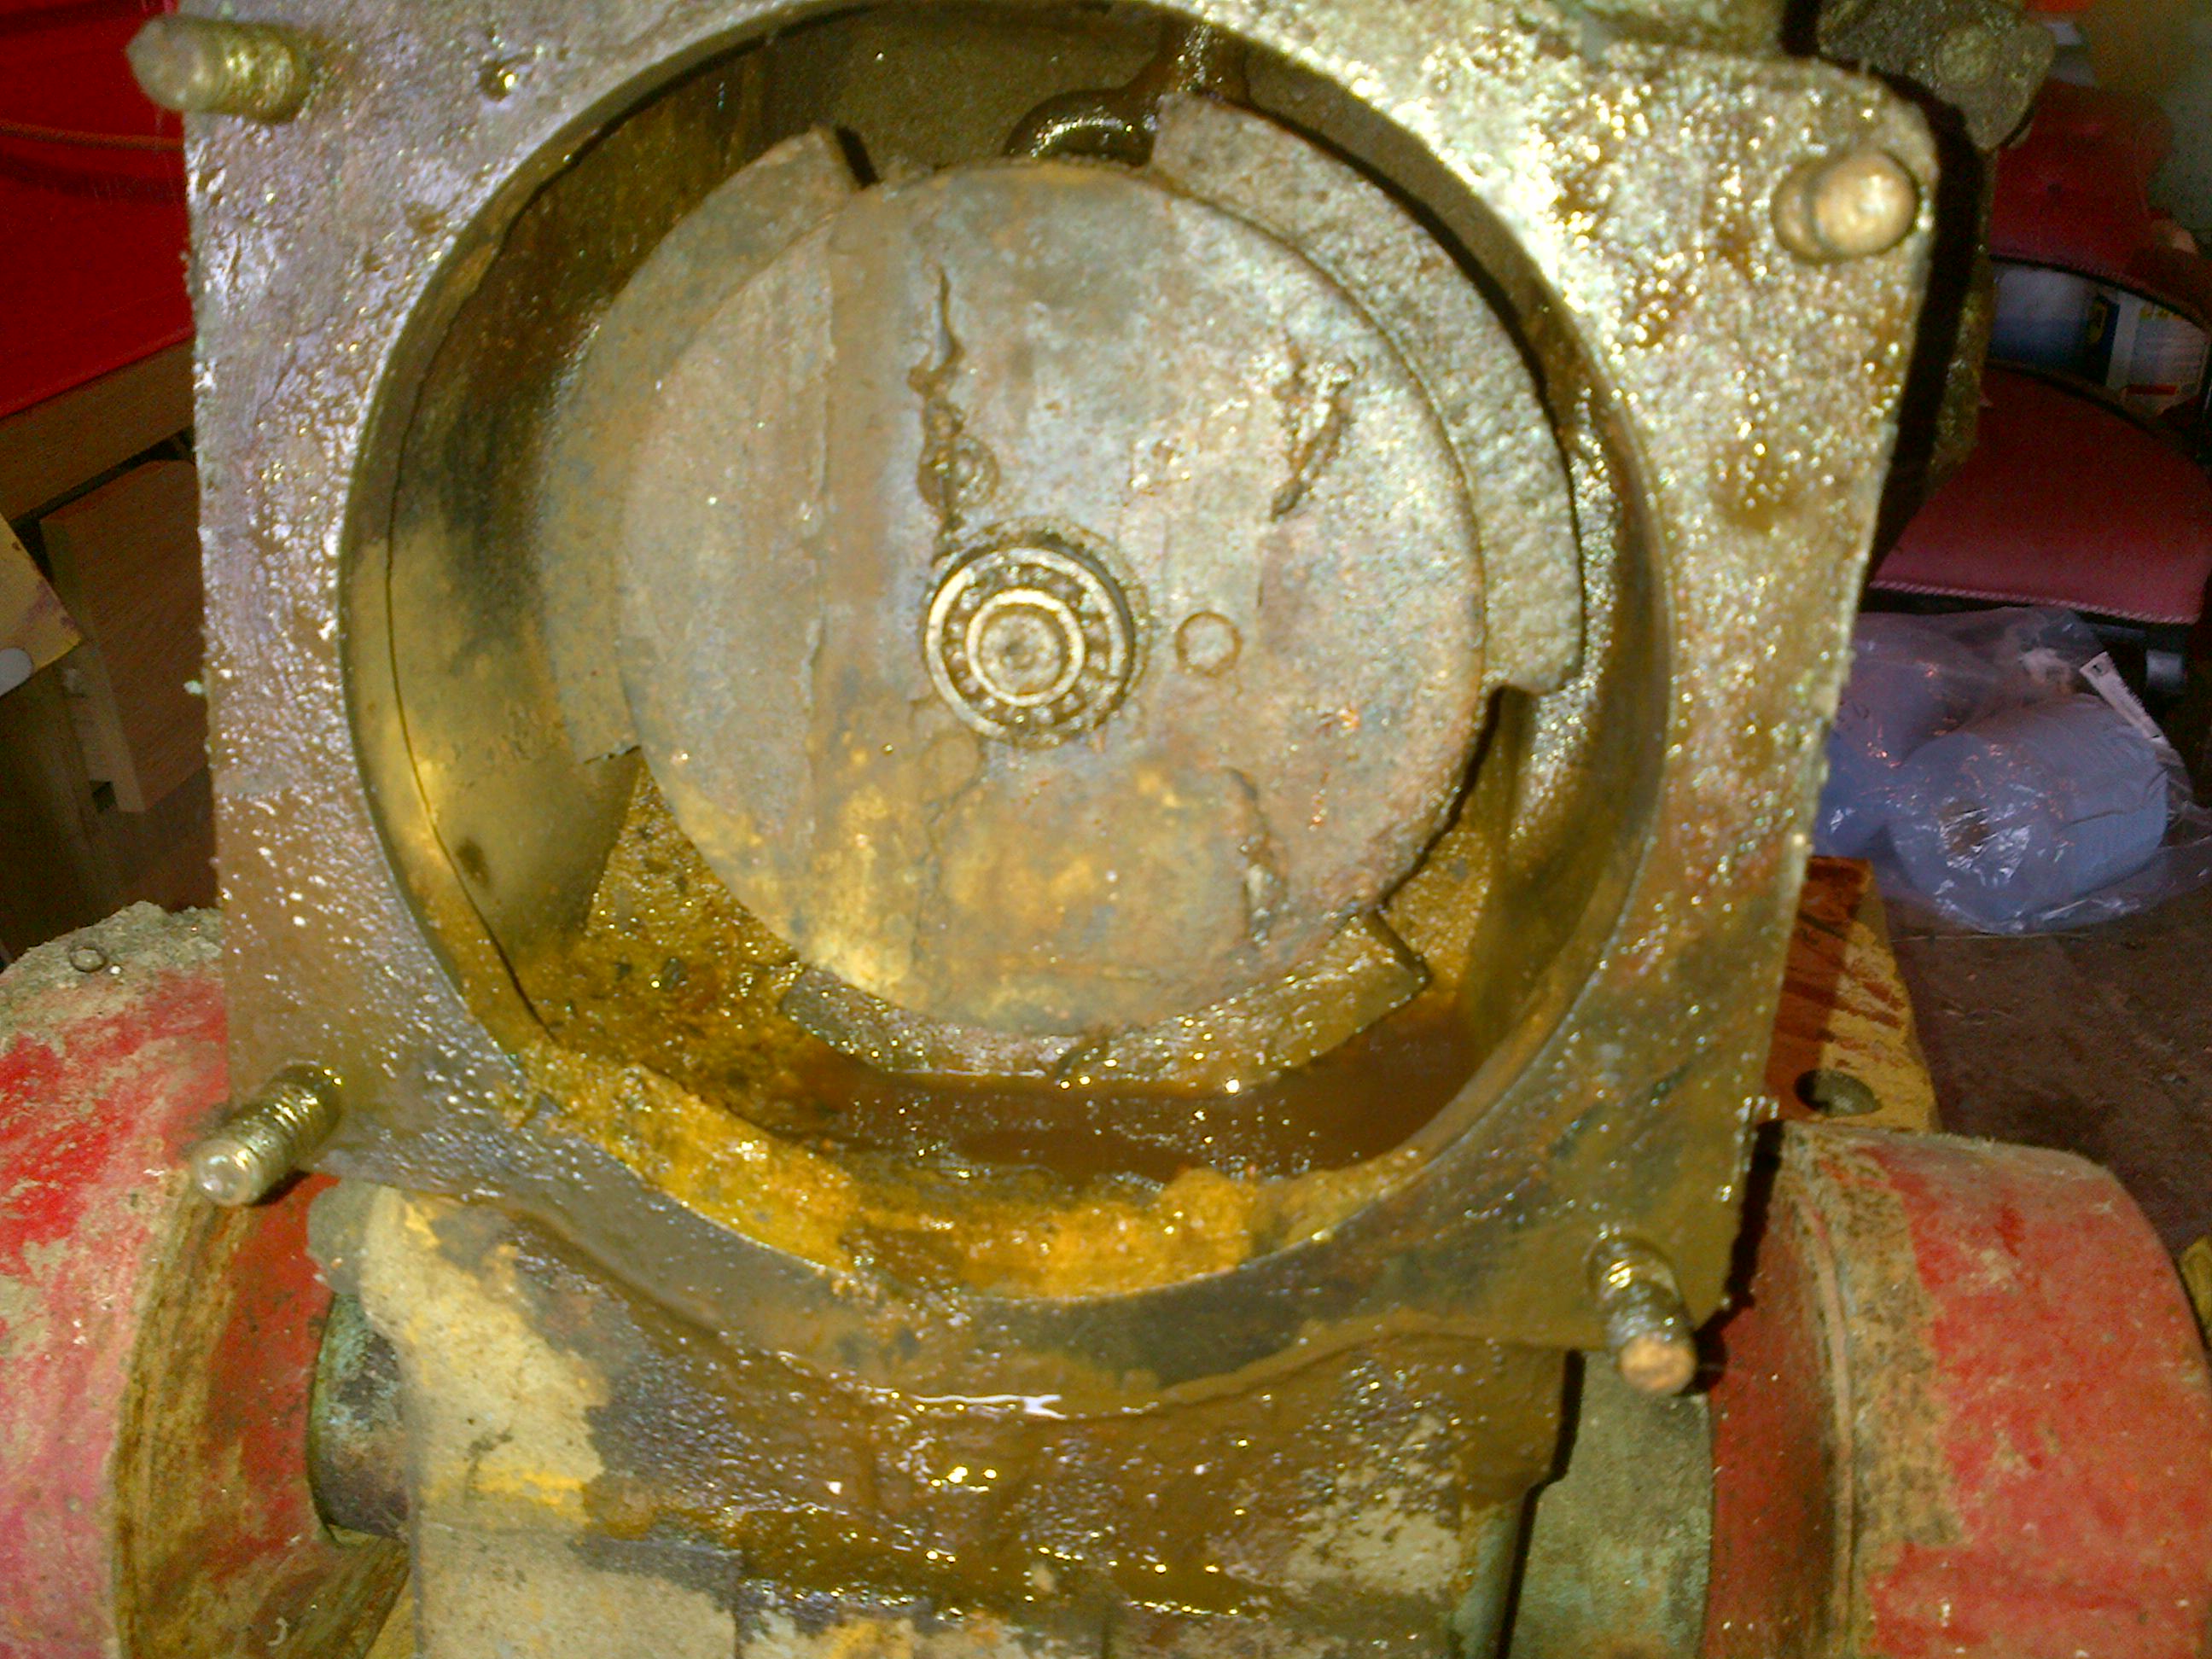
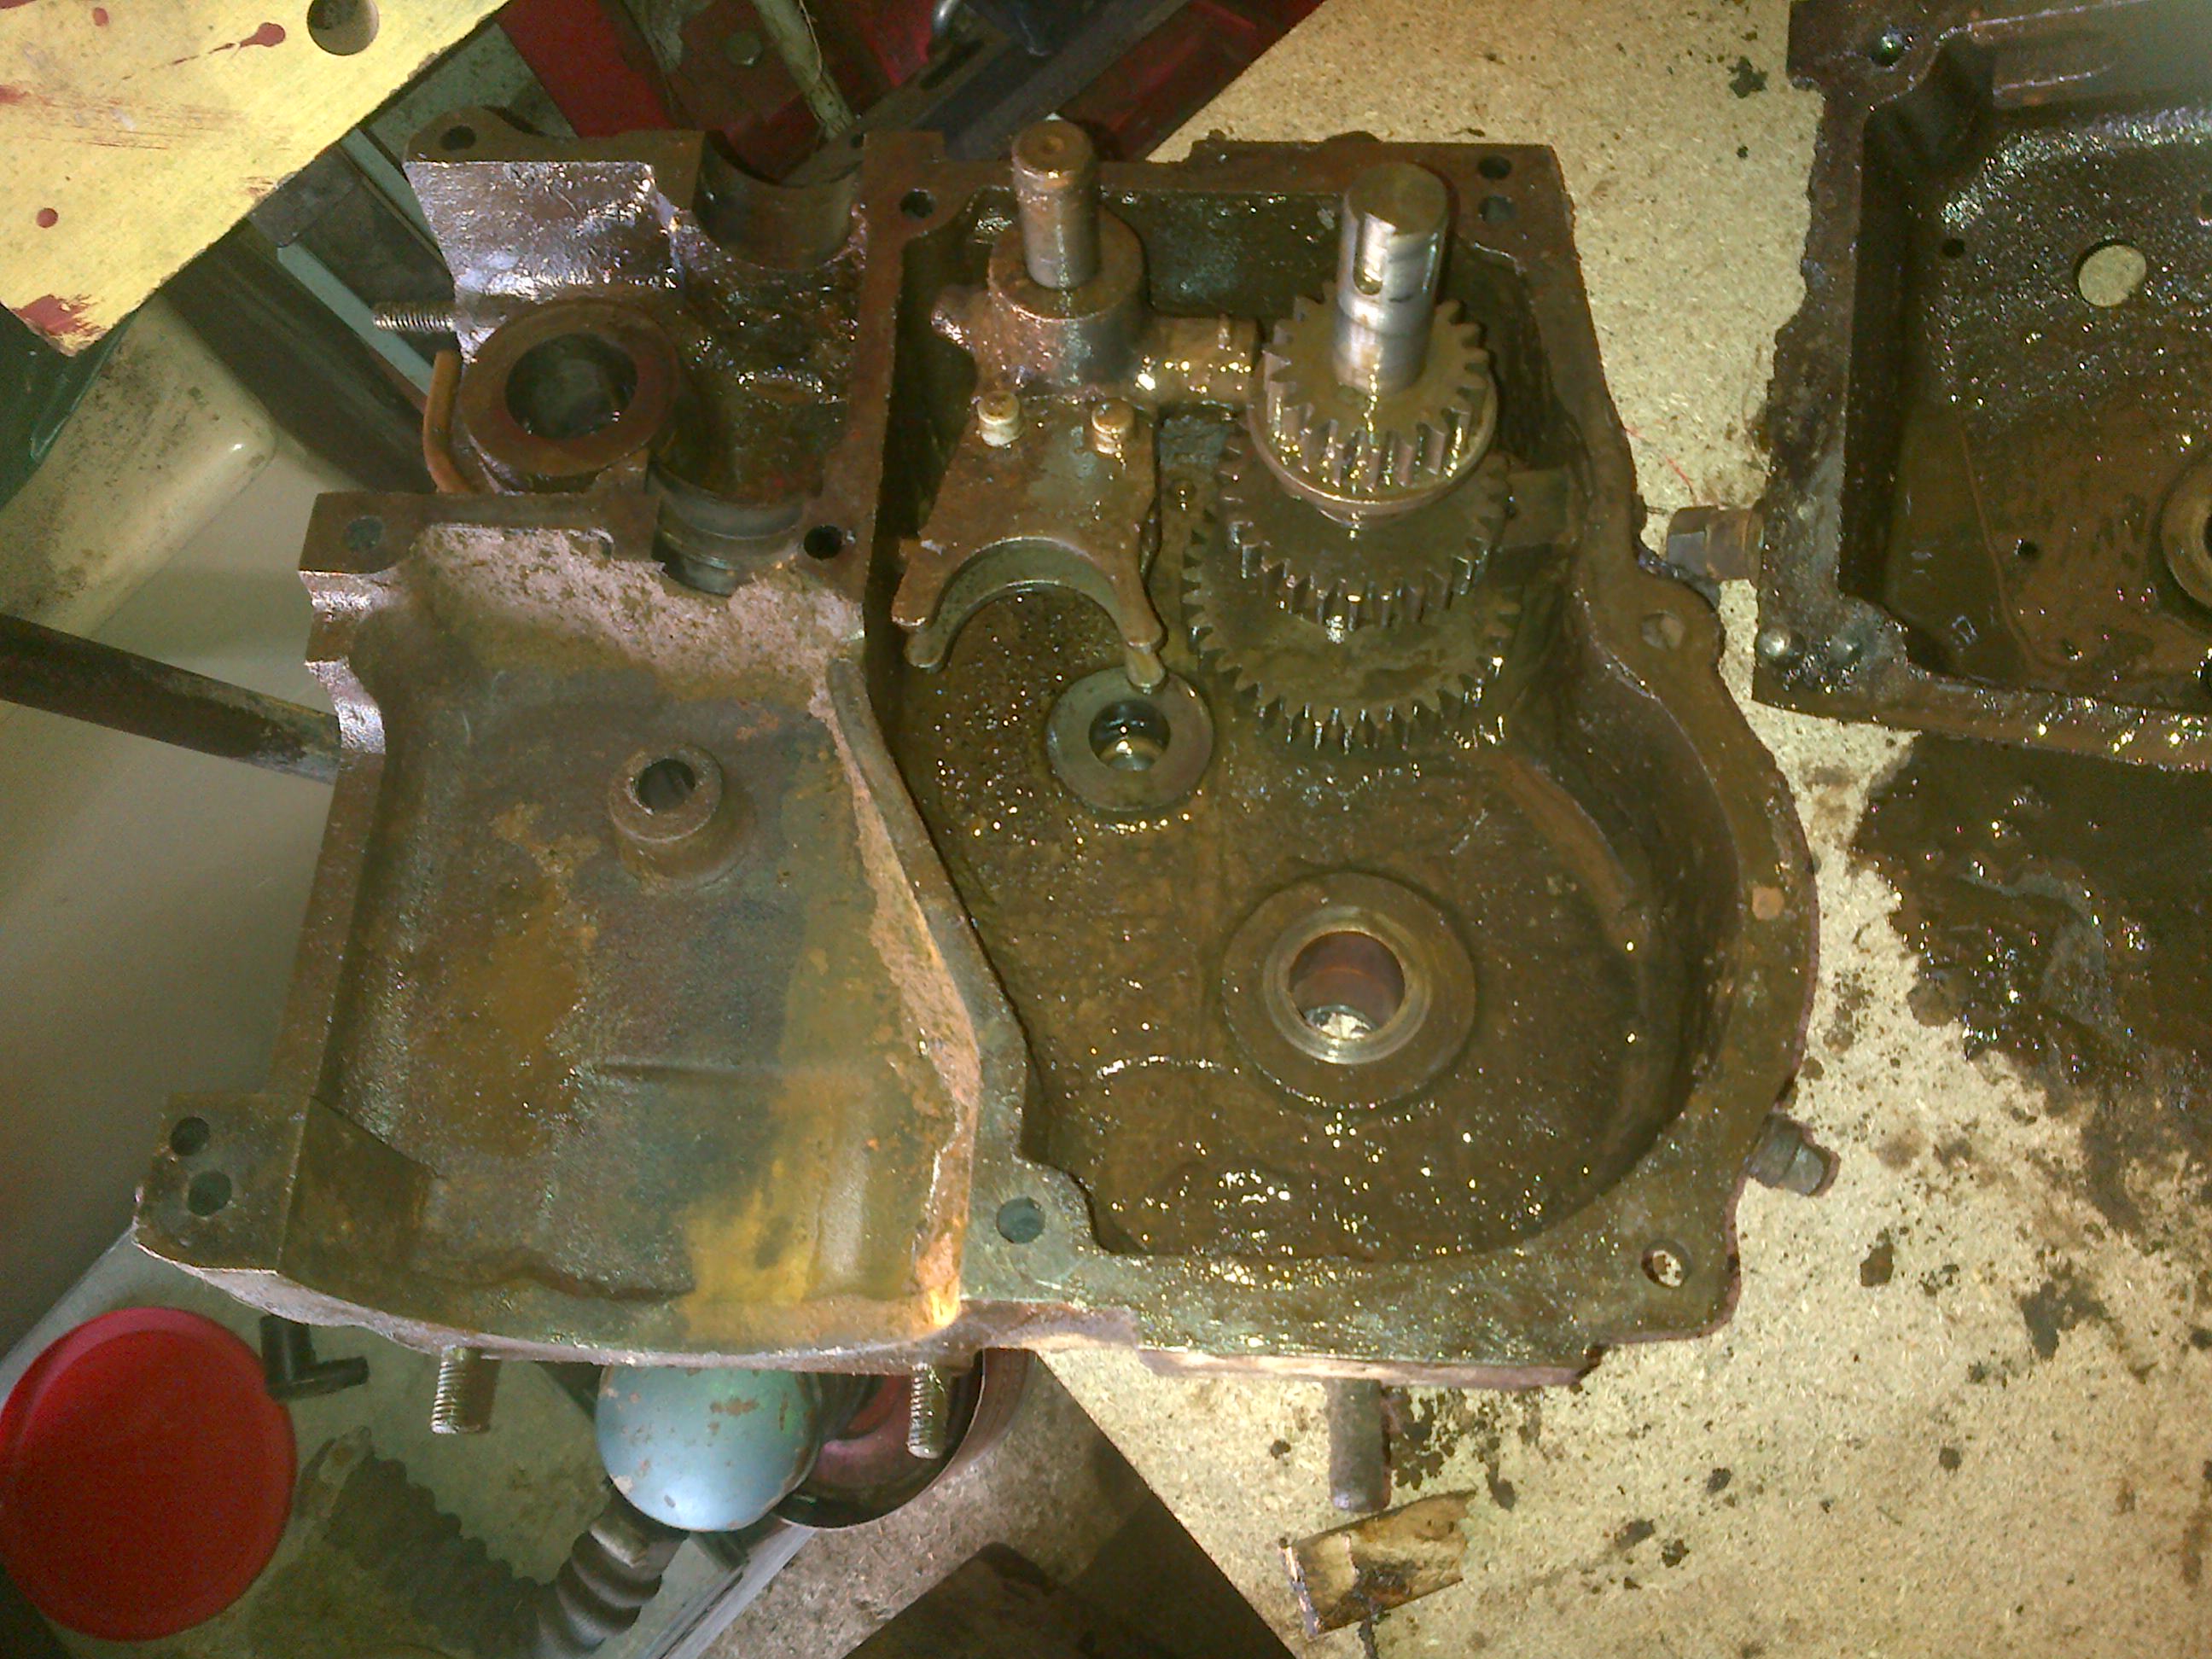
I did sneak into the shed for a bit, managed to get the gearbox split, and it doesn’t actually look too bad.
The clutch is looking pretty manky and we have the broken clutch lever to deal with, but the actual gears are in really good nick. No dicernable wear or chipped teeth, just a good layer of gunk.
Next job, will be to start cleaning.
Attachments:
May 17, 2015 at 7:55 am #13100charlieKeymasterGood news by the look of it, a good clean will confirm this. Whilst you have it apart it will be worth checking the plunger on the oil pump works. The gearbox I stripped recently the plunger was sticking and would not have pumped oil. This is critical as it pumps oil to the worm gear.
Ratchets are unlocked with pin out, see page 11 of manual. A good clean should and oil should free everything off without dismantling completely. Check pawl spring MT215 is not broken.
I am currently making up some control cables for another club member and will be writing an article for The Cultivator covering removal and fitting of same, also how to split gearbox.May 31, 2015 at 5:30 pm #13246joegrgrahamParticipantEvening all,
Time for an update.
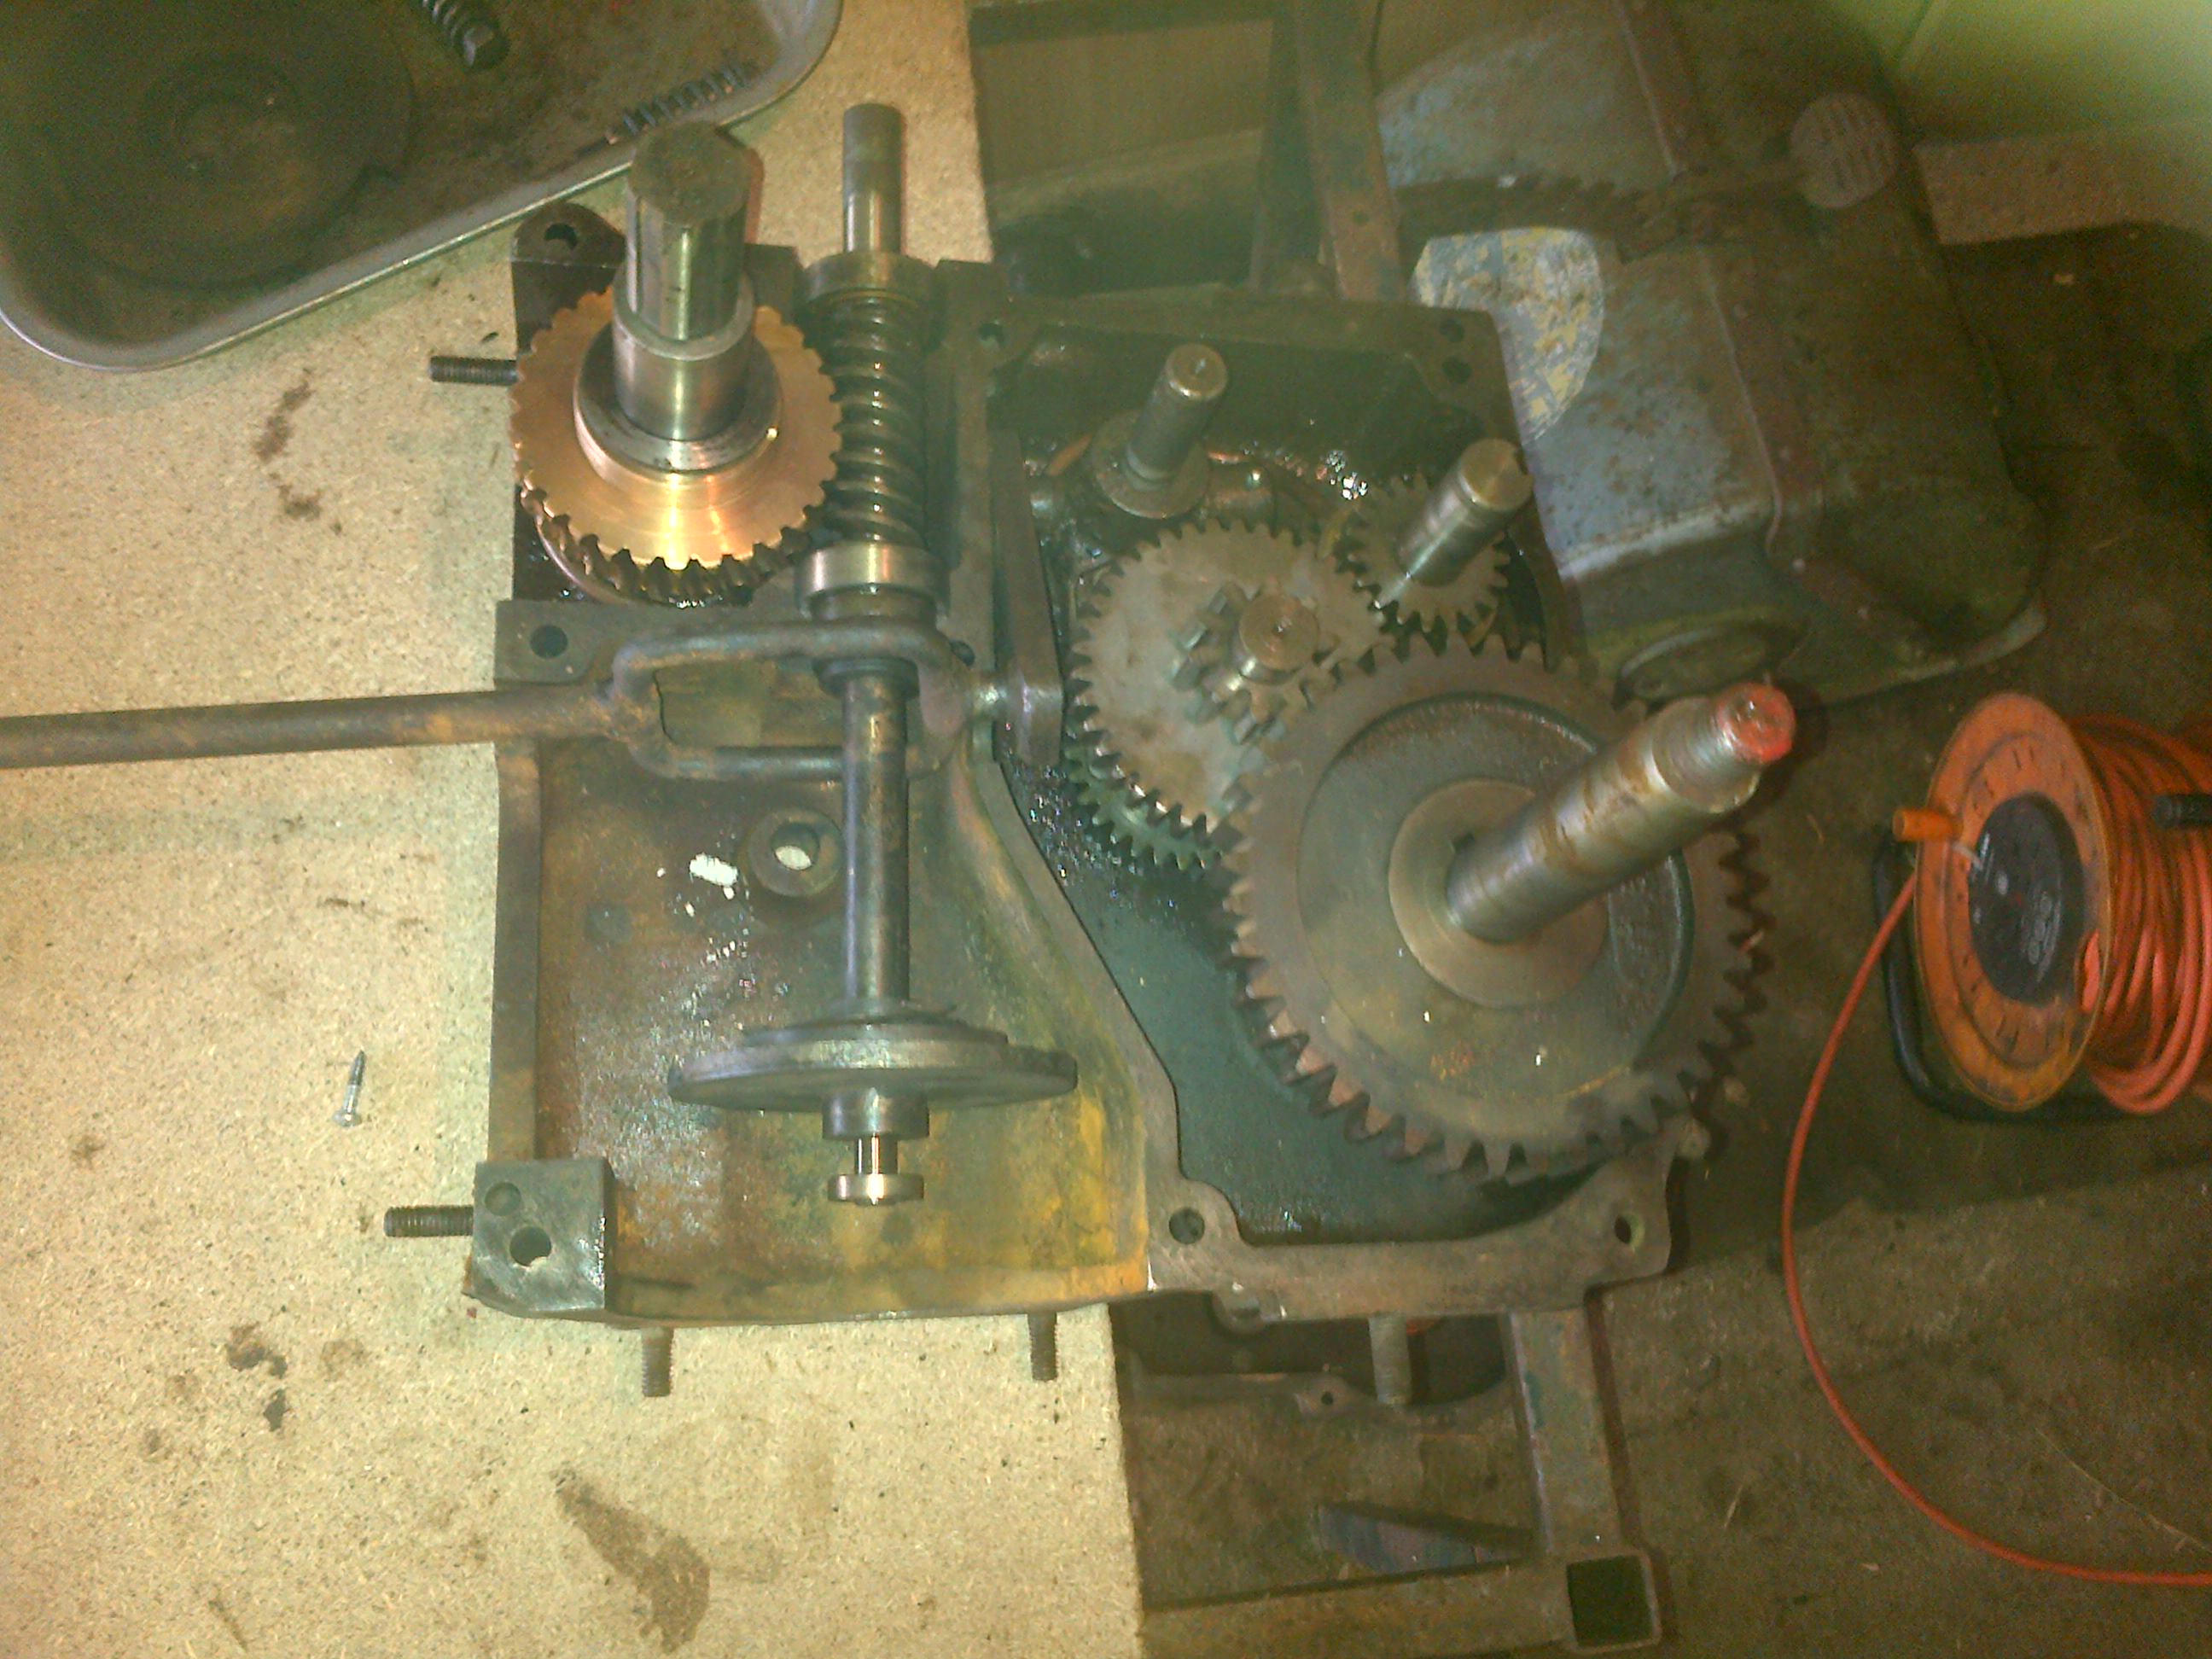
The gearbox internals have all had a trip through the parrafin bath and have been loosely reassembled, looking in really good condition.
Just need to sort out the repair to the clutch release lever and source a new friction plate and the gearbox can go back together.The hubs have been stripped, freed off, greased and reassembled (with the aid of a couple of paperclips to keep the ratchet fingers out of the way!!).
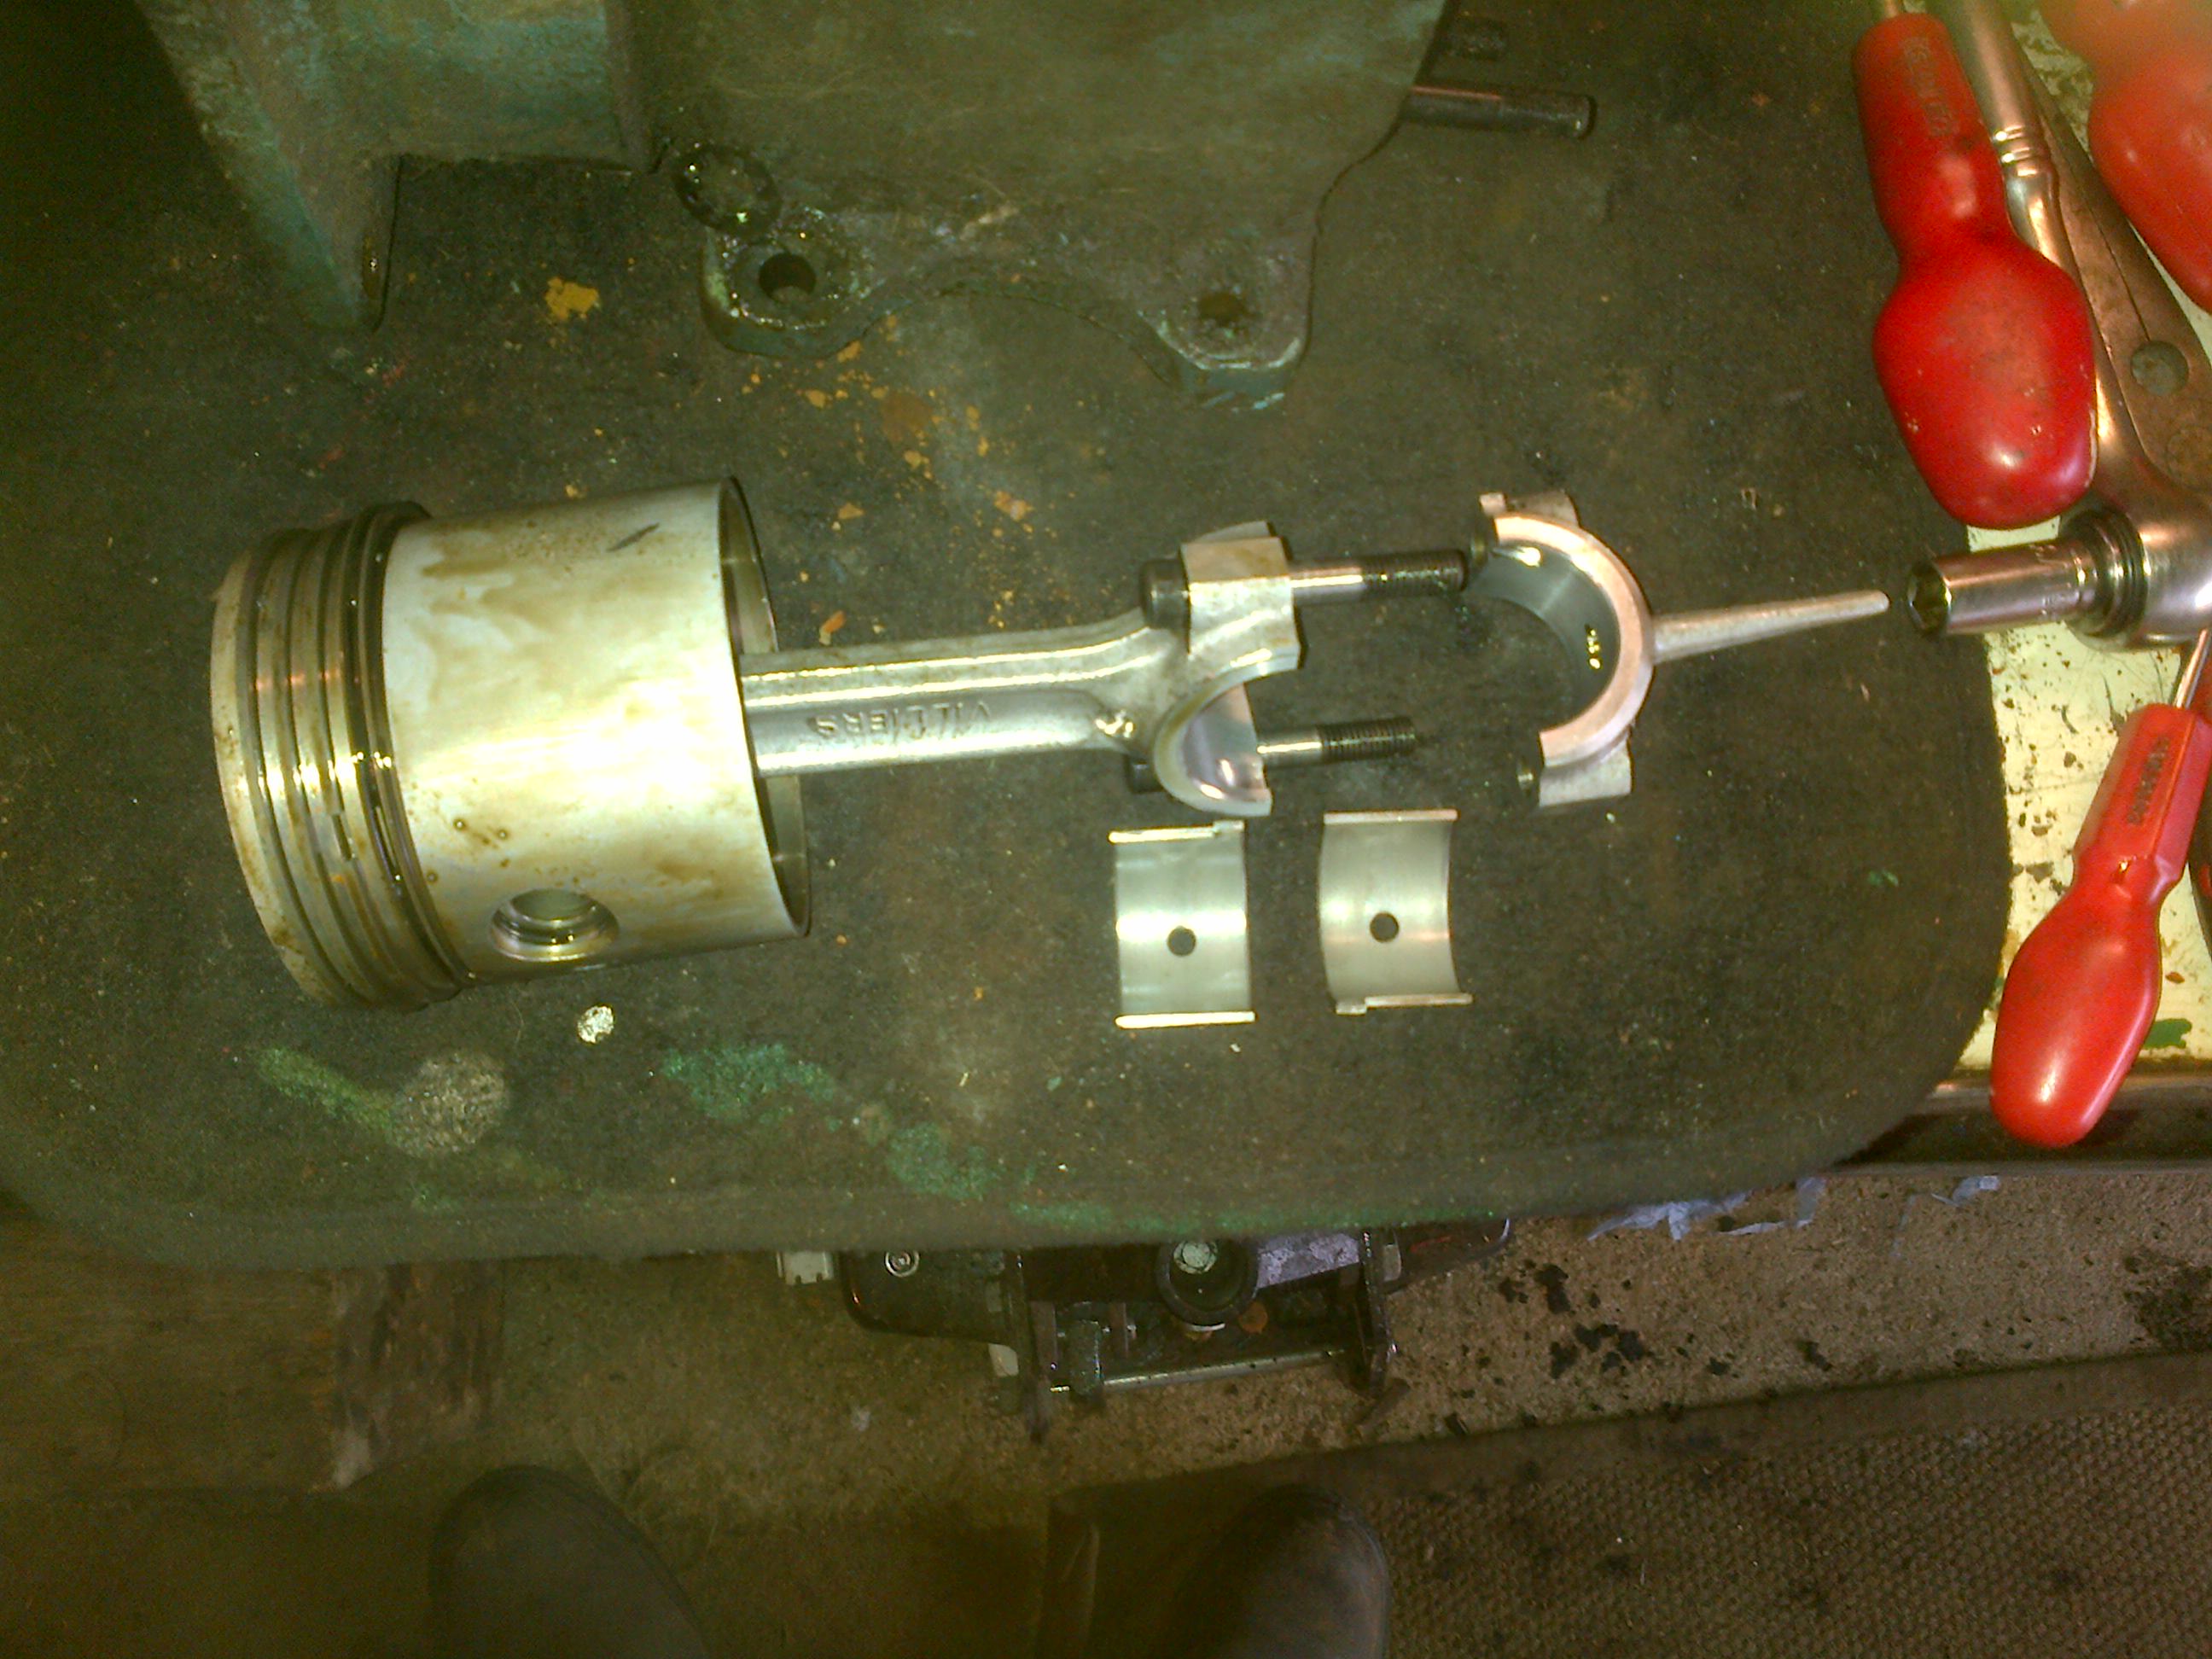
I made a start on the engine today, the head and valves are well choked up with carbon, so that will require attention.
Pulled the piston and it all looks in really good condition, the bore needs a little polish to remove slight rusting, but everything else just needs a trip to the parrafin bath.
I just need to place an order for some ignition parts and an exhaust.Attachments:
-
AuthorPosts
- You must be logged in to reply to this topic.