Trusty Drawbar

Home Forums General Help and information Trusty Drawbar

Viewing 3 posts - 1 through 3 (of 3 total)
  • Author
    Posts
  • #8307
    vhgmcbuddy
    Member

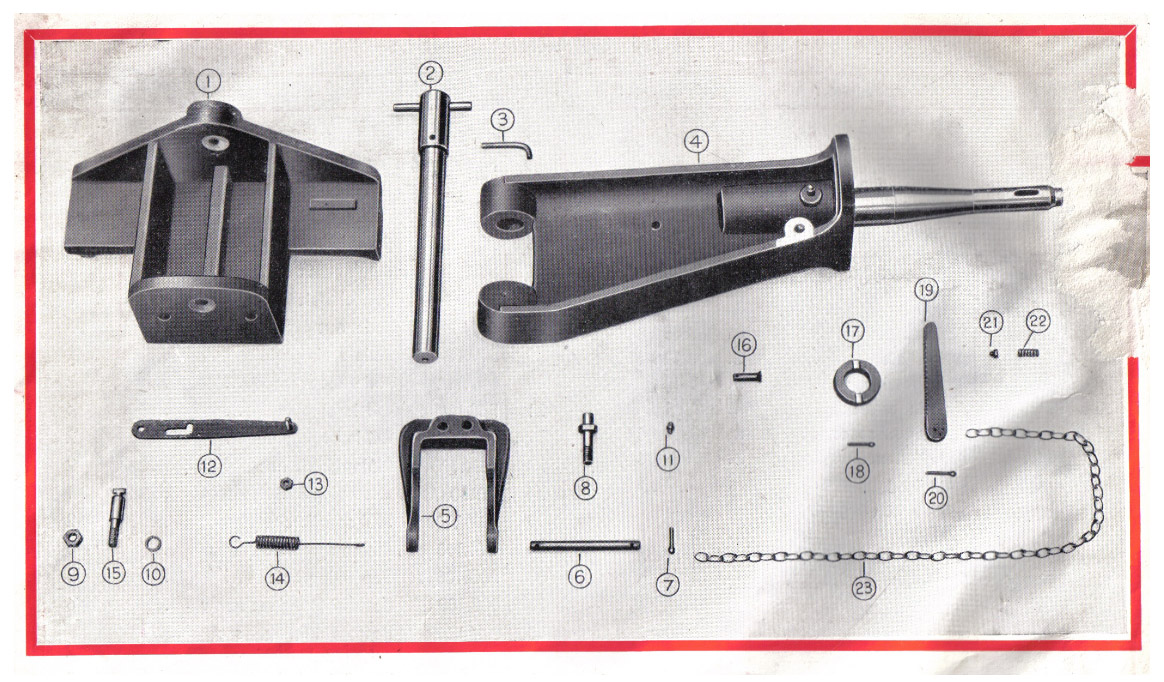
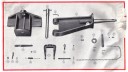
    Have hit a bit of a stumbling block with my Norton engined Trusty rebuild. Looking through the spare parts list for the drawbar (see attached), I can see that I am missing quite a few bits.
    I do not have items 6, 8, 16, 17, 19, 21 and 22. I do have item 12, but the diagram appears to show a pin in the end, where mine just has a hole.
    Also, my item 15 has the T-shaped bit at the top broken off.
    Before I set about trying to source/manufacture the missing and damaged parts, it would be nice to know what they all do!! Unfortunately, the parts list shows all the bits, but doesn’t show where they fit.
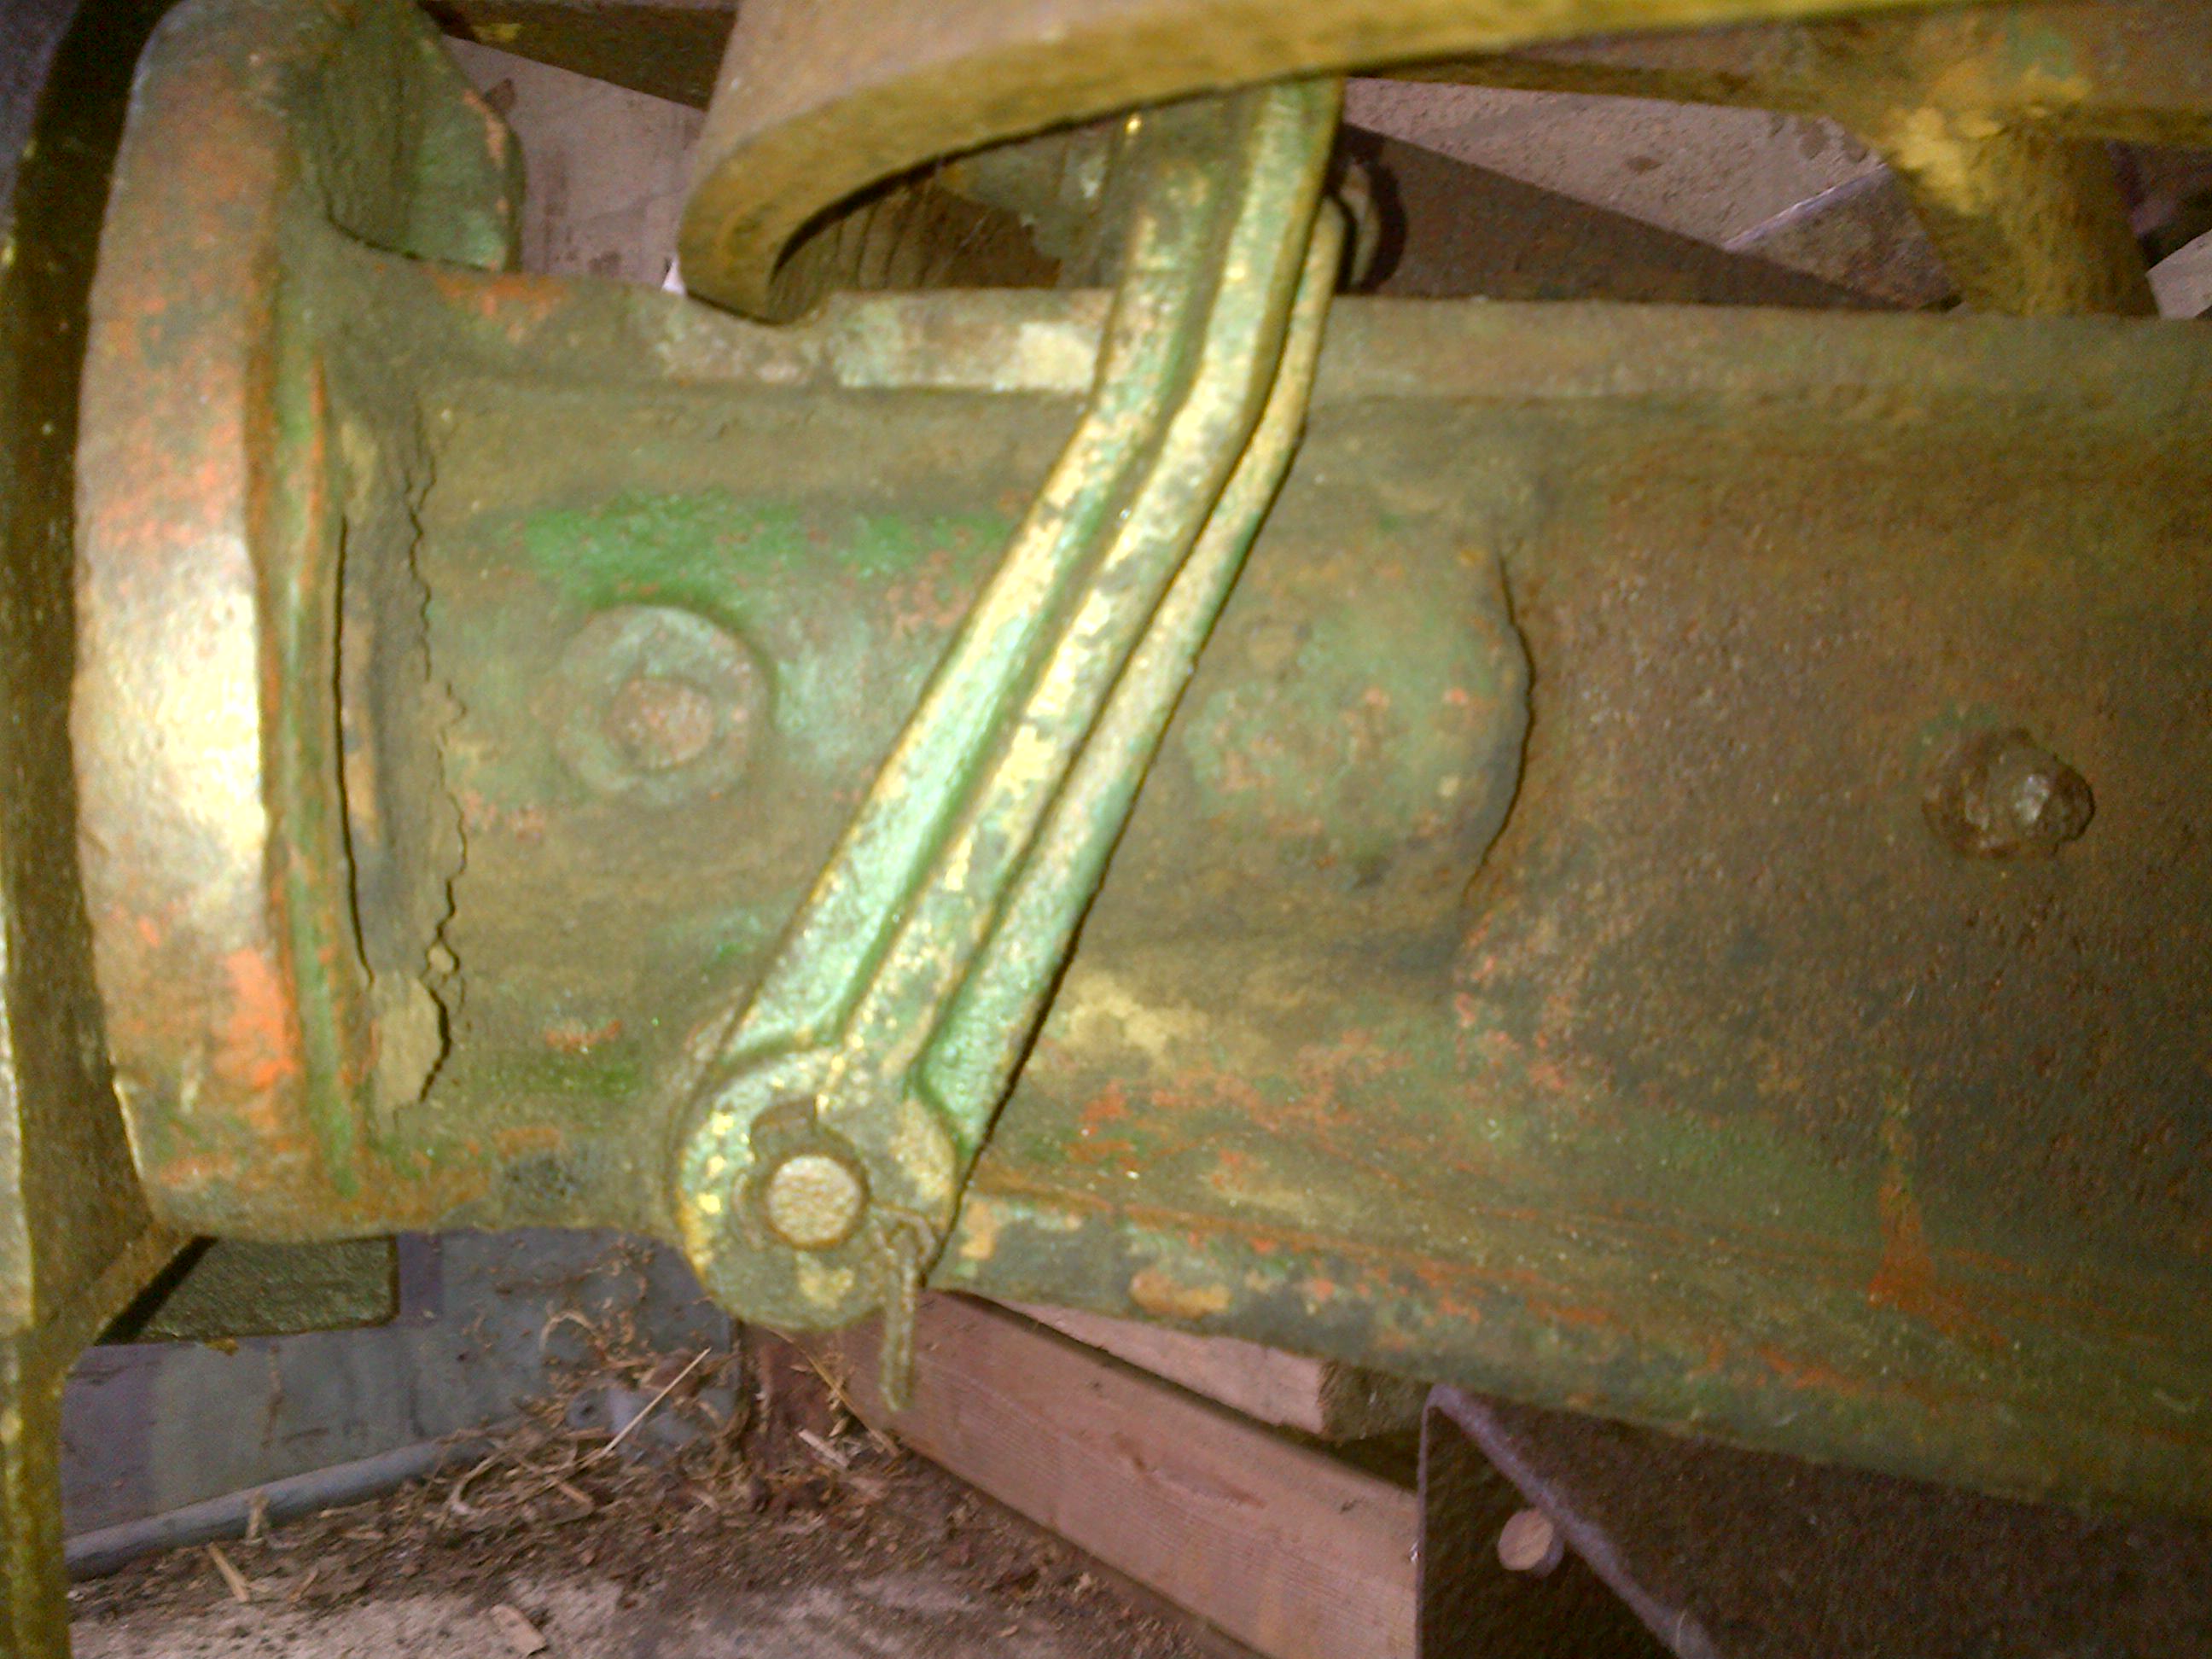
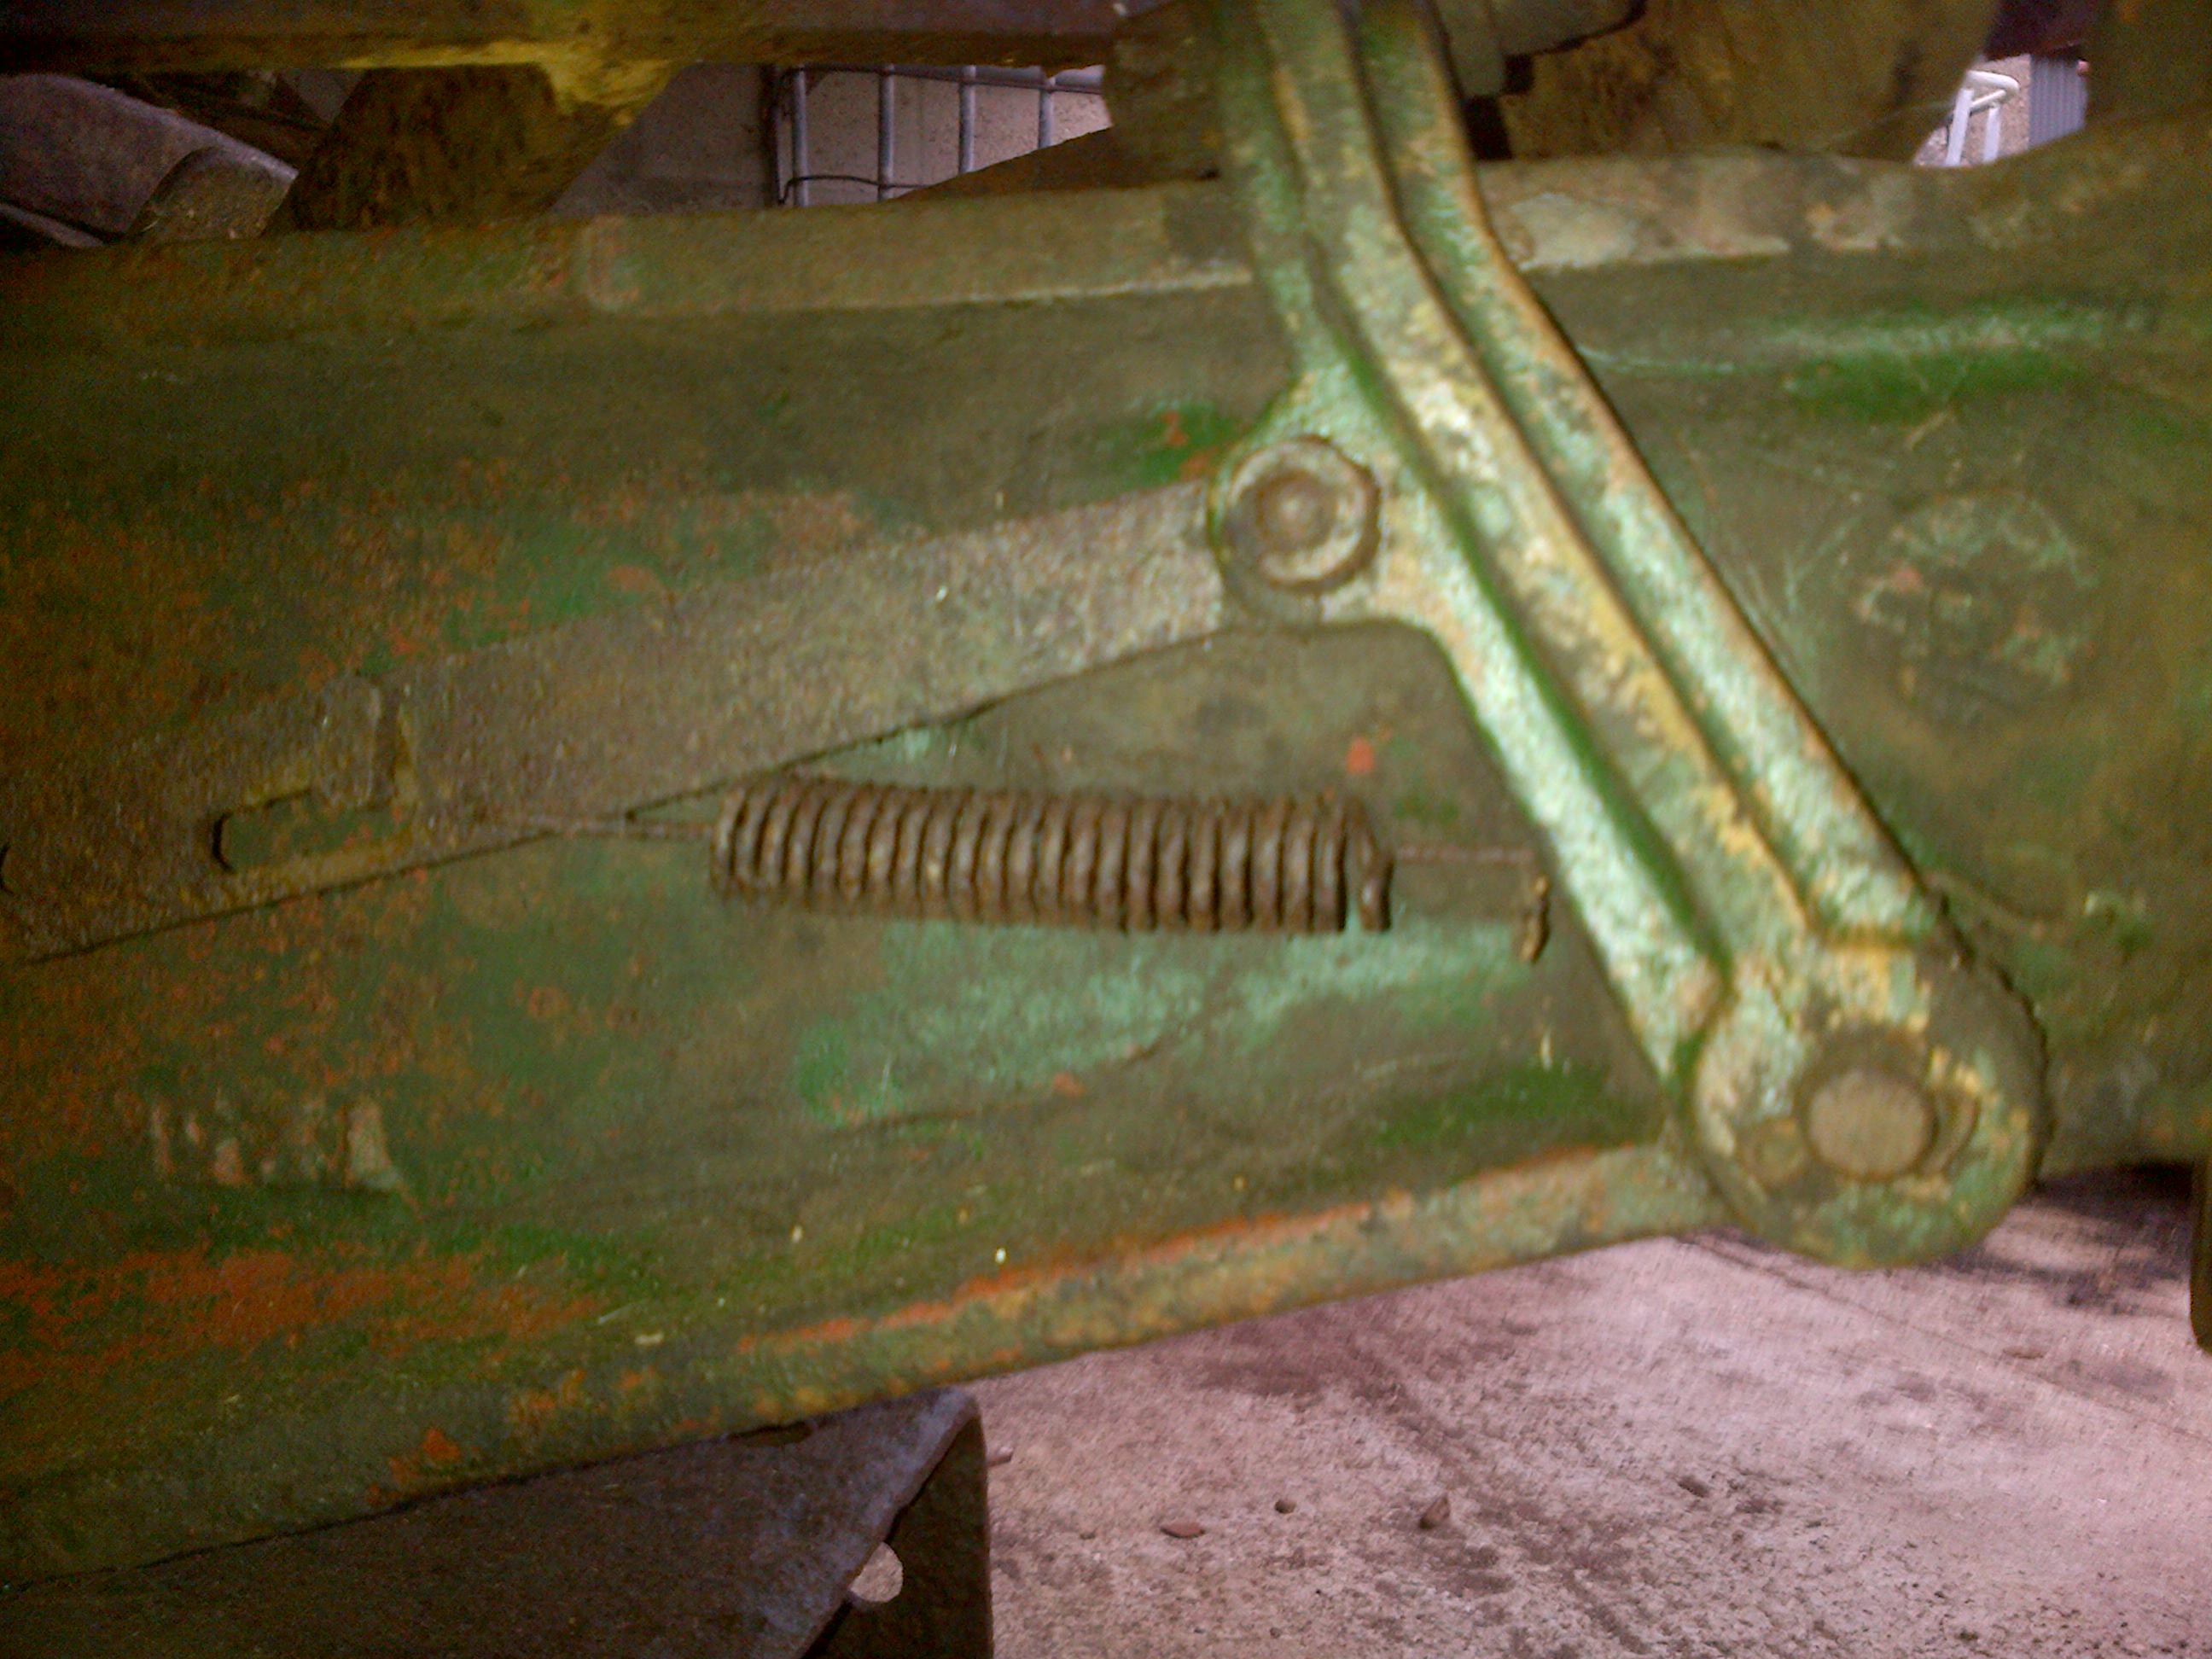
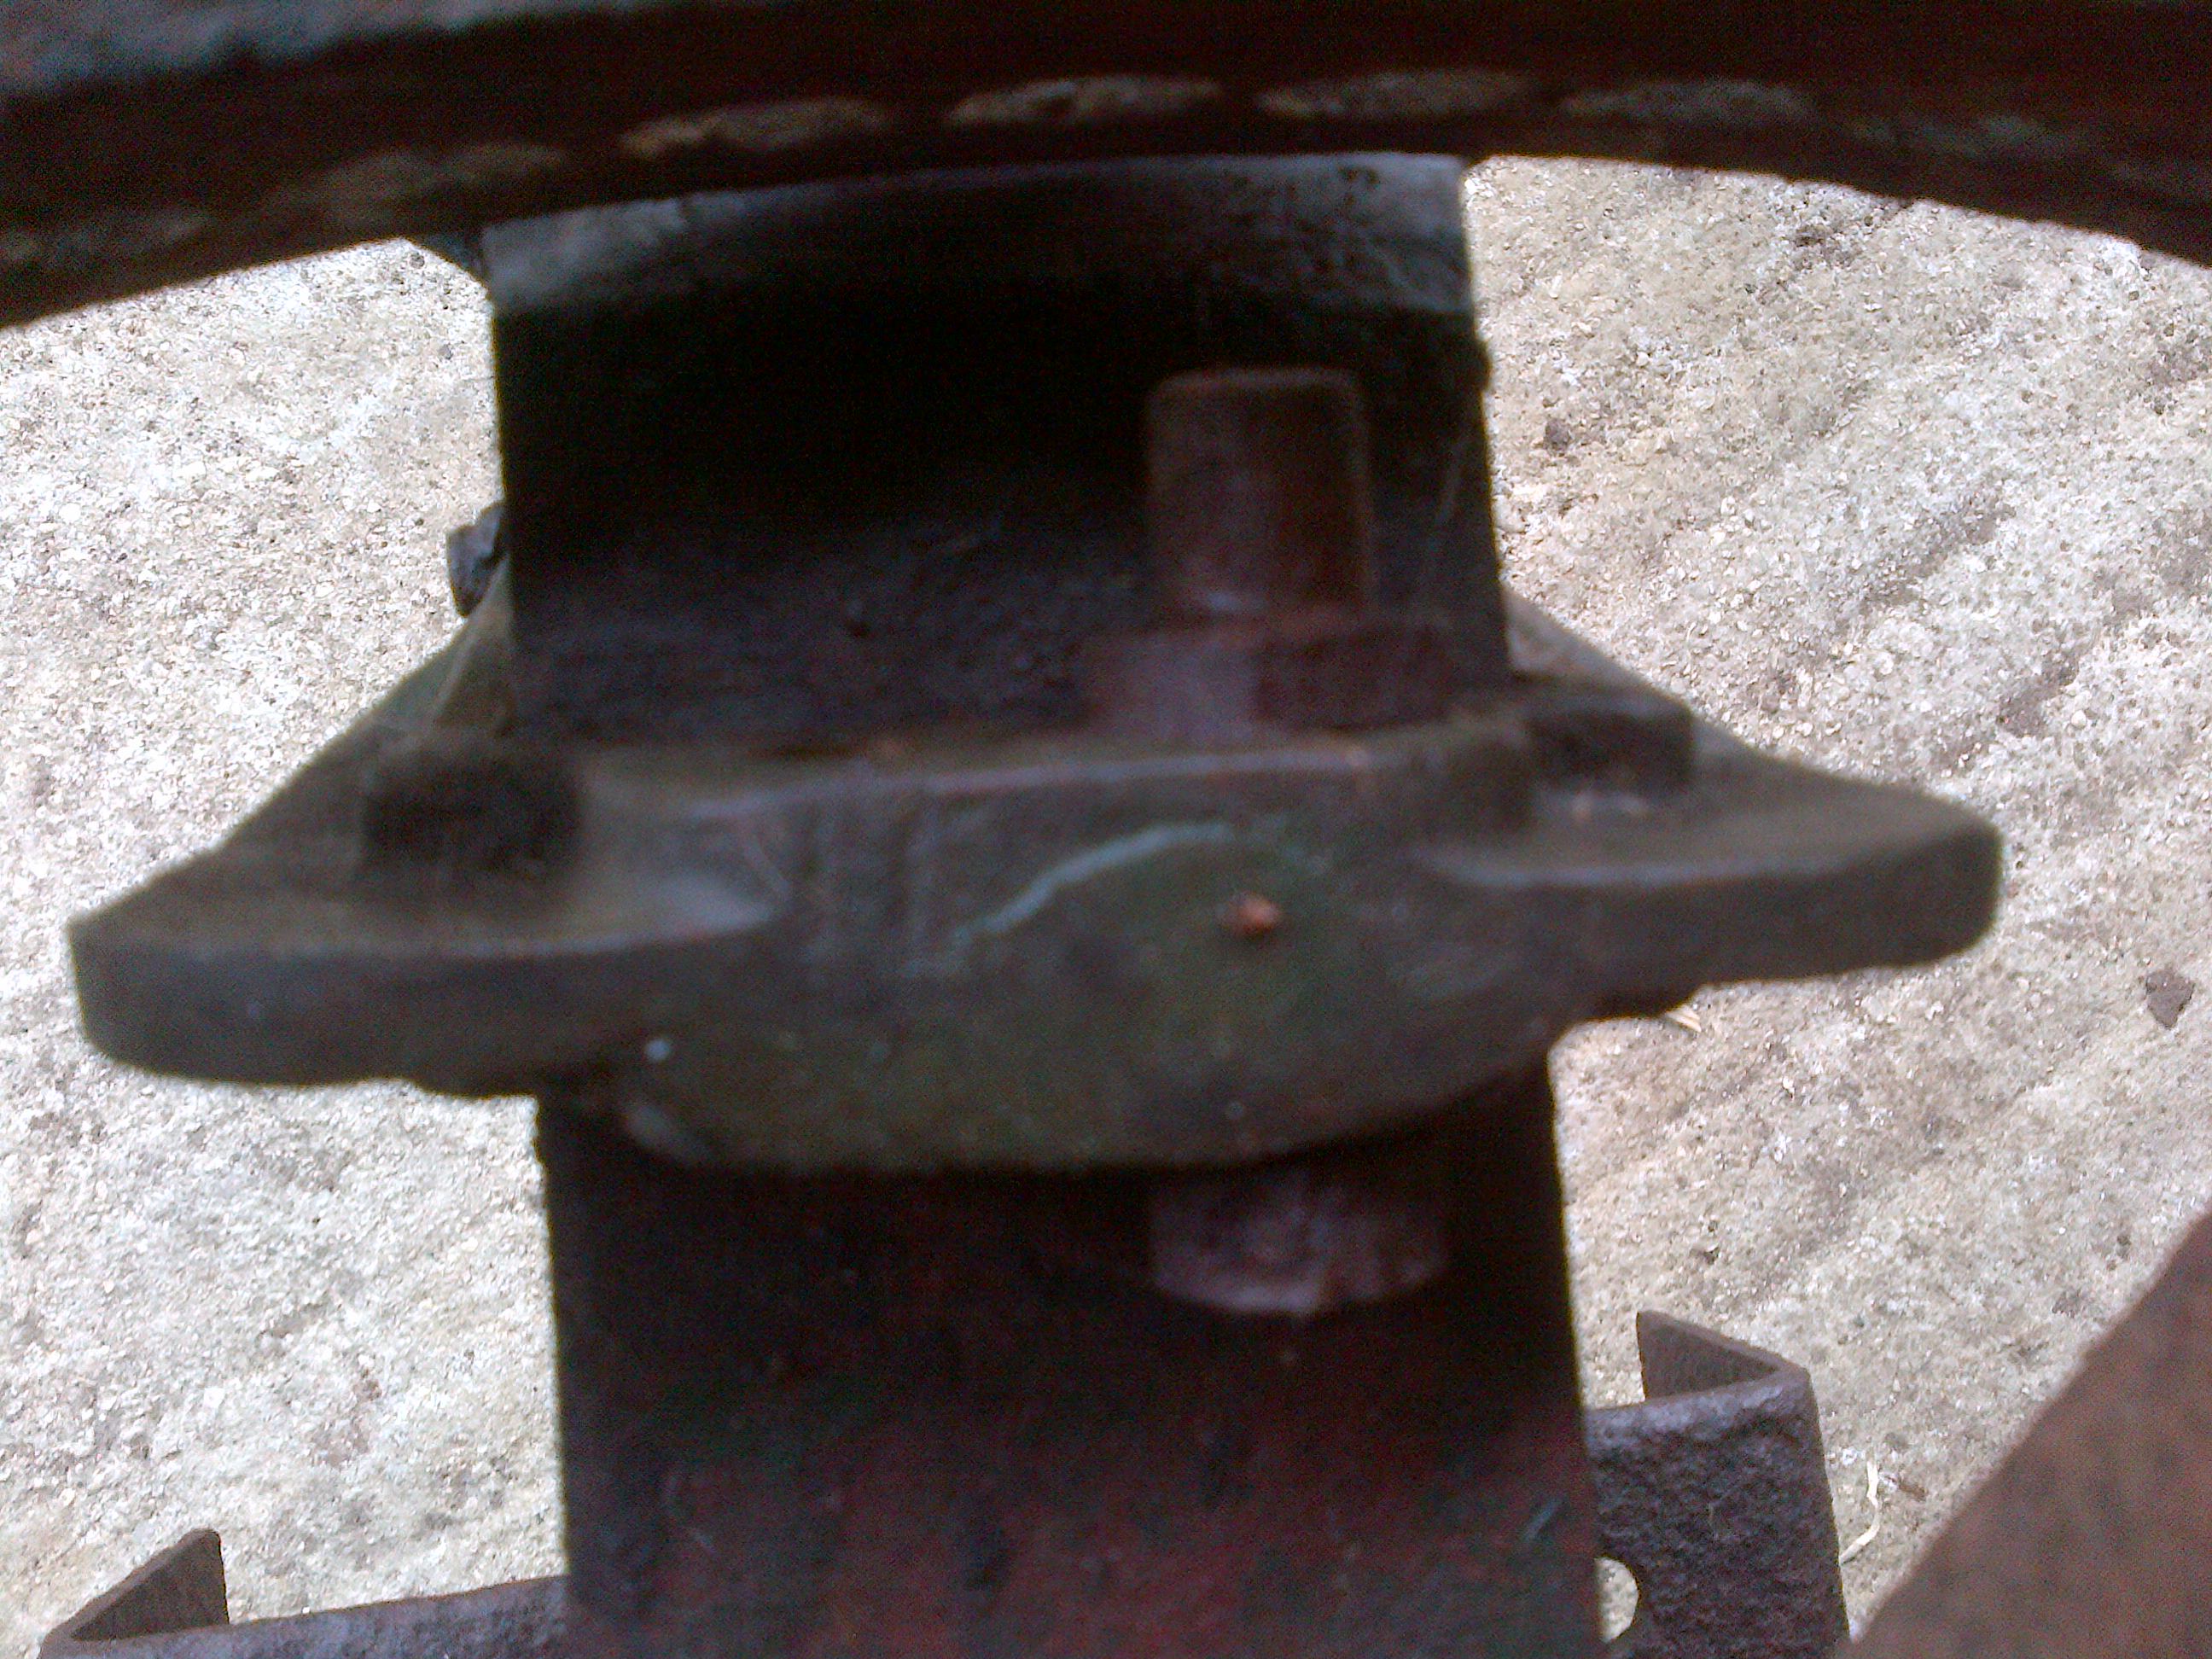
    Can anyone post some pictures of their Trusty with implement attached, showing the drawbar area and how all these bits go together?

    Thanks

    Sean

    Attachments:
    #8338
    joegrgraham
    Participant

    Sean,
    Most of the parts are to lock the drawbar into a fixed position.
    item 6 is the pin that holds 5 to the main coupling.
    8 goes through one of the two holes in the top of 5
    16, i think, goes through the end of 12 to hold it to 5. the pin you are missing.
    Don’t know where 17 goes.
    19 is the pin that goes through the slot in the end of 4 to hold the implement on the coupling.
    Don’t know on 21 and 22.
    The T shaped bit that is broken off of 15 is needed as it runs in the L shaped slot in 12.

    I hope some of that makes sense!
    the pics aren’t the best as I took them with my phone in a dingy shed!
    Hope it helps though,

    Joe

    Attachments:
    #8351
    vhgmcbuddy
    Member

    Thanks Joe. Description and photo’s are a great help. Hopefully, some other learned souls on the art of attaching implements to Trusty’s can fill in the few remaining blanks.

    Cheers,

    Sean

Viewing 3 posts - 1 through 3 (of 3 total)
  • You must be logged in to reply to this topic.