Home › Forums › The Main Forum Area › Projects › Trusty Norton engine rectification
- This topic has 6 replies, 2 voices, and was last updated 10 years, 1 month ago by
 trusty220.
-
AuthorPosts
-
April 27, 2016 at 8:06 pm #20699
 trusty220Keymaster
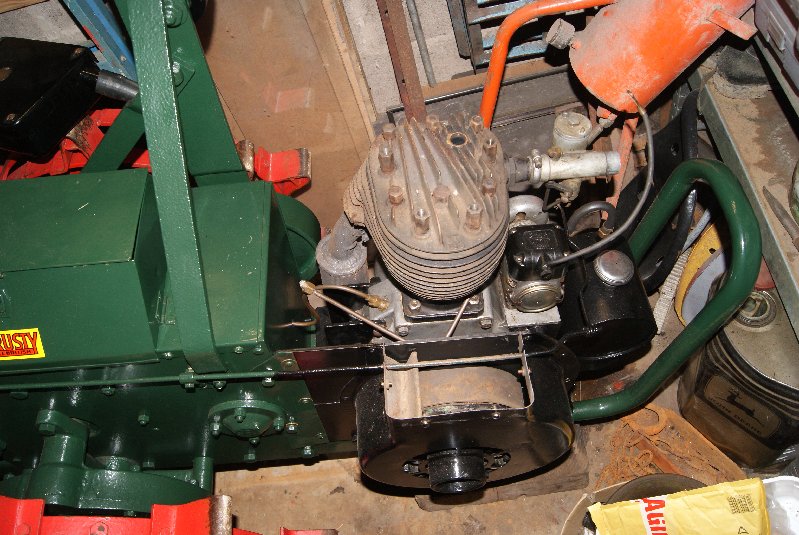
It’s not often that I make a mistake, but once in a while something pops up just to prove that I’m human like the rest of us. This one concerns my faithful old 2-wheeled Norton Trusty; I’ve taken it to many working events and it really does work well with a set of discs or a roller. I don’t do ploughing with it because it has spade lug wheels and these don’t plough well in competition- besides, I have a 3-speed on rubbers for that and I find the spade lugs are ideal for grip on ground that has been worked already.
Anyway, the story starts with an entry to Tractor Newark about three years ago. I had just bought the Trusty Sawbench and was in the middle of restoring it in time for the show when an idea just popped into my head; what if I displayed it with a Trusty and my Trusty trailer? I then hit on the idea of driving the sawbench off the belt pulley on the Trusty and so I set to work to finish the sawbench, smarten up the trailer and give the Norton Trusty a facelift.
Because the cowlings were off the Norton engine for painting I decided to change the piston for a new one with two scraper rings, honing the bore at the same time and hopefully curing the slight oil burning issue that I had with it. By this time the clock had ticked away and used up most of the available time that I had, so I slapped the engine back together quickly and did a hasty paint job on the tractor just in time for the show.
Now, the problem was that when I turned the crankshaft it seemed to come up against something solid at one point in the stroke. The rest was fine and it turned easily and it wasn’t long before I figured it out- the piston was coming up to TDC and contacting the head gasket, which was encroaching slightly on the bore. This wouldn’t normally be a problem because the piston shouldn’t protrude from the bore on TDC, but silly me hadn’t bothered to check in my hurry to put it back together.
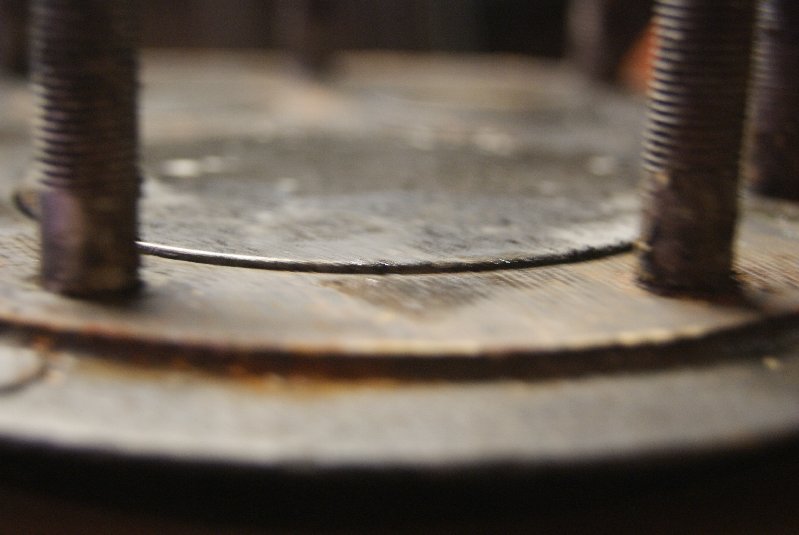
From that day to this I haven’t even attempted to start the engine, knowing that I would have to put it right before it ran again. This week, however, I decided to give it a go and see how far the piston came out of the bore. You can see from the pictures that it isn’t very much and I should be able to get over the problem by making another base gasket to go between the barrel and the crankcase. All sorts of things had been going through my head, such as turning a bit off the crown of the piston, but the amount it projects is about 10 thou so I’ll buy some aluminium sheet and make up a gasket to space the barrel up a bit.
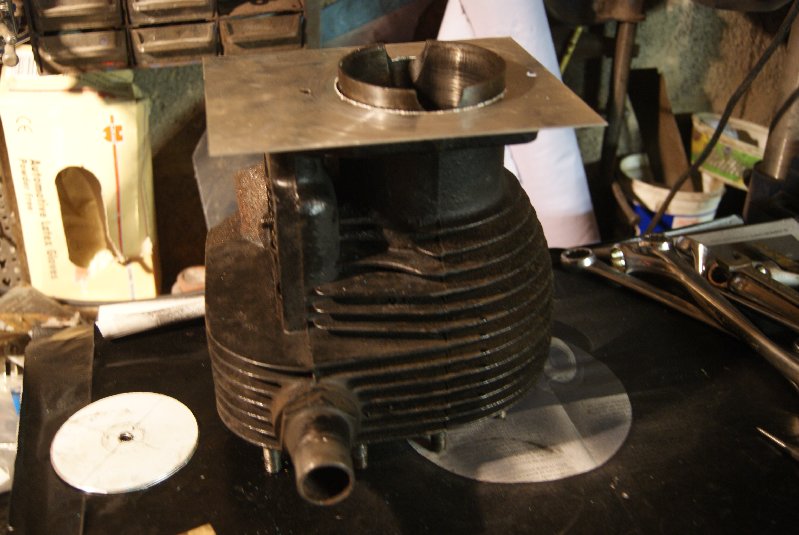
Whilst you are looking at the pictures have a squint at the picture of the cylinder head and compare it to the one on the Trusty Steed engine rebuild that I did last year. The Steed engine had a cast aluminium head with the fins running front to back like a motorbike, whereas this one has a cast iron head with the fins running sideways. This is how all Norton Big Fours fitted to 2-wheeled tractors were, and Steed engines were always similar to motorbike engines.
Attachments:
May 8, 2016 at 5:14 pm #20837trusty220KeymasterIt’s been a week or so since I last looked at this and I decided to move it on a pace today, seeing as the shows are getting closer and I need it finished. The course of action decided upon was to make a spacer gasket to lift the barrel 40 thou and bringing the top of the piston level with the top of the barrel. The only problem was that it isn’t easy making a circular hole 3.55″ in diameter in 40 thou Aluminium sheet.
The easiest way was to mount it on the faceplate on the lathe with a hardboard backing piece so that I didn’t cut into the faceplate. The job itself took seconds, but mounting it took a while longer. Still, the end result was worth it and I now have a sheet of 40 thou Aluminium plate with a 3.56″ hole in it and no distortion. Now to mark it out, drill the other holes and cut it to shape.
Attachments:
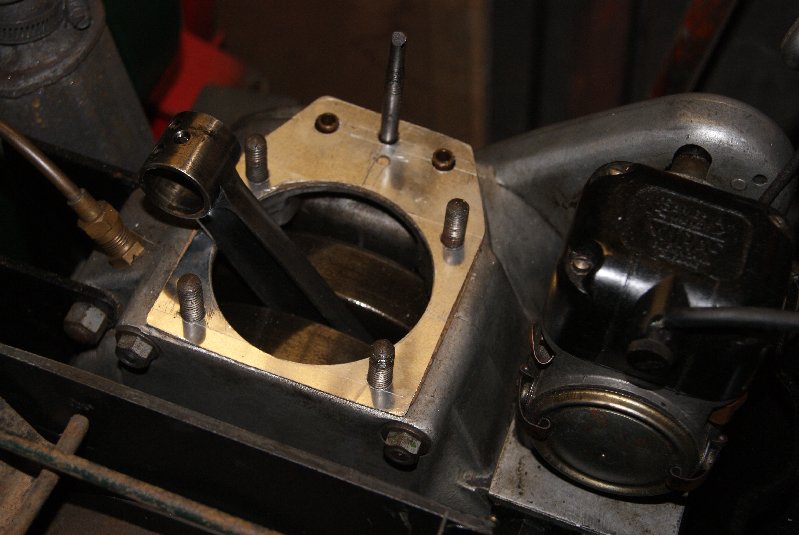
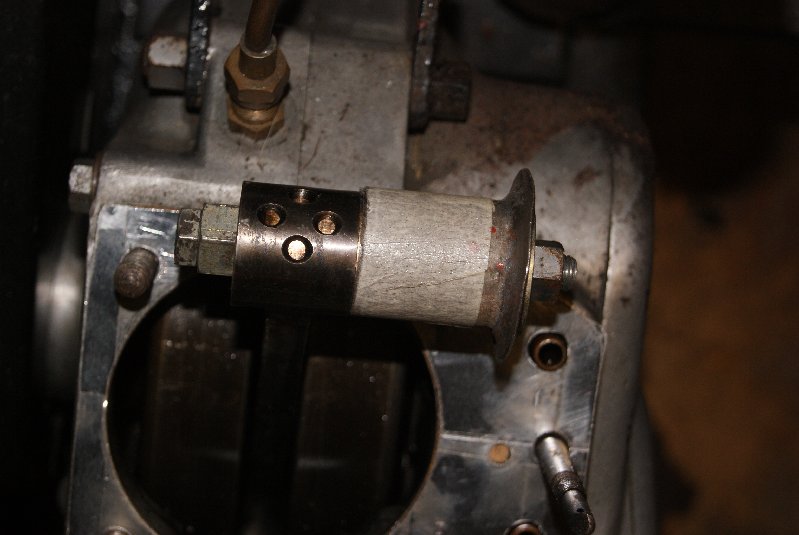
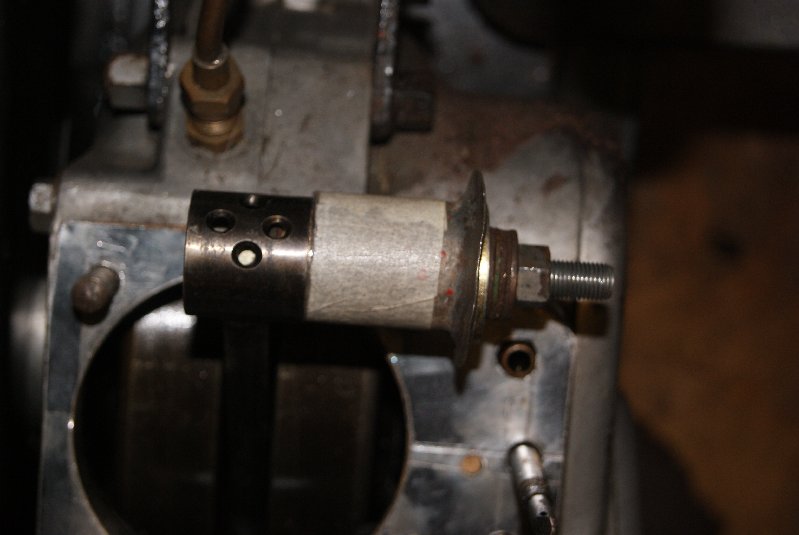
May 11, 2016 at 9:49 pm #20864trusty220KeymasterHoles are now drilled for the five retaining studs, not forgetting the two additional holes for the cam followers that operate the valves. It was a major work to get all of the dimensions right and complete the spacer without any distortion at all; still, you can judge for yourselves from the photo’s.
Whilst working on this part of the engine I thought it prudent to change the little end bush as there was a slight amount of movement in it. Now, this is where my latest problems arose as the piston appears to be non-standard. The outer dimension of the bush (ie the diameter of the hole in the end of the con rod) is 1.032″, the length of it is 1.125″- so far so good. The gudgeon pin has a diameter of .866″ (which is 21.99mm ), and the standard Norton bush has an internal hole diameter of .875″. That means that I can’t buy a bush off the shelf.
When I get problems like this I normally end up either making the part myself or going to Alpha Bearings in Netherton, Dudley. That’s what I did today and they are going to make me a bush to fit; call me lazy, but I’m very busy at work at just haven’t got the time.
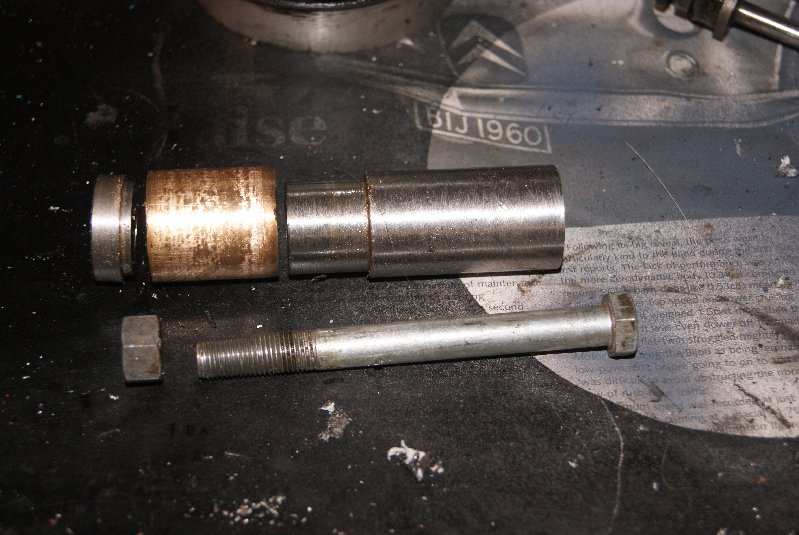
Now that I know that I can get a replacement I decided to remove the old one. As you can see from the pictures I made up a puller from a long bolt with a washer at one end to engage the bush. At the other end was a tube that the bush would slide into, with another larger washer and the nut on the other end of the bolt. As the nut was tightened it pulled the bush from the con rod into the spacer tube with no risk of bending the con rod. I now have a bare con rod awaiting the new bush, so fingers crossed!
Attachments:
May 12, 2016 at 6:53 pm #20873 vhgmcbuddyKeymaster
Geoff,
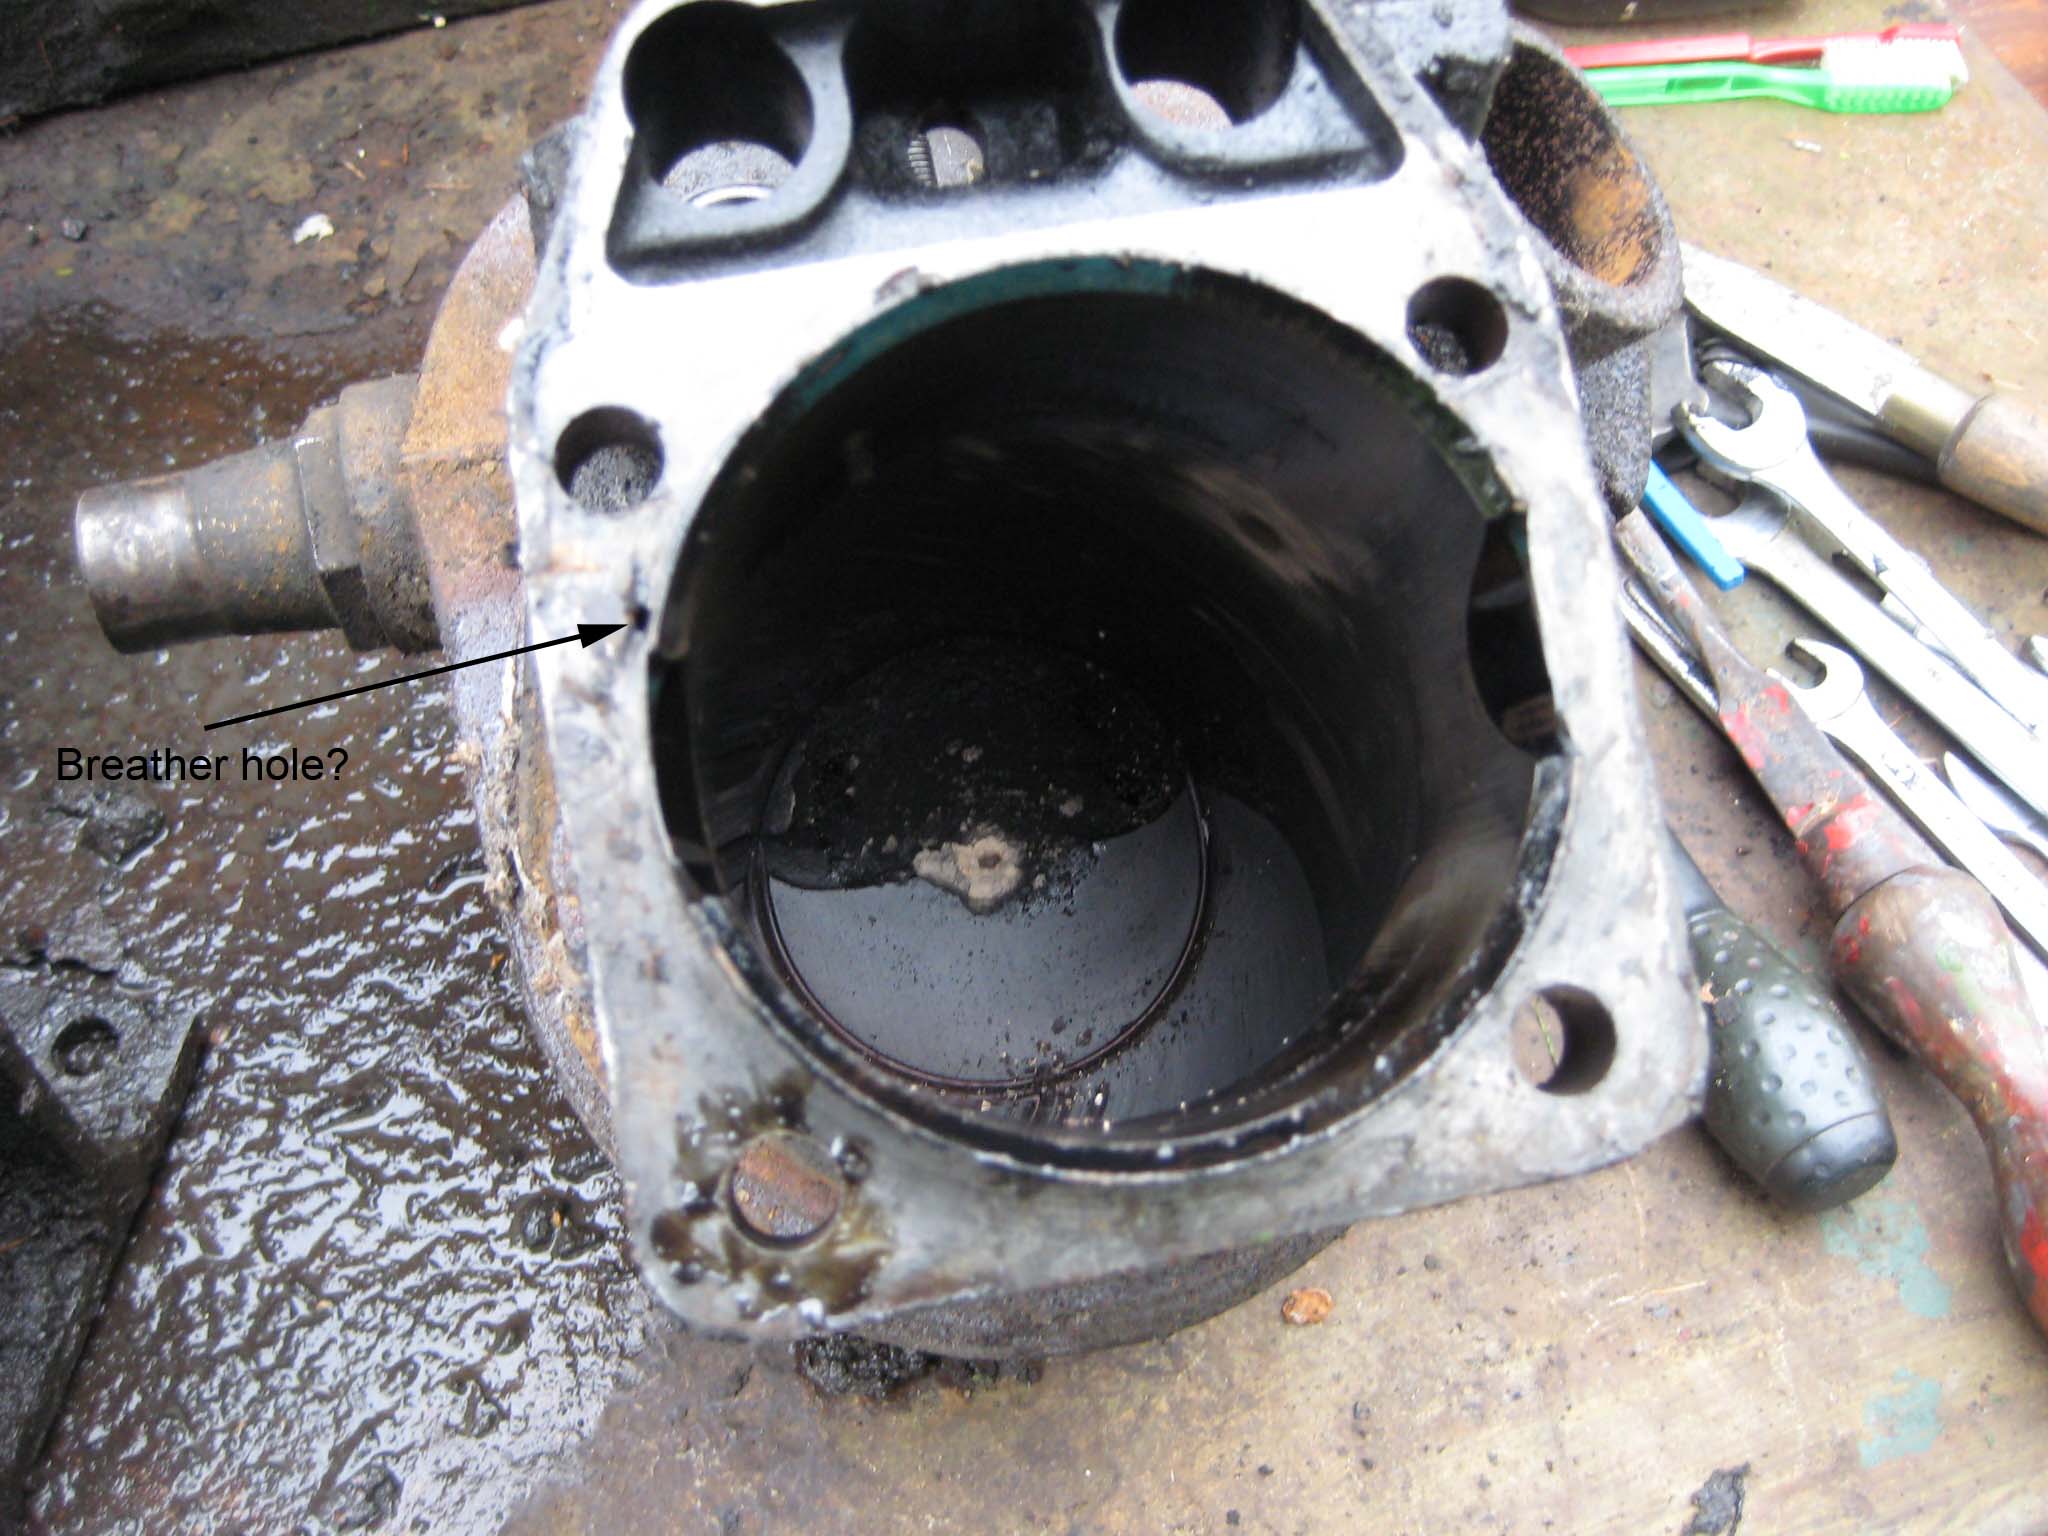
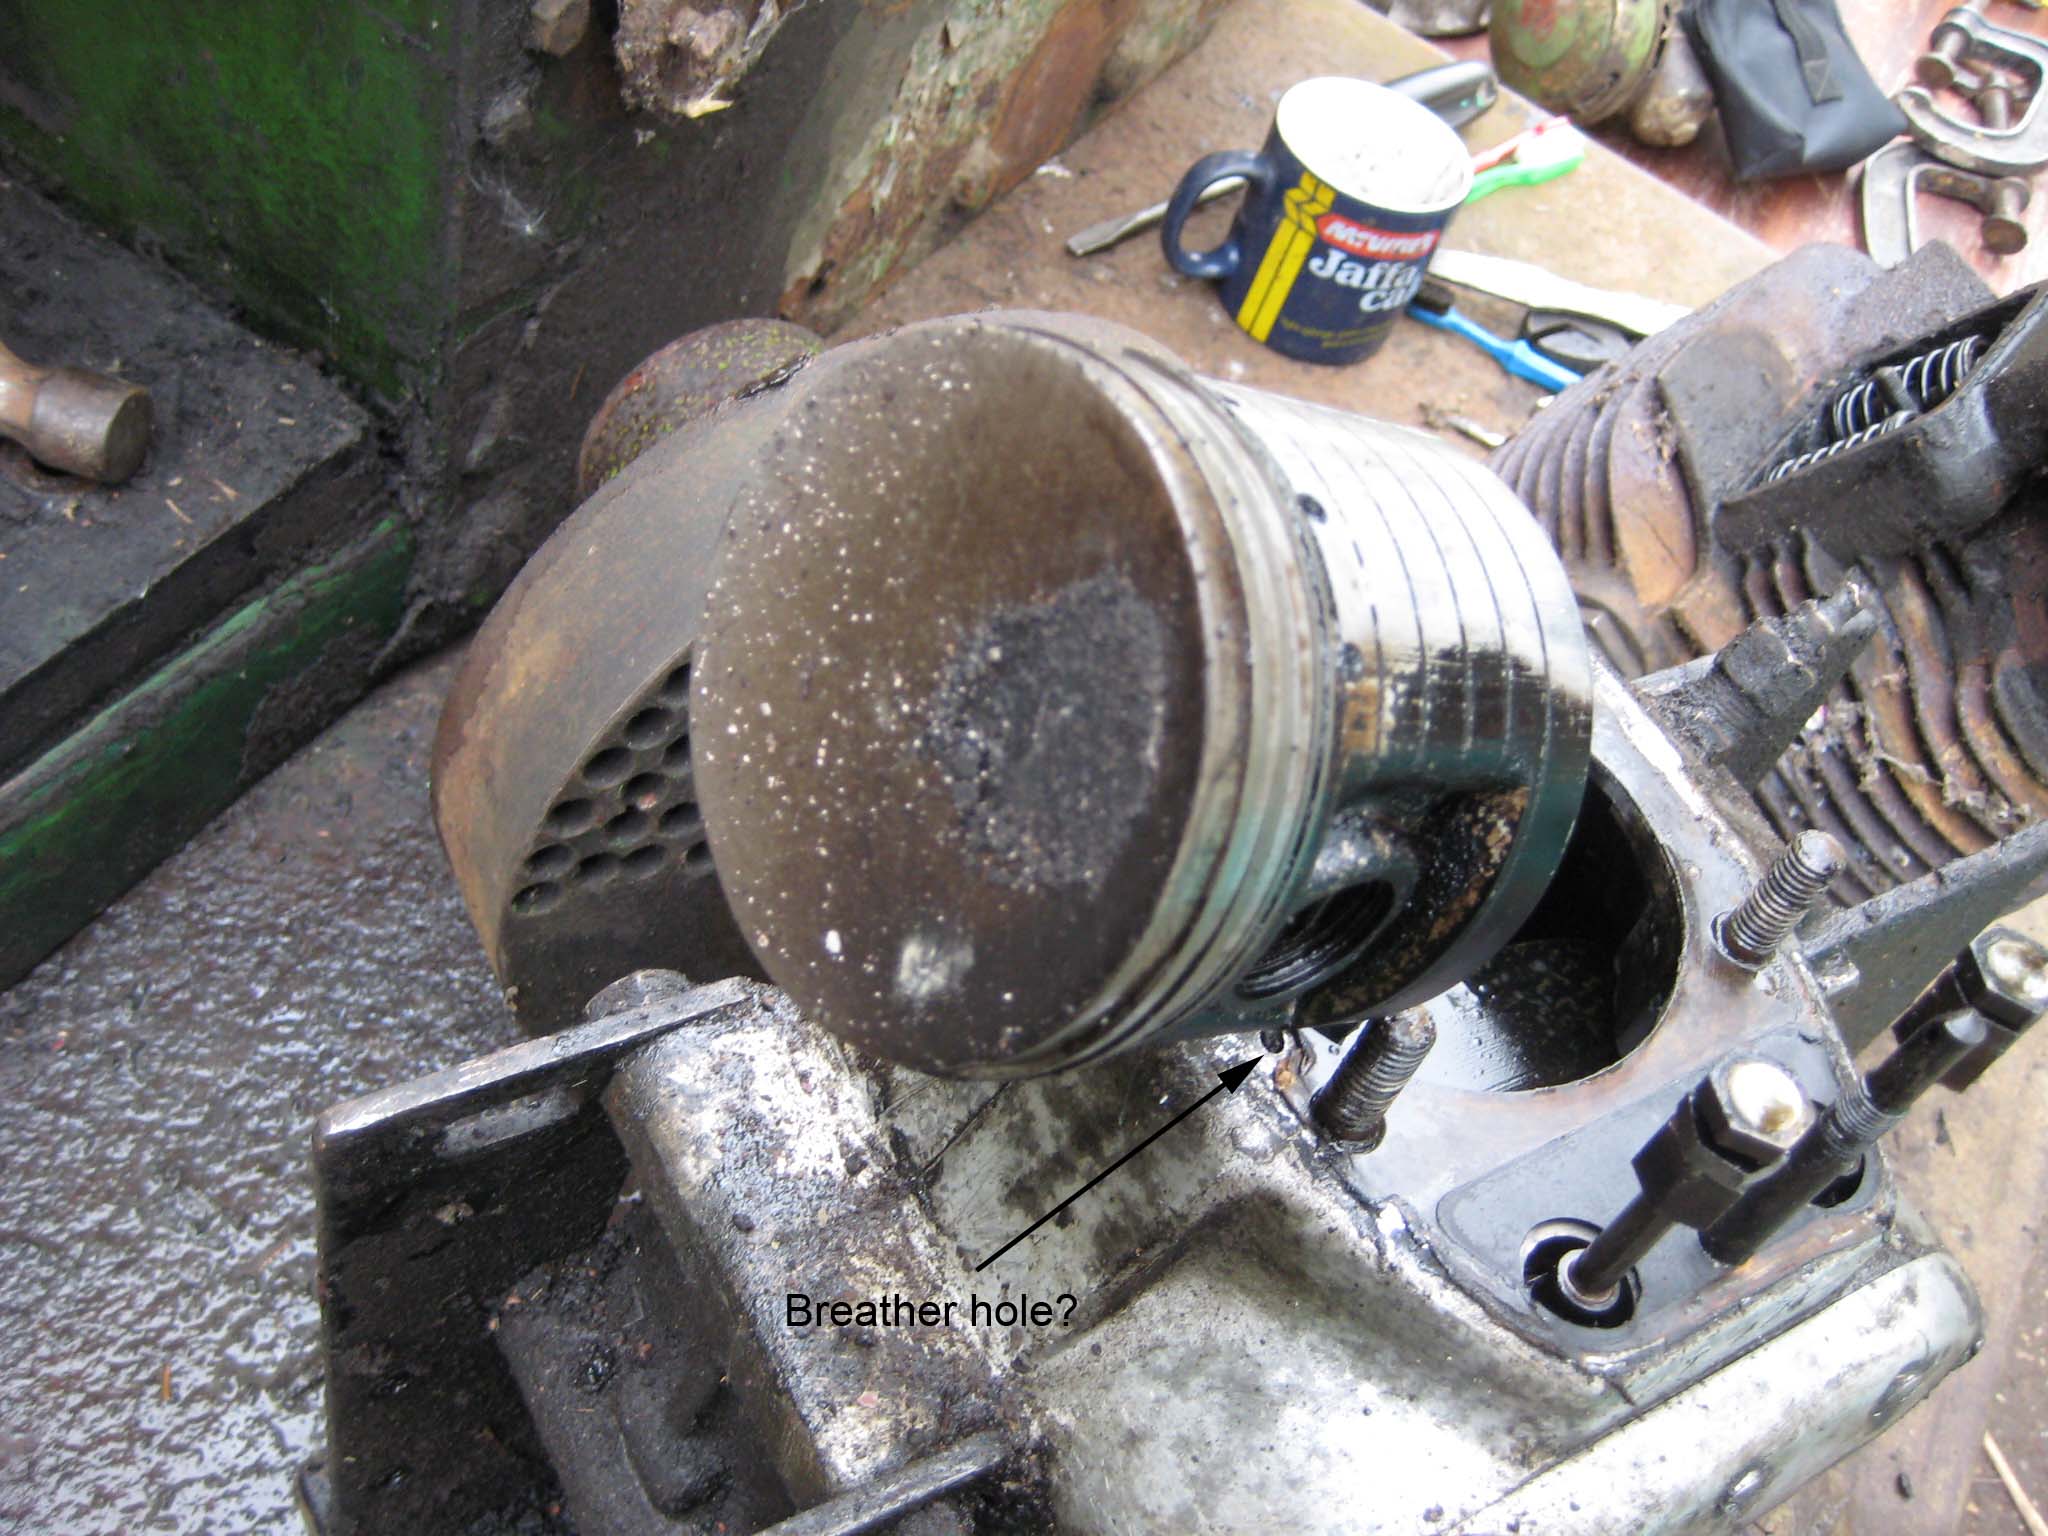
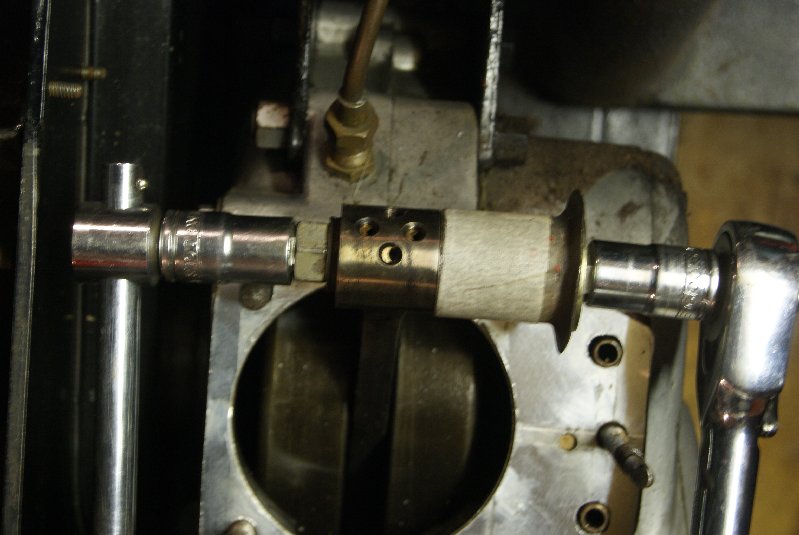
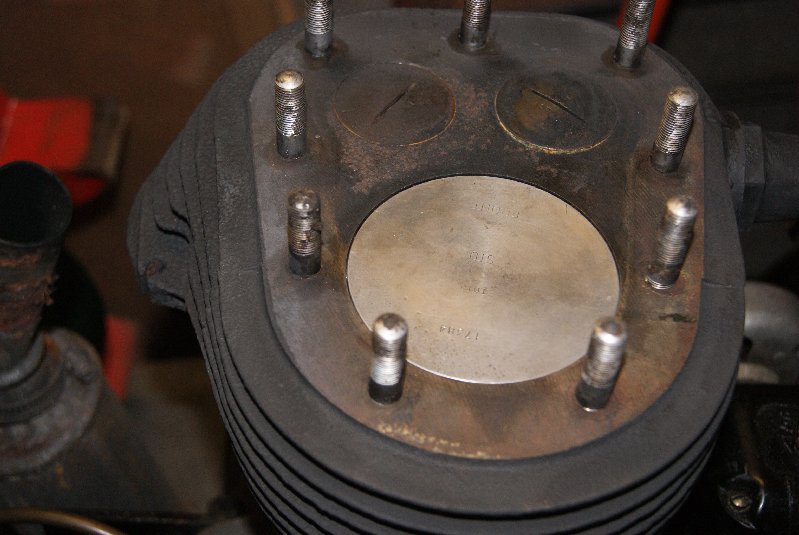
When I stripped my Norton down, I noticed a small hole in the top face of the crankcase which lined up with another hole in the cylinder barrel (see photo’s below). I’m not sure of it’s purpose, maybe lubrication or a breather. Looking at your photo’s suggests that either your engine hasn’t got these holes or you may have accidentally covered them over with the new gasket.
Sean
Attachments:
May 13, 2016 at 3:43 pm #20887trusty220KeymasterThere is a hole there on both faces. I’ve poked a piece of wire down the crankcase one the other day and it seems to be an exit into the crankcase for some sort of oil drain from above.
So far that’s classified as a “work in progress”, so watch this space. It was possibly intended to supply oil to a rocker shaft for an overhead valve version of this engine, but I’m only guessing.
More photo’s to come this weekend as I’ve just picked up the new little end bush from Alpha Bearings. Let’s hope it fits!
May 15, 2016 at 6:00 pm #20905trusty220KeymasterI’ve been poking bits of wire into all sorts of holes this weekend, and the one that Sean is pointing out is actually a pressure feed from the pump. It corresponds to a hole drilled in the cast iron barrel which exits about 1/3rd of the way up the bore. The only use I can see for this is to lubricate the piston skirt- maybe they had a problem with overheating caused by excessive friction in the bore- so I will have to drill a hole in my new spacer to allow oil to flow through.
Thanks for pointing it out, Sean.
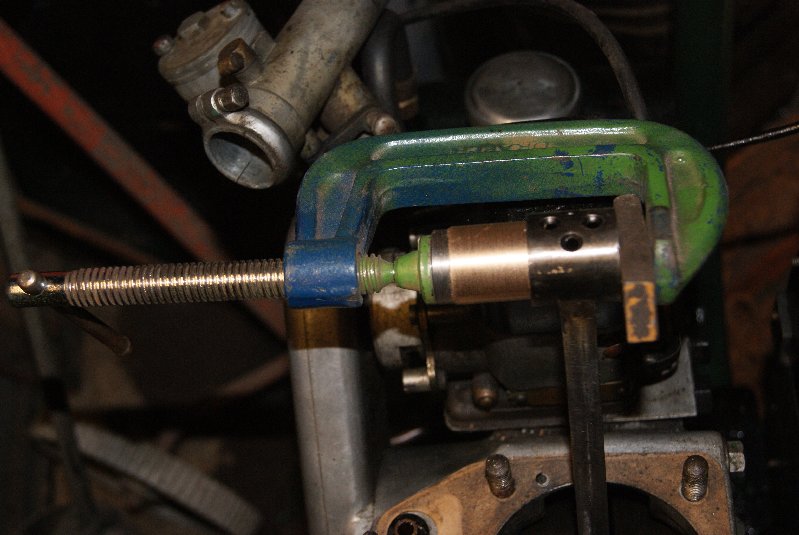
May 26, 2016 at 6:23 pm #20963trusty220KeymasterI’ve been busy doing other “stuff” lately, so I had to put this little project down for a bit. I think I’m in the first stages of senility as well, because do you think I could find the new little-end bush that I’d bought? I gave up looking in the end and bought a new bush from the local bearing supplier that was the correct internal diameter (22mm), but had an outside diameter of 28mm.
Now, how do we hold a thin walled bush to turn down the outside diameter? My inventive brain came up with a carrier that could be held in the 3-jaw chuck and mounted the bush on a shoulder, then clamped a shouldered washer on the other end with a long bolt through it. This leaves the outside free to turn down and allows the tool to pass over the ends as well, so the whole length of the bush could be turned accurately. The photo’s will give a better idea of how it worked out.
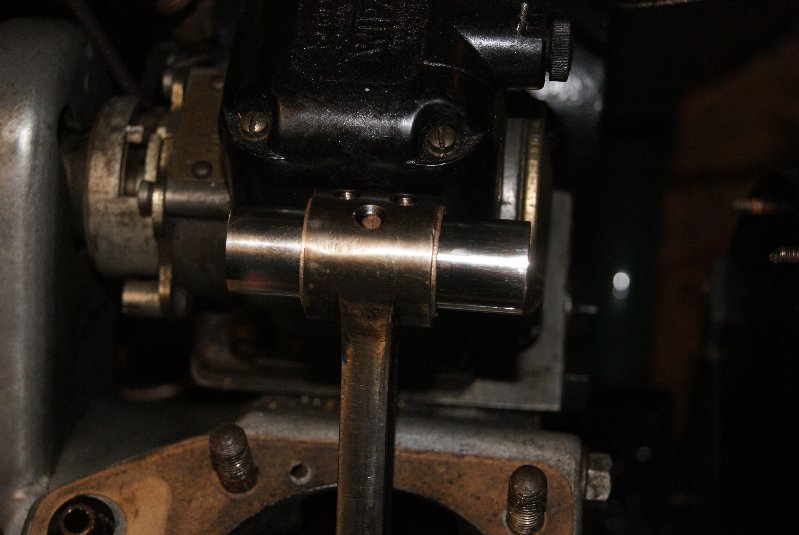
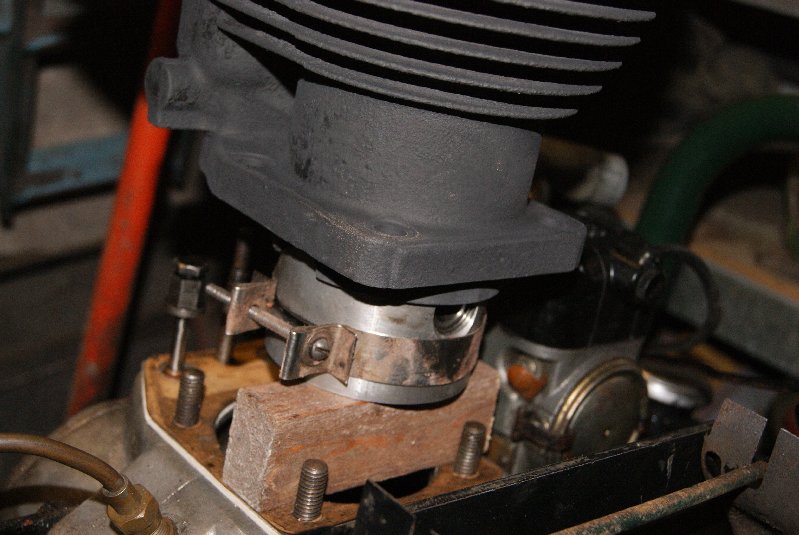
The bush was then turned down to 1.032″ to give an interference fit in the little end hole in the con rod. It was then coaxed in with a stepped washer and a long bolt, then finally four oil holes were drilled in the top. The piston was fitted and the barrel dropped over, using a block of wood to take the weight until the piston rings were well inside the bore. It was then a simple matter of bolting everything up tight again. I will have to re-set the tappet clearances now the spacer gasket is in place, but the piston is now flush with the top of the bore when it’s on TDC so it looks like mission accomplished.
Attachments:
-
AuthorPosts


- You must be logged in to reply to this topic.