Home › Forums › General › Help and information › Simar 56A Cooling Fan Nut
- This topic has 5 replies, 2 voices, and was last updated 11 years, 1 month ago by
 charlie.
-
AuthorPosts
-
December 7, 2014 at 6:25 pm #10988
 vhgmcbuddyMember
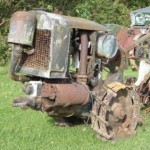
Can anyone advise if the thread is right hand or left hand for the nut that holds the cooling fan to the crankshaft on a Simar 56A?
December 7, 2014 at 8:48 pm #10991 charlieKeymaster
I will have to check but I think it is right hand thread. Getting the nut undone is the easy bit. Getting the fan off the taper is the hard bit.
December 8, 2014 at 4:42 pm #10997 vhgmcbuddyMember
Thanks Charlie. I think you are correct about it being a right hand thread. There are only a couple of badly corroded threads sticking through the nut, but they do appear to be right hand. I have had a breaker bar plus a length of scaffolding pole on the nut, but it wont budge, even after heating. I could resort to using a torque multiplier, but I am concerned about damaging the crankshaft, so I think the best bet will be to carefully cut the nut with my Dremel tool and cutting disc.
December 9, 2014 at 9:12 am #11009 charlieKeymaster
Before cutting the nut try soaking it with penetrating oil (not WD40), worth trying heat then rapid cooling with WD40 or similar, then after a day or so try an impact driver the shock should free it. DO NOT use fins of cooling fan to lock crank. Remember it has probably never been off since it was originally assembled. Do you have a parts list? If not drop me a pm with your e mail address so I can send one. If you do not already have the date for your machine I can supply this from the machine serial number 56???
December 9, 2014 at 5:59 pm #11016 vhgmcbuddyMember
You have already supplied me with parts and user manual for the machine concerned (see https://vhgmc.co.uk/forums/topic/any-one-want-a-project/), but thanks for the offer!!
I removed the cylinder head, filled the cylinder with rags and then replaced the head in order to lock the crank. I will persevere with the penetrating fluid for a while longer.
Once I’ve got the machine fully dismantled, I will then decide if it is viable to restore. If it is, I will start a thread in the Projects section. So far, it is looking pretty good internally. Most of the damaged/missing parts are confined to the outside. In the parts manual it shows a pair of additional tines (part no. 10396 on plate 6) which are pinned into the ends of the main tine carriers. My machine is missing these extensions, so were they an optional extra?December 10, 2014 at 9:13 am #11023 charlieKeymaster
Part no. 10396 is an extension which would have been an extra, not standard.
-
AuthorPosts
- You must be logged in to reply to this topic.
