Home › Forums › Groundcare Machinery › Anzani rescue
- This topic has 8 replies, 5 voices, and was last updated 4 years, 1 month ago by
 wristpin.
-
AuthorPosts
-
June 1, 2022 at 9:41 pm #39134
 wristpinParticipant
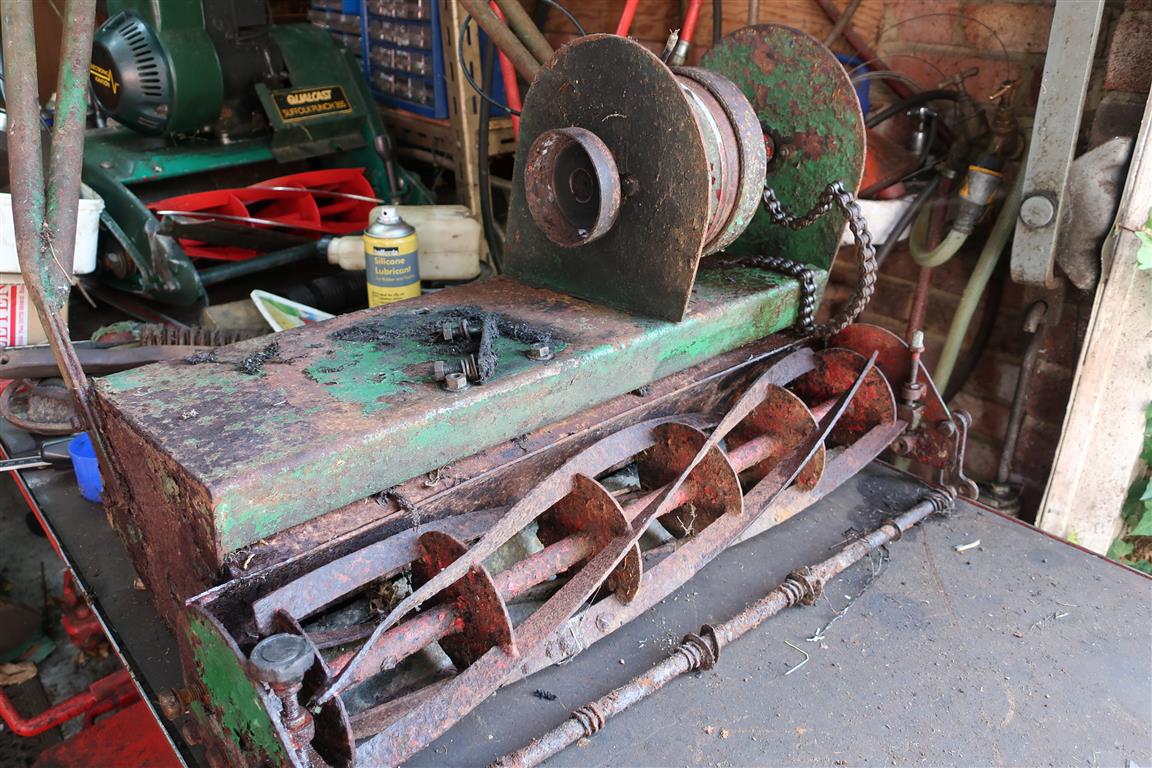
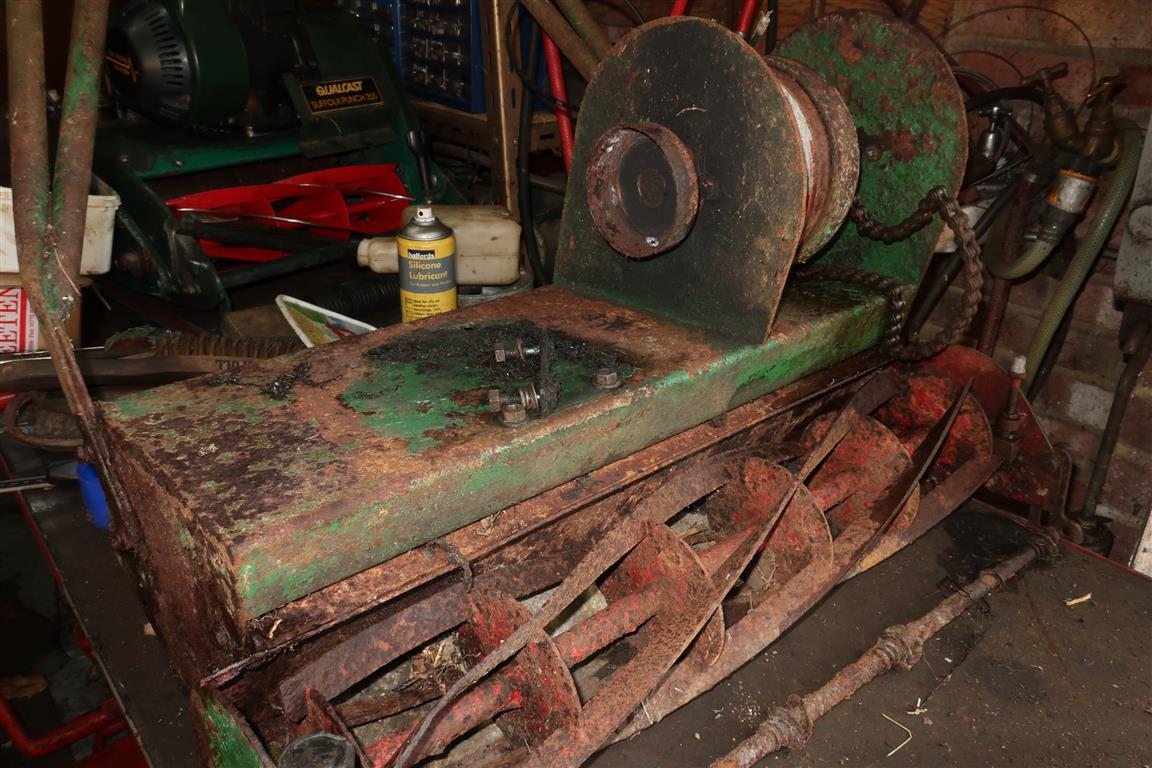
A couple of years ago I was given a lead to an Anzani Powermow that had been lurking in the under growth at the end of a private garden. Not so much a barn find as a hedgerow rescue. It had been covered up but had been there for over ten years – possibly nearer twenty- and had gradually become exposed to the elements. Fortunately, the grass box was painted alloy and had not succumbed to the dreaded tin worm.
I will mainly let the images tell the story, starting with “as found” and proceeding through the strip and rebuild.To be continued!
Attachments:
June 2, 2022 at 6:47 am #39143 charlieKeymaster
An interesting find. Looking forward to seeing the next instalment, maybe something to send to Alan for The Cultivator?
June 2, 2022 at 8:38 am #39144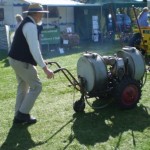 will-haggleParticipant
Looking forward to it!
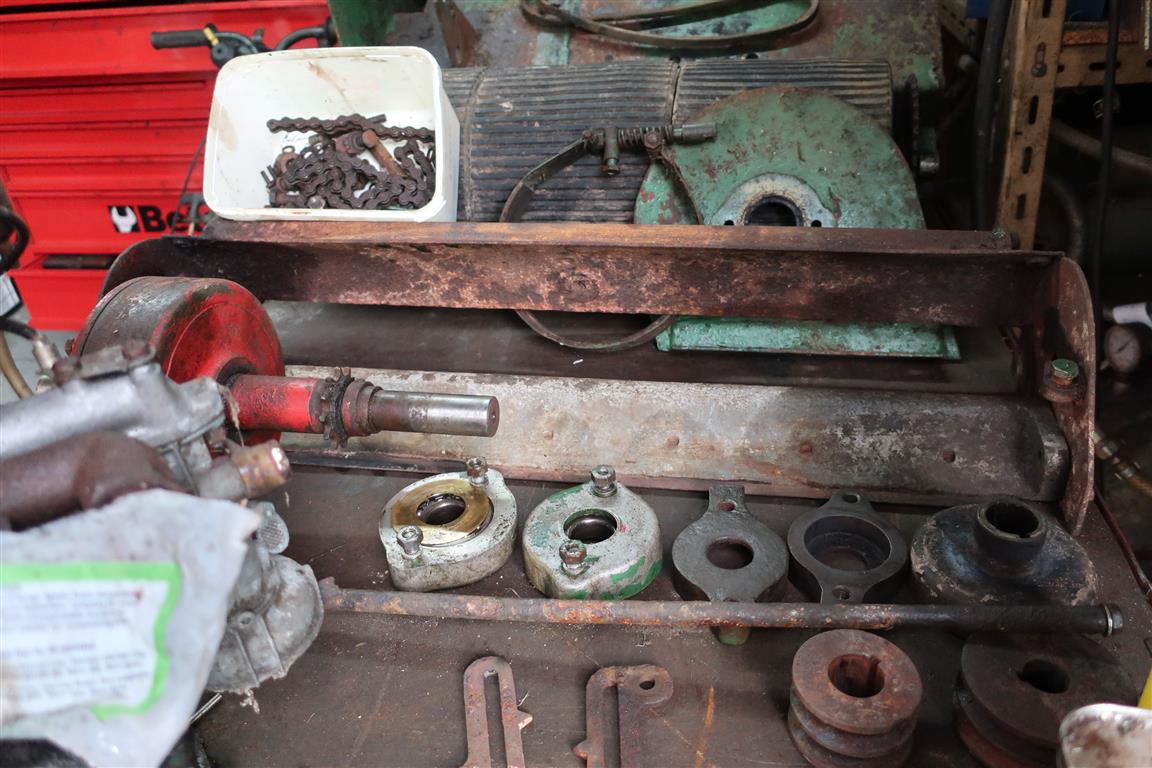
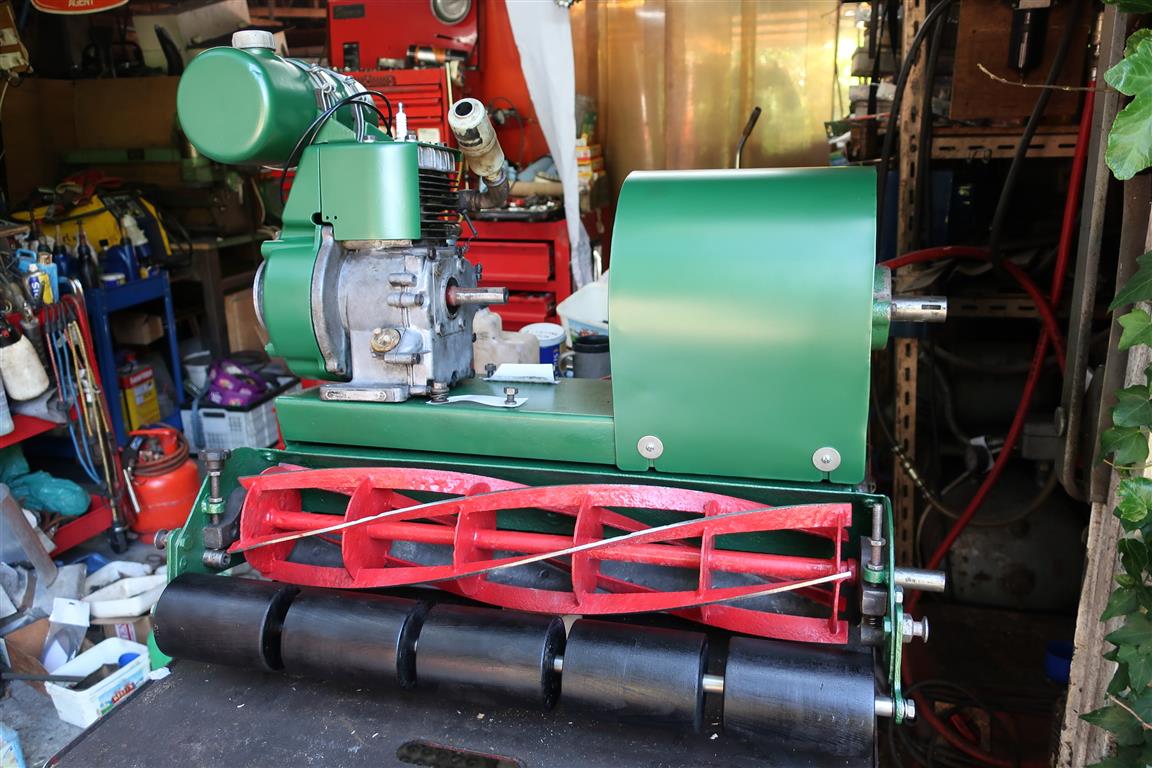
June 2, 2022 at 2:34 pm #39147wristpinParticipantAnzani part two – bottom blade and rear roller.
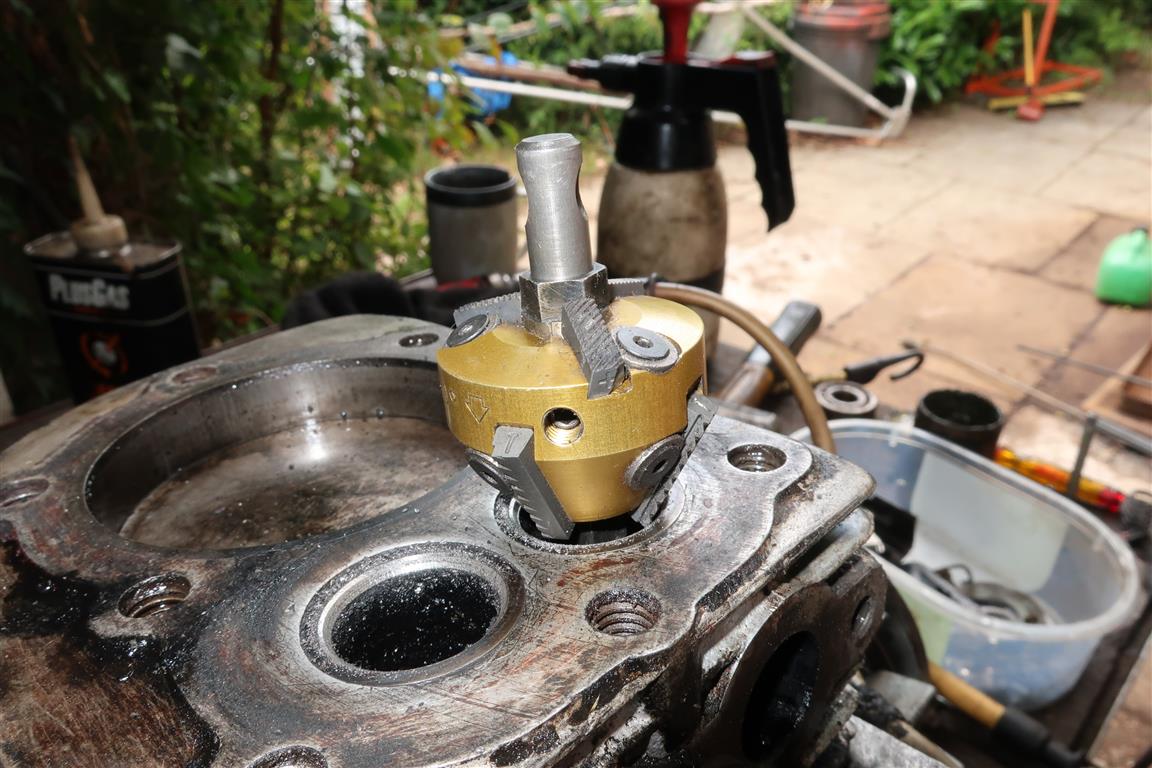
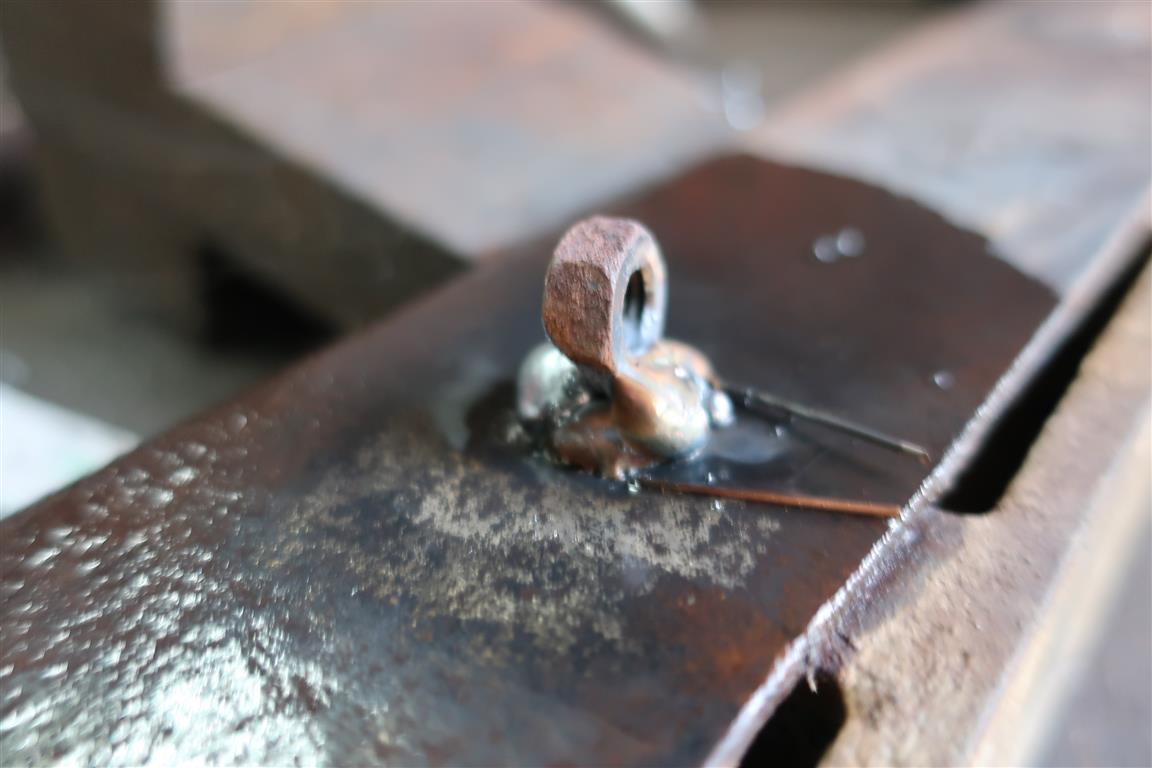
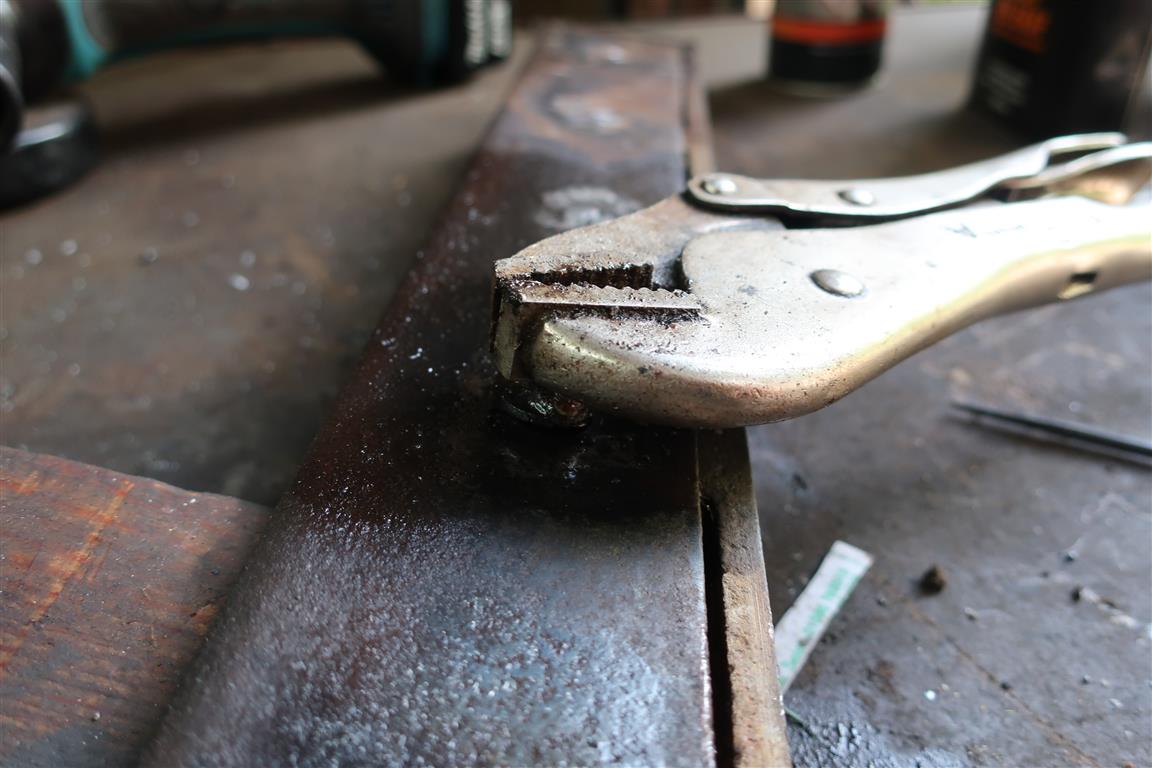
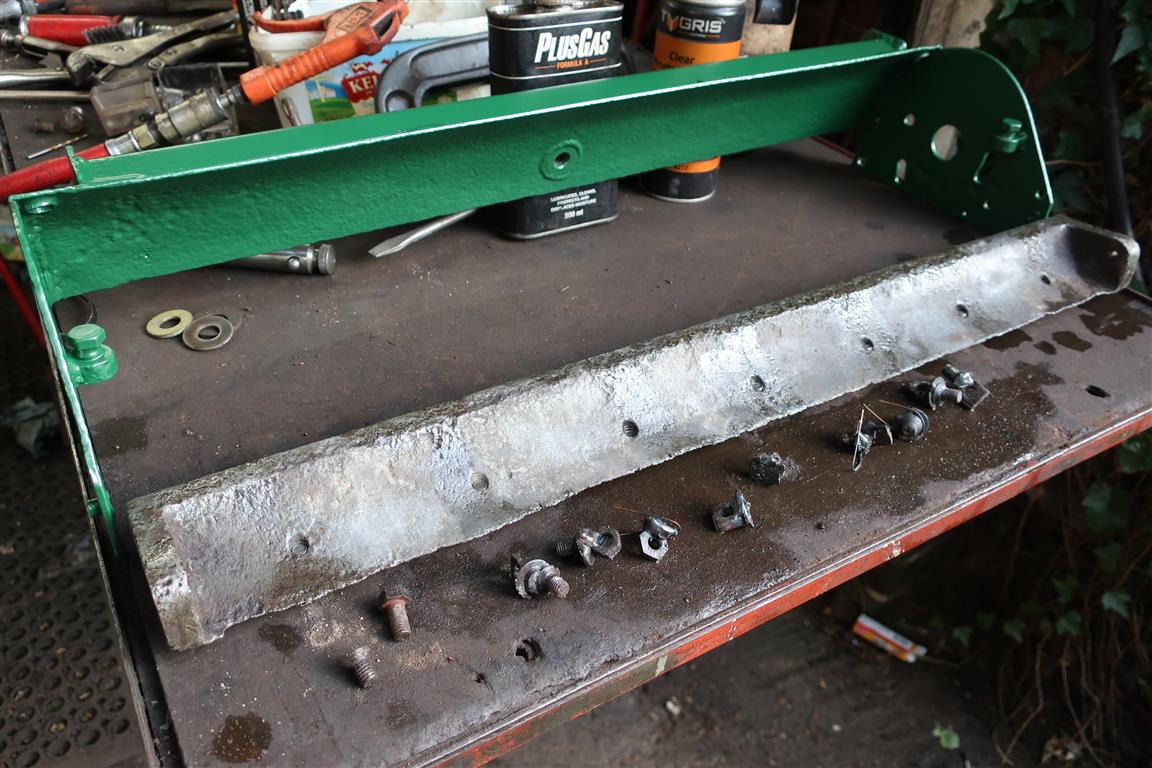
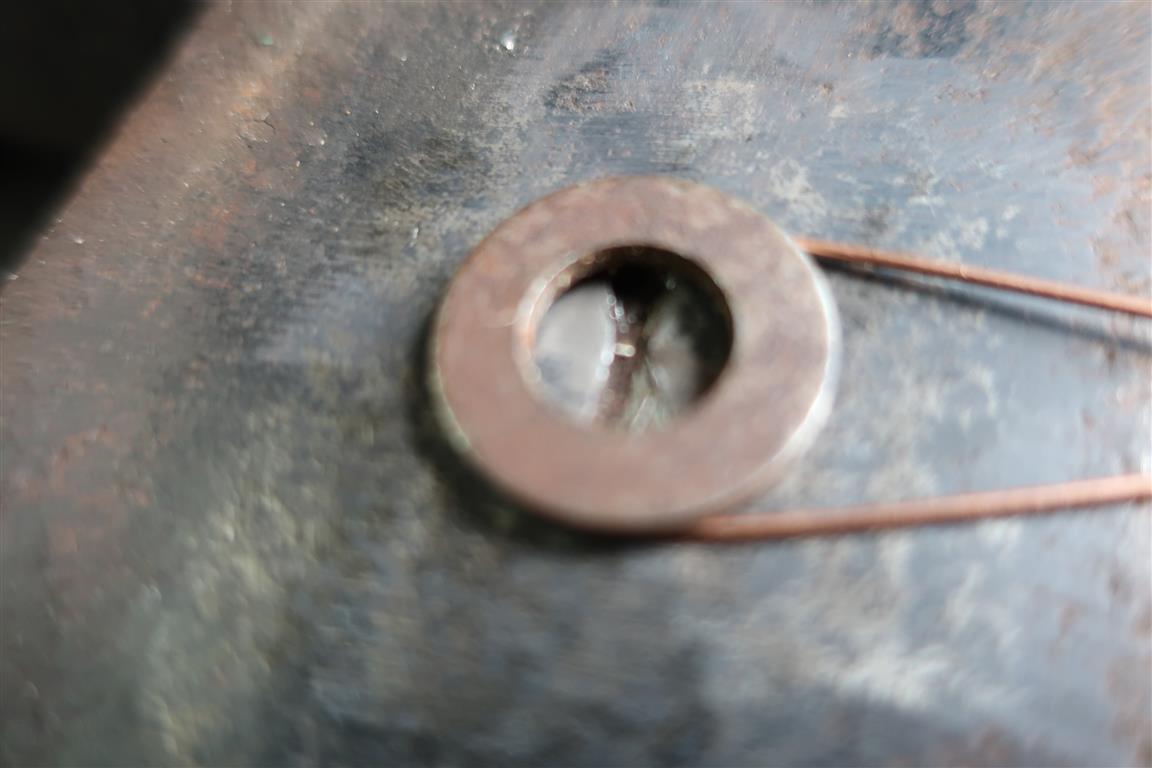
The bottom blade should be lipped, but the lip was nearly gone. That combined with a well-worn cutting cylinder meant that they barely touched. A fair amount of asking around including Garfitts failed to produce a blade, but a sort through the “might come in useful” bin produced one for a Greens Zephyr which lent itself to some modification. The next issue was that the sole plate as well as being an alloy casting was a bit corroded and wasted and not likely to put up with any welly from an impact driver, so each screw had to have the welding treatment. The screws were countersunk and flush with the blade, so a washer was welded to each with a loop of mig wire underneath to prevent the cooling shrinkage pulling the washer down onto the blade. A nut on edge was then welded to the washer – safer and more effective than welding straight to the screw. The heat from the weld plus penetrating fluid and a bit of gentle wiggling resulted in 100% success, with no sheared screws or damaged threads.
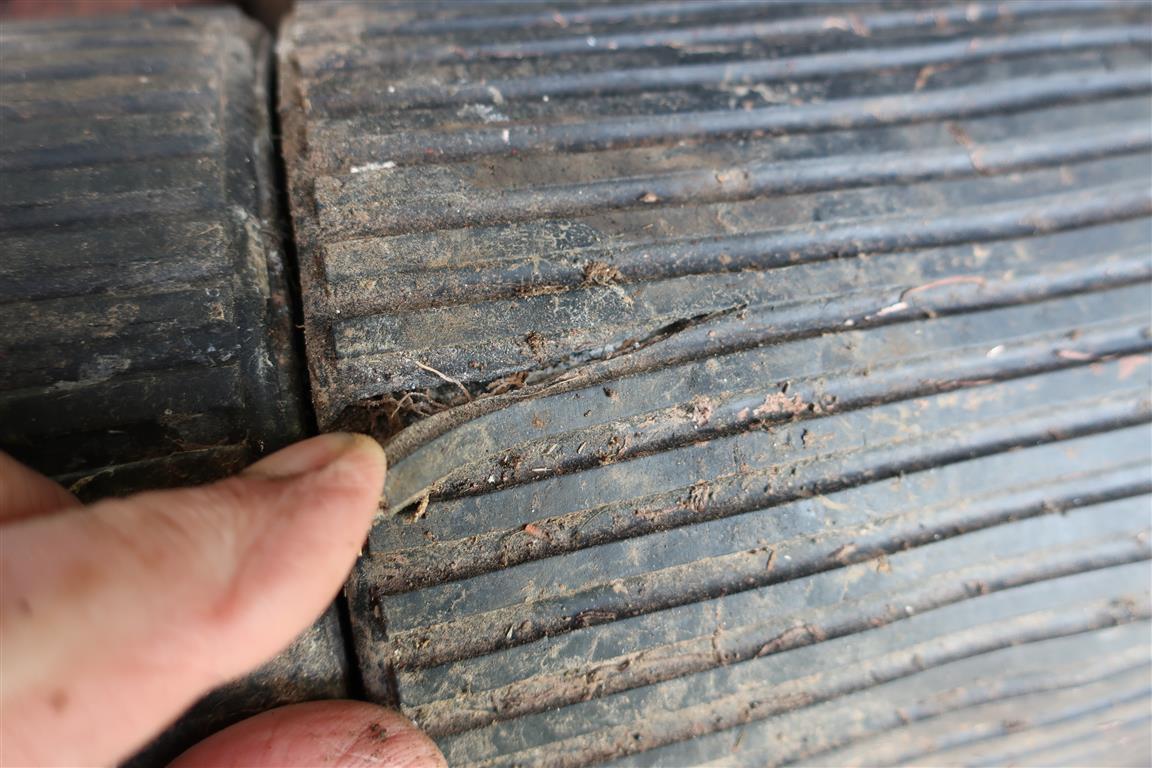
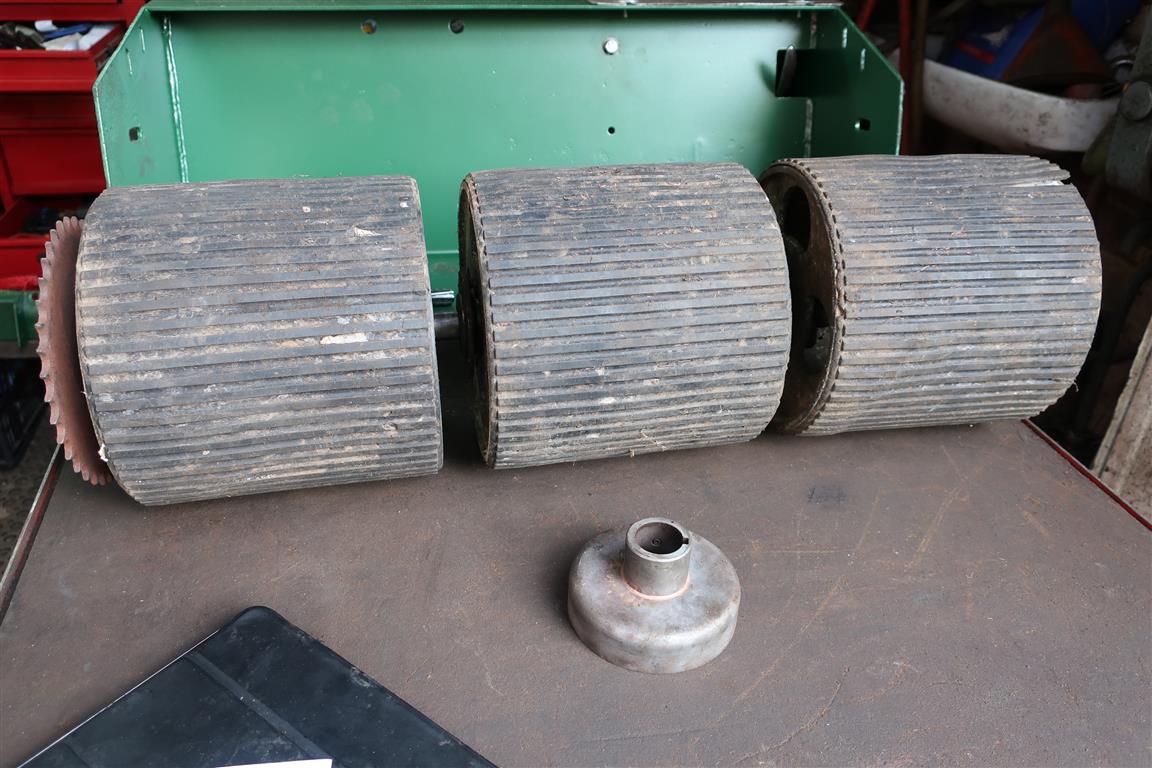
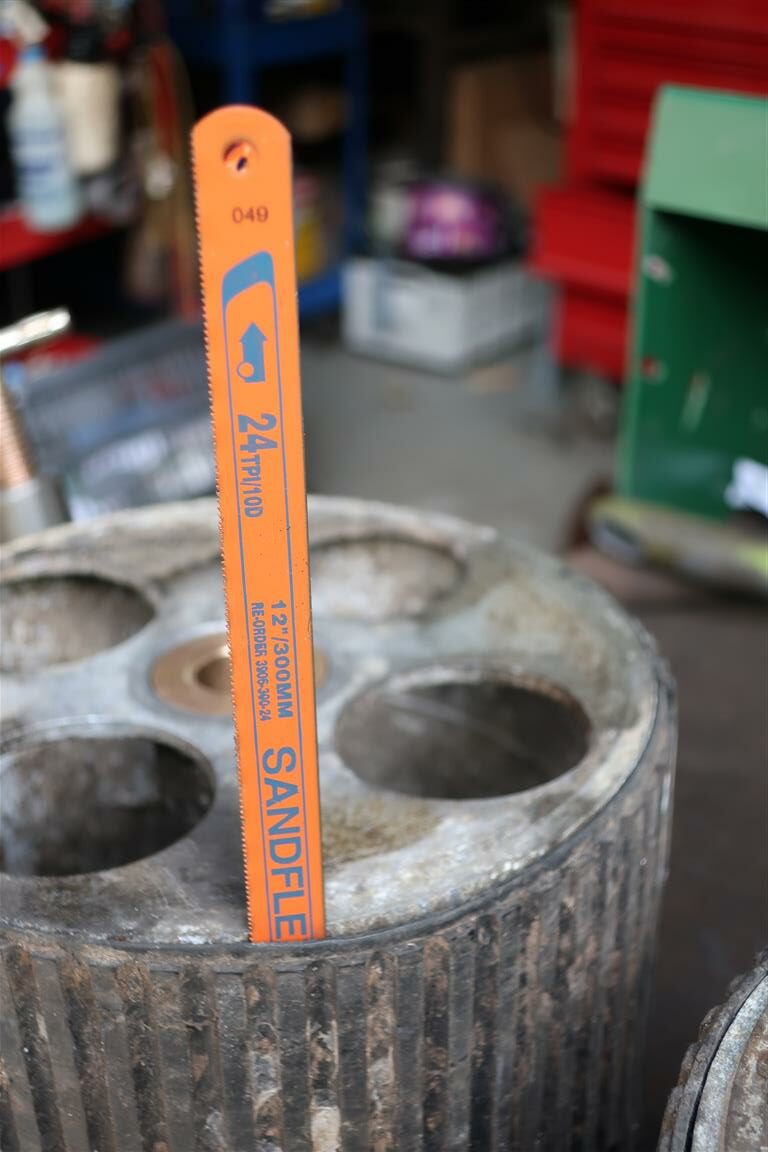
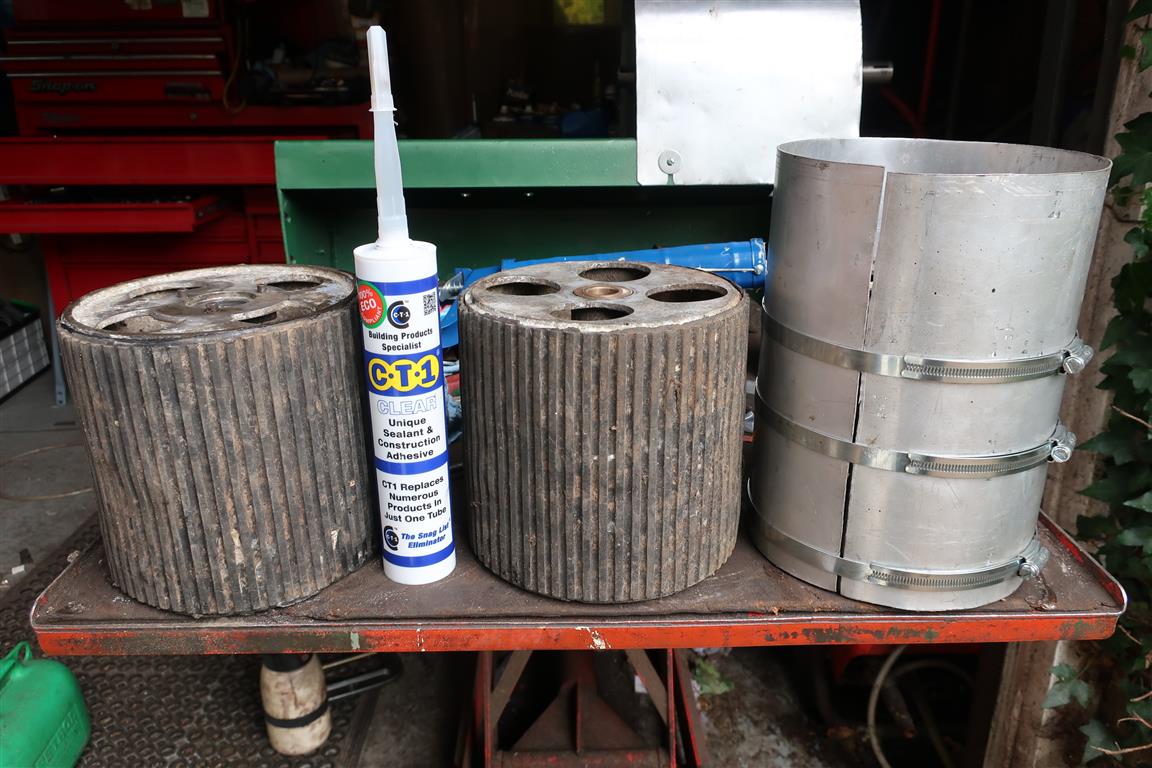
Using the Anzani blade as a template, the Zephyr blade was modified accordingly, some holes being redundant and others “just not right” being welded up and redrilled.The rear roller. This is a three section alloy rubber covered unit. The main issue there was that moisture had crept between the rubber and alloy, the consequent corrosion having blown the rubber away from the alloy. My concern was to preserve the rubber if at all possible. The extent of the separation was such that it was possible to insert a hacksaw blade between the rubber and alloy and gently remove the corrosion – blowing it out with the air line. It was then a matter of re-securing rubber to alloy. After considerable consultation, a suitable adhesive was chosen and squirted in from each end of each section one at a time, with each being left to cure clamped up with an alloy sleeve and large Jubilee clips. It seems to have worked and put up with some gentle experimental trips up the lawn!
Apologies, Had an issue with image posting and they are out of order.
Attachments:
June 2, 2022 at 4:38 pm #39155andyfrost
ParticipantAlways interesting to read on the widely varied problems we all have , and the way they are overcome.
TOP job.Andy.
June 3, 2022 at 8:23 am #39157 trusty220Keymaster
I’ve never seen that method of removing bottom blade screws before but I’m going to try it next time. What we used to do was to try to move them first with a large centre punch (I’m guessing that’s what you do as well) and any that didn’t move we heated with an oxy-propane torch to red hot. That normally broke the rust seal, but if it didn’t the head of the screw normally came off when you hit it again with the centre punch leaving the thread in the hole. A quick drill down the centre, opening out to successively larger sizes, would get it to move. Your method seems a little less time consuming.
If you didn’t get it quite right there’s always the Heli-coil kit!
We found that Hayter bottom blade screws were the easiest as they had a nut on the back, recessed into the blade carrier. The technique for these is to run a line of weld across all of the screw heads to secure them to the bottom blade, then simply undo the nuts with the rattler- works every time and saves you skinning your knuckles!
Keep it up, Angus, we’re all watching!
June 3, 2022 at 8:43 am #39158wristpinParticipantMy choice of extraction method for this job was made due to the probable fragile nature of the alloy sole plate; not to mention the comparative rarity of finding another.
When it comes to frozen bolts and bottom blade screws etc, a couple of minutes spent thinking and forming a plan can avoid half an hour of aggro, or worse. Better to avoid creating the problem than spend time and resources on rectification.June 4, 2022 at 6:28 am #39159charlieKeymasterAs I remember someone saying, every 5 minute job is only a sheared bolt away from been an all day job. I have seen the weld a nut on method of extracting tight or sheared bolts/studs used by my son with good results.
June 8, 2022 at 5:38 pm #39189wristpinParticipantAs I remember someone saying, every 5 minute job is only a sheared bolt away from been an all day job.
Never a truer word- or two!
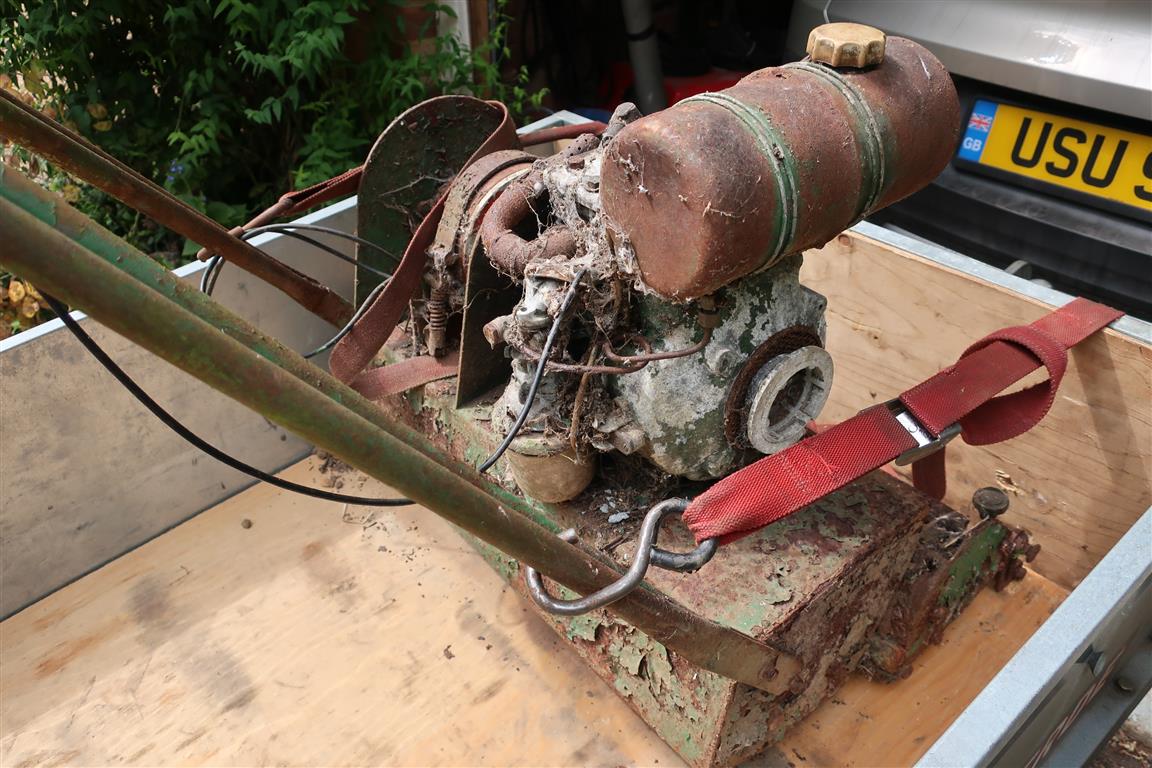
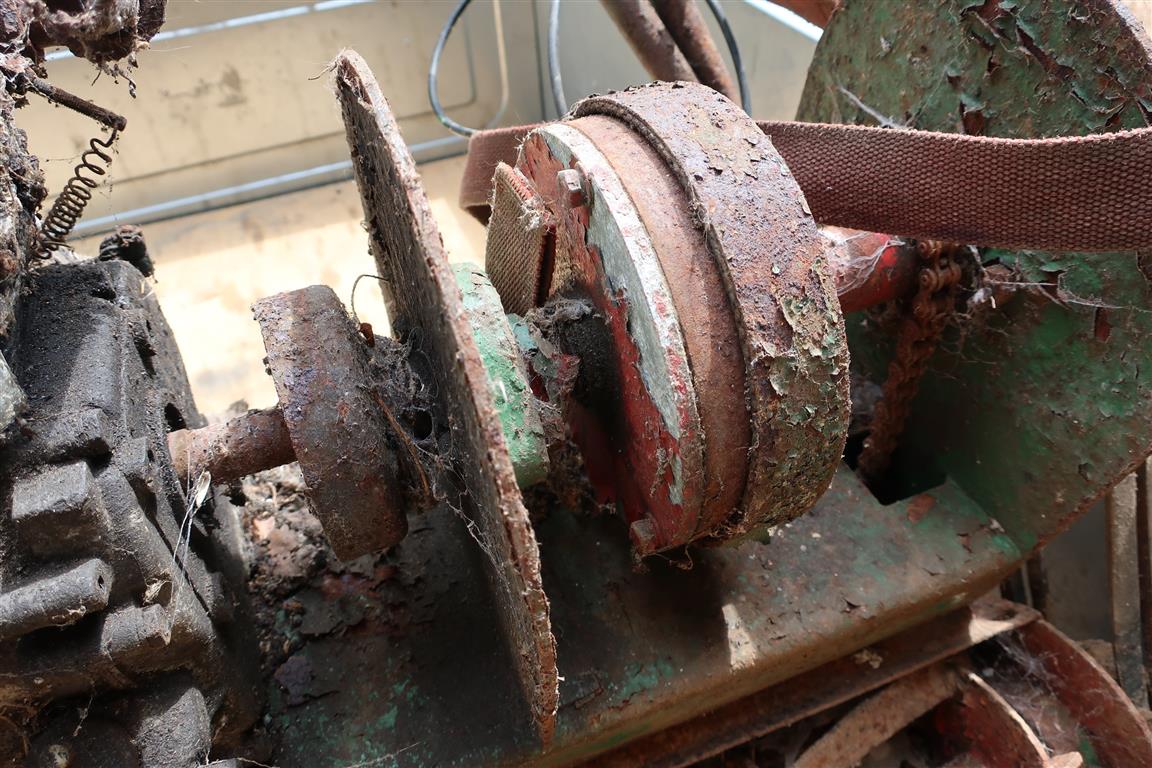
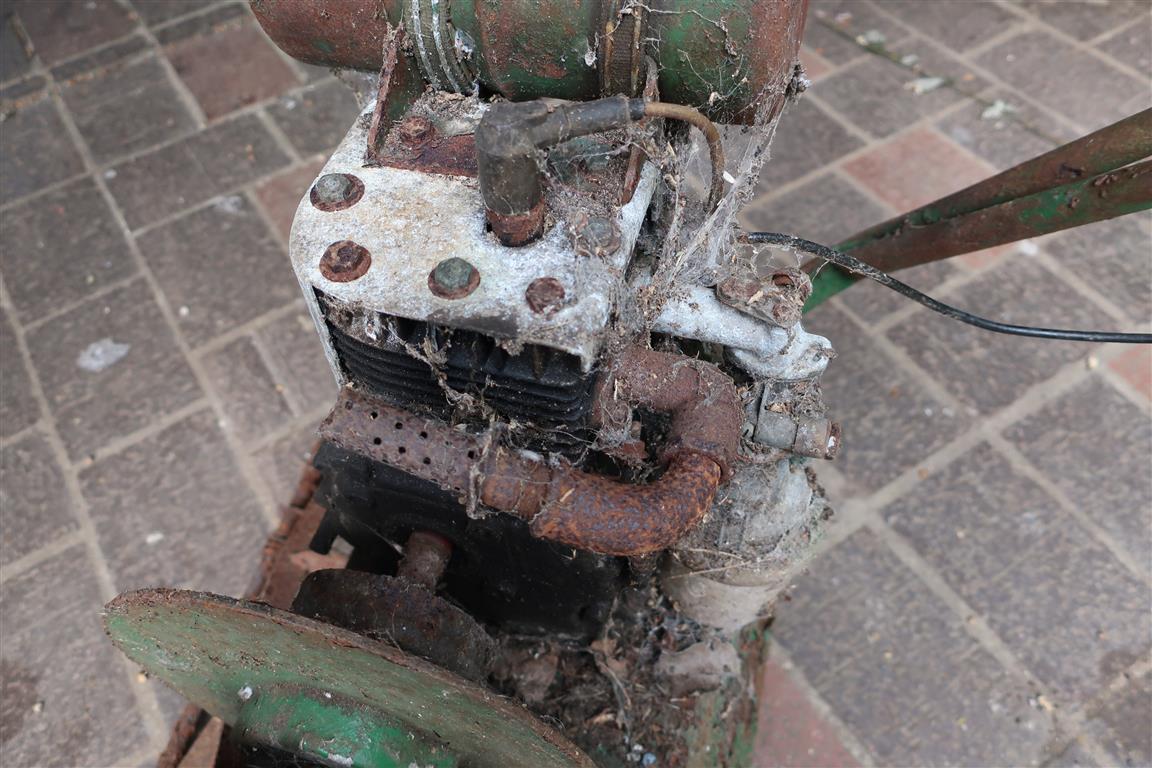
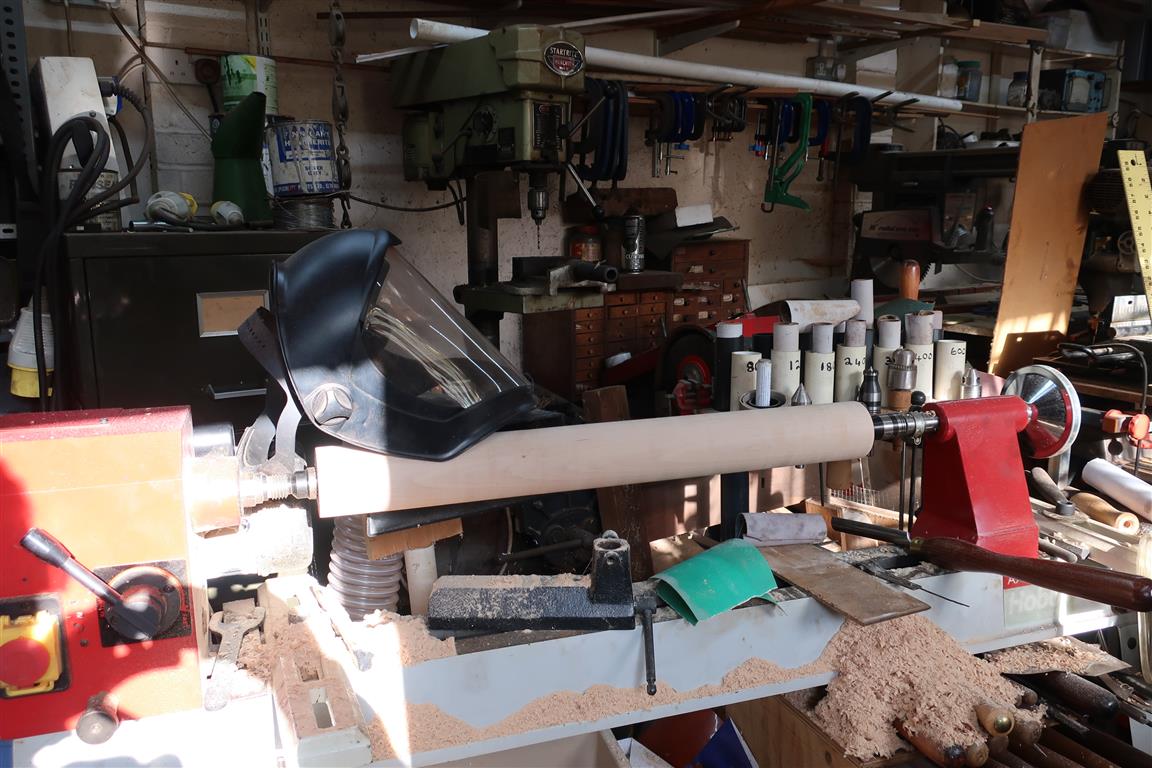
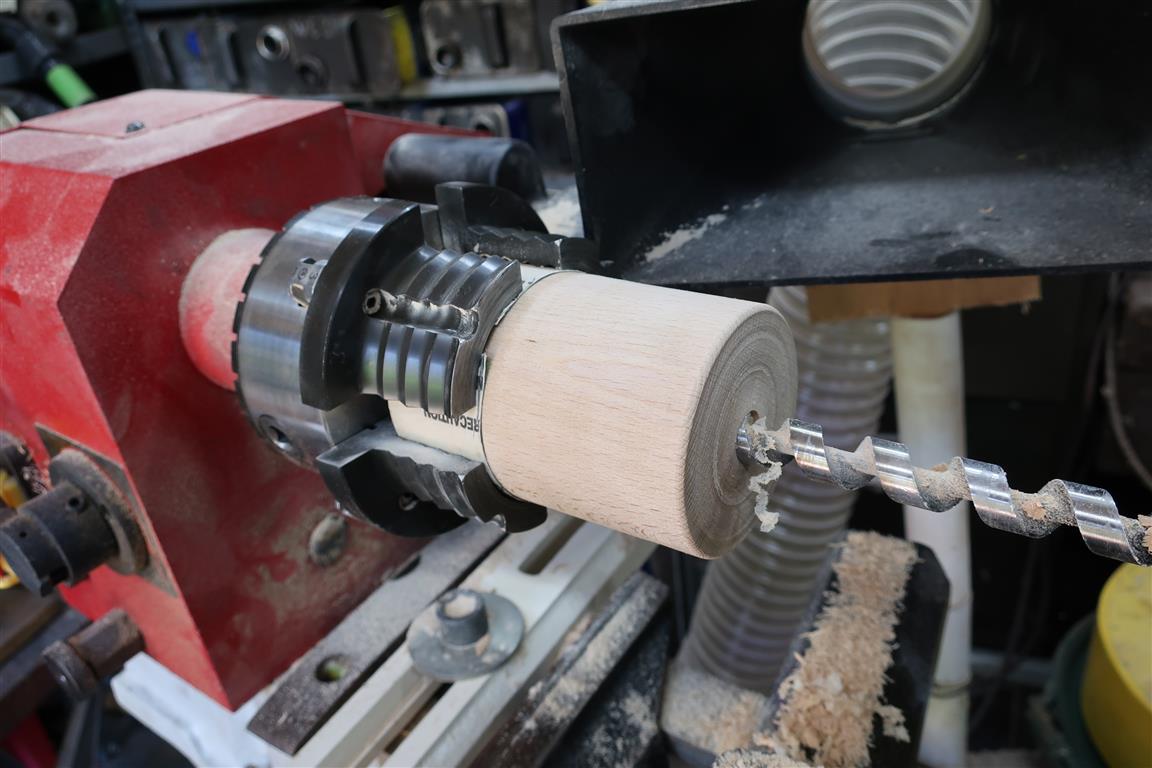
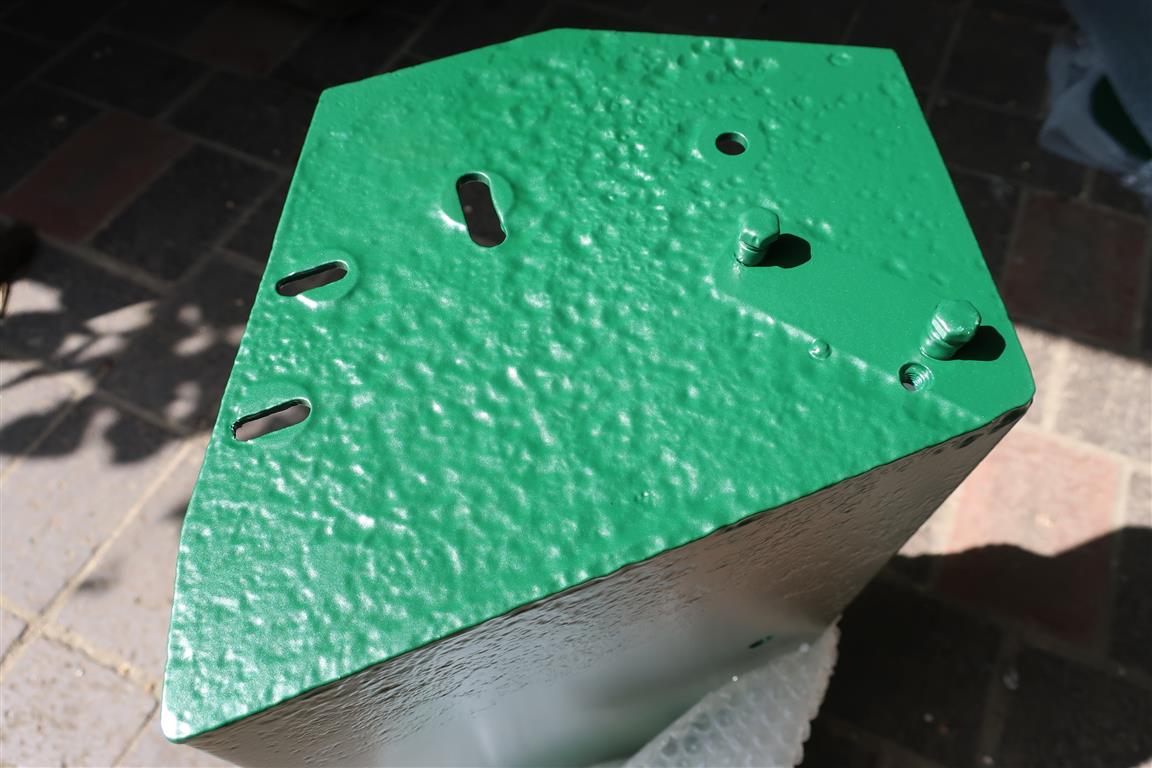
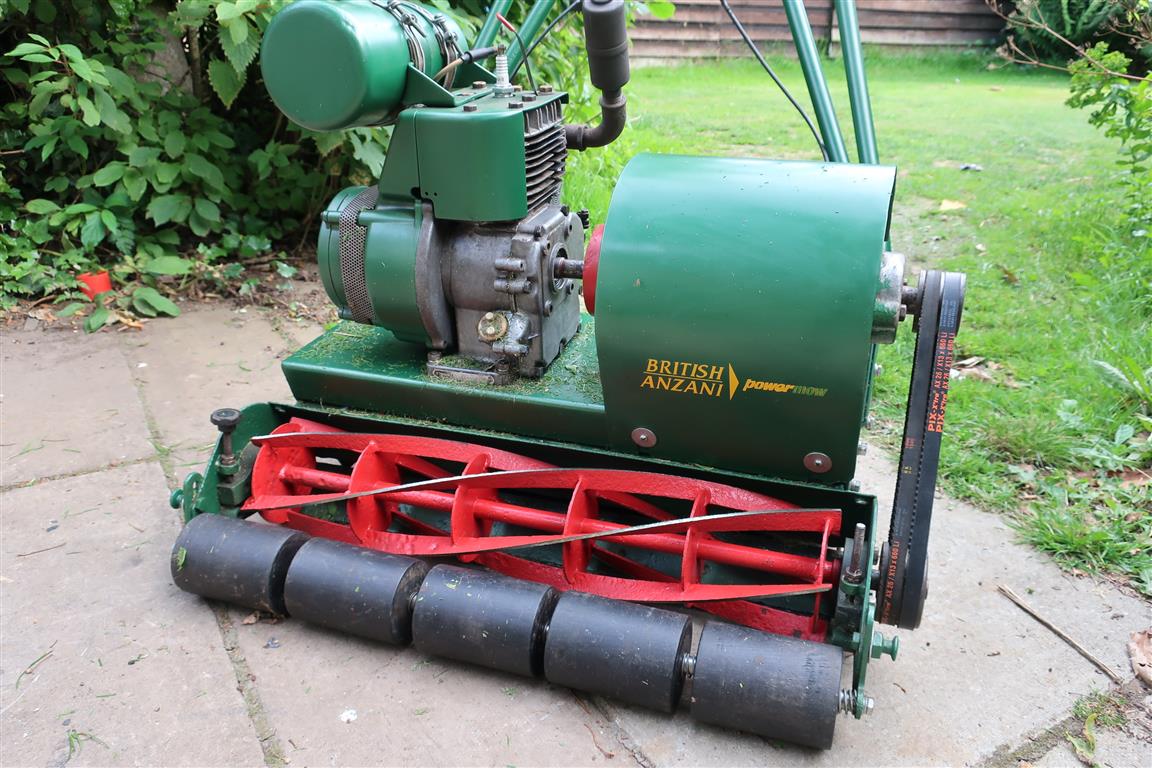
Back to the Anzani. Here’s an image to show the amount of metal wastage on the exposed to the weather side during its sojourn in the undergrowth, and another showing the complete absence of front rollers and the front roller shaft, with just the springs that separated them. The shaft, although corroded, could be persuaded into a piece of 15mm copper water pipe, and the homemade rollers were drilled to accommodate it.
The chassis is made of welded steel plate of generous thickness, so did not need structural reinforcement so rather than smother the wastage in filler, it’s been left as is.
It has had a short run up the lawn and all is well mechanically, but at this stage in proceedings, other distractions have taken precedence. It could do with stronger springs in the centrifugal clutch, but the major job is to make a belt guard – unless anyone has one going spare. The shape of the guard is not immediately obvious, or how it is fitted. If anyone has a similar machine, an image or two of the guard will be greatly appreciated.Attachments:
-
AuthorPosts
- You must be logged in to reply to this topic.